How to sculpt convincing eyes in ZBrush
Time-saving tips for sculpting realistic-looking eyes.
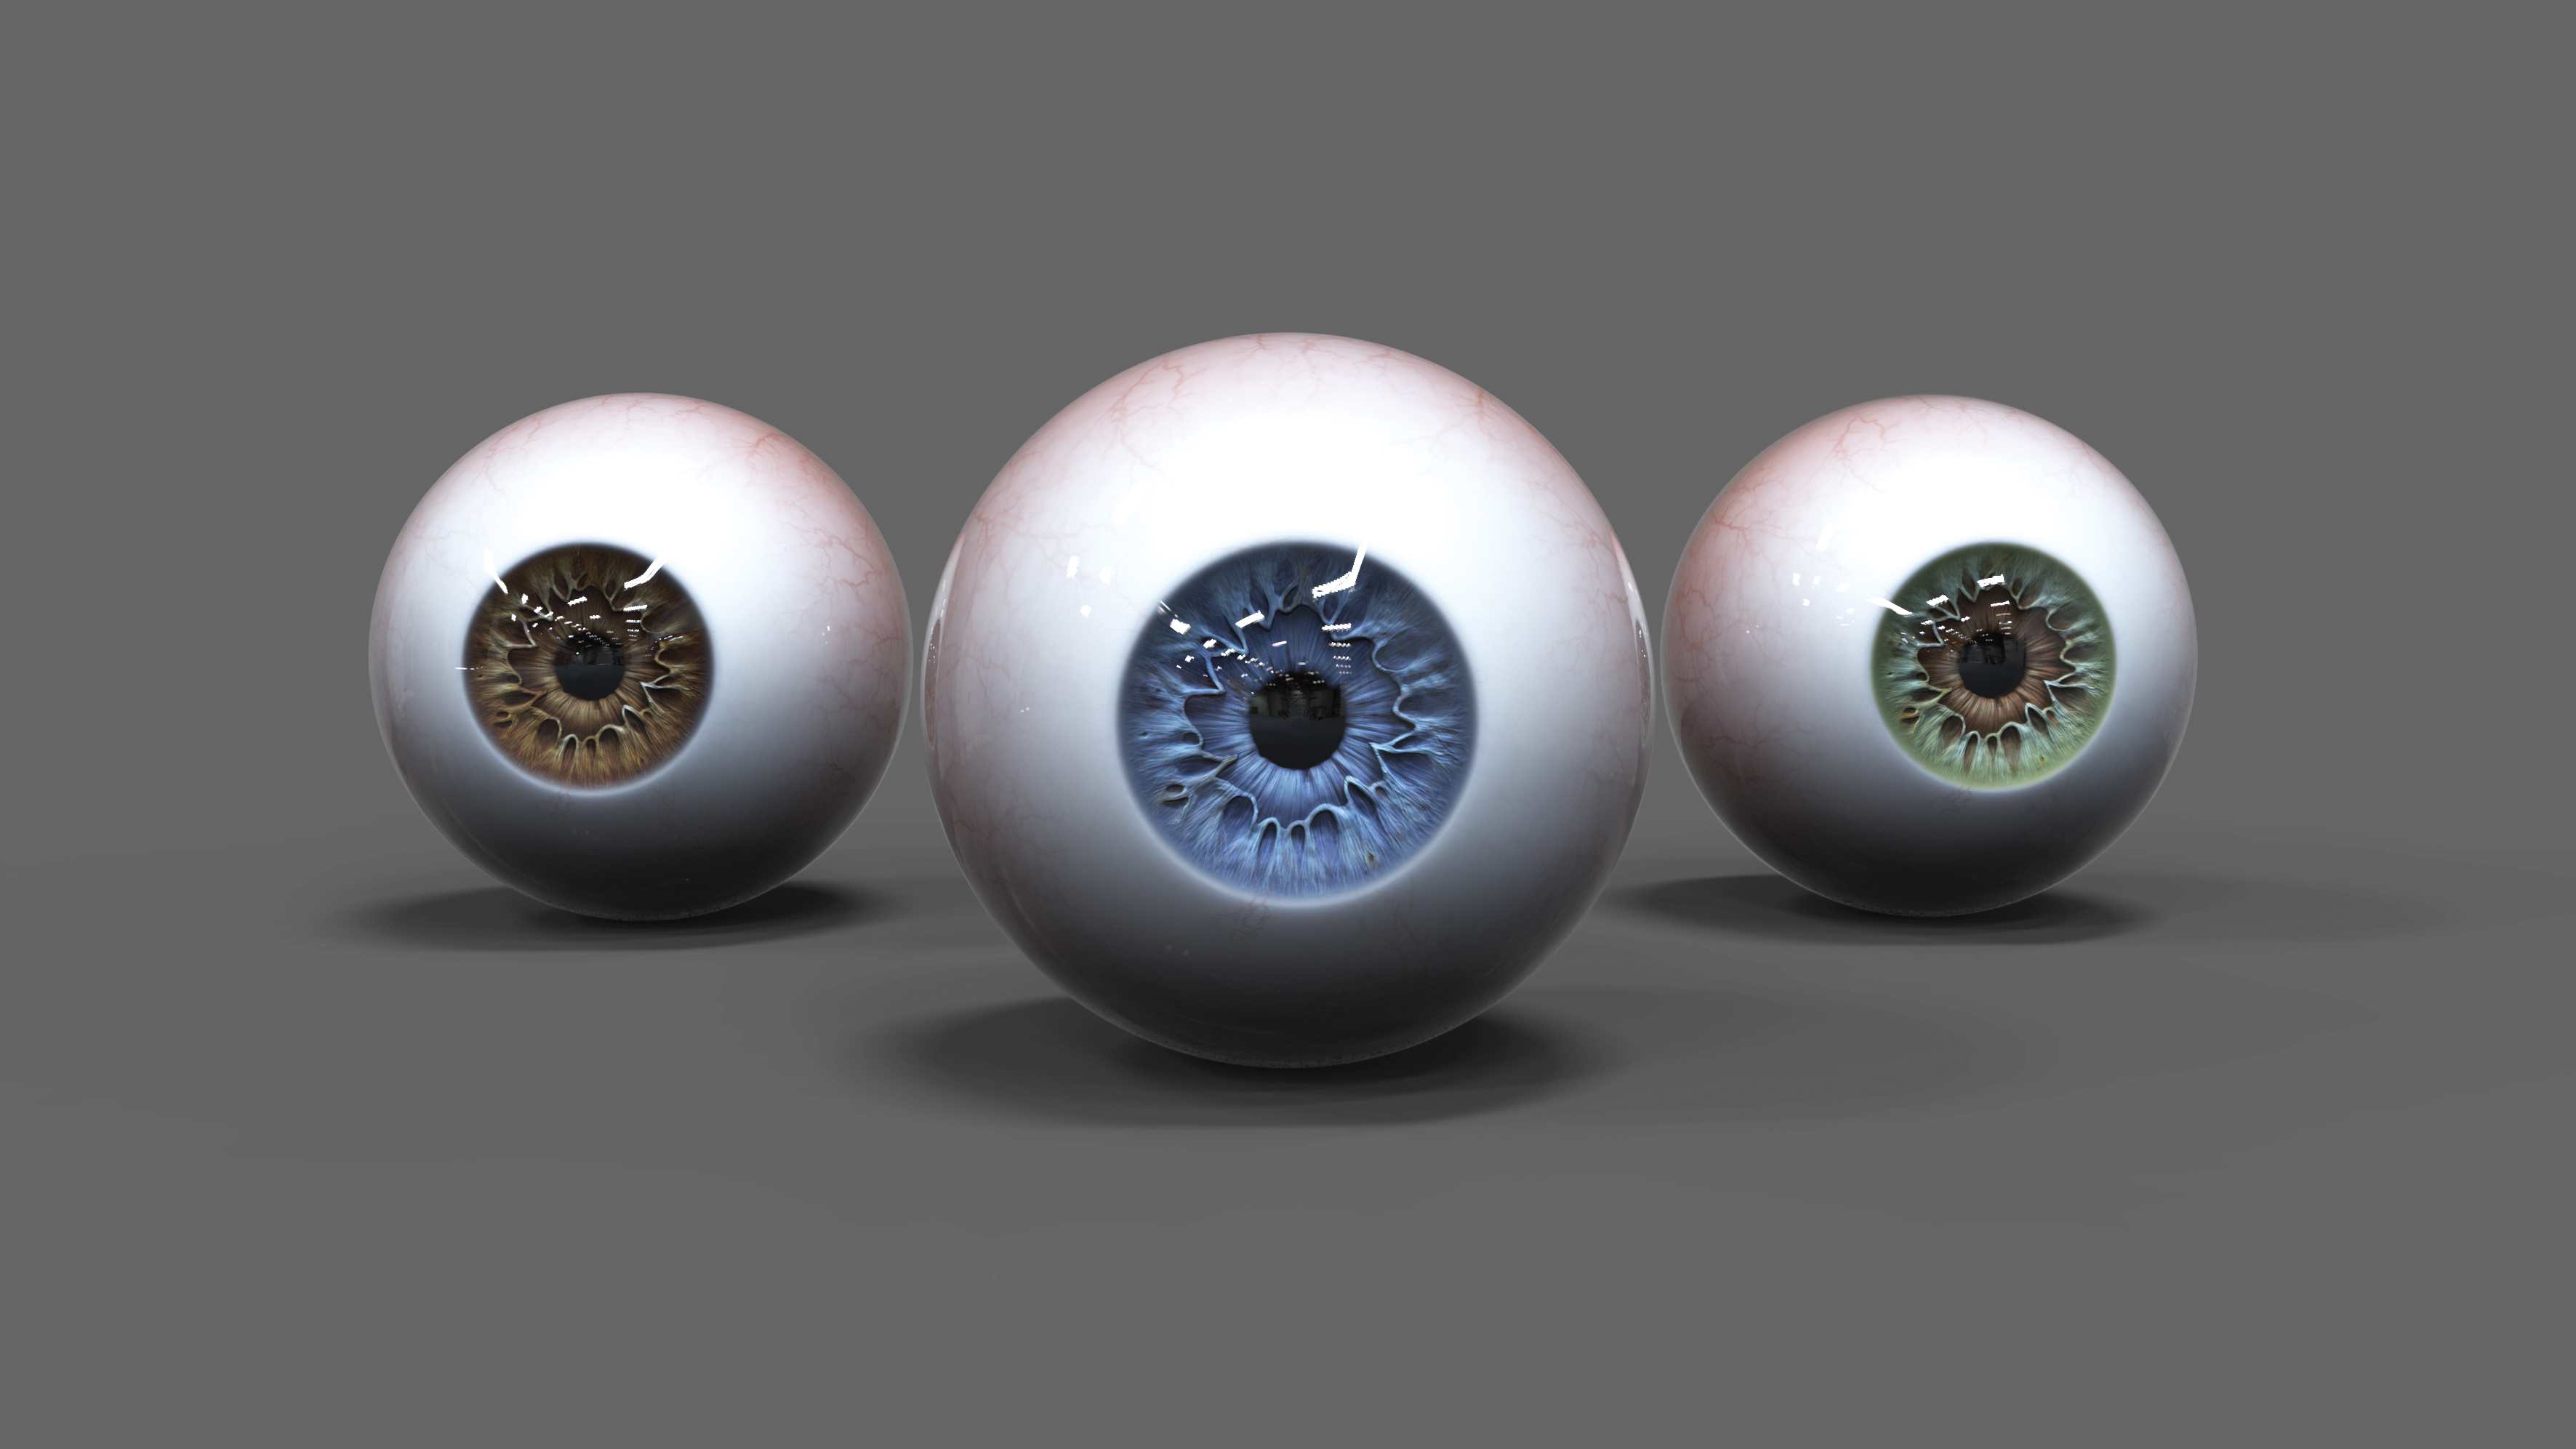
When sculpting a realistic 3D human eye to add to your library of ready-to-use assets, remember that no two eyes are exactly the same. So unless you have something very specific in mind, it doesn't matter how perfectly you copy the reference material. As long as you understand the anatomy and get the general shape right to allow the light to do its job, you can create just about anything.
Eyes can be simplified into four areas: cornea, iris, pupil and sclera. A real human eye contains a lot more than this, but we are going to focus on the four visible areas because that is all we need to make it believable.
01. Sculpt two spheres
To start off, create two spheres. Let’s name the first one Sclera (the white part of the eye), and its duplicate Cornea (the dome-shaped clear front surface of the eye, which works like a camera lens to focus light). Scale up the Cornea a tiny bit so it wraps around the Sclera. Make sure that the Cornea sphere is not so big that it casts shadows on the Sclera, but big enough not to intersect. With the base prepared, you are ready to sculpt.
Before you jump into ZBrush, look at reference images of human eyes; you will see how different they all are. Decide which pattern you like most.
02. Model the cornea and the iris
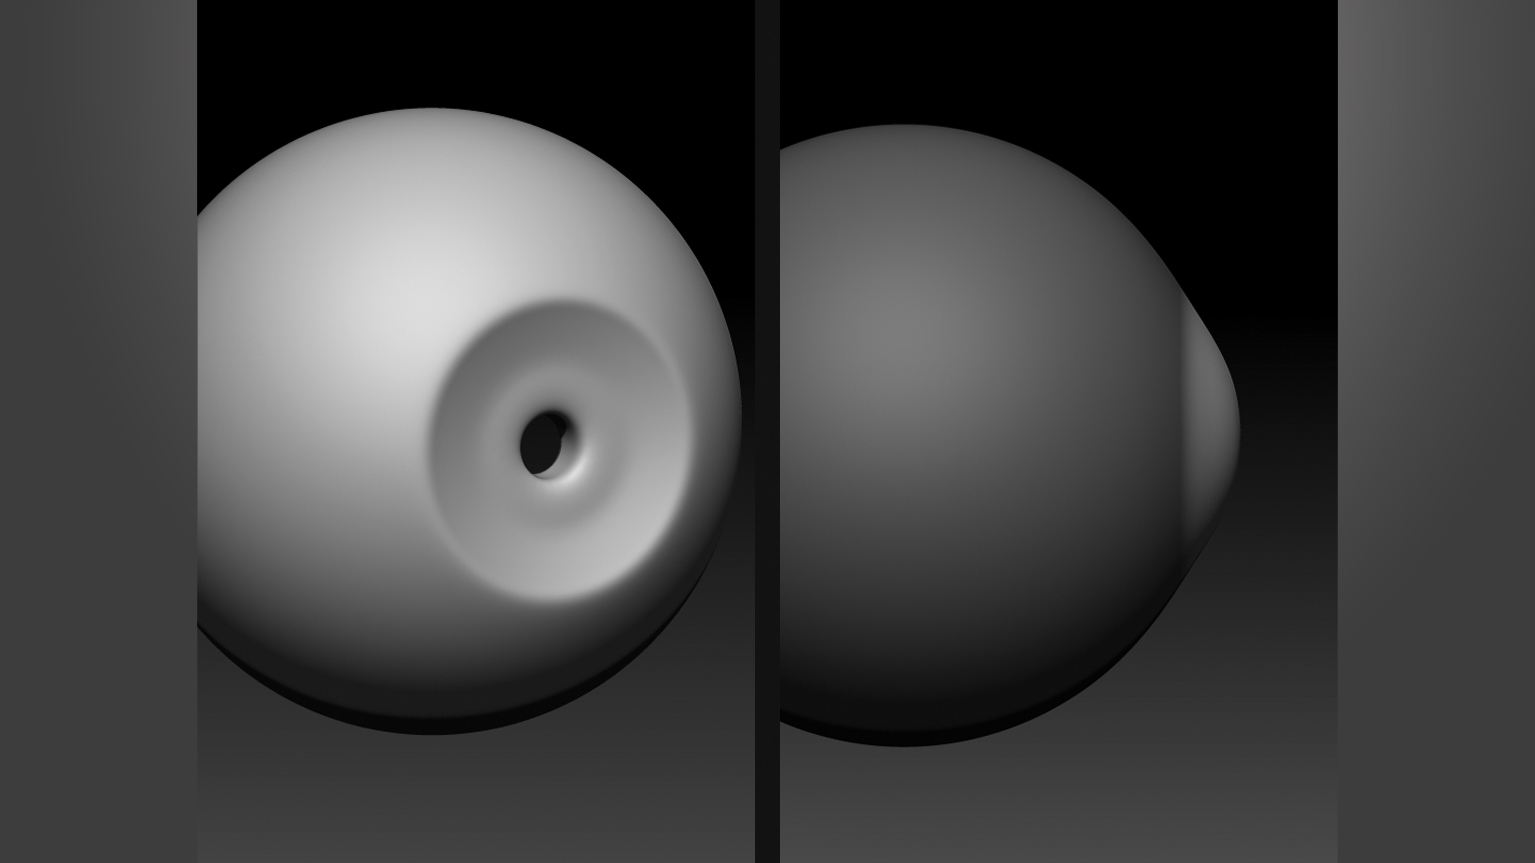
Select the Sclera, mask out the iris (the coloured part of the eye) and push it in with the Move tool, creating an inverse dome. Mask out the pupil, remove those polygons and extend the edges towards the centre of the eye. Unhide the Cornea, mask the same area as for the iris and push it out, making a smooth dome.
03. Sculpt the iris
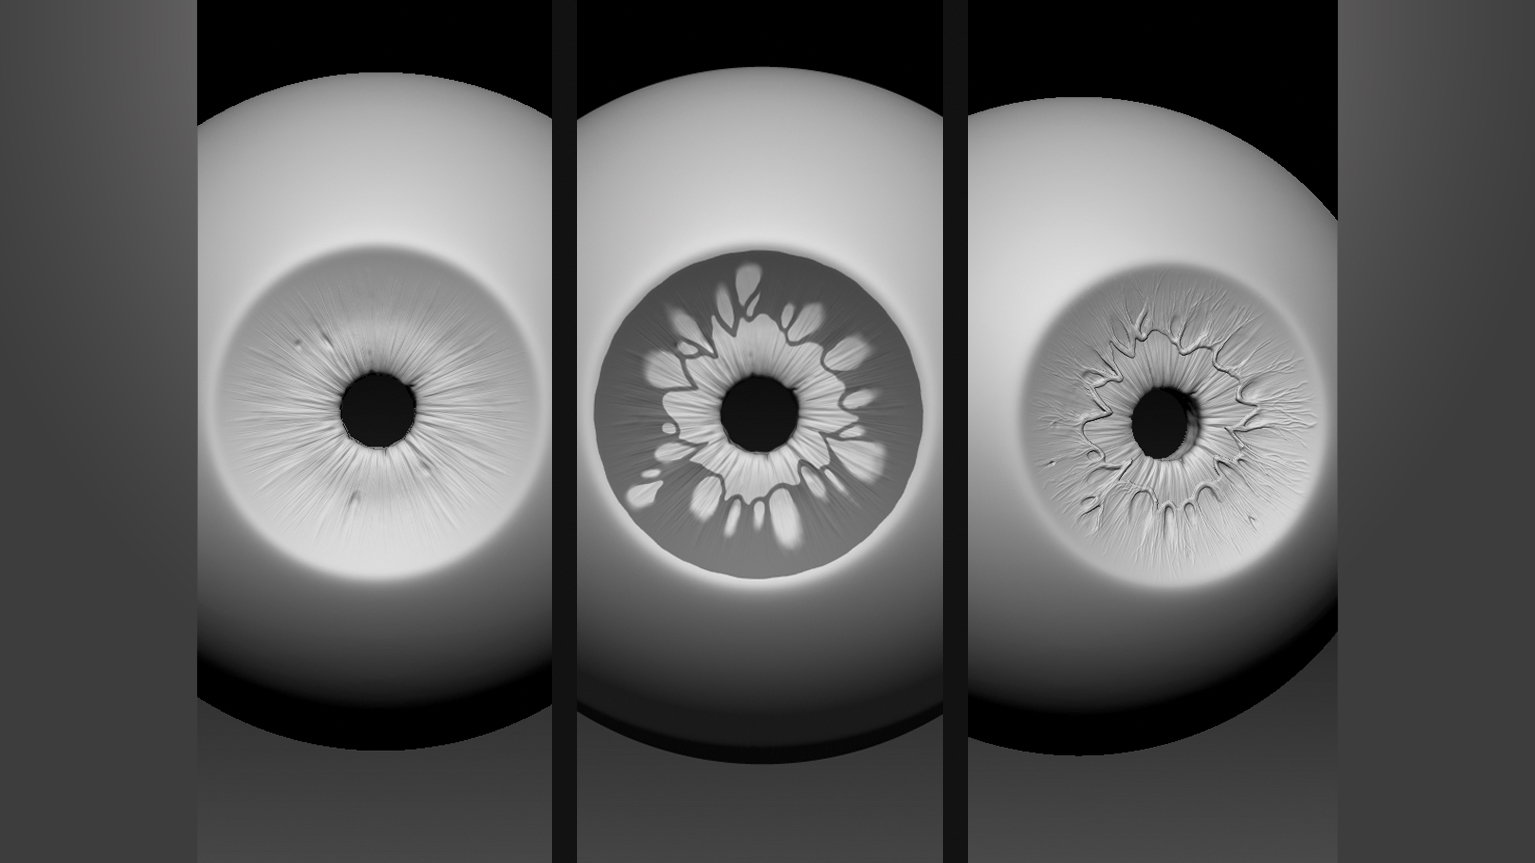
Using Standard and Dam Standard brushes, begin sculpting fibres from the pupil towards the outer edge of the iris. The aim is to make them resemble the sphincter pupillae and dilator pupillae muscles that narrow and widen the pupil. Mask out a pattern with the radial symmetry, then edit it according to how you want it to look. Pull out the shape and then smooth it out a little.
04. Paint the eye
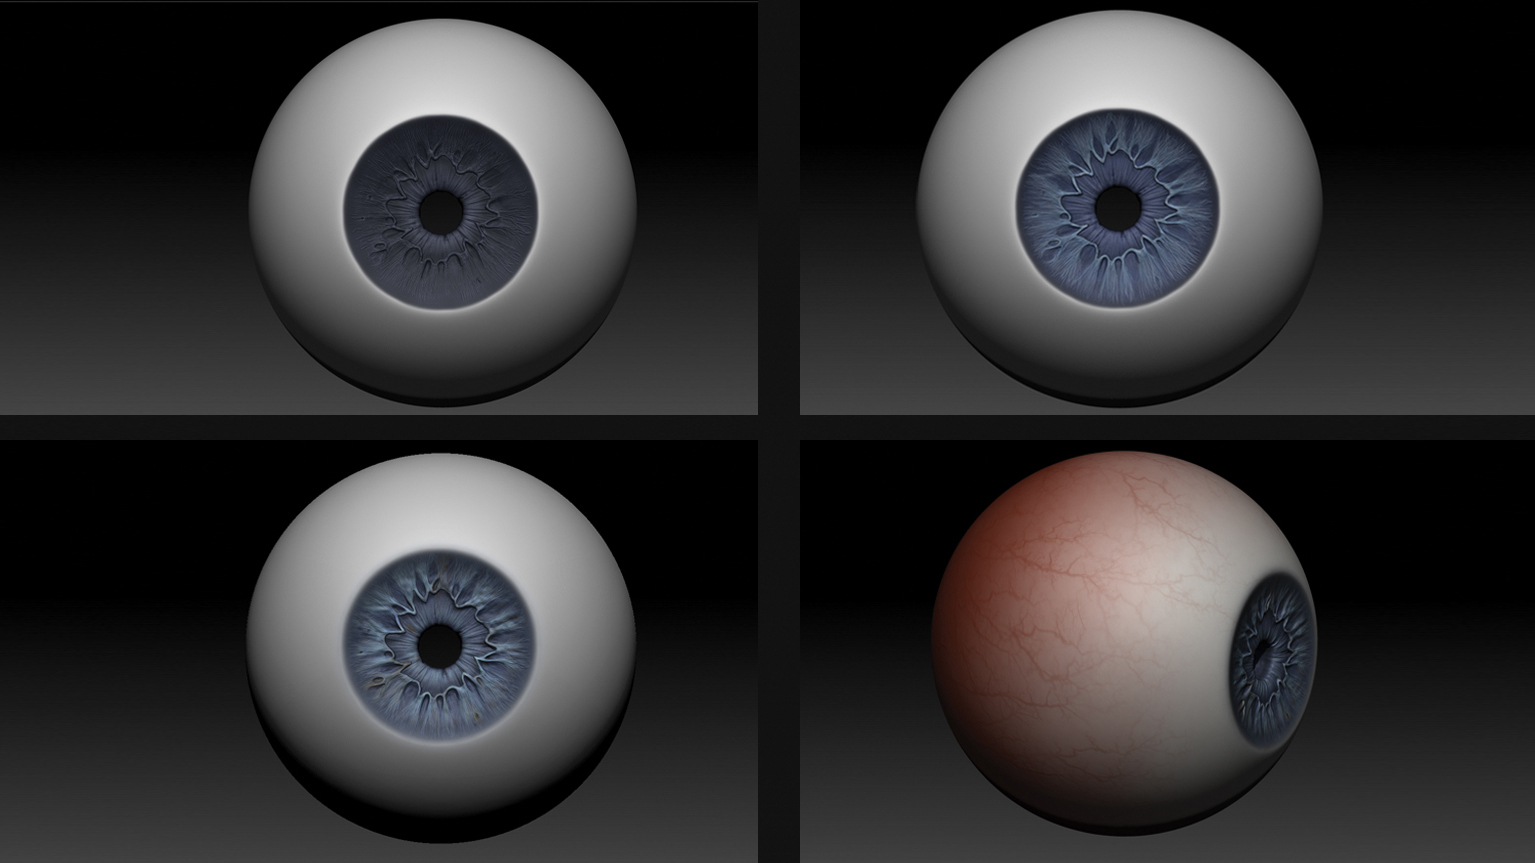
With the base structure sorted, it’s time to add some colour and finer detail. Use mask by cavity to add extra depth when painting the iris. Draw more colourful fibres and blend them out around the edge of the iris.
Get the Creative Bloq Newsletter
Daily design news, reviews, how-tos and more, as picked by the editors.

To add veins, you can download ready-made alpha maps from Pixologic’s download centre, or make your own in Photoshop. Then cover most of the white with a red mist, and then drag out vein alphas.
05. Add shine and refractions
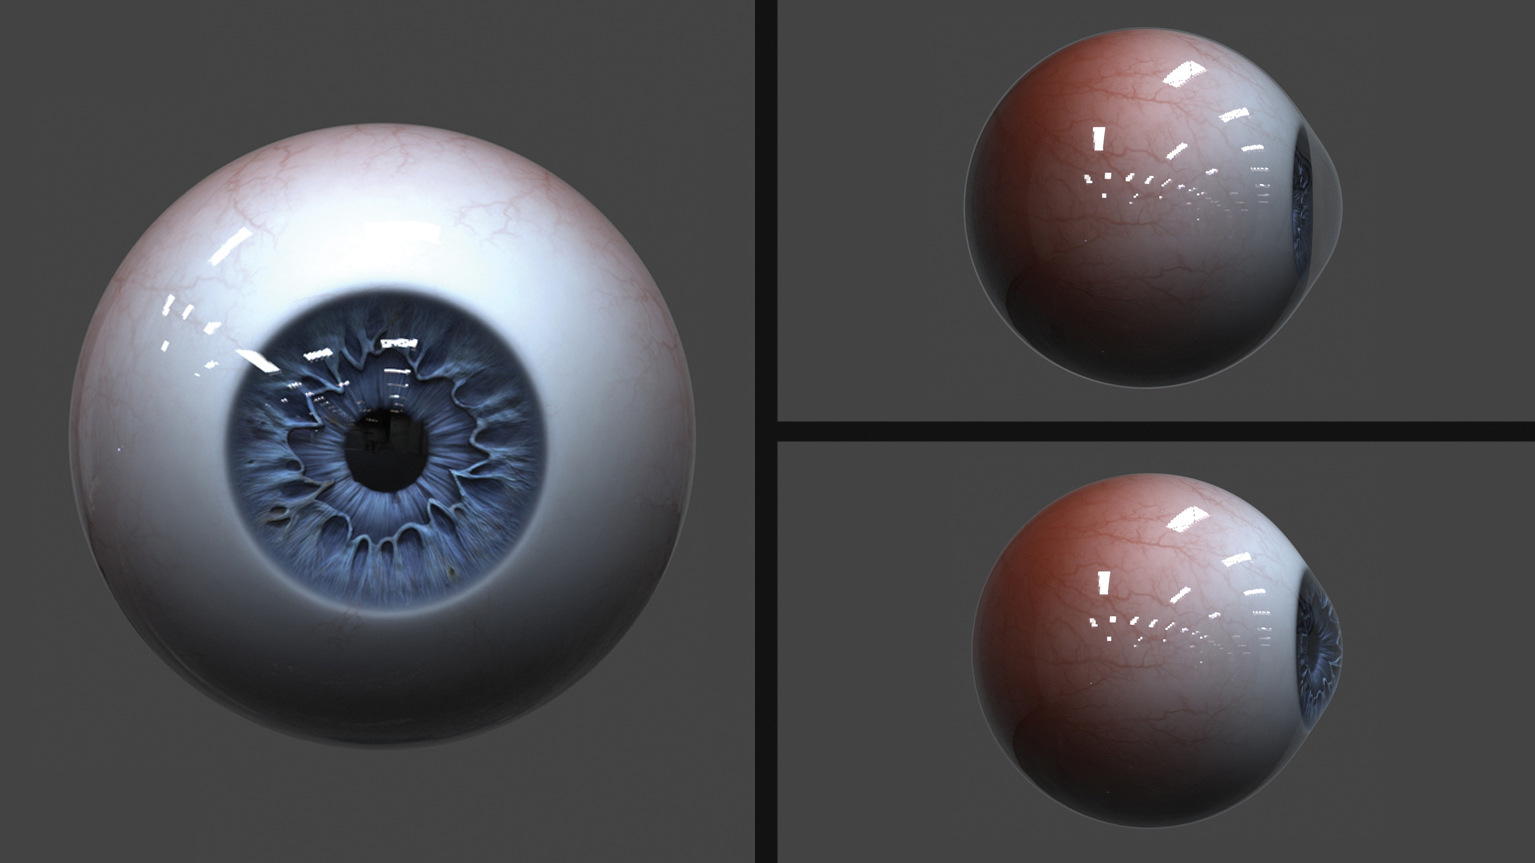
Export the eye model to KeyShot. Apply glass material to the cornea and enable two-sided refractions. No refractions would make it look as though there was an empty space between the iris and the cornea. If needed, go back to ZBrush and tweak the eye until you reach the desired look.
This article was originally published in 3D World magazine issue 227. Buy it here.
Related articles:

Thank you for reading 5 articles this month* Join now for unlimited access
Enjoy your first month for just £1 / $1 / €1
*Read 5 free articles per month without a subscription

Join now for unlimited access
Try first month for just £1 / $1 / €1

Maya is a 3D artist with a broad set of skills, diverse portfolio and extensive experience creating 3D assets for games and learning programmes. She has an excellent knowledge of Blender, ZBrush, Keyshot, Autodesk 3ds Max and Maya, Substance Painter and Designer, Photoshop; and integrating assets into Unity and Unreal Engine.
