How to sculpt a character in VR
Discover how to use Oculus Rift in a 3D character concept pipeline.
16. Create the shape of the head
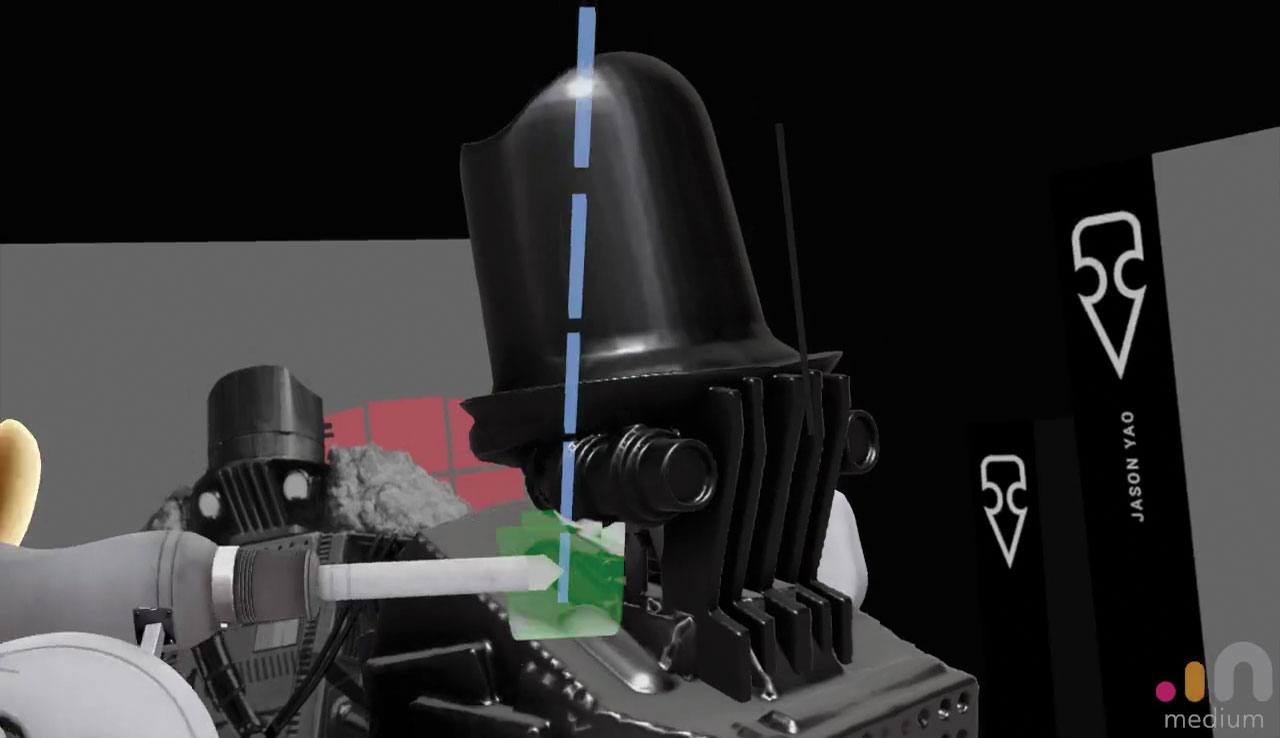
Make sure you have the head layer selected and pick some stamps that give you a cylinder and the rim for the shape of the head. Mechanical stamps are a great place to start for stamps of this nature. For the top of the head layer we use the subtract mode to create the hollow in the top. Use basic square shapes to add the grids at the front. This is best done with the 'single' brush mode.
17. Add shoulder pads
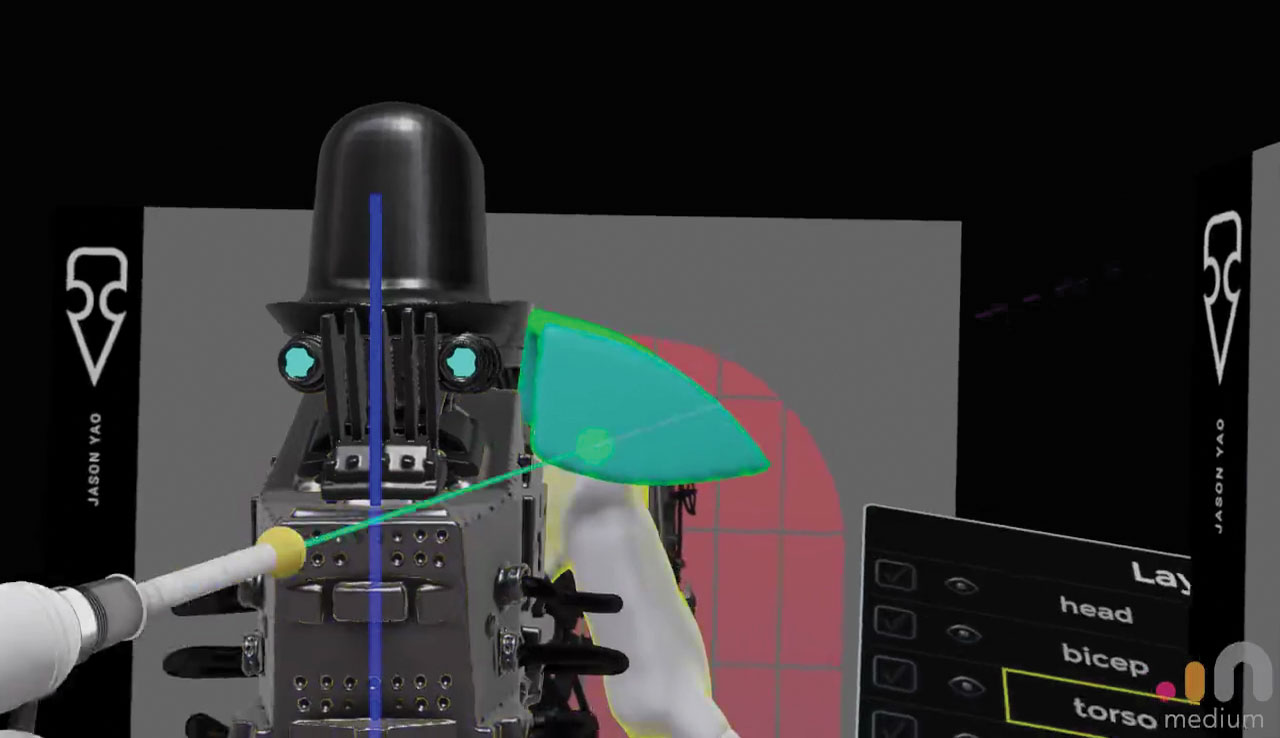
The shoulder pads can be created using some of the built-in stamps. Choose a shape that reflects that curved shape and apply to a new layer. This means you can position the shoulders separately to the arms. The shoulder pads on the concept appear to have a rough surface, so we can add the rough texture using a basic Clay tool with an organic stamp. Using the 'surface' mode found under the Brush Options menu, the brush can be applied directly to the surface of the model. The stamp will follow the surface normals.
18. Define the shape of the arms
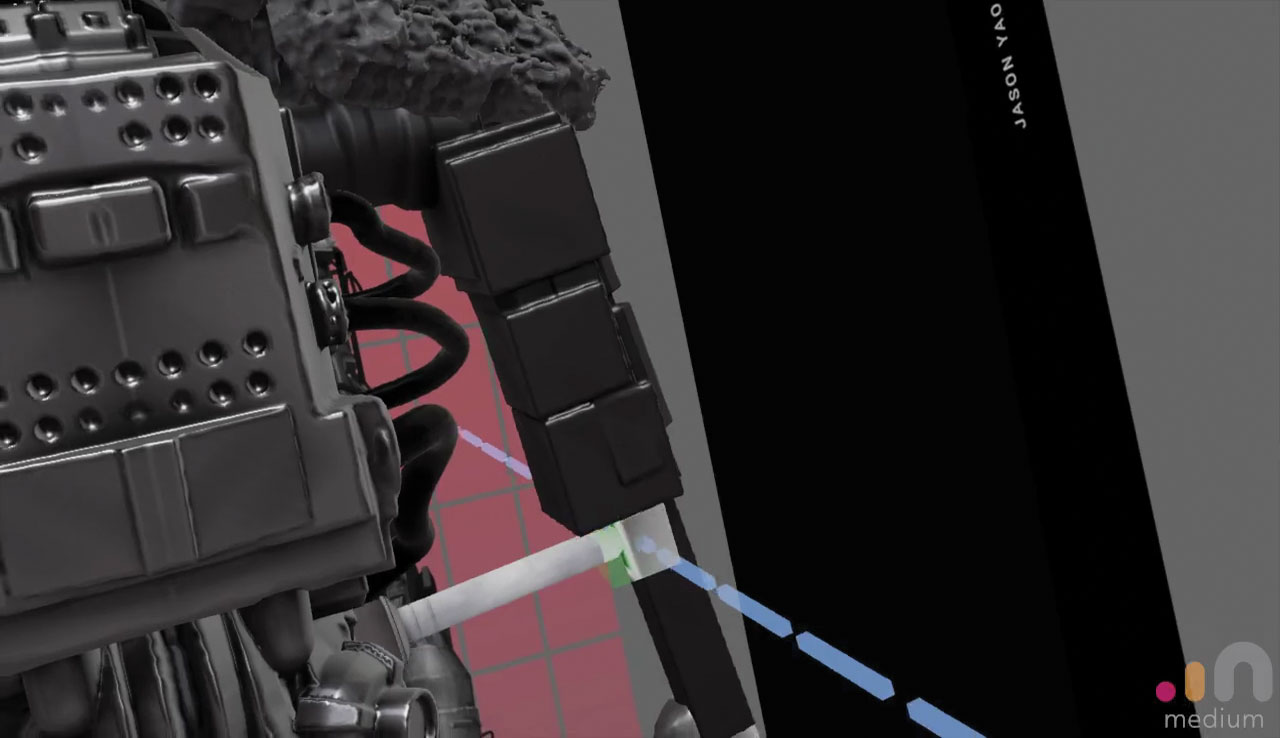
The arms are made up in the same way as the rest of the sculpt. The best stamps to use here are still the Mechanical ones. Start by creating some cylinders using the line brush method to create the basic arm structure. Remember you can push forward or pull back with the Tool hand thumbstick to increase and decrease the size.
Add a lot of visual interest with really complex stamps and make sure that the layer resolution is set high enough before adding clay in order to avoid rough or jagged edges.
19. Establish the shape of the hands
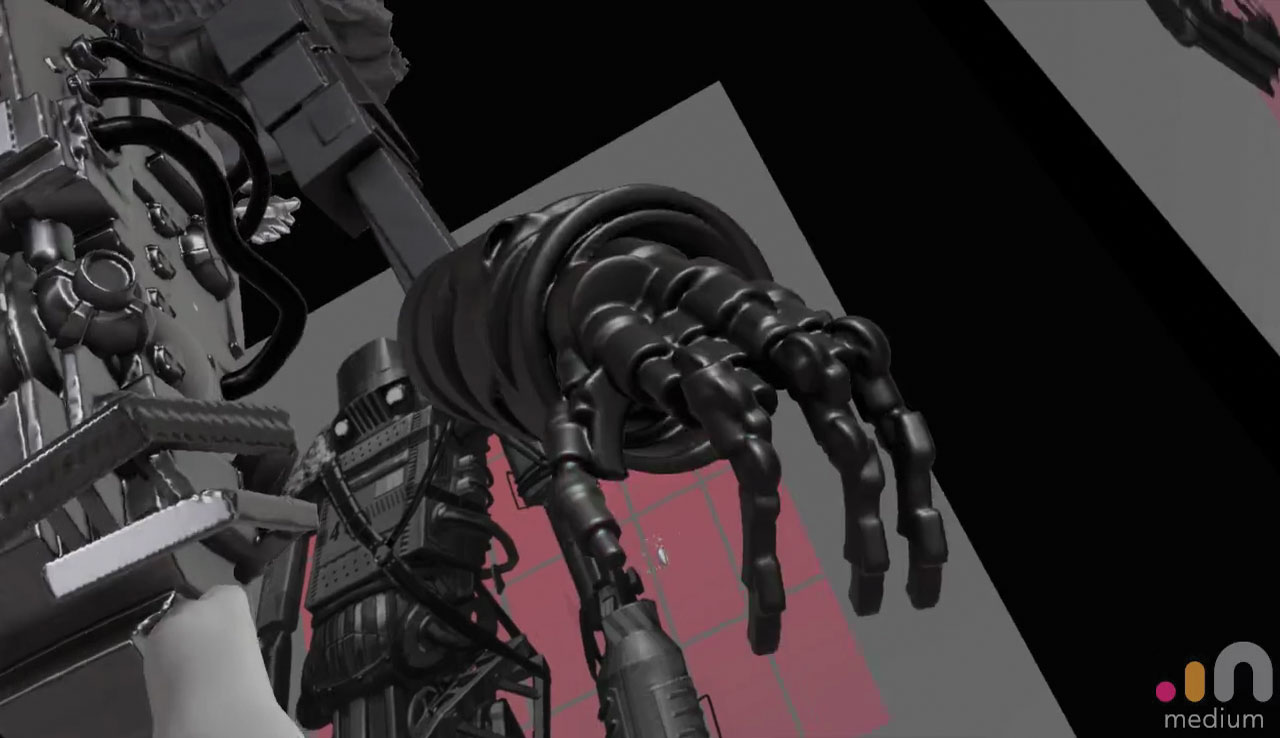
The hands are made using a combination of stamps. Add a block of clay to represent the base of the hand. Add in lots of disk shapes to represent the knuckles and each finger joint, followed by small cylinders to represent each finger bone. Add a thumb on the side in the same way. You can split the model down further if you like and use the Cut tool to separate the hand from the arm.
We only need to make one arm and leg as we will be duplicating and mirroring the limbs across the world axis.
20. Define the shape of the legs
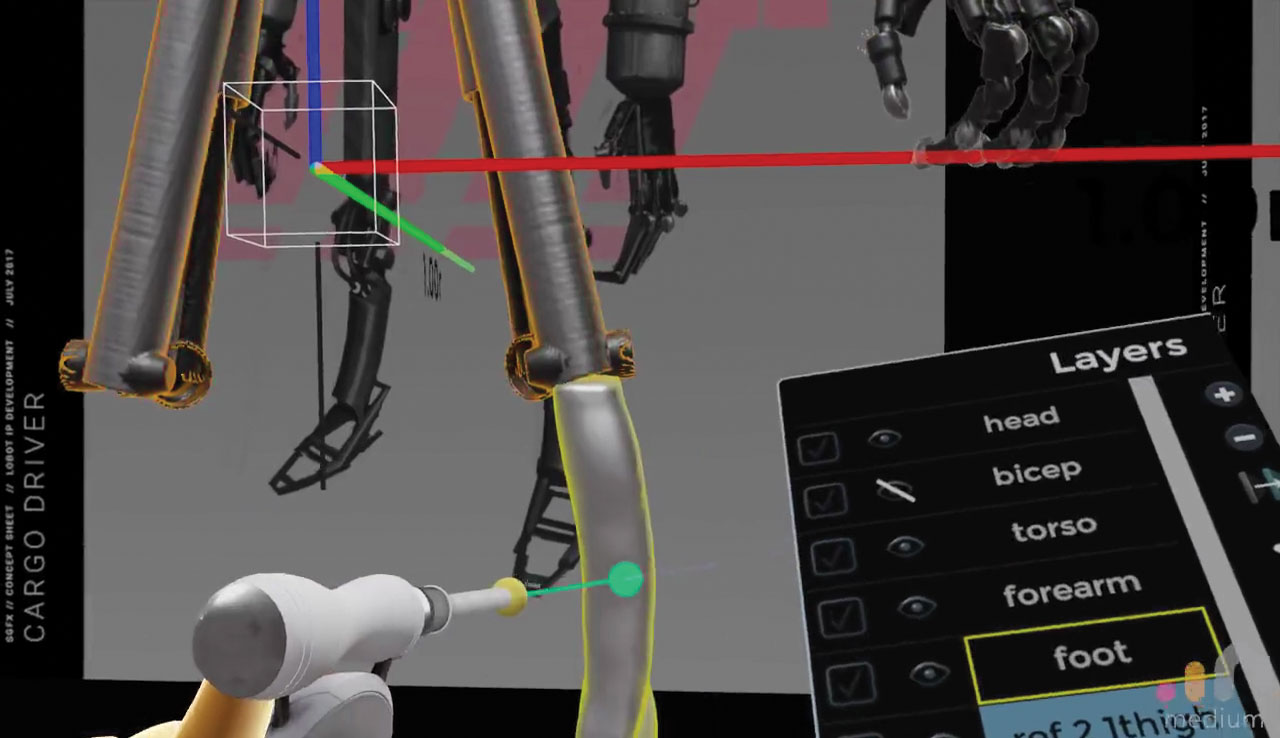
The legs are comprised of very simple shapes, compared to the upper body. They are basically a group of cylinders with some complexity to add detail. Make sure when you are building them that you get the pose correct from the side. Adding cogs and wheel shapes among other greeble to the back of the knee gives the sense of a functioning robot joint.
Get the Creative Bloq Newsletter
Daily design news, reviews, how-tos and more, as picked by the editors.
21. Determine the shape of the feet
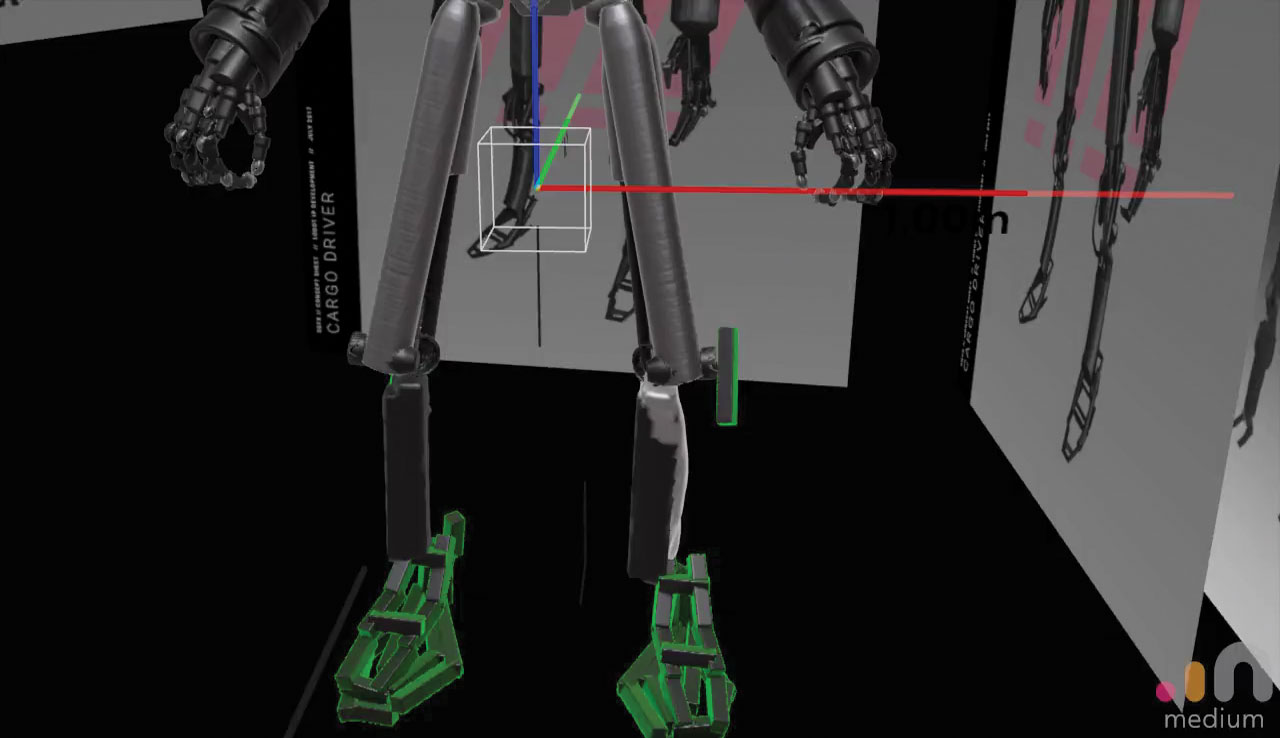
The feet of the robot are essentially a metal cage. Using a cube or square stamp, select the line brush mode. Begin to create the base shape of the cage, remembering to adjust the layer resolution as needed to ensure that the edges are crisp. Keep adjusting the position of the sculpt's feet to ensure that the pose maintains balance. To do this, select the foot or leg layer you wish to move, then using the inner grips of the controllers, you can move that layer around independently from the rest of the model.
22. Add high levels of detail
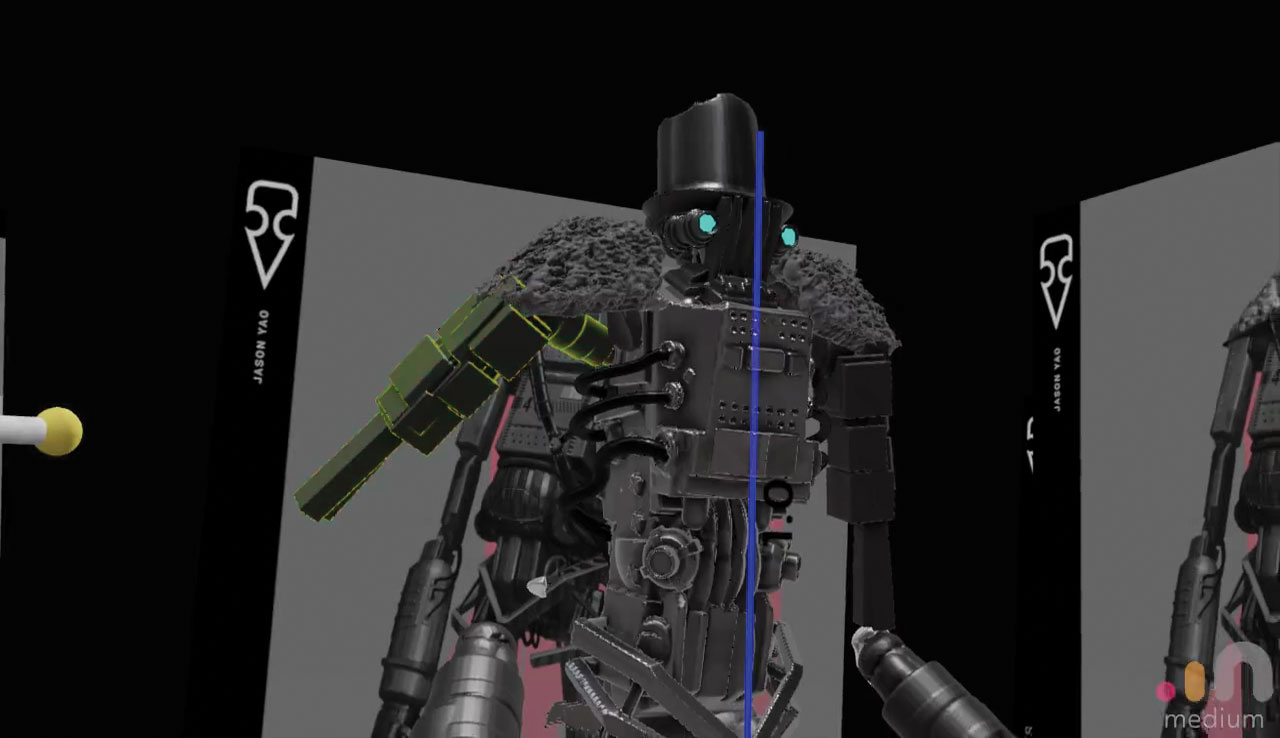
Once the shapes for all the layers have been defined, any additional details can be added, as well as sharpening any edges which are jagged due to low resolution. The Smooth tool can also be used to blend any seams together, where different brushes meet. Remember to make sure that layers don't clip due to bounding boxes shrinking when increasing resolution.
23. Photograph inside Medium
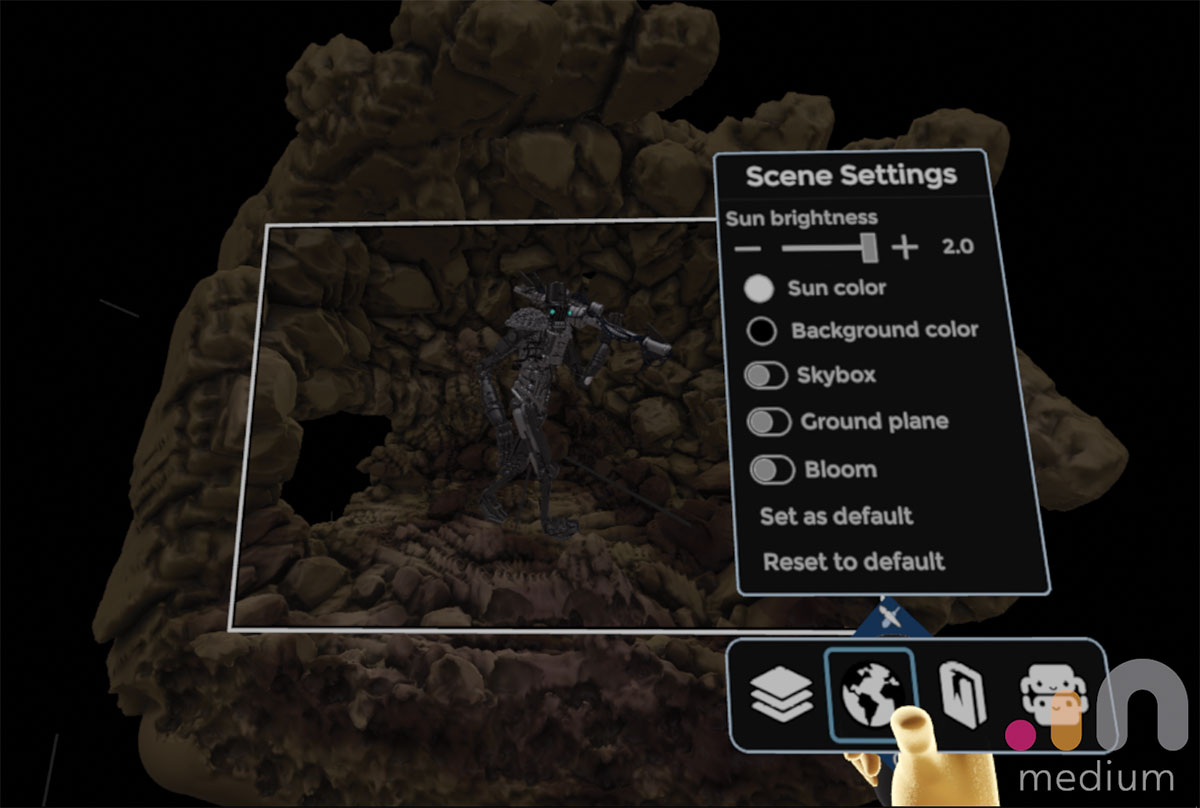
There are a few methods to capture images from inside Oculus Medium. You can capture stills, record video or record live scenes for playback in VR. These methods can be accessed by pressing the yellow control panel button on the Support hand.
When capturing a photo or video, the camera can be locked to the sculptor's hand, to follow the headset or free float in the scene. This last method is useful as you can take multiple exposures of the same scene using different materials or lighting setups in a way that is similar to multi-pass rendering. These 'passes' can be combined to create interesting effects in Photoshop.
24. Paint and comp
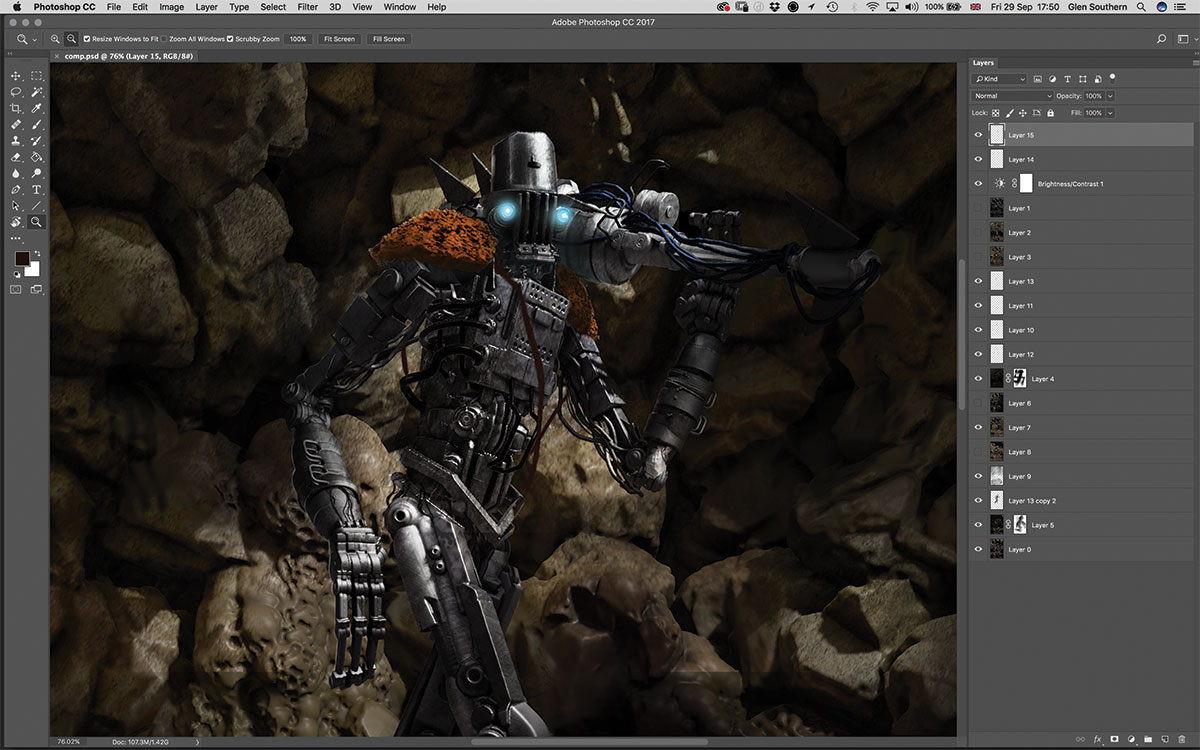
In the Control Panel there is a Photo button. Lower the FOV to 0 to stop distortion. Lock the Photoframe to the world with the small Globe icon. Hit the Photo button to take a picture. Now move the lighting and retake. Keep repeating until you are happy. These images were brought into Photoshop where I composited them using the VR Photographs and layer blend modes.
25. Export for other programs
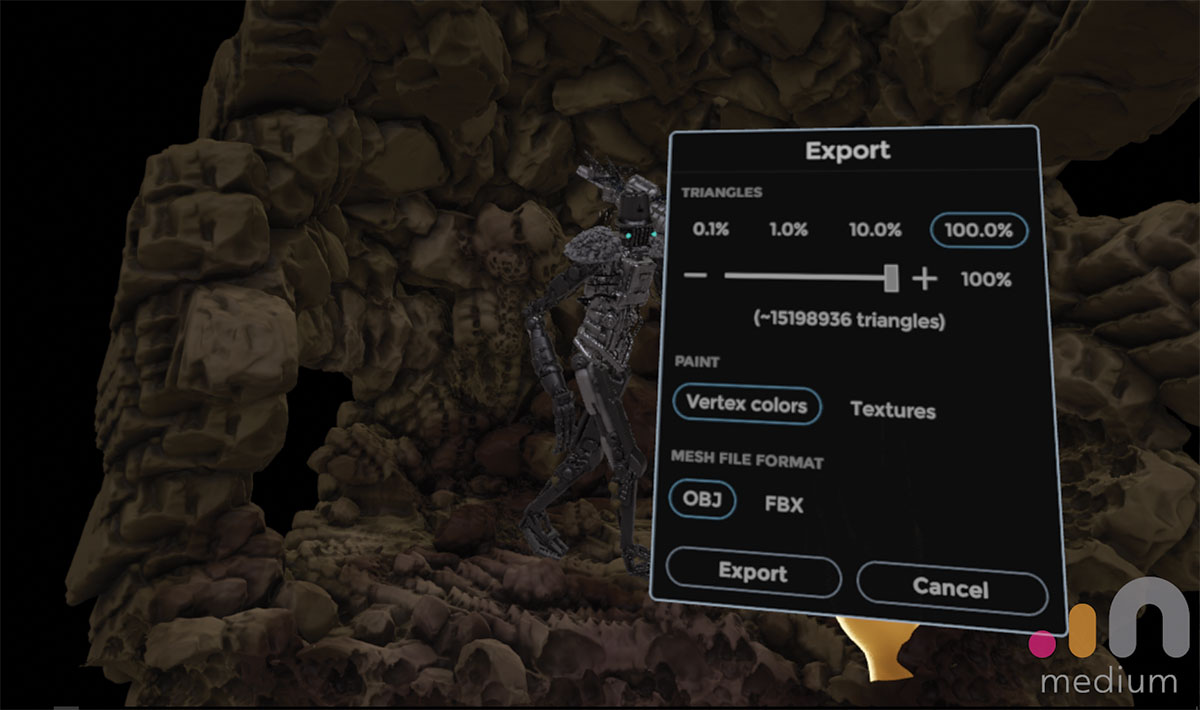
The options for export can be found by pressing the yellow Control Panel button on the Support hand and selecting Export. The options include the ability to reduce polycount through a process called decimation, which involves setting a target polycount that the application will try to match.
The formats you can export as are FBX and OBJ with the ability to export colours as a texture map or by vertex colour. With these options you should be able to export the file in a format that most software is able to read.
Vertex is the event for the CG community. Book your ticket now at vertexconf.com, where you can find out more about the other amazing speakers, workshops, recruitment fair, networking event, expo and more.
Related articles:

Thank you for reading 5 articles this month* Join now for unlimited access
Enjoy your first month for just £1 / $1 / €1
*Read 5 free articles per month without a subscription

Join now for unlimited access
Try first month for just £1 / $1 / €1
Glen runs SouthernGFX, a small Cheshire-based studio specialising in character and creature design, which creates assets for TV and film. Clients include SKY, Wacom and Oculus Medium and the studio has an impressive project list that features 3D models for Game of Thrones' house sigils. He's been using and training ZBrush for over 15 years and is a Wacom Ambassador for the UK and Ireland.
