How to sculpt a 3D-printed goblin
Transform a 2D concept into a 3D collectible in ZBrush.
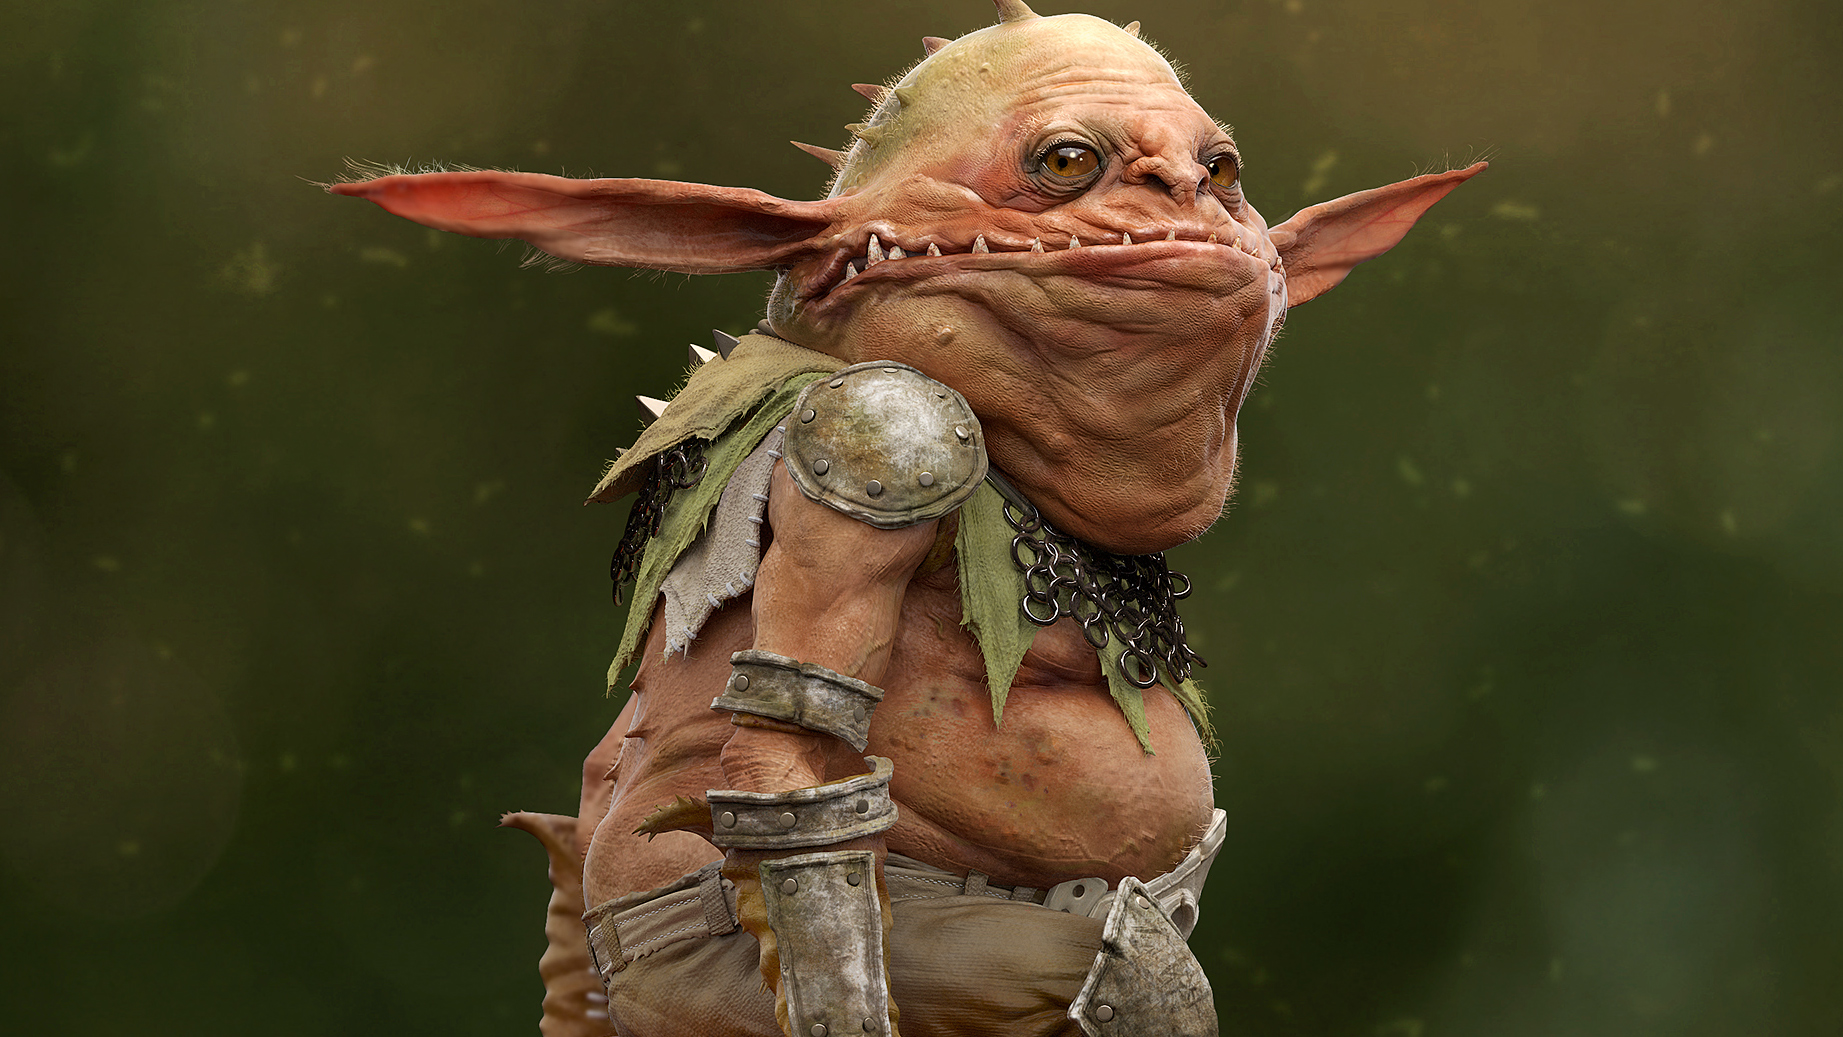
The concept for this project, Mushroom Goblin, comes from a drawing by my friend Adrian Smith. I have been working on making this concept into a 3D printed collectible for the site Industria Mechanika.
I used ZBrush to create a 3D sculpt, Polypaint for quick texturing and V-Ray for rendering. I will share my entire process with you, explaining how I took a 2D concept and turned it into a 3D illustration.
01. Study the drawing
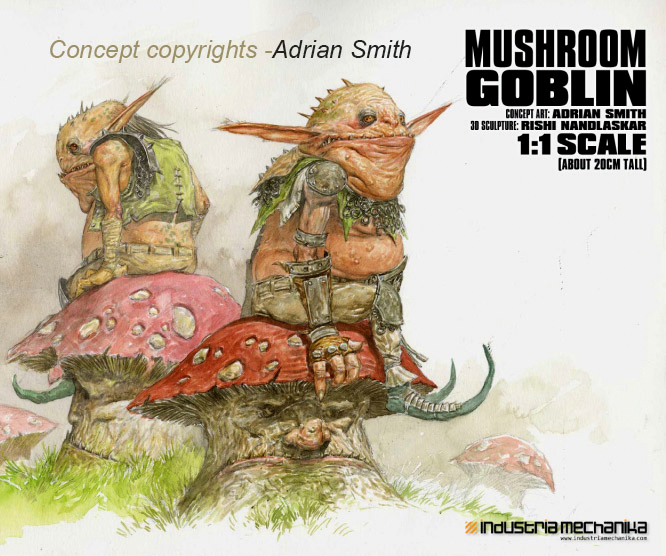
Before diving into any project, it’s important to do what I call a ‘warm up’ to get the hang of the character. This warm up could be drawing the character from different angles or messing around with clay for some basic forms, for example. Warming up first means that the digital sculpting process becomes more free-flowing.
I also try to draw roughs of the character in T-pose if not provided in the concept so that I can get a good sense of the proportions. Always try to nail the proportions of a concept because they are what make the character look cool in the concept art. You can modify the original later if required, but it’s a good idea to stick to original proportions at least at first.
02. Create a base mesh
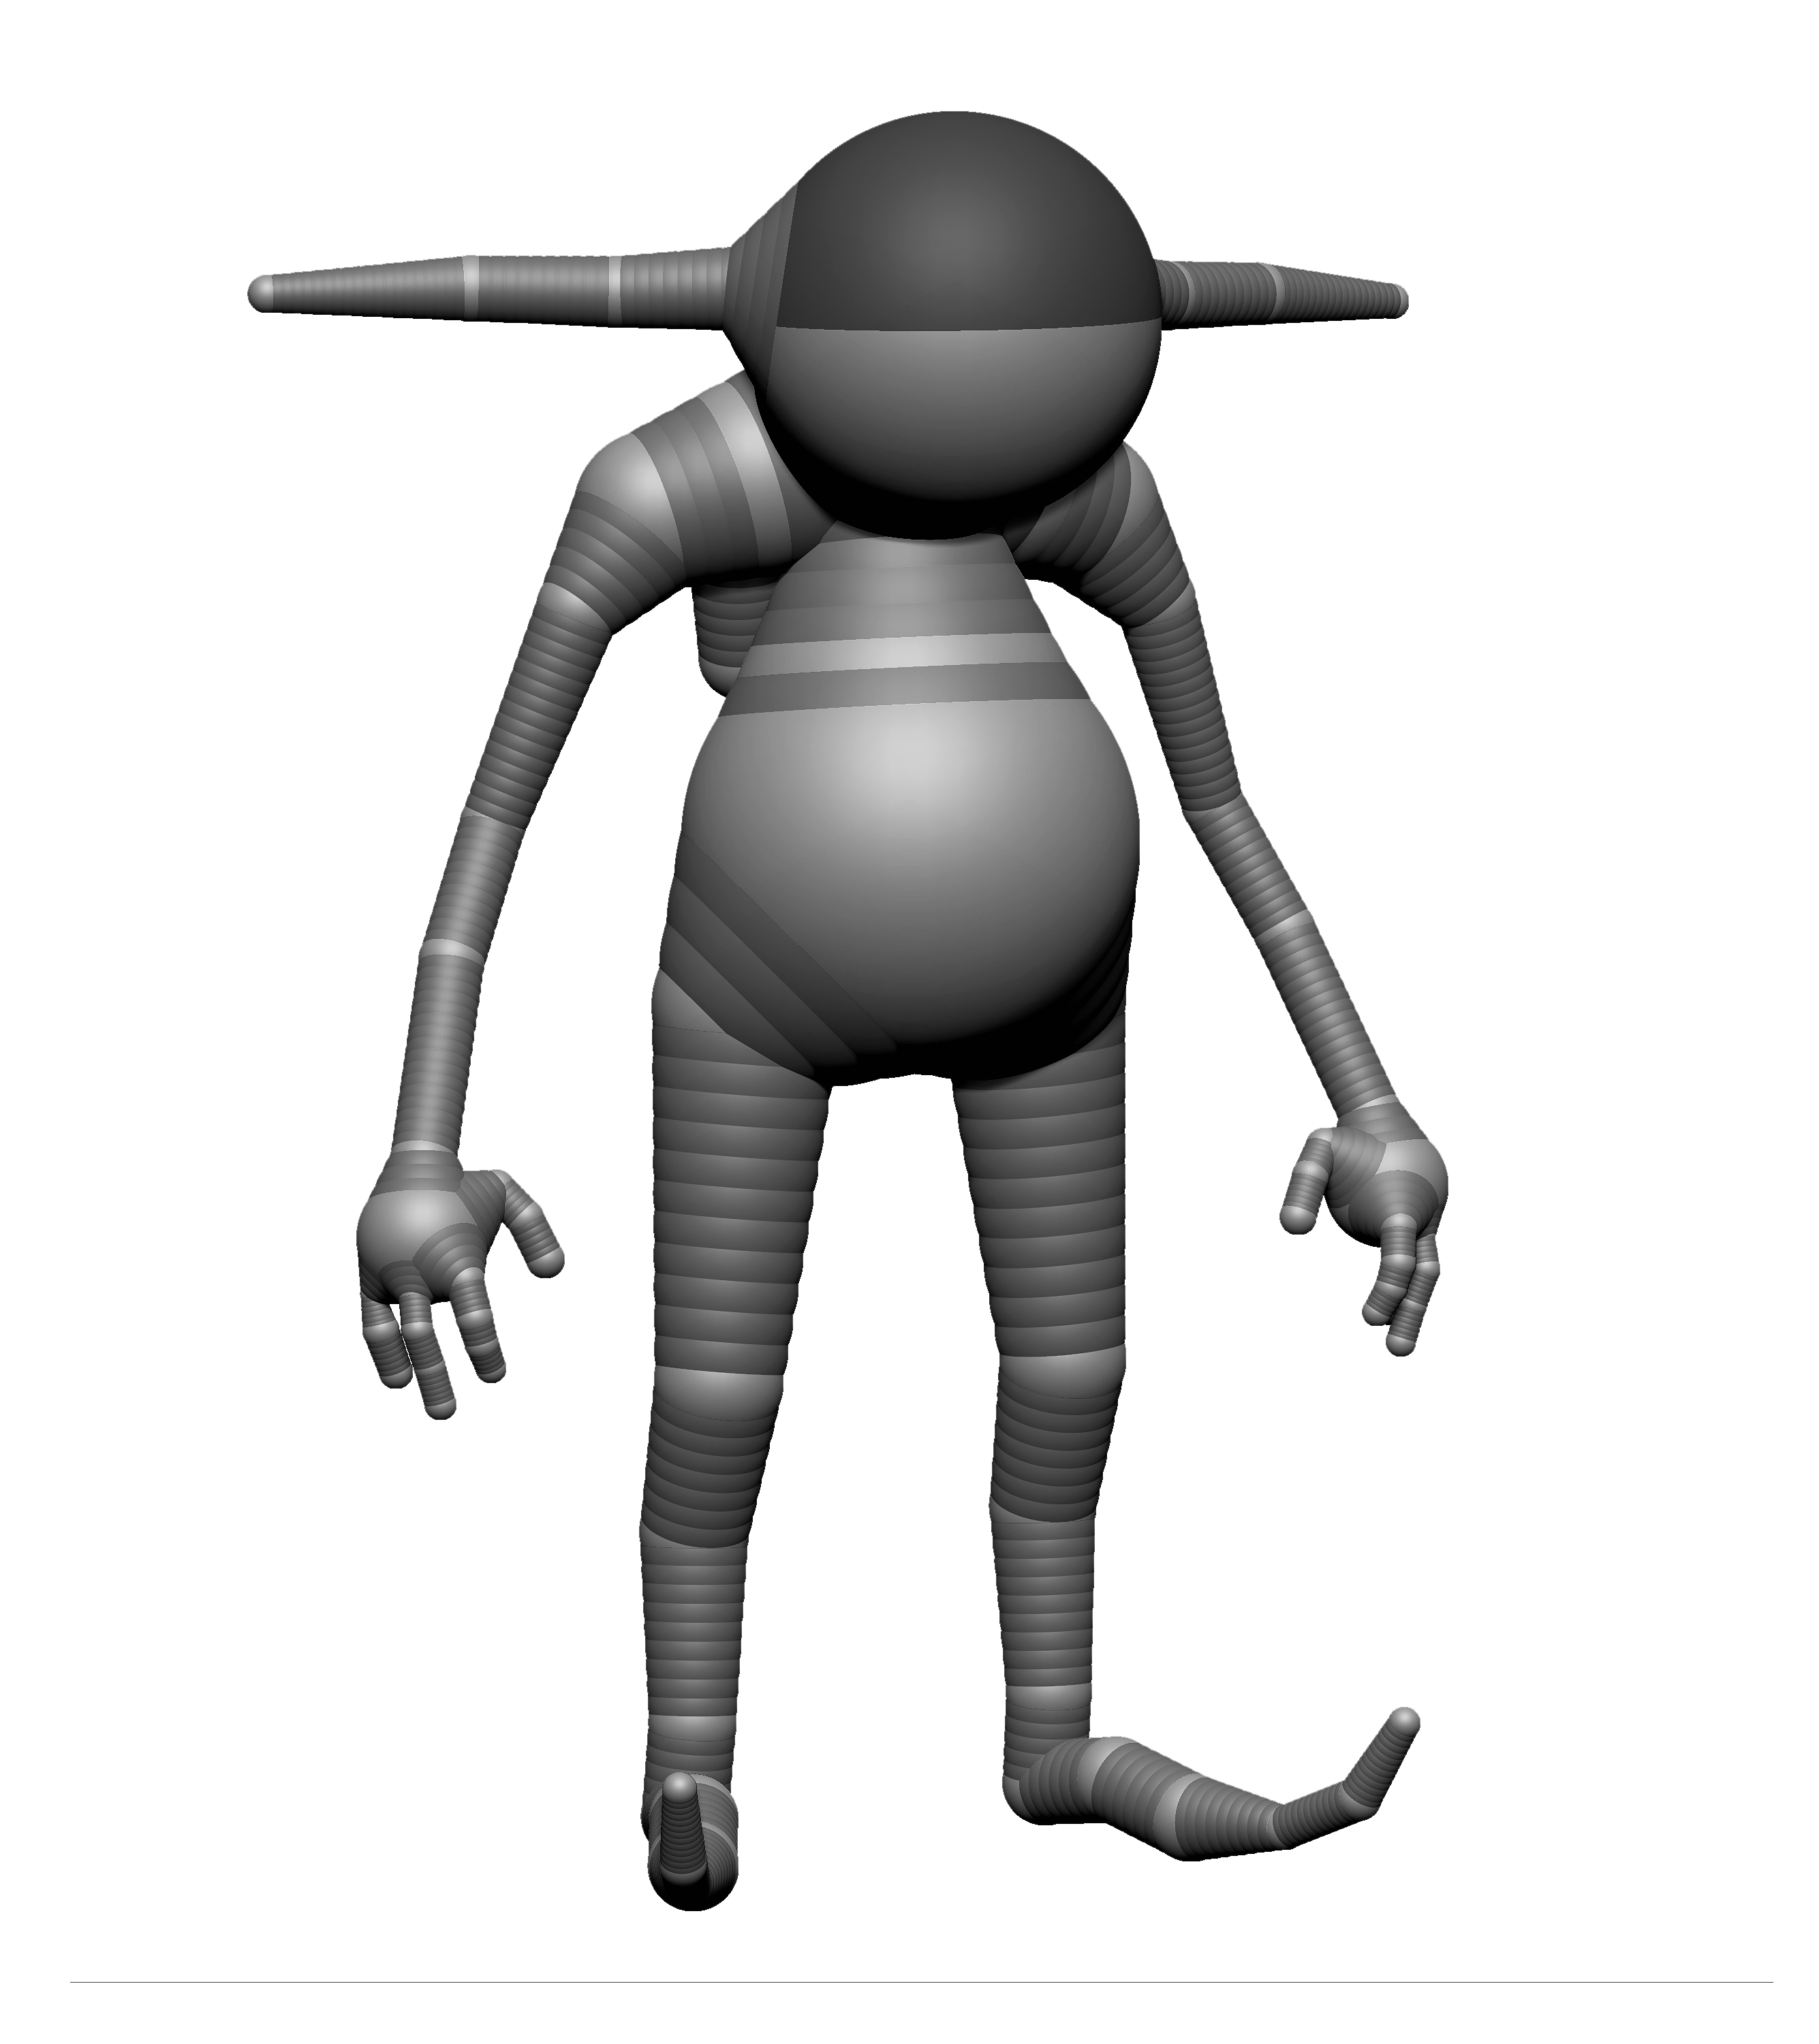
I usually make a base mesh in Maya and get it ready to be sculpted in ZBrush, which is kind of an old-school method. But for this project, I use ZSpheres to make the base mesh. Zspheres mean I can quickly extrude body volumes and create an armature in minutes. This armature acts as my base mesh. You can choose whichever method you like to get your basic mesh.
03. Basic sculpting
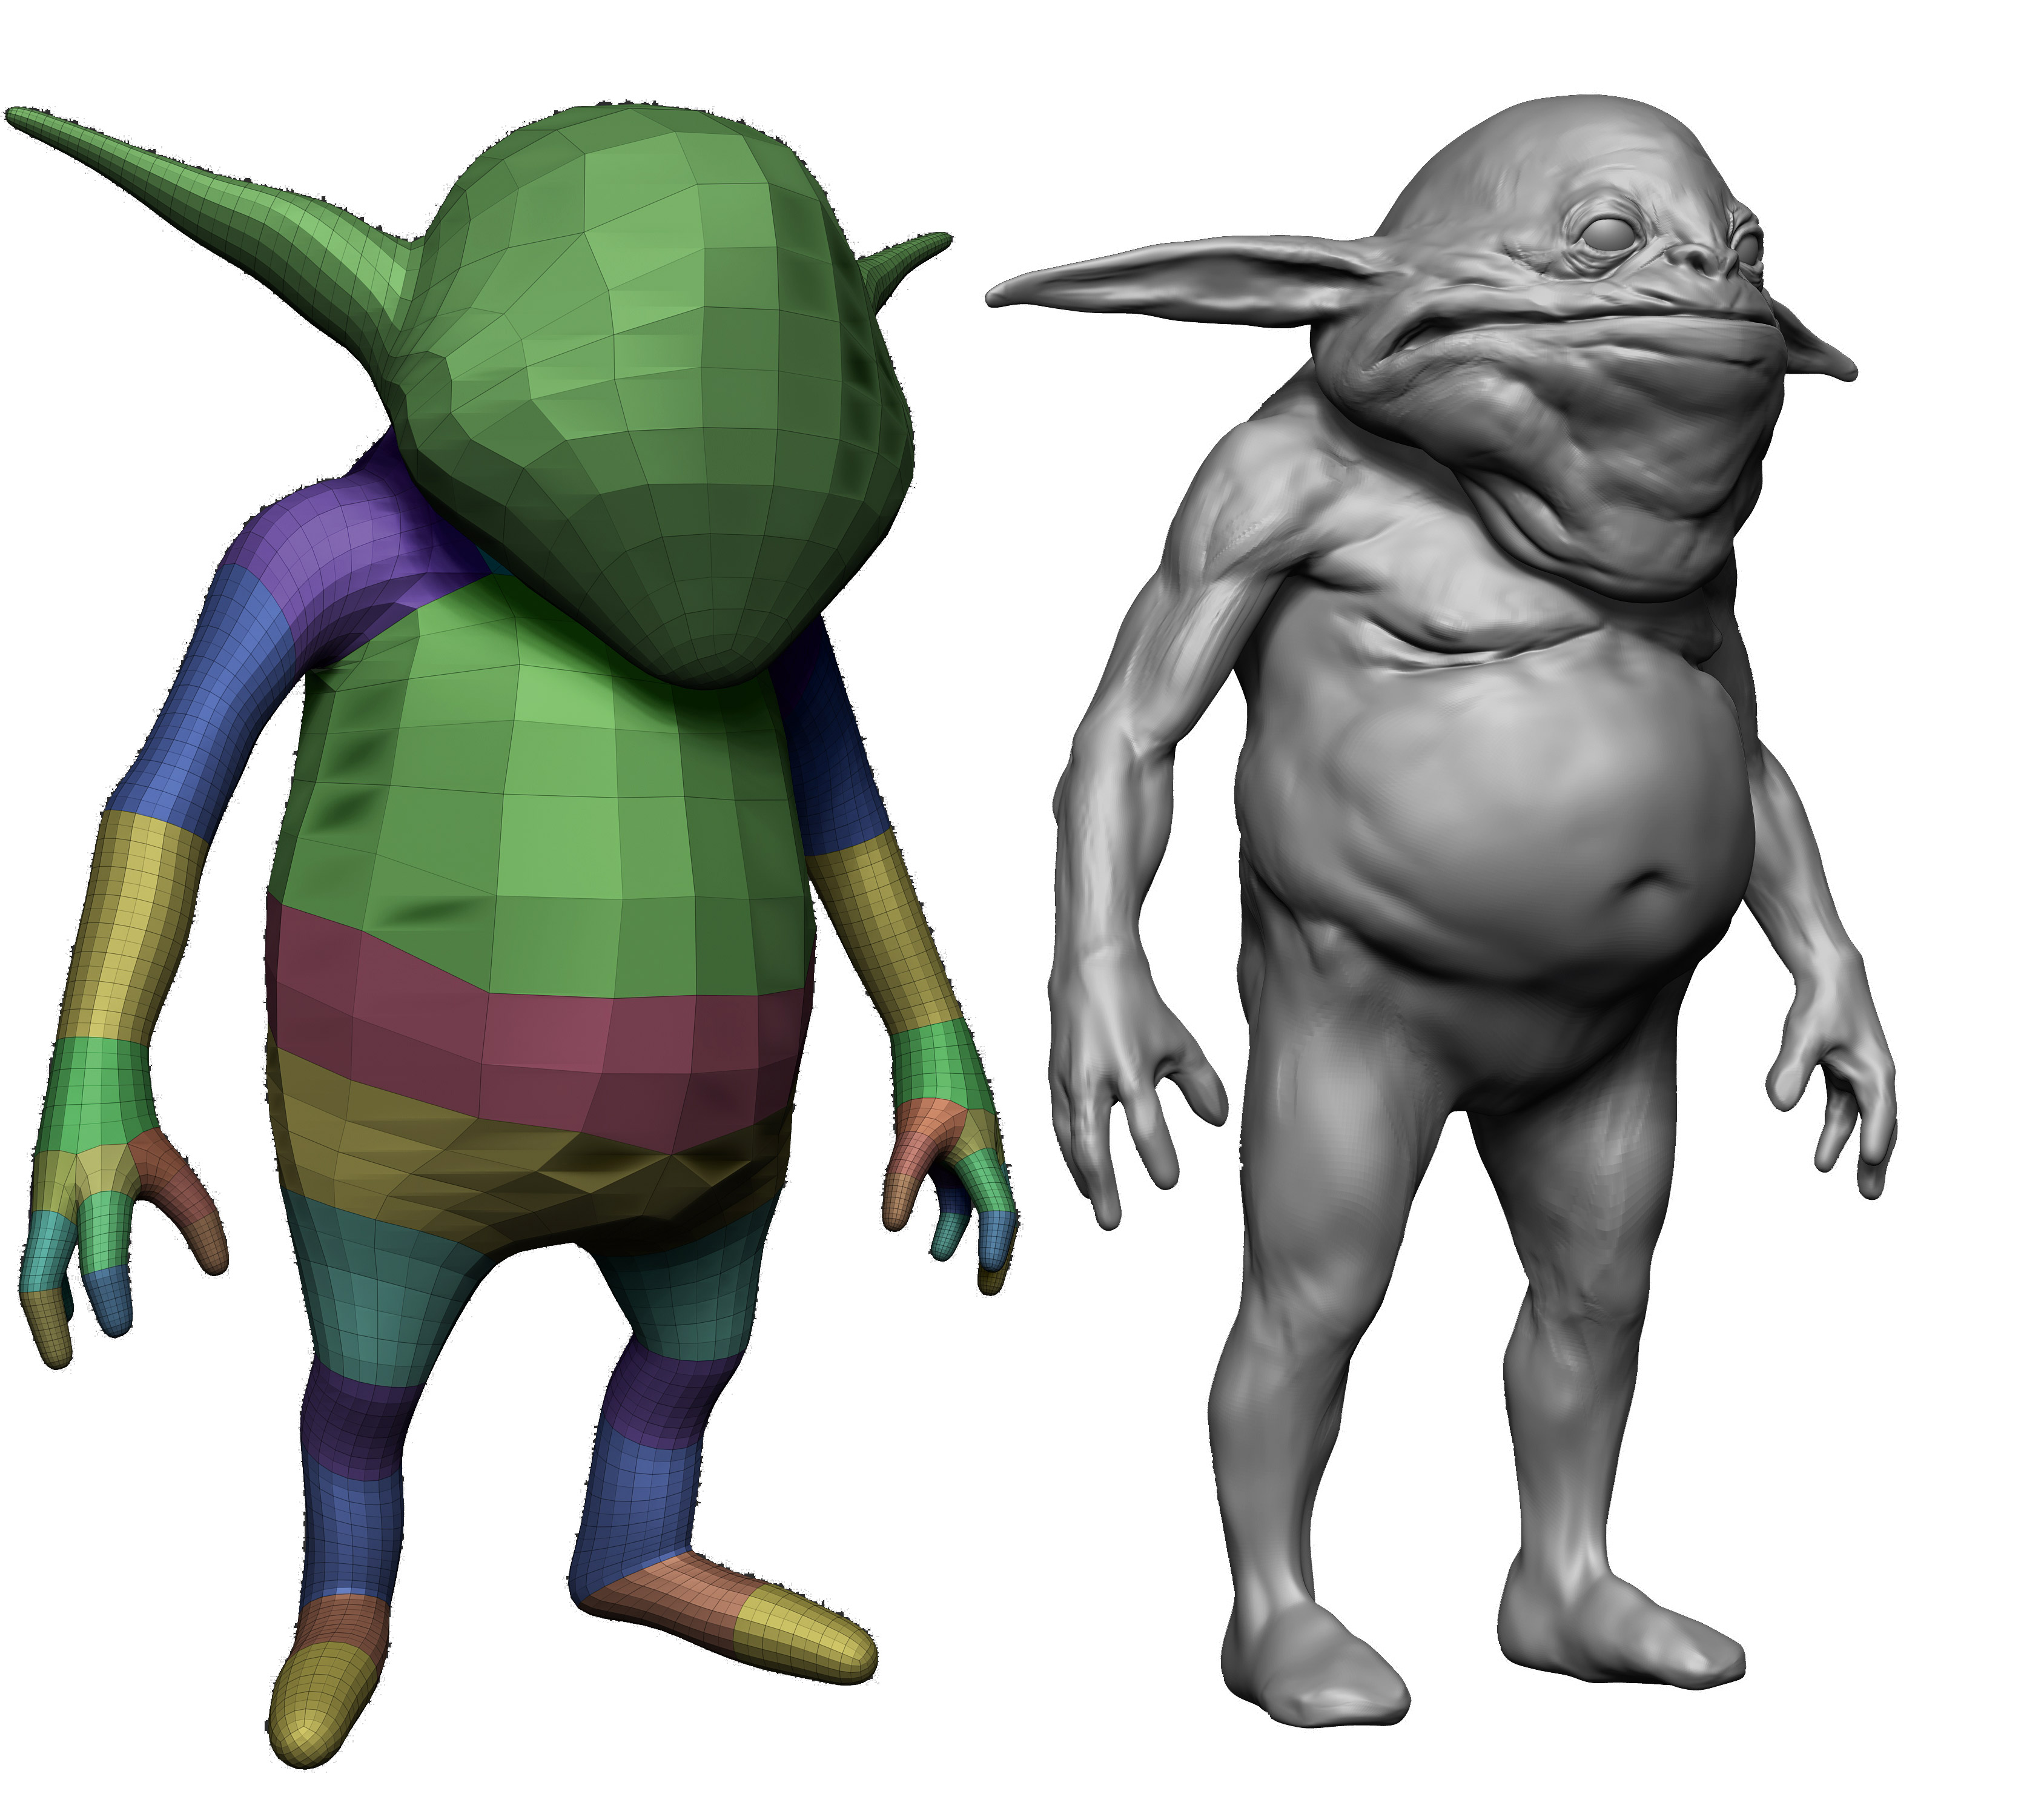
I start sculpting basic forms on the base mesh, but only add secondary forms after I feel it’s time to unwrap and pose. The rest of the detailed sculpting can follow later. It’s important not to hesitate when changing proportions and forms in the process. Keep visualising the form, check how it reads in the concept art and try to fill in the third dimension.
A good understanding of anatomy is essential while sculpting a character. So if you don’t know much about anatomy then at least refer to reference.
Get the Creative Bloq Newsletter
Daily design news, reviews, how-tos and more, as picked by the editors.
04. Retopologise model
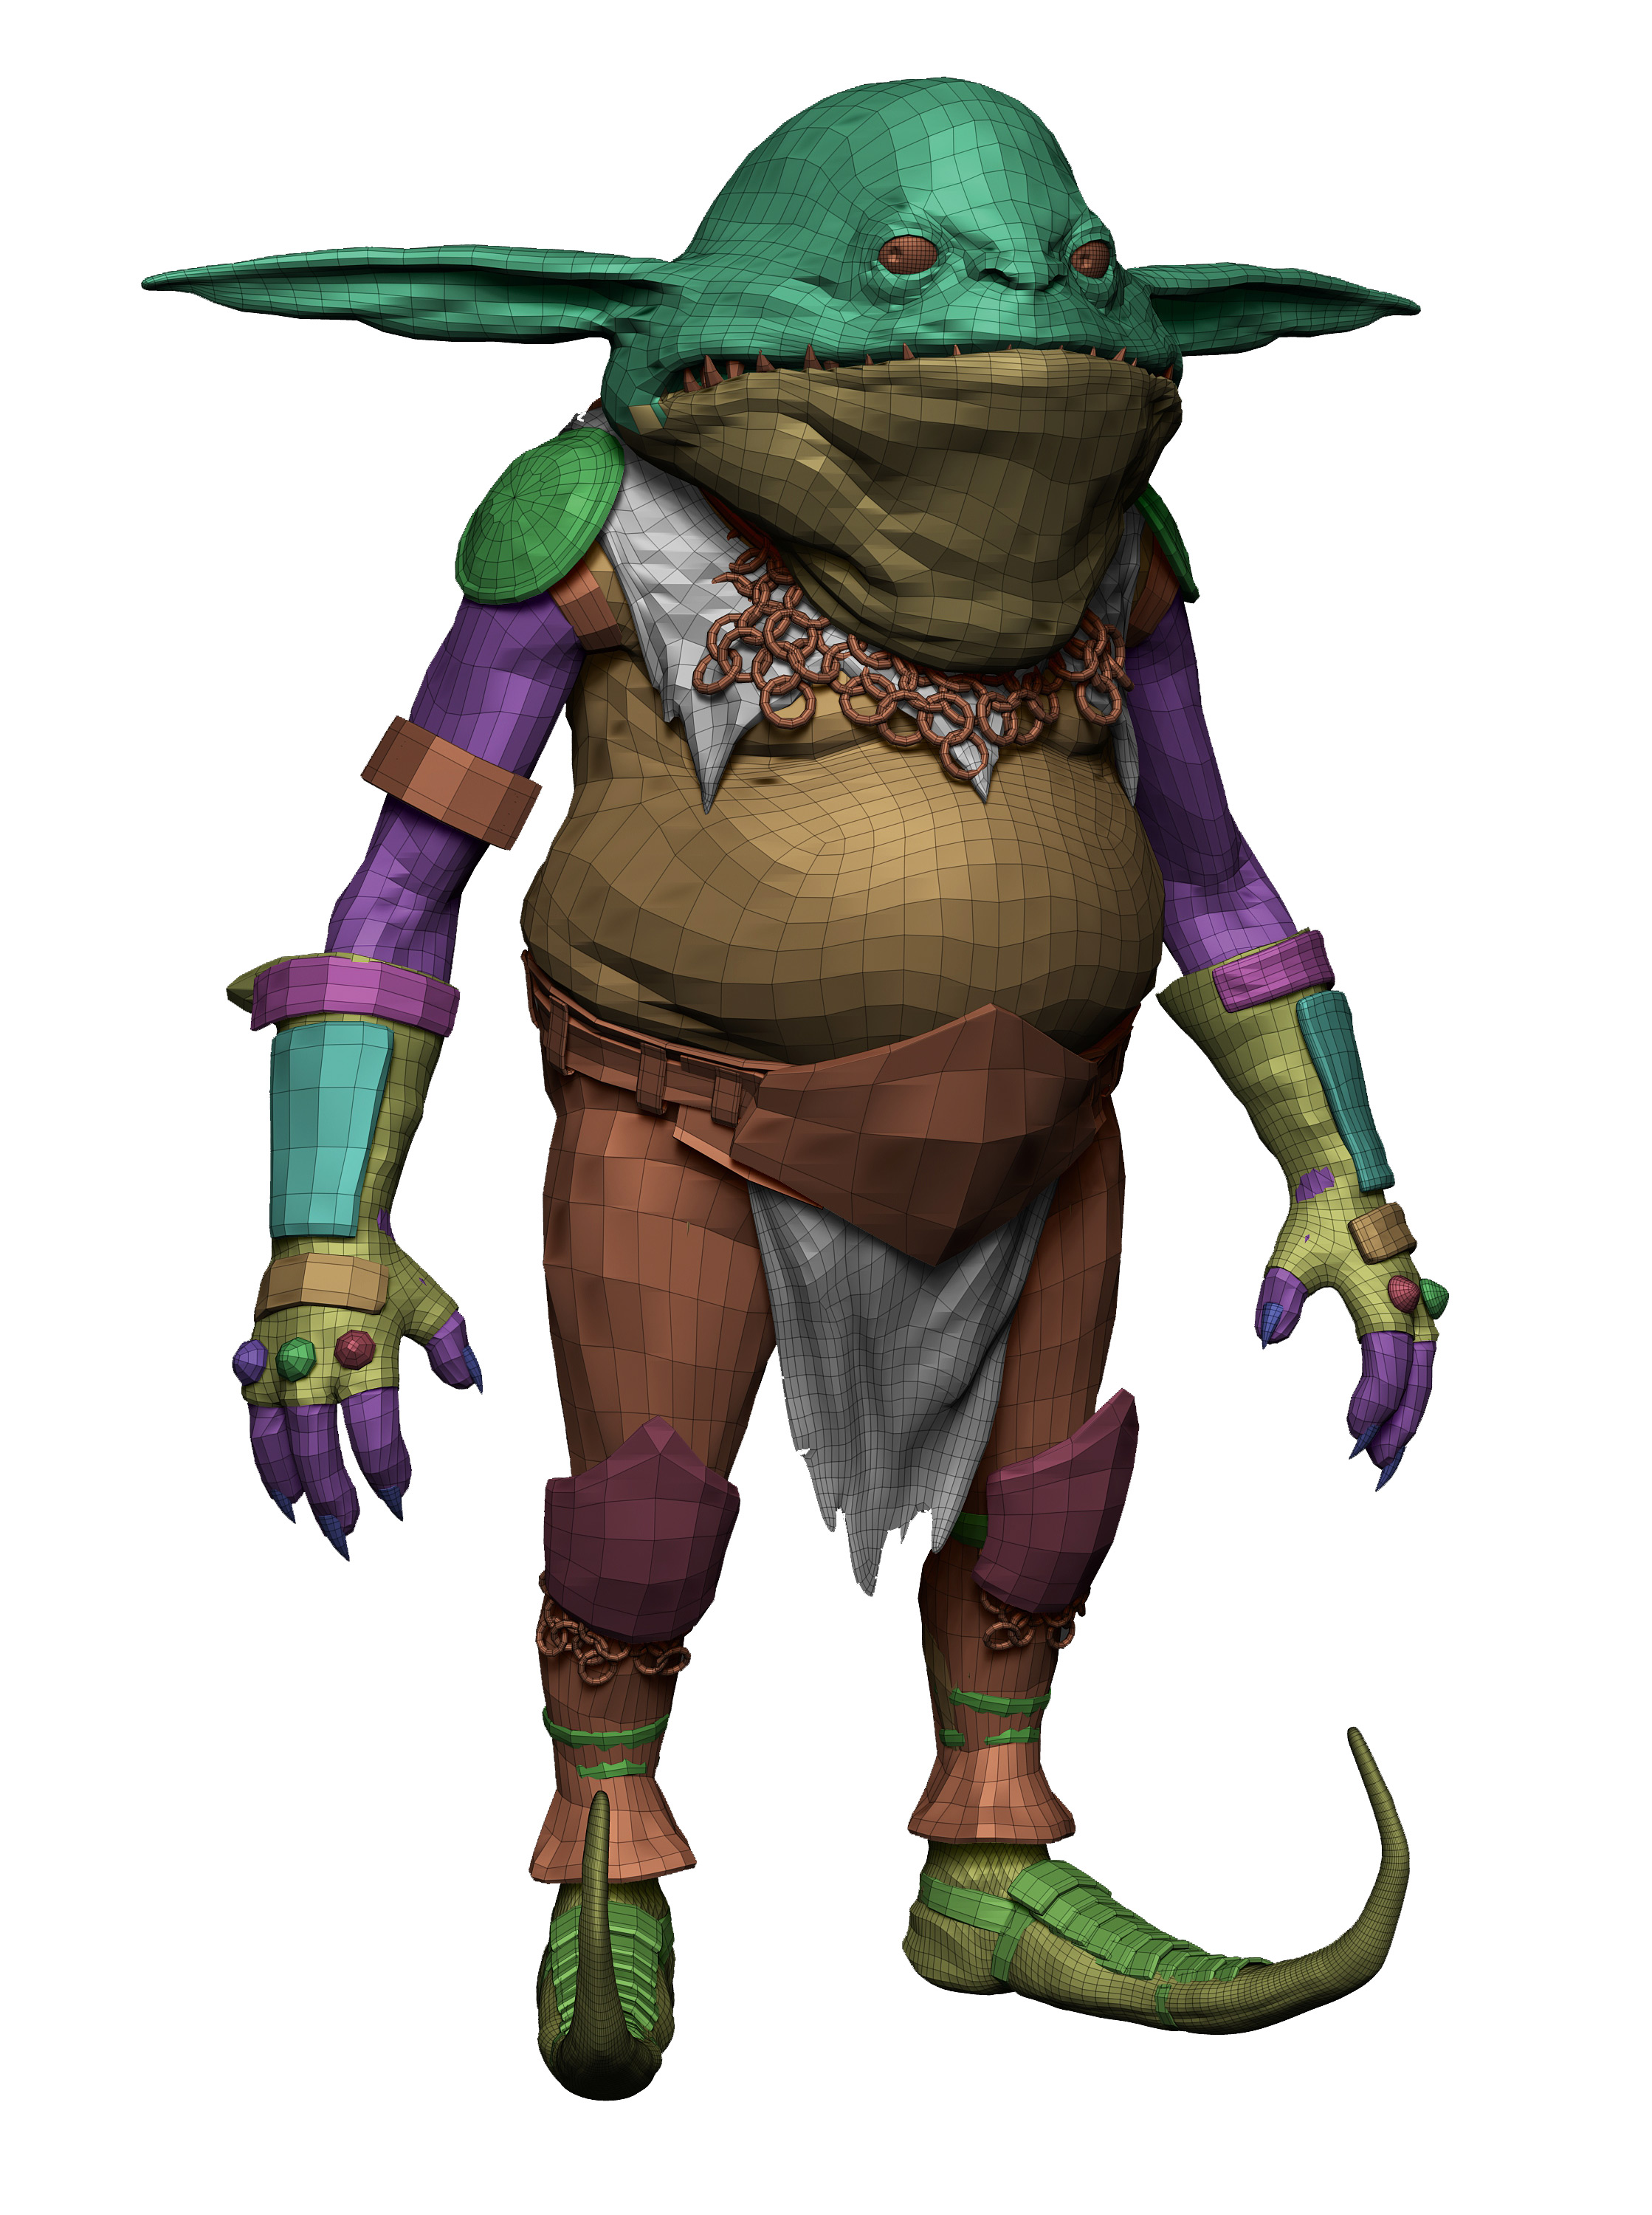
Retoplogy of the basic sculpting can be done directly in ZBrush. I used to prefer TopoGun but I now I tend to use Maya’s latest Quad Draw Tool, which is really handy and quick. Try to capture mid-level details while retopologising to get better results after subdivisions. This is also useful when projecting details later.
05. Sculpt secondary details
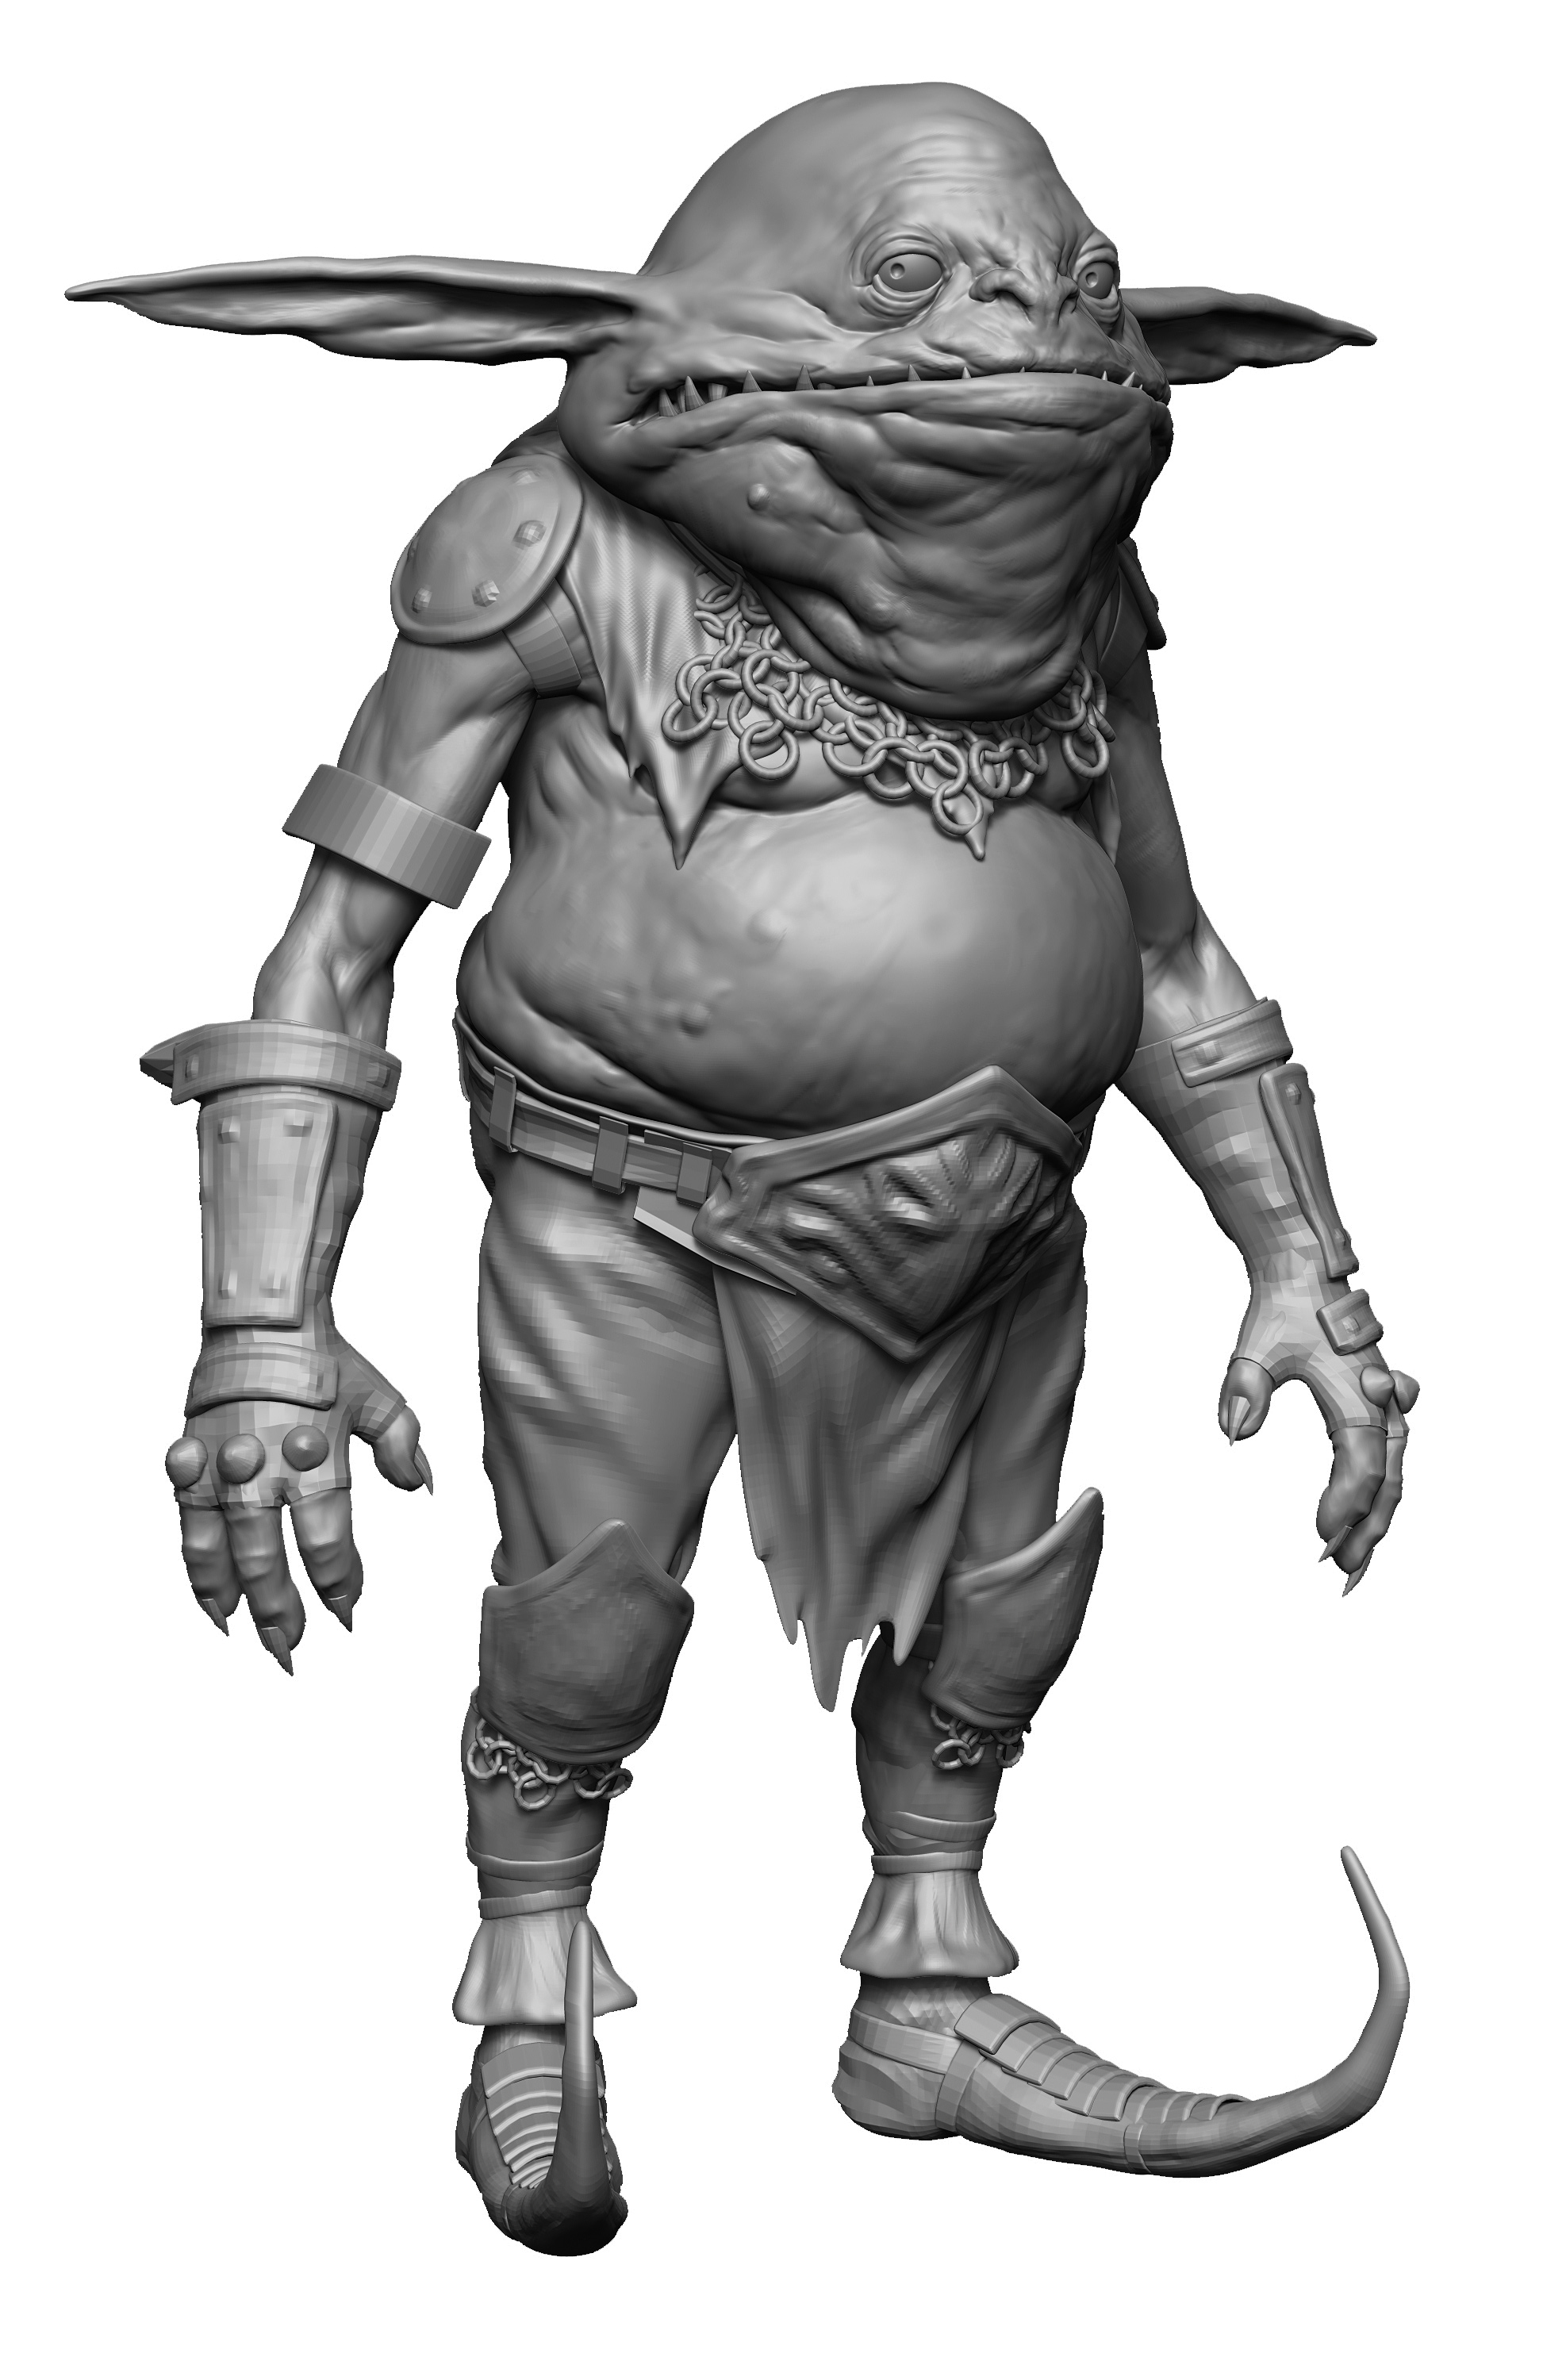
Secondary forms help to add details to the existing primary forms by giving it a more finished look. So when you zoom out, the primary forms should read neatly, and when zoomed in a bit, the secondary shapes should just complement rather than supersede.
06. Unwrap your model
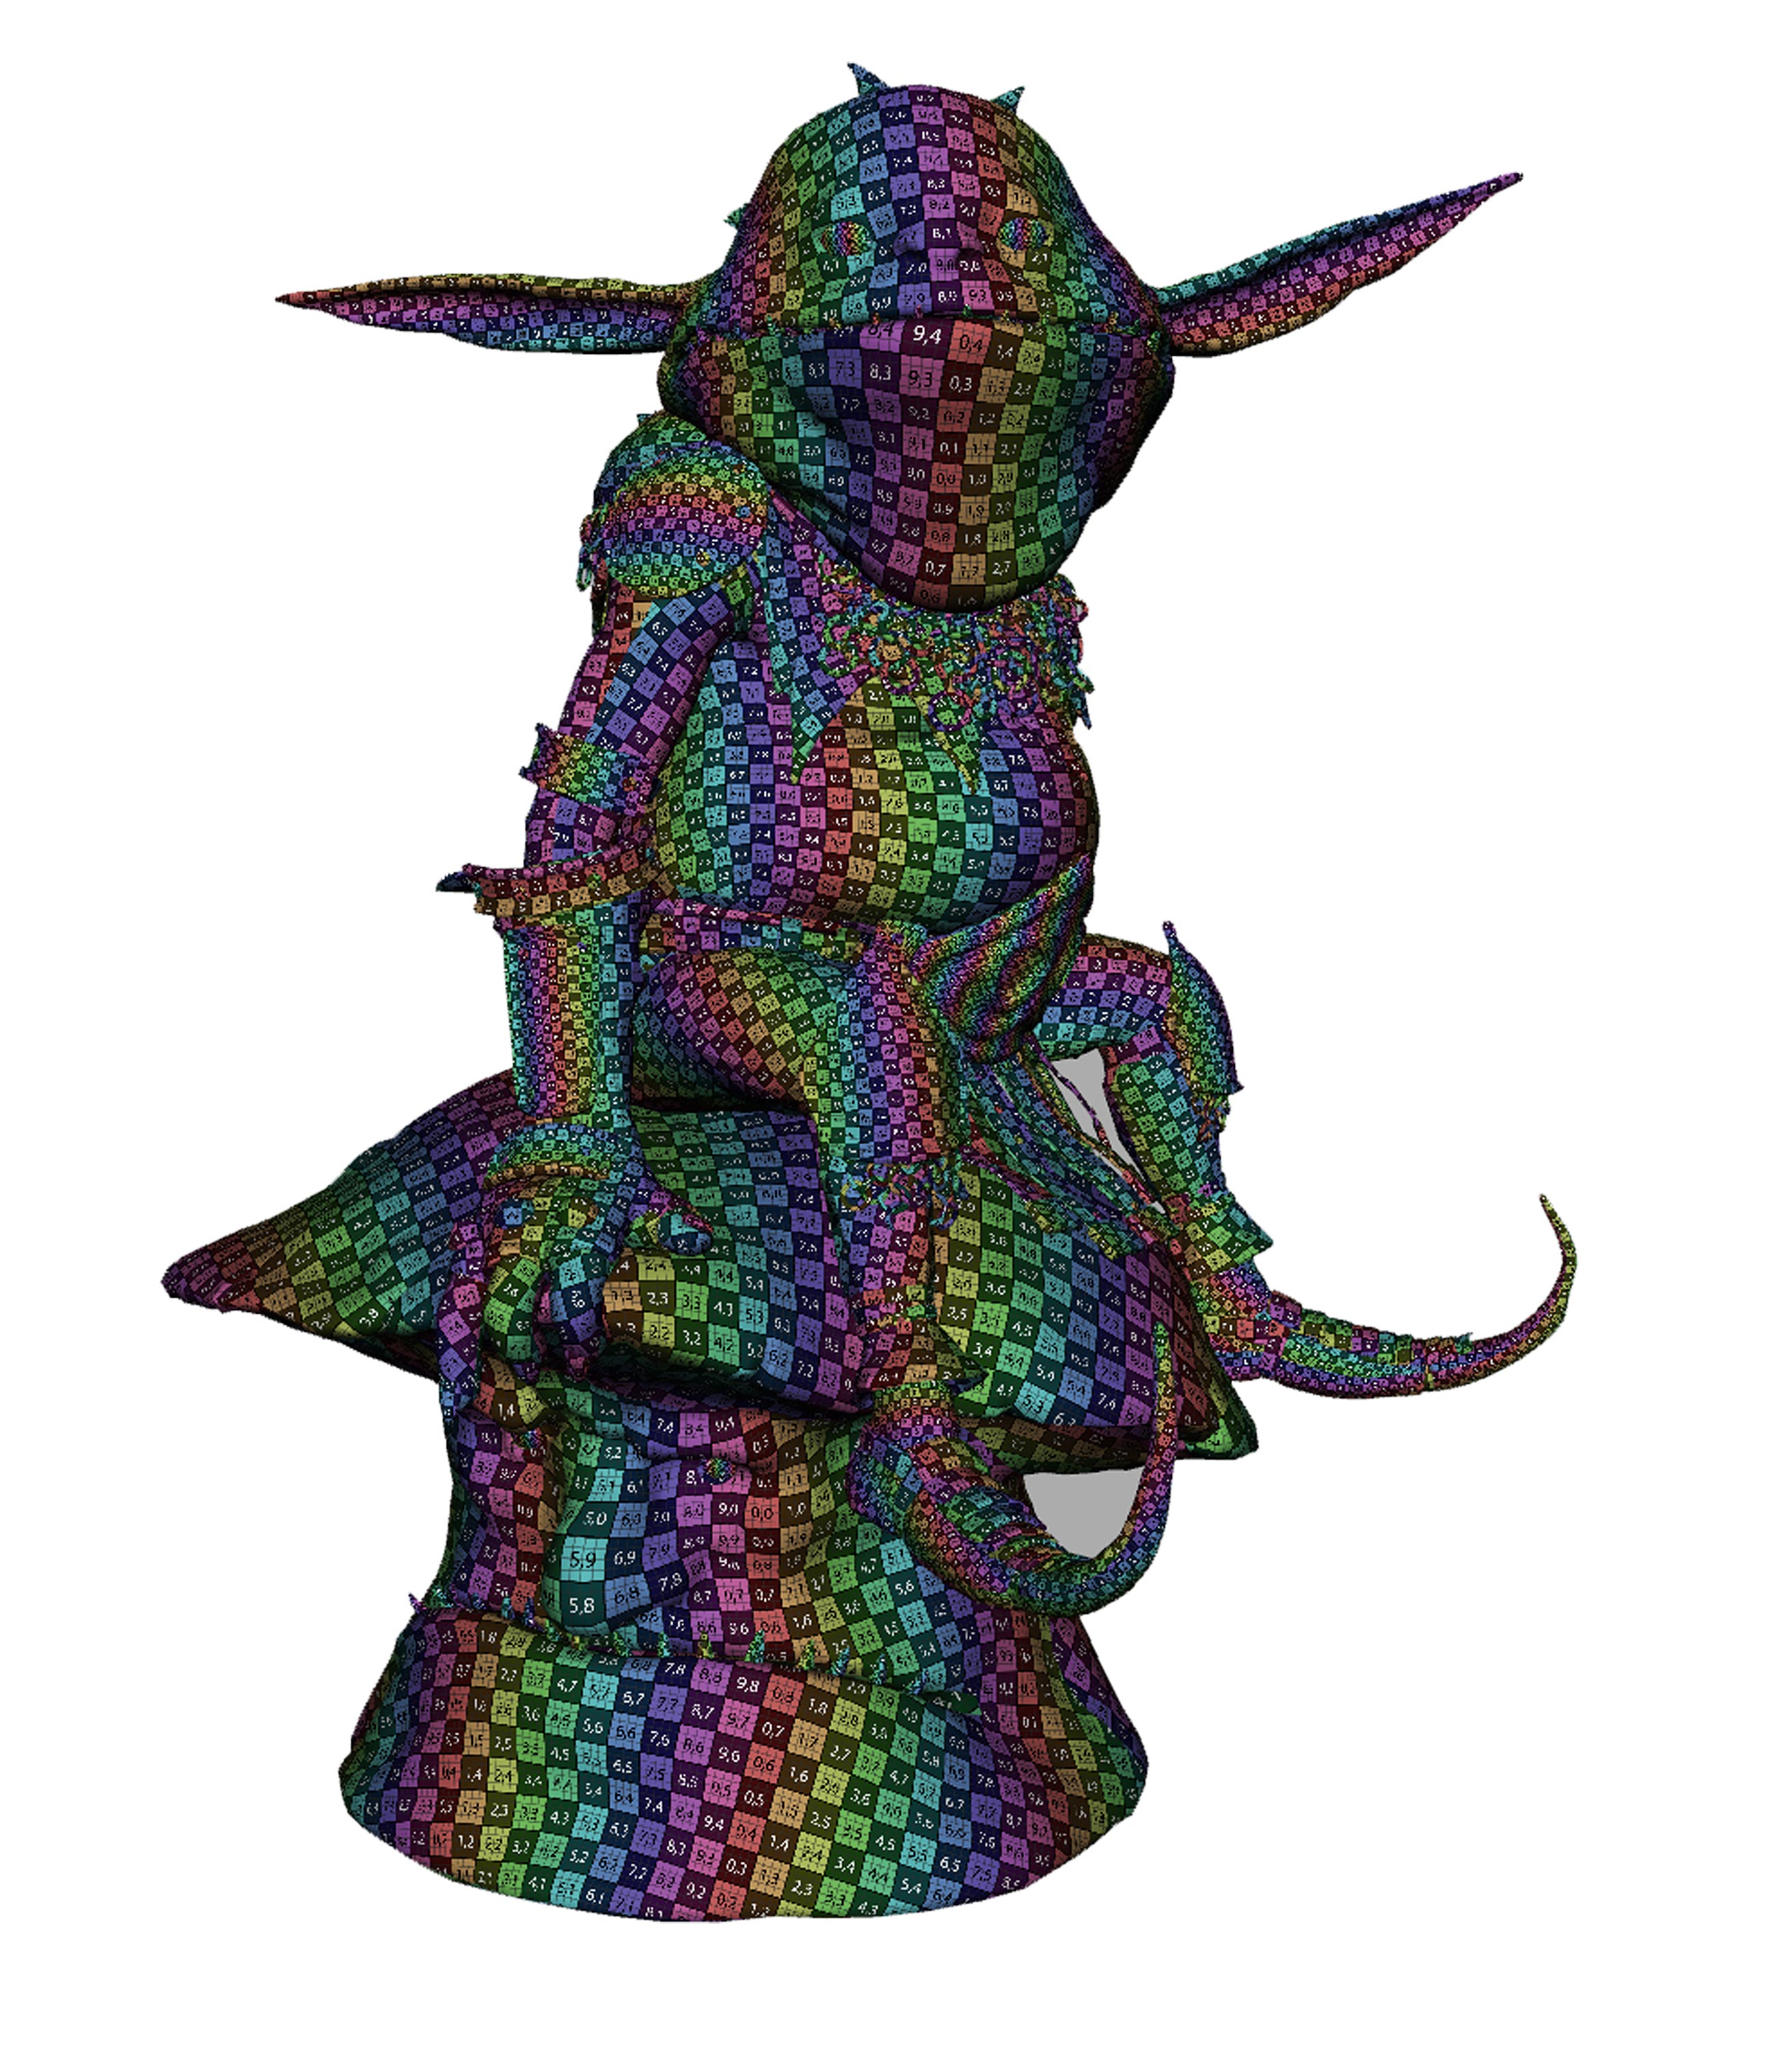
There are various ways to unwrap your model. I use Maya for basic unwrapping and then UV Master in ZBrush. I define the seams of the UVs where necessary in Maya, and then in ZBrush press Unwrap, keeping the existing UVs, and it’s done. ZBrush does the relaxing of UVs quite effectively, especially if the seams are defined properly.
07. Pose using Transpose Master
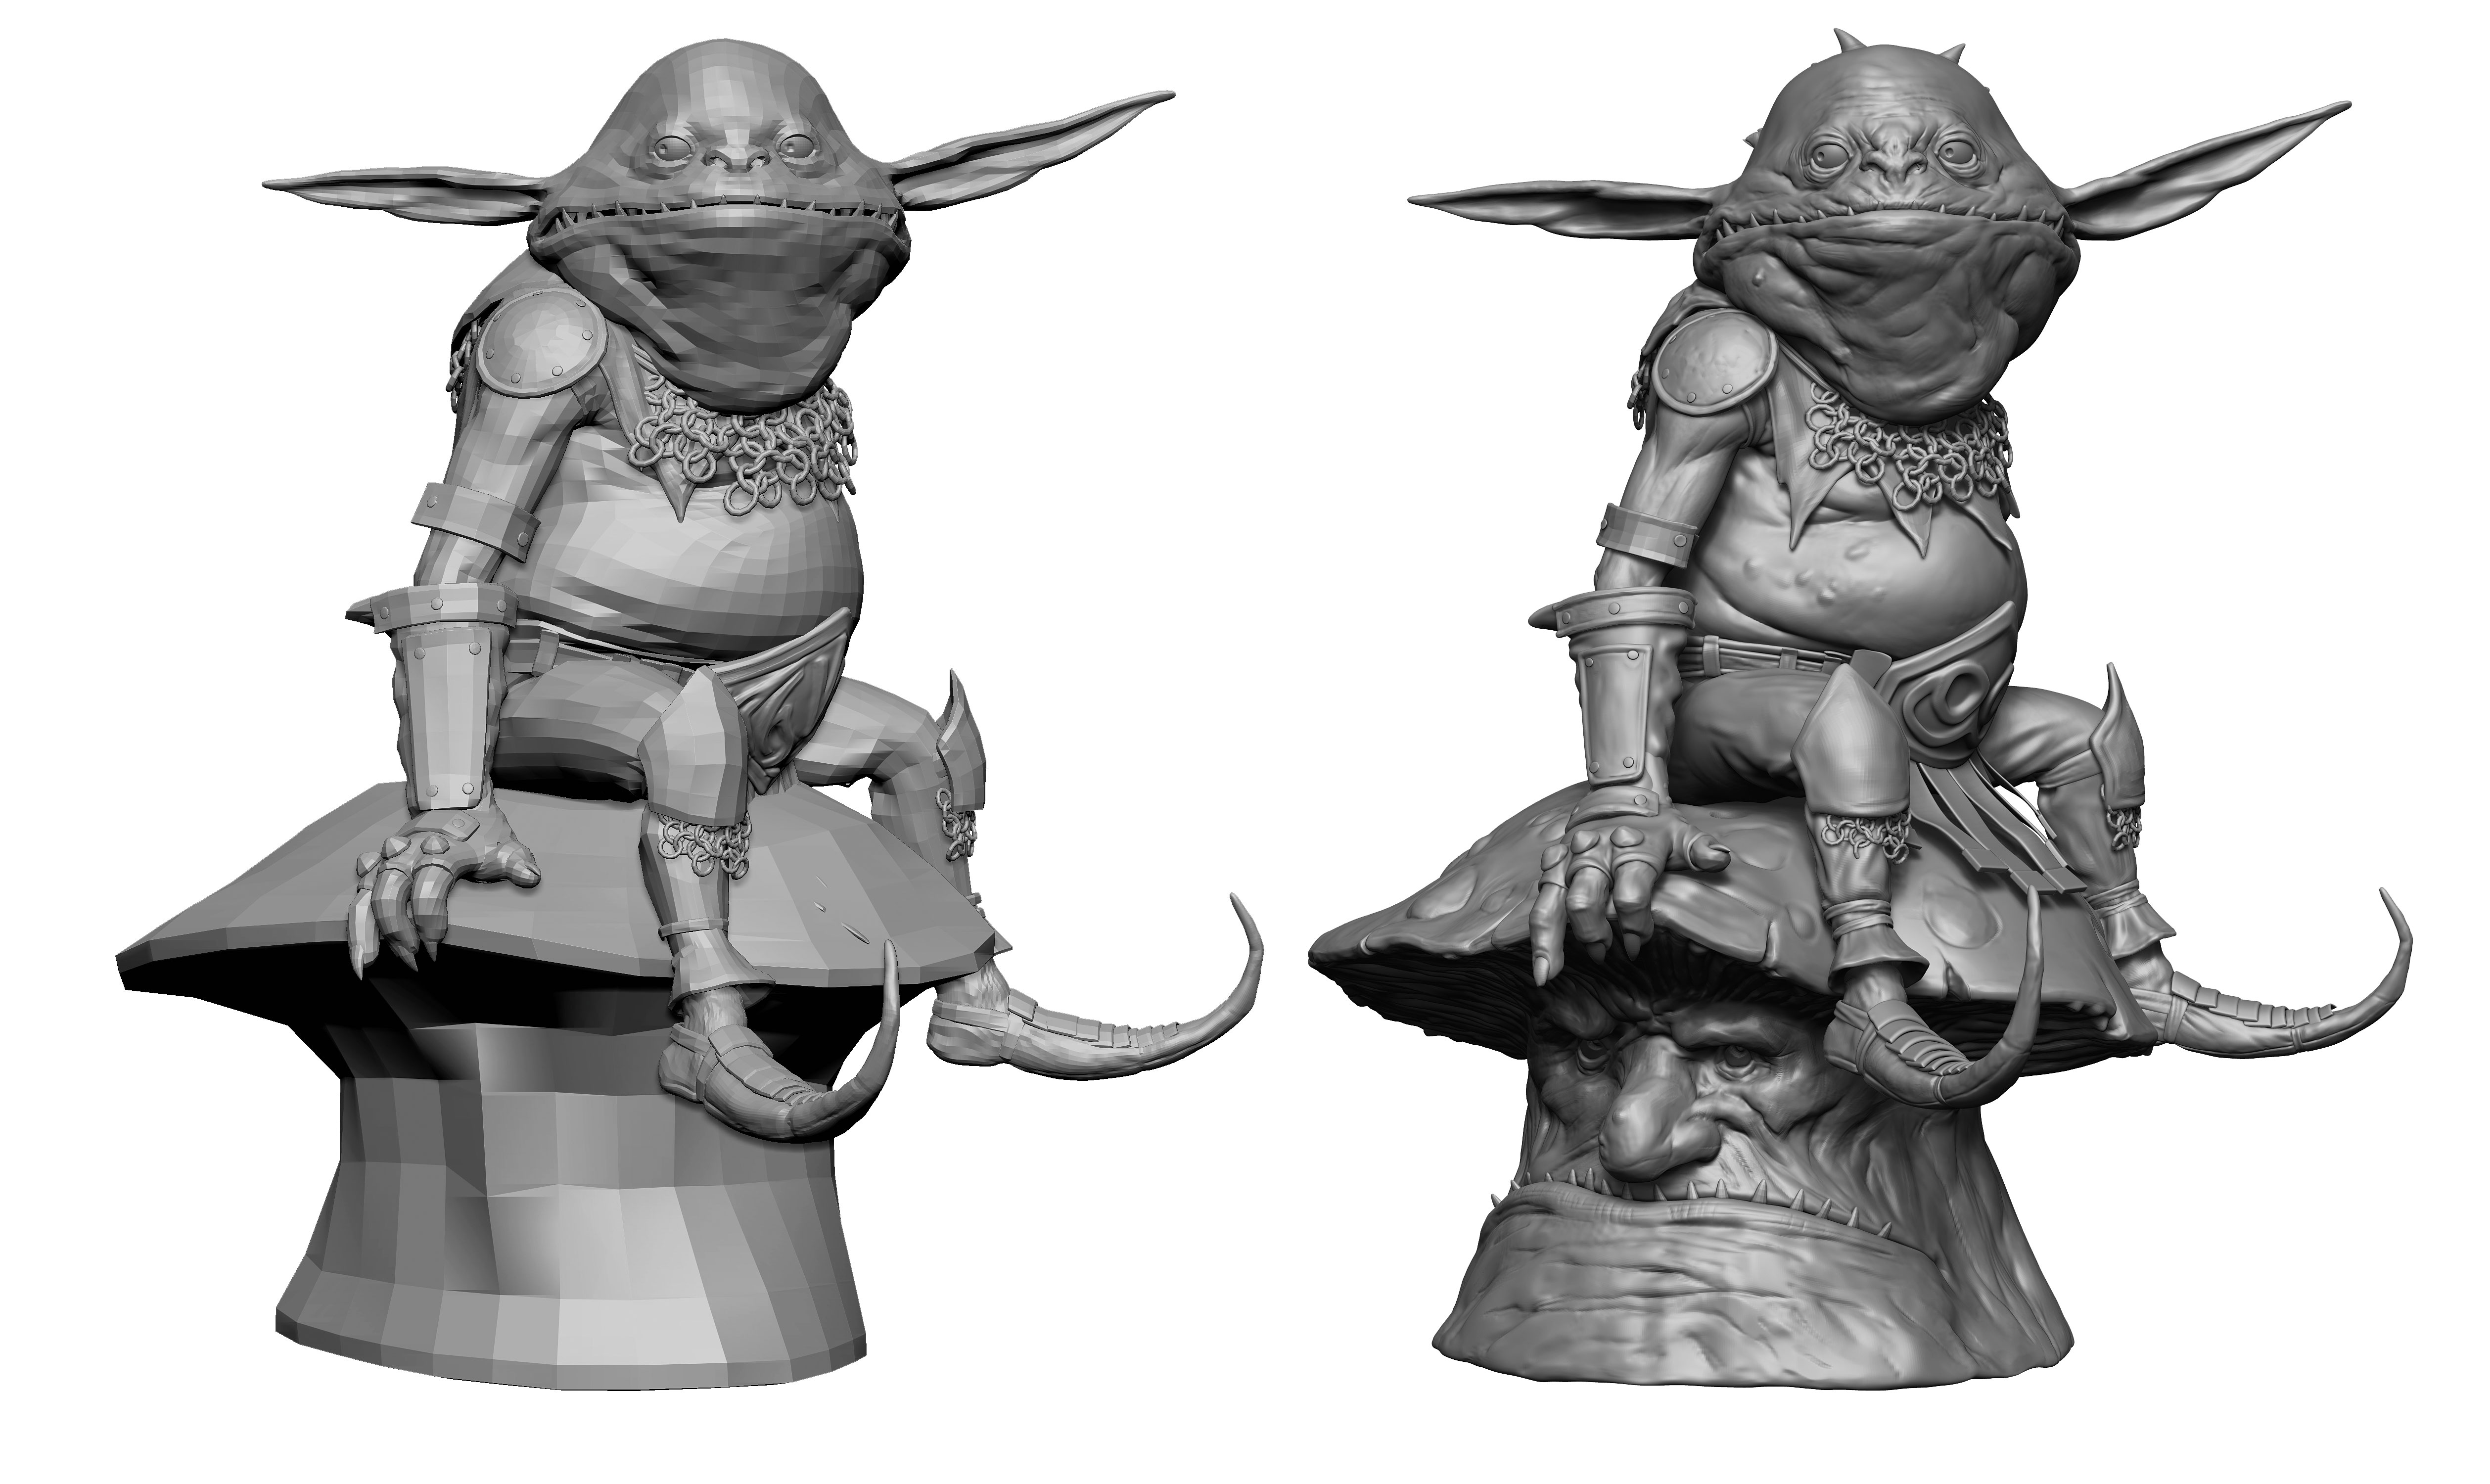
After unwrapping the model, I start to pose the character using Transpose Master – a simple masking method – and the rotate tool. It’s not always 100 per cent accurate, but is a quick way to get a pose for illustrative purposes.
Posing will help you realise if you need to make any further changes to the proportions – do so now if necessary. After posing there will be areas to clean up. Next, you can move onto adding more details.
08. Add detailing
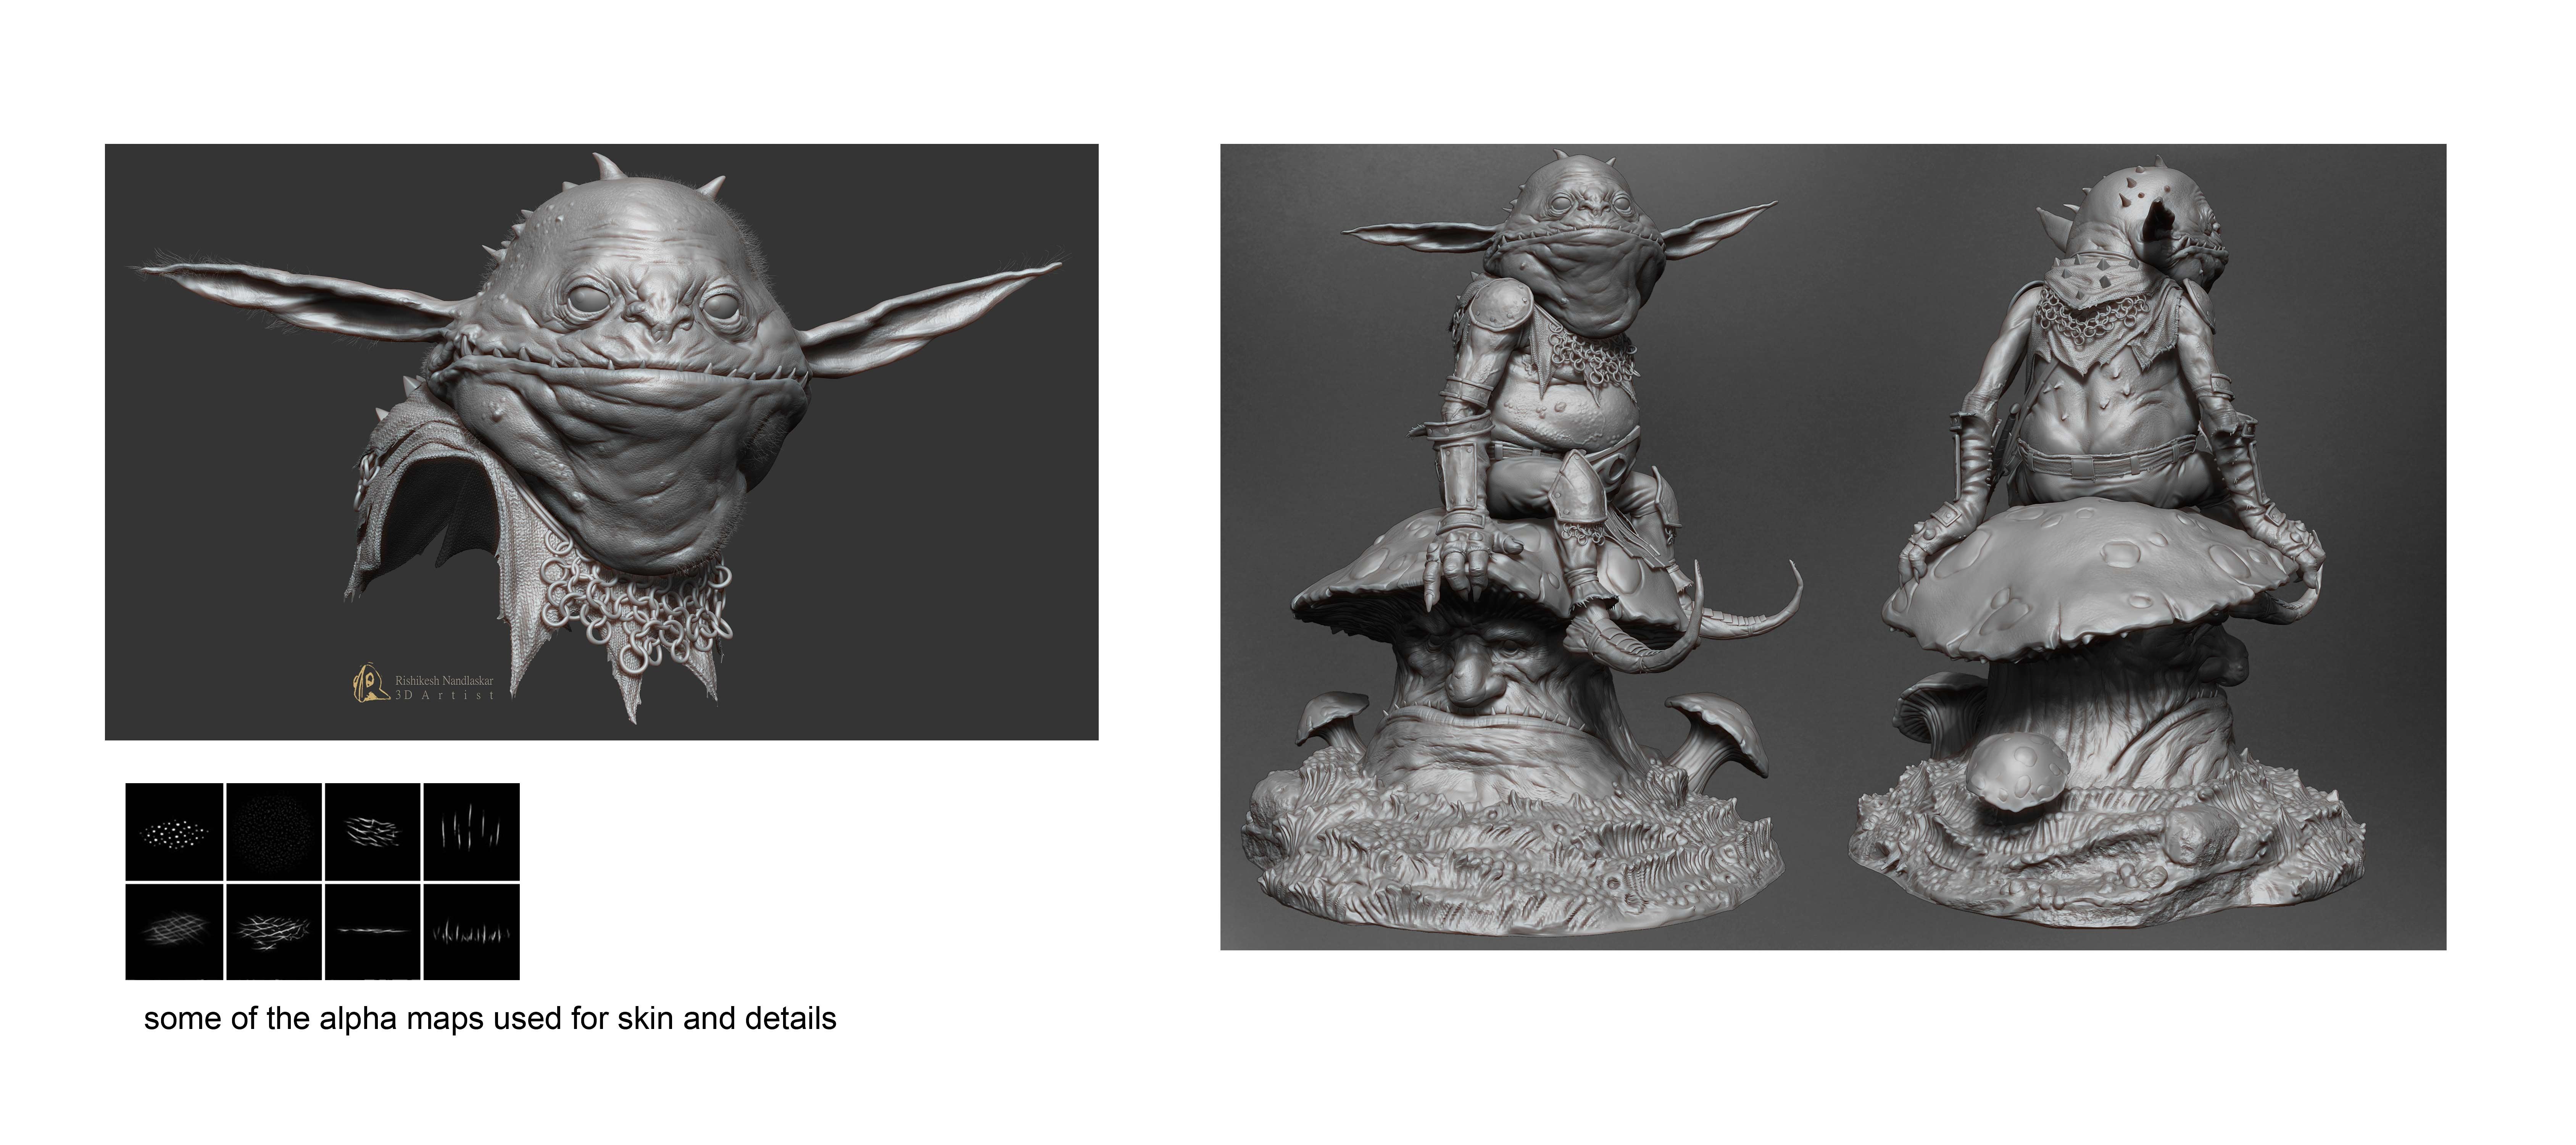
For detailing, again it’s important to retain the secondary shapes and any detailing should complement the forms instead of just using of random alphas. I use the DragRect stroke with alphas.
09. Polypaint in ZBrush
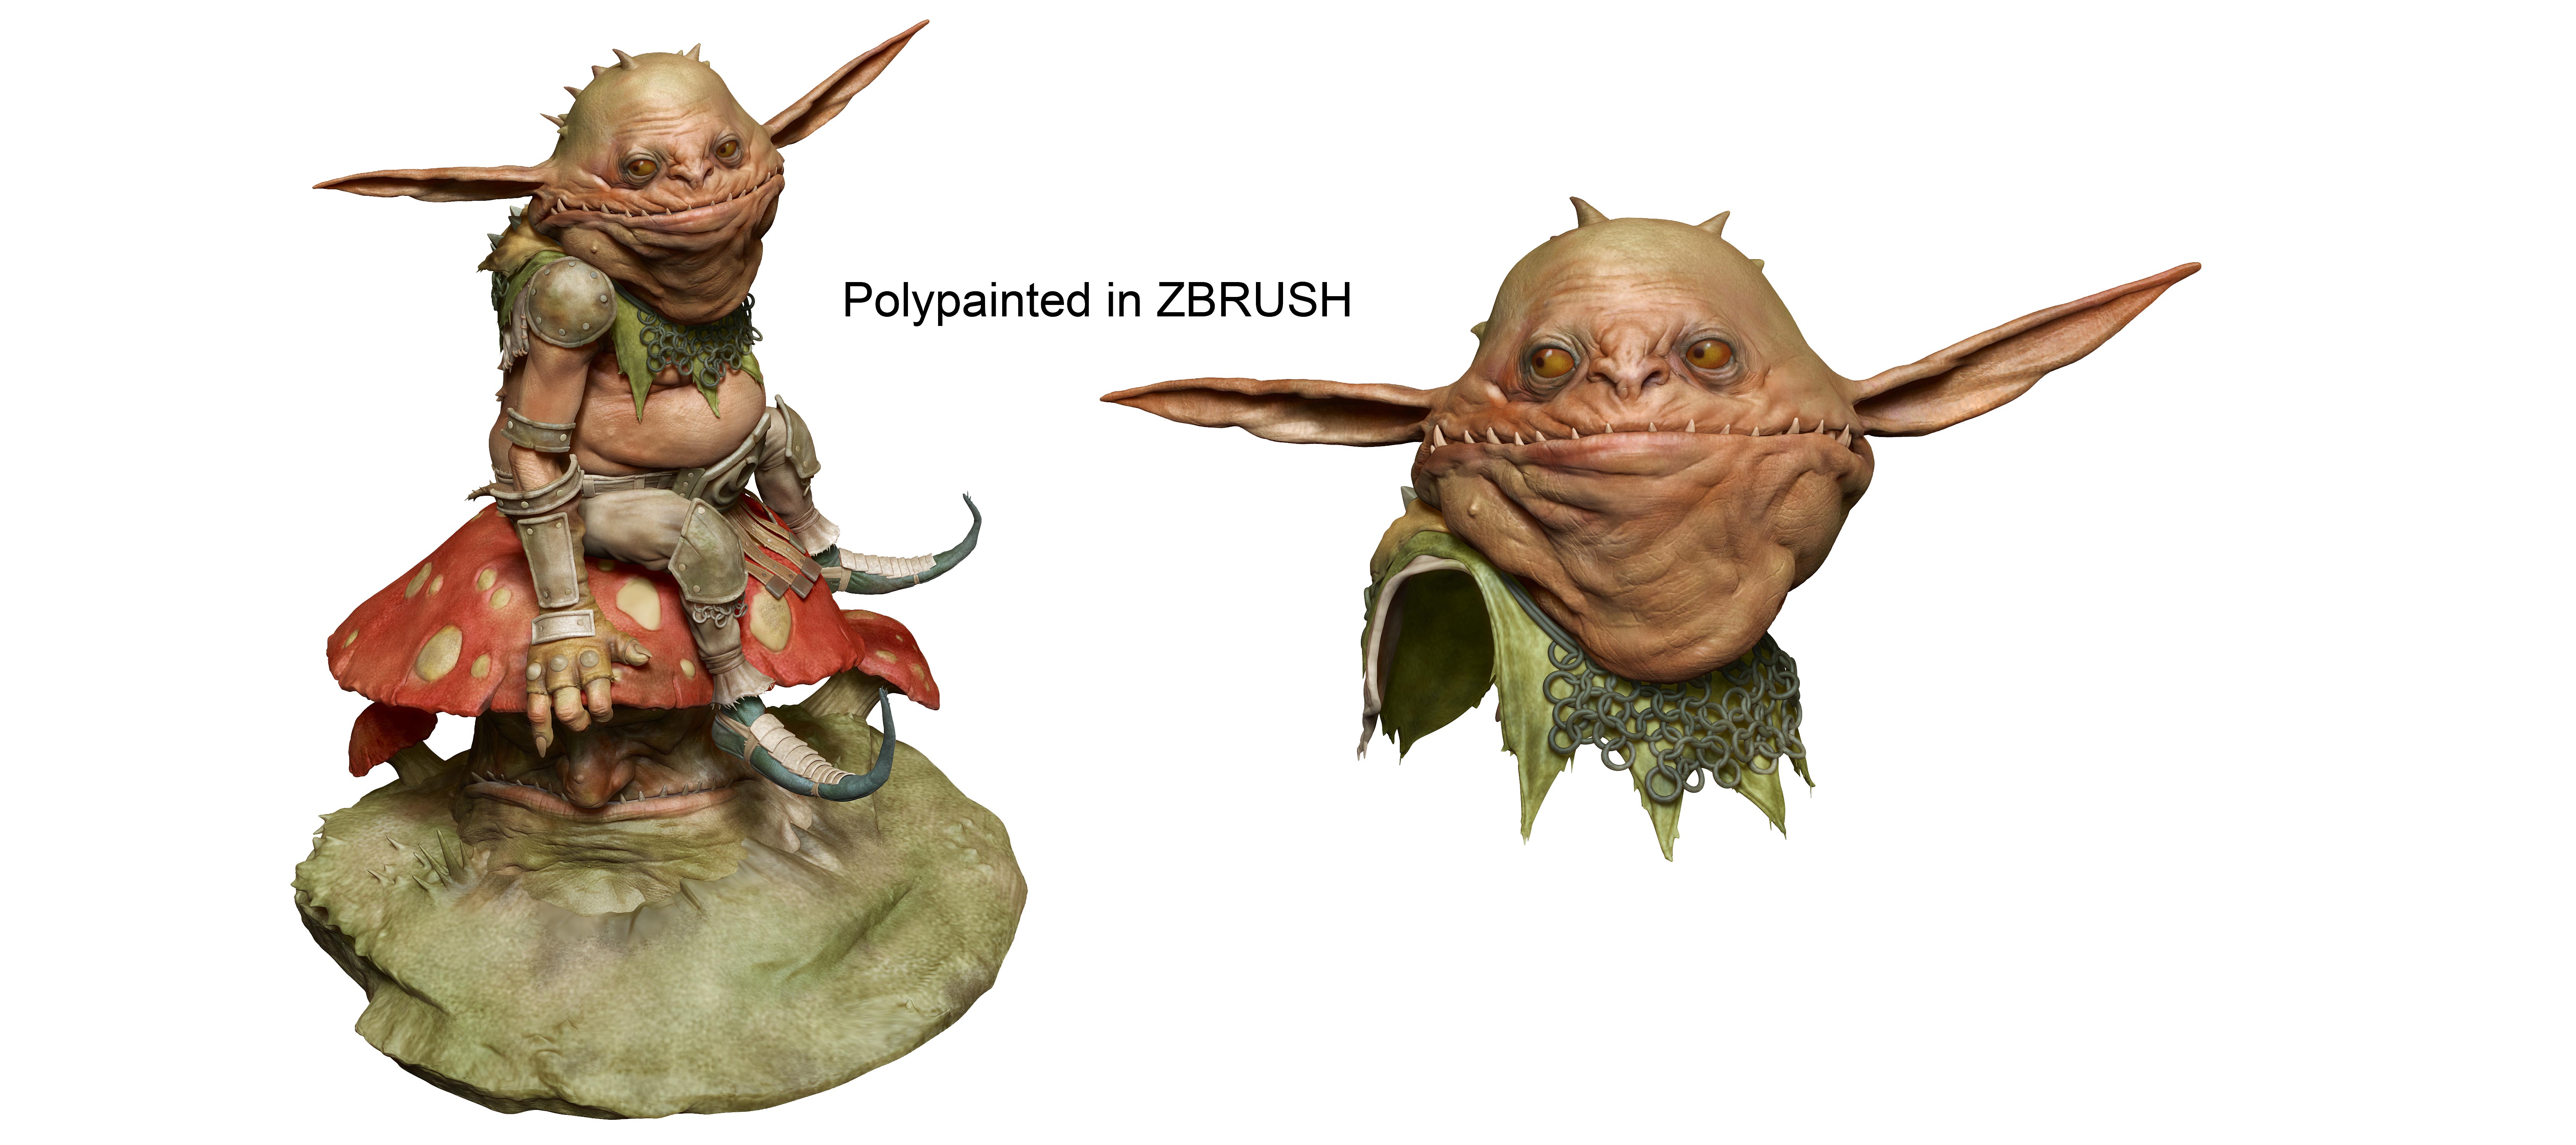
Polypaint in ZBrush is an amazing tool that helps to quickly paint over your model in layers. I use the Spray stroke and Alpha 07 in ZBrush to paint the basic colours to get the overall character covered. Then I keep adding layers of colours and strokes until I feel that it’s close enough to the concept artwork.
10. Extract maps
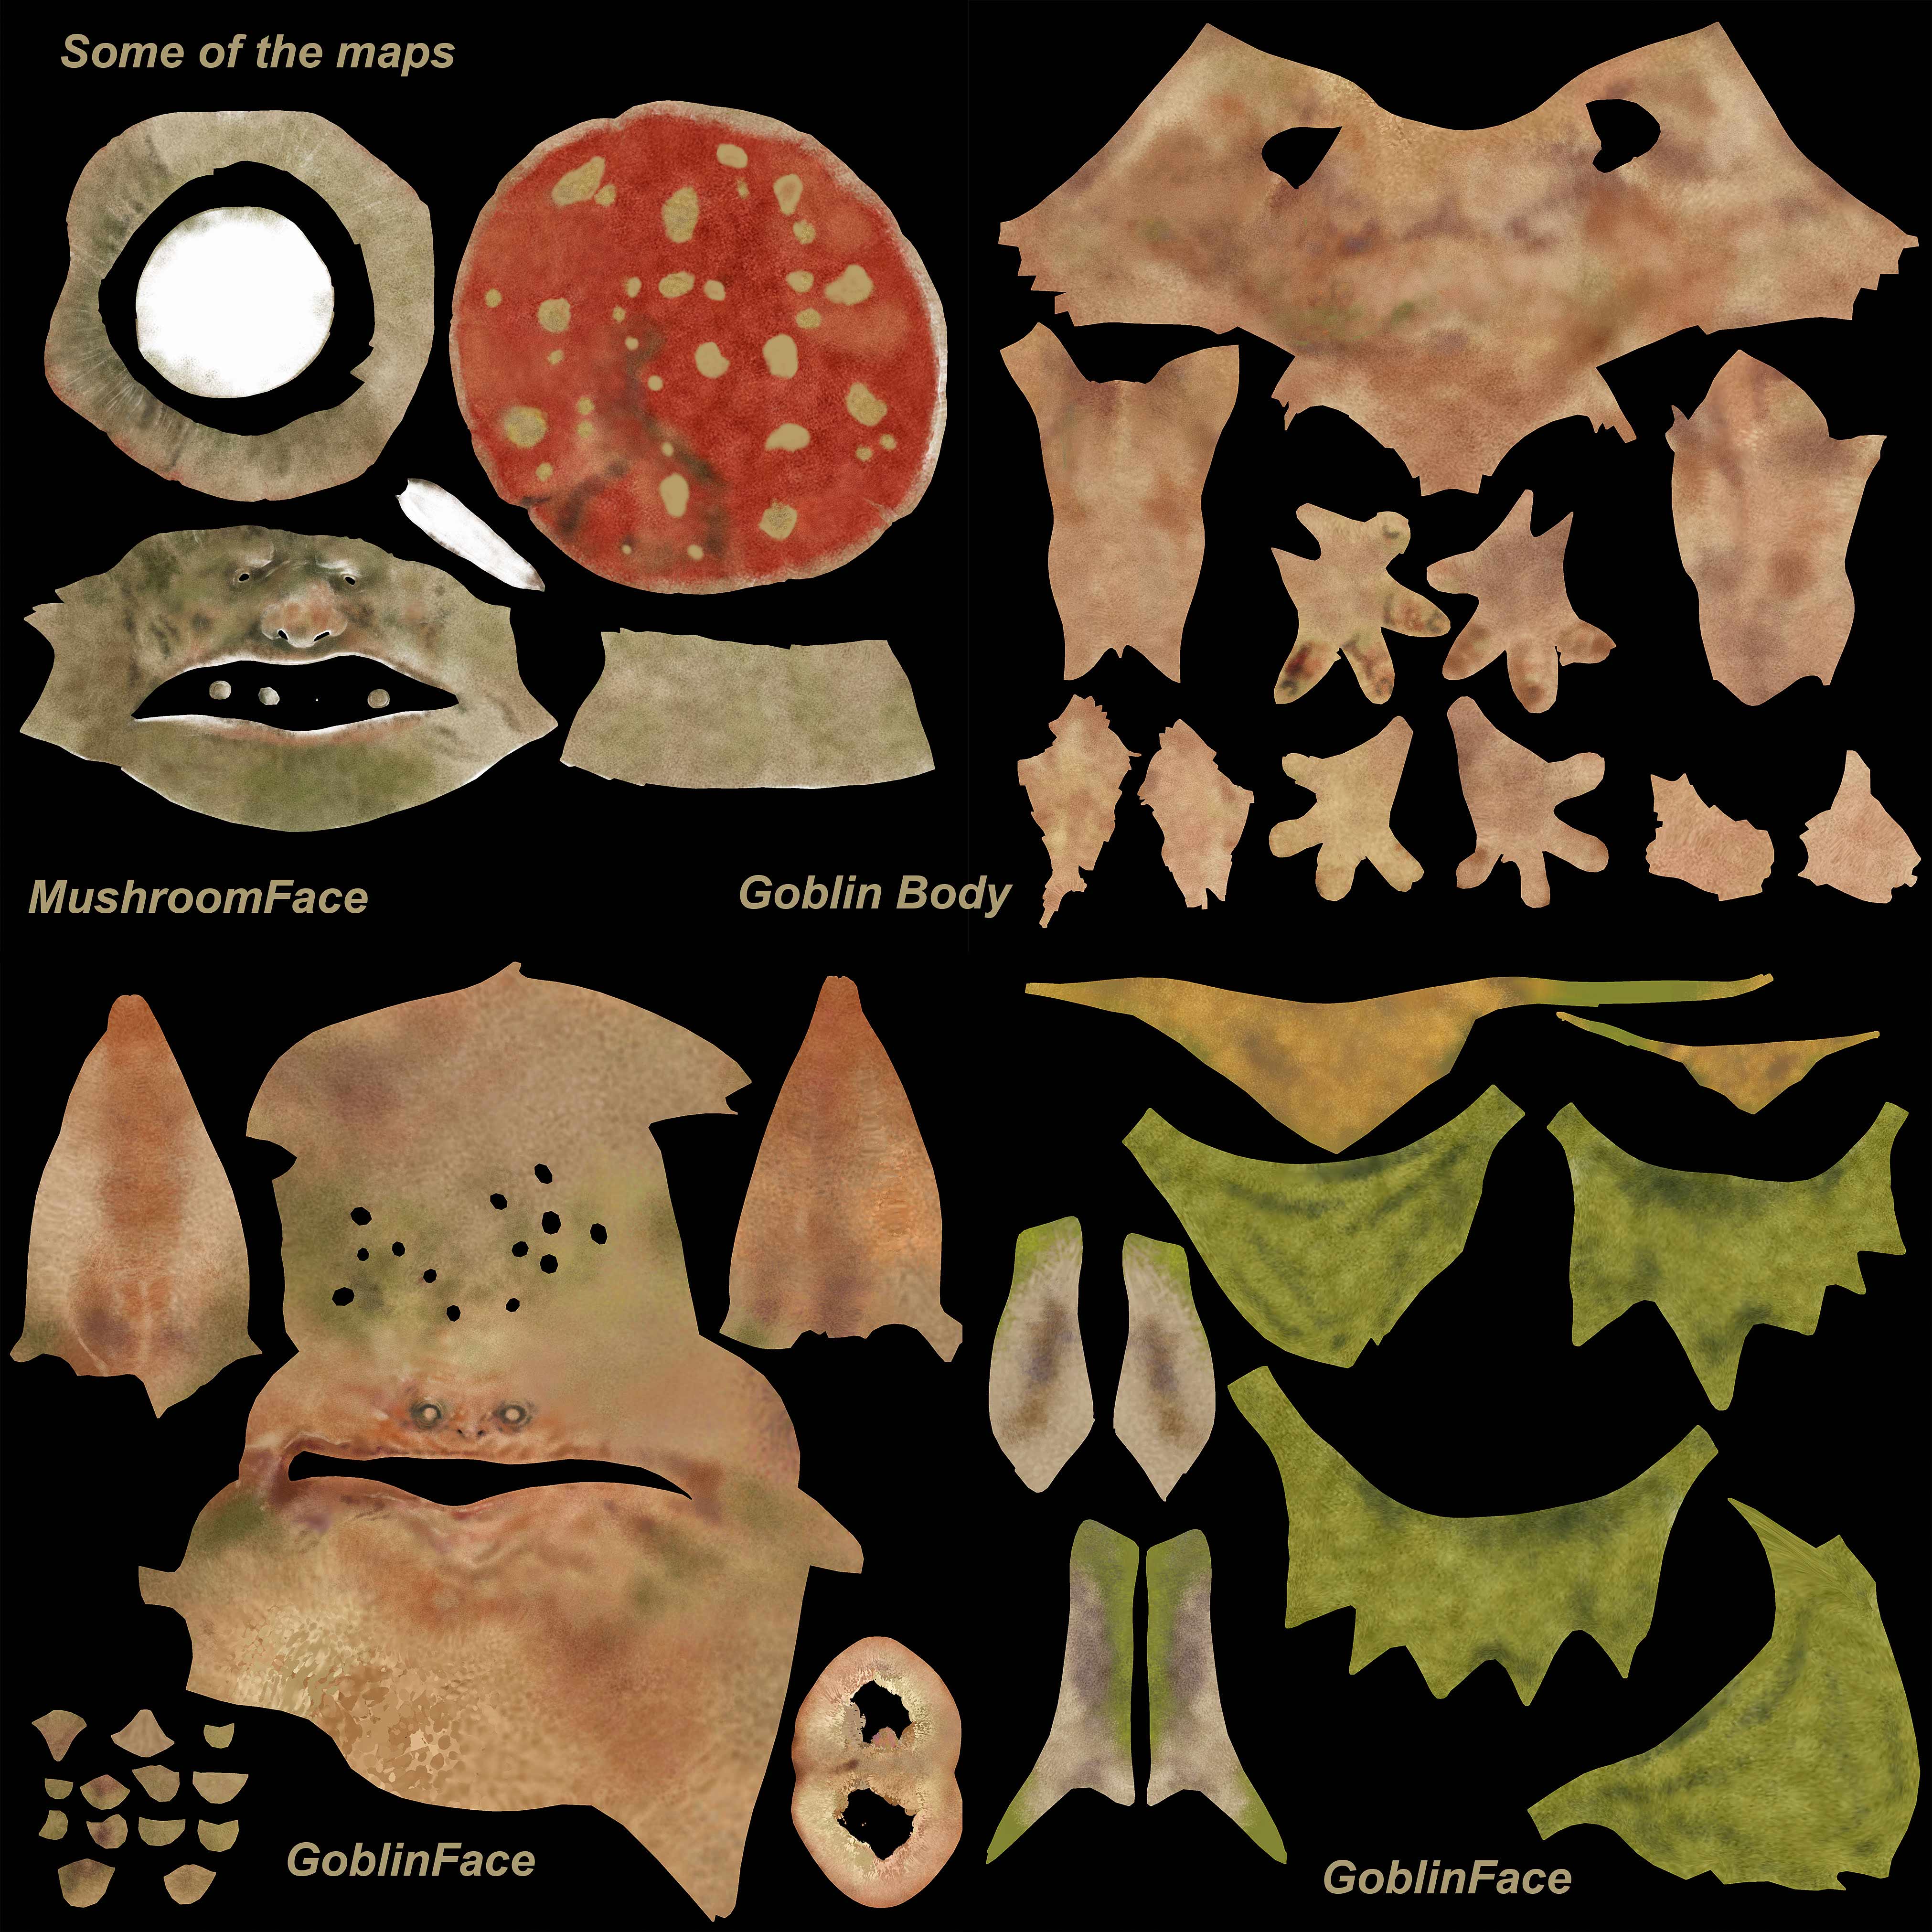
Multi Map Exporter in ZBrush helps to extract different maps as required. I usually extract some basic maps such as diffuse, specular, SSS, displacement and normal maps. These maps can be then be used to plug into the various render engines. I use V-Ray for this.
11. Set-up in Maya
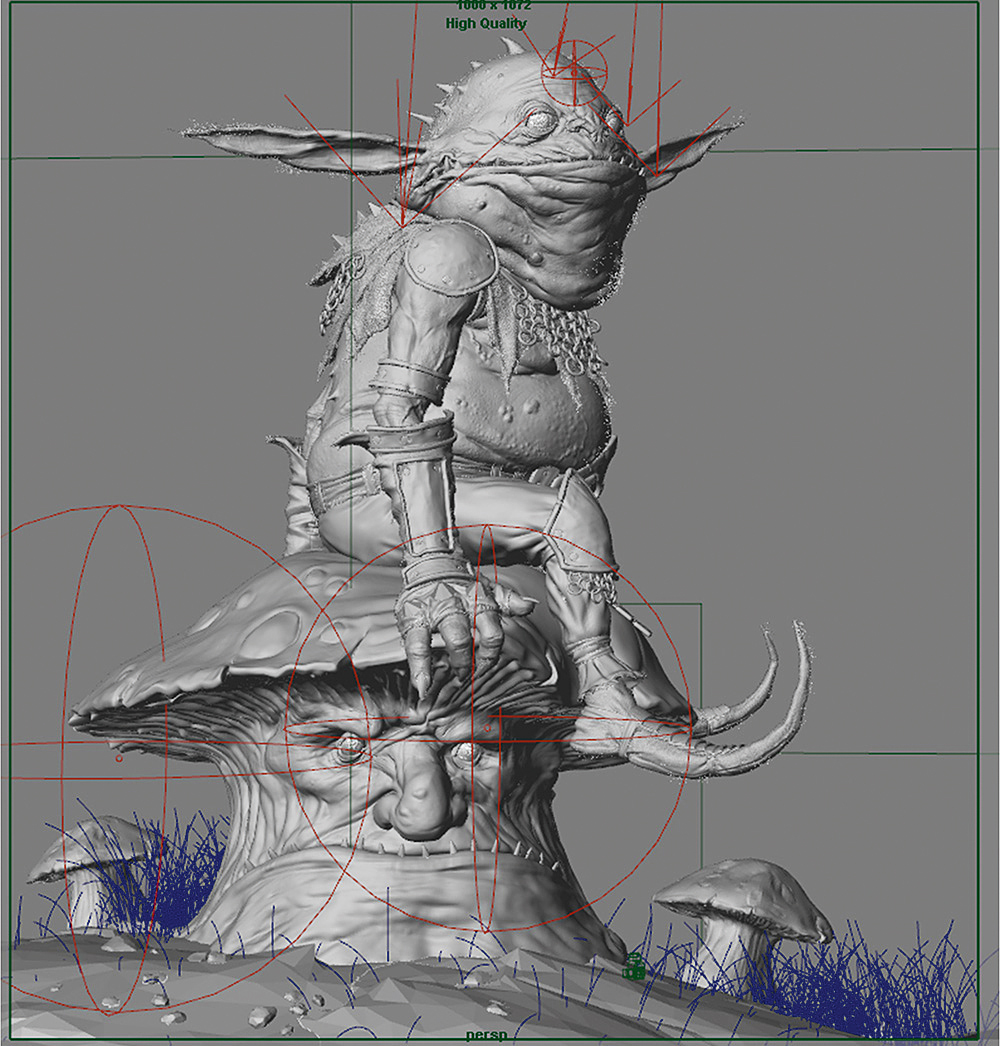
Using a real-world scale for your models helps you to get accurate results when rendering. But sometimes you have to deal with scaled-down models for specific needs. My goblin character is around two-feet-tall when standing up and in this case, the lighting, exposure, and other factors need to be adjusted accordingly.
I don’t recommend using displacement maps if your machine is not super-powerful. Instead, it’s better to export a decent high-res model from ZBrush and normal maps, especially if it’s for a fixed camera angle. That way, you will get quicker results. However, if your machine is powerful enough, then you should go for displacement maps. For this project, I have varied subdivision levels from subtool to subtool exported as per the distance from the camera, which is fixed in Maya.
11. Render in V-Ray
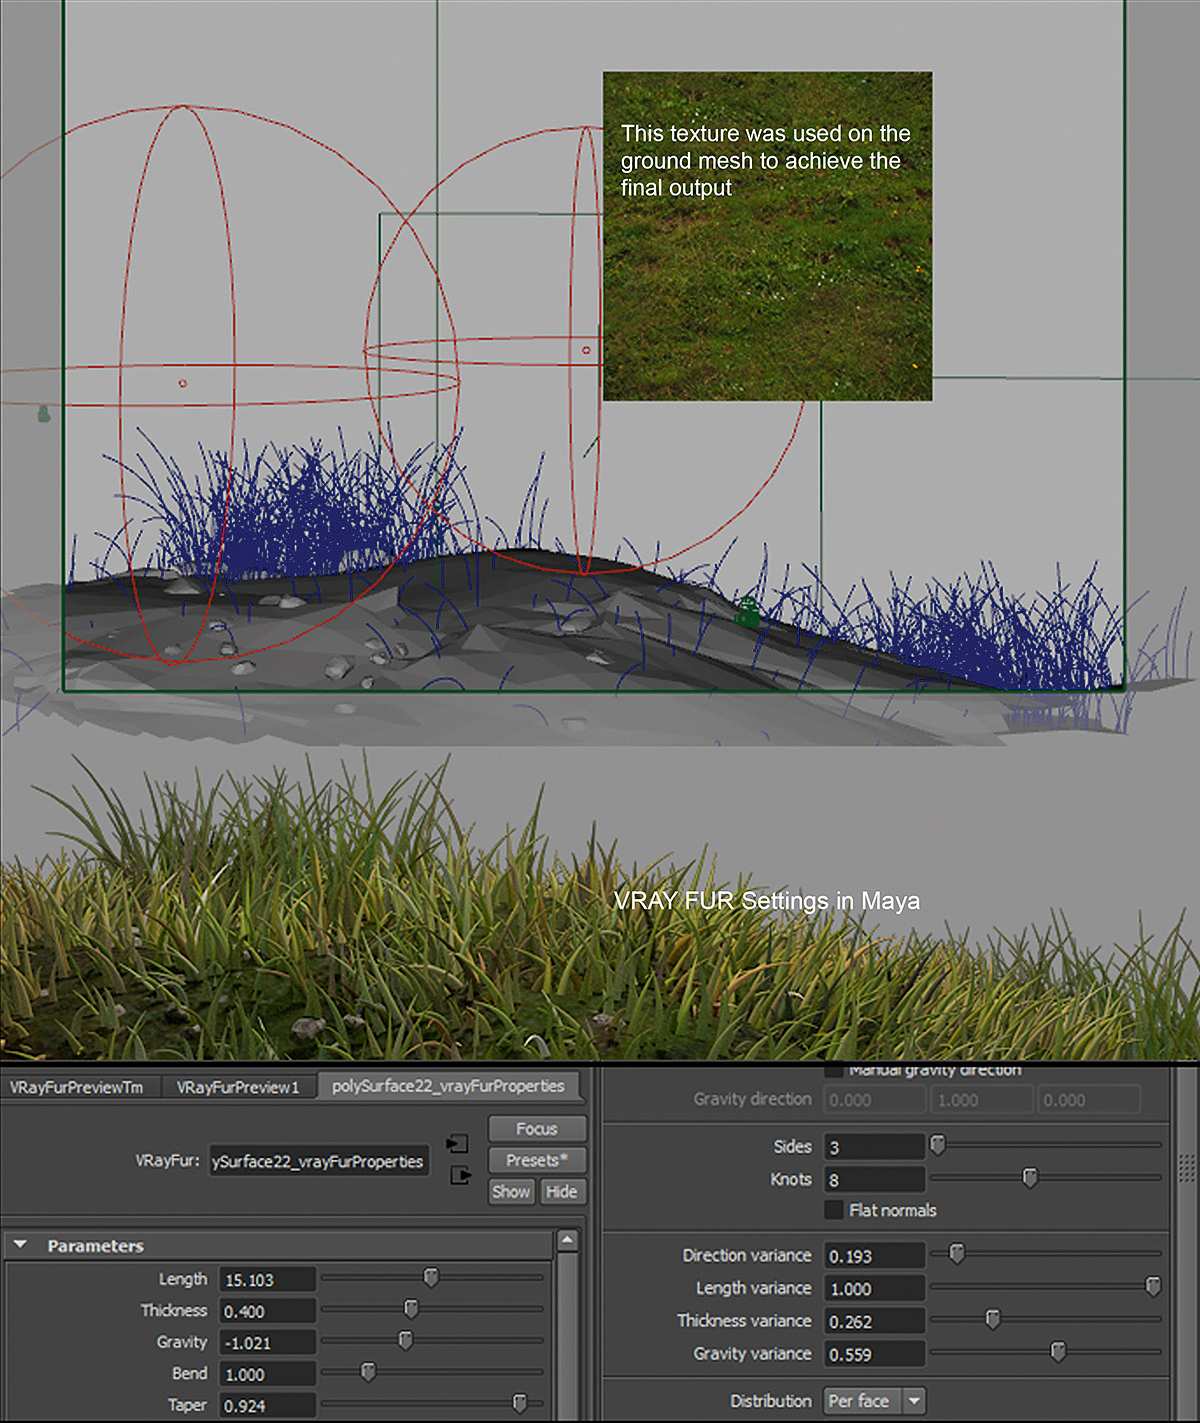
I use VRayLightRect and VRayLightSphere lights to light the scene. Now it’s time to test lots of rendering before finalising the lighting set-up. I place a few area lights from the top. Their intensity and angles vary. Not all of the lights actually light the character. There are a few that are exempt from lighting different parts and a few are included to light the hidden areas. This is not a traditional three-point lighting set-up, but it works for the look I am aiming for.
For the grass, I used VRayFur, which is super-fast and gives decent results with a few tweaks.
13. Start compositing
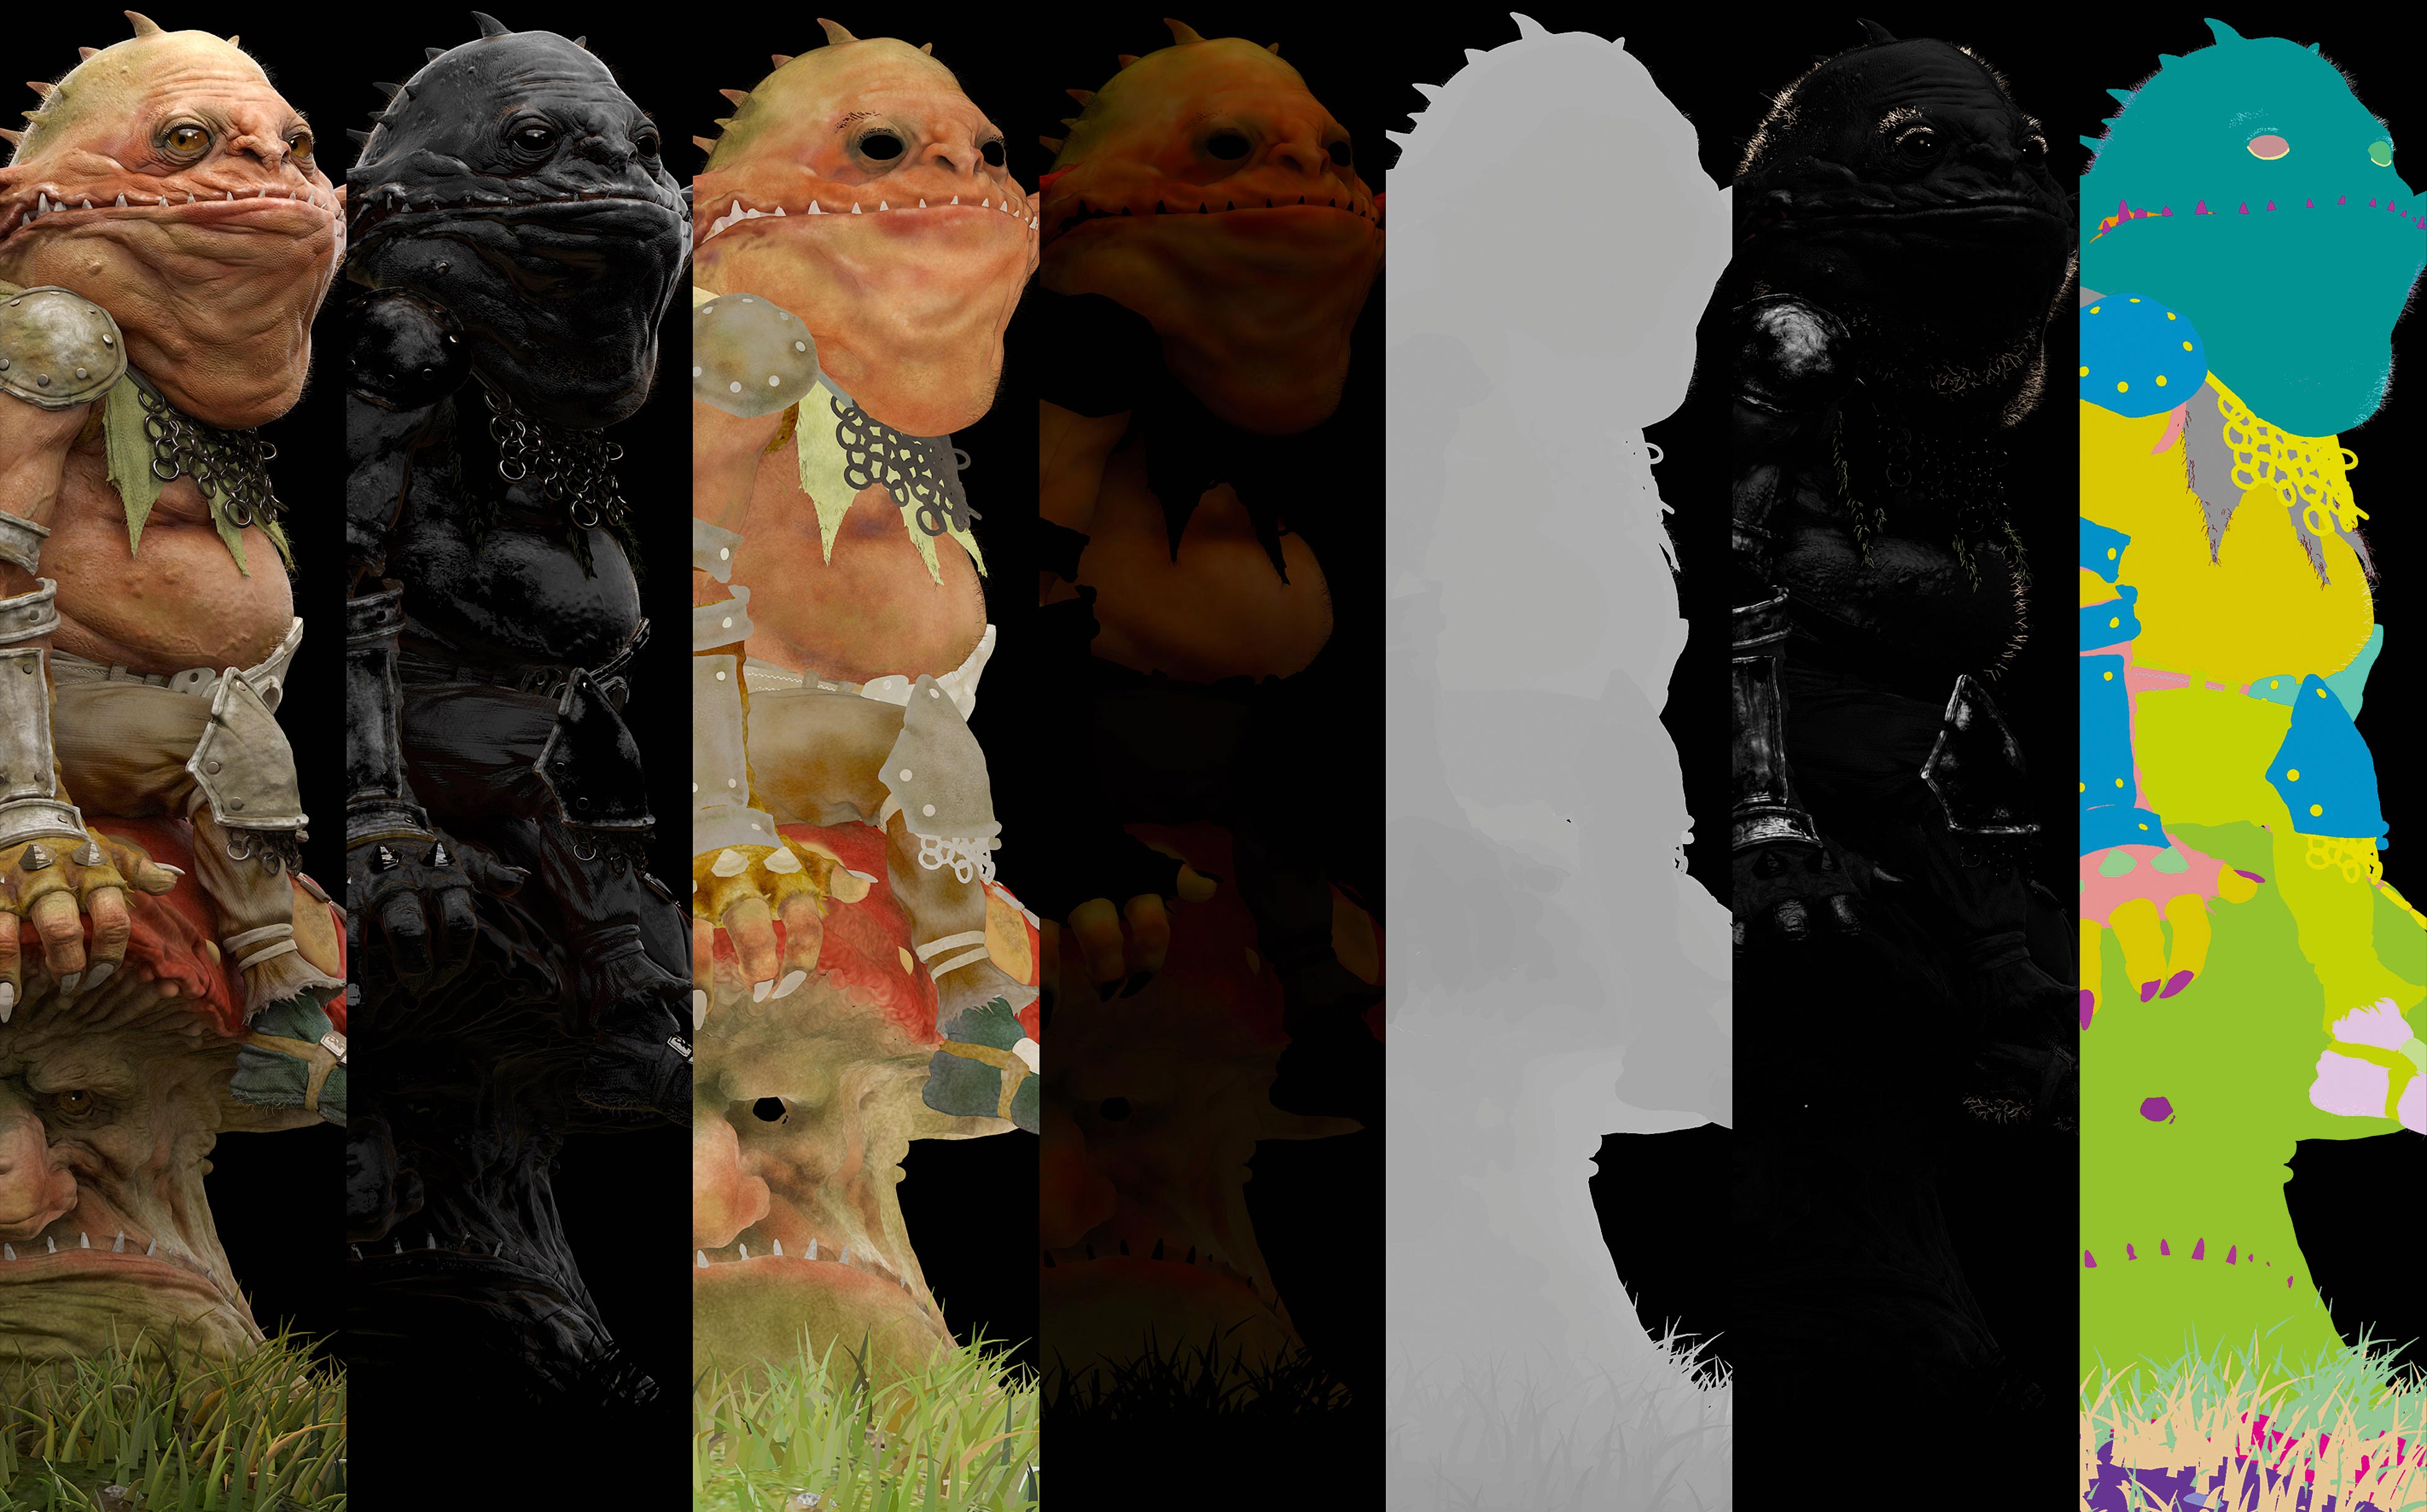
I do various render passes in Maya with V-Ray, including Diffuse, Specular, SSS, ZDepth and fur pass. It’s also good to have a selection pass, which is helpful to select regions in Photoshop. Play around with the Layers in Photoshop and try to go through and check all the filters (I use Dissolve, Multiply and Overlay between different Layers) to get the desired output. It’s fun.
For me, there is no specific method to achieve a specific look. I’m always experimenting and the compositing process is constantly evolving for me. This way of working often leads to happy accidental results that I try and embrace if I can.
14. Final render
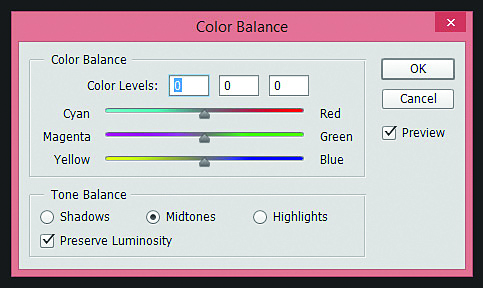
Once I am happy with the final look of my piece, I usually export a high-res .tiff file as the master file. Then, with all the Layers merged, I try to colour correct a bit more to enhance the overall look. Usually this means playing around with the colour balance settings in Photoshop until I’m totally happy with my project.
This article originally appeared in 3D World issue 224. Buy it here.
Related articles:

Thank you for reading 5 articles this month* Join now for unlimited access
Enjoy your first month for just £1 / $1 / €1
*Read 5 free articles per month without a subscription

Join now for unlimited access
Try first month for just £1 / $1 / €1
