Paint onto a 3D mesh with ZBrushCore's Polypaint tool
Discover the easy way to add colour and texture to 3D models.
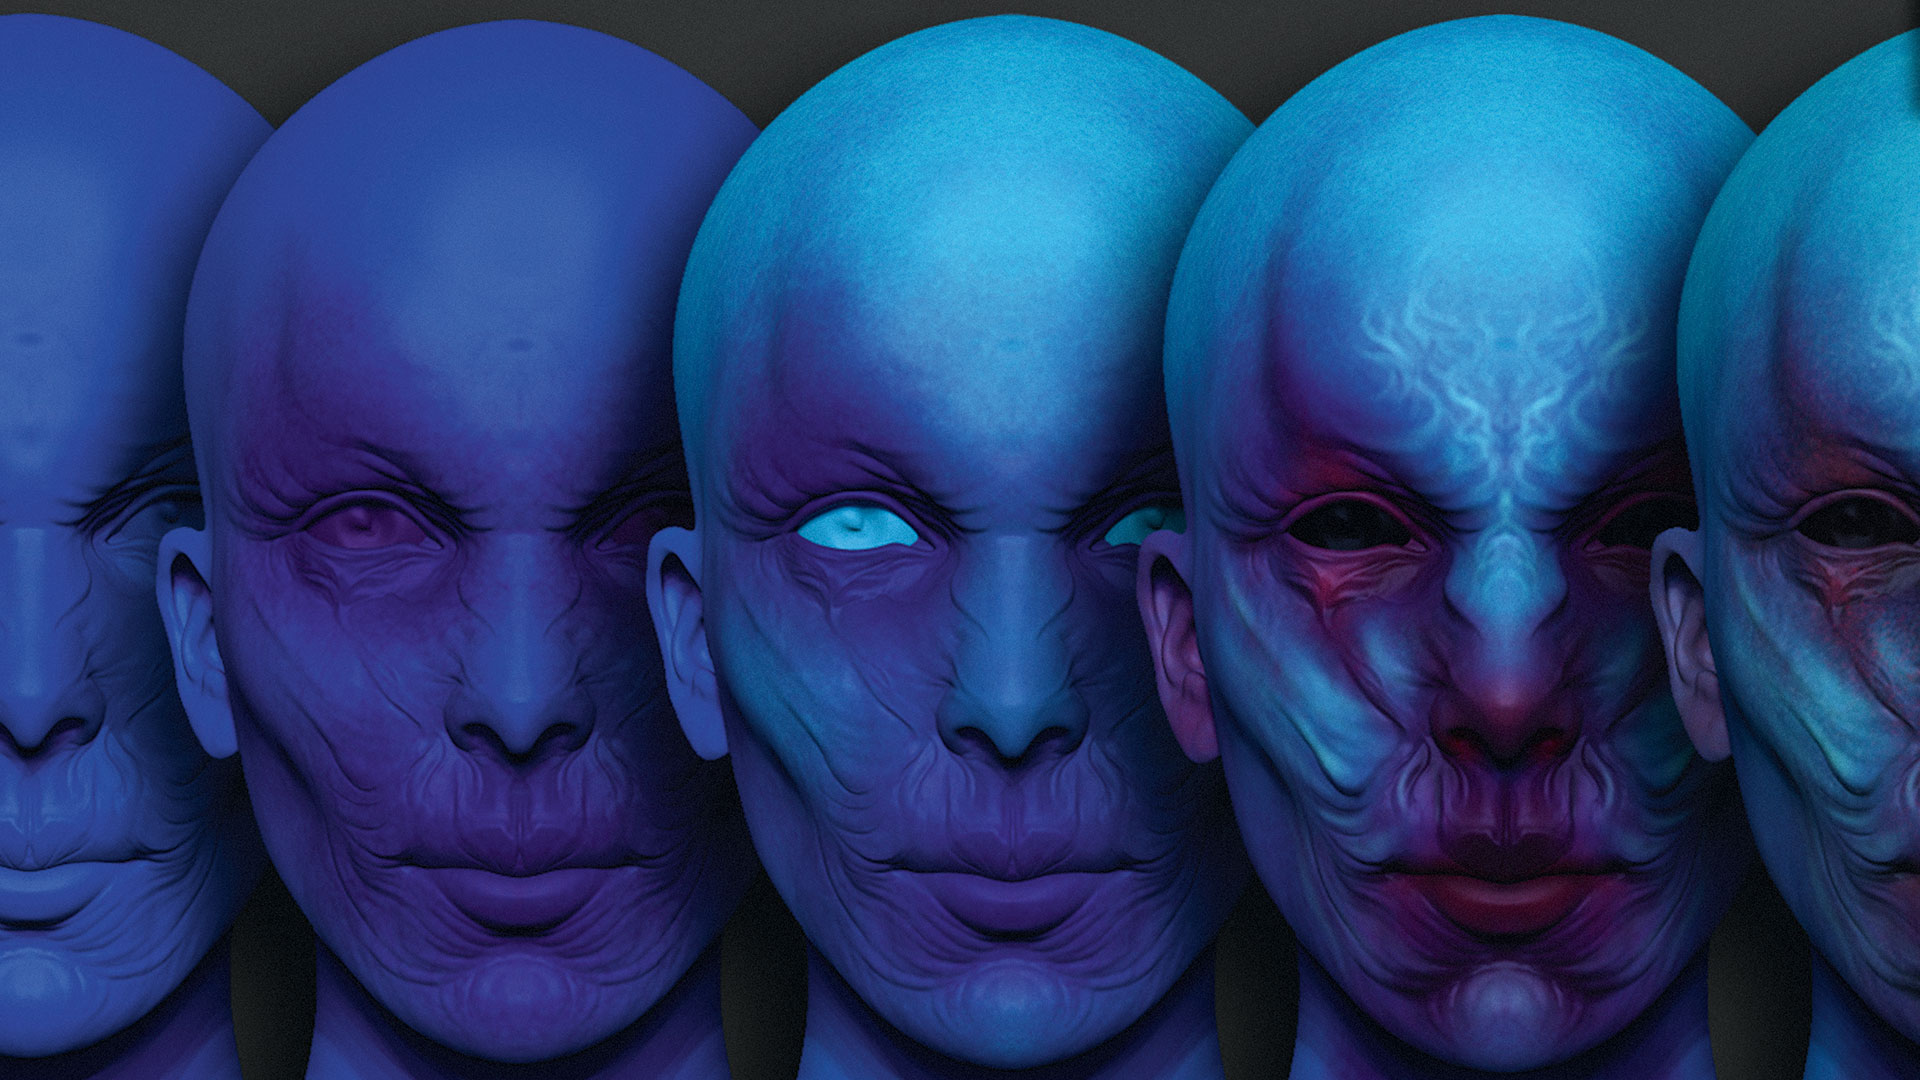
Polypaint in ZBrushCore is a fantastic tool that enables you to add colour and textures to your model when you're creating 3D art. The best thing about Polypaint is that you don't need to have a geometry with UVs to be able to paint, because you're actually painting the polygons (or vertex) of your mesh.
Since Polypaint adds colour to the actual geometry, the resolution (density) of your mesh will play a huge part in the quality of your painted strokes. If you start painting on a model and notice that the painted colour has a jagged edge, then you need to subdivide your mesh or increase the Dynamesh resolution before continuing.
The density or subdivisions of your model needs to be determined at the beginning of the Polypaint process, because subdividing a mesh after painting in a low resolution won't improve or fixed 'pixelated' lines.
Choosing the SkinShade material is one of the best options when Polypainting. Other materials like GrayMatcap or RedWax are great for sculpting, but not ideal for displaying true colours when Polypainting.
01. Paint a sculpture
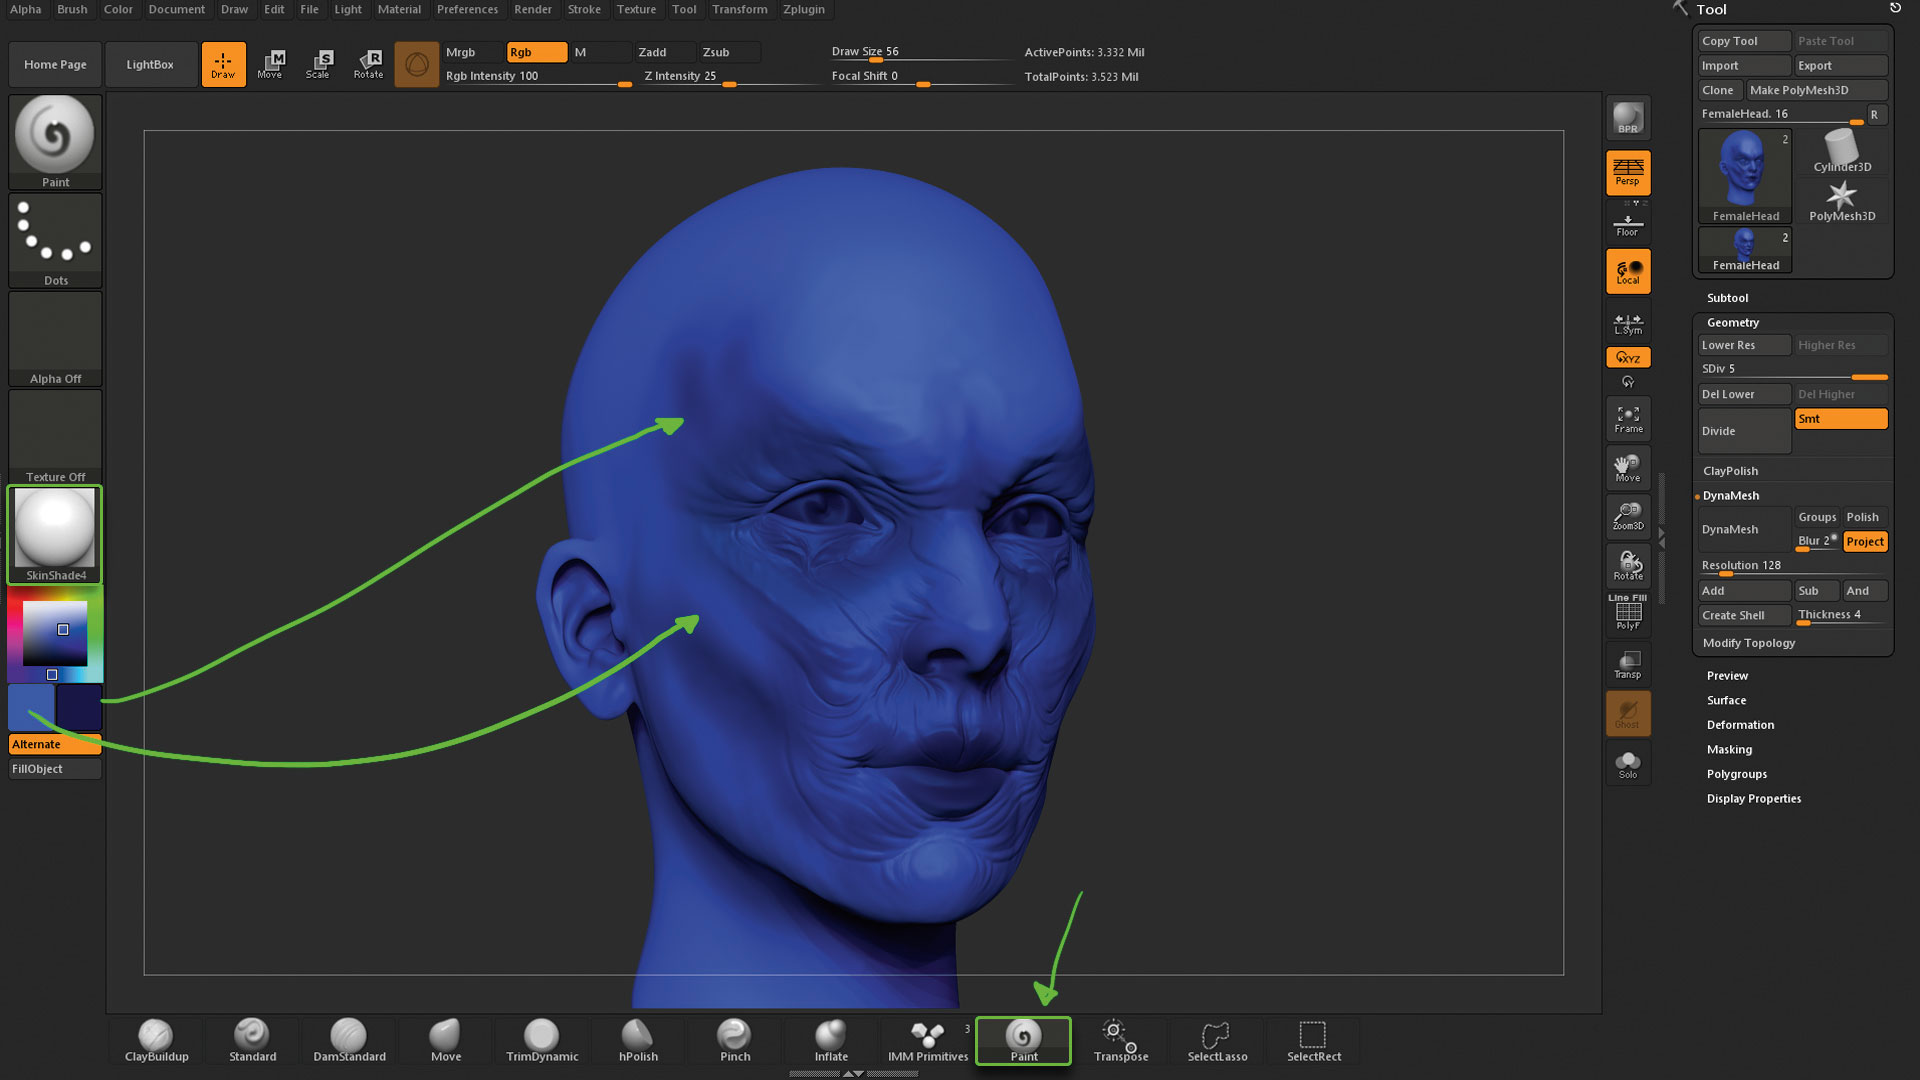
To start painting in ZBrushCore all you need to do is have a sculpture ready (or a sphere, for instance, if you just want to practise some painting techniques), then select the Paint brush from the bottom of the UI and begin painting. Use the colour palette to choose a colour to paint with: the square (in the Color dialog) on the right is your main colour and the one on the left is your secondary colour. You can press V to switch between them.
02. Choose your painting brushes
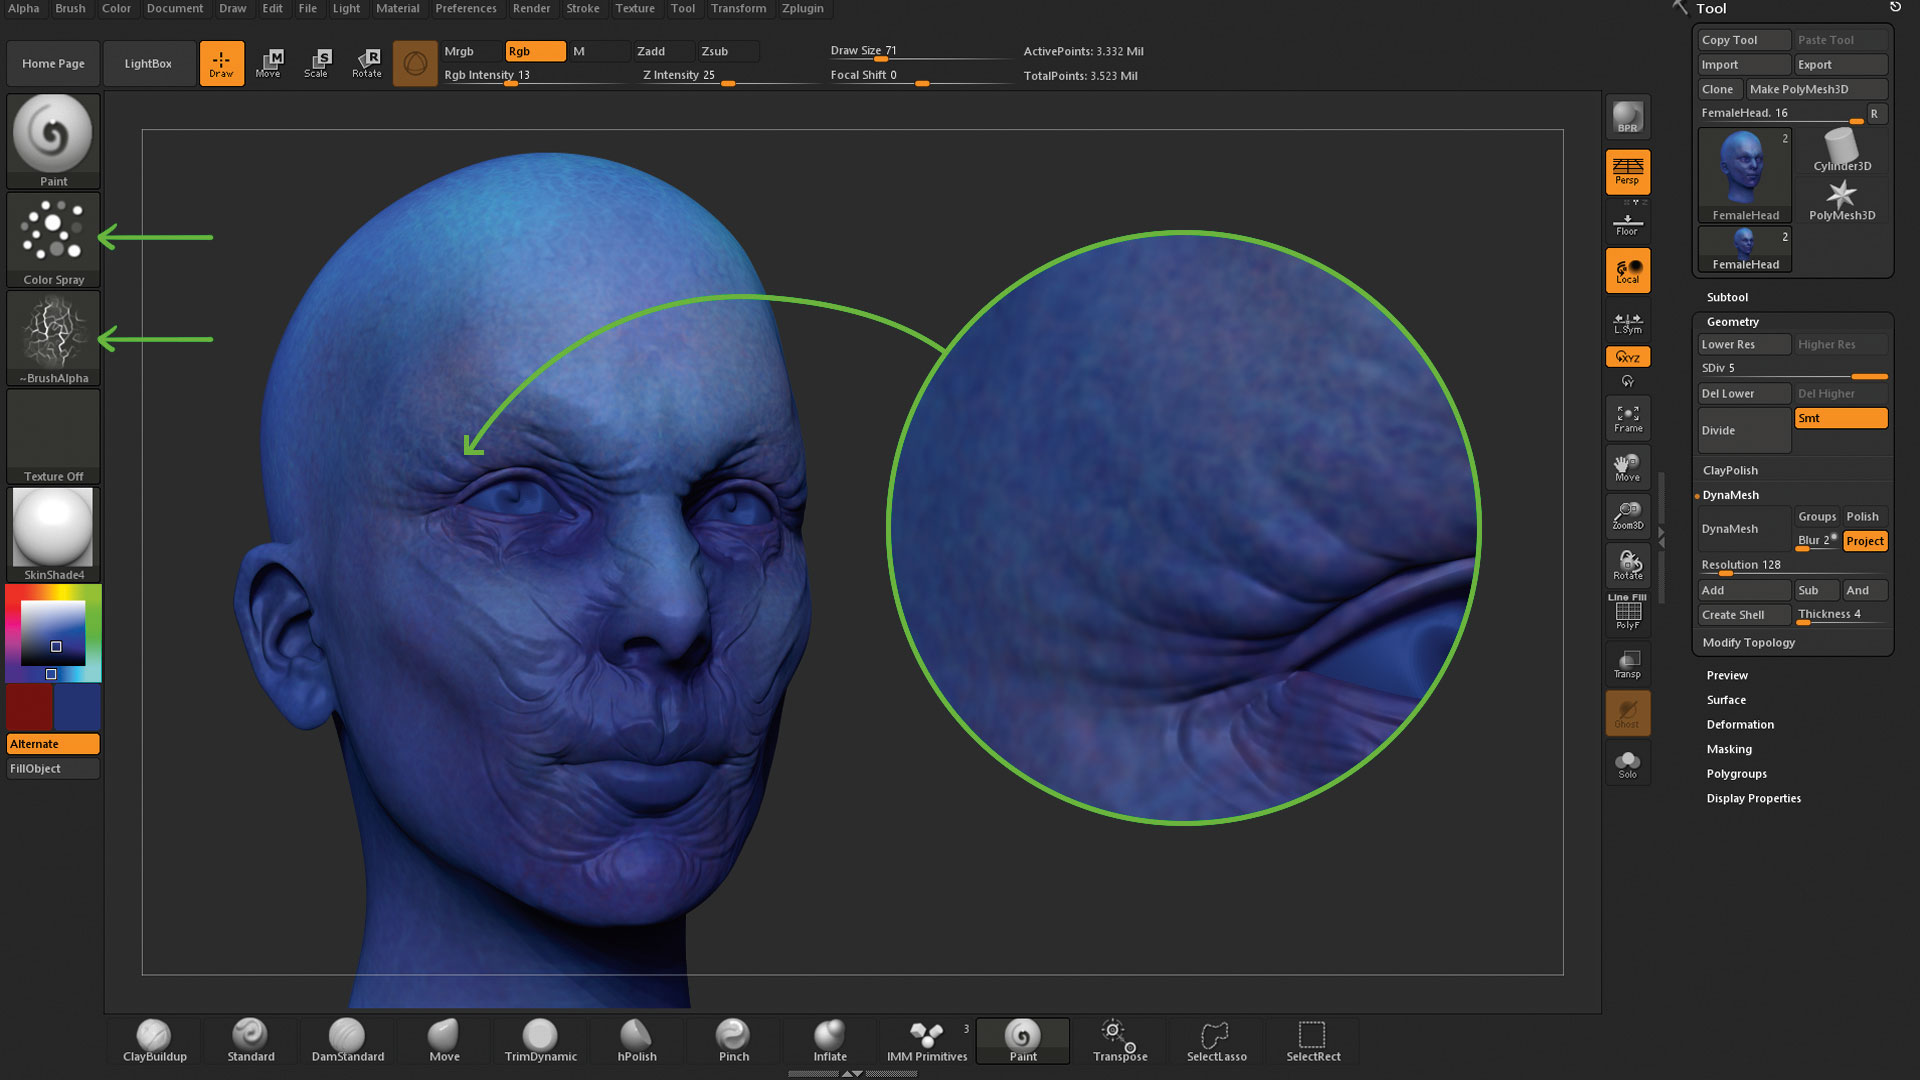
In the same way we customise sculpting brushes, we can modify painting brushes. With the Paint Brush selected, change the Stroke to Color Spray from the Stroke thumbnail and select Alpha 22 from the Alpha thumbnail. Now, when you paint the brush will act as a spray can, which is ideal for creating skin textures. You can also reduce the value of RGB intensity, using the slider at the top of the UI, to add more variations.
03. Any brush can paint
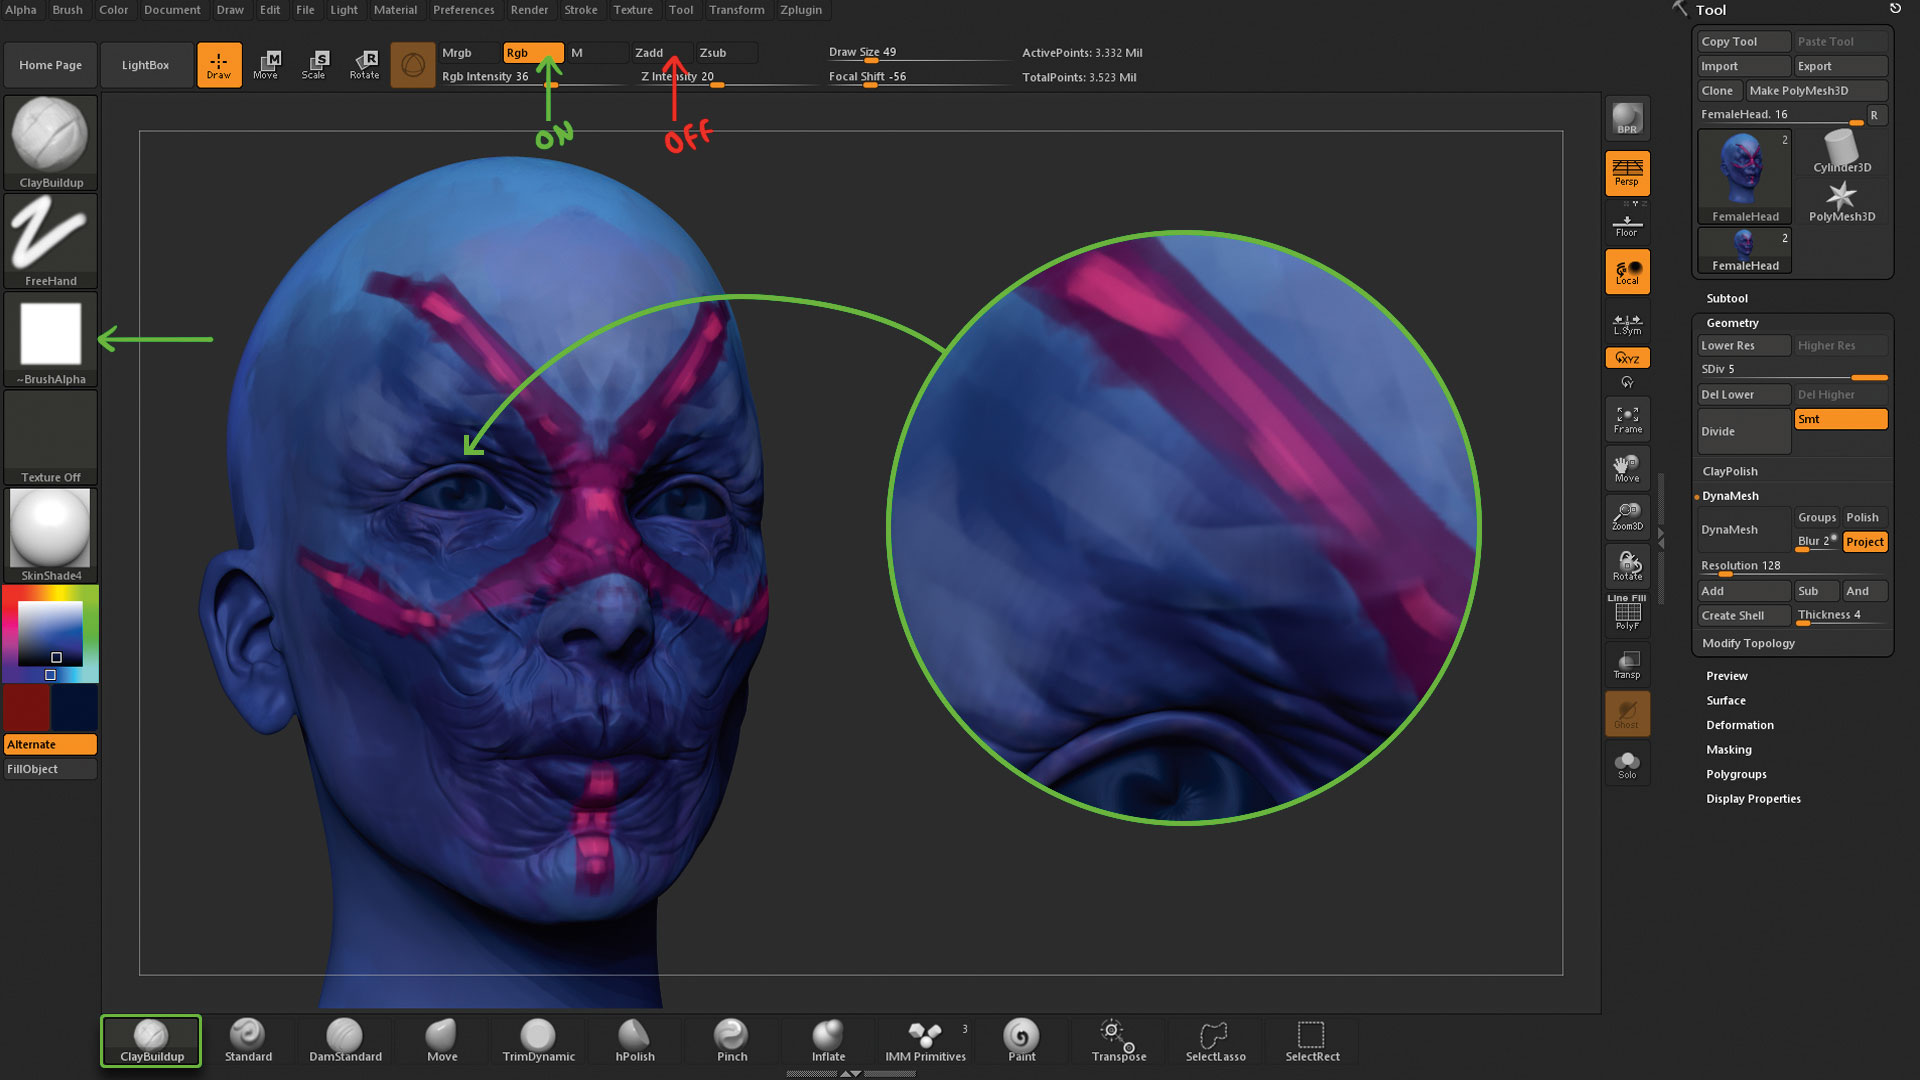
Note that you're not limited to the paint brush – most of ZBrushCore's sculpting brushes can act as paint brushes, too. Select the ClayBuild Up, and at the top of the UI switch off Zadd and turn on RGB. This will disable sculpting and enable painting. The rest of the brush's characteristics will still be active, so you can develop a sketch effect with the square alpha, for instance.
Get the Creative Bloq Newsletter
Daily design news, reviews, how-tos and more, as picked by the editors.
04. Workflow advice
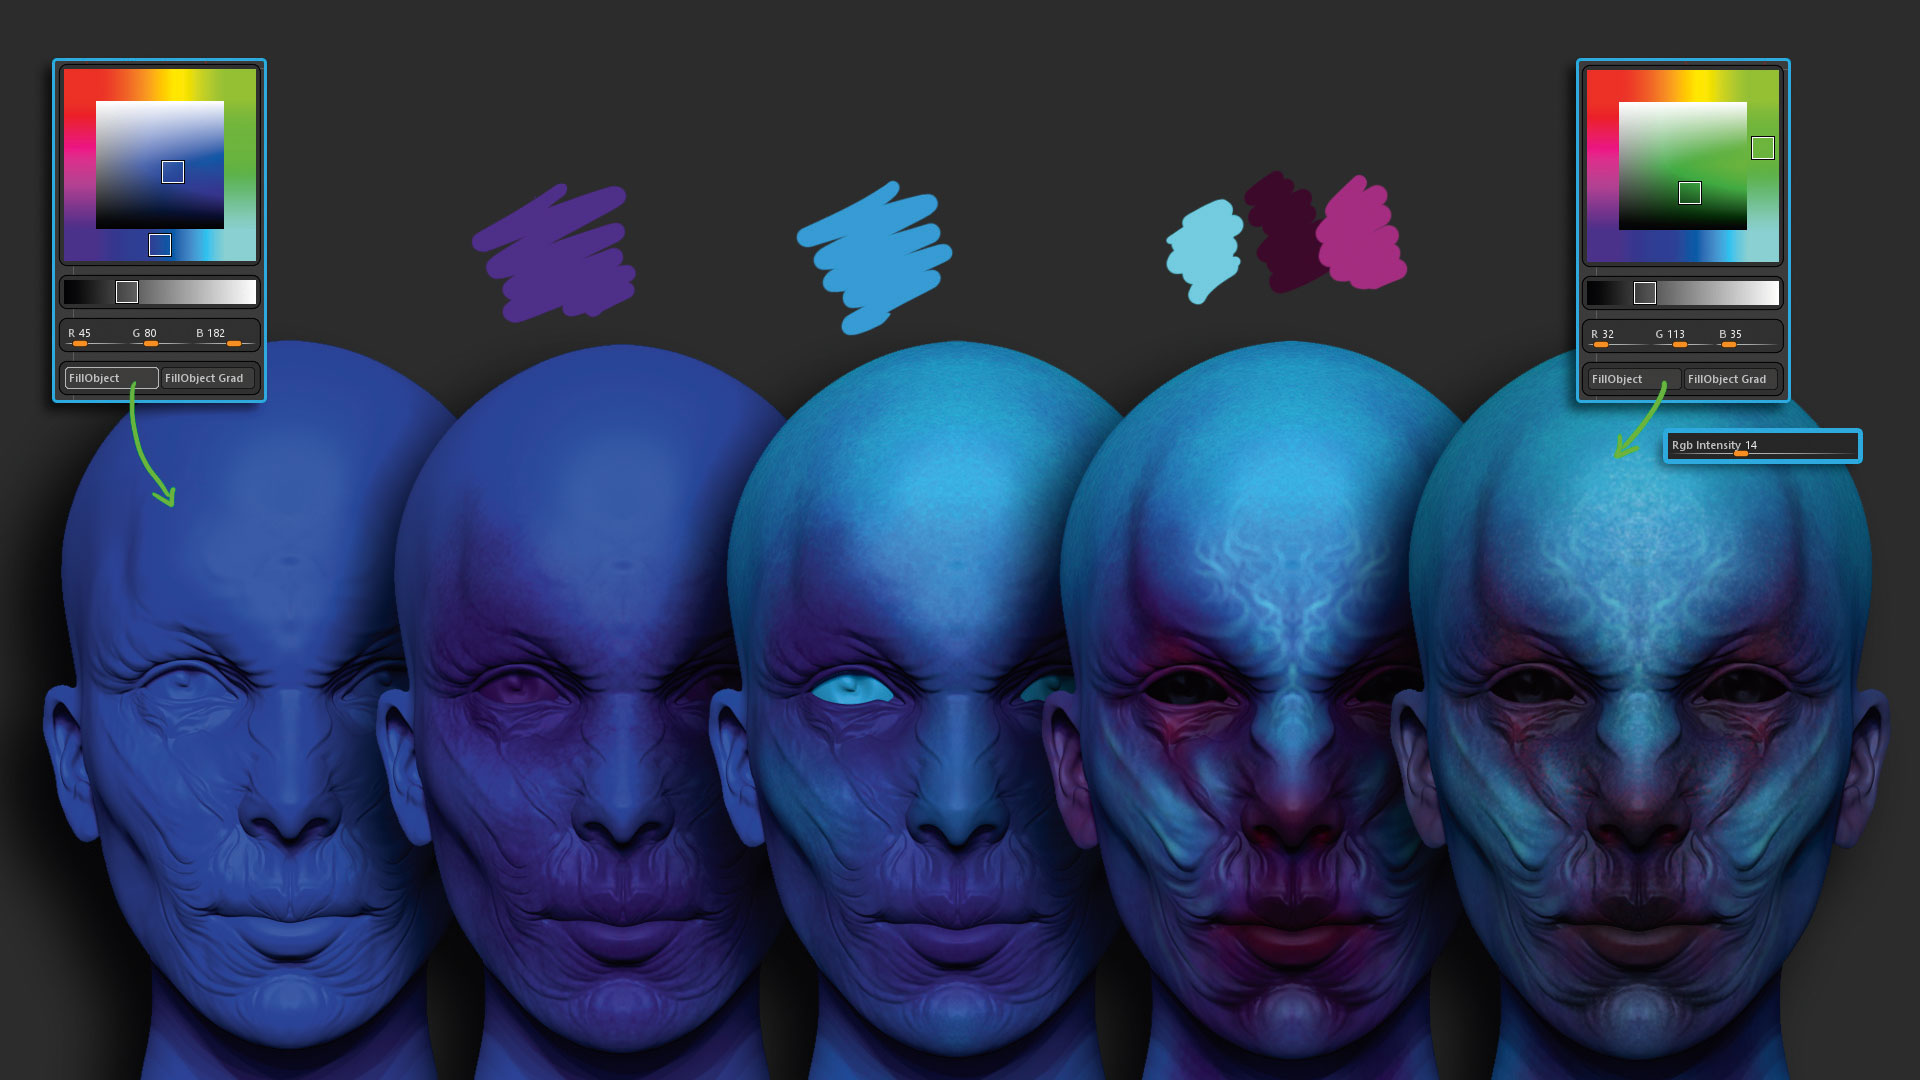
A good rule of thumb when painting is to start with a base colour, select a colour and then click FillObject from the Color palette. Now select your paint brush and reduce the RGB intensity to 50. Select a darker variation of your base colour and start to paint with it. Choose a different colour and repeat this process, with RGB intensity at 50 (or lower), and then use FillObject to unify all of your colours.
05. Texture details
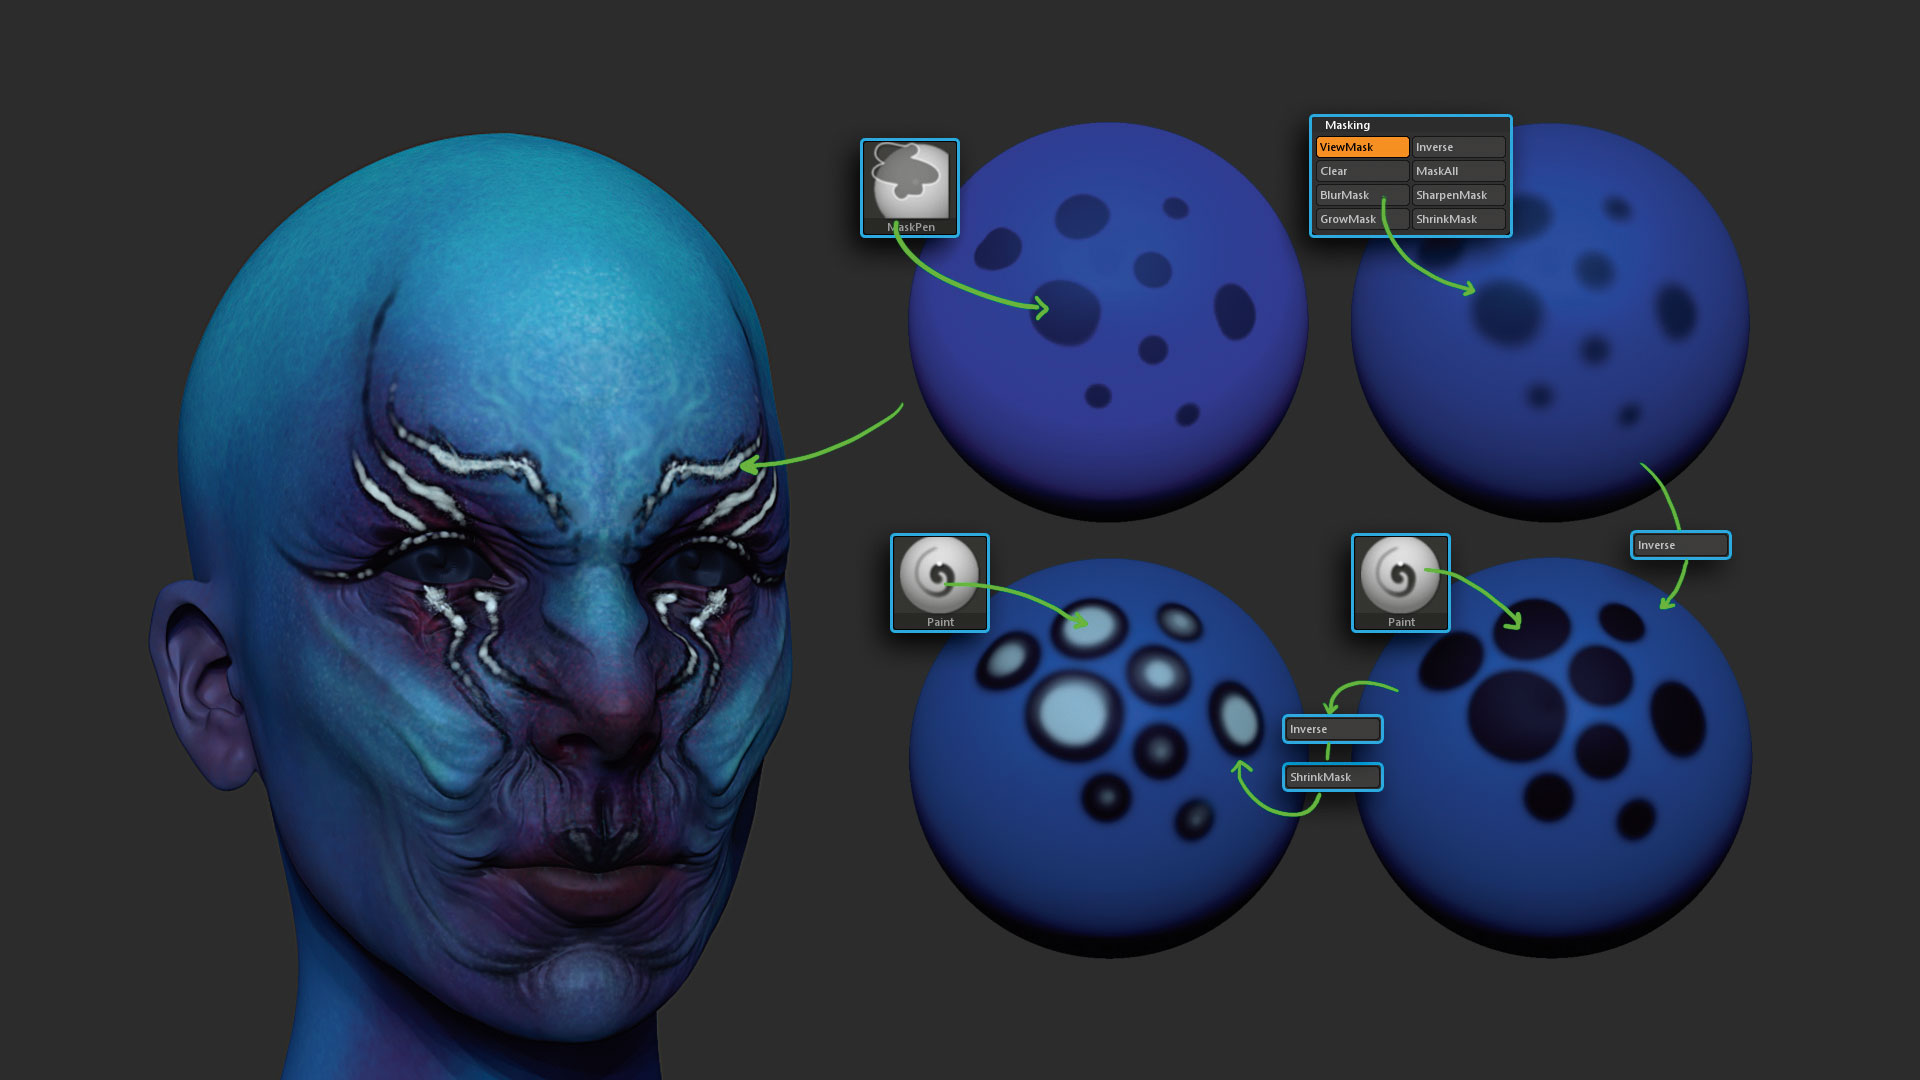
Using masks with PolyPaint will help you to achieve interesting textures on your model. Mask a few points on your mesh and blur the mask, invert it and then paint the unmasked points. Now invert the mask again and sharpen it a couple of times, invert it again and paint the unmasked areas. This process will give you a visually complex effect in just a couple of easy steps.
This article was originally published in issue 157 of ImagineFX, the world's best-selling magazine for digital artists. Buy issue 157 here or subscribe to ImagineFX here.
Related articles:

Thank you for reading 5 articles this month* Join now for unlimited access
Enjoy your first month for just £1 / $1 / €1
*Read 5 free articles per month without a subscription

Join now for unlimited access
Try first month for just £1 / $1 / €1
