How to paint clouds
Master the gouache wet-in-wet technique as you learn how to paint clouds.

Fine artist Justin Donaldson is here to show us how to paint clouds. He uses gouache, poster colour, oil and open-acrylics in his everyday adventure with painting. He's created a number of online courses around painting with gouache, and painting landscapes, including how to paint clouds, and he's created this tutorial just for you.
If you're looking to get started in traditional painting, then take a look at our advice for canvas painting for beginners before you jump into Donaldson's cloud painting tutorial. You may also want to look at the best art easels around, as well as the best oil paints if you're using oils.
In this workshop Donaldson will show you some of the core skills he uses when creating landscape paintings in gouache, with a focus on cumulonimbus clouds. Clouds are a difficult subject to paint at the best of times. They’re full of a massive variety of edge qualities, from lost edges to hard edges. If you're using gouache, being able to paint consistently with soft edges provides a particular challenge since it’s the nature of gouache to dry very quickly. Don’t fear though – Donaldson has a few tricks to share that will help combat this particular difficulty.
How to paint clouds
01. Soak the paper on both sides
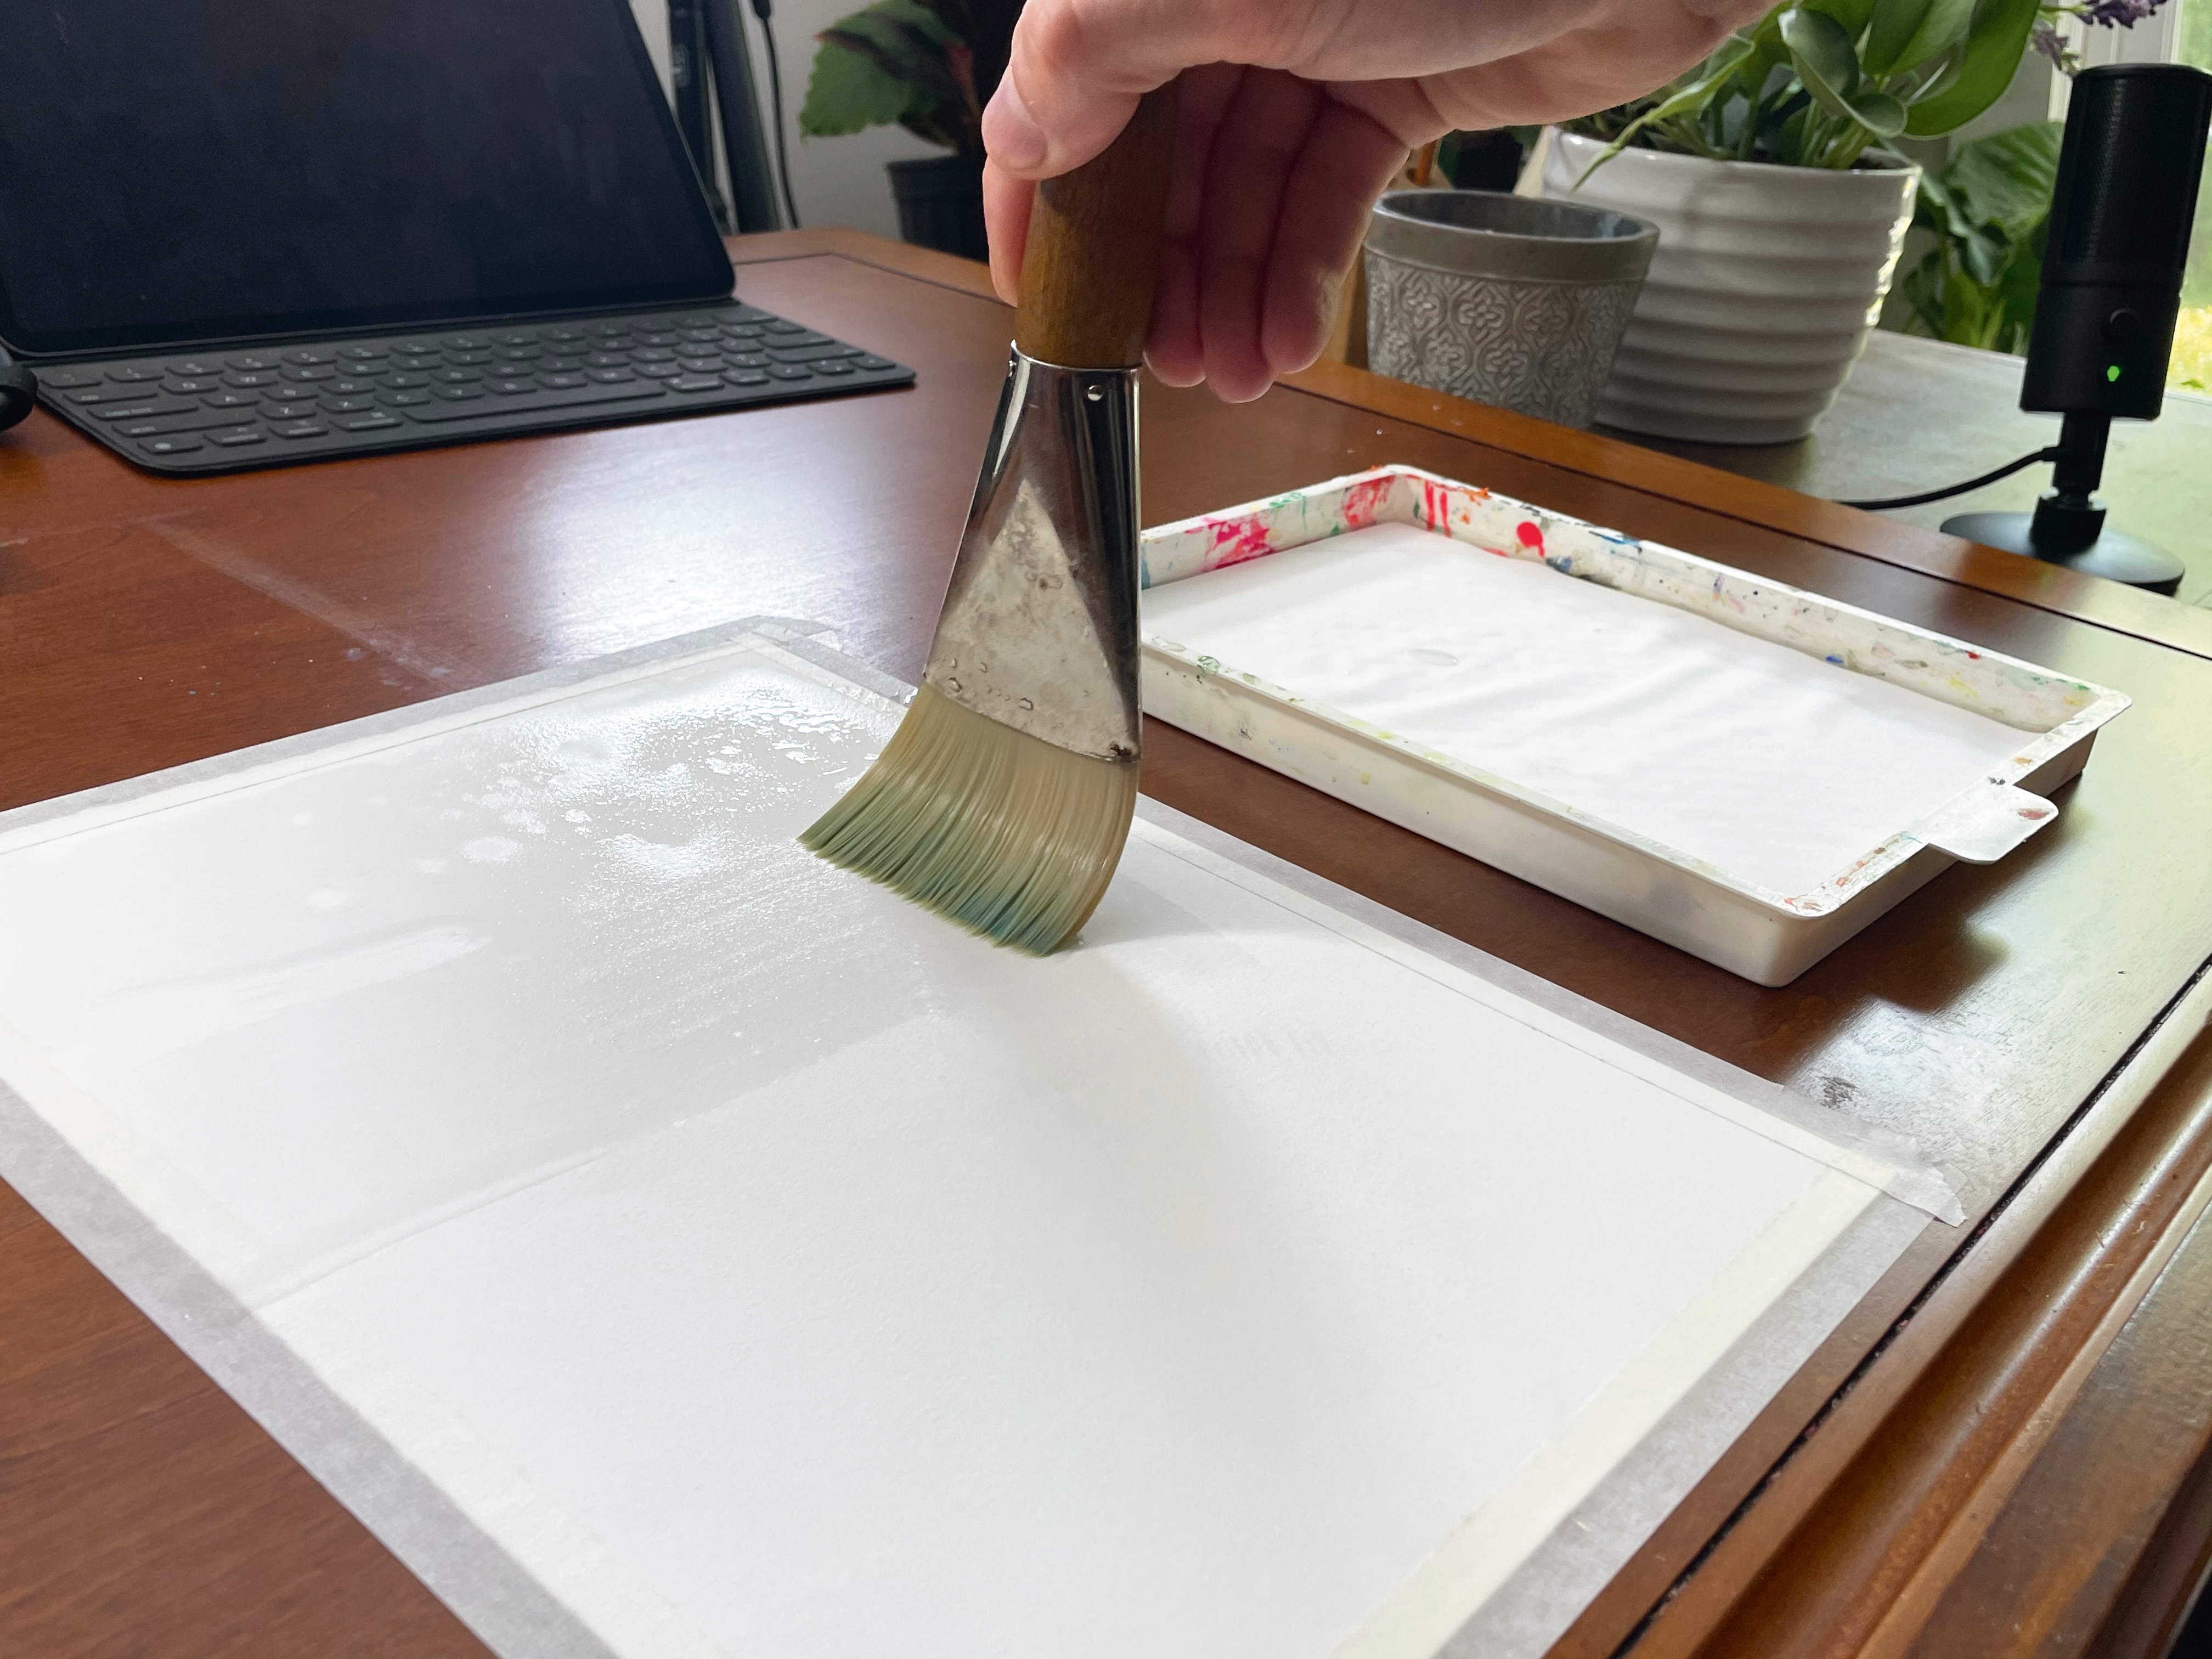
Use your biggest brush to apply water on both sides of the paper. Warping occurs when water is unevenly distributed on the paper. By getting both sides of the paper wet we’ll avoid most instances of warping as well as provide a longer time in which the paint remains wet, activated and therefore workable.
Sky gradient setup
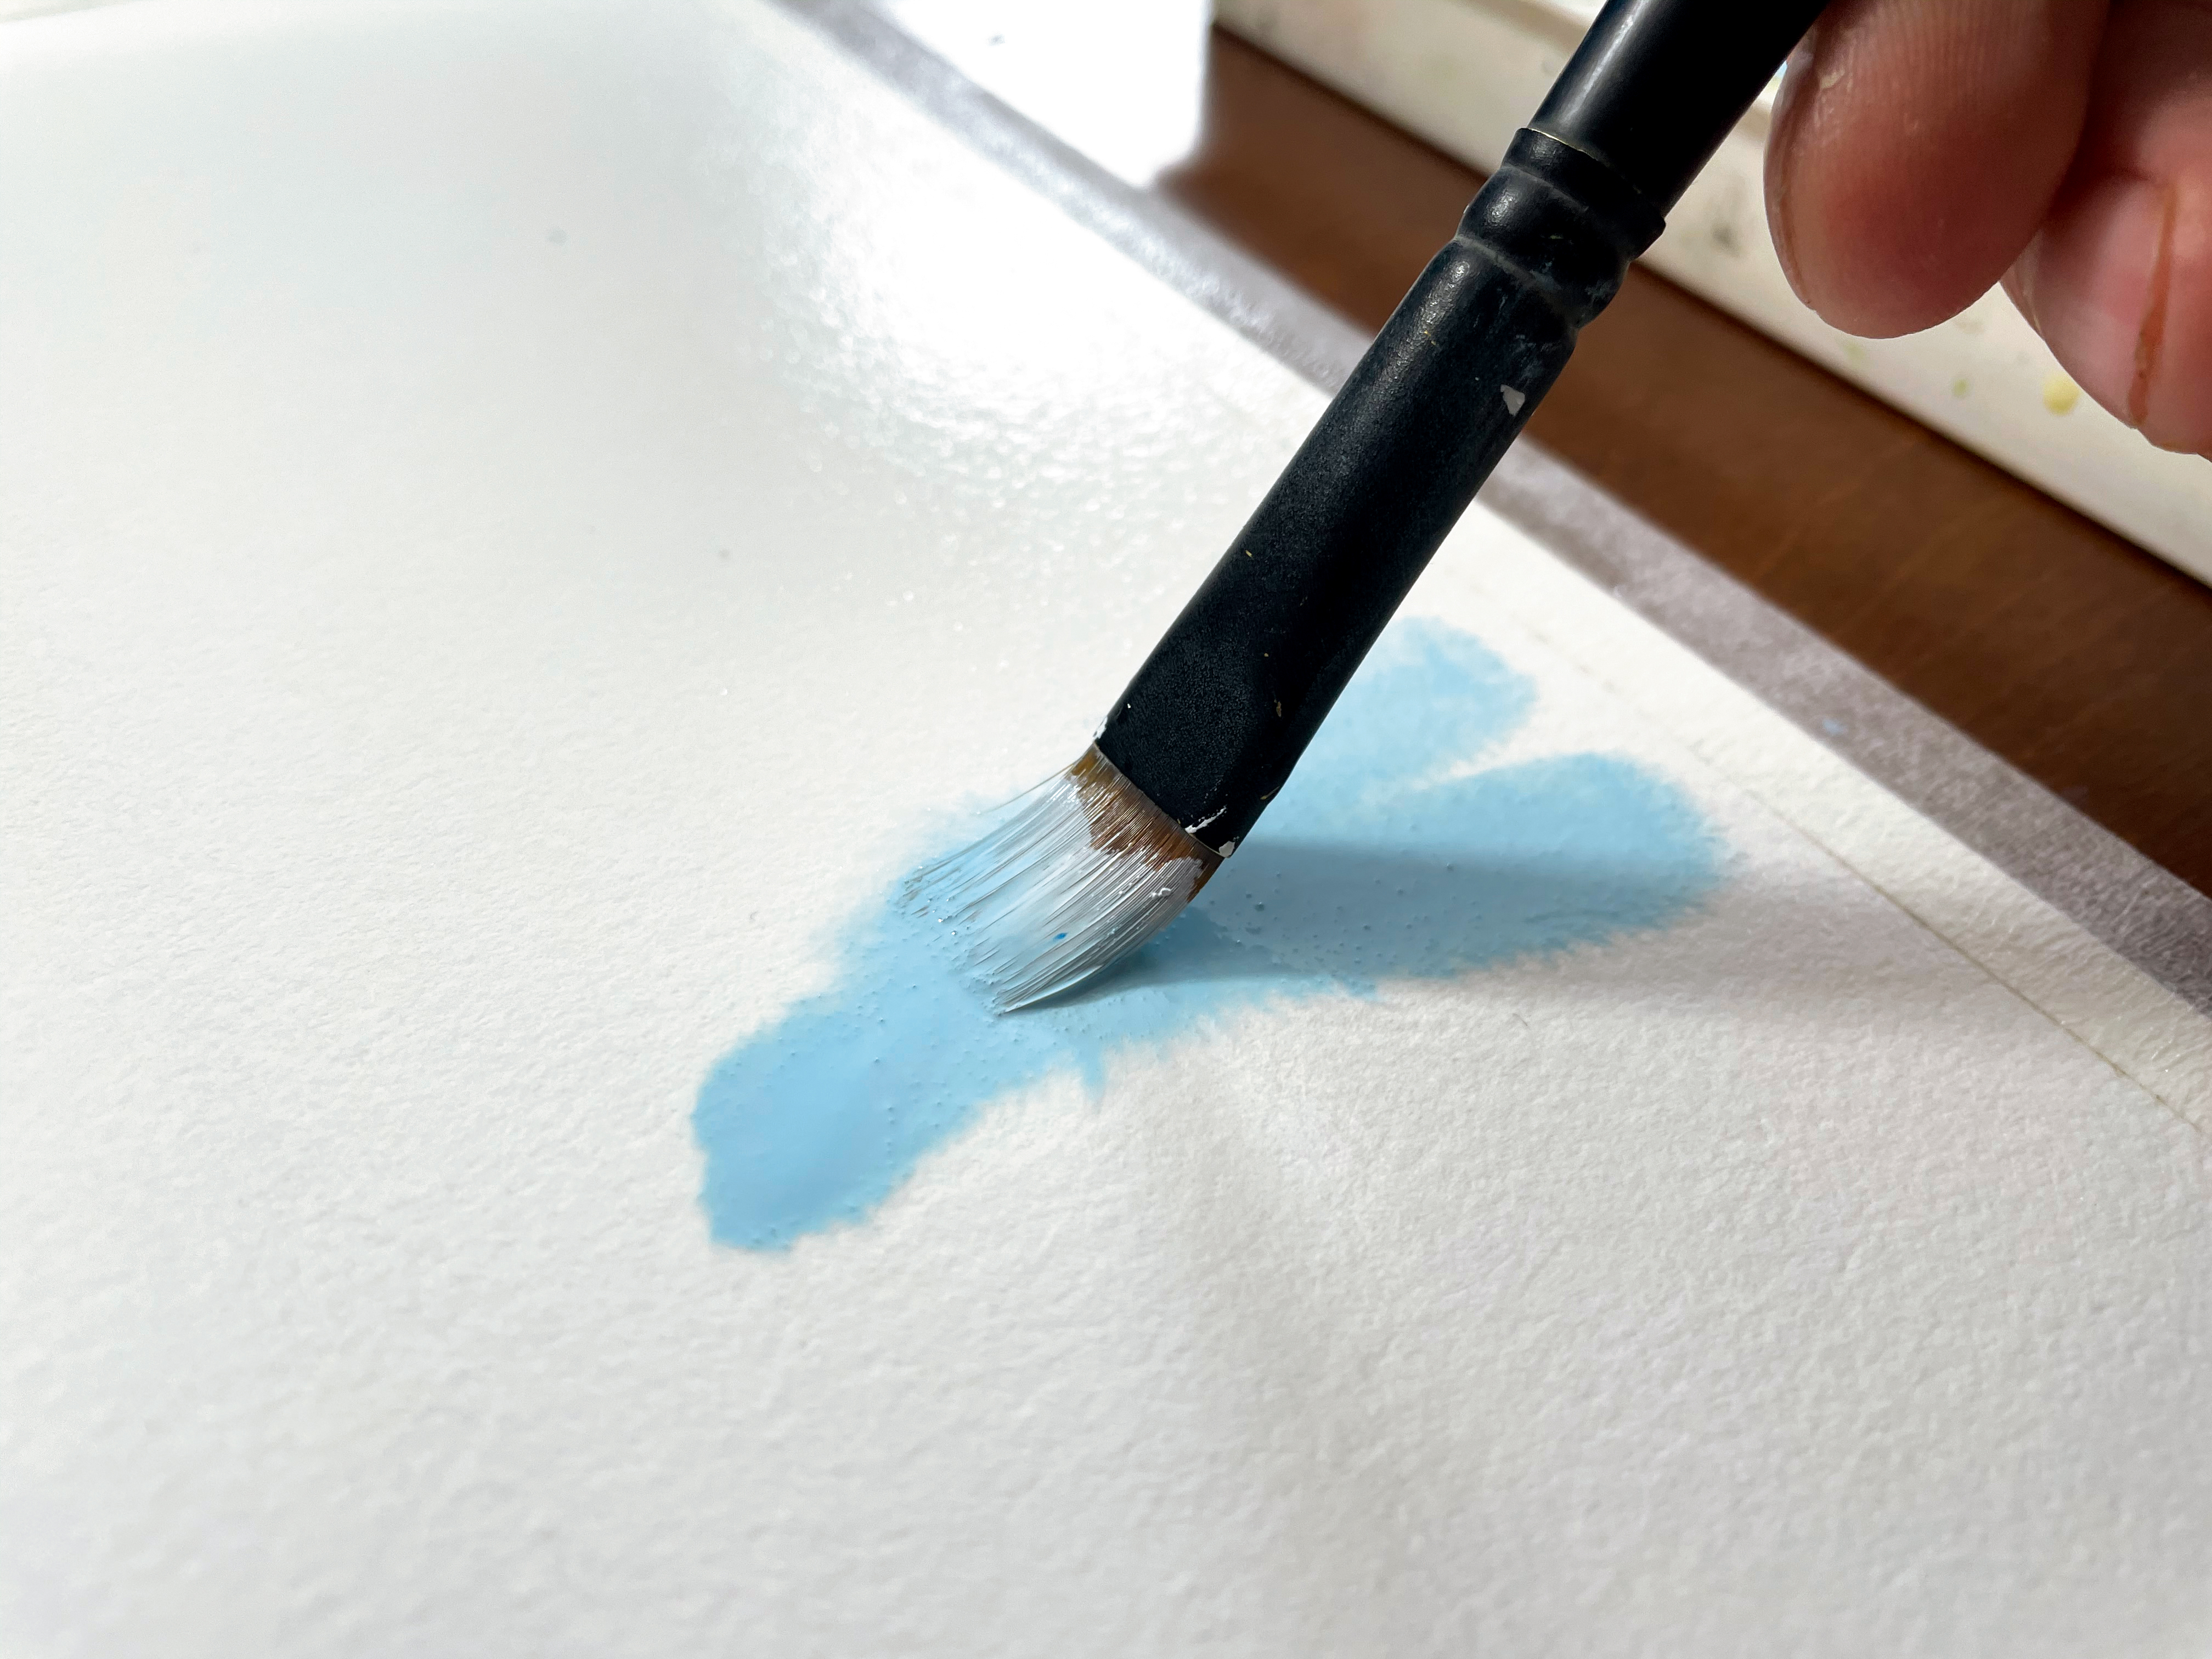
Let’s take Cerulean blue and Titanium white to create a layer of paint where the sky will be. Make sure that you’re painting with some thick paint. It needs to be thick enough to interact with the white of the cloud when we paint it in.
03. Paint the gradient
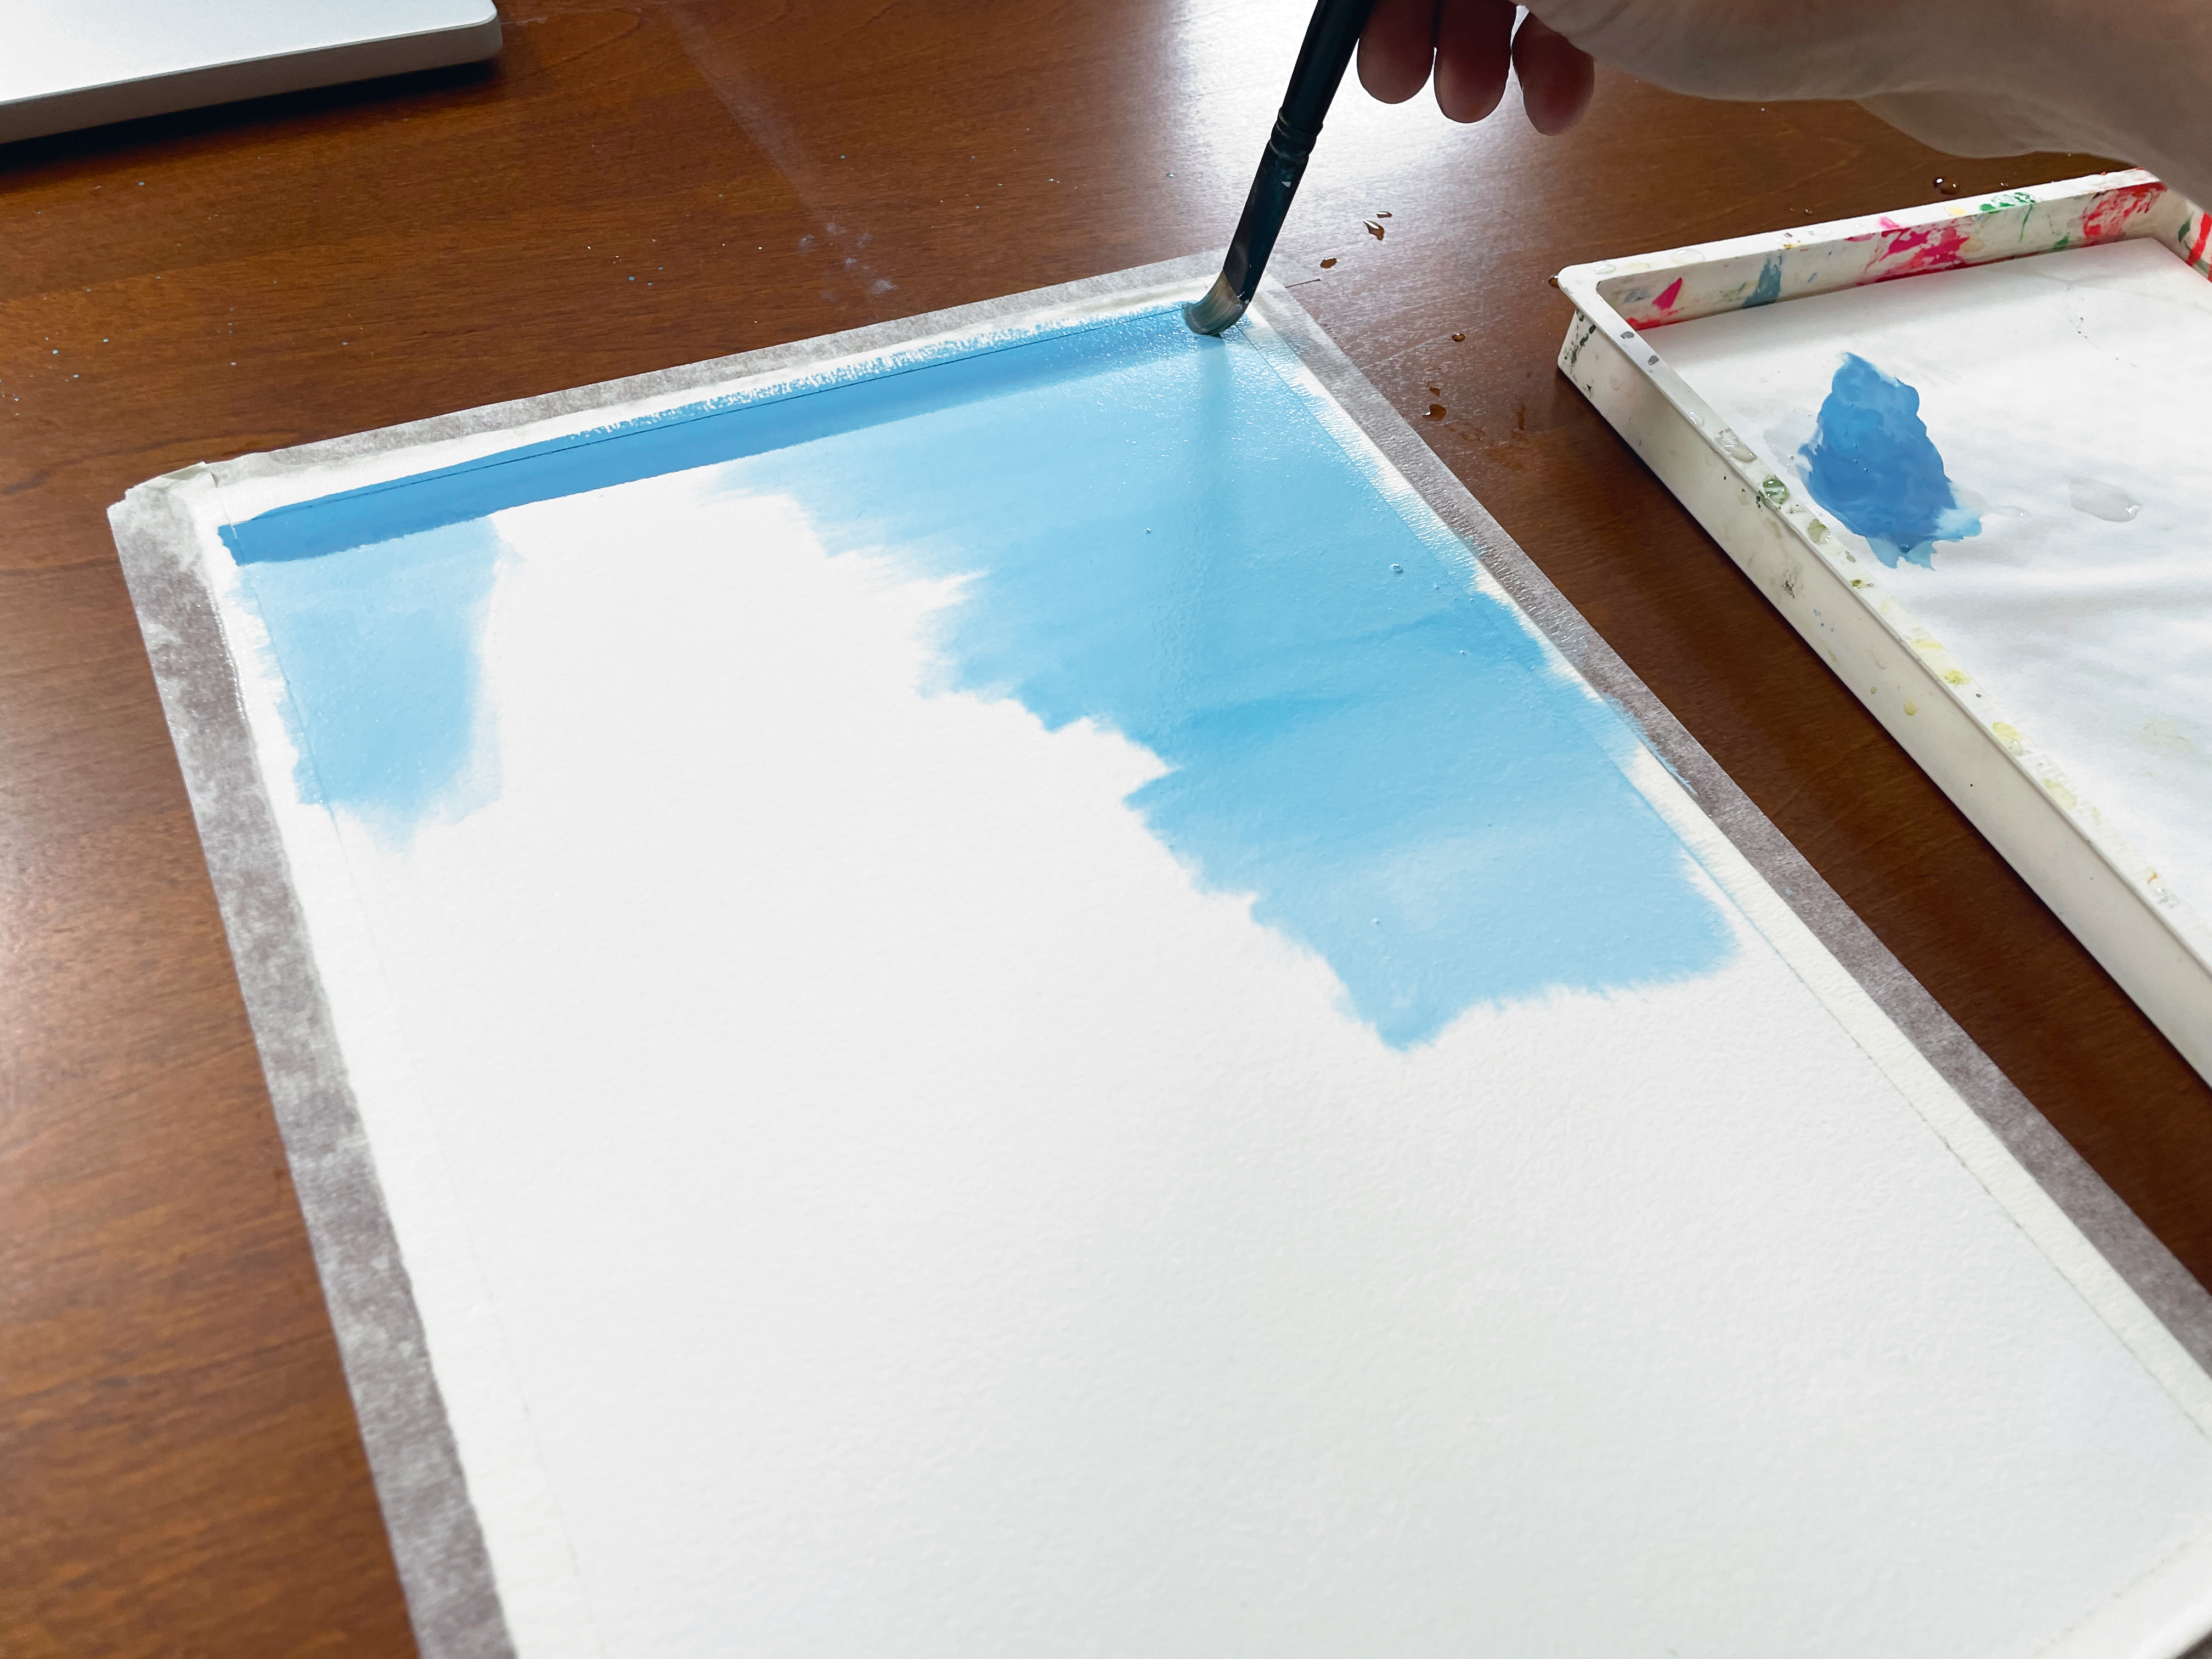
From the top down, horizontally apply a layer of pure Cerulean blue to the area that already contains the base sky layer. As you bring your brush down the paper avoid the temptation to reload your brush. The natural mix of paint that occurs as you bring the brush down the page will result in a gradient.
04. Start the clouds
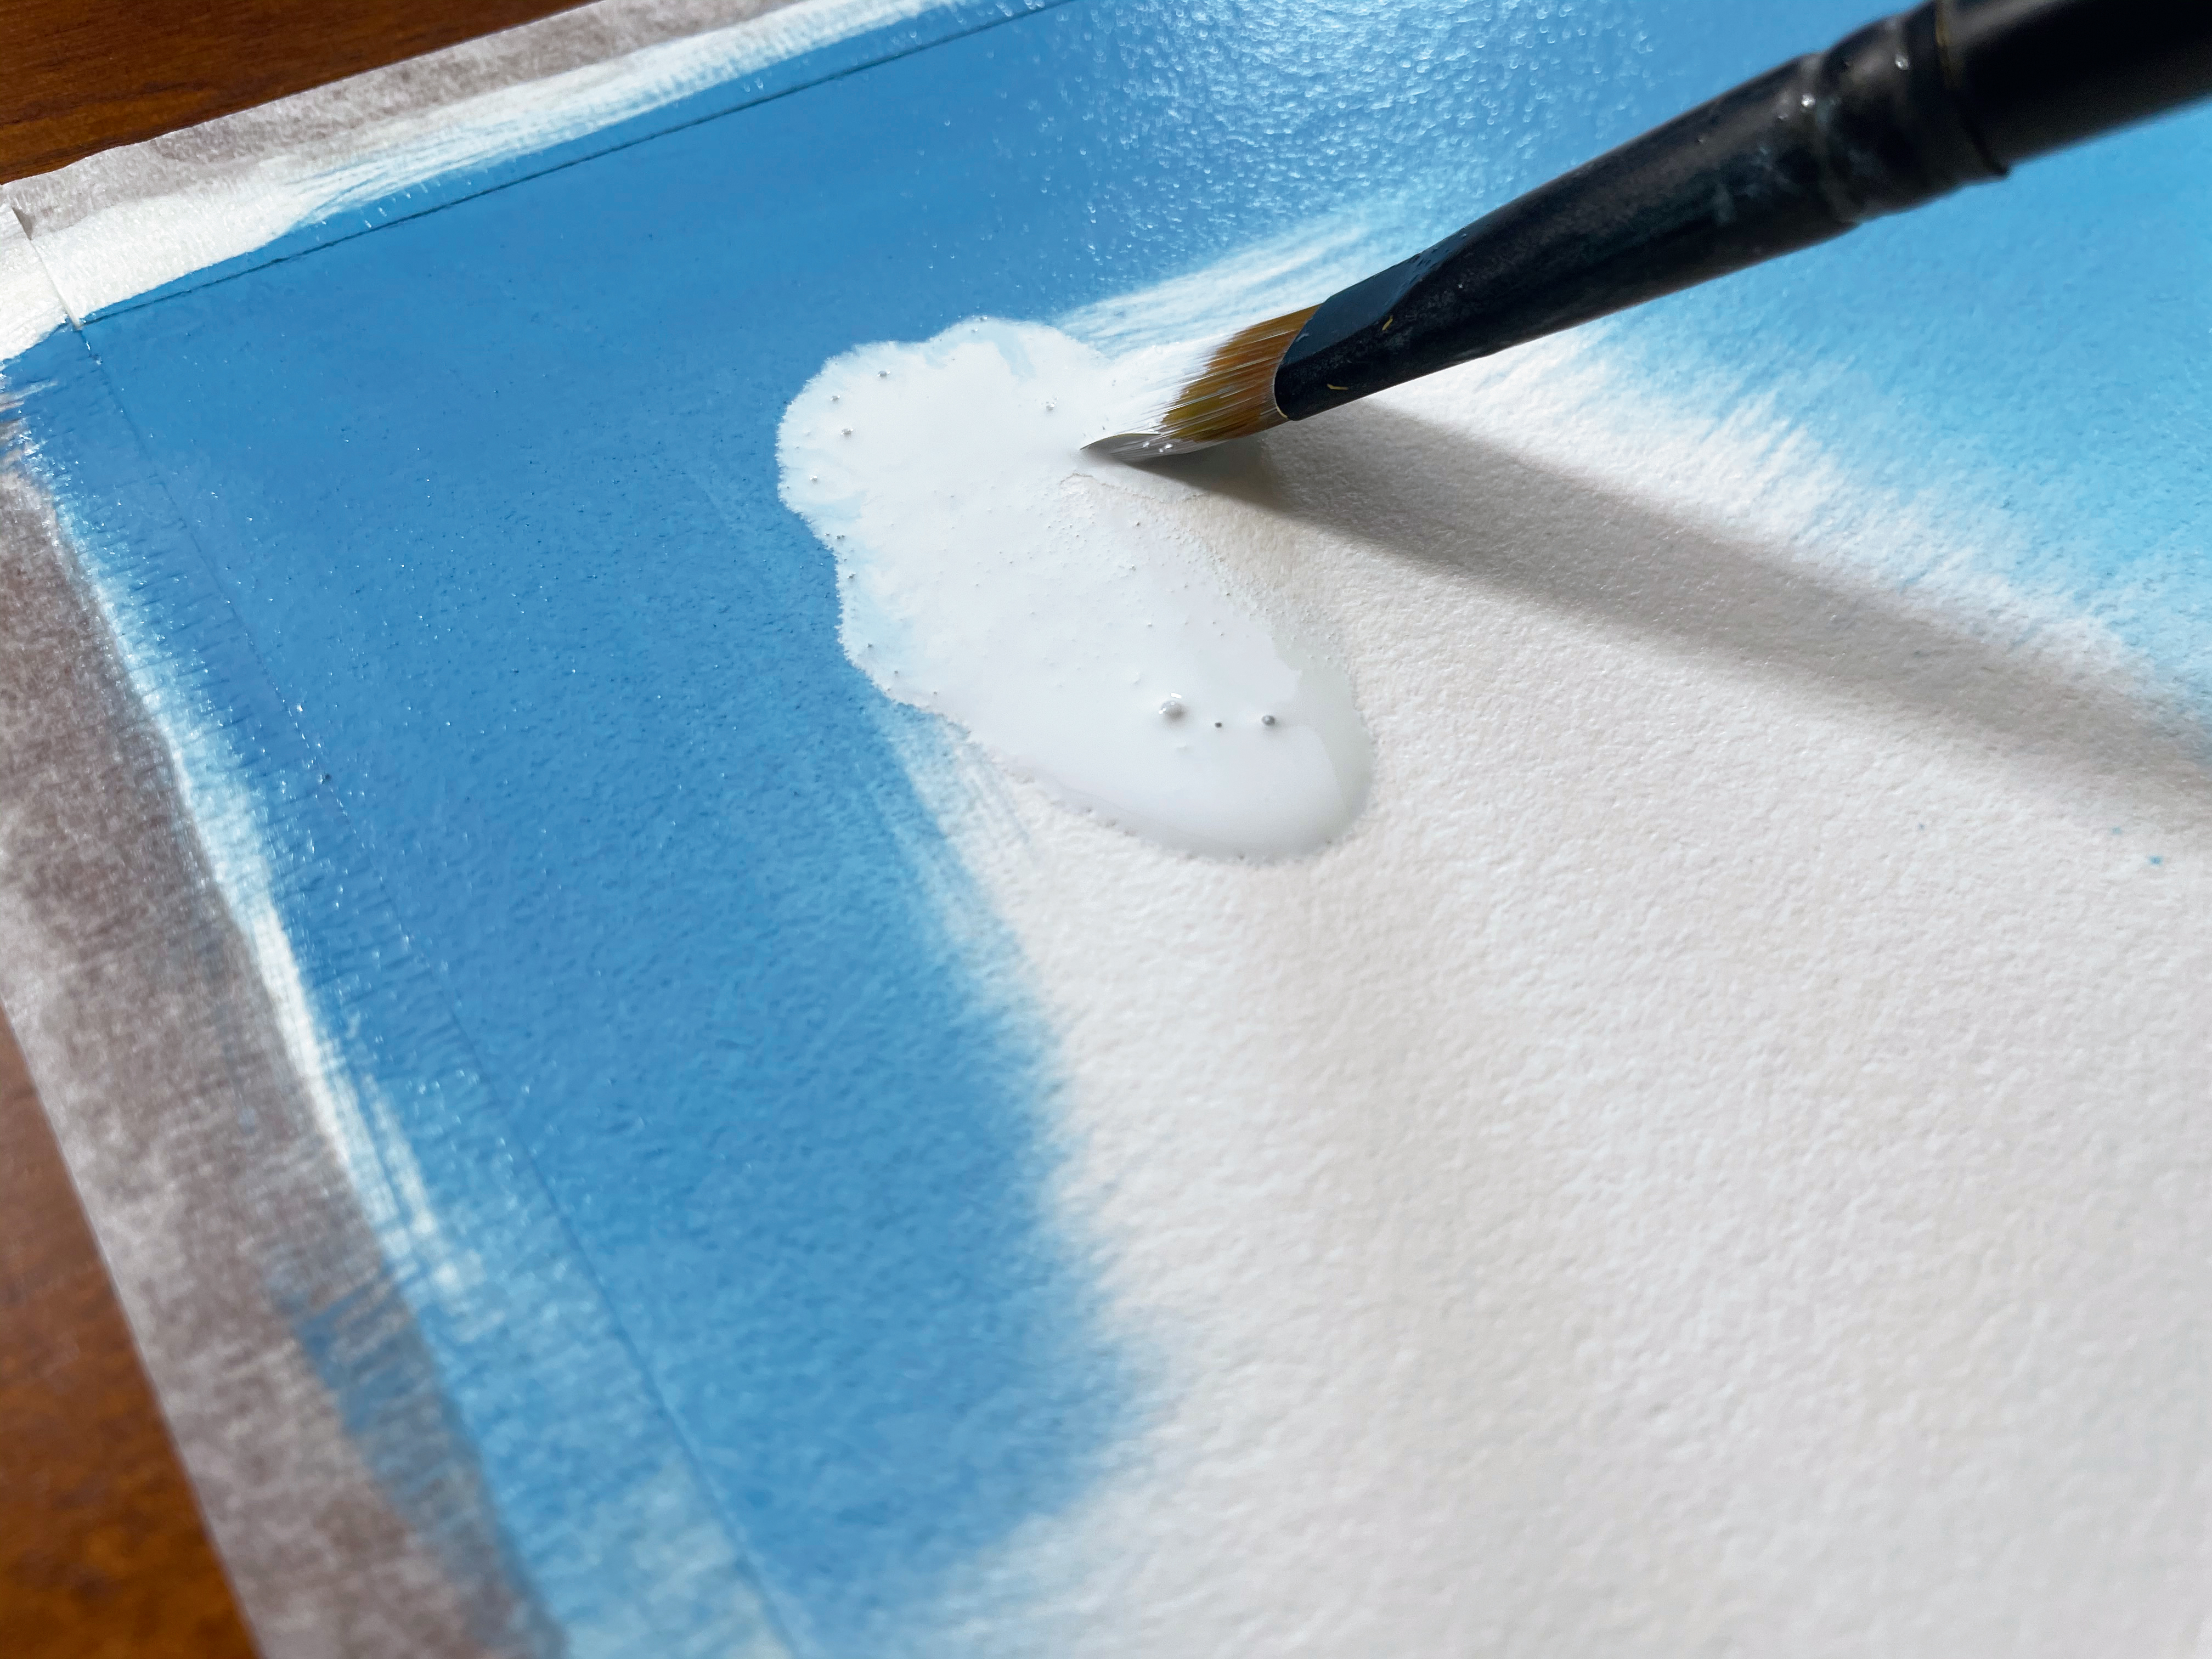
While the paint that you’ve applied is still wet, charge a layer of white paint into the blue sky to create your clouds. Charging requires a lot of paint and water at the same time. This technique will enable all the paint we’ve used so far to mix very naturally, and will result in a very soft edge for the cloud.
05. Create the shadows
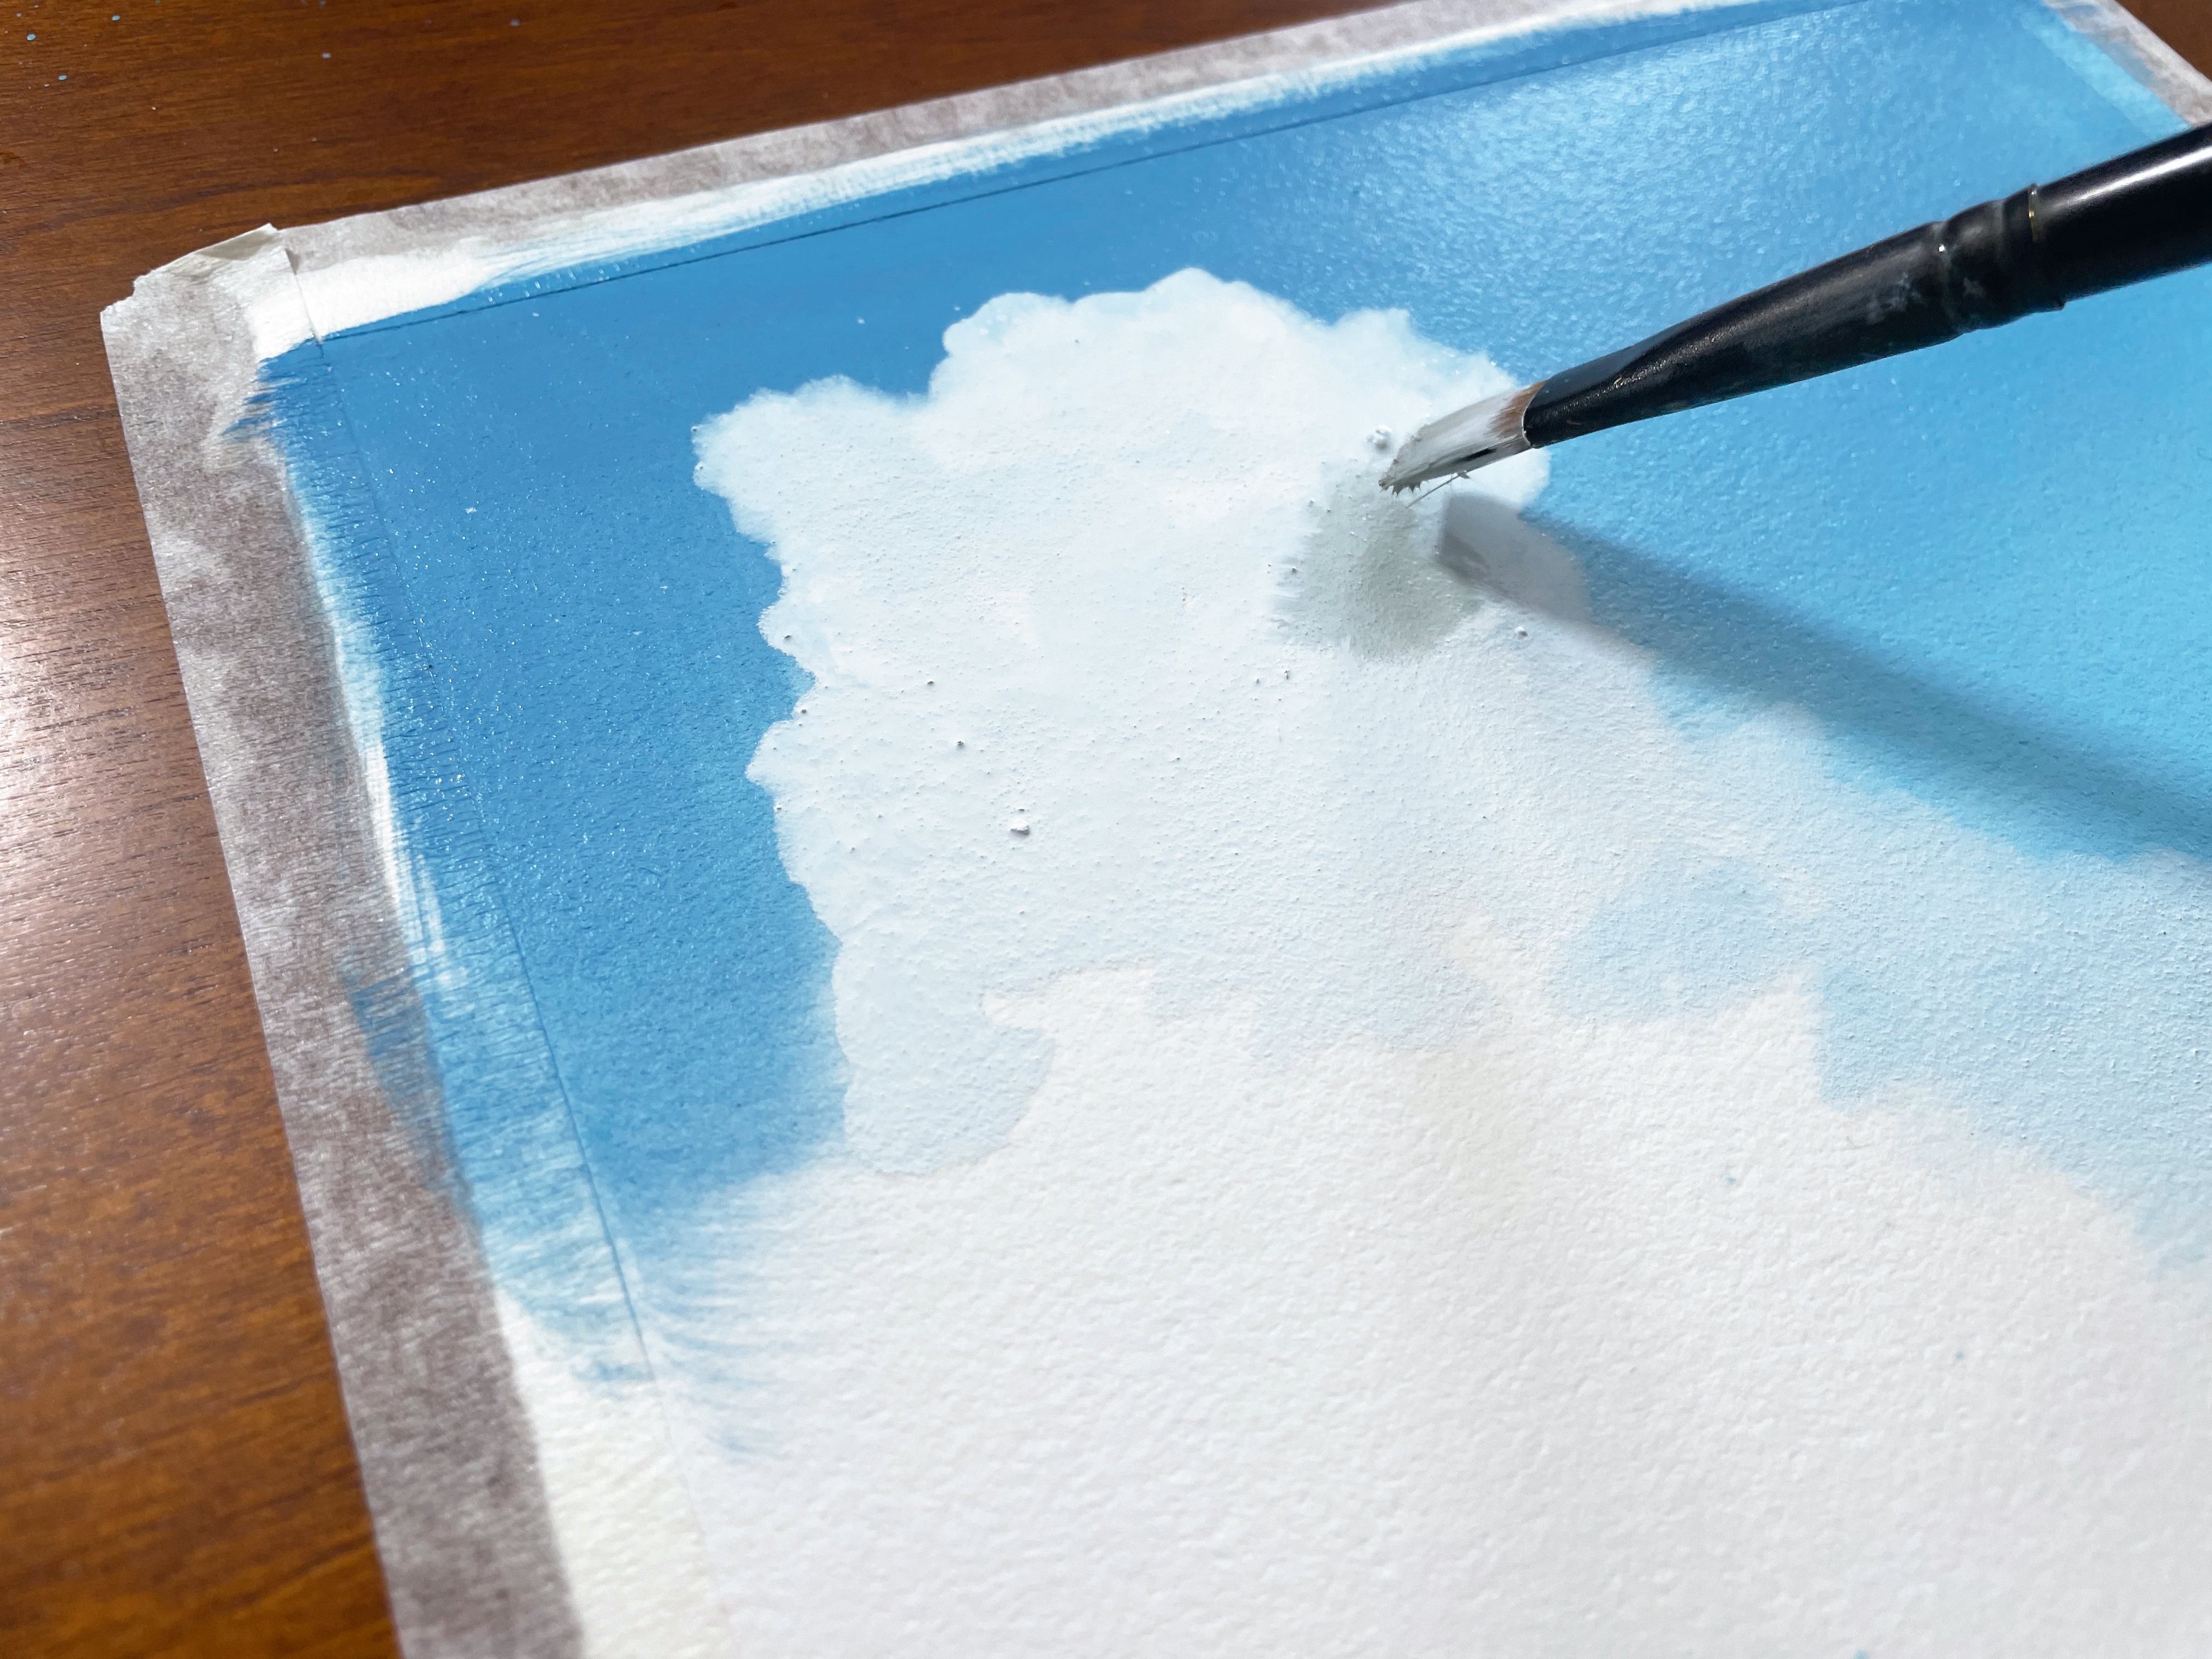
Create a darker mix for the shadows of the cloud. I like to focus on the larger gradients within the shape at this point, rather than getting sucked into the smaller shapes within the clouds. This is a great time to think about the bounce light that might be occurring. Bounce light helps the clouds to feel light and fluffy.
06. Paint smaller shapes within the cloud
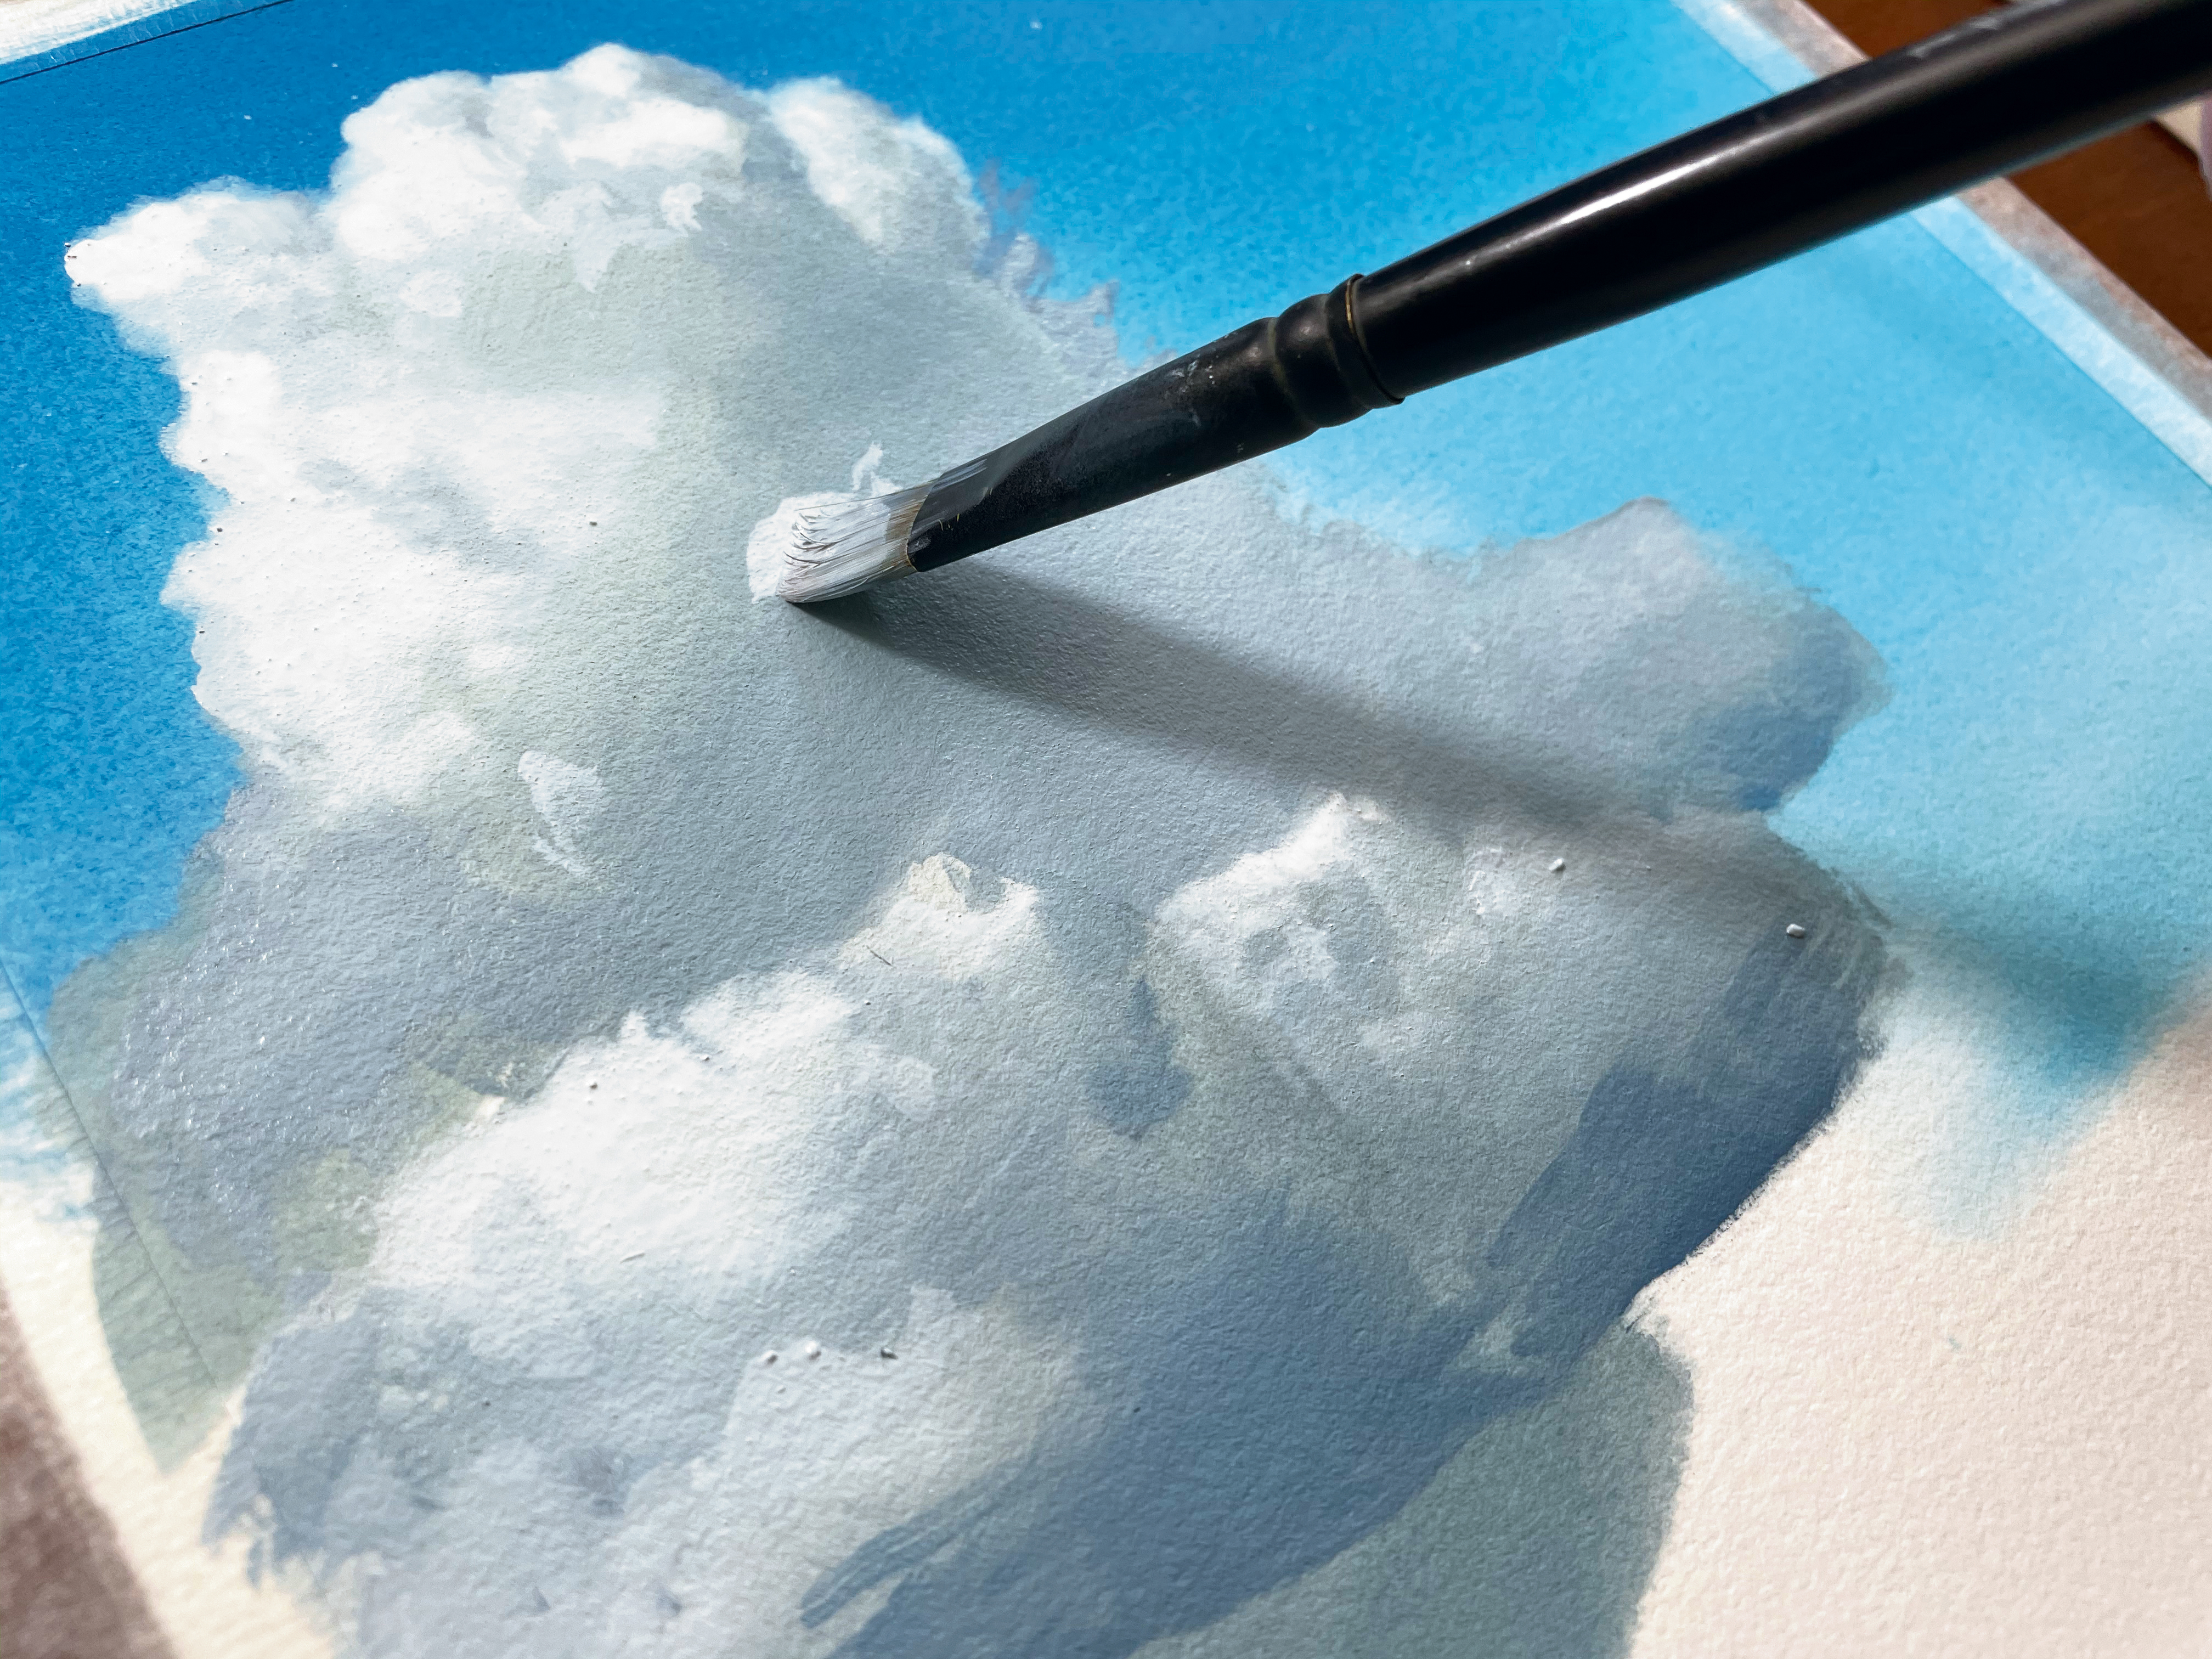
Next, focus on smaller shapes within the painting. At this point some of the paint has evaporated from the painting and we’ll be able to apply paint with an edge quality that’s not yet hard, but not as soft as it was in the initial layout.
07. Use the soft brushing technique
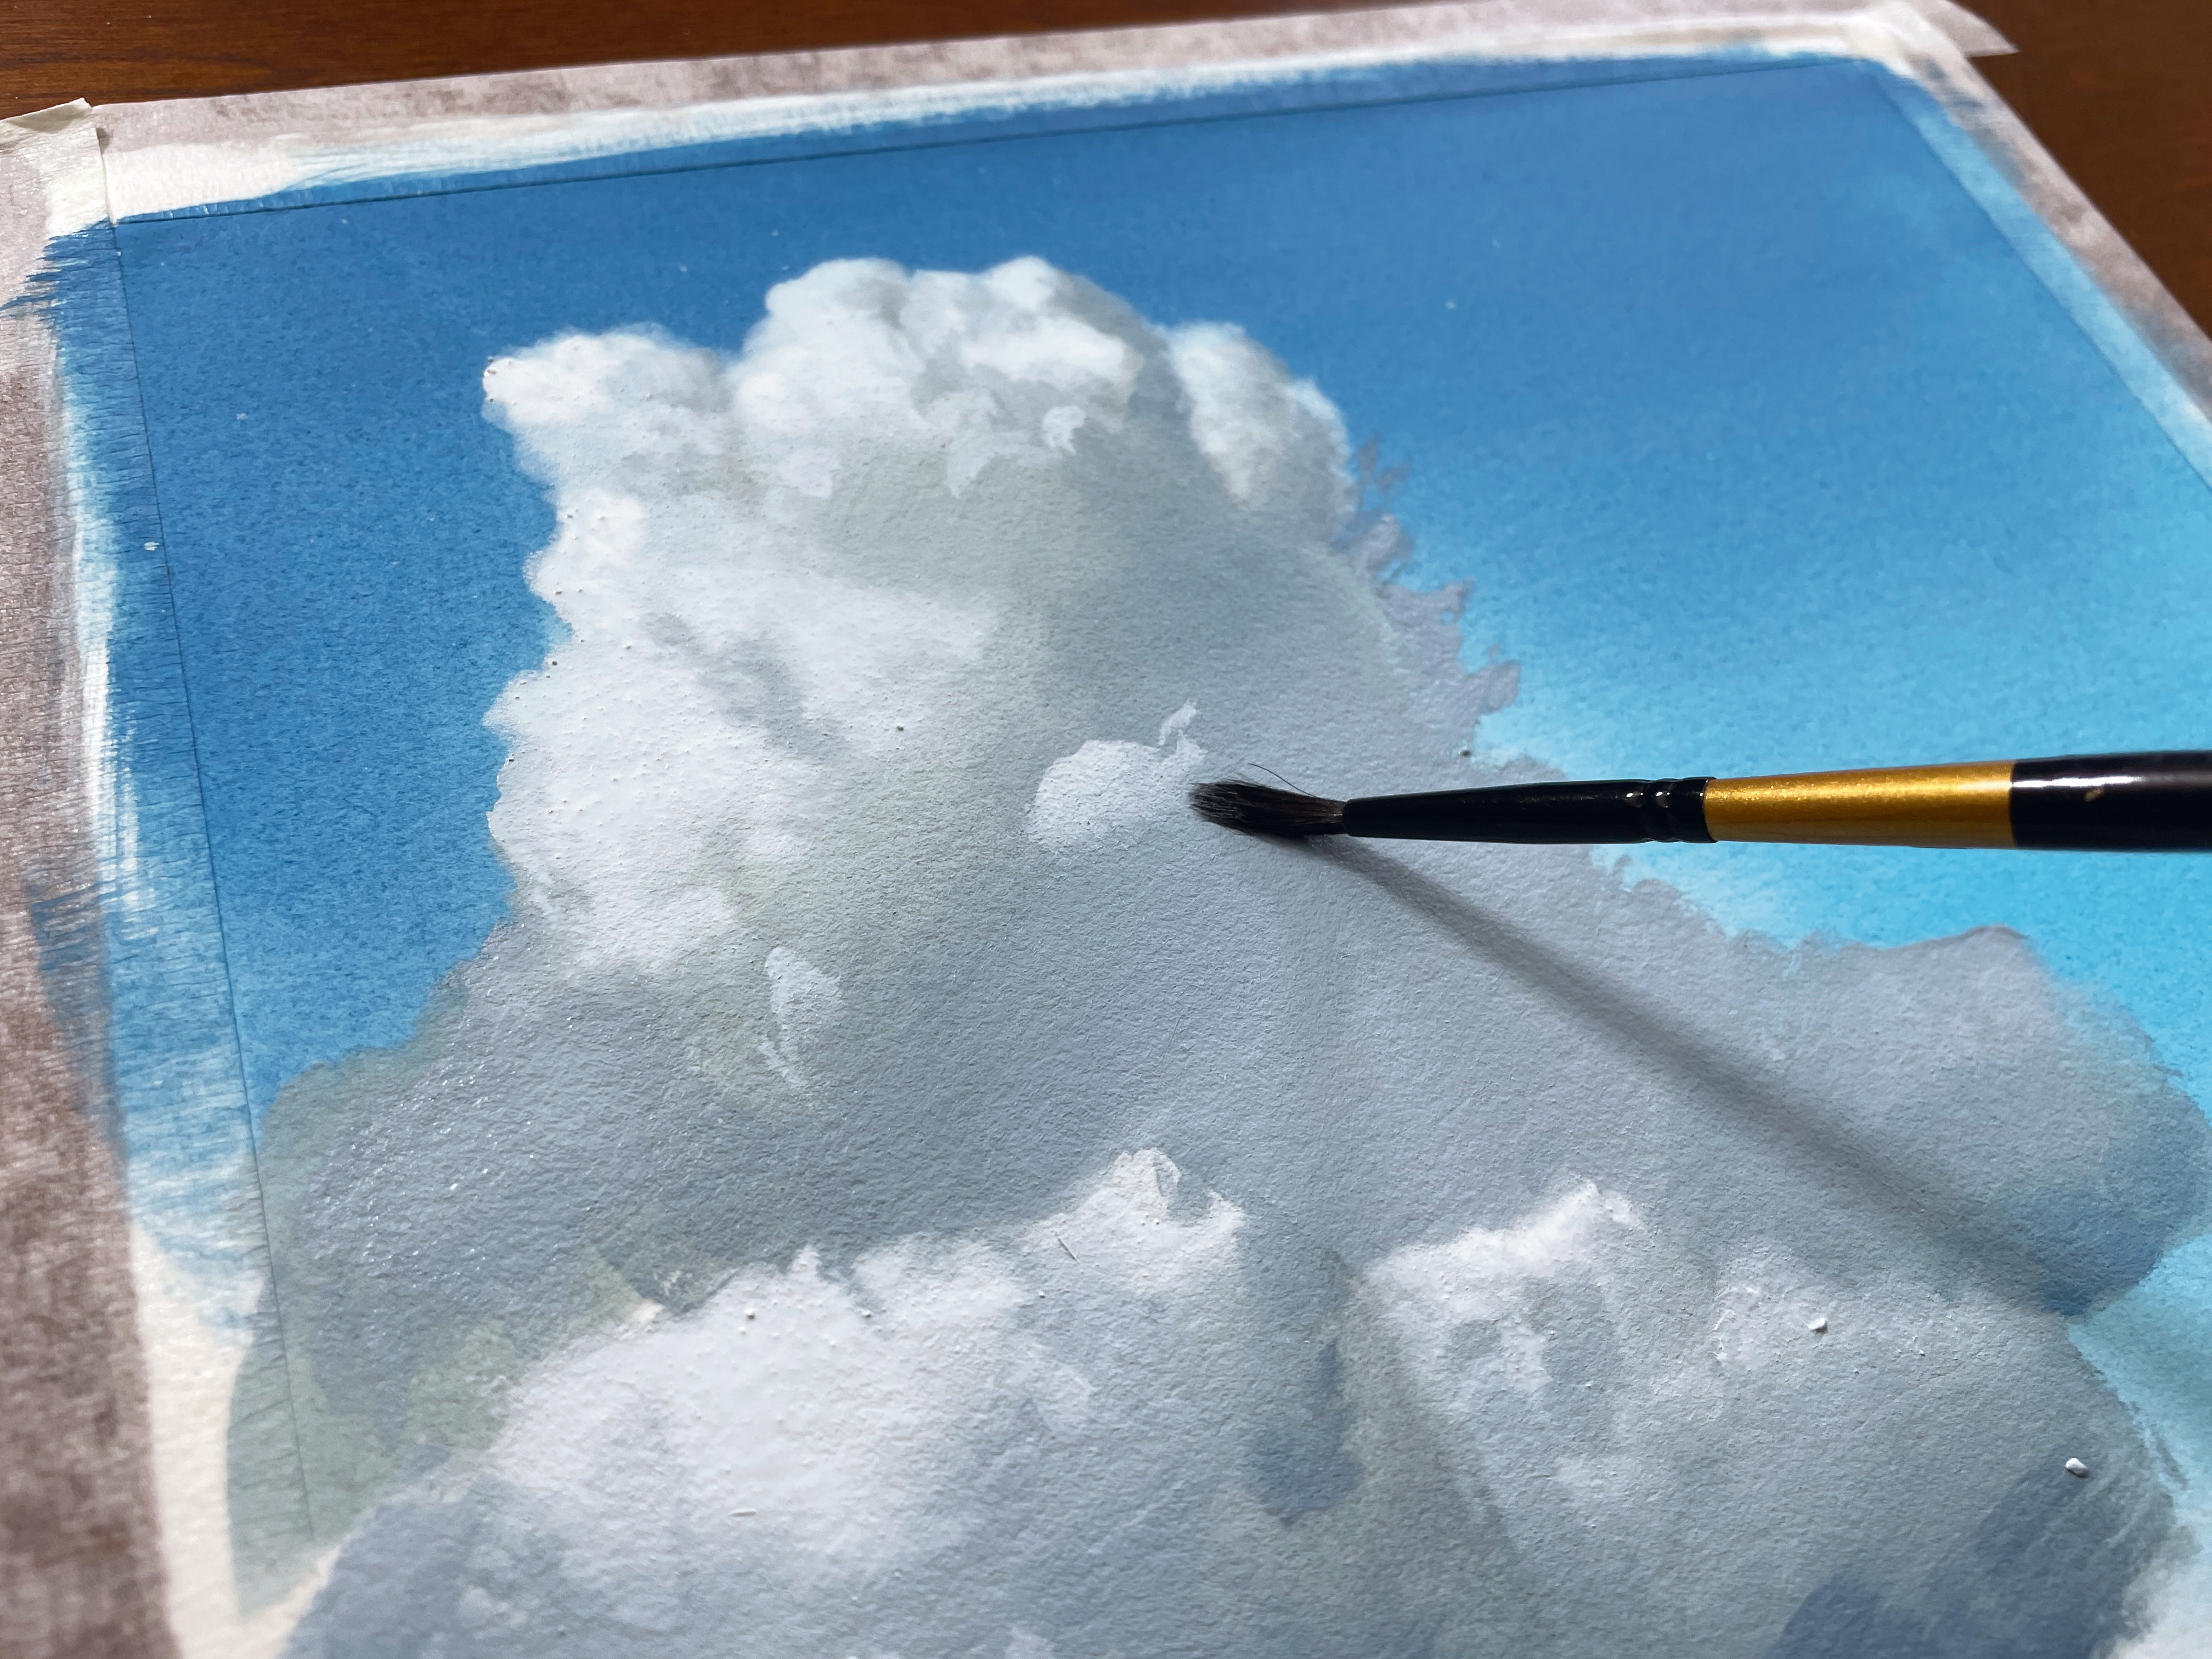
A lot of clouds shapes have a variety of edge qualities within a single shape. We can take a dry soft brush with no paint on it and drag it over an edge to soften the edge up. This is often useful when trying to describe form shadows or lost edges.
08. Create context for the composition
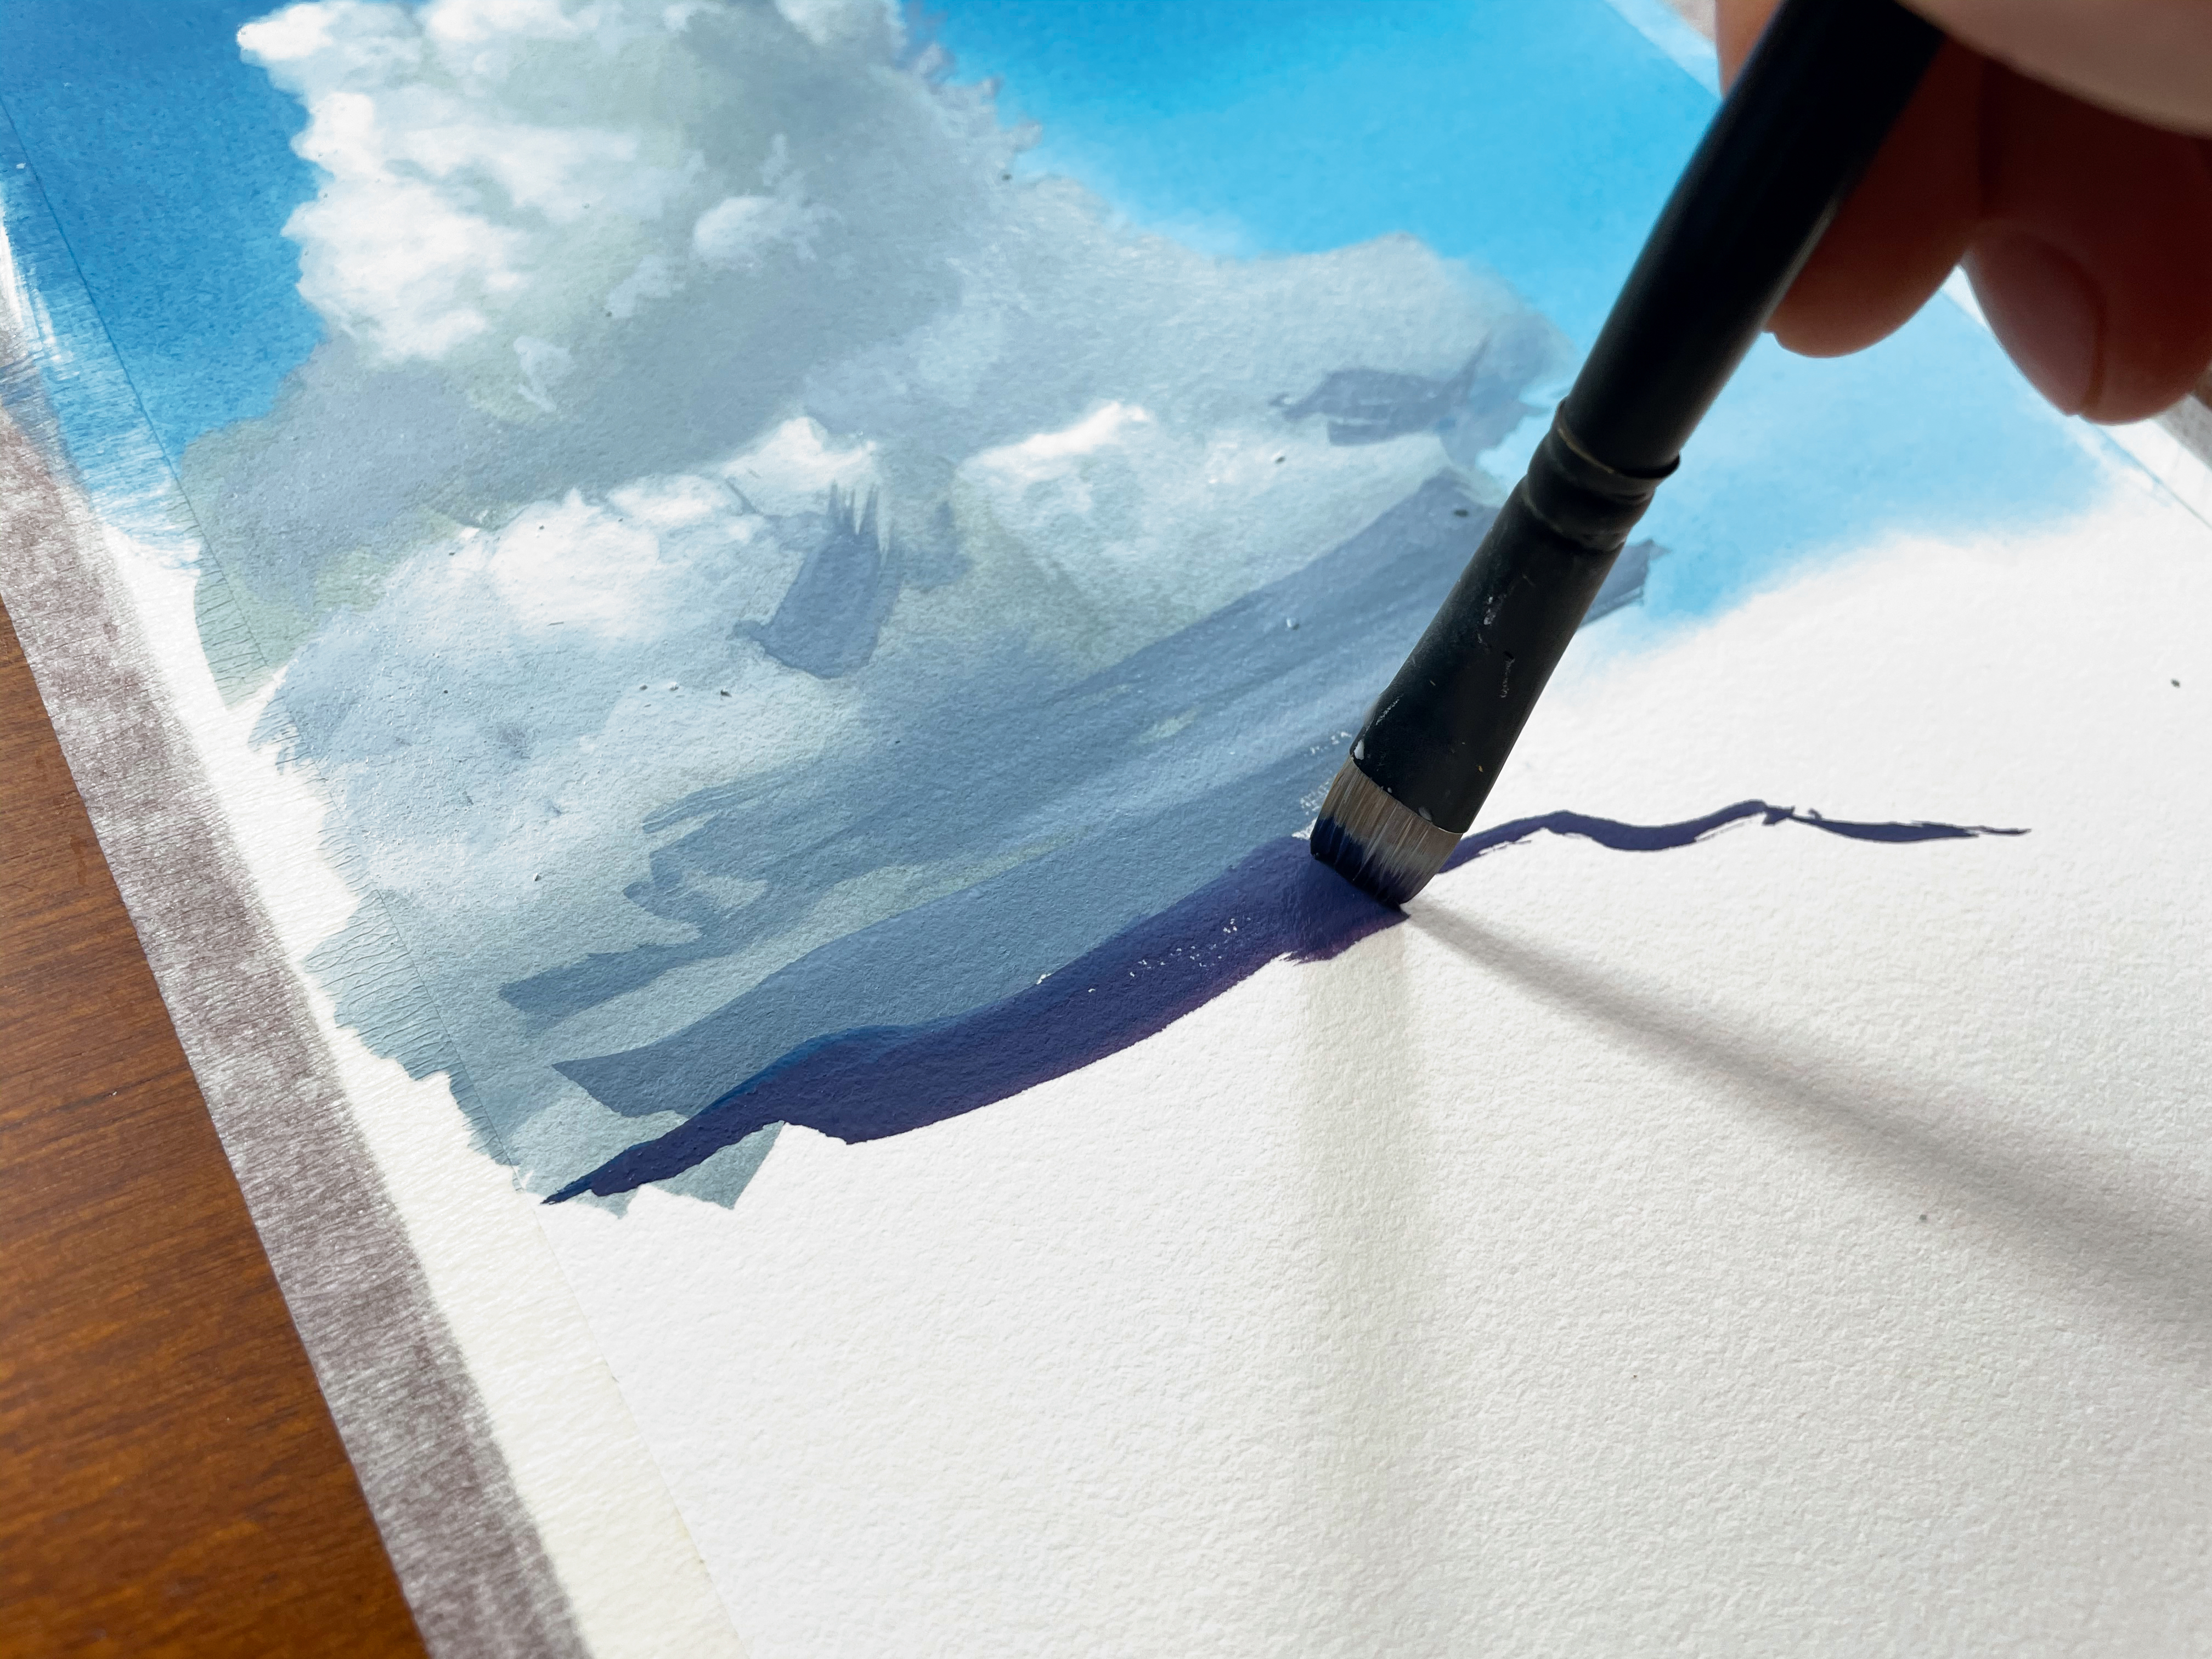
Now we get to provide context for the cloud. When we paint we’re never dealing with an object in isolation, and the way our cloud interacts with what’s around it says a great deal about the cloud itself. This cloud is casting a shadow onto a mountain, and this gives it a definite location in space.
09. Paint soft shadows on the mountainside

Create a gradient on the mountain. The soft quality of this gradient tells us that the cloud which is casting the shadow is far away and has soft edges. Once again, we get to communicate about the cloud in the act of painting our mountain! Feel free to use a soft dry brush to extend the length of the gradient.
10. Detail the mountain
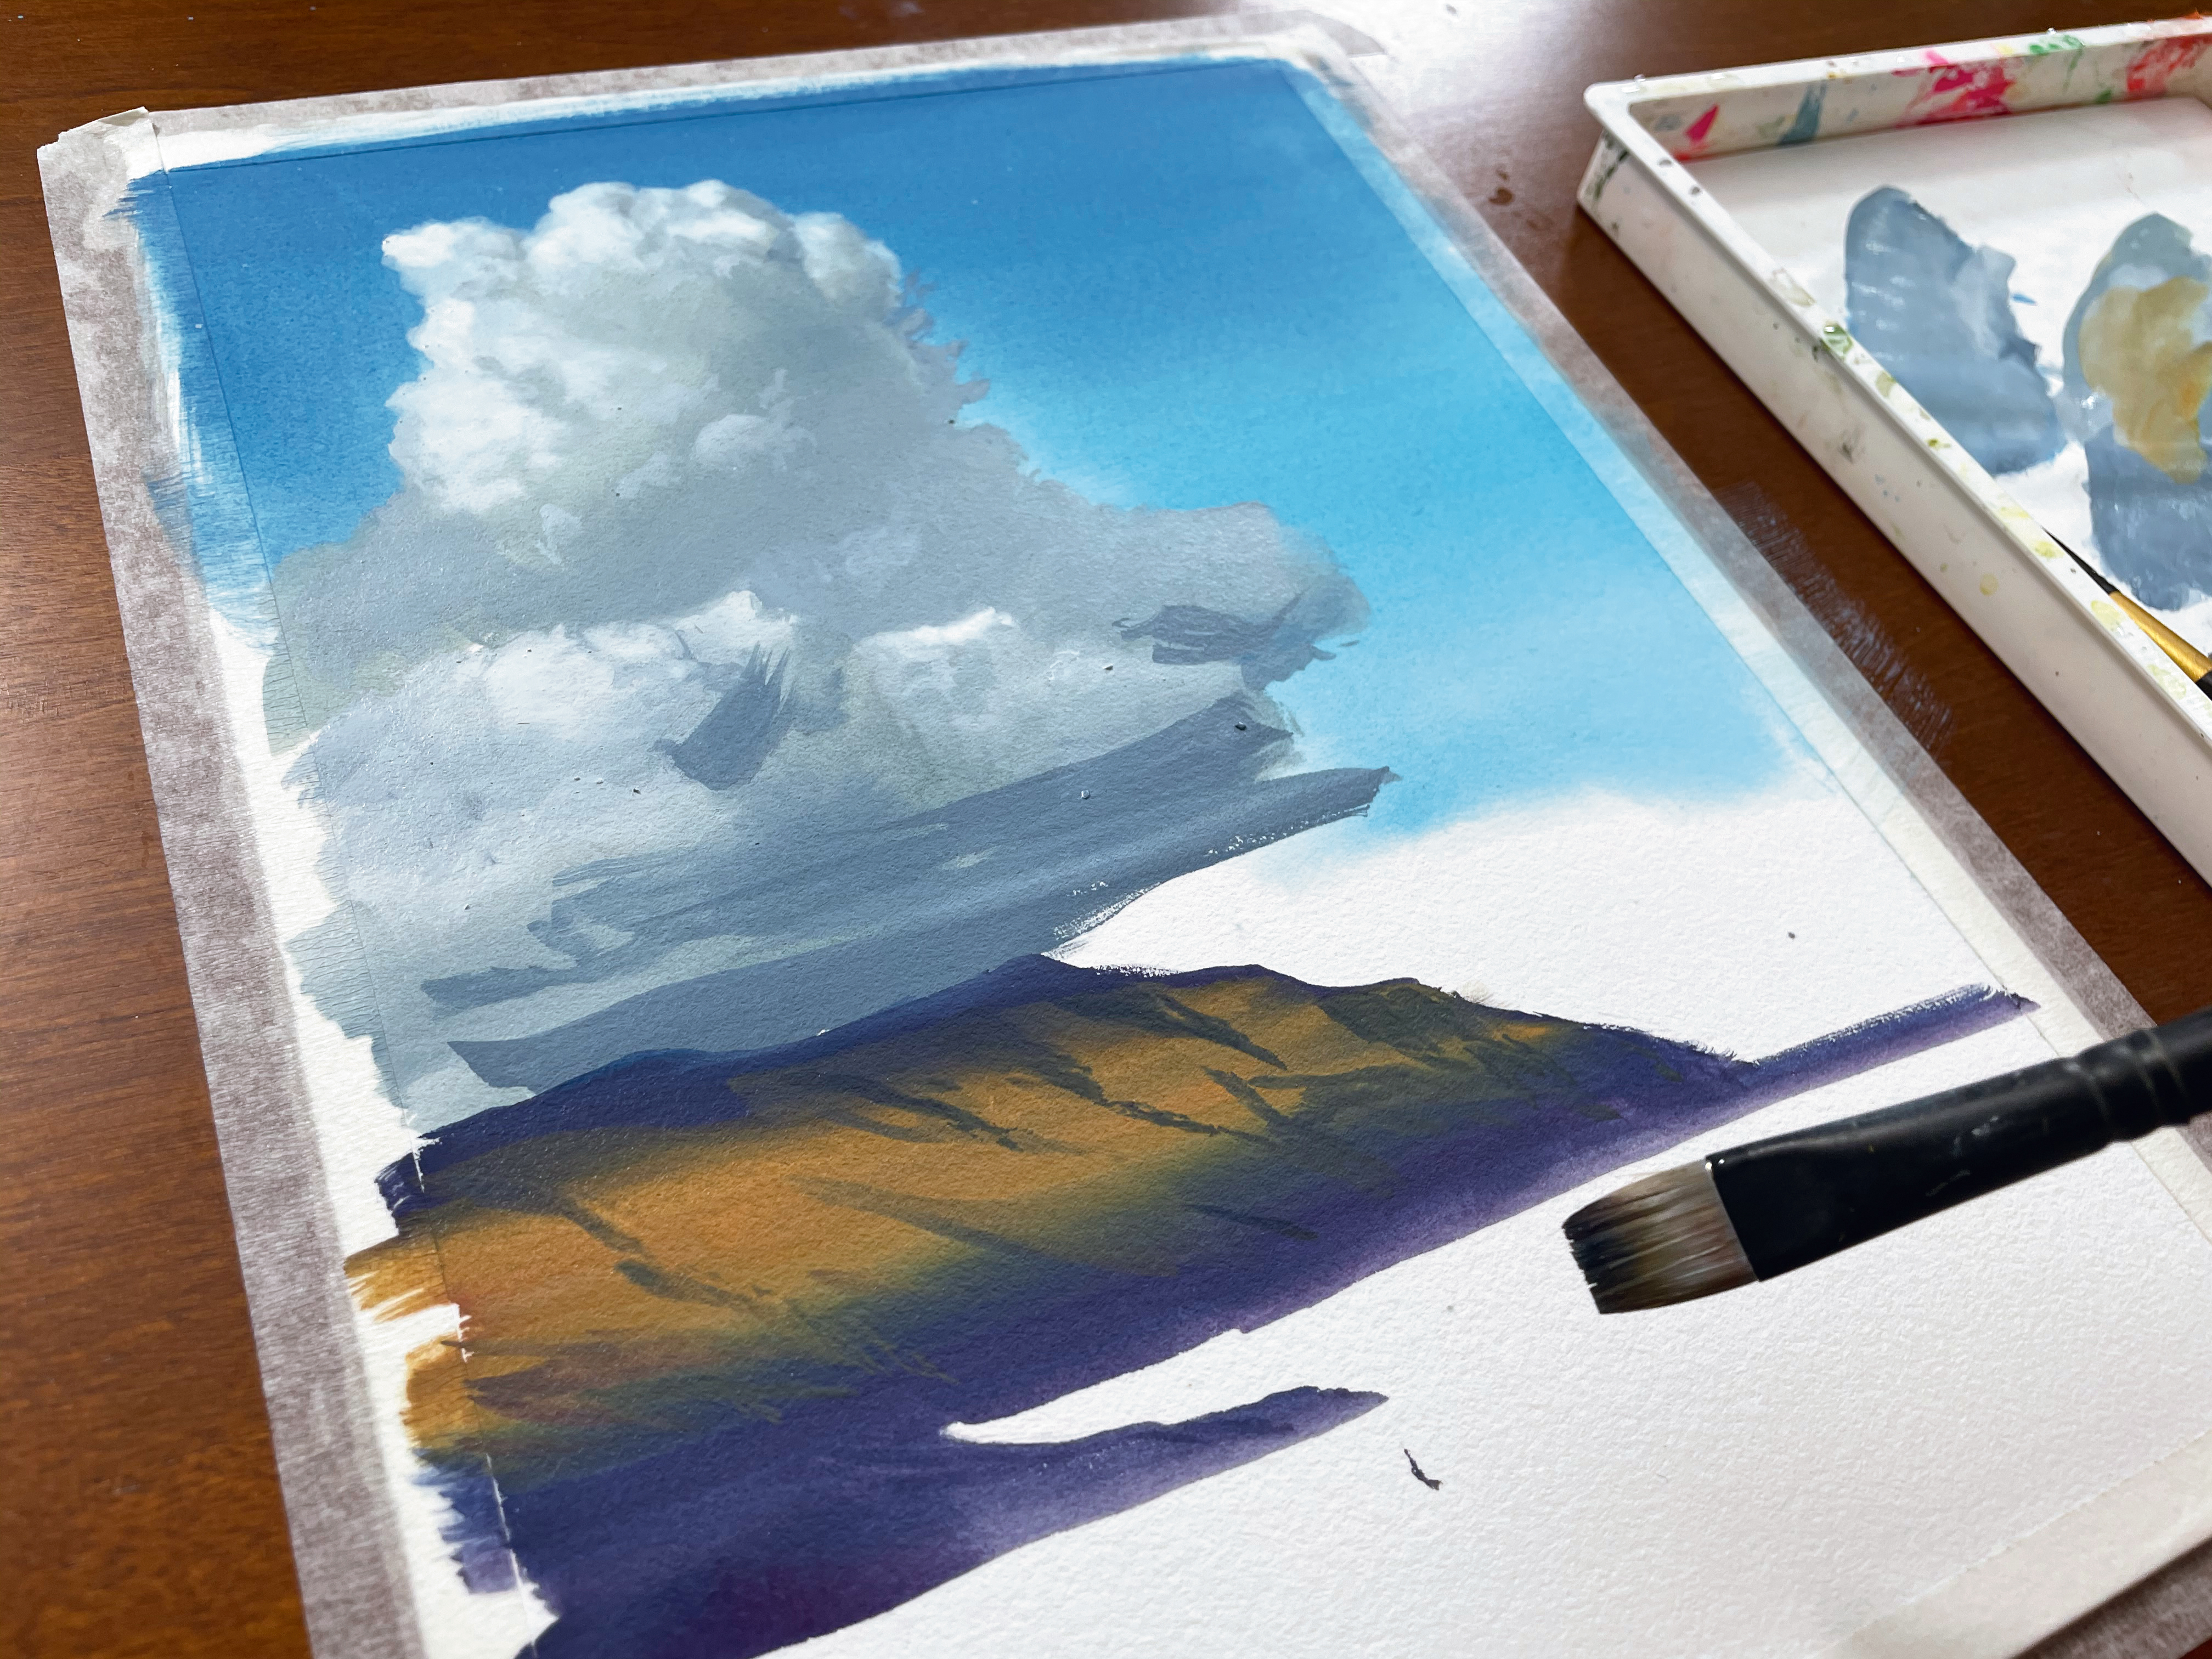
In the mountain gradient we have communicated the larger quality of the mountains form. Now we get to go in and detail the smaller forms. Use the shadow colour and drag it from the shadow into the light. Because the paint is still wet we’ll end up with edges that are moderately soft.
11. Paint the lake at the base of the mountain
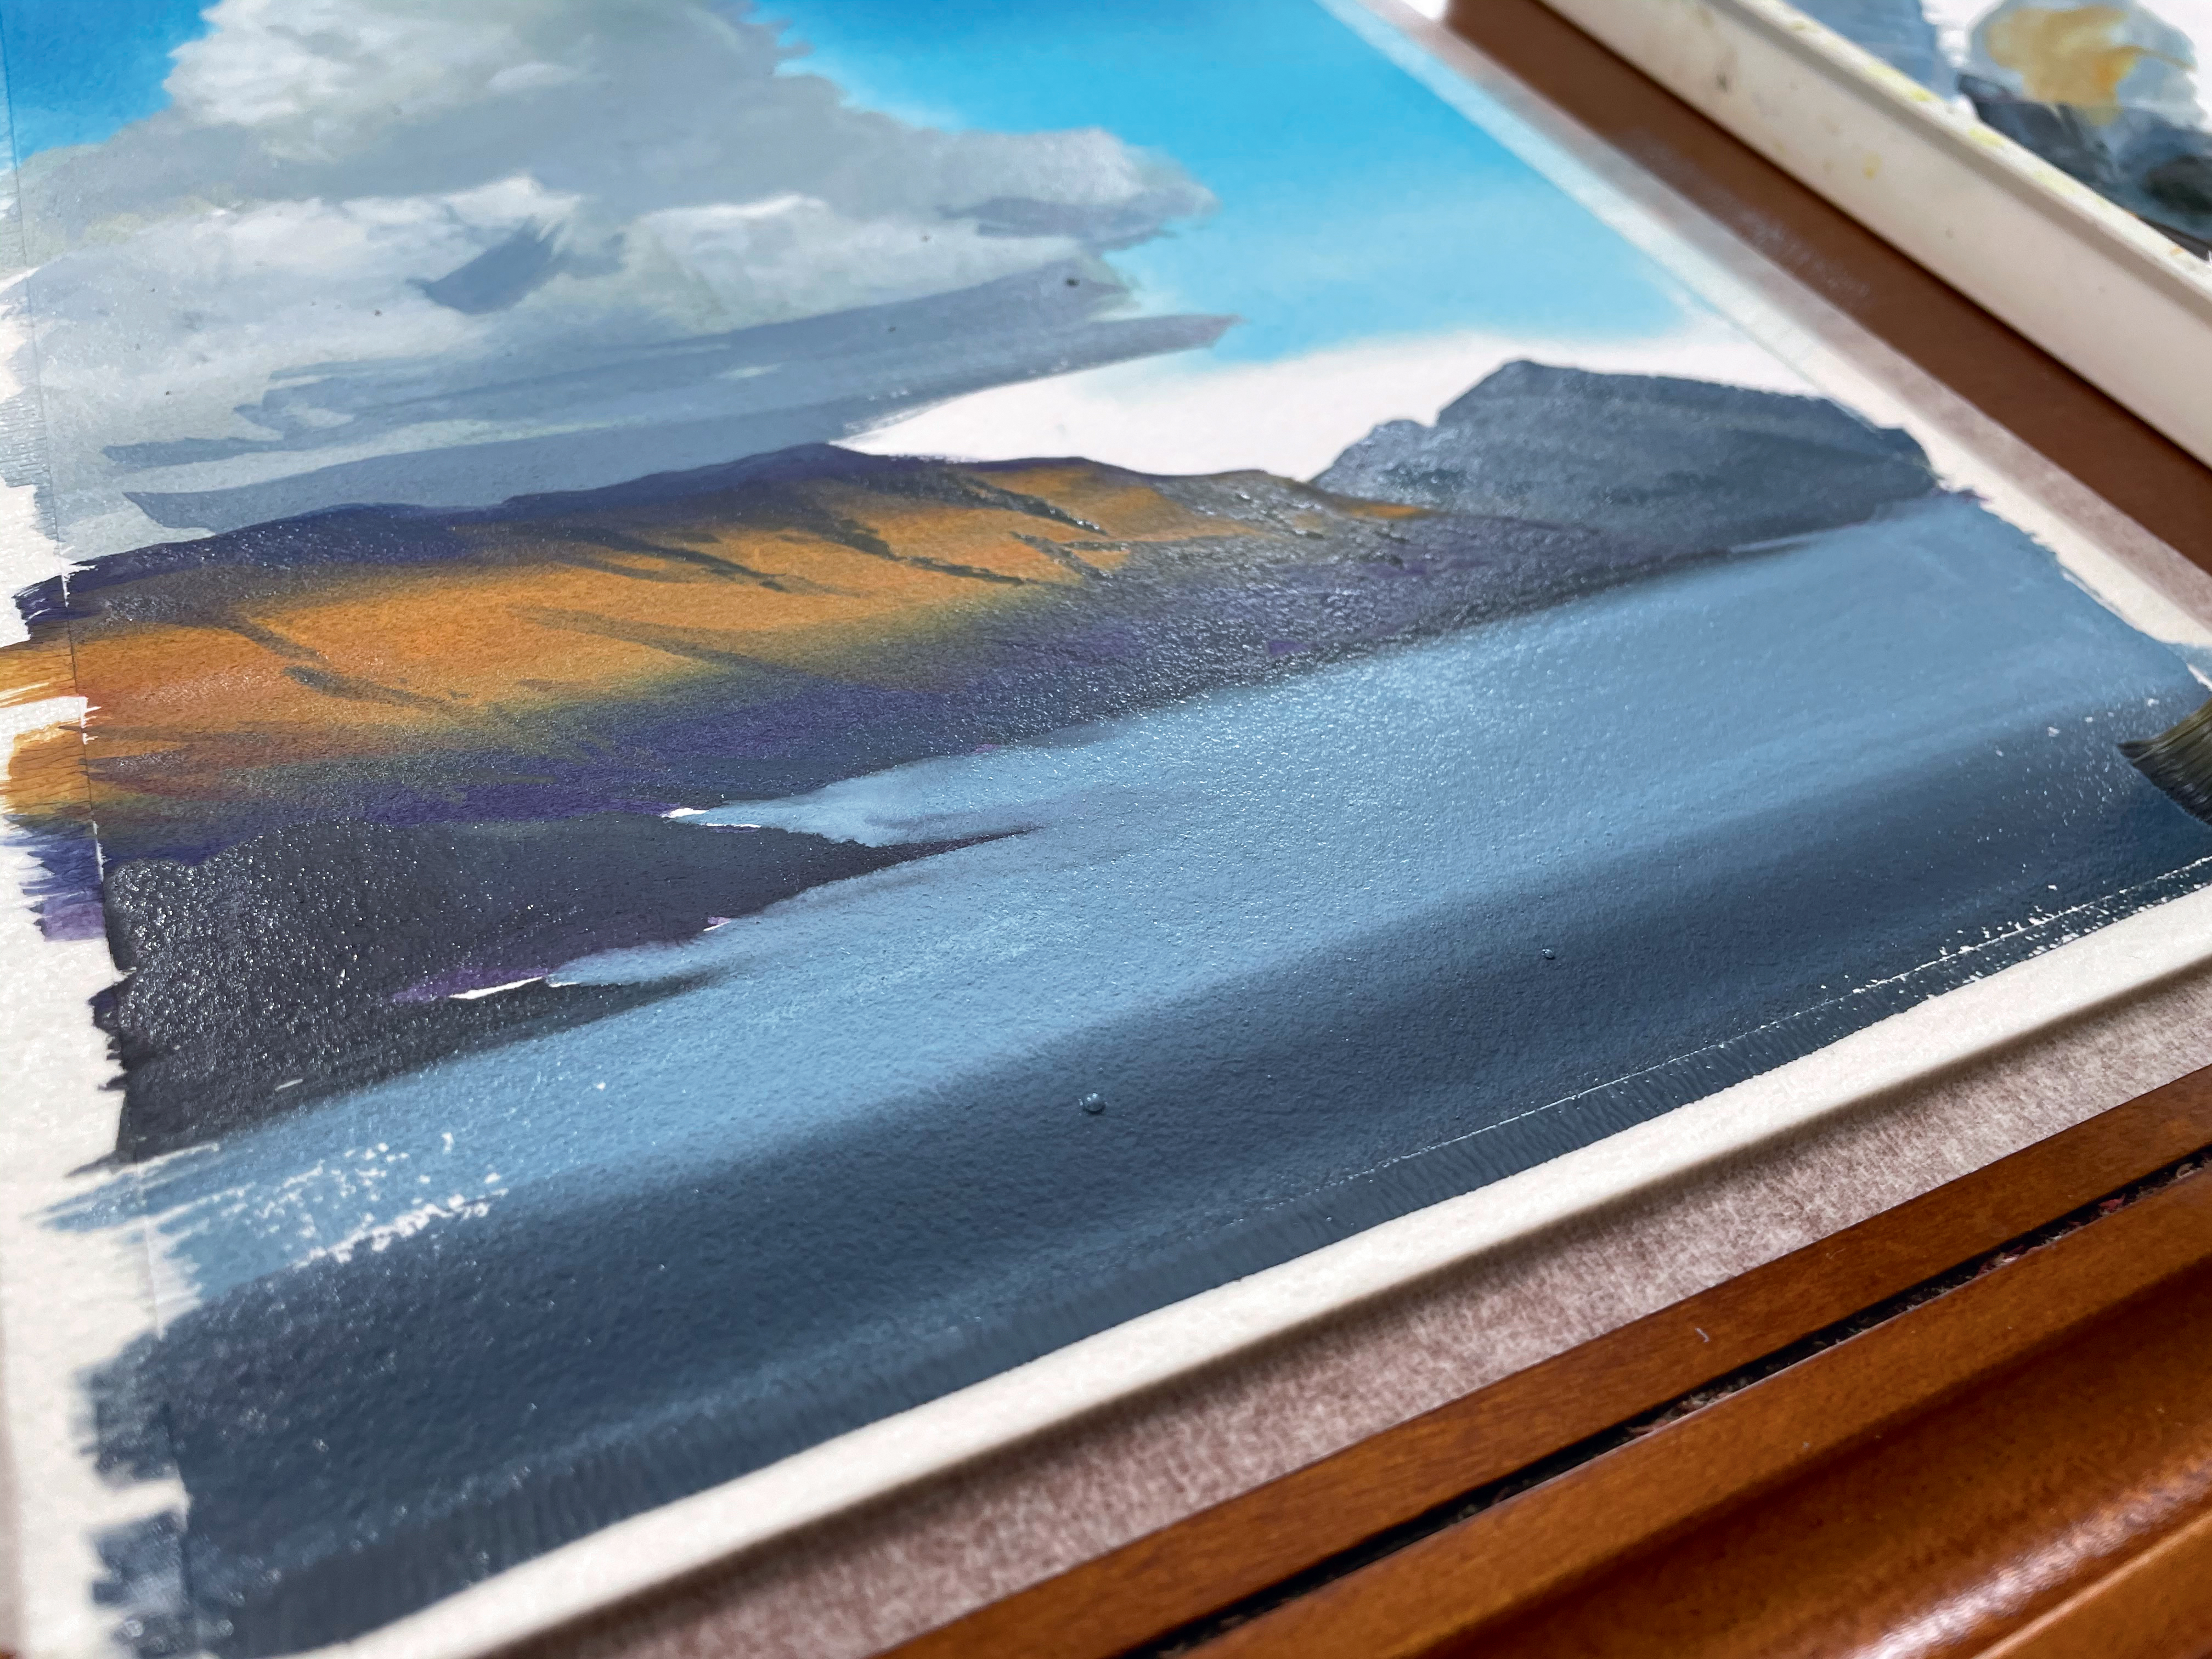
Now we are going to create the body of water. The major movement of the water is to paint a gradient lighter nearer to the mountain and darker as it gets closer to the bottom of the page.
12. Add fine details
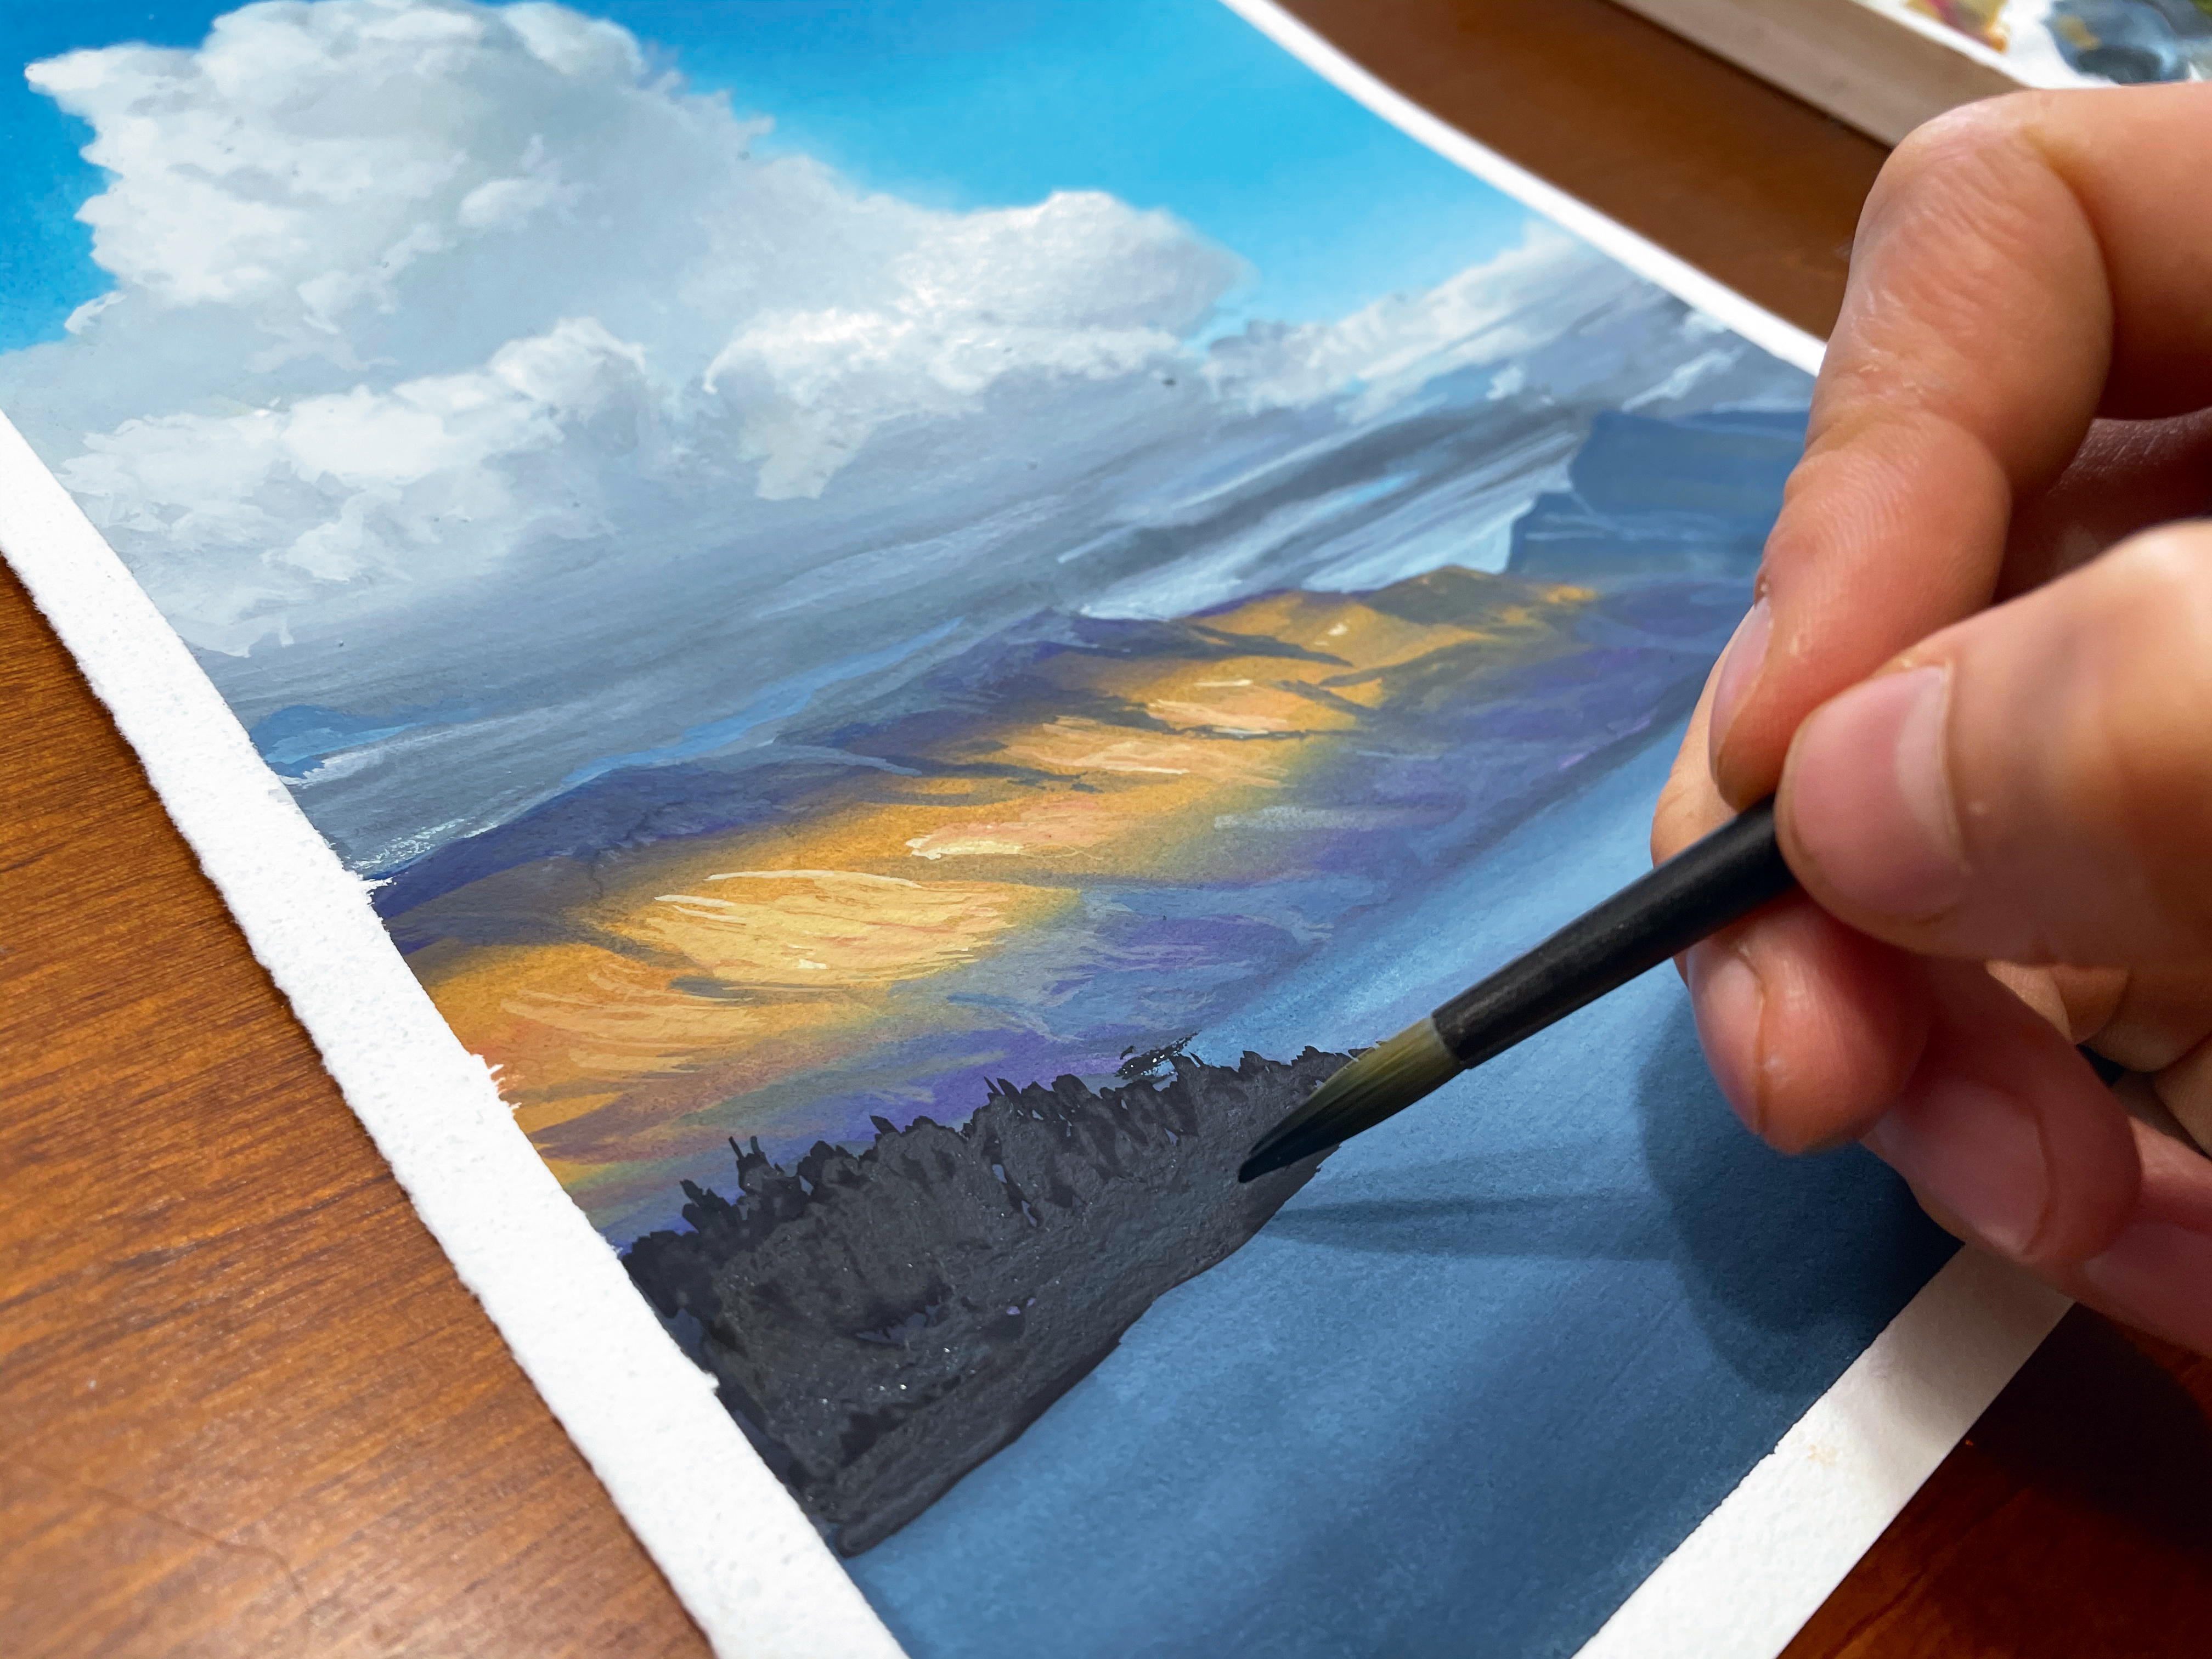
We want to create a little more dynamism to the painting, so let’s add in a triangle mountain edge coming into view. So far we’ve been careful with our values, not allowing the shadows to become too dark. Now we can use the room that has afforded us to silhouette the new mountain edge in an even darker colour.
13. Re-wet the paint
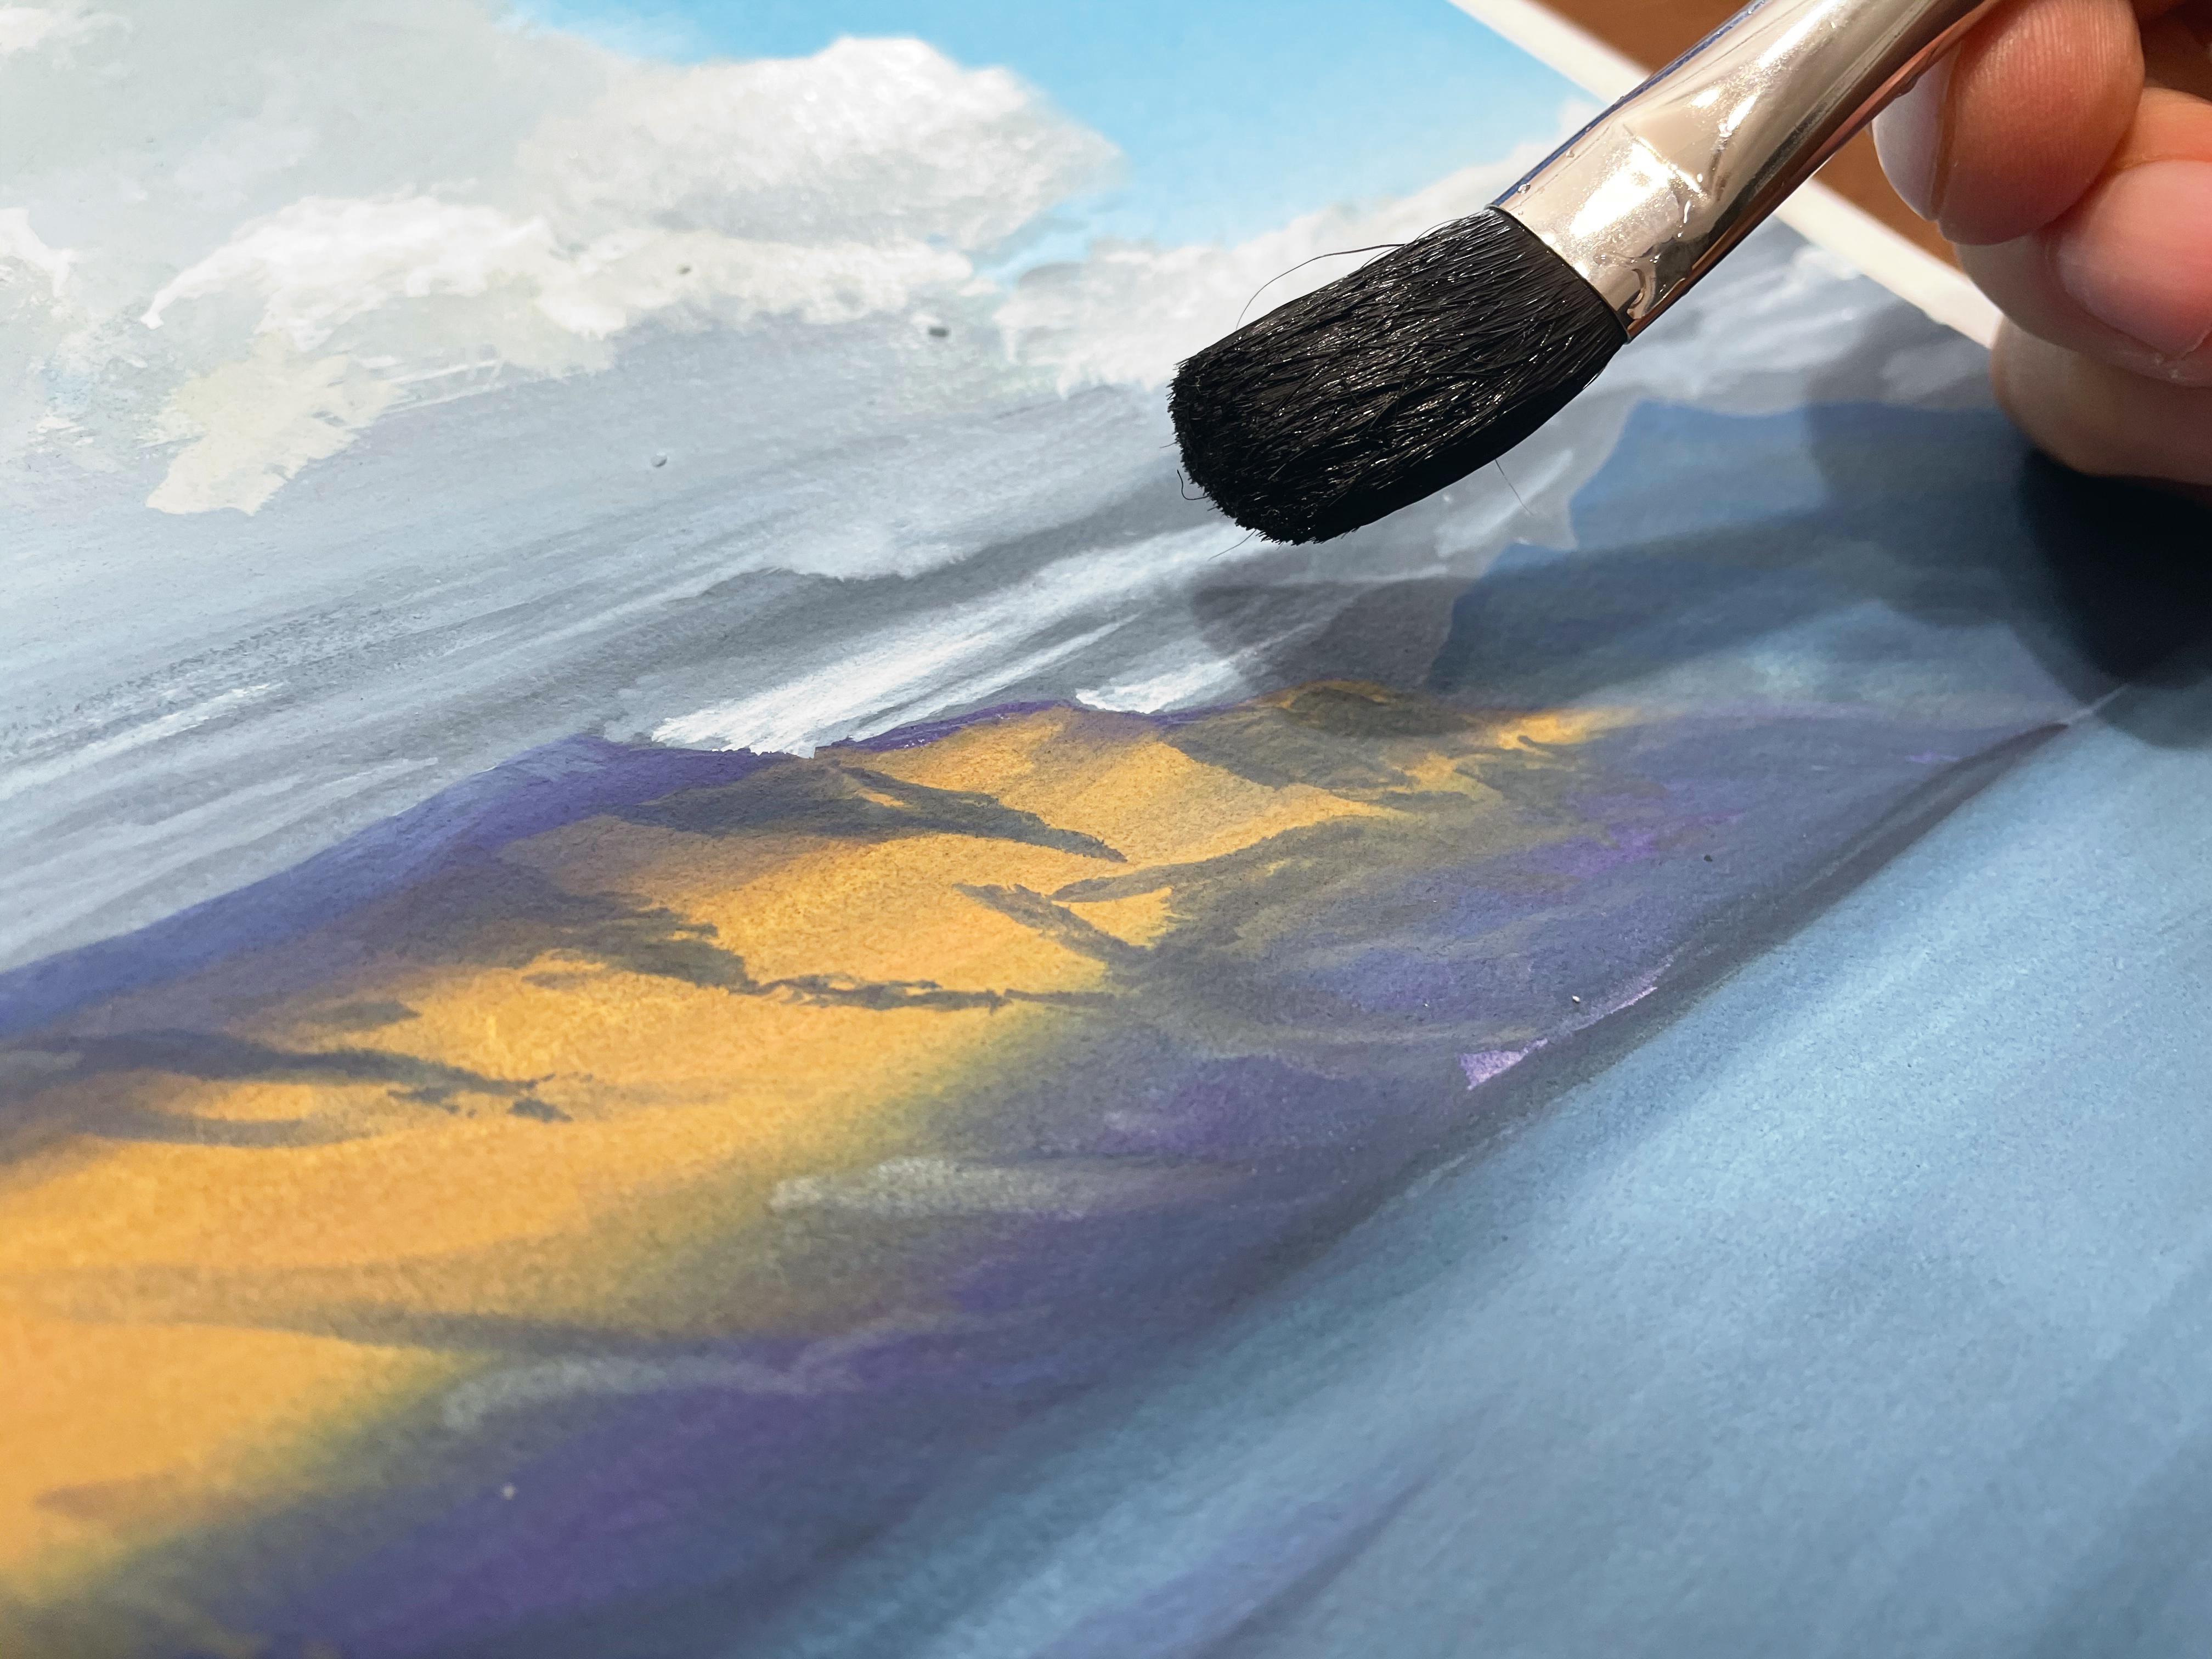
If you step away from your painting and need to come back to it with soft edges it’s often helpful to reactivate the paint on the page, to achieve a wet-in-wet effect again. To do this I recommend quick, even, large and light sweeps of your brush loaded with only a small amount of water.
14. Add the finishing touches
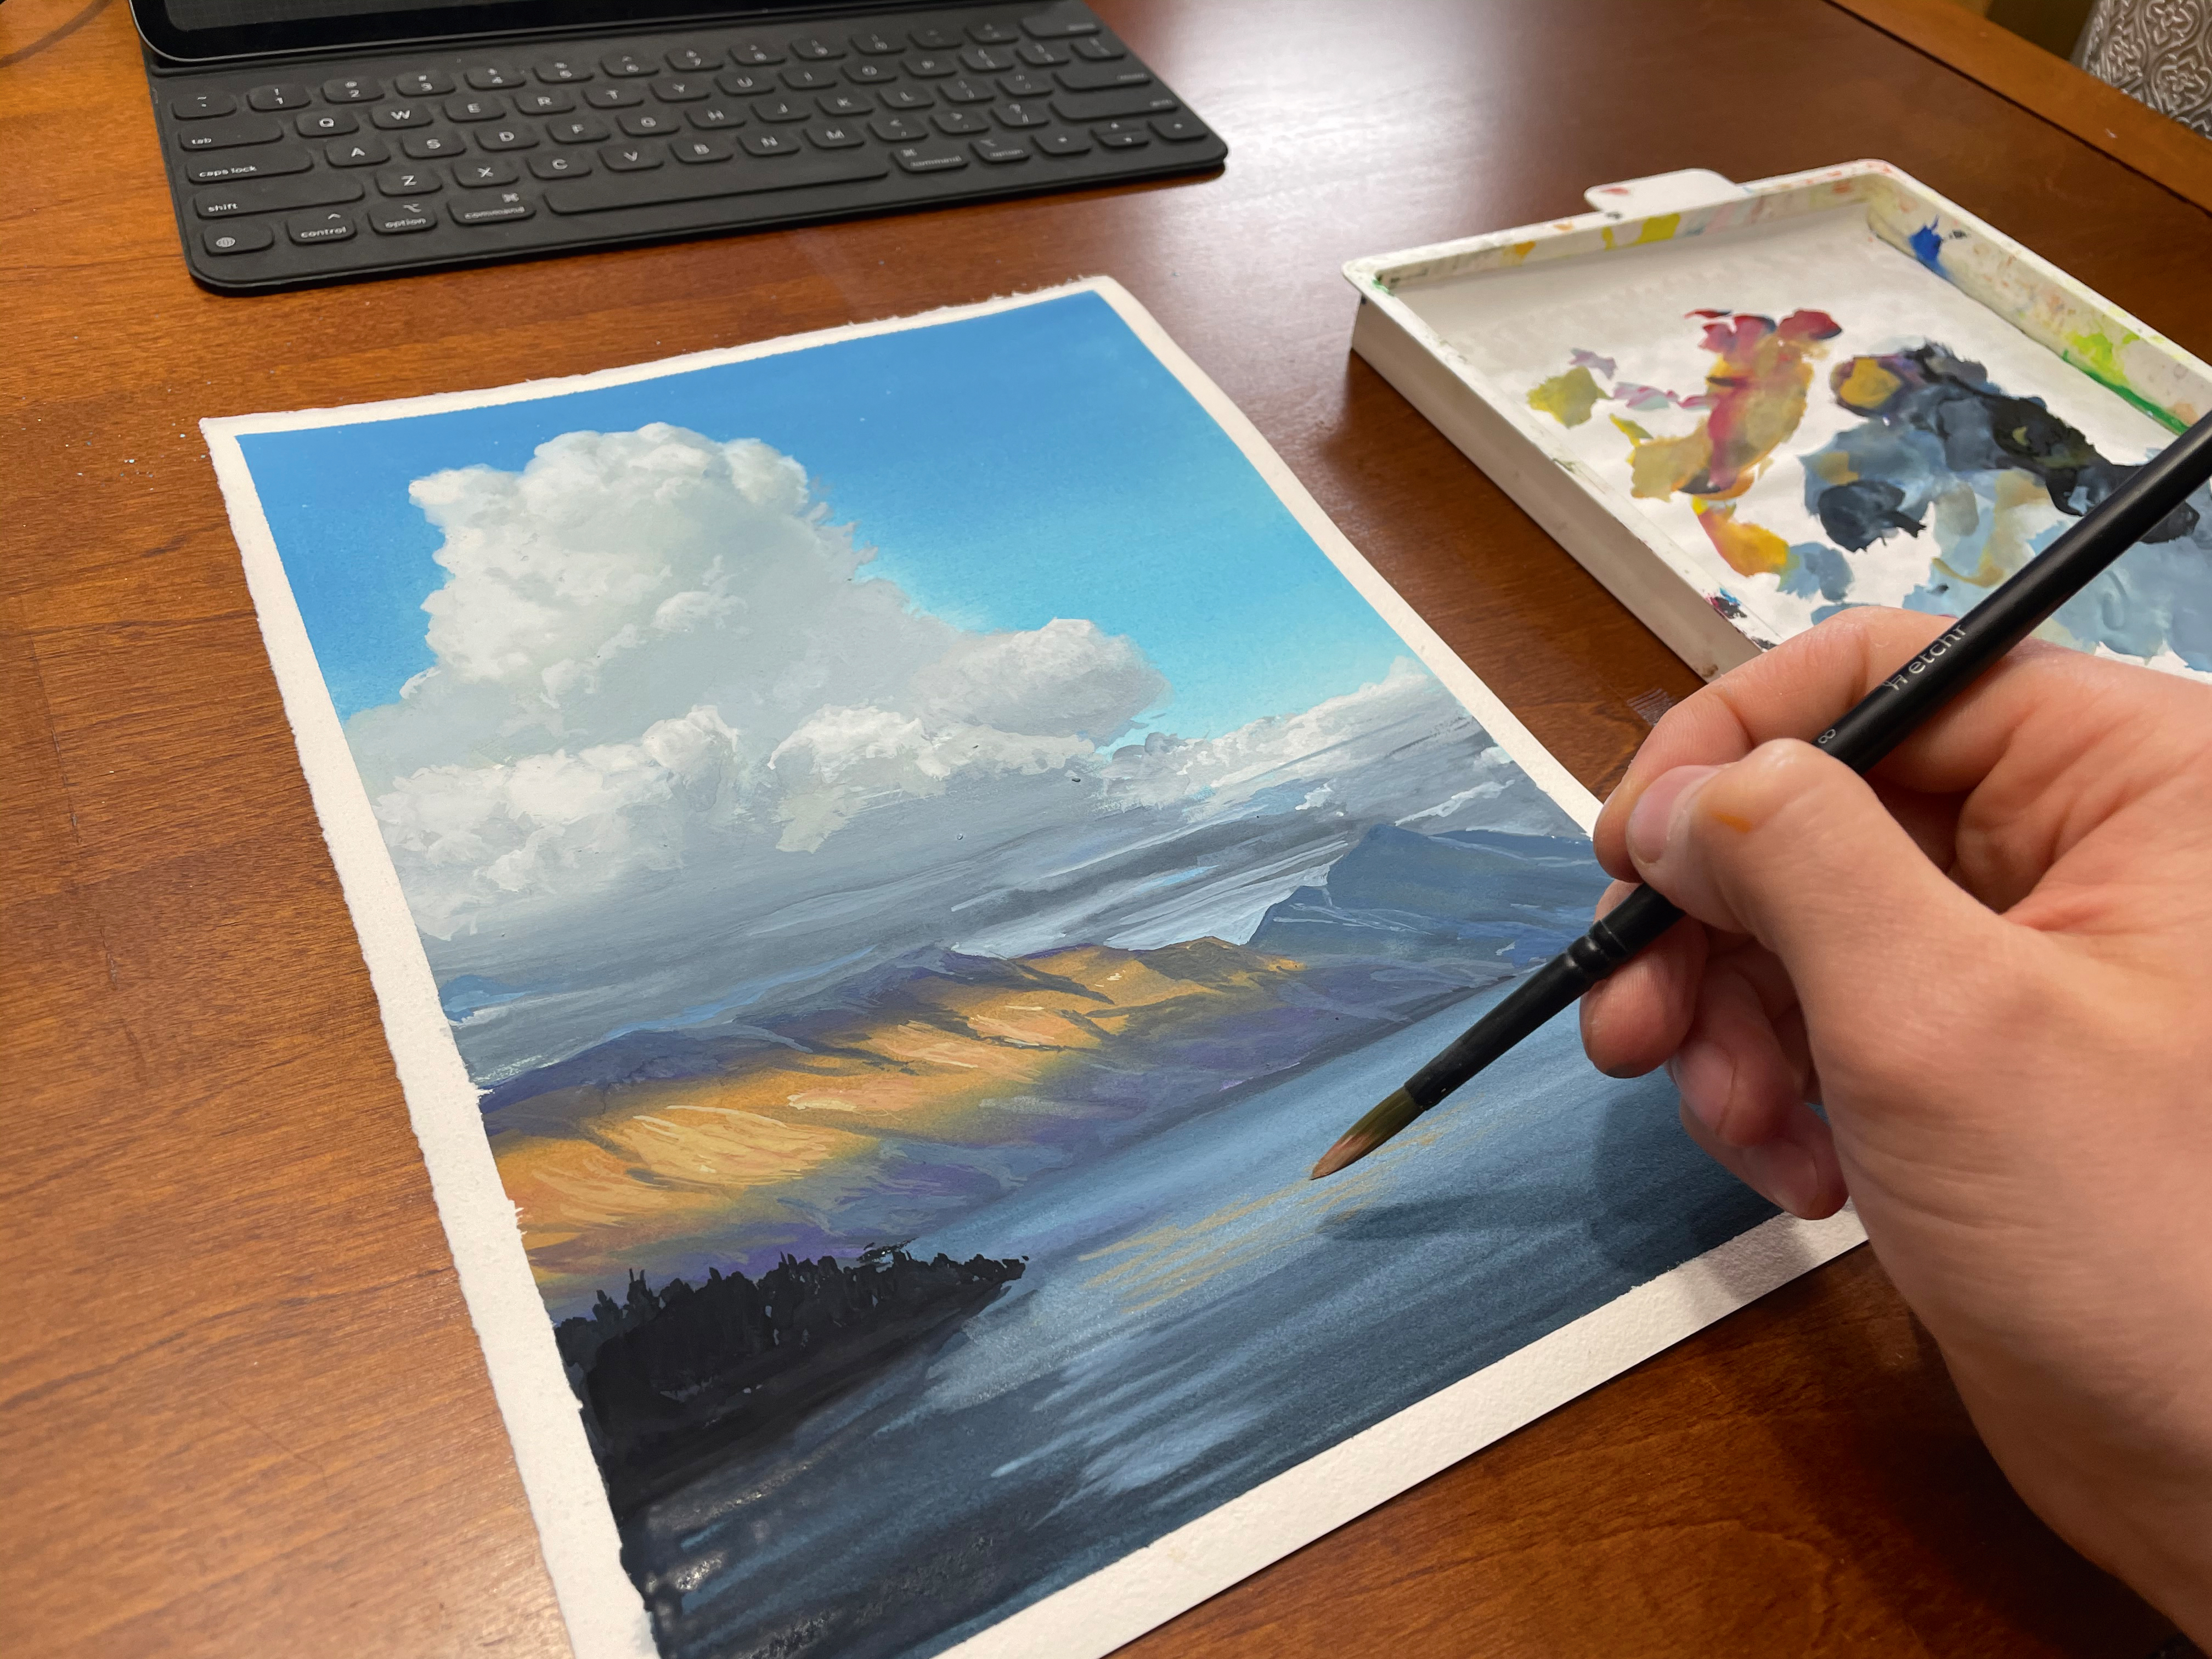
You can then come in with a brush loaded with normal water and work back into the painting. Let’s use this technique to bring in new details to our clouds, water and mountains. It can be difficult, but with practice you can apply extra wet-in-wet details and no one will be the wiser that you ever left your painting to dry.
15. Choose how to protect your artwork
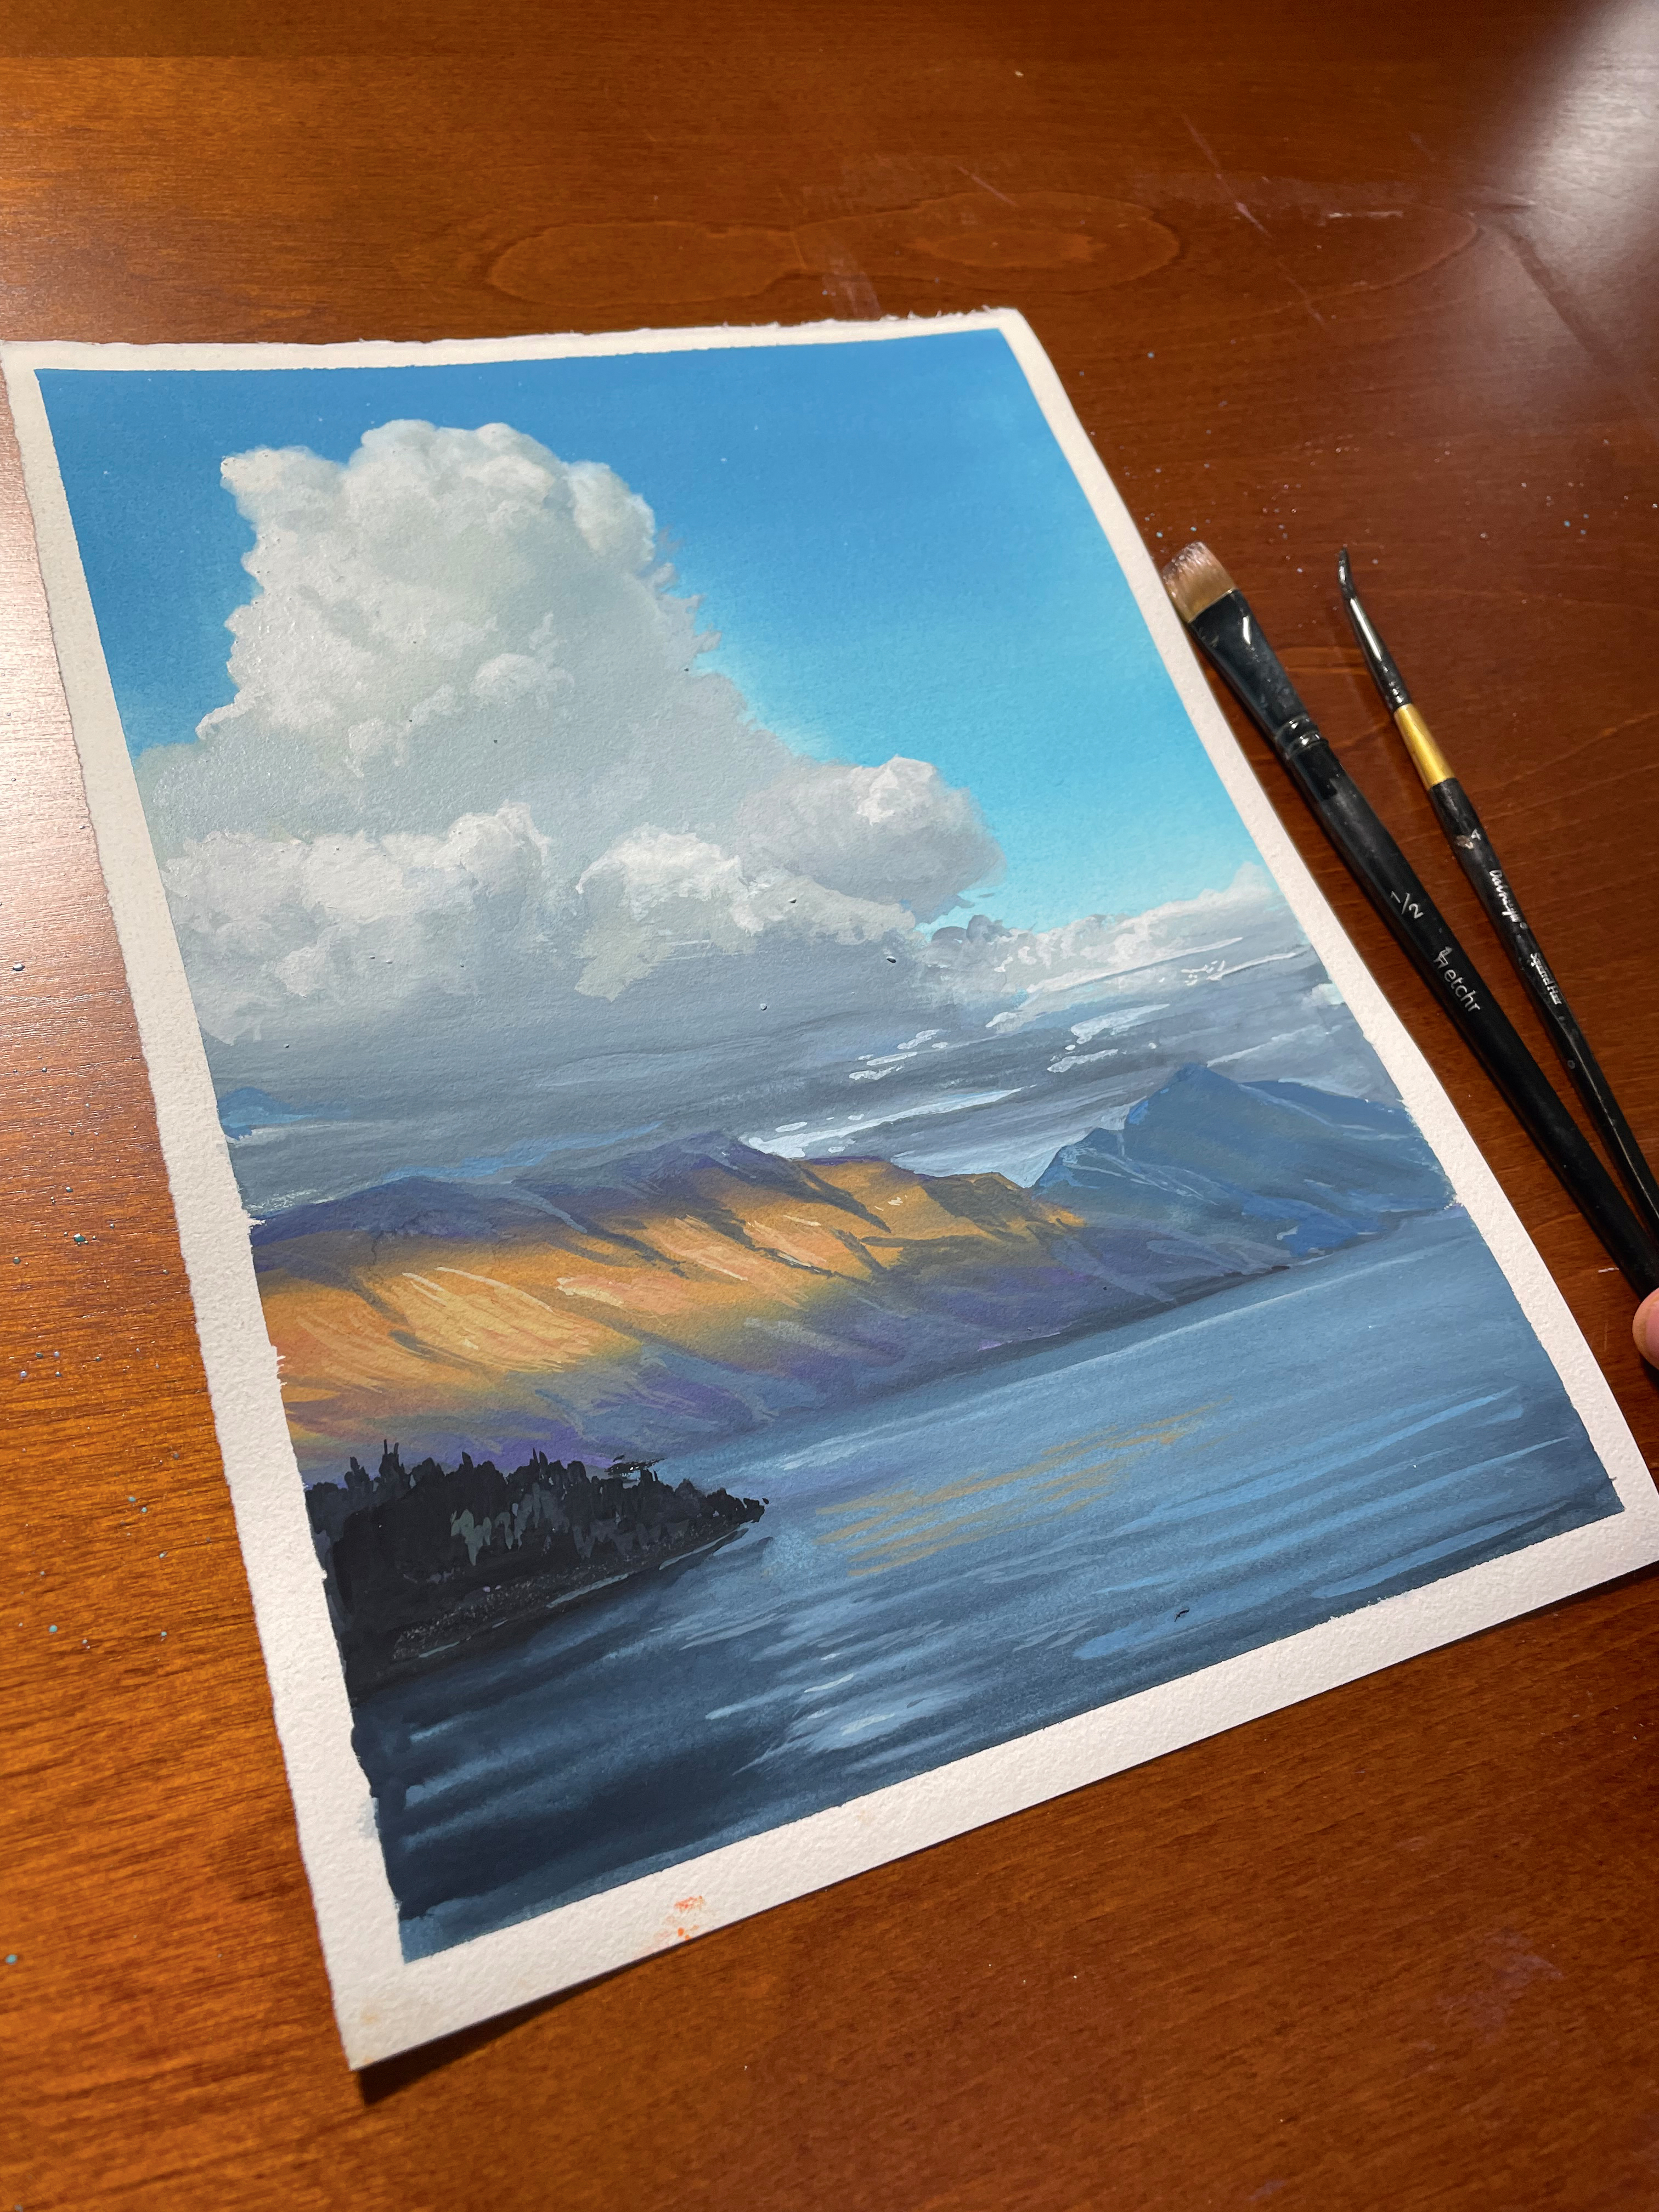
Now we can step back and enjoy our art! Gouache is traditionally framed behind glass so that it’s not accidentally reactivated by moisture, but you can frame it open, use a wax sealant, or apply a matte sealant to keep it safe.
This article was originally published in ImagineFX, the world's best-selling magazine for digital artists. Subscribe here.
Related articles:
- Discover the 7 essential painting techniques for artists
- Learn the best watercolour techniques
- Art advice: How to clean paint brushes
Get the Creative Bloq Newsletter
Daily design news, reviews, how-tos and more, as picked by the editors.

Thank you for reading 5 articles this month* Join now for unlimited access
Enjoy your first month for just £1 / $1 / €1
*Read 5 free articles per month without a subscription

Join now for unlimited access
Try first month for just £1 / $1 / €1
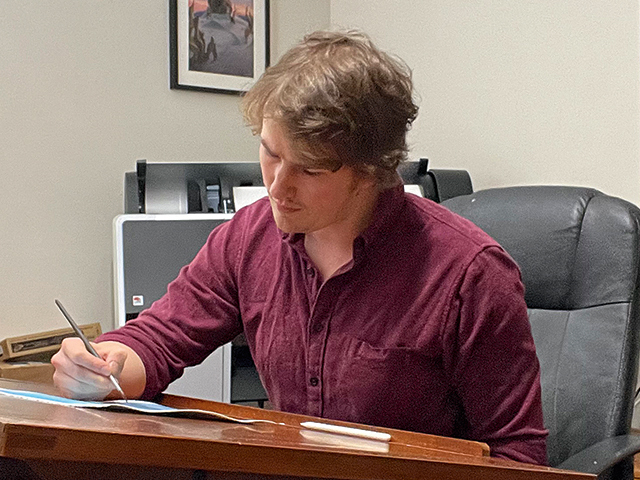
Justin Donaldson is an Australian artist who works and lives in the US. He creates lush landscapes in gouache, acrylic and oil and loves to teach art.
