Paint a furry pet portrait
Learn how to realistically recreate the fluffy fur of your pets in this fun workshop.
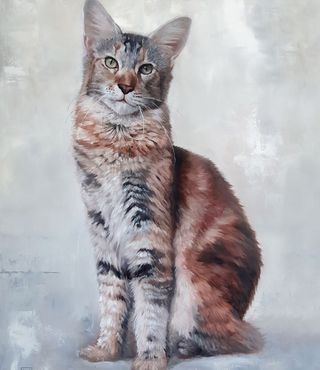
Painting pets and drawing animals can be a lot of fun. While it's great to see the artwork finished and ready to hang on a wall, the process itself brings a lot of satisfaction. And it's not just about copying a photo. An important part is also expressing yourself through your brushstrokes and artistic decisions. In other words, take the reference and make it your own, because that's what really makes a painting stand out! For more on this, check out our guide on how to paint fur.
I admire the grace and beauty of animals, and I love painting fur and seeing brushstrokes come to life and become something you could almost touch. And, although you can use different mediums to achieve that effect, I use oils because it's my favourite medium. In this workshop, I will show you my technique and offer tips on how to improve your painting. Some of the tips also work if you're painting a portrait of a person or even a landscape.
I will also tell you how to prepare your painting surface. Painting on board will allow you to convey the texture of your subject more effectively. However, painting on canvas works just as well.
01. Prepare the board
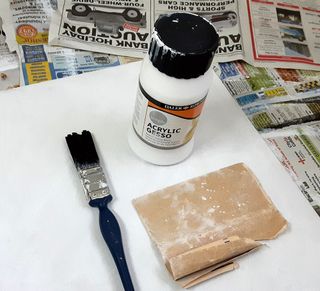
If you're using MDF, you'll need to sand the board first. You can then apply three to four thin layers of acrylic gesso to the surface. Let each layer dry and sand it, before applying the next layer. Try to keep the layers thin, as thick layers are harder to smooth out.
02. Apply a wash
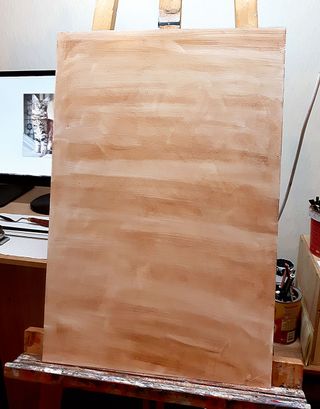
I create a wash using a mixture of burnt umber paint and thinner and apply it onto the board. White board can be very overpowering, so toning it with a wash will help you see the values better once you start to paint. I use burnt umber because it dries quickly.
03. First sketch
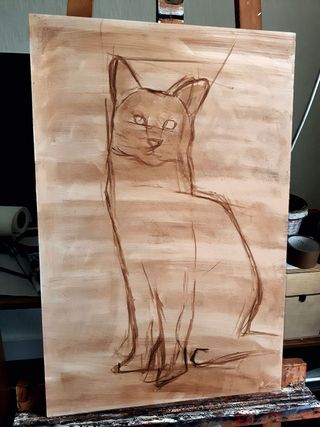
The more time you spend getting the anatomy and proportions correct at this early stage, the less correcting you will need to make later. Keep your reference photo to hand – or print it big – so you can compare it with the painting at all times.
04. Paint the background
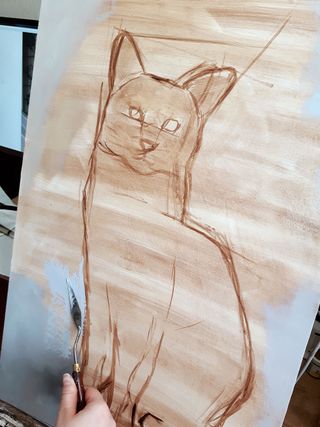
The background of a painting can strongly affect how colours work together, which is why it's the first thing I paint. It's also easier to focus on the subject when a large part of the painting is already established. I use a flat brush and palette knife to create the background.
Get the Creative Bloq Newsletter
Daily design news, reviews, how-tos and more, as picked by the editors.
05. Paint the eyes
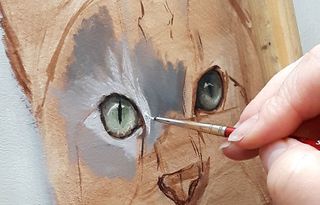
Eyes are very important when establishing likeness in a portrait. It's important to remember that highlights appear on the surface of the translucent cornea, while shadows are created underneath, on top of the iris. This is especially visible in cats' eyes as their pupils are very narrow.
06. Paint the face
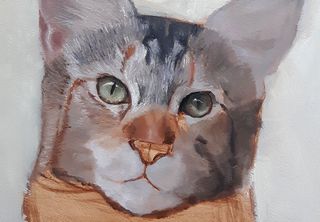
For the face, I first add a base colour to establish shapes and likeness. Once I have this, I start working on details (fur, ears, nose) using a fine 00 brush. I then gradually apply thicker layers of paint on top, working with two or more shades and trying not to mix them.
07. Then... paint fluffy fur!
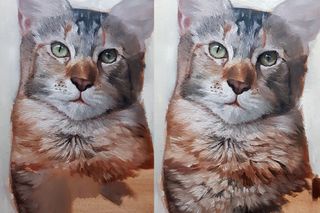
This cat is very fluffy and long and therefore fun to paint! Fur consists of different types of colours layered on top of each other. Each strand has a shadow and highlight defining its shape. I paint fur in sections, applying darker colour (shade) first, then lighter colour (highlight) on top.
08. Transition furry edges
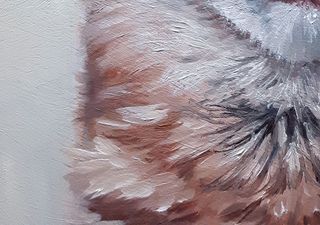
In most paintings, you will have sharp edges while others are left soft. The transition between the fur and background should be fairly soft but not blurred. Make sure soft strands of hair are still visible. Oils are very good for creating soft and hard transitions, so experiment a little.
09. Evaluate your painting
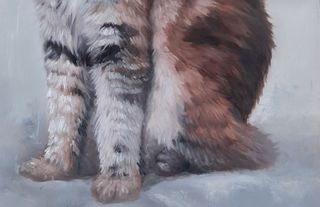
Sometimes I have to make last-minute decisions, even when the painting is almost finished. At first I liked the composition I had here, but when I finished the portrait, the tail going out of the shot started to bother me… I decided to paint over it, therefore hiding it behind the cat. In the end, I feel it really helped the final composition.
10. Add whiskers
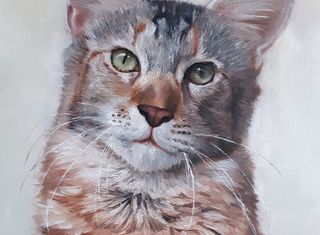
Whiskers should be painted after all the other layers have been rendered. You can wait until the painting dries before you apply them, but it's not absolutely necessary. I use the smallest 00 brush, applying paint slowly, but with a degree of confidence. As with the rest of the details, steadying my hand with a mahlstick is essential.
This article originally appeared in Paint & Draw issue 6; buy it here!
Related posts:

Thank you for reading 5 articles this month* Join now for unlimited access
Enjoy your first month for just £1 / $1 / €1
*Read 5 free articles per month without a subscription

Join now for unlimited access
Try first month for just £1 / $1 / €1
