How to set up and optimise your SmugMug storefront
Top ways for photographers to make use of SmugMug’s slick storefront.

A simple website builder that also acts as one of the best cloud storage options on the market, SmugMug is popular with both amateur and professional photographers as a way to showcase and sell original photographs and videos.
A family-run business launched in 2002, SmugMug’s exponential growth and longevity was demonstrated in 2018 when it purchased image hosting giant Flickr. You can read a full SmugMug review, or read on for our guide on how to set up and optimise your SmugMug storefront to increase visibility and sales. For more options, see our guide to the best website builders around.
How to set up and optimise your SmugMug storefront: Preparation
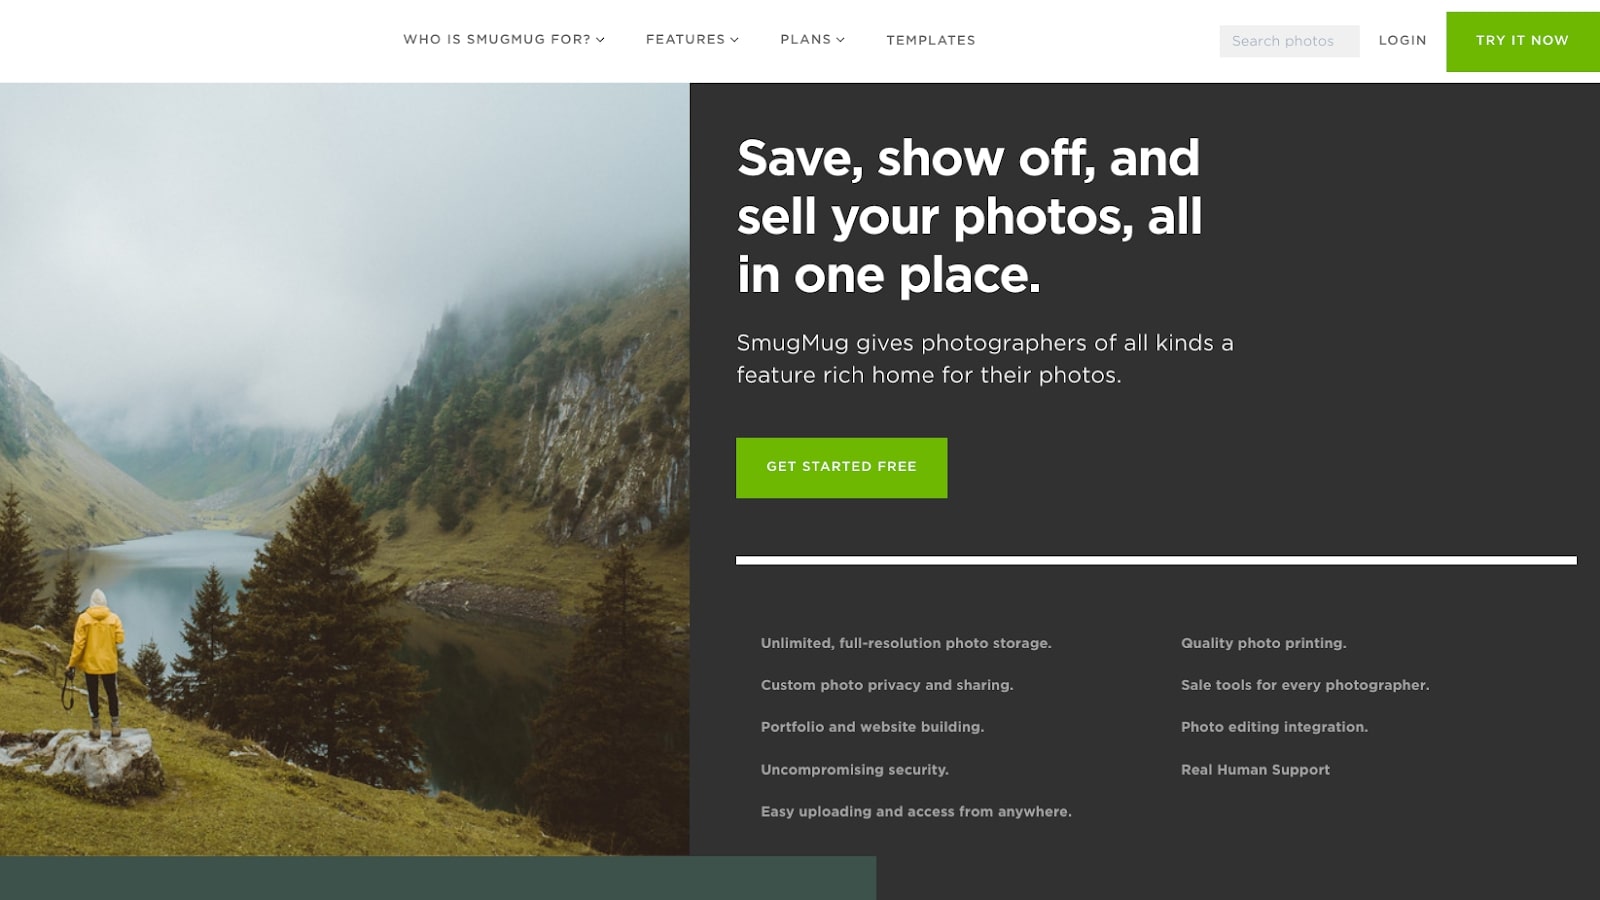
If you don’t already have a SmugMug account, the first thing to do is to sign up. Simply click the Get Started Free button and you’ll be invited to complete a form that will grant you access to the platform as part of a 14-day free trial.
When you first sign up, you’ll be asked if you intend to sell your photos online. So it’s a good idea at this point to have in mind how you intend to use SmugMug, whether simply as a cloud storage utility, an archive from which to share photos with family and friends, or a platform to sell your photos or videos. Your preferences are likely to affect what subscription tier you opt for and what website design choices you make.
It’s worth noting that SmugMug claims that, on average, photographers who sell through it earn more than the cost of their subscription, so it’s certainly worth considering putting your photos available for sale. Simply tick ‘not sure yet’ if it’s not something you’ve considered but may do in the future.
Before continuing, you might also want to download the SmugMug app for your smartphone and/or tablet device, particularly if this is an avenue from which you envisage selling. If you’re a business, it always helps to be able to see exactly what the customer is seeing, and these days many, if not most, people shop from a mobile device.
01. Choose your storefront design
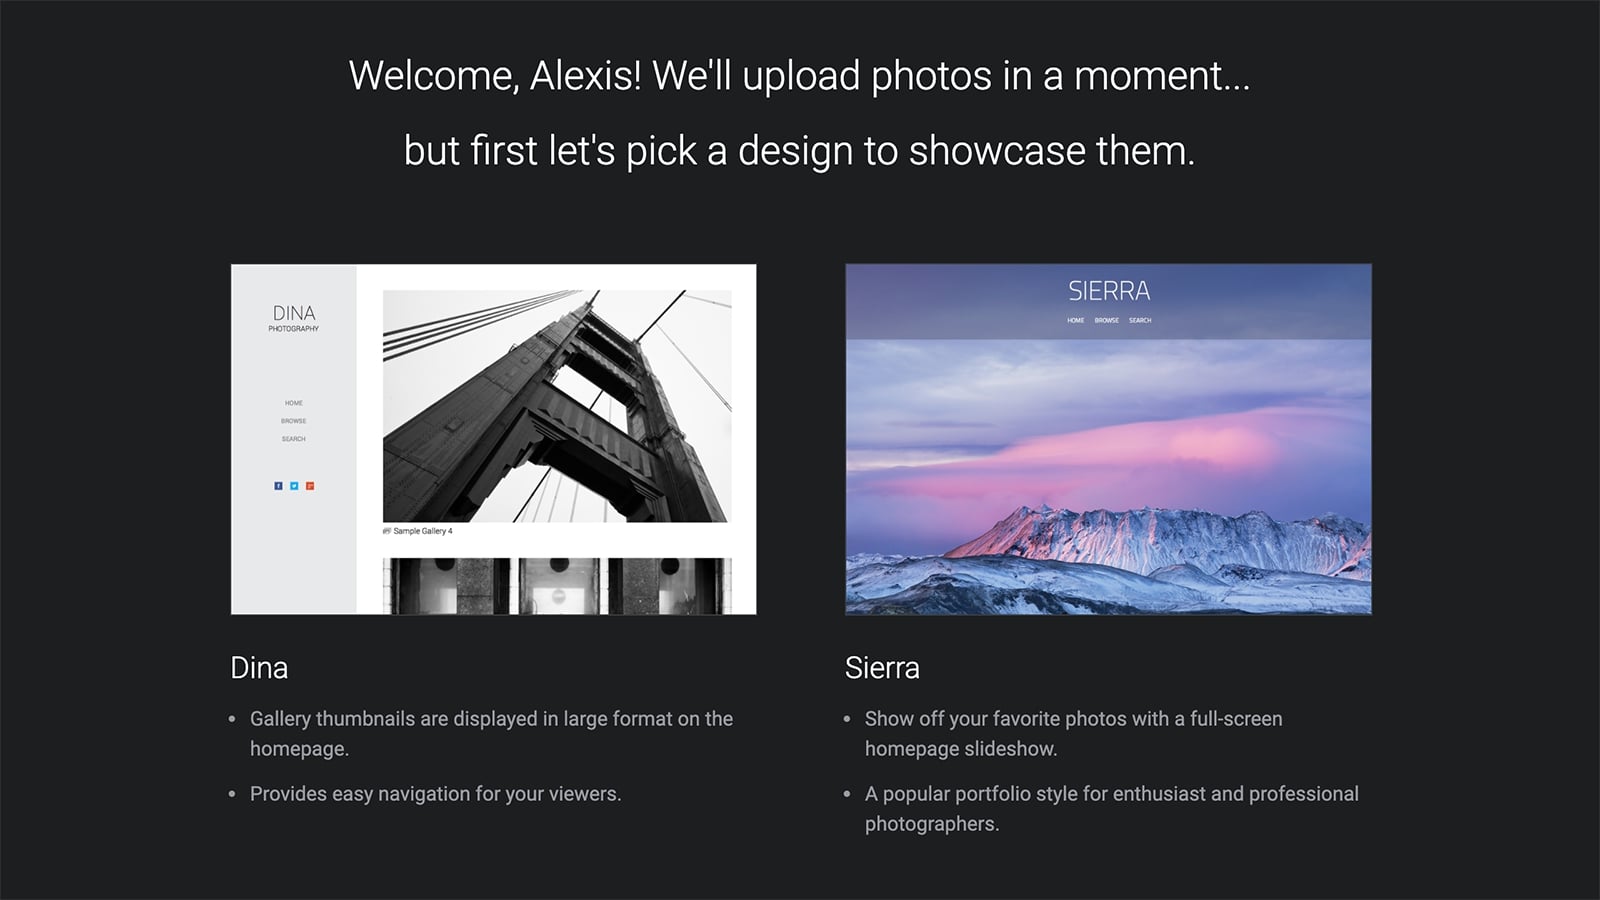
Before you get to upload your photos and videos and see how they look, your first decision is to choose from the selection of design templates for your storefront. For example, Sierra offers an expansive full-screen slideshow that allows your photos to shine in full screen.
Get the Creative Bloq Newsletter
Daily design news, reviews, how-tos and more, as picked by the editors.
Then there’s the stripped back and elegant style offered with the Dina template, templates like Turbo and Cosmo with navigation bars on the left-hand side, and an emphasis on archiving with Classic, which has a Flickr-style design placing folders at the forefront.
02. Upload your photos and videos
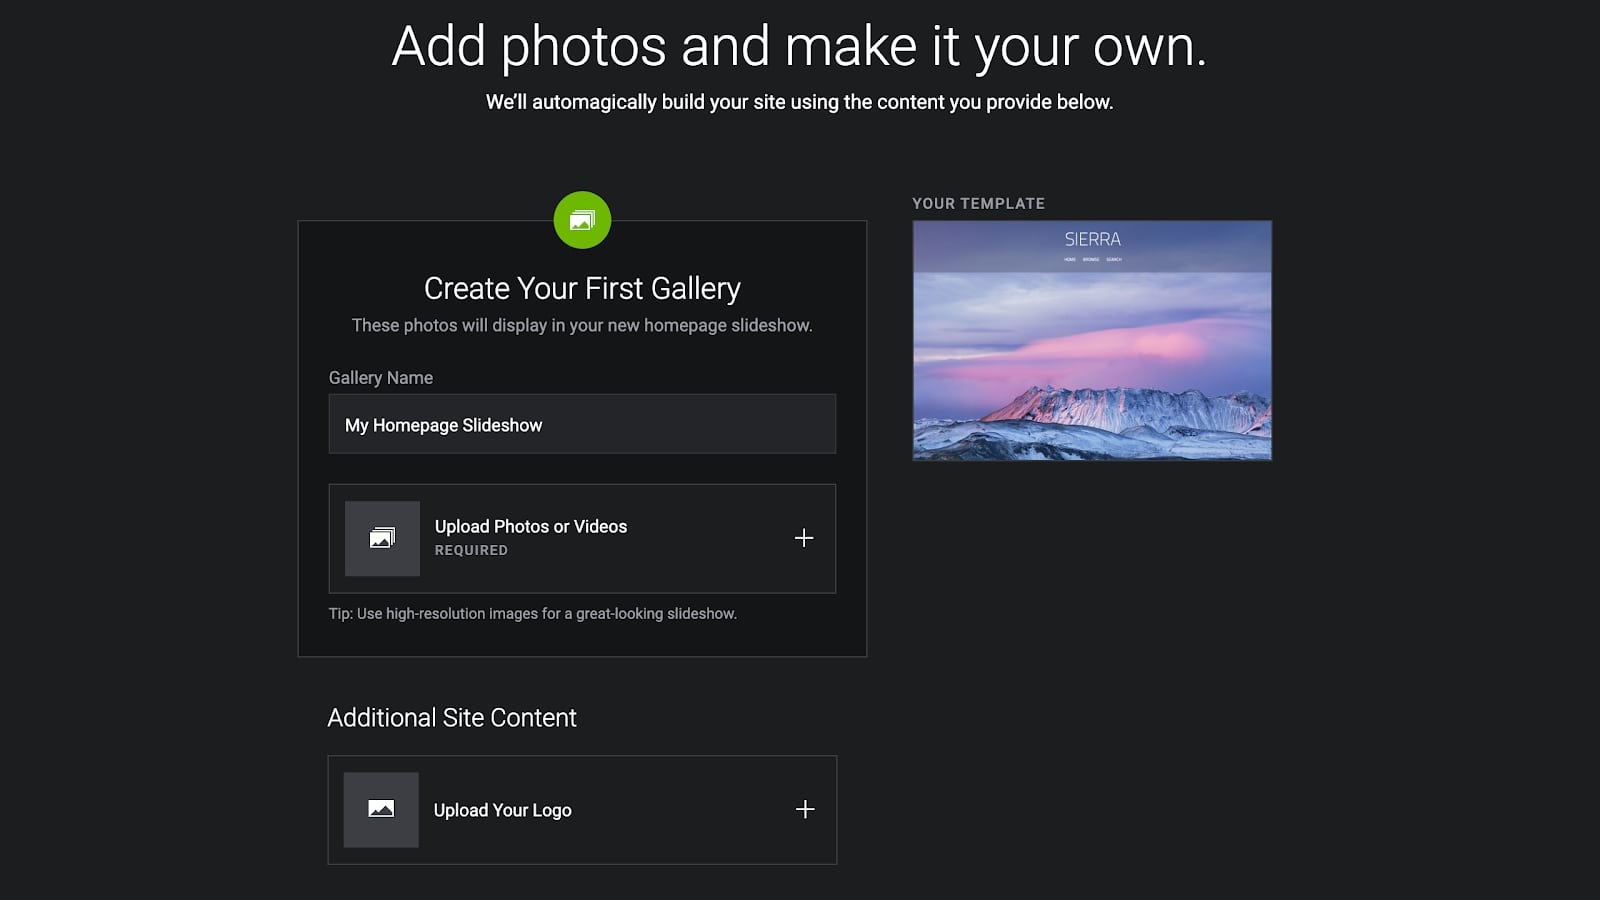
Once you’ve chosen the initial look and feel of your storefront, it’s time to begin uploading your premium content. Begin by creating your first gallery, and select multiple images to get started. Be descriptive with your gallery name so that visitors know what to expect.
To inject more personality into your site, it’s key that you add as much information as you can, particularly if you’re aiming to sell your imagery. That includes a site logo and your display name. You can also sync social media accounts to your SmugMug storefront, which is recommended if you’re aiming to promote your work to a larger audience.
03. Tweak your design and add content
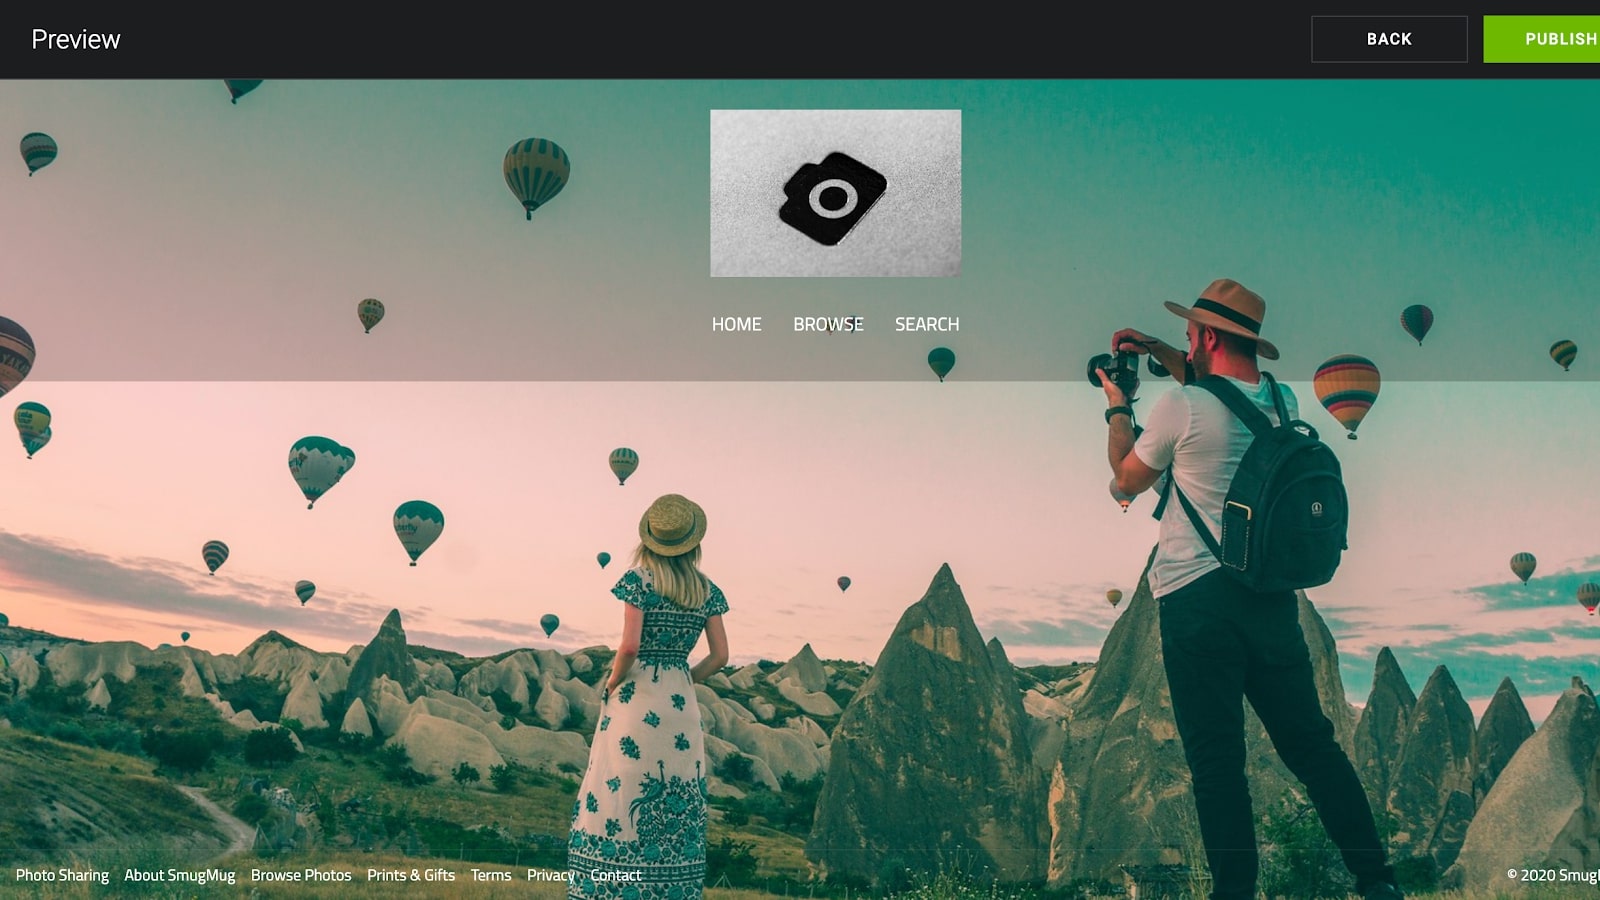
Once you’ve chosen your design and uploaded your first gallery, you’ll be shown a preview of how your storefront currently looks. Depending on which design you’ve chosen (the above example is the Sierra template) you should see your uploaded images on display, along with your chosen logo.
To enact more design changes, click the Customize button. Here, you’ll be given the opportunity to edit a range of options relating to navigation, menu, social buttons, background content, slideshow transitions, and preferred layout size. If you’re unhappy with your chosen theme or logo, you can also change or amend either at this stage.
04. Add personal branding touches
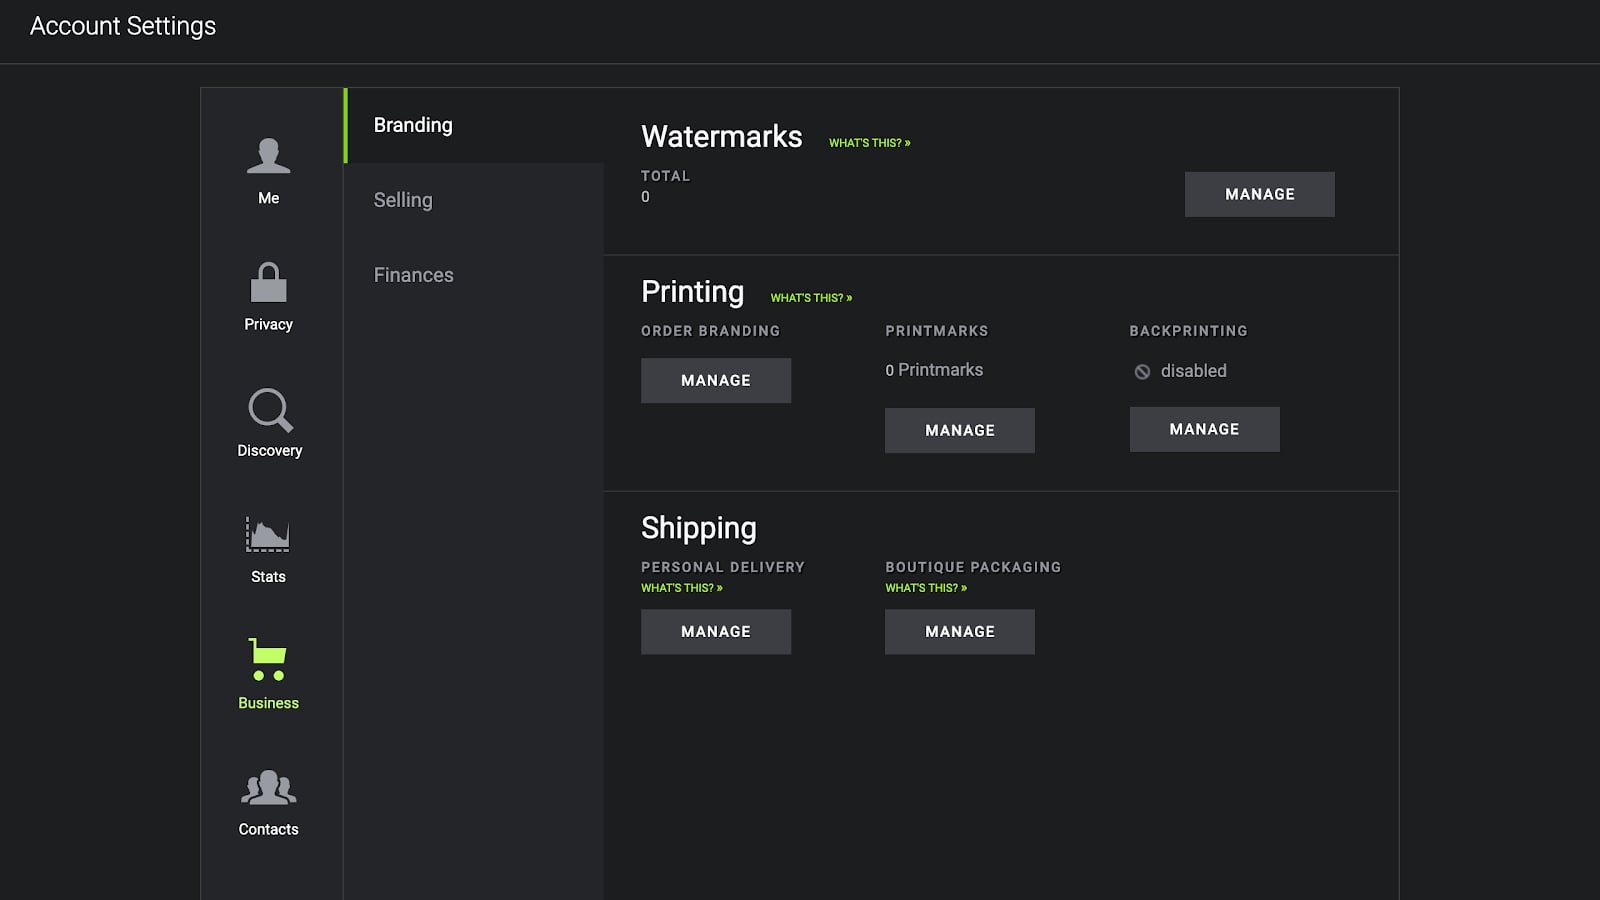
Once you’re happy with the design of your site, photographers looking to sell through the inbuilt SmugMug commerce platform will need to click on Selling Tools, then look for the Business tab.
Here you'll discover a range of things to consider in order to set up the shopping cart and sales process. From a security and copyright perspective, you can choose to add watermarks to all images displayed on your site, or implement a right-click pop-up warning to prevent visitors from saving your image without permission.
In terms of fulfillment, you can include branded thank you prints with every physical photo order, opt for boutique packaging, set price lists, create discount coupons, or even advertise events.
05. Keep an eye on analytics
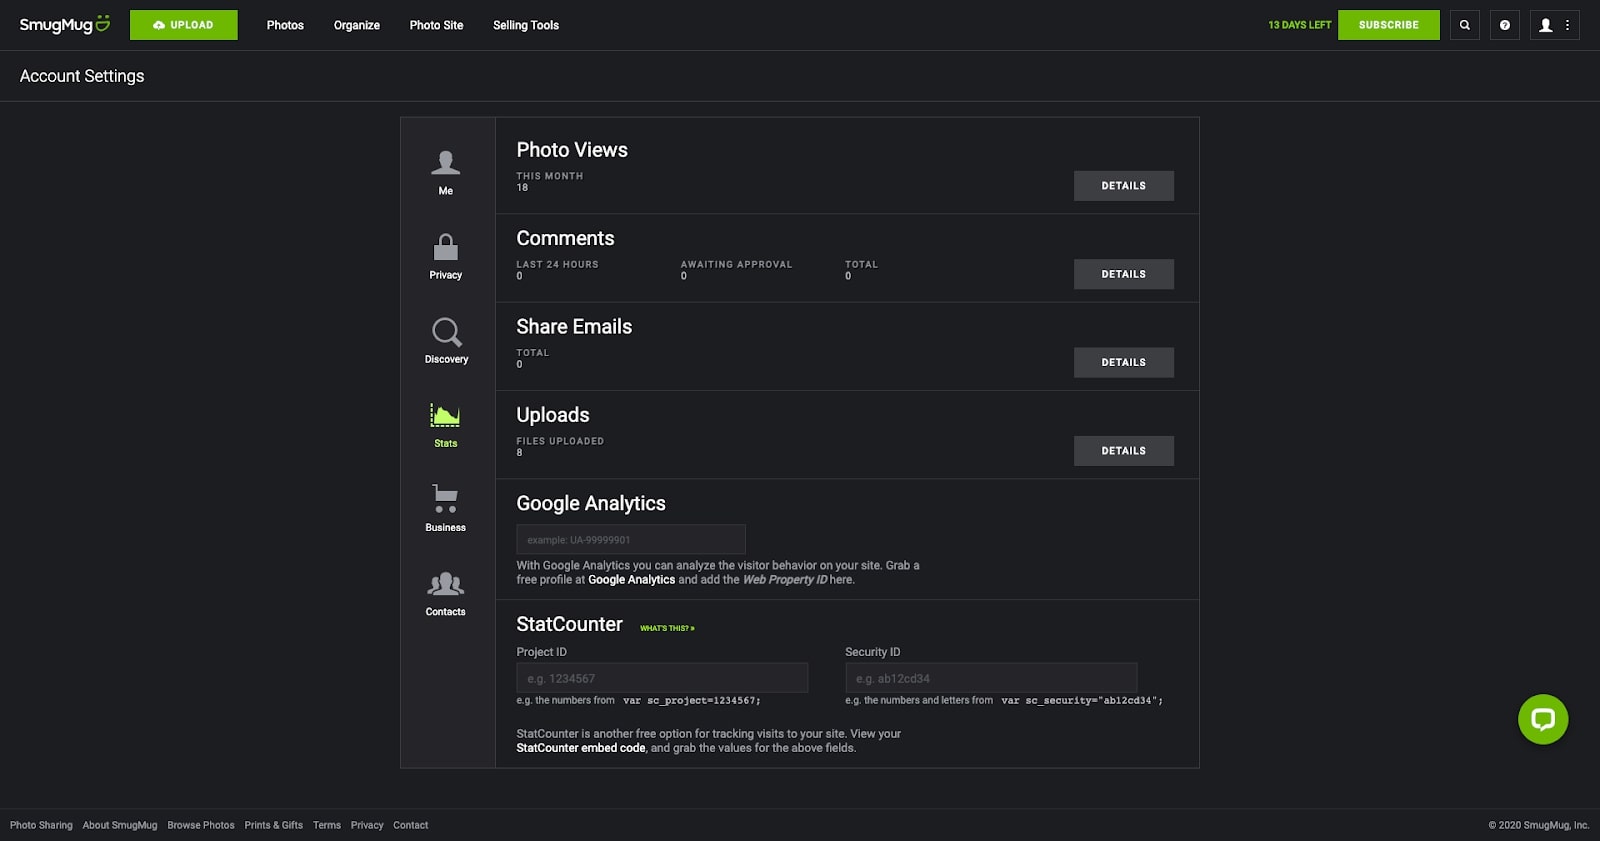
Discoverability is vital in terms of raising your profile, increasing site visits, and boosting sales. So don’t forget to take advantage of SmugMug’s SEO and Meta Title settings to ensure your site is search engine optimized and can be found via all major search engines.
And, as with any business, customer data is key in terms of monitoring what sells and what doesn’t. The Stats tab within the Selling Tools will show you exactly how many views each photo and gallery has had over a given timeframe, with an option to plug in your own Google Analytics or StatCounter accounts. On the same page, the Business tab will show a complete sales history and allow you to input any relevant tax and payment information.
If at any point you have issues with the design, analytics, or business settings of your storefront page, SmugMug’s support options are swift and effective. There’s a green live chat widget available at the bottom right of the screen, or alternatively a comprehensive help center with answers to frequently asked questions.
06. Customise
You should now have a clearer understanding of the many ways in which to personalise your own SmugMug storefront, whether you intend to use it for business purposes or purely for pleasure.
Make sure to continue to explore the many customisable settings within the platform, including the ability to remove the SmugMug branding from the site header and minimise the footer. While getting your storefront up to scratch, you might also want to take advantage of the ability to restrict site access to only those with whom you share a password.
Once you’re happy with the design and your commerce and analytics settings are good to go, you can upload more photos, videos, or galleries by simply clicking the green Upload button in the top left corner.
Read more:
- We reveal the best website builder for photographers
- WordPress.com review
- Cloud storage for photos and images: How to choose the best cloud for your work

Thank you for reading 5 articles this month* Join now for unlimited access
Enjoy your first month for just £1 / $1 / €1
*Read 5 free articles per month without a subscription

Join now for unlimited access
Try first month for just £1 / $1 / €1

Alexis is a freelance writer and journalist from the north east of England. His love for creative technology stems from the day he was gifted his first ever digital voice recorder (a beloved Olympus WS 110), which brought with it the wonderful realisation that he'd never again have to rely on his iffy shorthand.
