Step-by-step: How to mimic oil paint in Corel Painter
Achieve a traditional oil paint aesthetic in Corel Painter.
It only feels like yesterday when I was role-playing with high school friends in fantasy worlds full of knights, wizards, barbarians and treasures hidden in dungeons. As teenagers, the most treasured possessions we owned were the RPG handbooks. Among them, the bestiary books were my first contact with the world of concept art and character design, and that’s what made me interested in pursuing a career in art.
Almost everything back then was still painted traditionally in acrylics or oils. My preference for clear brush strokes and canvas or paper texture visible in print has stayed with me over the years, and for a long time I looked for a way to create the same effects in my digital paintings.
What’s so beautiful about traditional art is its unpredictability. There are so many happy accidents that give traditional painting a soul. The way that every hair in your brush tip leaves an individual mark. How pigments don’t just mix, but 'sing' a magical song together.
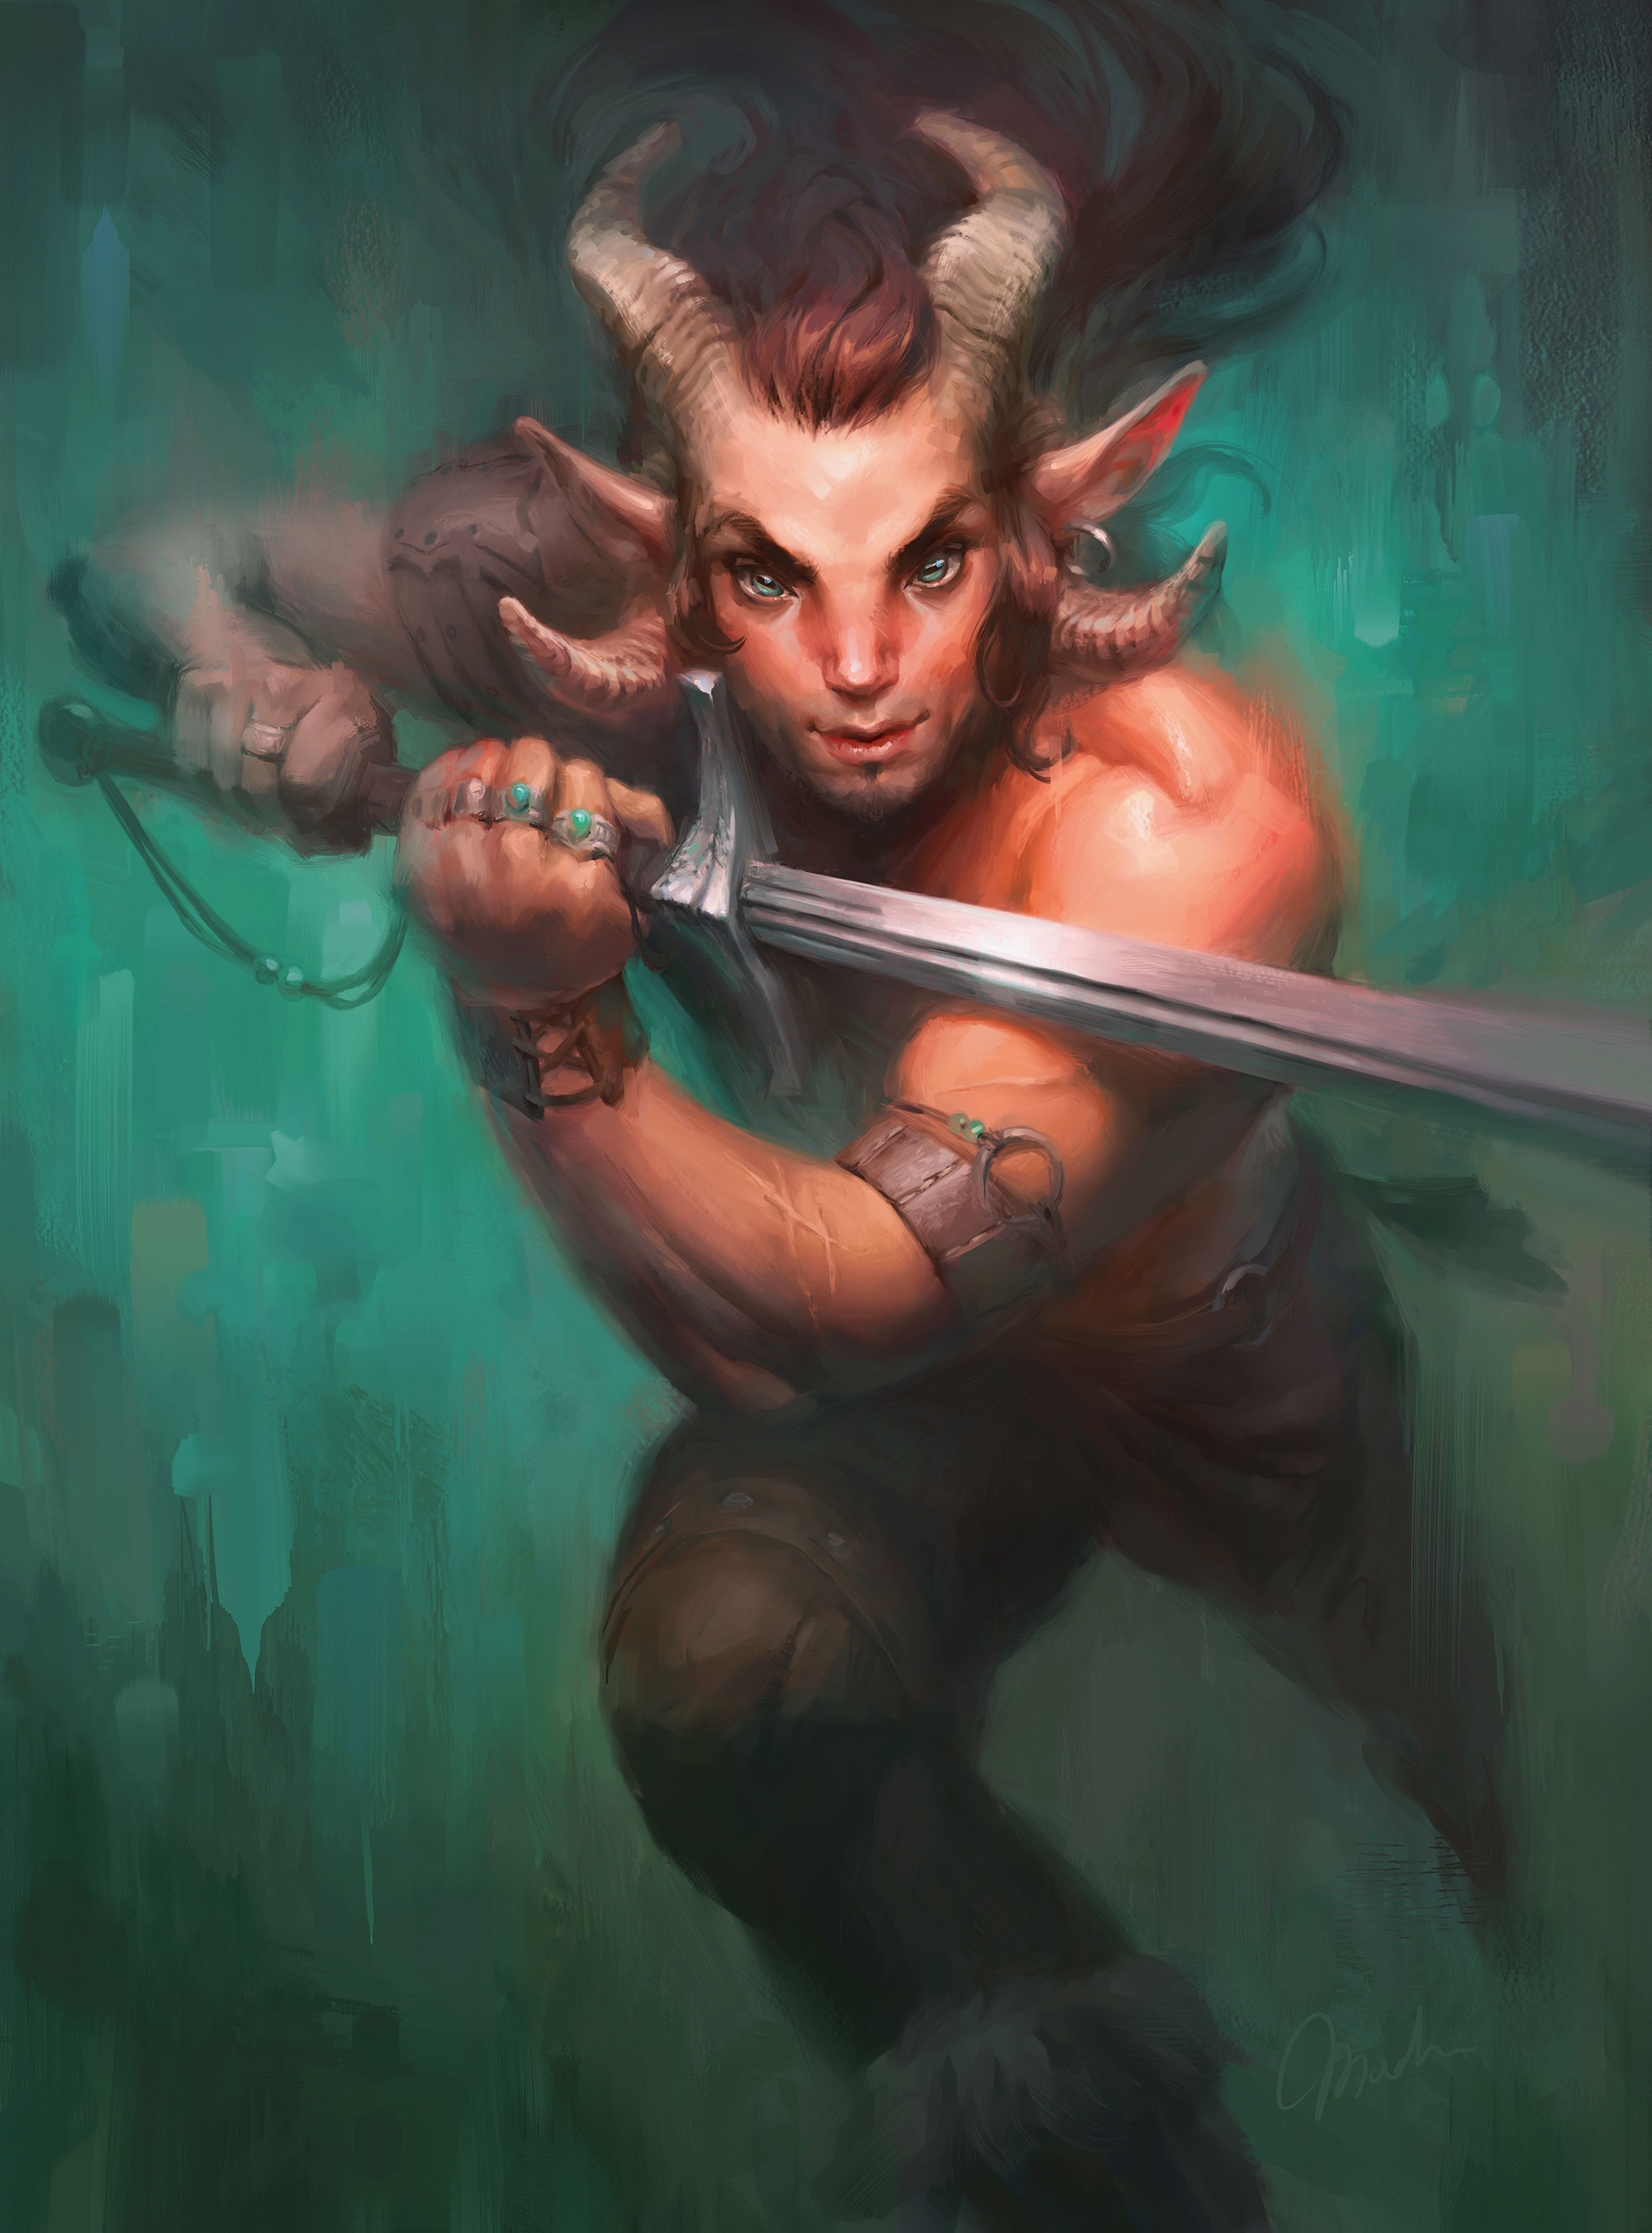
With Corel Painter 2019, I found the perfect tool to recreate some of these art techniques digitally. In this tutorial, I'll show you how you can use Corel's different features to mimic oil paints. Above you can see the final version of the painting we'll be working on.
Click the icon in the top right of each image to enlarge it.
01. Establish your concept and composition
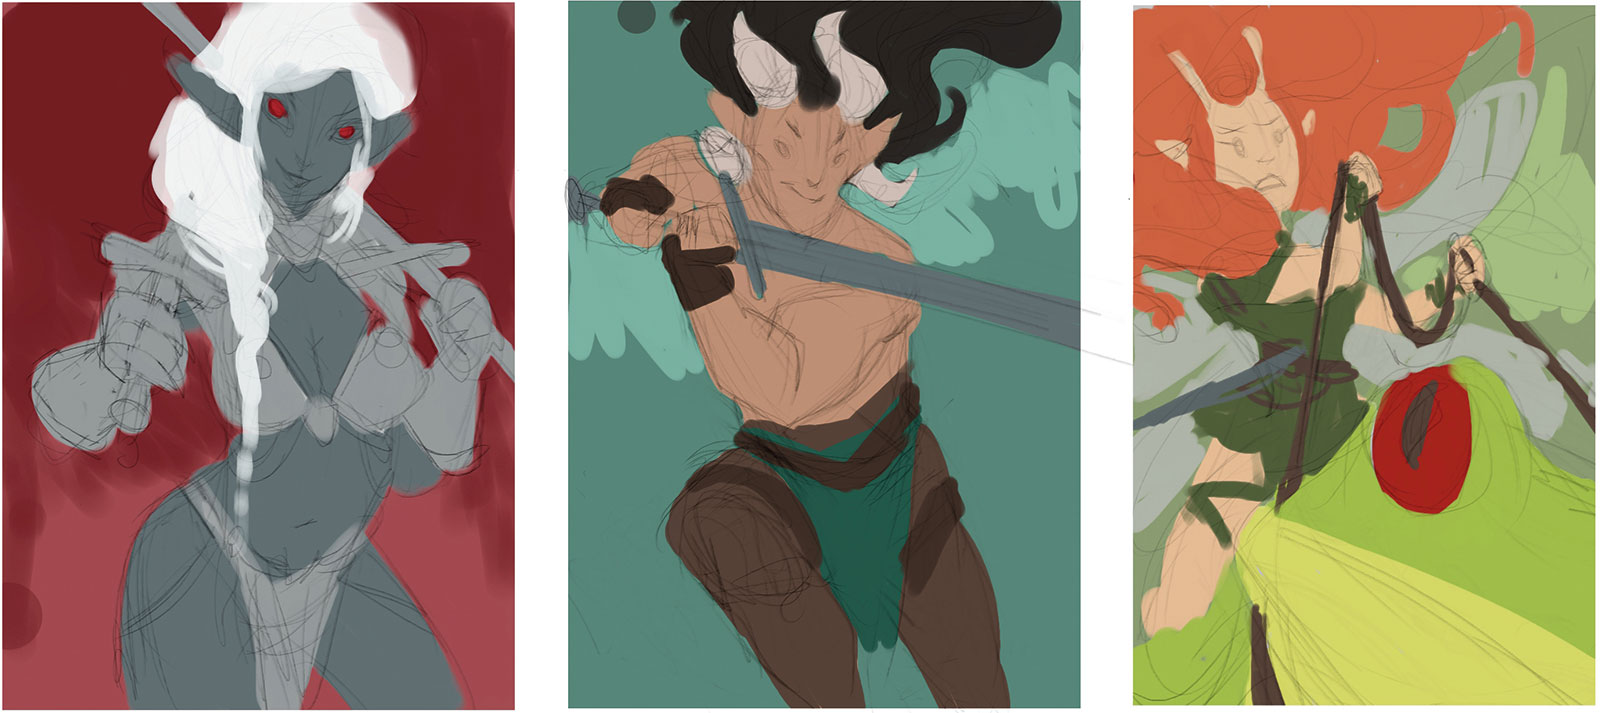
The first thing to do is to work out your composition. My rough initial thumbnails are done in just few minutes – I often think in colours, seeing what combinations creates interesting harmonies. Gather reference pictures while sketching and developing the idea. I use free software PureRef to organise my photographs: I can save my collection and return to it any time. I keep it visible on my secondary monitor.
You want to make sure you've fully decided on the composition, colours and details, before you start work on the final piece. Make sure the figure’s anatomy and perspective is correct and the key shapes balance nicely (for advice on this, take a look at our how to draw tutorials).
Get the Creative Bloq Newsletter
Daily design news, reviews, how-tos and more, as picked by the editors.
02. Create a burnt sienna underpainting
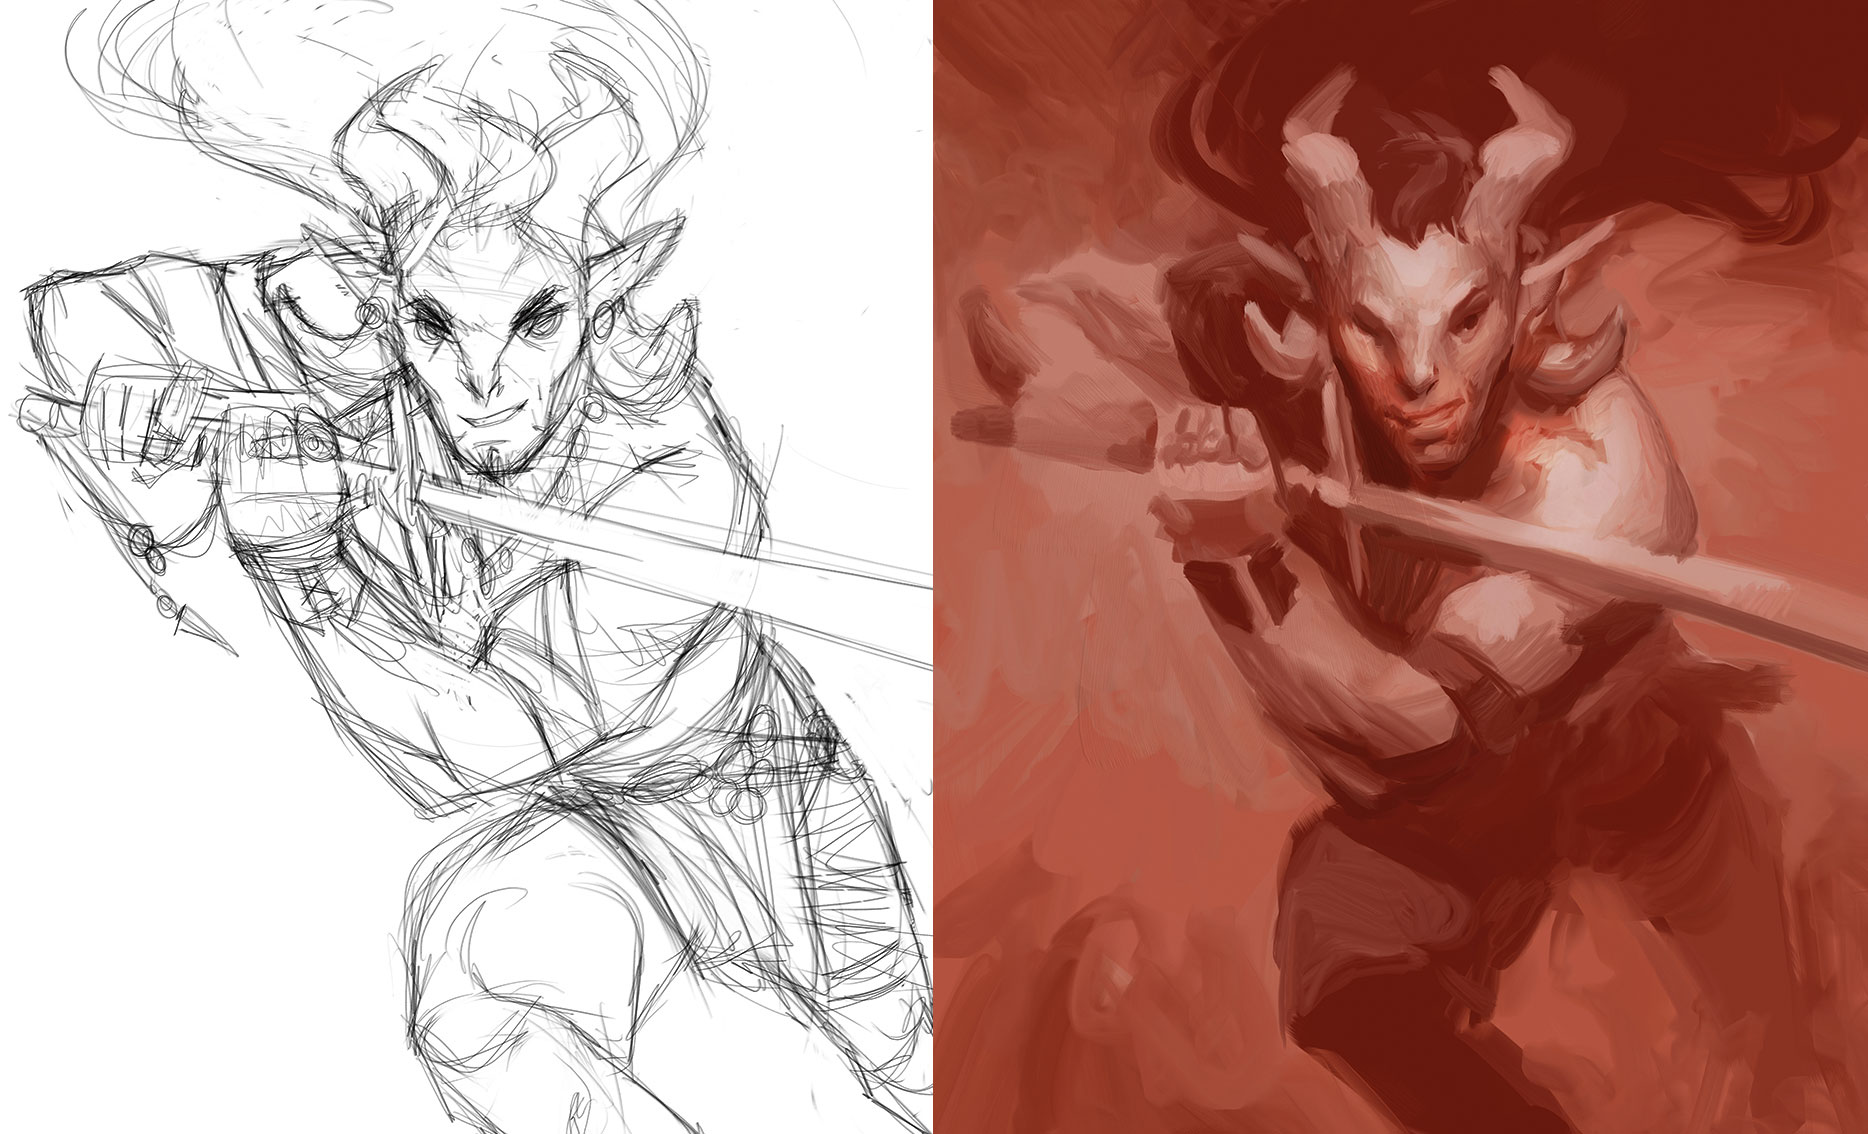
This step is taken straight from the traditional oil painting process (learn more about underpainting here). Painters use it to create monochromatic value composition, by setting up a basic environment of light and shadows. I open the Mixer window in Painter and create a gradation of Burnt Sienna to black and white. I make sure that the contrast is interesting and strongest in points of interest (mainly the face).
03. Bring in colour
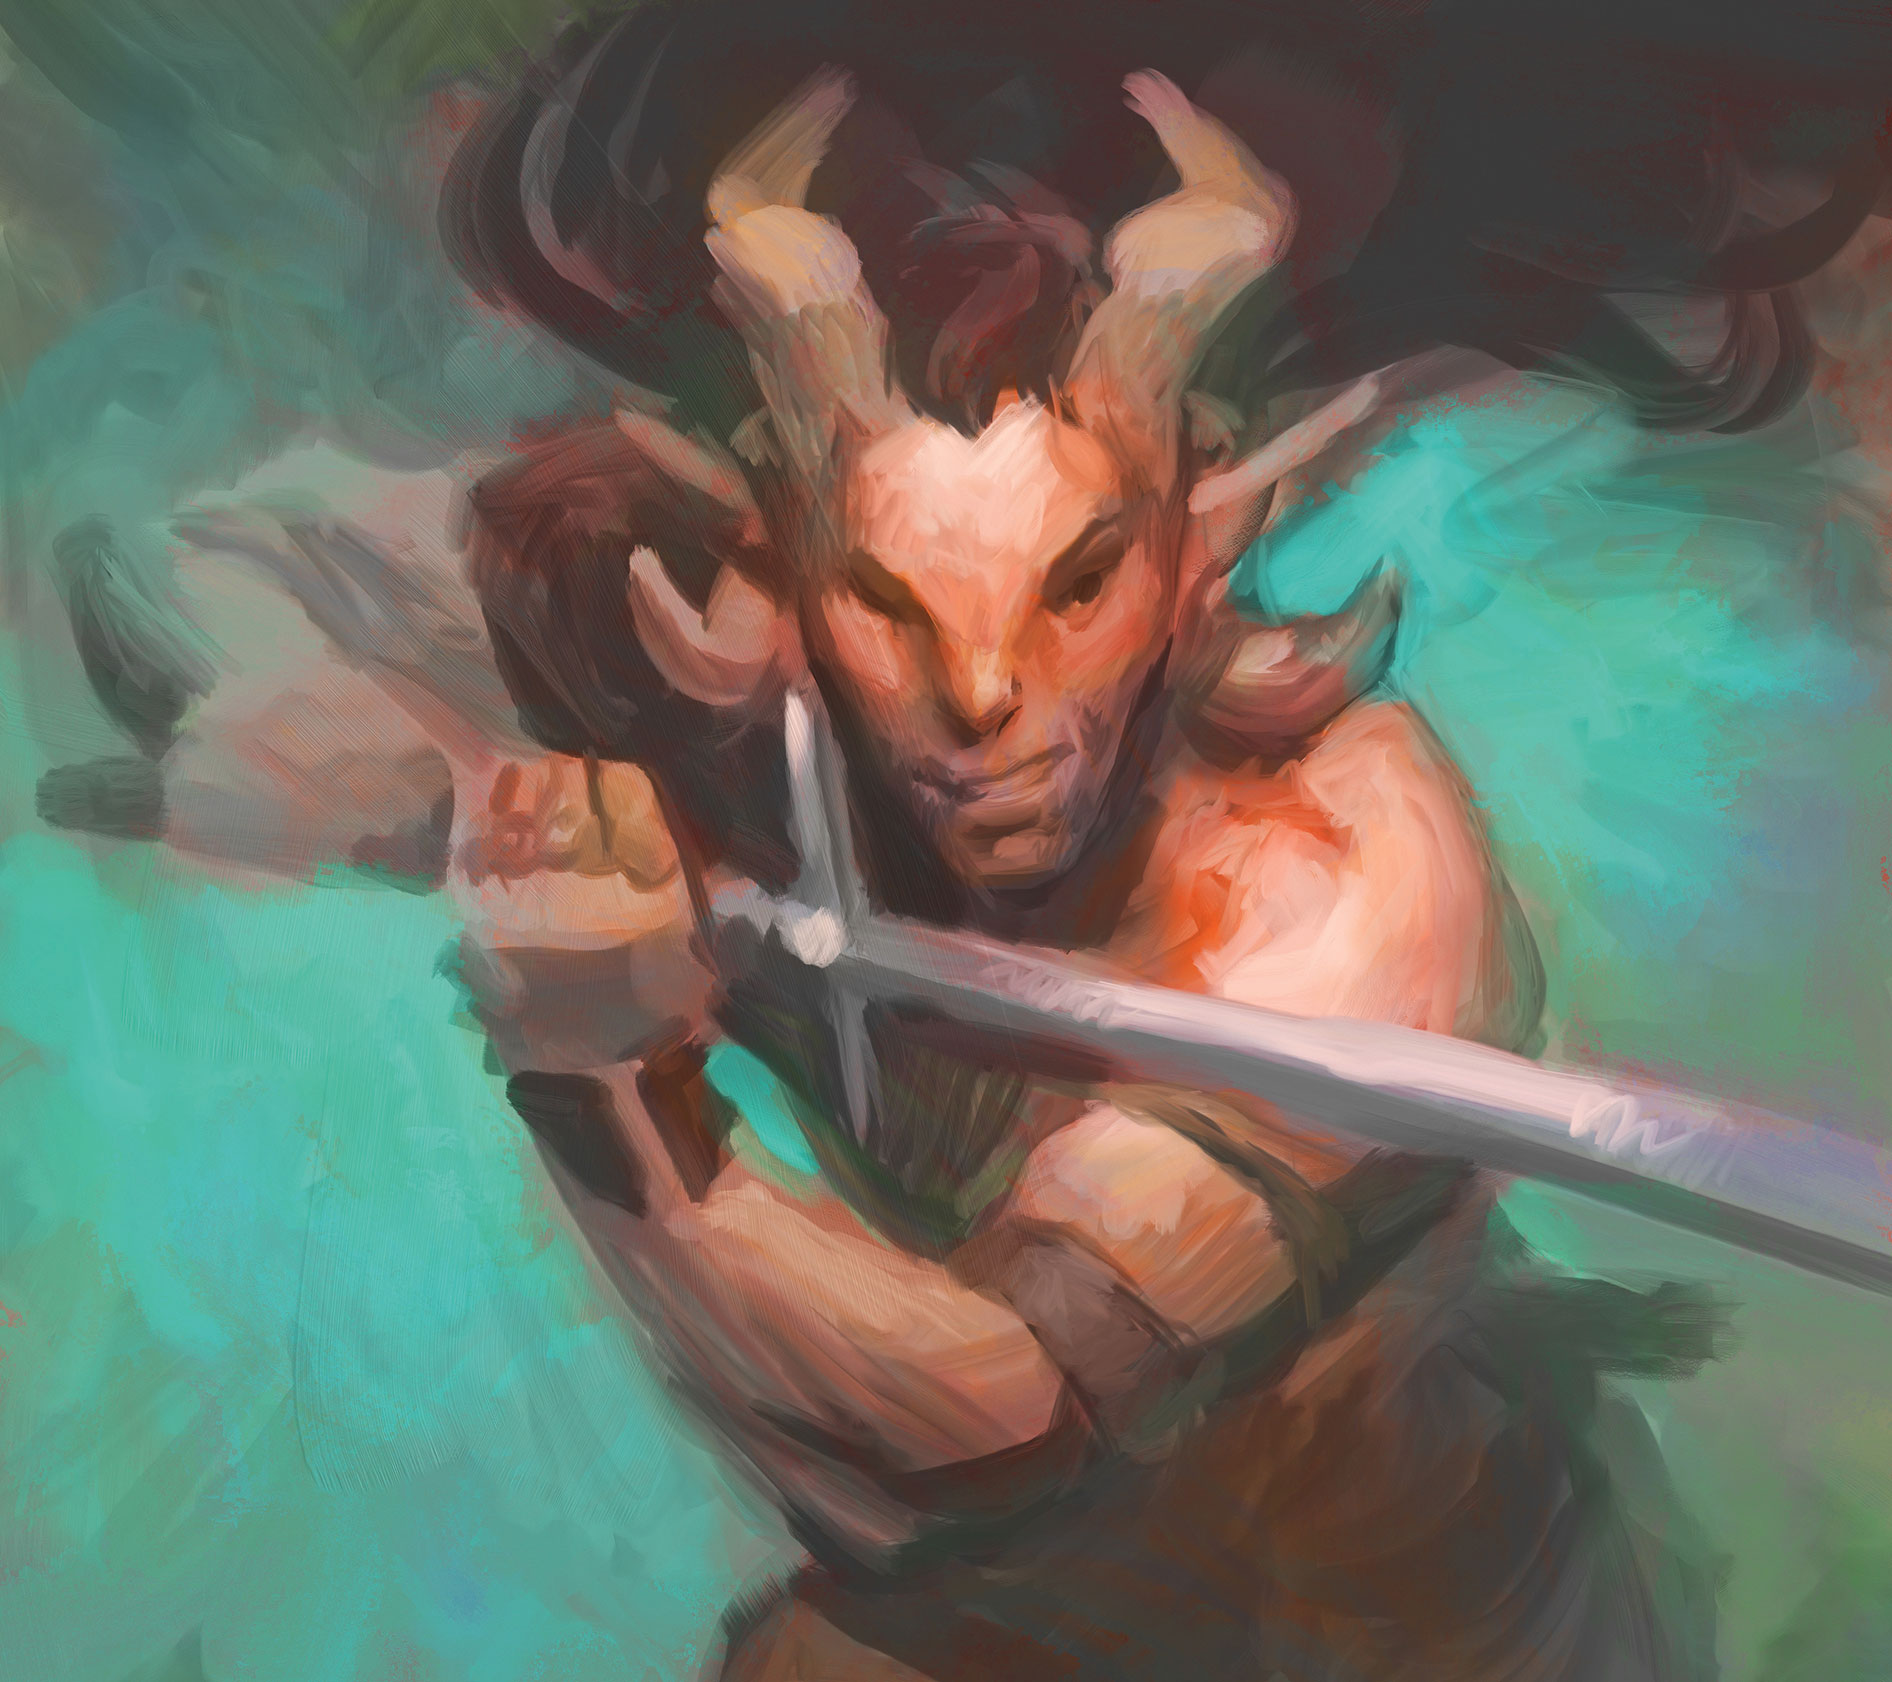
In traditional art, the next step would be to create thin layers of paint to colourise the monochromatic picture. This process is called glazing. Corel Painter 2019 has a new family of Glazing brushes for this very step. I set the layer mode to Colorize and apply various colours. I let some of the underpainting show through and avoid having flat shapes of the same hue or colour. This creates a mesmerising mosaic of brushstrokes.
04. Keep an eye on the big picture
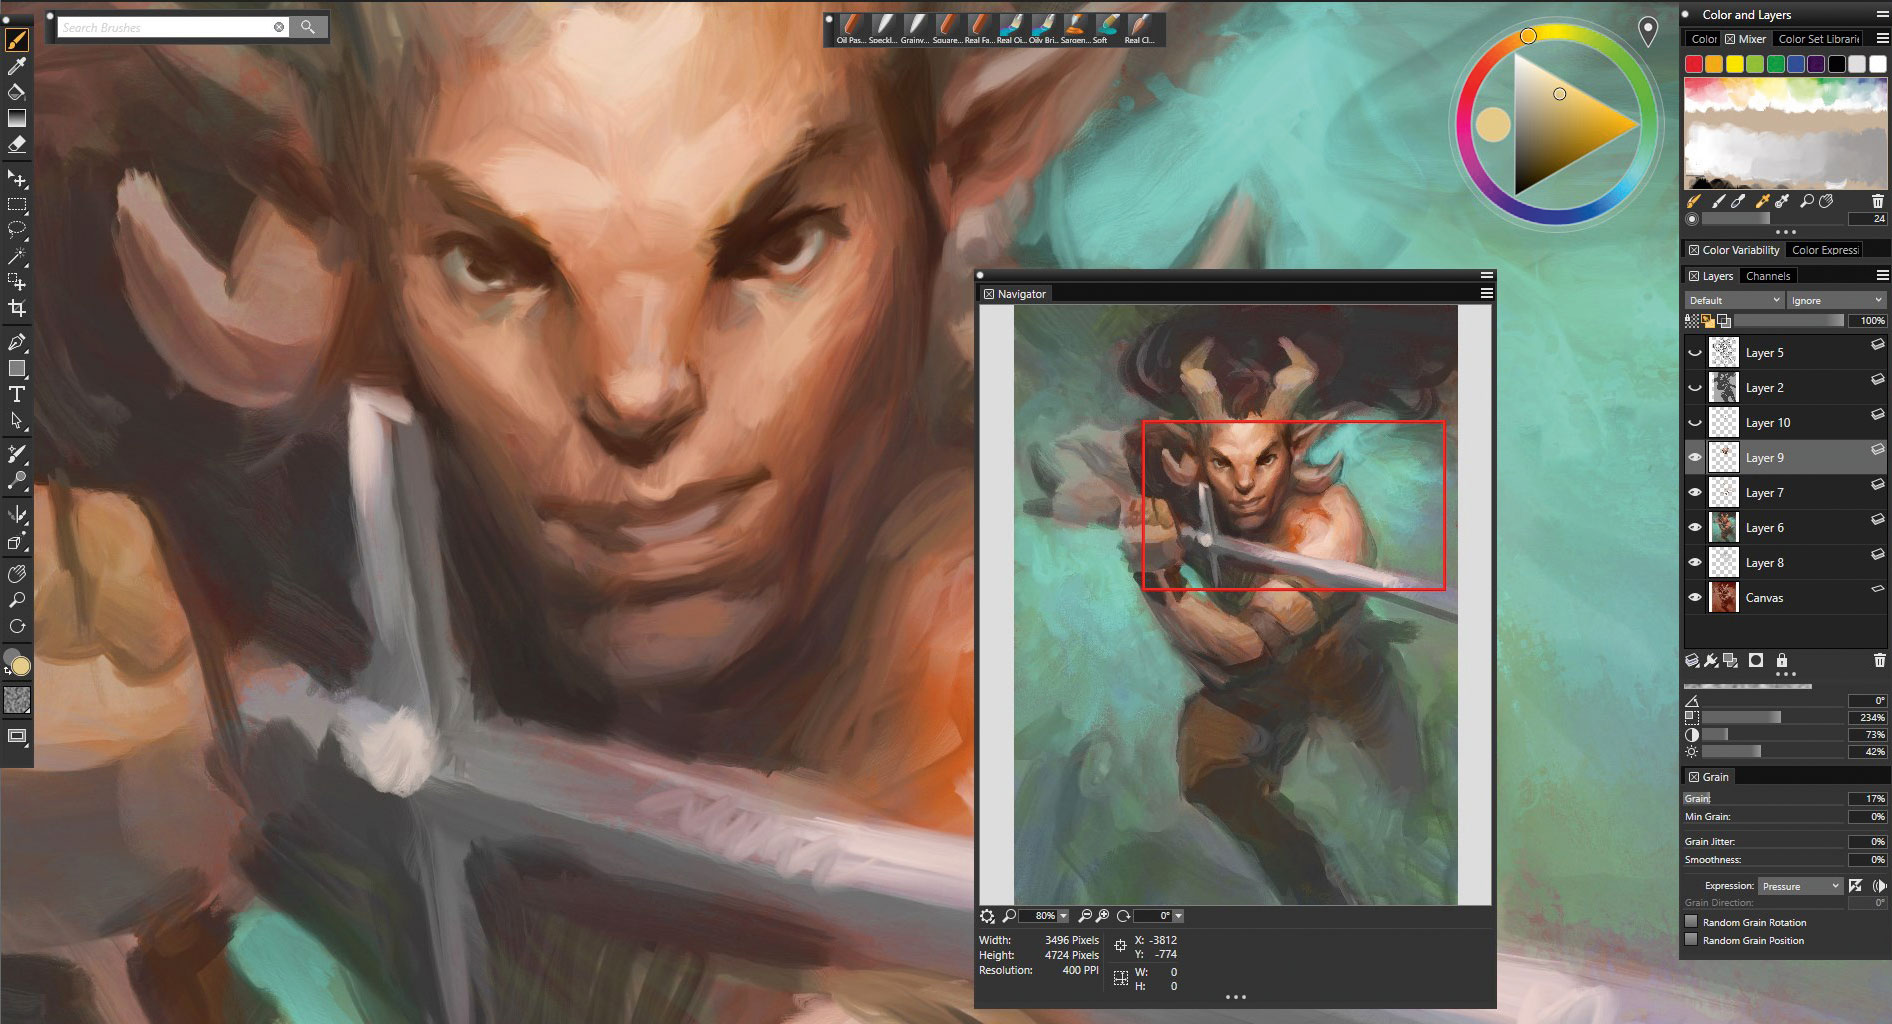
At this point 80 per cent of the image is completed. The remaining 20 per cent will take five times as long, as I polish all the details. I never stop controlling the whole picture. Even when I’m zoomed on a portion of the painting, I keep the Navigator window open (Window > Navigator or ctrl+7) on my second monitor, and constantly compare my progress across the whole image.
05. Try the Distorto brush
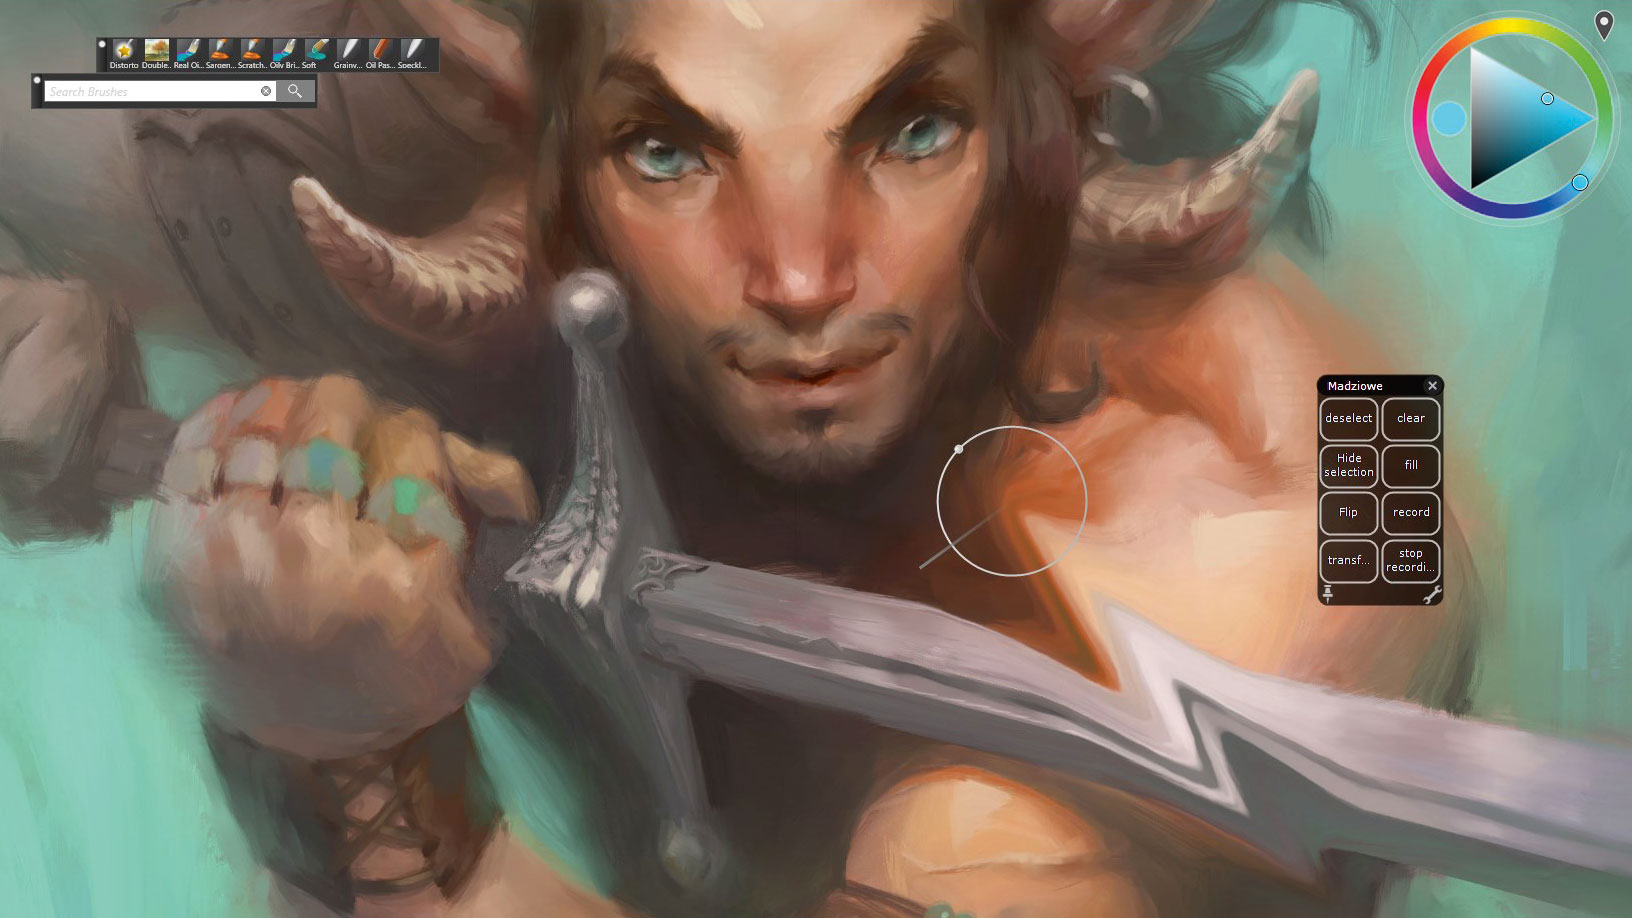
In Corel Painter 2019, the Distorto brush is an alternative to Photoshop’s Liquify tool. I use this brush on a low Strength setting (around seven per cent) to correct the position of any elements that feels 'off'. You can use this tool to do anything from moving the nose slightly to the right, to aligning eyes or changing the shape of the face. You can find the Distorto brush within the F-X brush group.
06. Jump around
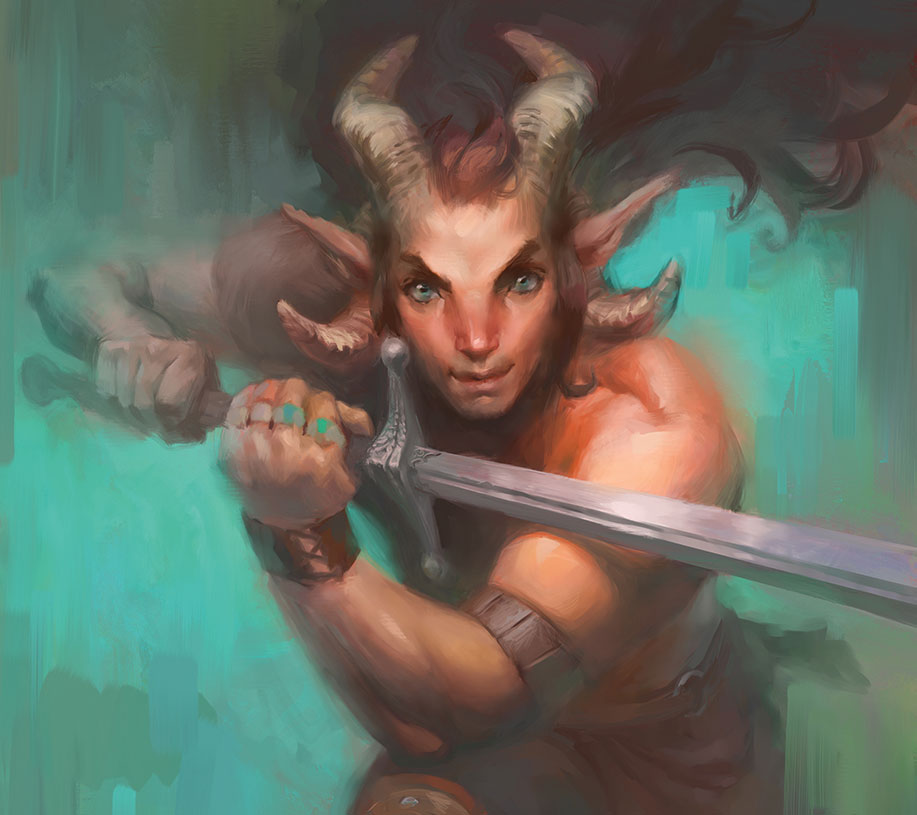
I force myself to never work in one spot for too long. I want my picture to develop evenly. My aim is to leave some parts looking quite rough, but I make sure I have full control over the painting’s development. How it graduates from focus points to less-important areas. I use a mix of Artists’ Oils and Sargent brushes for realistic touches.
07. Use the floating colour wheel
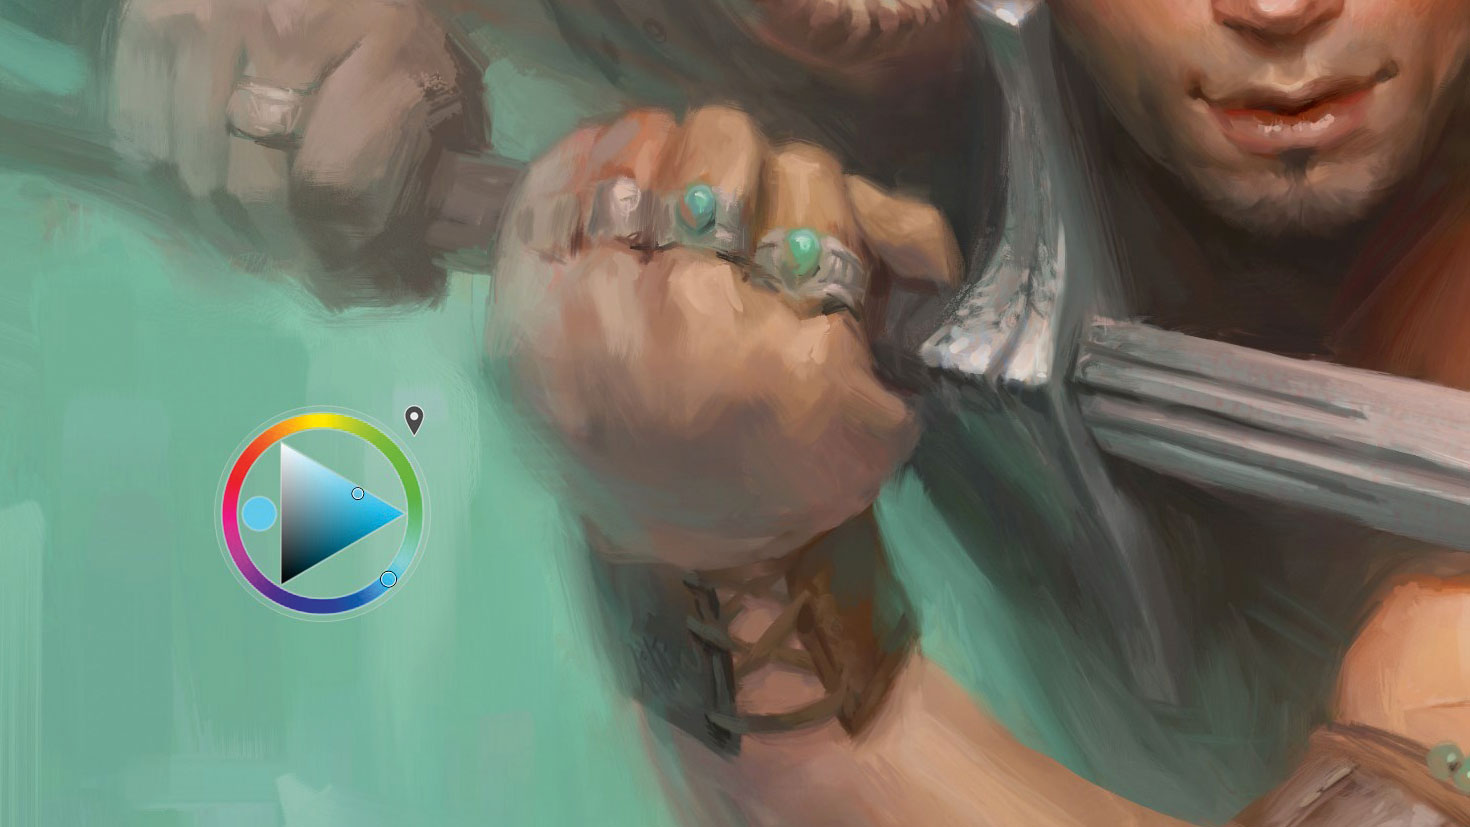
Painter 2019 now offers a floating colour wheel, which gives me full control over my colour choices while using the stylus. I paint directly with the colour I picked from the canvas, but only when blending. Otherwise I select a colour and suitable alternatives using the colour wheel. I change its temperature to warmer or cooler, make it brighter or darker, more or less saturated, and so on.
08. Correct values
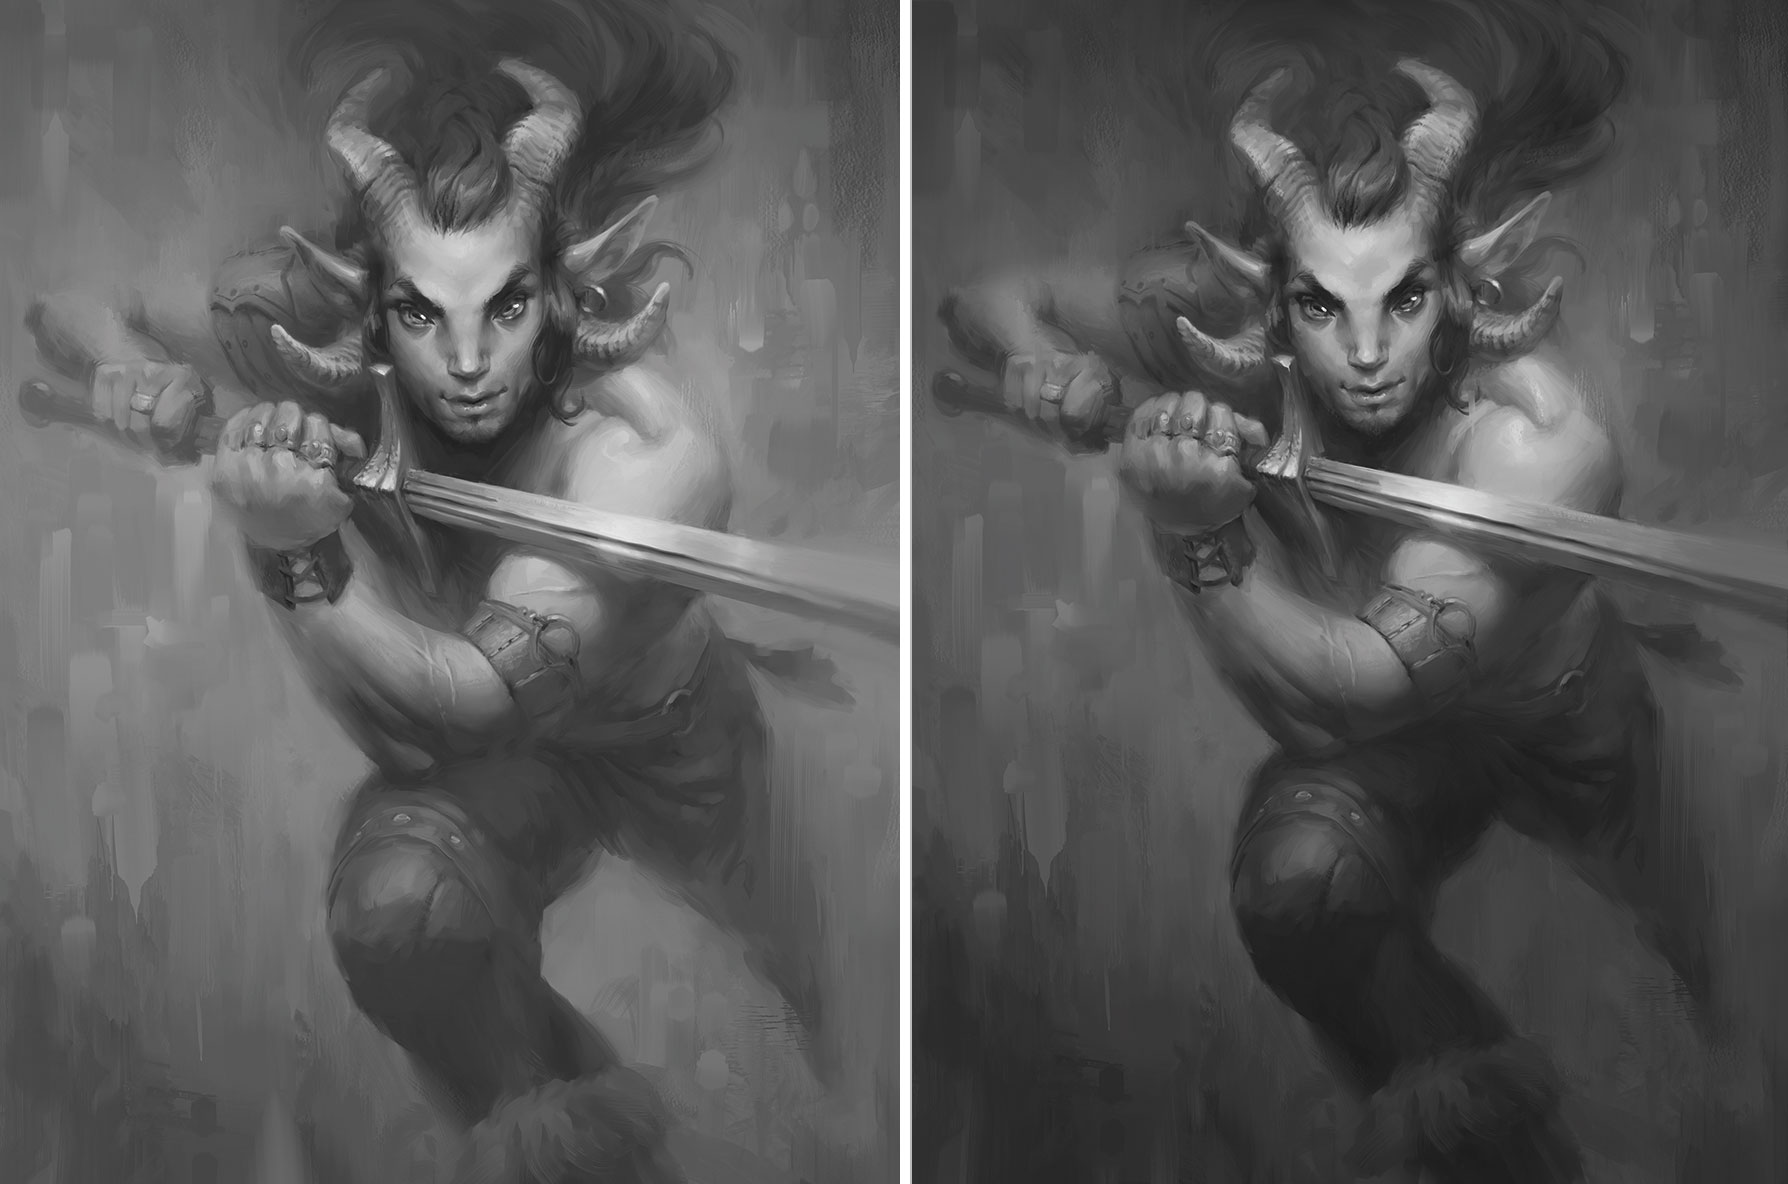
For a readability check, I turn the picture black and white. I notice how flat my value composition becomes when a green background and a warm skin share a similar brightness. Knowing how difficult is to print vibrant greens and cyan, I decide to darken the background. This also makes the character pop.
09. Mimic the glazing process with Multiply

The magic of digital art is all the shortcuts you can access. I stopped feeling guilty about using them long ago, knowing how much 'cheating' was applied in traditional painting. Maybe the Old Masters didn’t call it a Multiply layer, but glazing darker colours to dim down large areas of a painting is nothing new. That’s what’s I do here: use Multiply mode to darken the background.
10. Make final tweaks
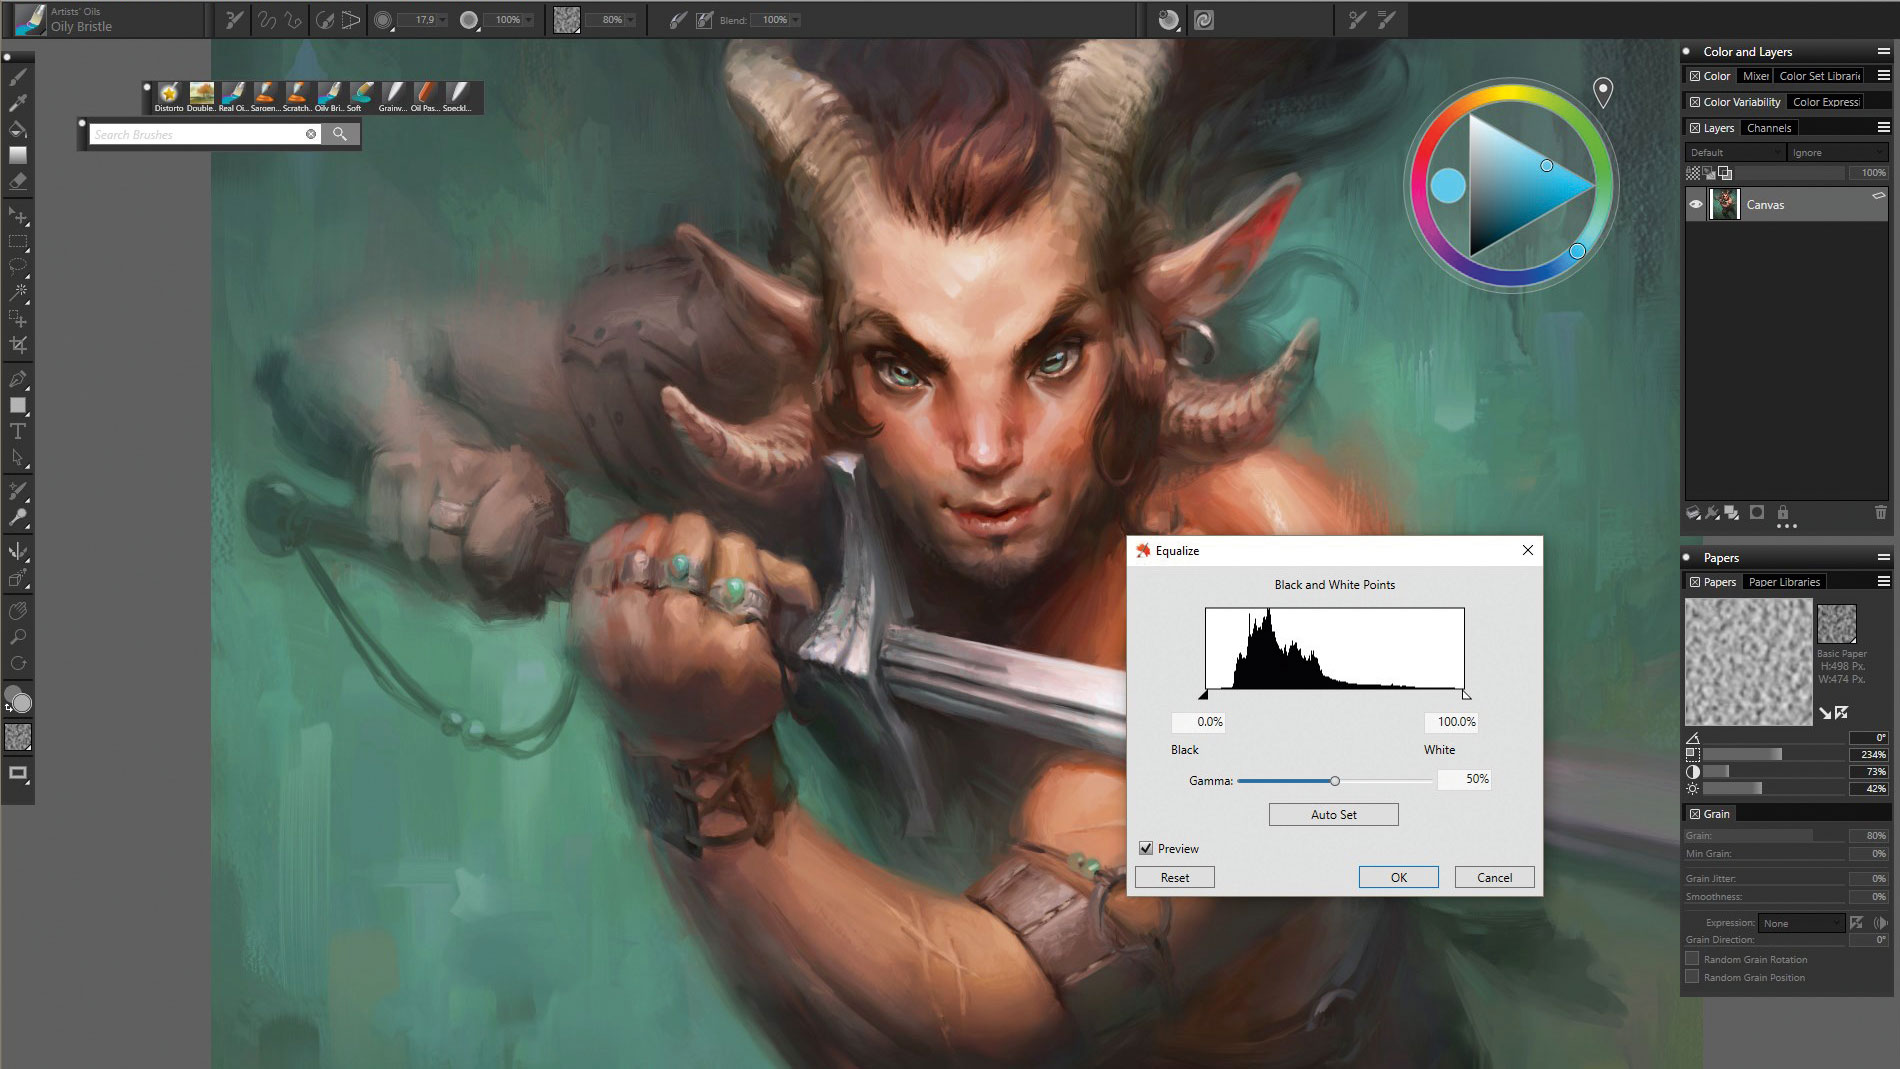
I correct the contrast and colours to create the most appealing version of the picture. I have a tendency to paint at a very low contrast, so to create more visual interest I play around with different settings. To finish up, I use Equalize and Correct Colors from the Tonal Control option under the Effect tab.
This article was originally published in issue 166 of ImagineFX, the world's best-selling magazine for digital artists. Buy issue 166 or subscribe.
Read more:

Thank you for reading 5 articles this month* Join now for unlimited access
Enjoy your first month for just £1 / $1 / €1
*Read 5 free articles per month without a subscription

Join now for unlimited access
Try first month for just £1 / $1 / €1
