How to manage CSS classes with JavaScript
Create a JS function to easily manage CSS class changes.

When developing simple web projects that involve user interaction, how best to manage changes of state in CSS becomes food for thought. When the user expands an accordion or toggles a menu, how should the CSS style changes be applied? One popular solution involves stateful classes, a naming convention which uses class names such as is-active or is-expanded as style hooks.
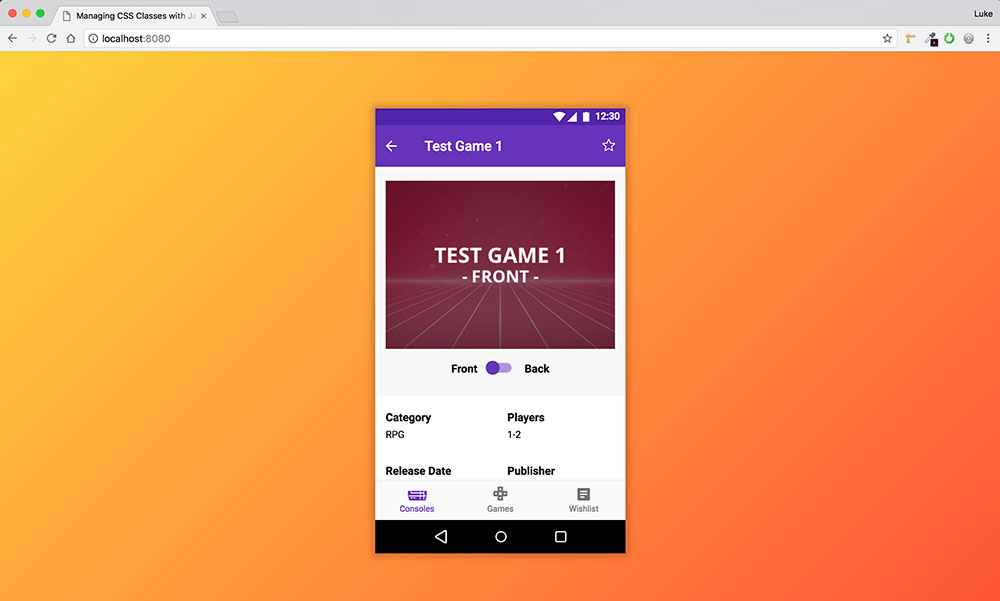
These stateful classes would typically be managed in JavaScript. Download the mock Android App and open the website-template directory in your text editor and you can see this for yourself in dev/js/main.js.
One thing you may notice here is that there's lots of duplicate code snippets all triggering very similar class toggles. Presumably, if this project were to grow in size, so would the amount of duplicates. A much more efficient approach would be instead to write a single JavaScript function, which performs the same task and can be reused over and over again – but toggling different stateful classes on different elements. In this tutorial, we'll explore how to do just that.
To get started, in your console, cd into 'website-template' and run npm install to install the project's node dependencies. We'll be working in the dev directory from here on out.
Want to keep things simple? You need a website builder. And however complex your sites needs, you must get your web hosting spot on.
01. Using HTML5 data attributes

In index.html, find the .js-description element on line 103 and attach the below HTML5 data attributes. We'll be using this pattern to store information, so when jsdescription is clicked, our reusable function will know the class we wish to toggle and the elements it should be toggled on.
data-class="is-active" data-class-element ="js-description-slide, js-home-slide" 02. Create data-class.js

In the js directory, create a new file called data-class.js. This is where we'll build our reusable function. Within, write an IIFE (Immediately-invoked function expression) to encapsulate our code and then import the closestParent helper, which we will be using later on in the tutorial.
Get the Creative Bloq Newsletter
Daily design news, reviews, how-tos and more, as picked by the editors.
(function(){ var closestParent = require("../../node_modules/orionjs/helpers/closestParent.js");
})();
03. Grab elements and loop through
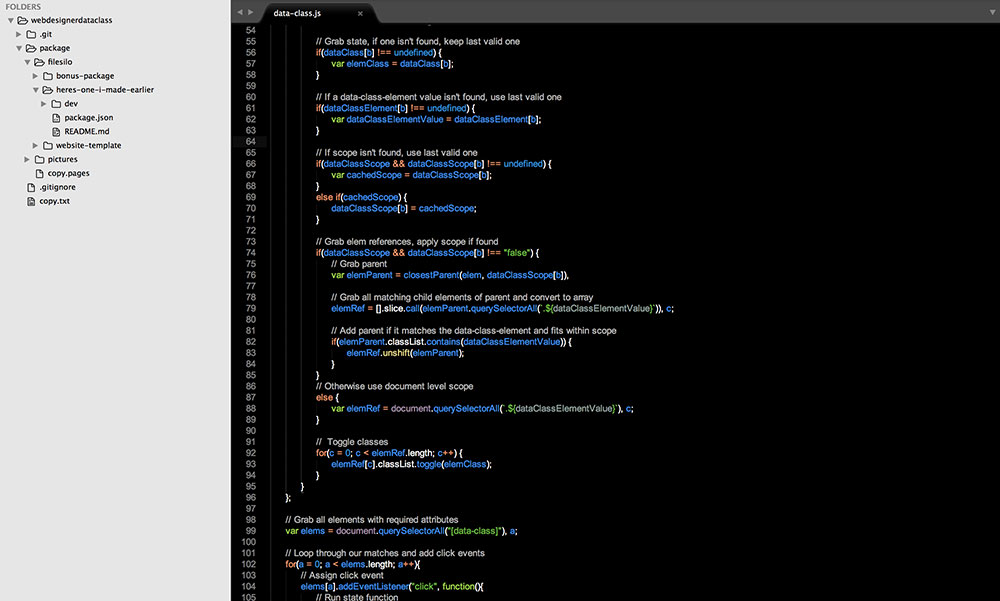
Below the helper import, we'll need to create a NodeList of all elements with dataclass attributes, as this is the only attribute that won't be optional. Next, we'll then loop through them with a classic FOR loop so we can access each individual element.
var elems = document .querySelectorAll("[data-class]"), a; for(a = 0; a < elems.length; a++){
}
04. Add click event listener
Within the FOR loop, add an event listener to watch for click events, so we know when the user has clicked the element we wish to trigger the class toggles (aka the trigger element). Within it, call the processChange() function and pass a reference to the clicked element, which within the scope of the function is accessible via the this keyword.
elems[a] .addEventListener("click", function(){
processChange(this); });
05. Add keyboard event listener
Just below the click event listener, add another one to watch for the press of the enter key and then run the same processChange() function. We're adding support for keyboard events to improve accessibility by considering users who can't use pointing devices such as a mouse.
elems[a] .addEventListener("keypress", function(e){
if(e.which === 13) { e.preventDefault(); processChange(this);
} });
06. Add mousedown event listener
Double-clicking an element often highlights all the text within it. If we're adding logic to the trigger element when clicked this functionality is something we'd want to prevent. To do this, add a mousedown event listener to call the events preventDefault() method and cancel default behaviour.
elems[a].addEventListener ("mousedown", function(e){
e.preventDefault(); });
07. Create processChange() function
Just after the closestParent import, create a function called processChange() which accepts an element. This is the same function referenced in previous steps, and will hold all our logic for processing class toggles on the target element.
Within the function, grab the contents of the elements data-class attribute and split into an array. This is to allow for multiple comma-separated classes within the single data attribute.
var processChange = function(elem){ var dataClass = elem .dataset.class.split(", ");
}
08. data-class-scope attribute
Next, within the function, check for the presence of a data-class-scope attribute, if found, split into an array as before. data-class-scope is an optional attribute, which allows you to limit where the class toggle will occur.
For instance, if dataclass-scope were set to js-my-element, only target elements that are children of this would be affected by a click of the trigger element.
if(elem.dataset.classScope) { var dataClassScope = elem.dataset.classScope.split(", ");
}
09. data-class-element attribute
The data-class-element attribute is another optional attribute. It specifies the element that the class toggle should affect. In the snippet below, we're checking for its presence and, if found, convert its contents to an array as before. Though, if it isn't found, we'll set both the target element and the scope to the trigger element, which means when clicked, it will trigger the class change on itself.
if(elem.dataset.classElement) { var dataClassElement = elem.dataset.classElement.split(", ");
}
else { var dataClassElement = [elem.classList[0]]; if(!dataClassScope) {
var dataClassScope = dataClassElement; } }
10. Setup class toggle loop
Because both data-class and data-class-element accept multiple comma separated values, we need to declare the dataLength variable and assign it the length of the biggest attribute between the two. This is to make sure we're looping enough times to make sure we don't miss a target element.
var dataLength = Math.max (dataClassElement.length, dataClass.length), b; for(b = 0; b < dataLength; b++) {
}
11. Reduce repetition in attribute values
It's possible for data attributes to have duplicate values. For example while <a data-class="is-hidden, is-hidden" data-class-element="js-elem, js-elem2"> is a valid use of the function, it'd be much better to only have to specify is-hidden once.
To do this, we'll add logic in the dataLength FOR loop that if a data-class or data-class-element entry is missing, use the last valid one. This means <a dataclass="is-hidden" data-class-element="js-elem, js-elem2"> would work as well.
if(dataClass[b] !== undefined) {
var elemClass = dataClass[b]; } if(dataClassElement[b] !== undefined) {
var dataClassElementValue = dataClassElement[b]; }
12. Reduce repetition
Still within the FOR loop, the same again, but with the data-class-scope attribute. If we don't have a scope, use the last valid one. This allows one scope to effect many class toggles.
if(dataClassScope && dataClassScope[b] !== undefined) {
var cachedScope = dataClassScope[b]; } else if(cachedScope) {
dataClassScope[b] = cachedScope; }
13. Apply scope: Part 1
The last thing in the FOR loop we have to do before we have everything we need to trigger the class toggle is make sure that if a scope is defined, only elements within it are being targeted. We'll start by creating a conditional statement that checks for scope data, and if none is found just use global document scope.
if(dataClassScope && dataClassScope[b] !== "false") {
}
else { var elemRef = document.querySelectorAll ('.${dataClassElementValue}'), c; }
14. Apply scope: Part 2
Within the empty if statement from the previous step, add the below snippet. This finds the element defined in data-class-scope (elemParent) and then creates an array of all child elements matching data-class-element (elemRef). If the scope and target elements are the same, its reference is also added to the list of elements to modify.
var elemParent = closestParent (elem, dataClassScope[b]),
elemRef = [].slice.call(elemParent .querySelectorAll ('.${dataClassElementValue}')), c;
if(elemParent.classList. contains(dataClassElementValue)) { elemRef.unshift(elemParent); }
15. Toggle the classes
At last, at the bottom of the FOR loop, let's use the data we've built up and toggle all the correct classes on all the correct elements. To do this, we need a new FOR loop to go through the elemRef'nodeList/array, access each elements classList API and then use the toggle() method to add or remove the value of elemClass.
for(c = 0; c < elemRef.length; c++) { elemRef[c].classList.toggle(elemClass); }16. Include the function
Now the function is complete we need to include it in main.js. To do this, copy the snippet below and add it to the top of the file but within the IIFE function. We also don't need most of the code in main.js, so delete everything up until the STOP BOX ART CHECKBOX EVENT BUBBLE snippet.
require("./data-class.js"); 17. Add to favourite icons
Now to use the function. In index.html, find all instances of the favourite icon with a js-star class. Add the attribute below and when clicked it should add is-active to itself, as in the absence of data-class-element, the trigger element uses itself as the target element.
data-class="is-active" 18. Add to game links
Next, we need to link up the game box arts on the home slide so when clicked, is-active is added to the correct video game slide, whilst also removed from the current home slide. Below are the attributes which you should add to the js-test-game-1 img. The others follow the same pattern, just replace the test-game-1 with the new game title.
data-class="is-active" data-class-element= "js-test-game1--slide-slide, js-home-slide"19. Add to box art toggles
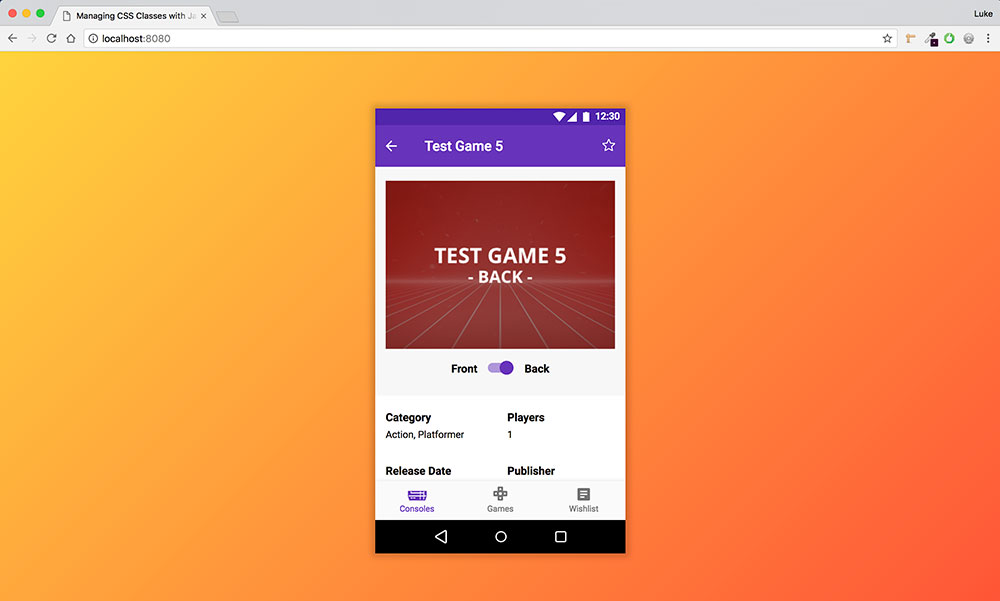
On each game slide is a switch which toggles the front and back of the box art. To make these work, add the snippet to each instance of js-boxart-toggle. When clicked a number of things happen: is-flipped is toggled on js-boxart scoped to the parent js-slide, whilst is-checked is toggled on the trigger element.
data-class="is-flipped, is-checked" data-class-element="js-boxart, js-boxart-toggle" data-class-scope="js-slide, js-boxart-toggle" 20. Add to back arrows
Finally, we need to add the attributes below to all instances of js-canceldescription and js-cancel-game so when clicked you are taken back to the home slide.
data-class="is-active" data-class-element="js-slide, js-home-slide" data-class-scope="js-slide, false" 21. Build the project

In terminal, run the command below to build the project. This will create a compiled version of the project in a new dist directory. This command uses npm scripts – a simple, native npm alternative to fully-functional build tools, such as Grunt or Gulp.
npm run build22. Serve the project.
Finally, in terminal, run the command below to create a local server to serve the dist folder. Take note of the port number returned in the terminal. In the browser, navigate to http://localhost:YOUR-PORT-NUMBER to view the finished project.
npm run serve 23. Test the project

Now you've finished the project (and backed up your files in cloud storage), all class logic is now being handled by our reusable function. If this were a live project, and more page or components were added as time went on, the ease of adding new class logic for these would be greatly reduced as we no longer have to write bespoke functionality for each instance.
This article was originally published in issue 267 of Web Designer, the creative web design magazine – offering expert tutorials, cutting-edge trends and free resources. Subscribe to Web Designer here.
Related articles:

Thank you for reading 5 articles this month* Join now for unlimited access
Enjoy your first month for just £1 / $1 / €1
*Read 5 free articles per month without a subscription

Join now for unlimited access
Try first month for just £1 / $1 / €1
