How to make stickers with Cricut
It's easy and rewarding to make stickers with Cricut, here we teach you how.
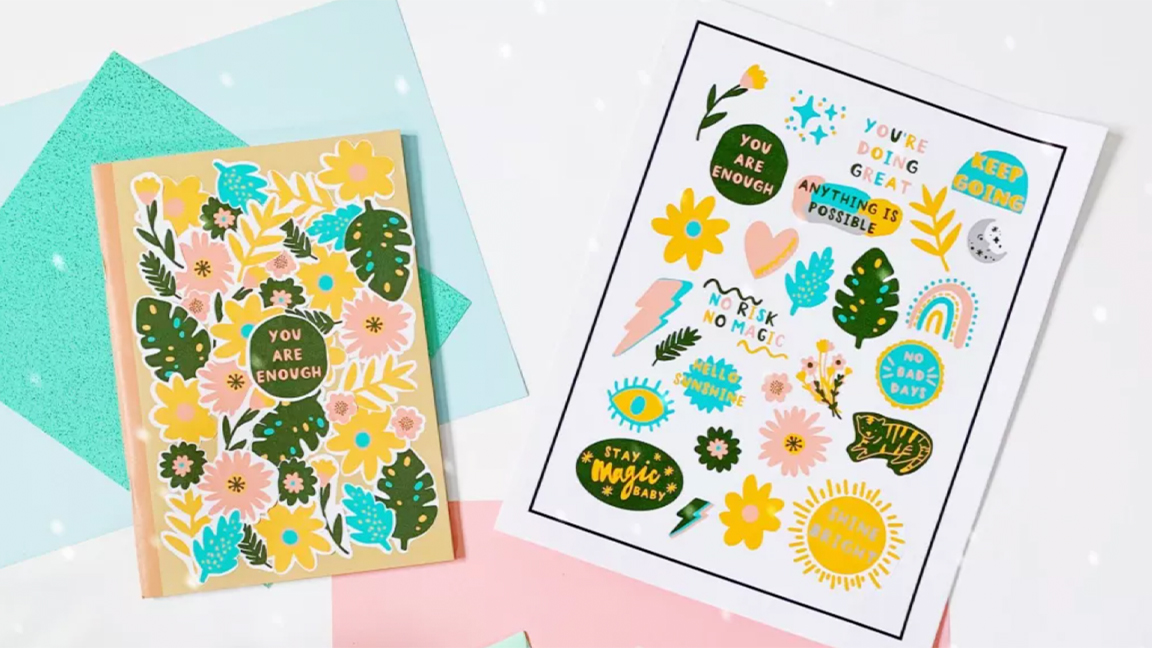
Learning how to make stickers with Cricut can be fun and easy. Stickers are creative, versatile and can be any shape and size you like. Stickers can be used for almost anything, they’re great for personalising your items, but they can also be a good tool for businesses who want to increase brand recognition. In this tutorial, we will show you just how easy it is making stickers with Cricut.
Cricut stickers are generally made using adhesive paper. This is then printed on and can be cut to size. The Cricut makes this process even easier as it enables you to make various different-sized stickers, which it then expertly cuts, leaving you with professional-looking stickers. Stickers can also be made using vinyl, PVC and even foil.
If you’re still wondering which machine is best for you, check out our round-up of the best Cricut machines. We are using the Cricut Print Then Cut function, which also requires an inkjet printer, but it is possible to draw your designs using the best Cricut pens, just set your images to 'draw' when you’re in Design Space.
Because of the size of the stickers and, in particular the sticker paper, you’ll need to use the Cricut Explore or Cricut Maker for this task
This guide will show you just how easy it is to make your own custom stickers with a Cricut. You’ll need some sticker paper, an inkjet printer, a Cricut machine, a Cricut mat and access to Cricut Design Space. For this tutorial, we’ve used images from Cricut Access to make our stickers, but you can, of course, create your own image in Procreate or Canva. Check out our guide to the best software for Cricut for more options.
For this tutorial, we are going to be using Cricut printable sticker paper, which has been designed to work with the Cricut Print Then Cut function. Because of the size of the stickers you’ll need to use the Cricut Explore or Cricut Maker for this task. What is Print Then Cut? This is simply an image that you design in Design Space, then print on your inkjet printer before running through your Cricut for it to cut out the shapes.
Any images can be turned into printable images by changing the line type. The line type tells your machine how to work with different materials. If you want a multi-layer image, for example, different colours, you must use the flatten tool found in the layer panel, which will convert your image to a single layer with a print line type, and it’ll be ready to send to your printer. Now, let's teach you how to make stickers with Cricut.
How to make stickers with Cricut, the easy way
01. Opening Cricut Design Space
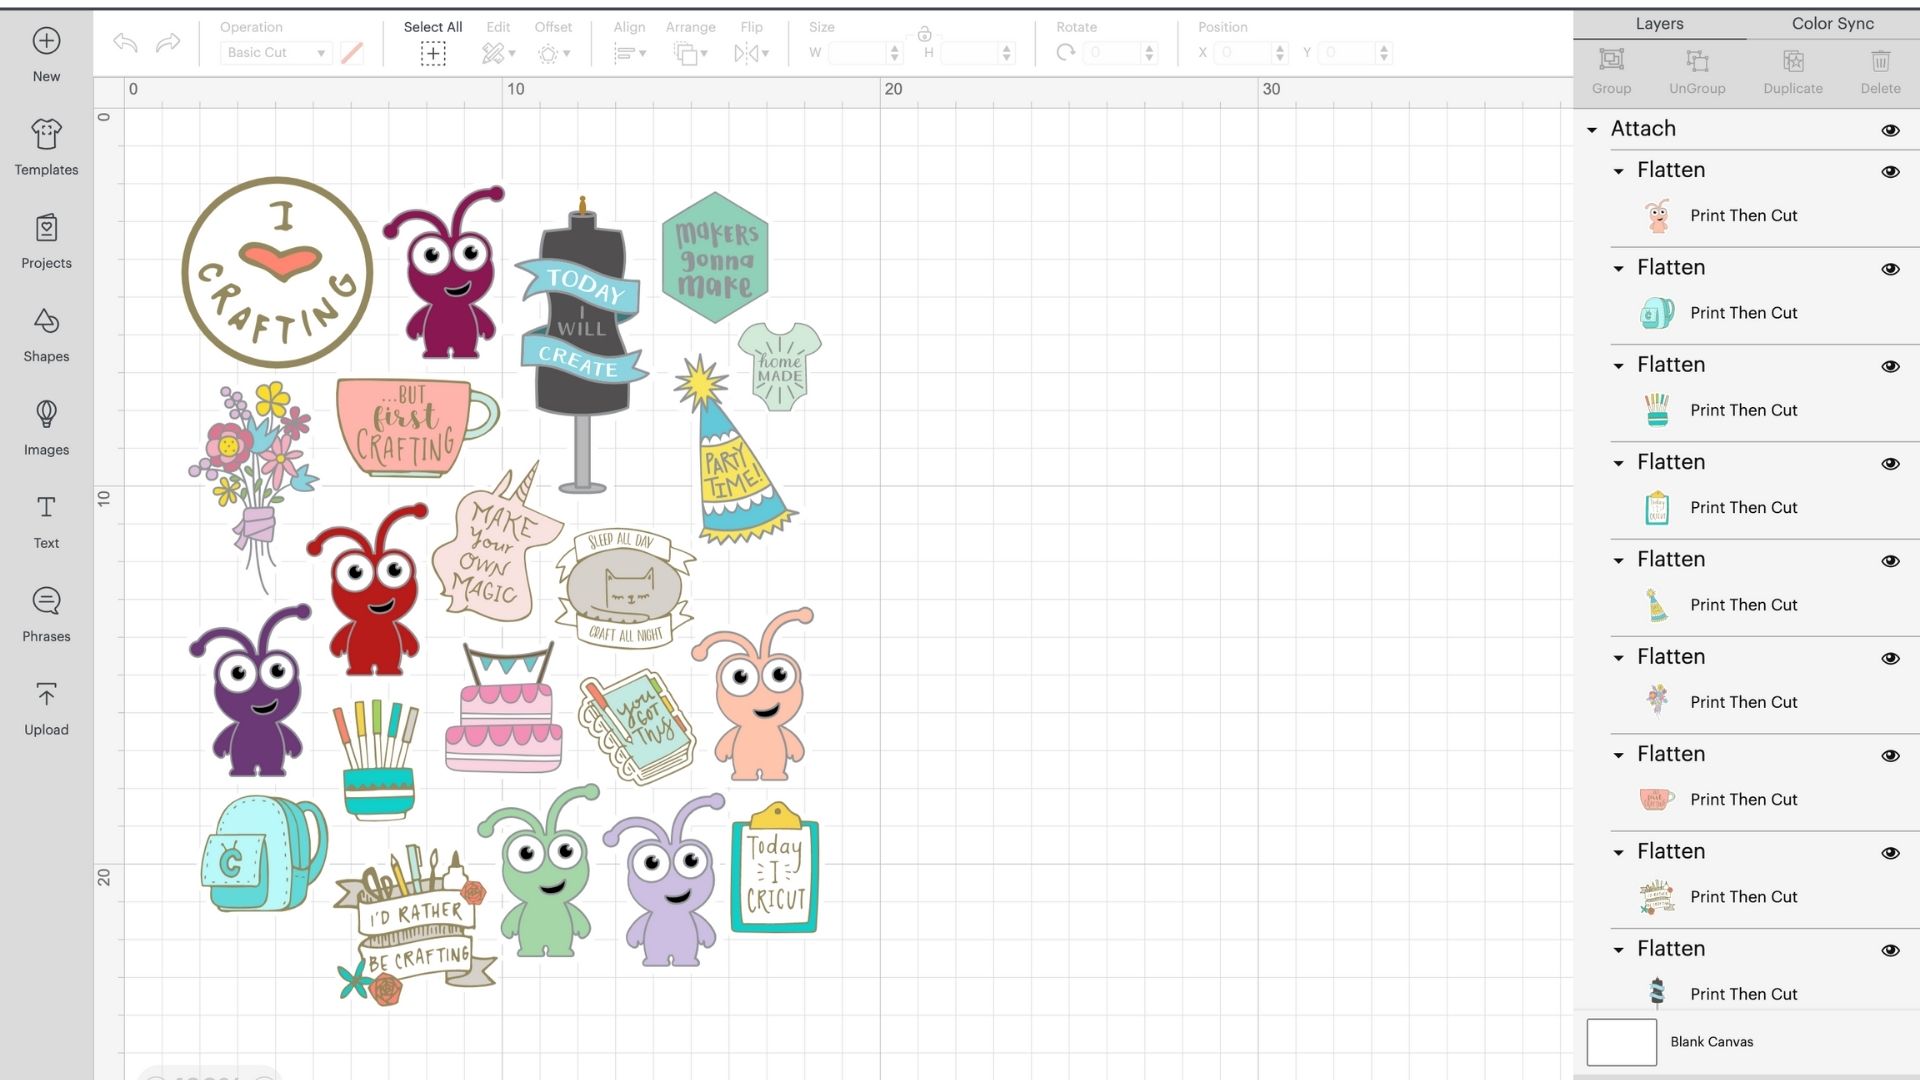
When learning how to make stickers with Cricut, you first need to open Cricut Design Space and start a new canvas. You can either upload your own design or use an image from Cricut Access. For more projects, read our guide to the best free SVG files for Cricut. If you upload your own design, make sure you flatten the image before going through to the next step.
Print Then Cut has a maximum size of 6.75 x 9.25 inches on an 8.5 x 11-inch sheet of material. The easiest way to make sure your sticker images fit is to use a square from the shapes library and resize it to 6.75 x 9.25 inches.
You can then arrange your stickers, and when you’re happy you’ve filled the space, delete the square. You will then need to highlight the images and make sure that Print Then Cut is selected in the operation section, which you’ll find on the top bar. Whilst the images are highlighted, click attach in the layers panel, which will keep them all in place for the next stage.
02. Setting up the printer
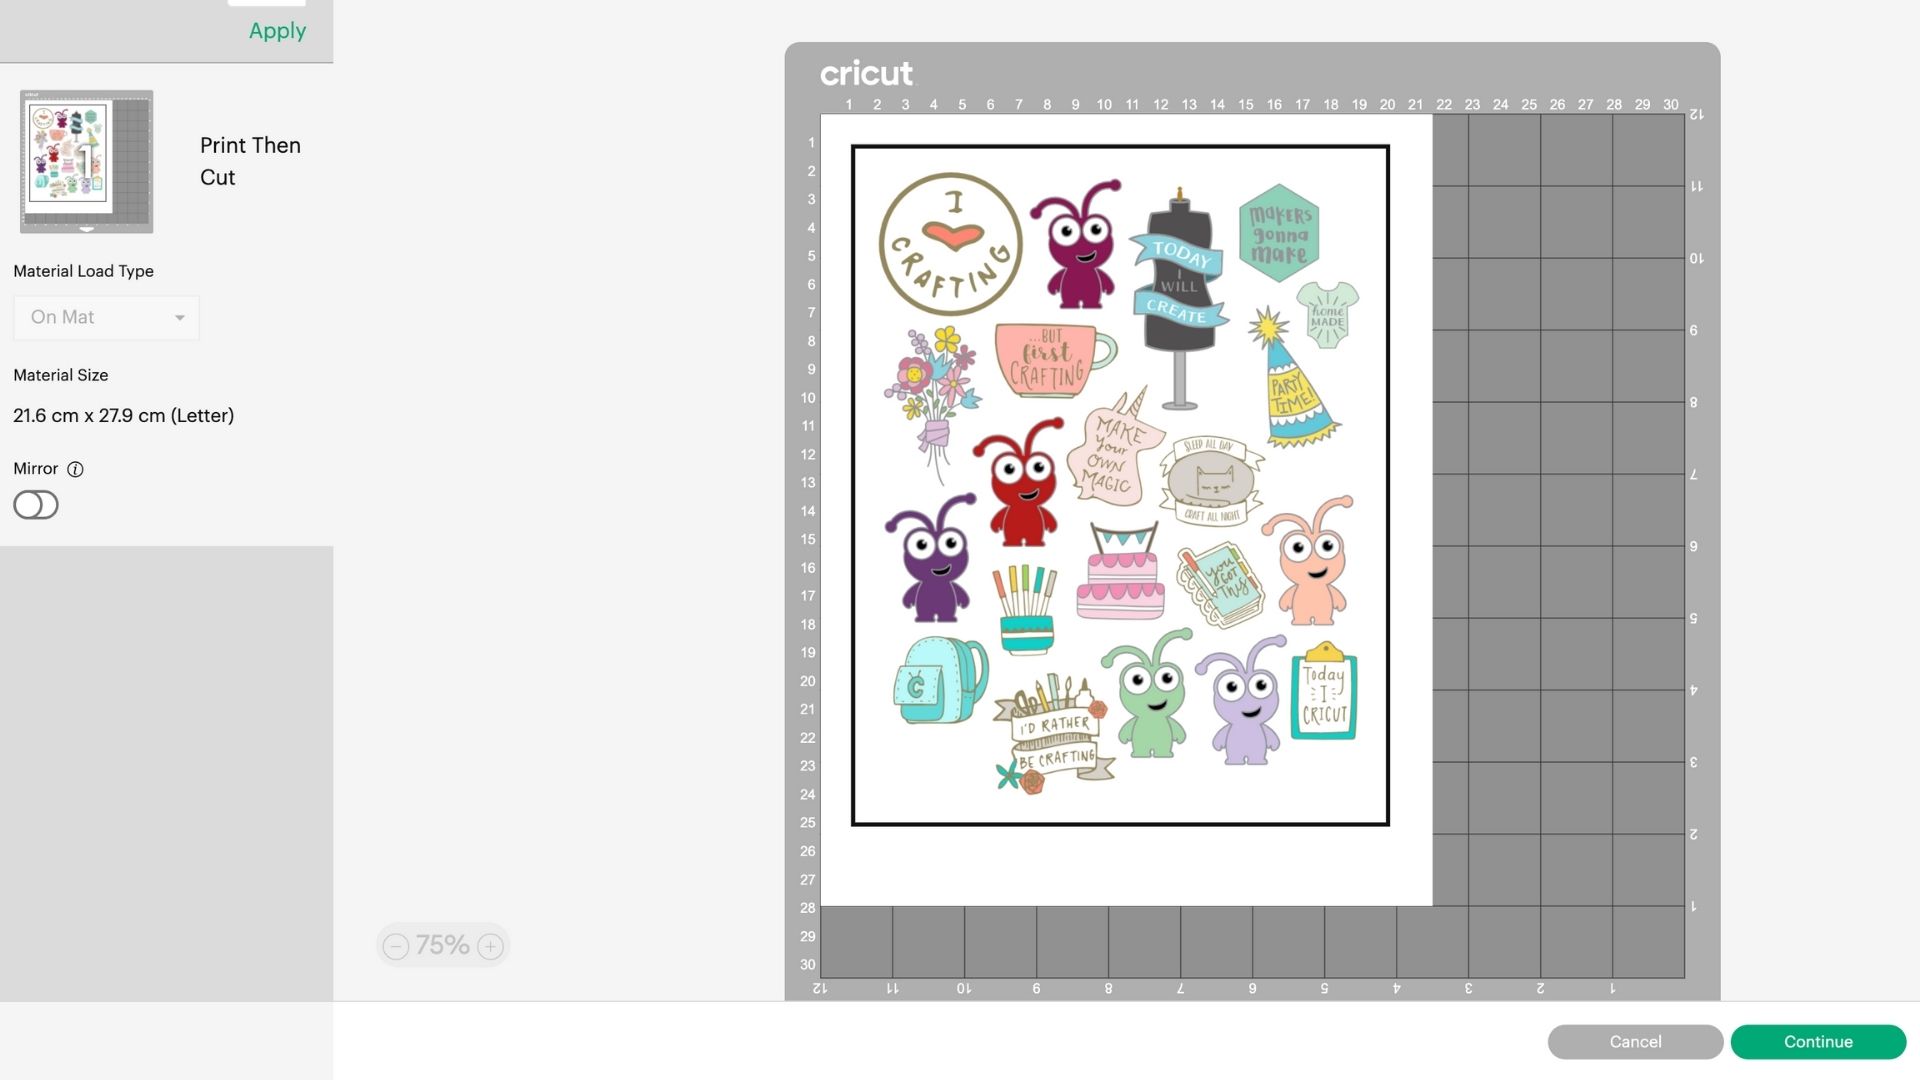
We're almost ready to make our Cricut stickers. Once you've got your images in place, it's time to select your machine from the top menu and click the Make It button. You will notice that a lined black box will surround your design. This box will be printed, and the Cricut sensors scan it, so the machine knows exactly where to cut.
Next, click Continue, where you'll be able to send it to your printer. When you click Print, you'll be able to select the Add Bleed function. When this is selected, the ink is extended slightly beyond the image's border, which eliminates the white margin when the image is cut. However, if you want your image surrounded by a white margin, turn this off.
You can also choose to turn on System Dialog, which will allow you to access your own printer settings, giving you the option to adjust the settings for the best print quality.
03. Printing and adding to the mat
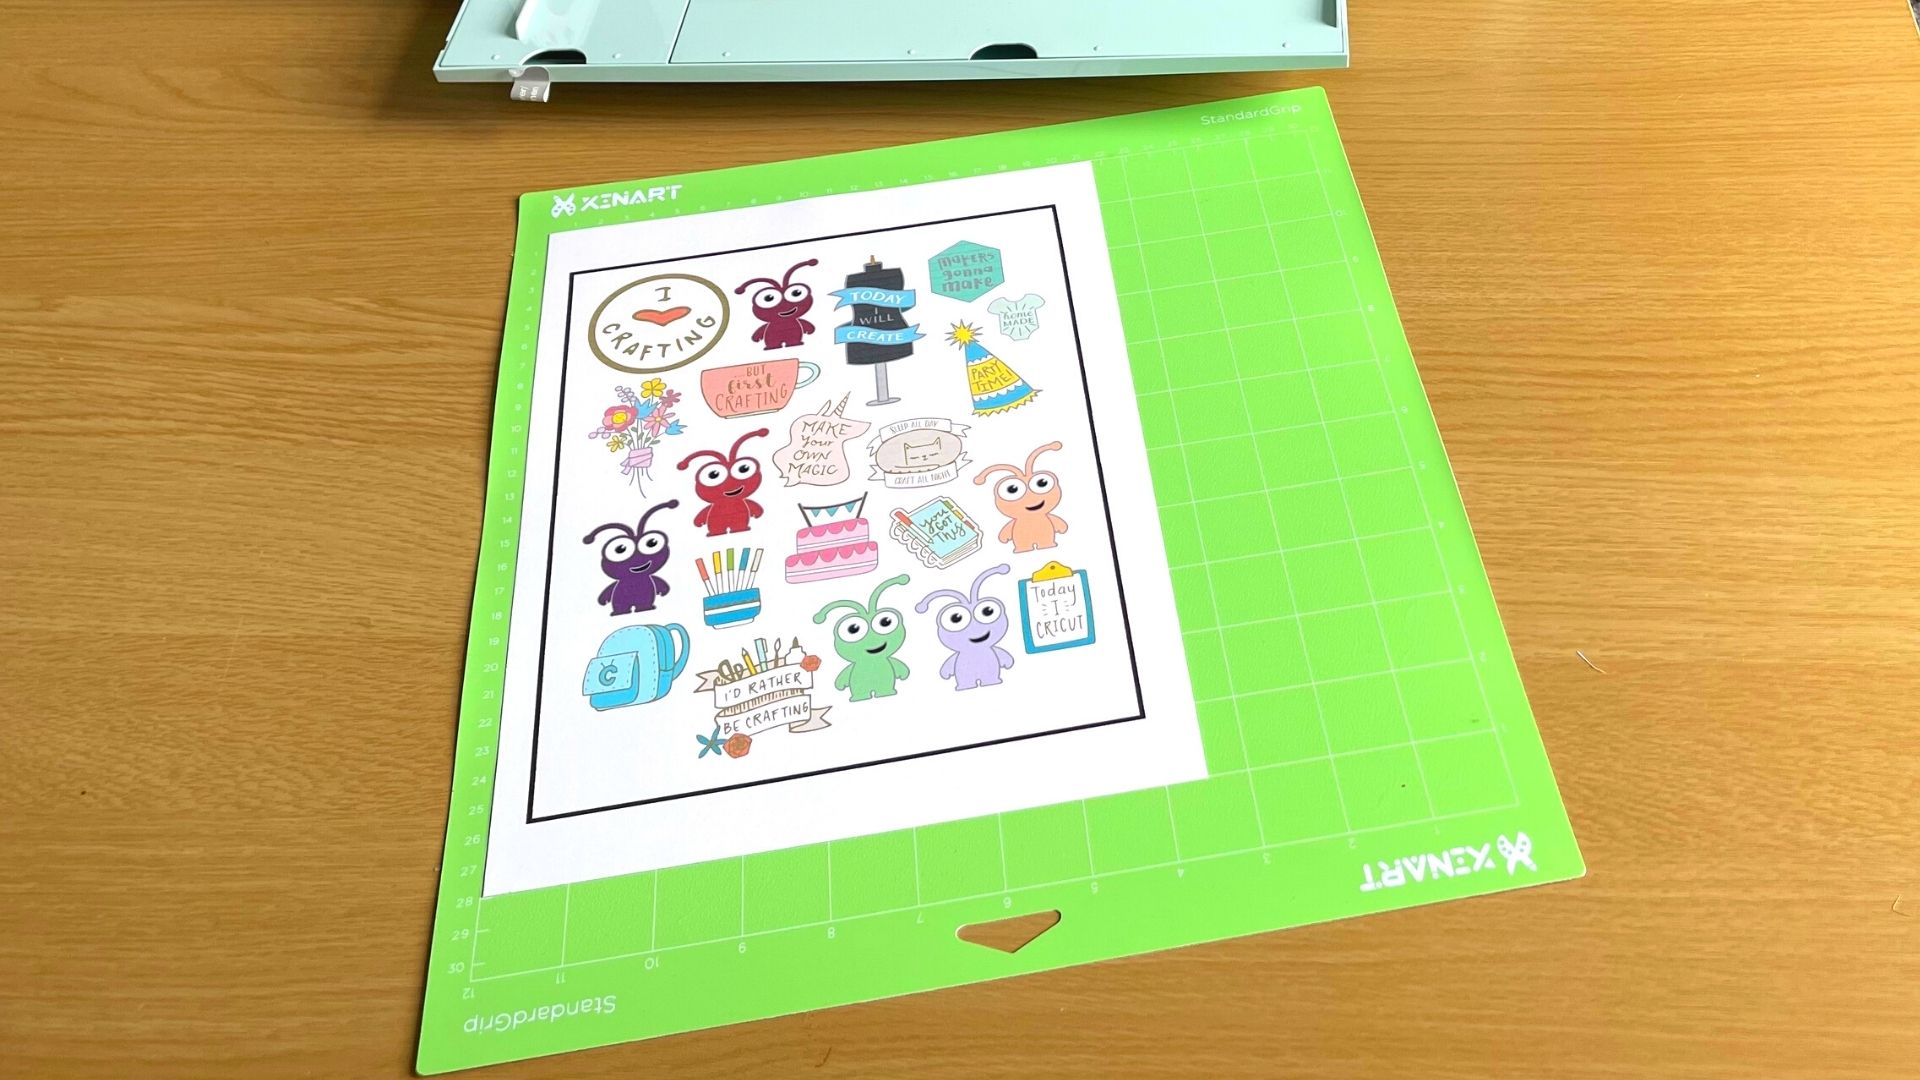
The next step of how guide to how to make stickers with Cricut includes your printer. This process only works with an inkjet printer; we have a list of the best art printers if you're looking to upgrade. You will need to check which way up your printer should be loaded. Add your chosen printable material to the feed and click Print.
Once your sheet has been printed, you’ll need to add it to a mat, lining up the top of the paper with the top left-hand corner. Even if you have a machine that uses Smart Materials, you will still need to use a mat for this project. We recommend a LightGrip mat as you’ll need to be able to remove it easily.
04. Selecting your material and get scanning
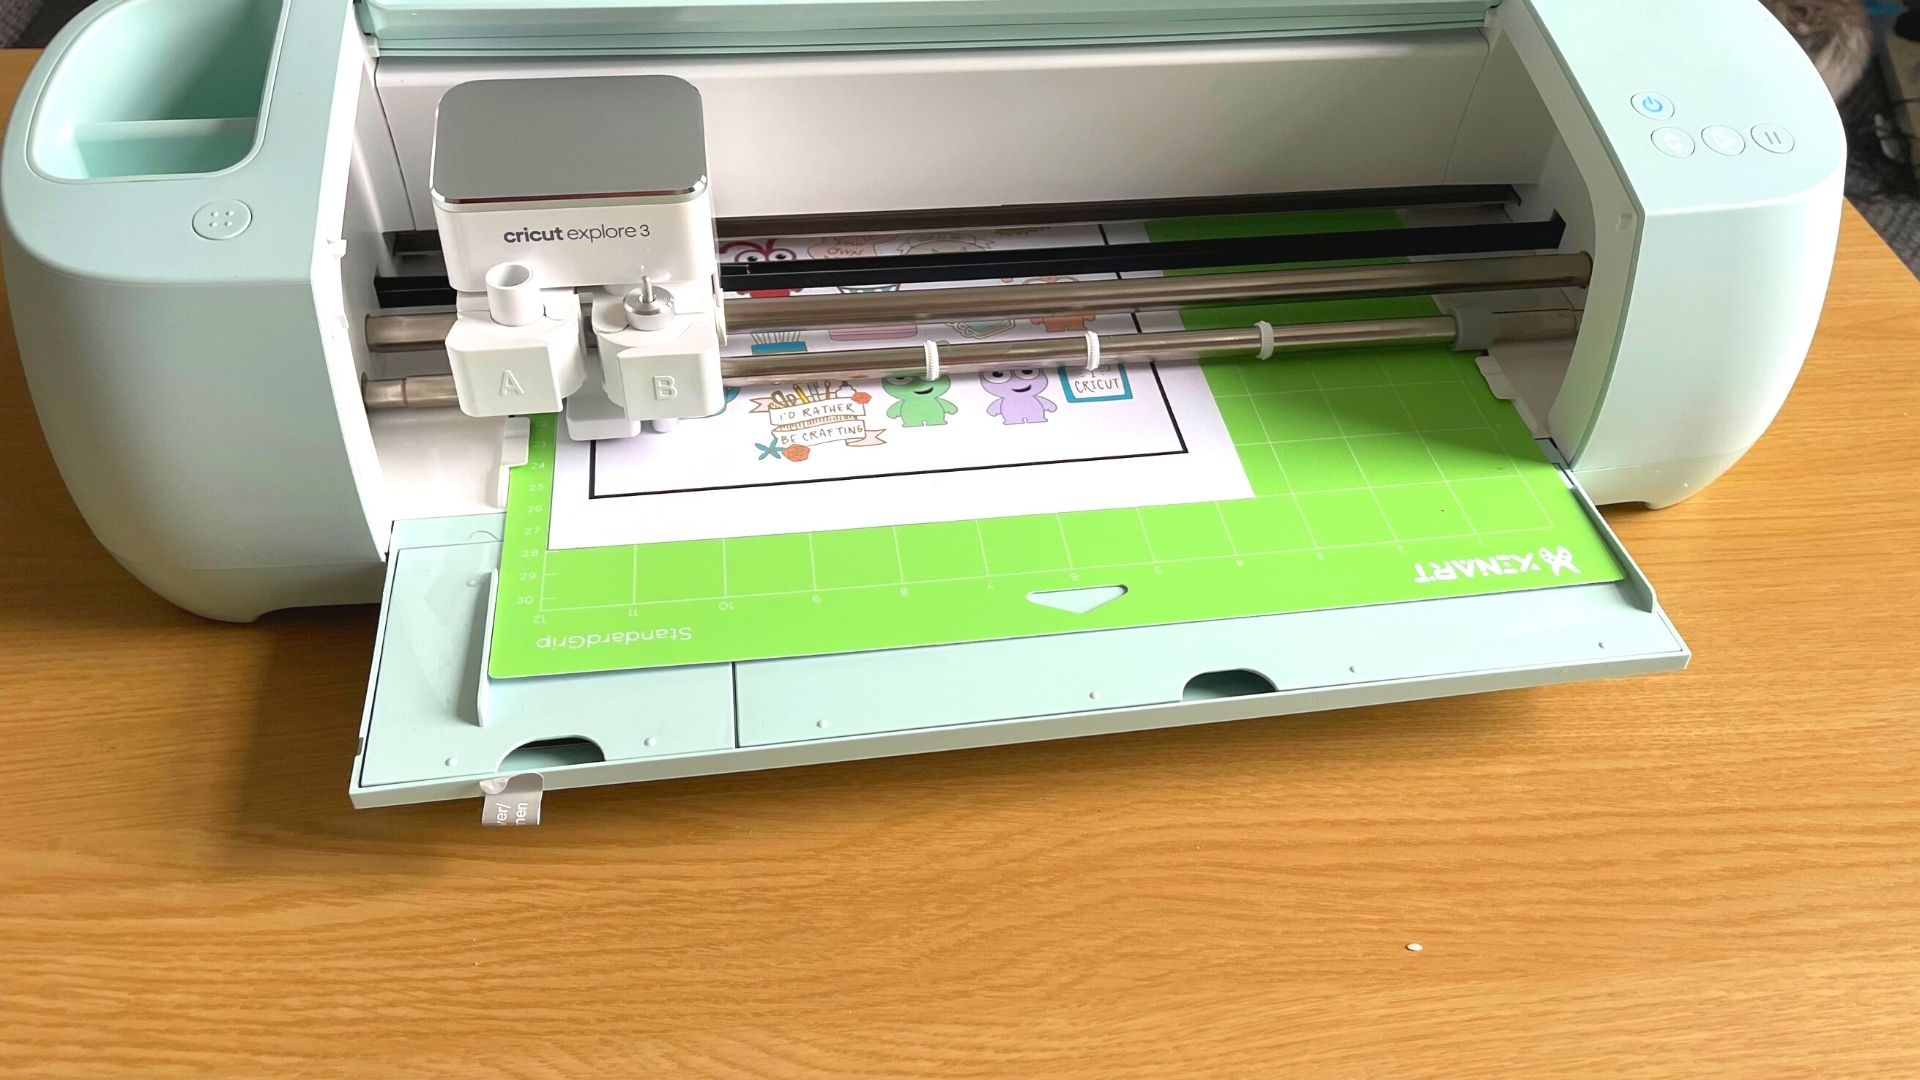
In Cricut Design Space, you need to tell your machine what type of material you’re using. We used the Cricut Printable Sticker Paper, so we just searched for that in the search bar. But if you’re not using the official Cricut paper, select the sticky note setting. We have a complete guide to the best Cricut materials, including papers for stickers.
A top tip if you’re planning to make Cricut stickers regularly is to click the star next to this material, which then adds it to your favourites. Once it’s in your favourites, it’ll save you plenty of time searching through the materials each time you want to create stickers.
The next step is to line your mat up and click Go. The machine will measure the mat length and will then use sensors to read the black lines before cutting around the individual images. And that’s it. Your stickers will be ready to peel off and use where you like.
How to make stickers with Cricut: tips and advice
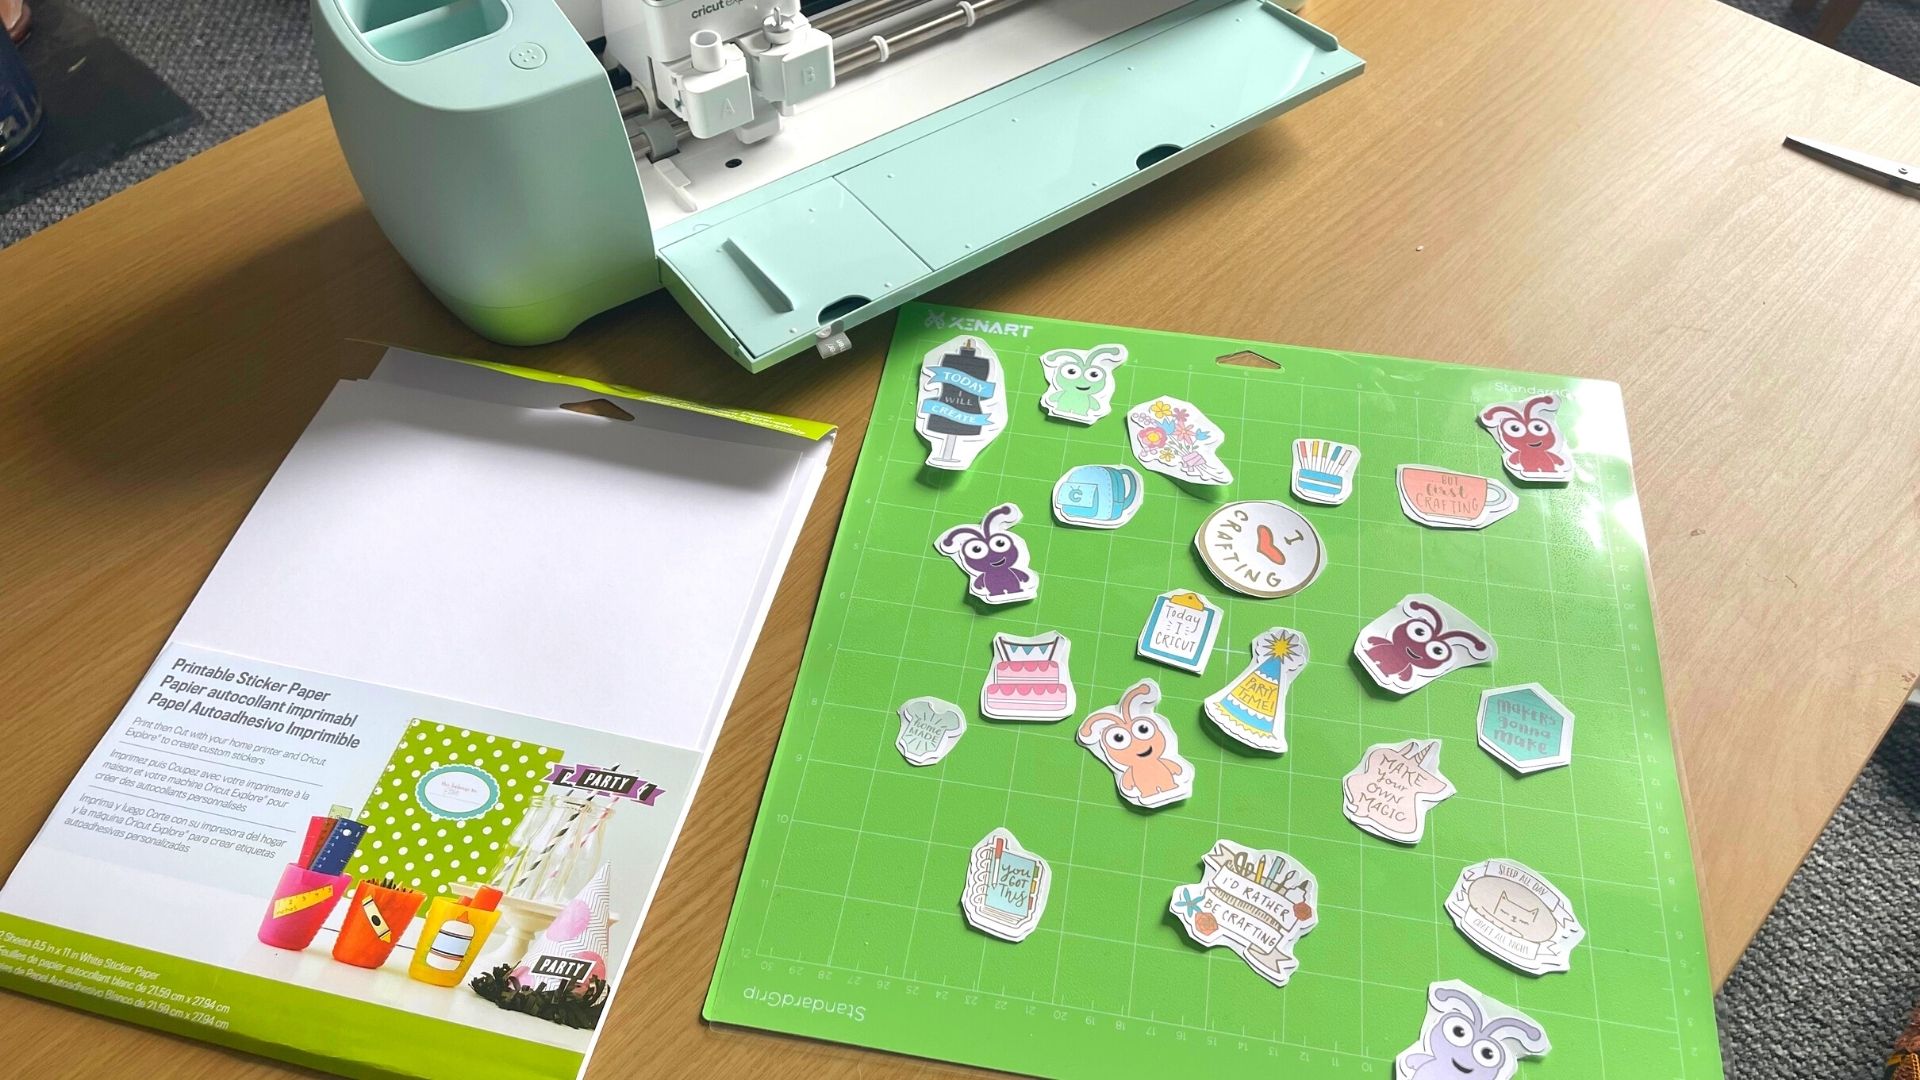
Making stickers with Cricut is so easy and once you get used to it you’ll whizz through the process in no time. But there are a few things that you need to know. Here we list our tips for making stickers with Cricut.
Get the Creative Bloq Newsletter
Daily design news, reviews, how-tos and more, as picked by the editors.
01. Sensor not working? Check the light
If your machine is throwing up an error when it’s in the scanning stage it could be to do with the light conditions in your room. Direct sunlight or bright lights shining directly towards your machine will interfere with the machine sensors. The sensors work best in low light so just draw the curtains or turn the light out before it starts scanning.
02. Always check Cricut's calibration
Cricut’s are smart cutting machines but sometimes they need a little help. If the cut isn’t quite right then head to the settings menu and follow the Print Then Cut calibration steps. The calibration sheet needs to be printed in black and white and printed in actual size to be successful.
03. Print Then Cut in one go
When you start a Print Then Cut project make sure to do it on the same computer and in one go to avoid the design jumping around and the sensor marks being incorrect. Take a look at our reviews of the best laptop for Cricut to see which computers we recommend.
04. Where you place the material matters
We mentioned above that when you place your material on the mat it needs to be placed in the top left corner of your cutting mat. Line this up directly along the top left edge of the cutting mat. Make sure the material is flat and doesn’t have any wrinkles or bubbles. If the material isn’t placed in the right place then the sensors won’t be able to detect your image and your cut won’t work.
As you can see, making stickers is really simple. There are so many different projects that you can do with a Cricut, including making your own mugs, read our Cricut Mug Press review for more, or cut HTV vinyl and make your own customised t-shirts with a Cricut EasyPress (we have a guide to the best heat press machines).
Read more:
- Discover the best Cricut accessories
- Cricut Maker vs Cricut Maker 3: which is right for you?
- We list the best Cricut alternatives in

Thank you for reading 5 articles this month* Join now for unlimited access
Enjoy your first month for just £1 / $1 / €1
*Read 5 free articles per month without a subscription

Join now for unlimited access
Try first month for just £1 / $1 / €1

Craft, photography and hardware writer Rachael Penn has written for The Evening Standard, The Independent, Fit&Well, The Radar, T3, and TopTenReviews. She also writes on many other subjects, including lifestyle, travel, food, internet culture and eco-living for online and print publications.
- Ian DeanEditor, Digital Arts & 3D
