Make realistic plants in Cinema 4D
Give archviz scenes an organic touch by building your own foliage.

No matter your final use, most scenes centred on a man-made structure will benefit from a touch of organic foliage in plants and trees. The contrast in colour, texture and form can really help add interest to the final render, as well as bring life and interest into a piece.
Though there are ready-made options for adding plants, it's best to know how to efficiently create your own 3D plants pretty easily. To do this, you can make good use of Cinema 4D's MoGraph tools, with a very low polygon proxy object used as a placeholder.
The process is simple but effective and is easily adaptable to different needs. Files are available below, but try creating your own in order to get a better understanding of how it all comes together in practice.
Download the files and accompanying video for this tutorial.
01. Create leaves
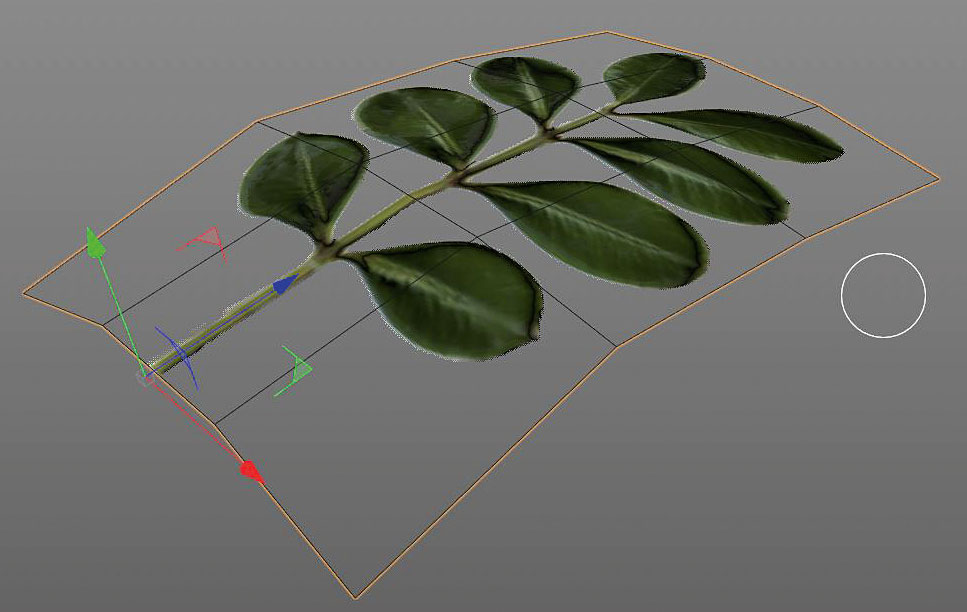
First off we need our leaf section. You can use the one supplied or create your own. The key is to use a format such as .png that allows for alpha channels and add a normal map as well, to help sell the details. Once you have that, apply it to a simple plane, bent in the middle to add a little life. Try to keep to around six to 10 polygons.
02. Make low-poly object
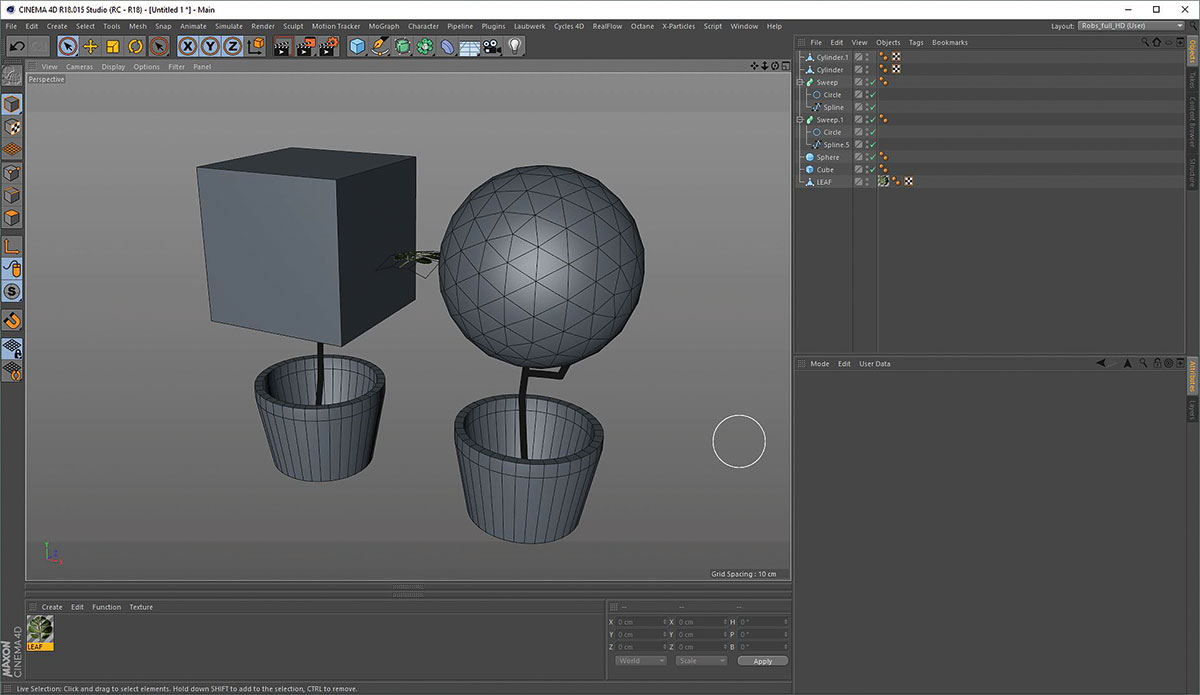
Now create a quick low-poly object to act as the growth base. Remember that modelling to scale will help. Make any shape you like and add any other details you need such as stems or trunks. Then, move your leaf axis point to the start of the stem, pointing along its length.
03. Add a cloner
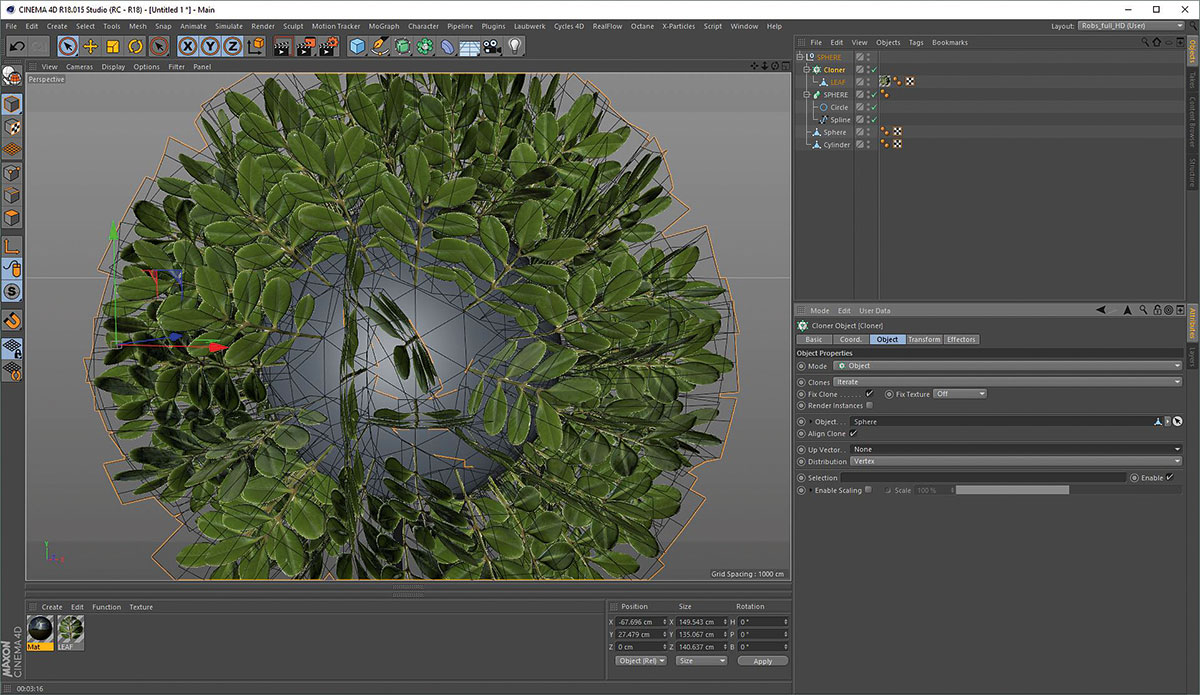
Add a Cloner to the scene, with the leaf as its child. At first there will only be a clone at each vertex of the underlying mesh, so change the Distribution setting to Surface and increase the count. If you have a flat underside, it might look a bit odd, in which case delete the bottom poly of the growth base object. As you go on it will begin to look more organic.
Get the Creative Bloq Newsletter
Daily design news, reviews, how-tos and more, as picked by the editors.
04. Add a random effector
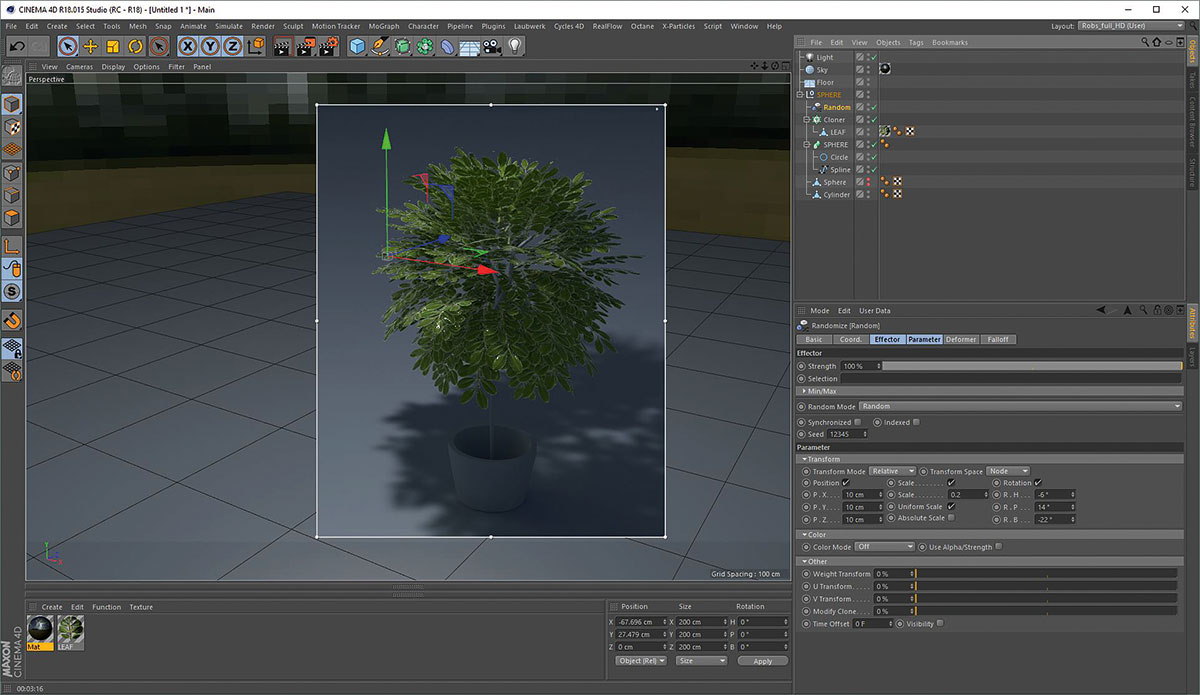
To finish up, add some variation by adding a Random Effector. Experiment with the settings to suit your needs but try to keep any scaling changes uniform, otherwise your leaves will stretch. Rotation and positional changes along all three axes can work well. If you find the faces of the leaves are too random, try changing the Up vector to +Y in the Cloner. Add more clones if you need to, until you are happy with the result.
This article originally appeared in 3D World issue 223. Buy it here!
Related articles:

Thank you for reading 5 articles this month* Join now for unlimited access
Enjoy your first month for just £1 / $1 / €1
*Read 5 free articles per month without a subscription

Join now for unlimited access
Try first month for just £1 / $1 / €1

Rob Redman is the editor of ImagineFX magazines and former editor of 3D World magazine. Rob has a background in animation, visual effects, and photography.
