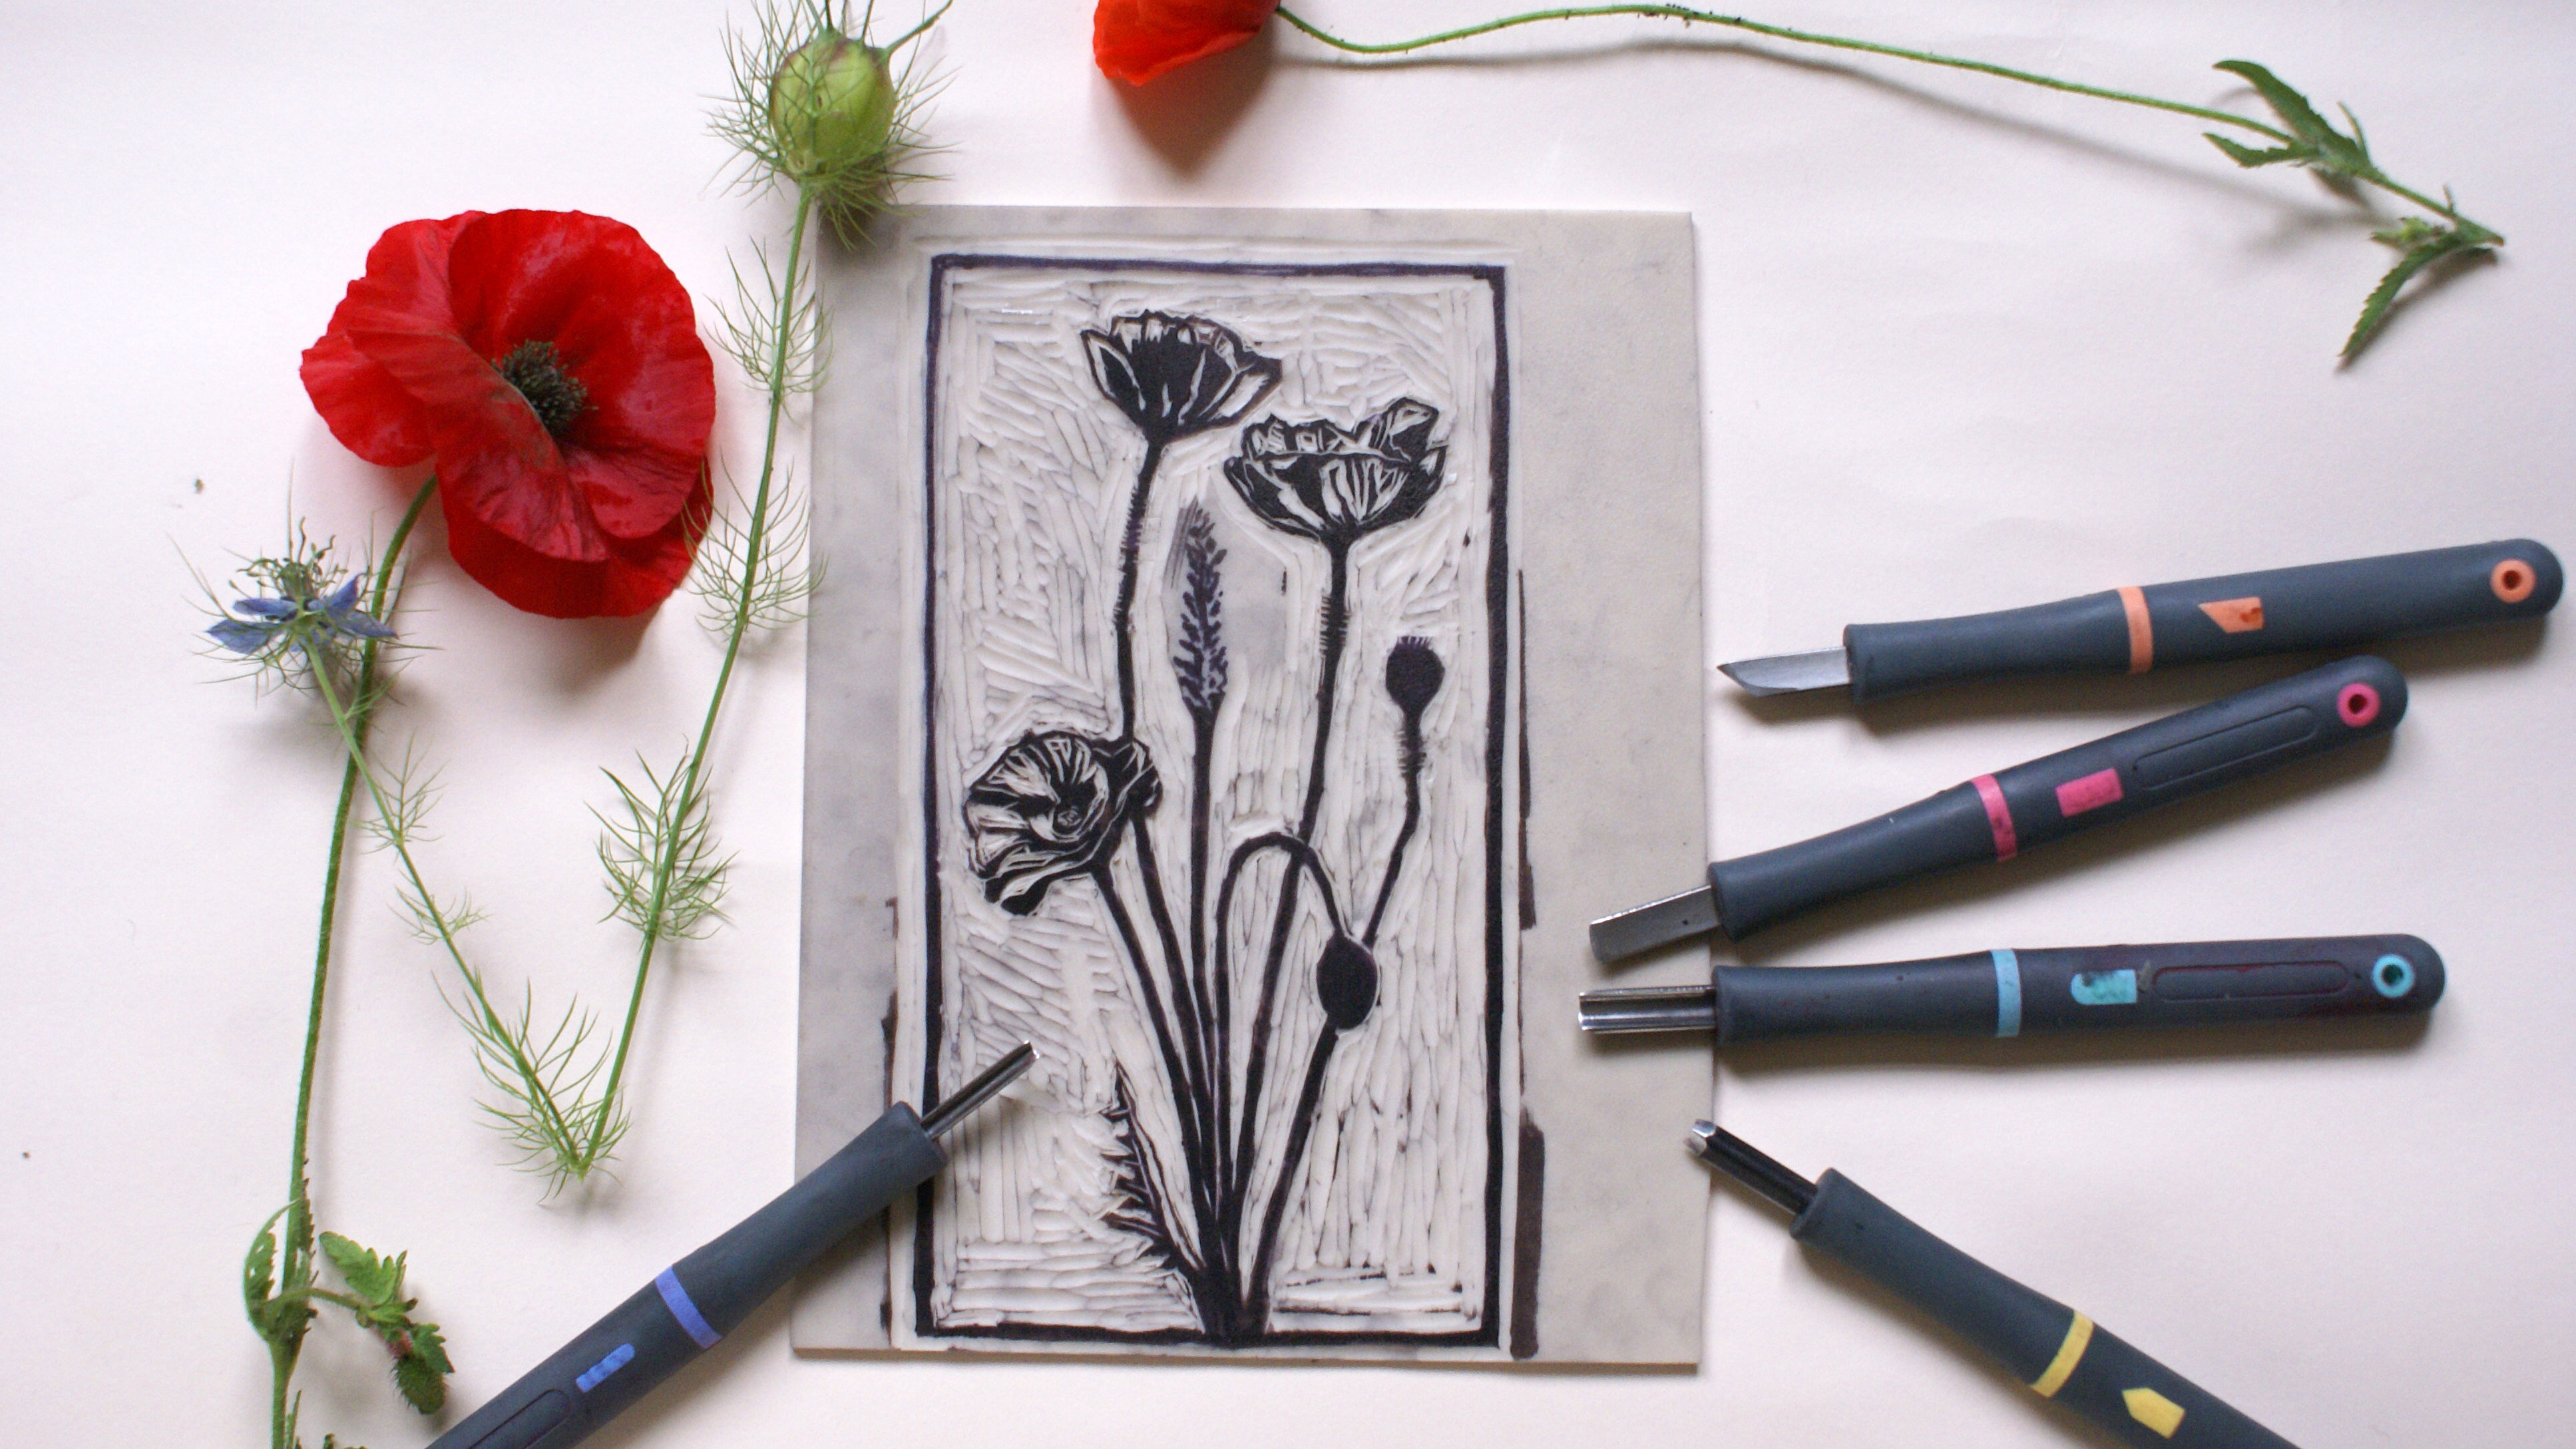
Lino printmaking is a method of relief printing, which involves carving a drawing into a soft linoleum block, rolling a thin layer of ink over it, and pressing paper on top to transfer the image. The areas where you have carved away often create quite beautiful results.
Lino prints look bold and powerful, with hard lines, flat areas of colour, and high contrast between the paper and ink. You can spend a long time carving, or just make a simple design, but the printing is fairly fast, so multiple copies can be made quickly and easily. Many artists find that working in lino changes their style, and drawings that look tentative or flimsy in pencil take on a more confident, powerful quality when transformed into lino prints (see our best pencil drawings for drawing inspiration).
In this tutorial you will learn the basics of lino printmaking as we explain how to make a simple lino print using a few basic materials. Also see our guide to woodcut printmaking if you're interested in a more traditional method.
For more tutorials, see our roundup of art techniques. And if you want to sharpen your drawing skills overall, see our how to draw tutorials.
01. Get to know your tools
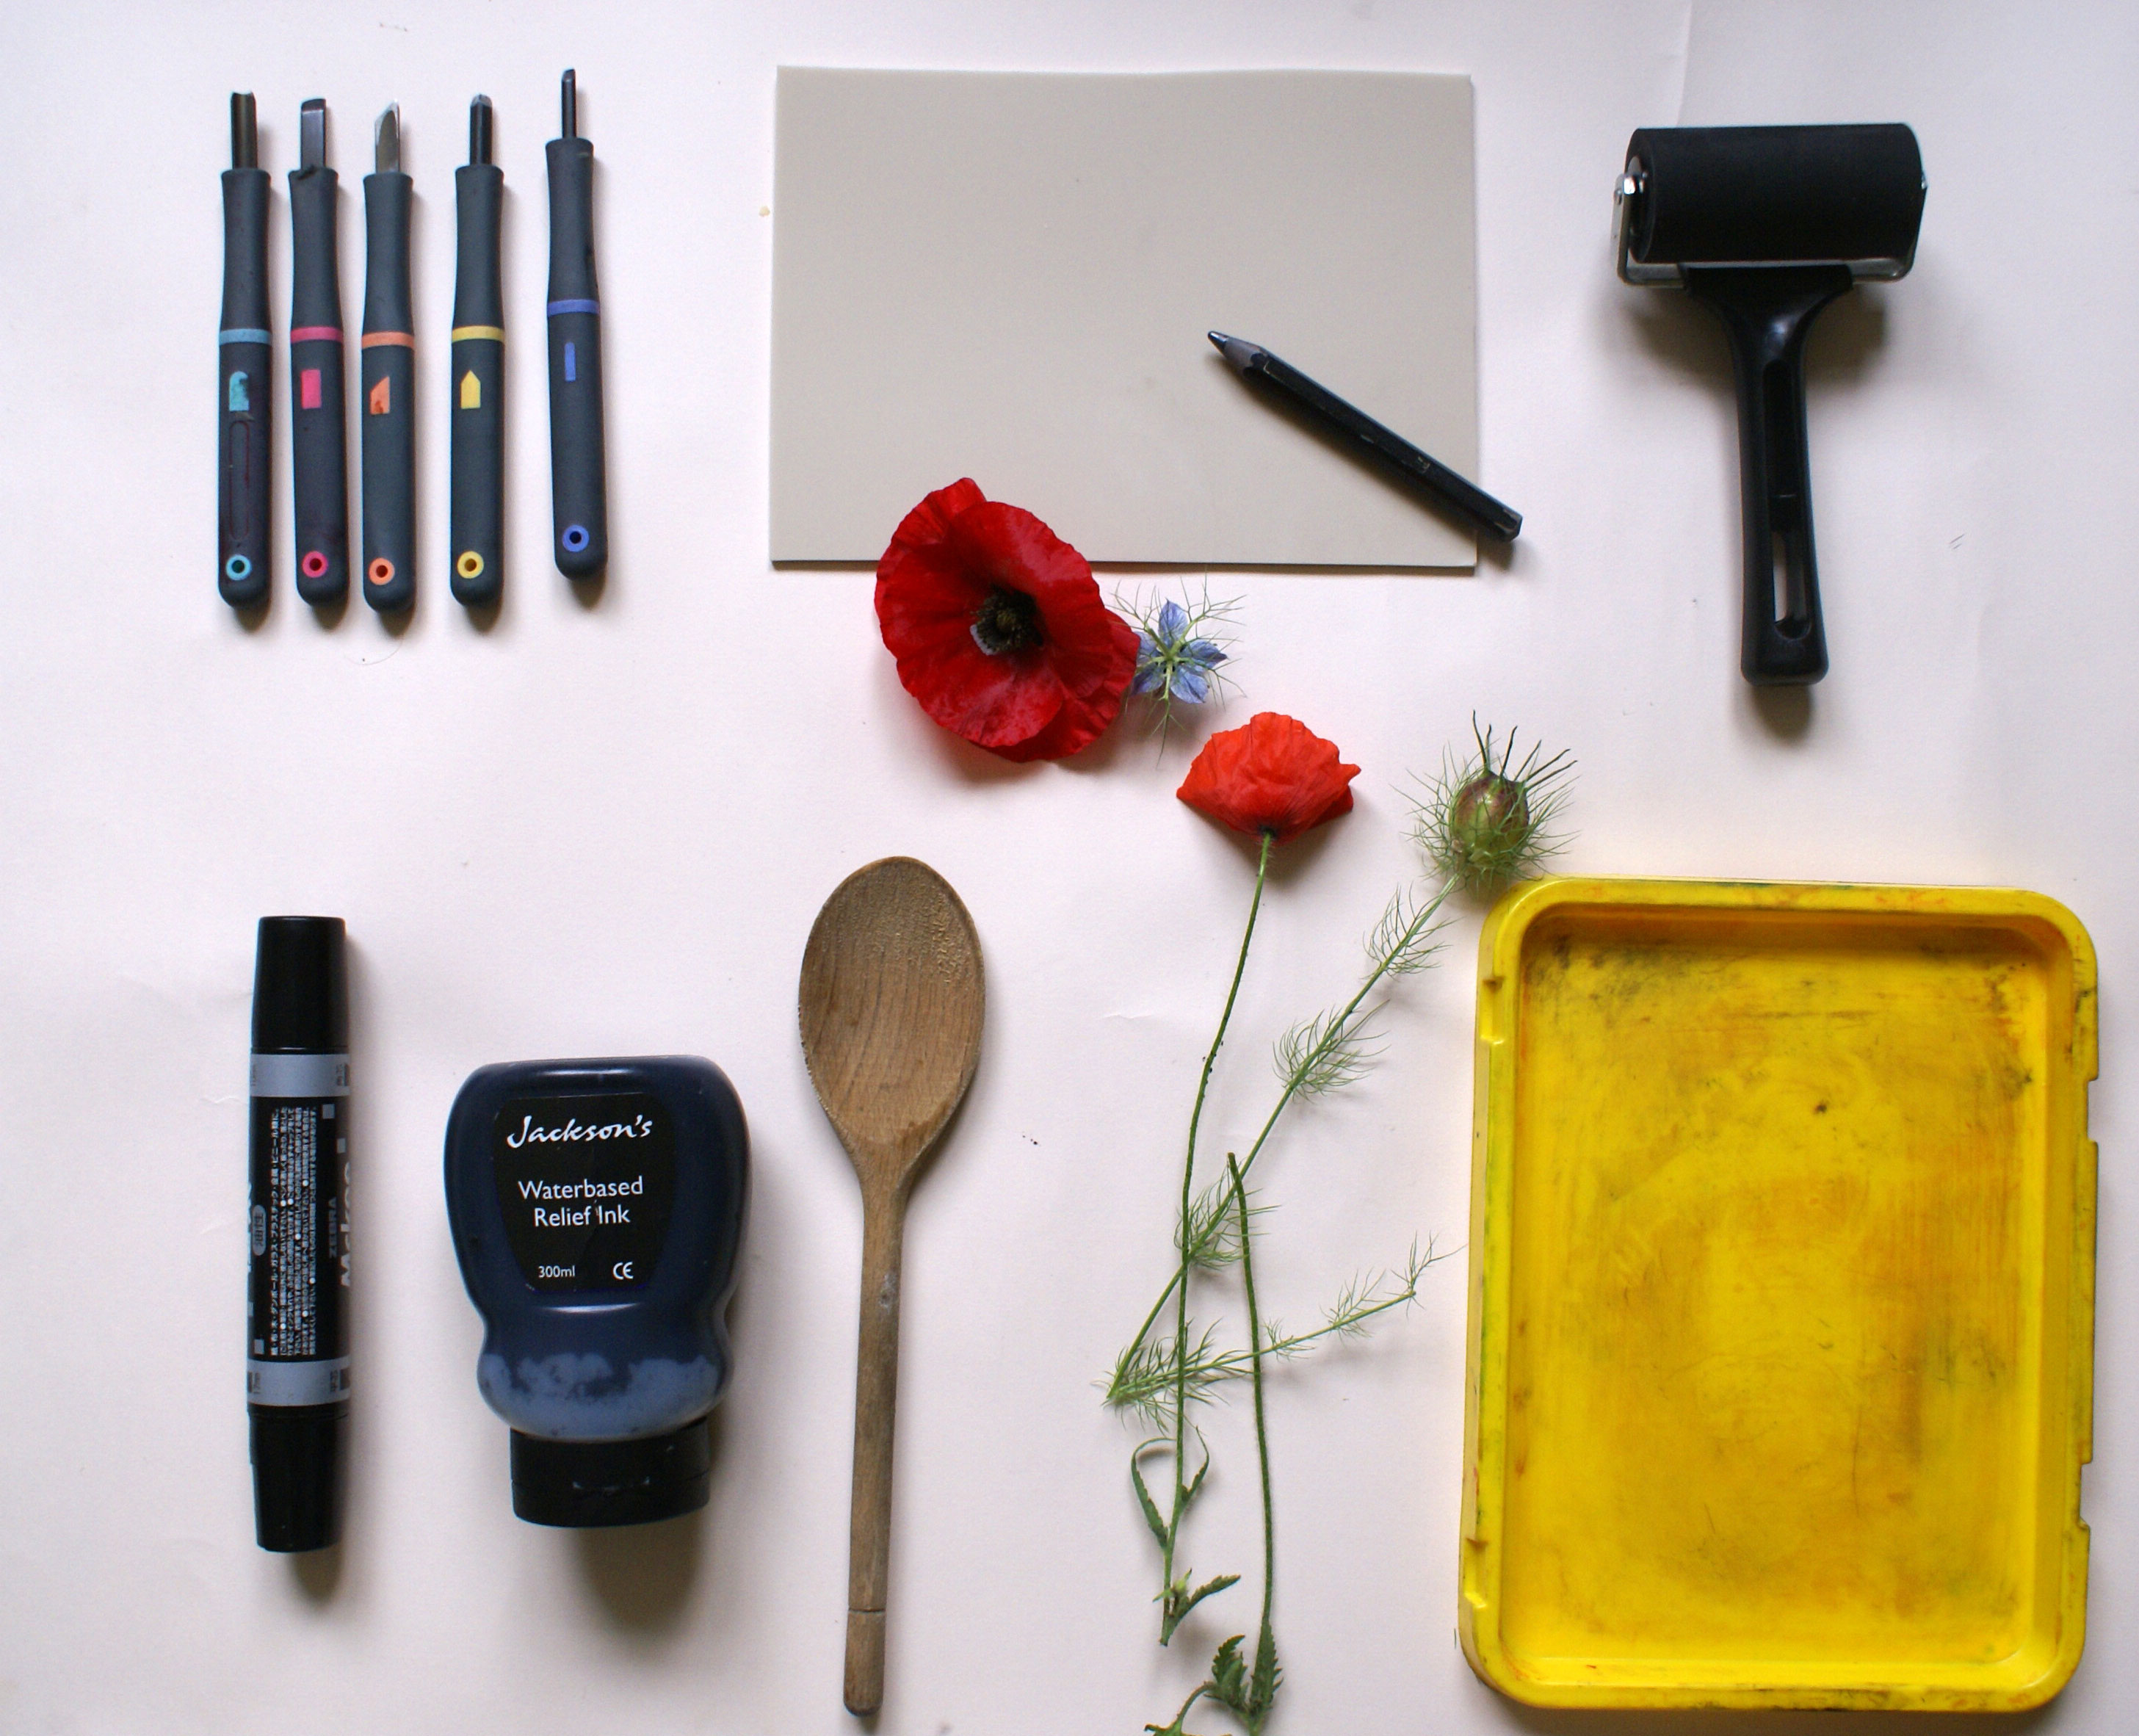
Before you start your lino printmaking project, you need to make sure you have the right tools. You will need the following:
- lino board
- ink roller
- carving tools
- sheet for inking up (glass, plastic, a tile, another piece of lino, anything that is smooth, flat and non-absorbent)
- marker pen
- pencil (see our post on the best pencils)
- carbon paper (optional)
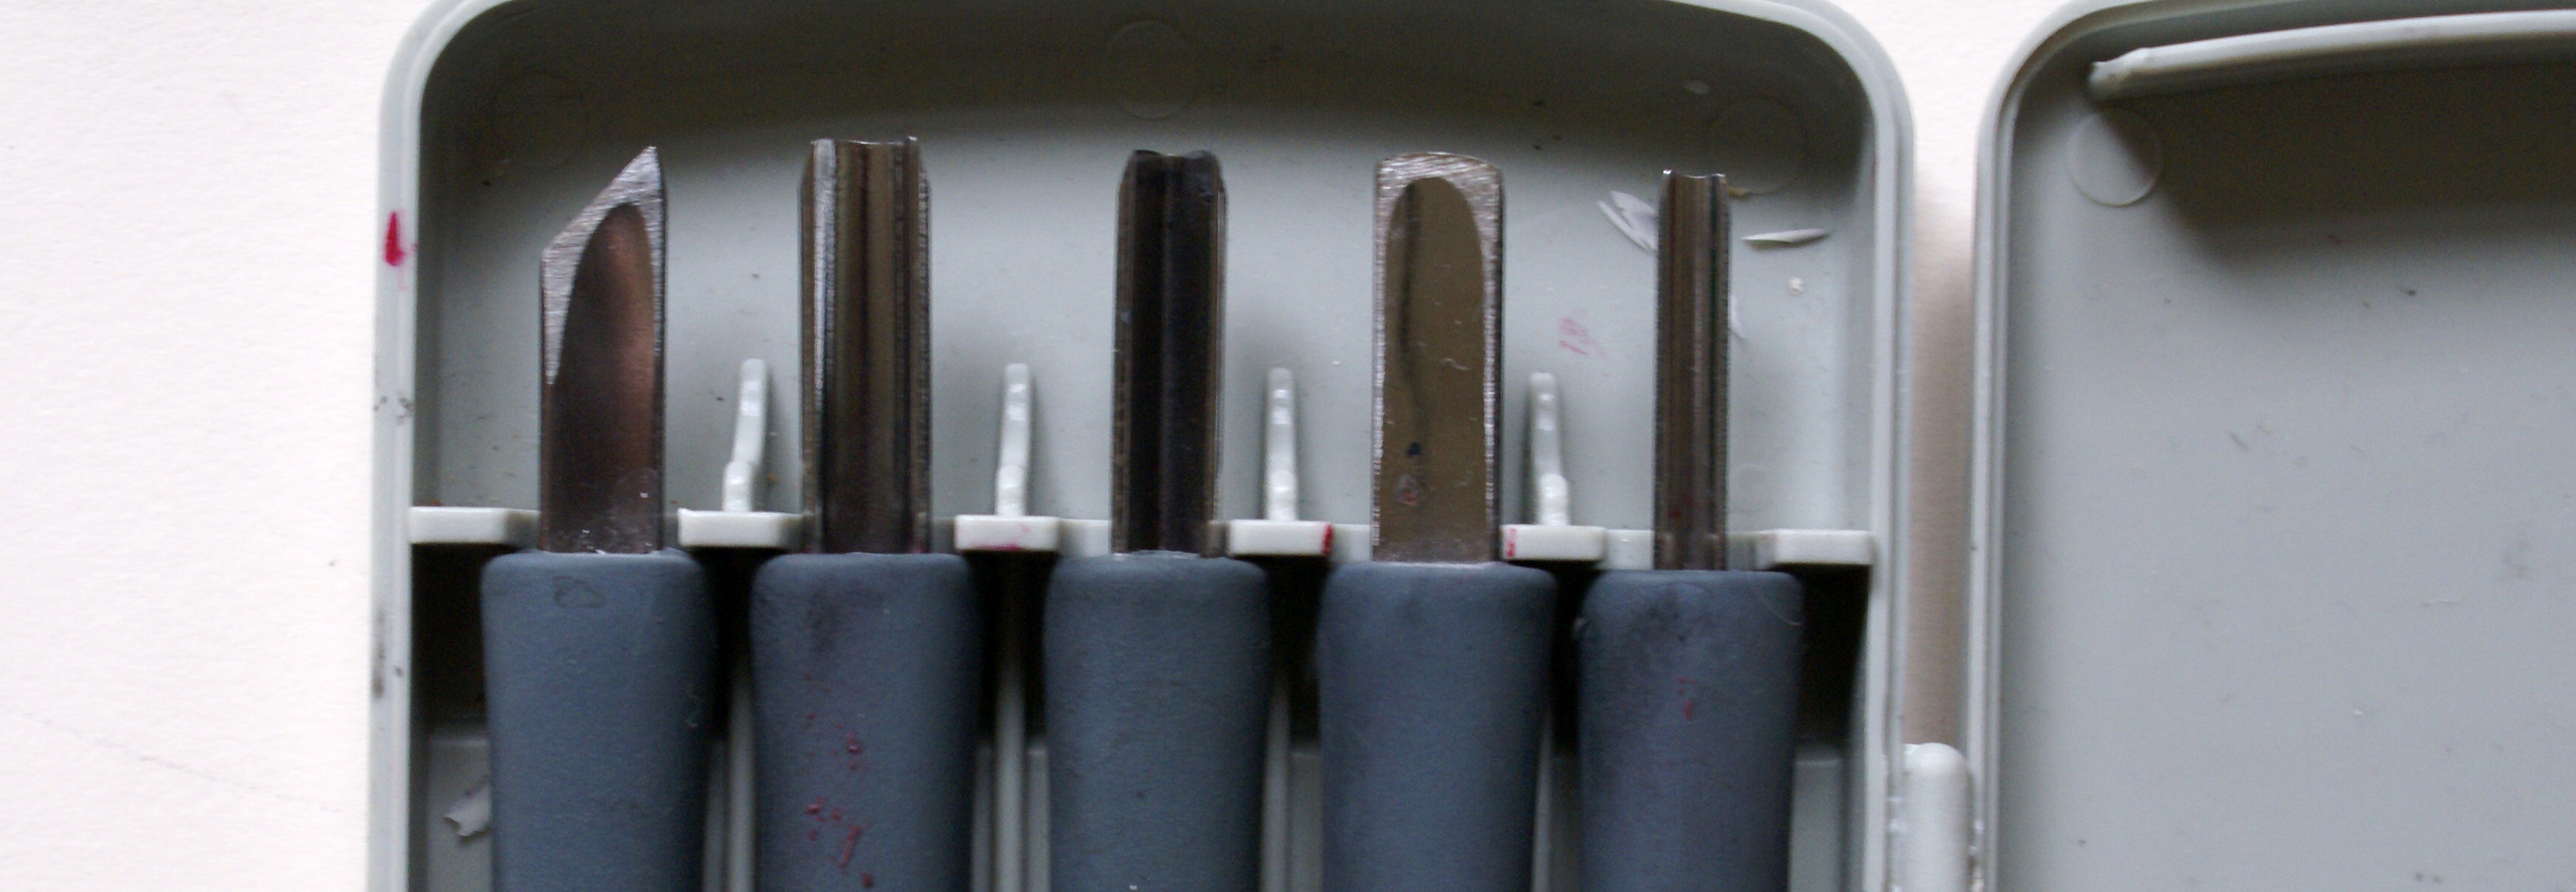
Each lino cut tool can be used to give a different mark or texture. Look at the blade of each tool. Some have a pointy ‘V’ shape, and some have a curvy ‘U’ shape. Another one is flat, and one is like a small craft knife.
02. Draw and transfer your design
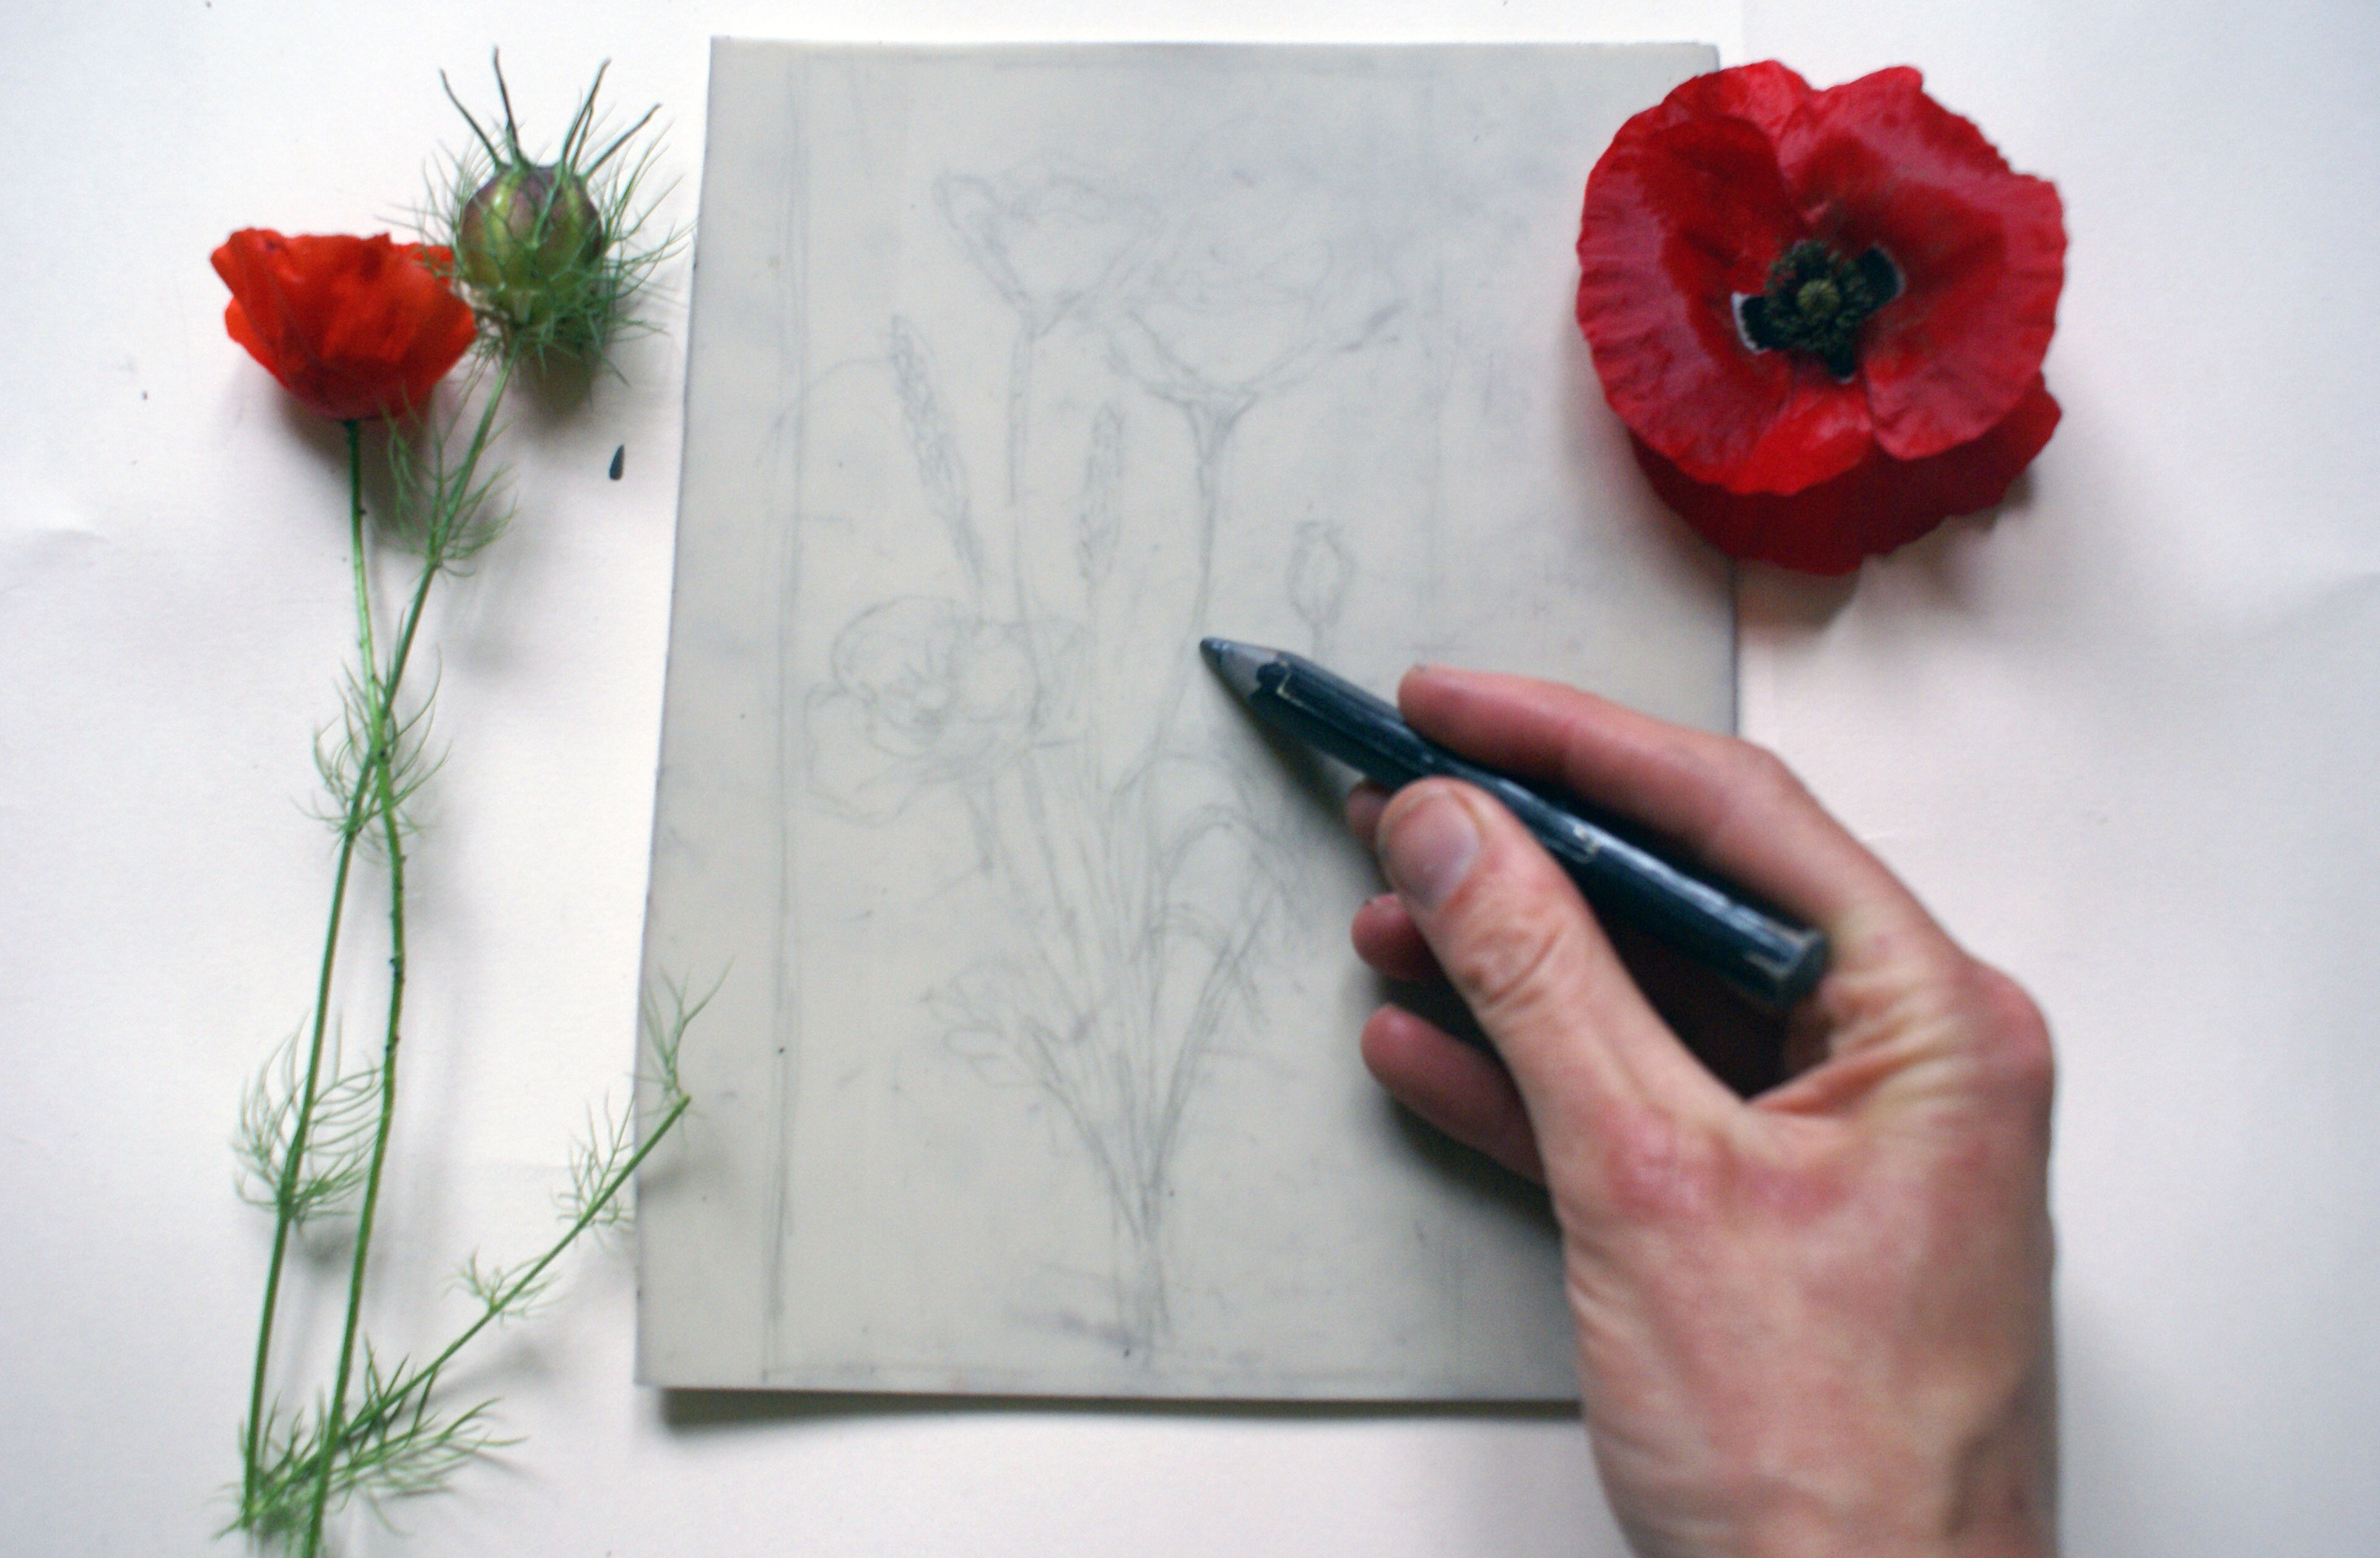
Start off with a simple drawing. You can draw directly onto the lino or you can transfer a photograph or drawing using carbon paper.
Get the Creative Bloq Newsletter
Daily design news, reviews, how-tos and more, as picked by the editors.
03. Create areas of light and dark
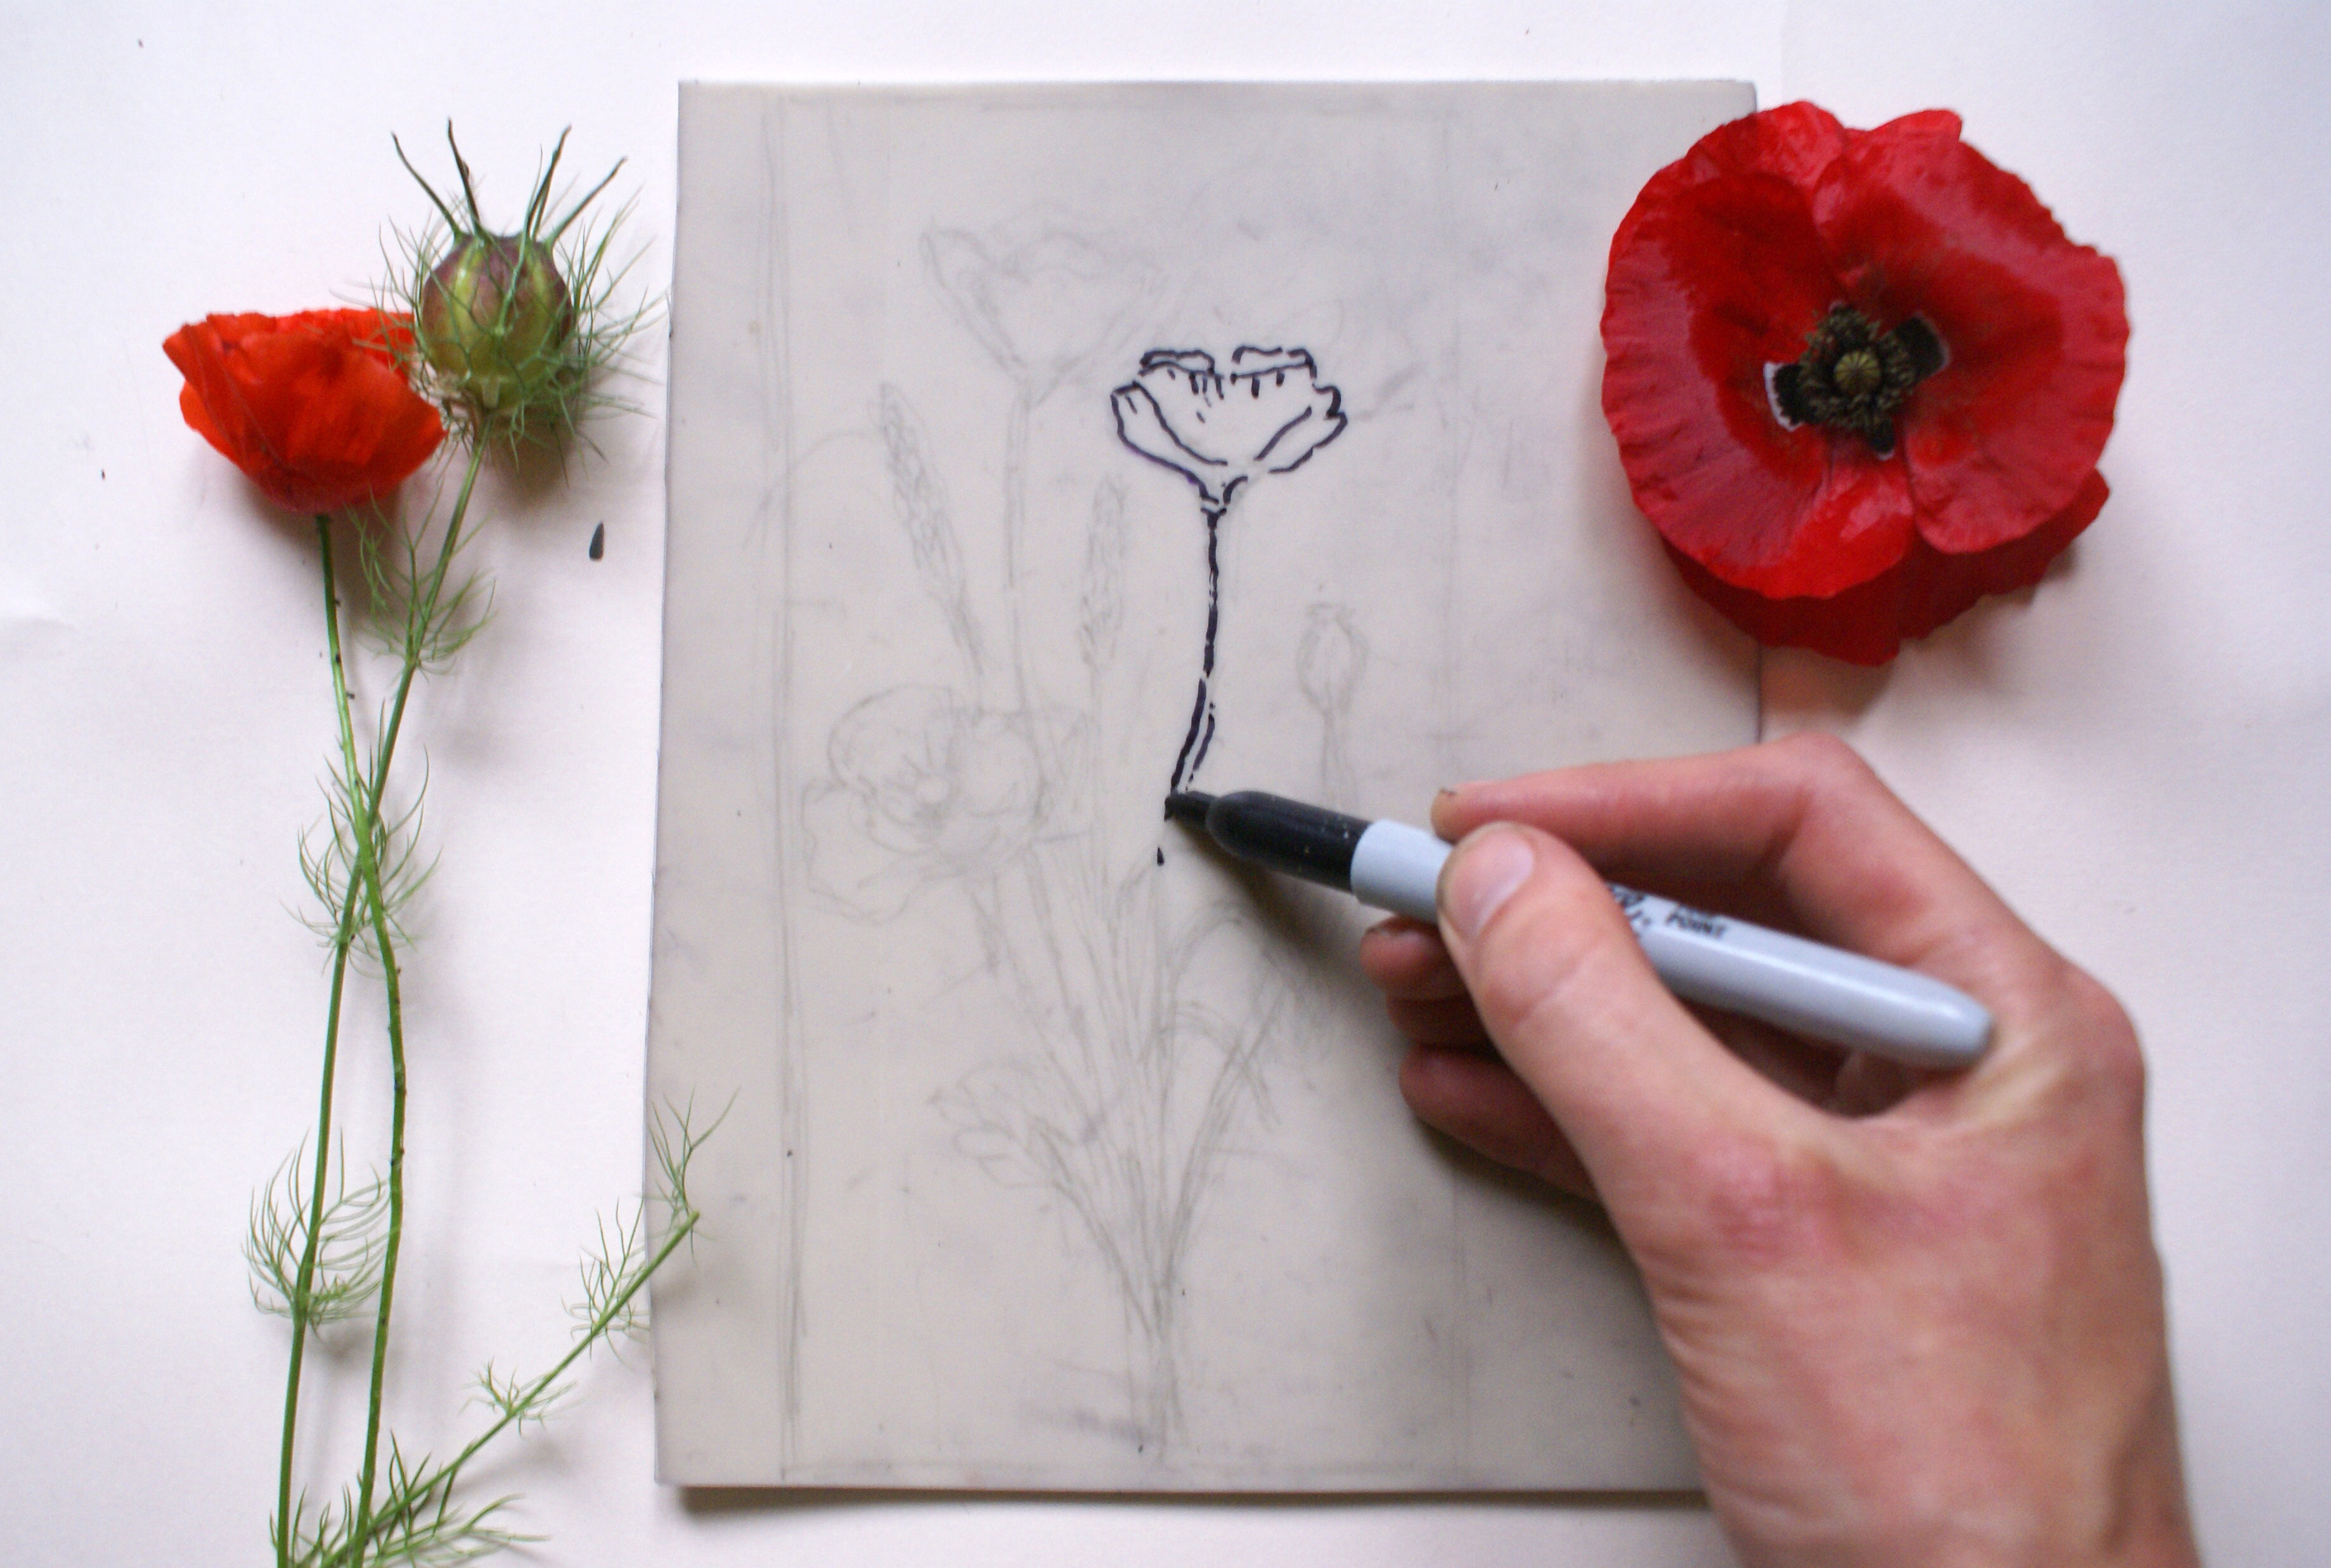
You will have to clear away all the 'paper' areas on the lino block with your tools – it’s an inverse of drawing with a black pen on white paper. It can help to use a marker pen to clarify the light and dark areas of your image.
04. Make a test piece to practise
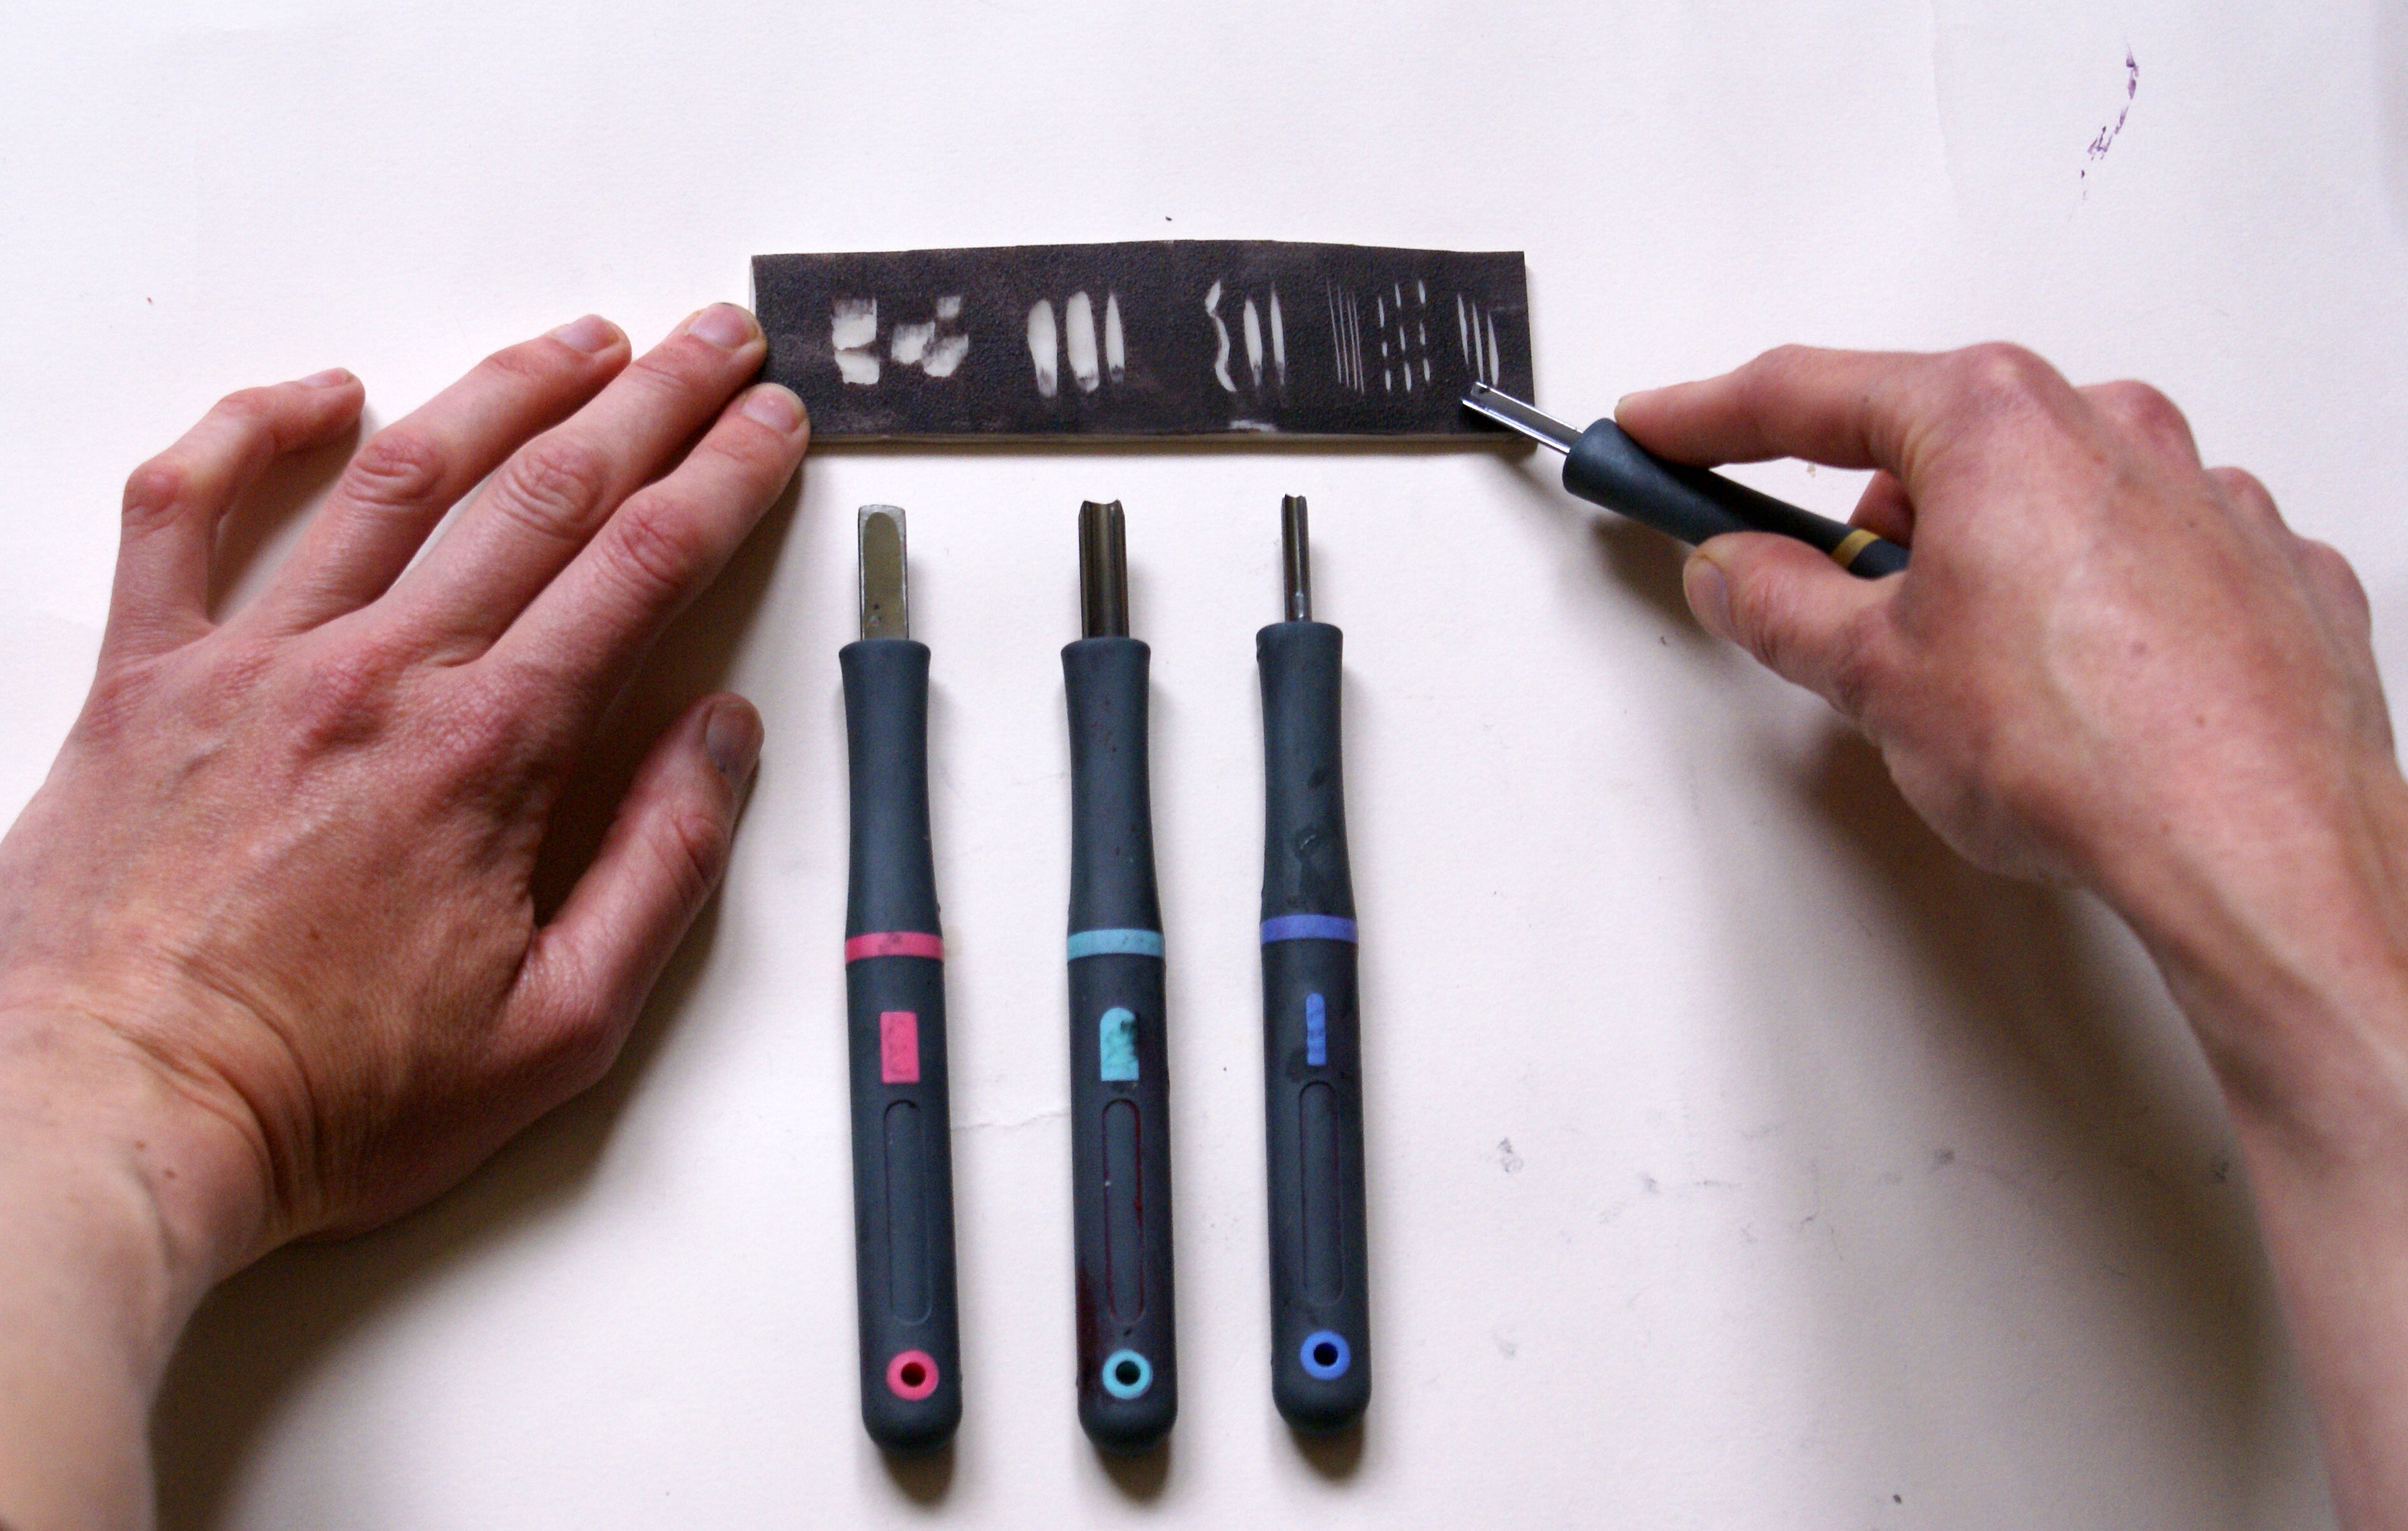
Try shading a test piece of lino with your marker pen (so you can see what you’re doing) and try and use every tool in the box to make as many textures as you can. Holding the tool in one hand a bit like a pen, insert it into the surface of the lino and push forward. You should see a slither of lino being lifted away.
Push forwards and tilt the angle of your hand to remove it completely, and have a look at the mark you have made. You’ll find that the V tools are better for narrow, sketchy lines like a fine point pen, while the U tool cuts wider marks like a marker.
The flat tool can be used for clearing larger areas Use one hand to carve and the other to steady it. The pressure, speed and angle of the tool will all make a difference.
Always cut away from your fingers – these blades can be sharp! Keep turning the block as you work on it rather than turning to cut back towards yourself.
04. Carve out your design

After practising with your tools on your test piece, choose the marks and textures you want to use in your design. You might want some areas to be drawn like a pencil line using the V tool, and others as flat areas of black or white.
05. Shade your carvings with a marker pen
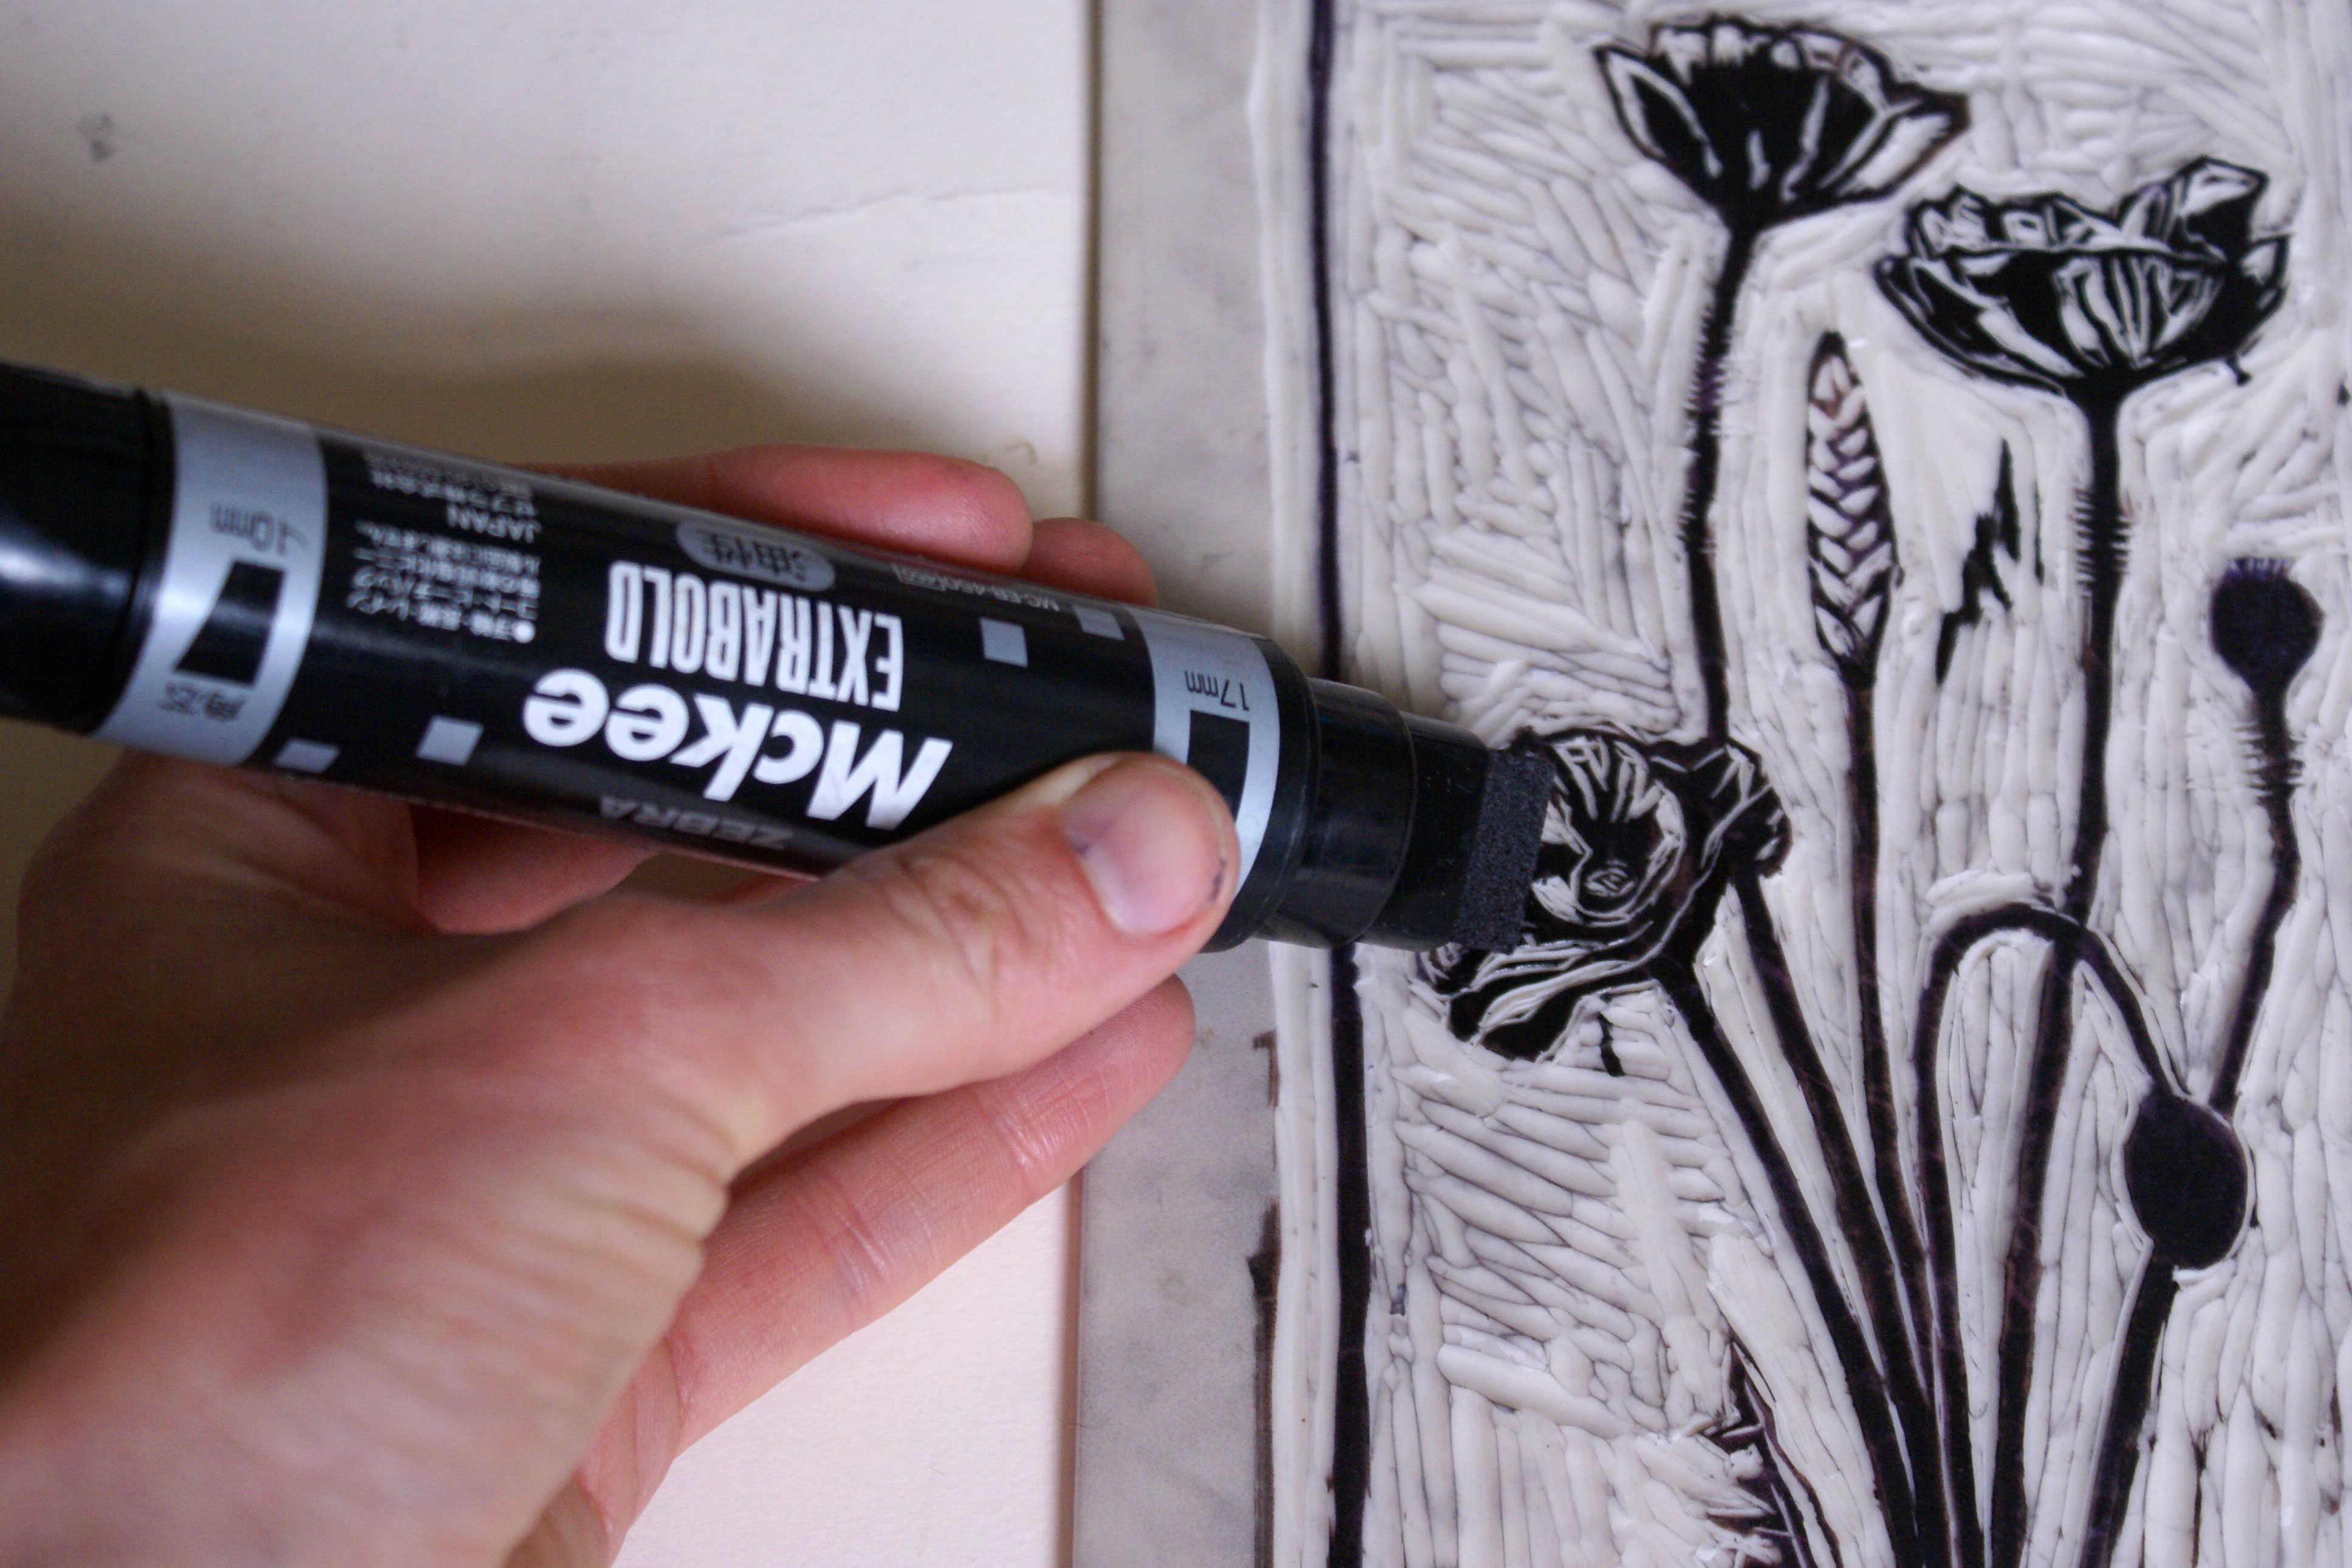
Use a chunky marker pen to shade over where you are carving – it will bring out the marks you are making, and give a better idea of what your block will look like when it is printed.
06. Roll your ink onto the sheet
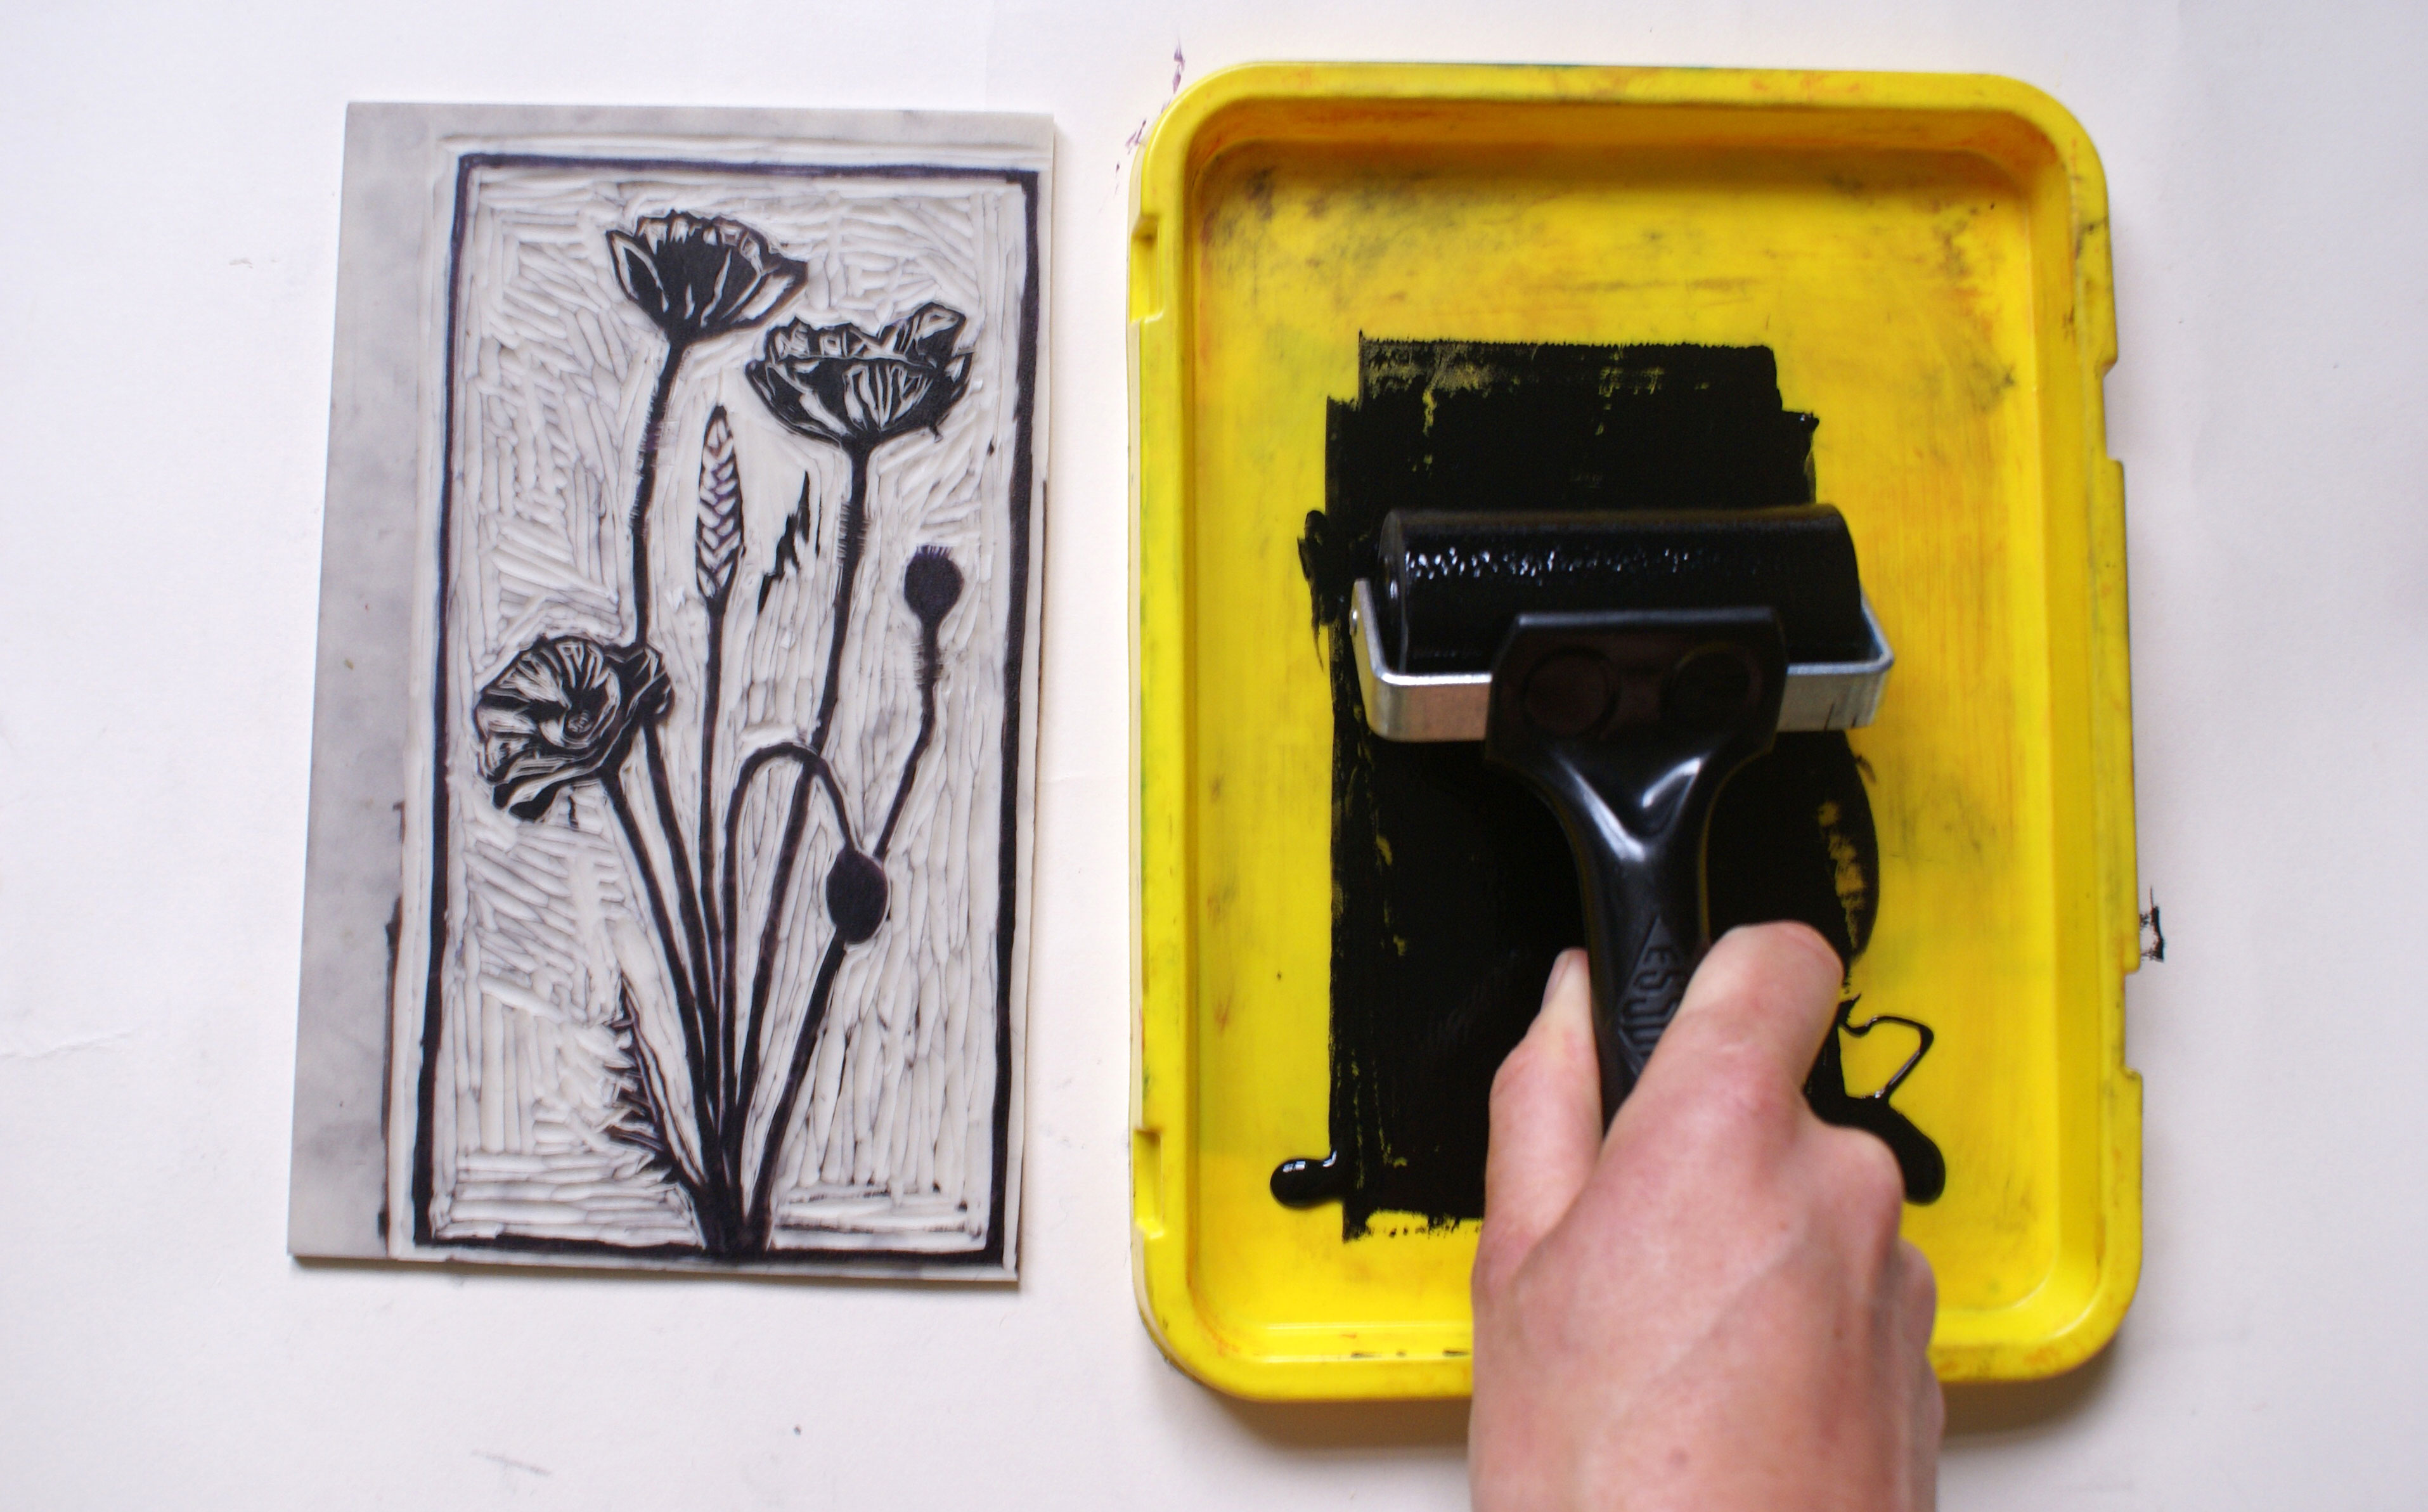
Now it’s time to get messy! You’ll need your 'slab' or 'sheet' for rolling out the ink. We are using a plastic lid. Start by squeezing a thin strip of ink at the bottom of your slab, straight from the tube.
Dip the roller in the ink and then roll forward onto the plastic, spreading ink out evenly across it until it covers it in a thin, even, flat layer. Too thick and it will sound squelchy and have little peaks, a bit like orange peel. Try and aim for a ‘whisper’ as the roller runs up and down, and a texture a bit like brushed suede.
07. Roll ink onto the lino
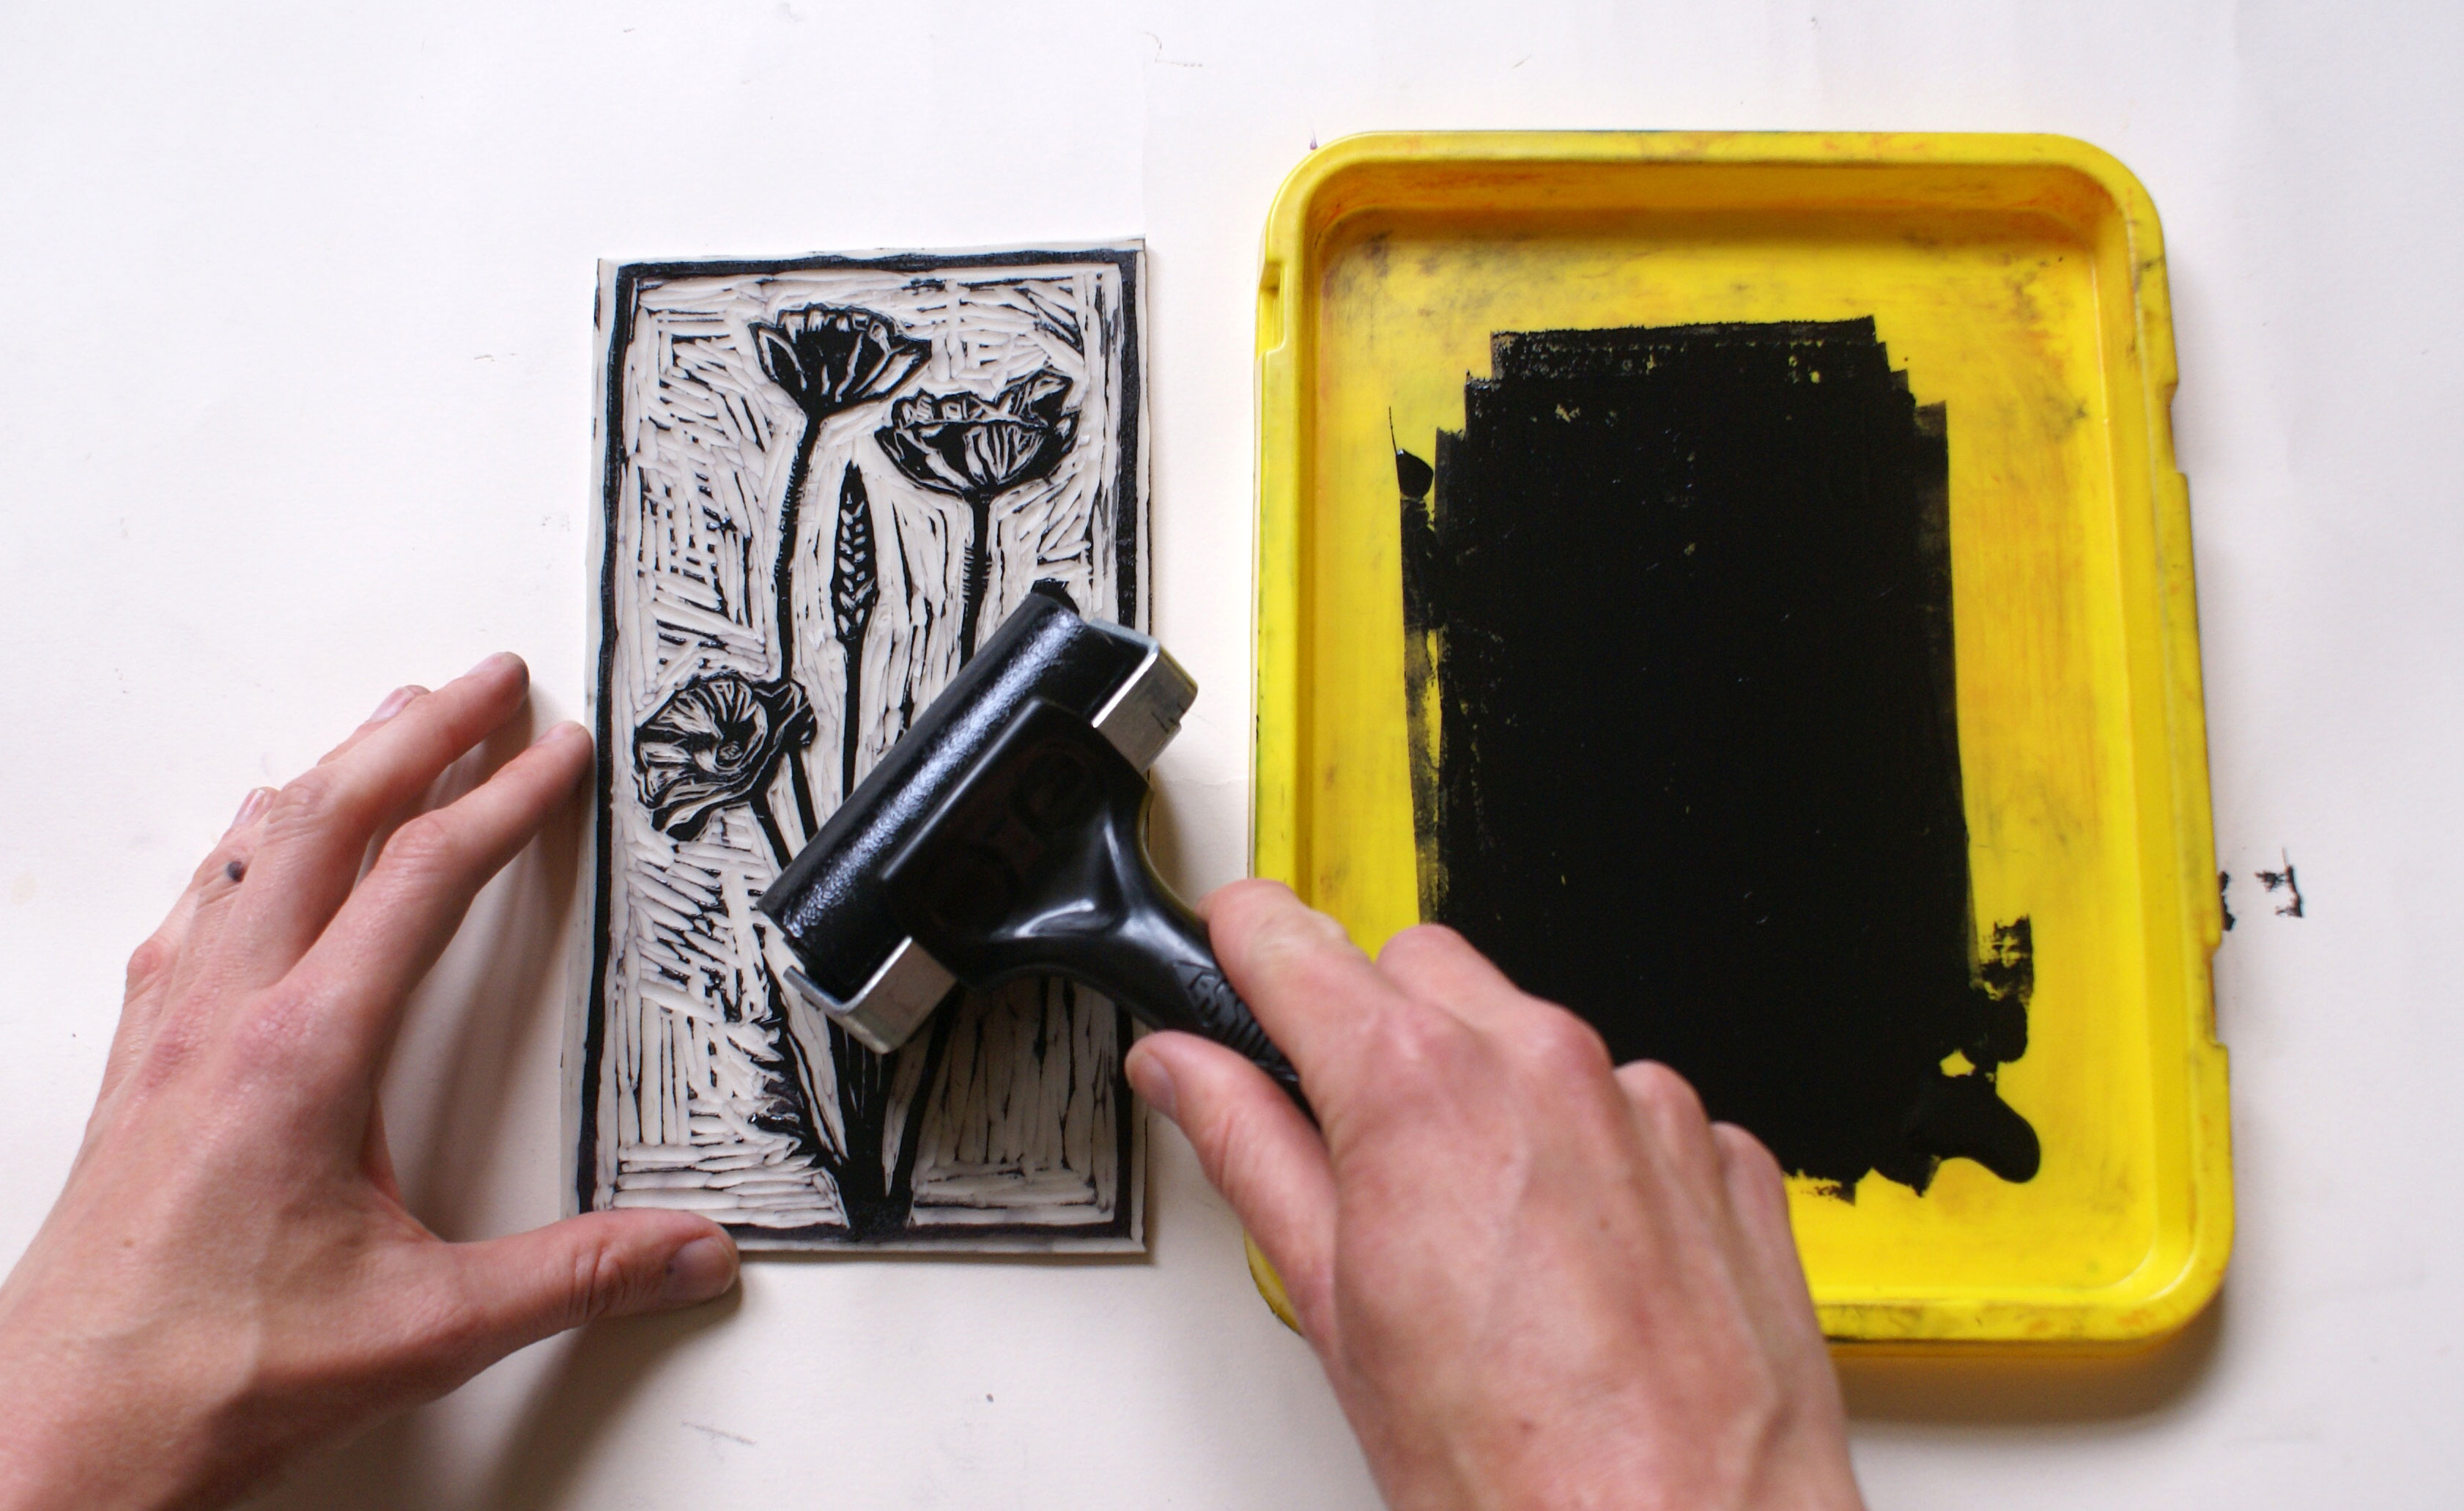
When you have a nice even layer of ink on your slab, roll directly onto your lino. This is the exciting bit where you start to get a sense of what your image will look like. Roll in lots of different directions and after rolling two or three times on your block, go back and roll in the inky slab to re-fill your roller by rolling across it again. When you have covered your block, it should be covered in an even, shiny texture, showing you that you have inked the entire image.
08. Press paper onto your lino
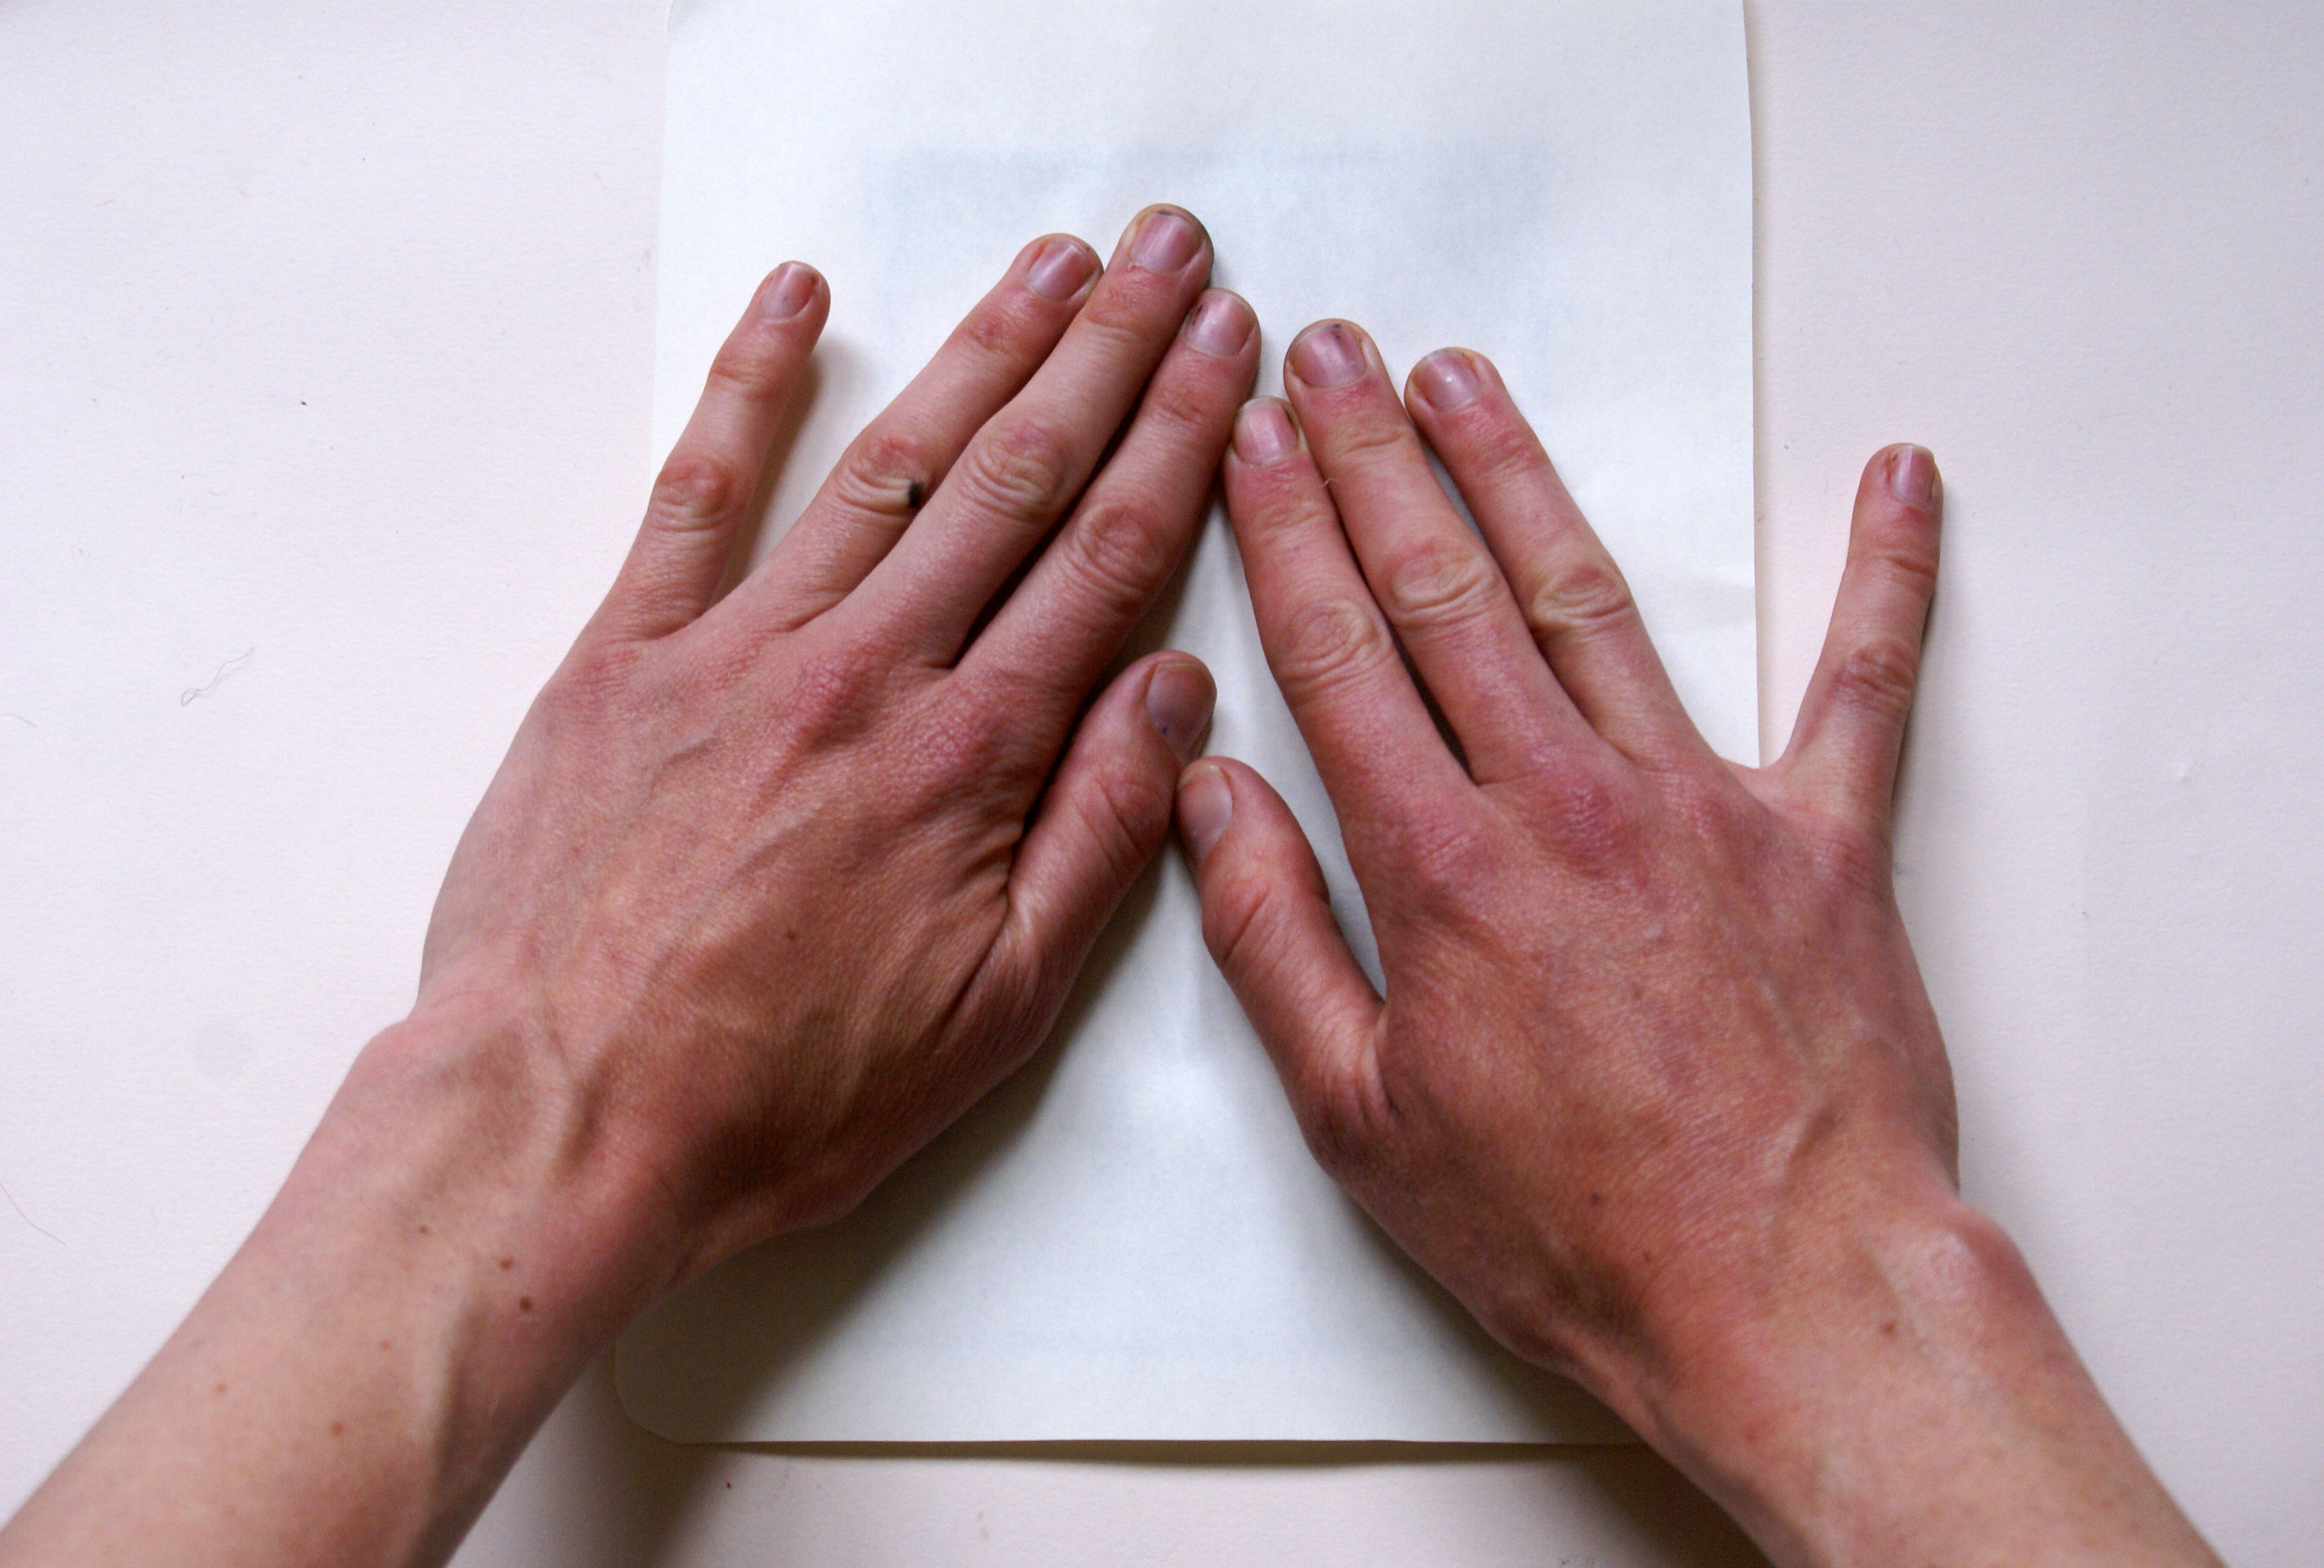
Now for the printing! A great thing about lino printmaking is that it can be done at home without the need for a printing press – all you need is your hands. Put a piece of paper directly on top of your image, and smooth down with your hands all over.
09. Press with a wooden spoon
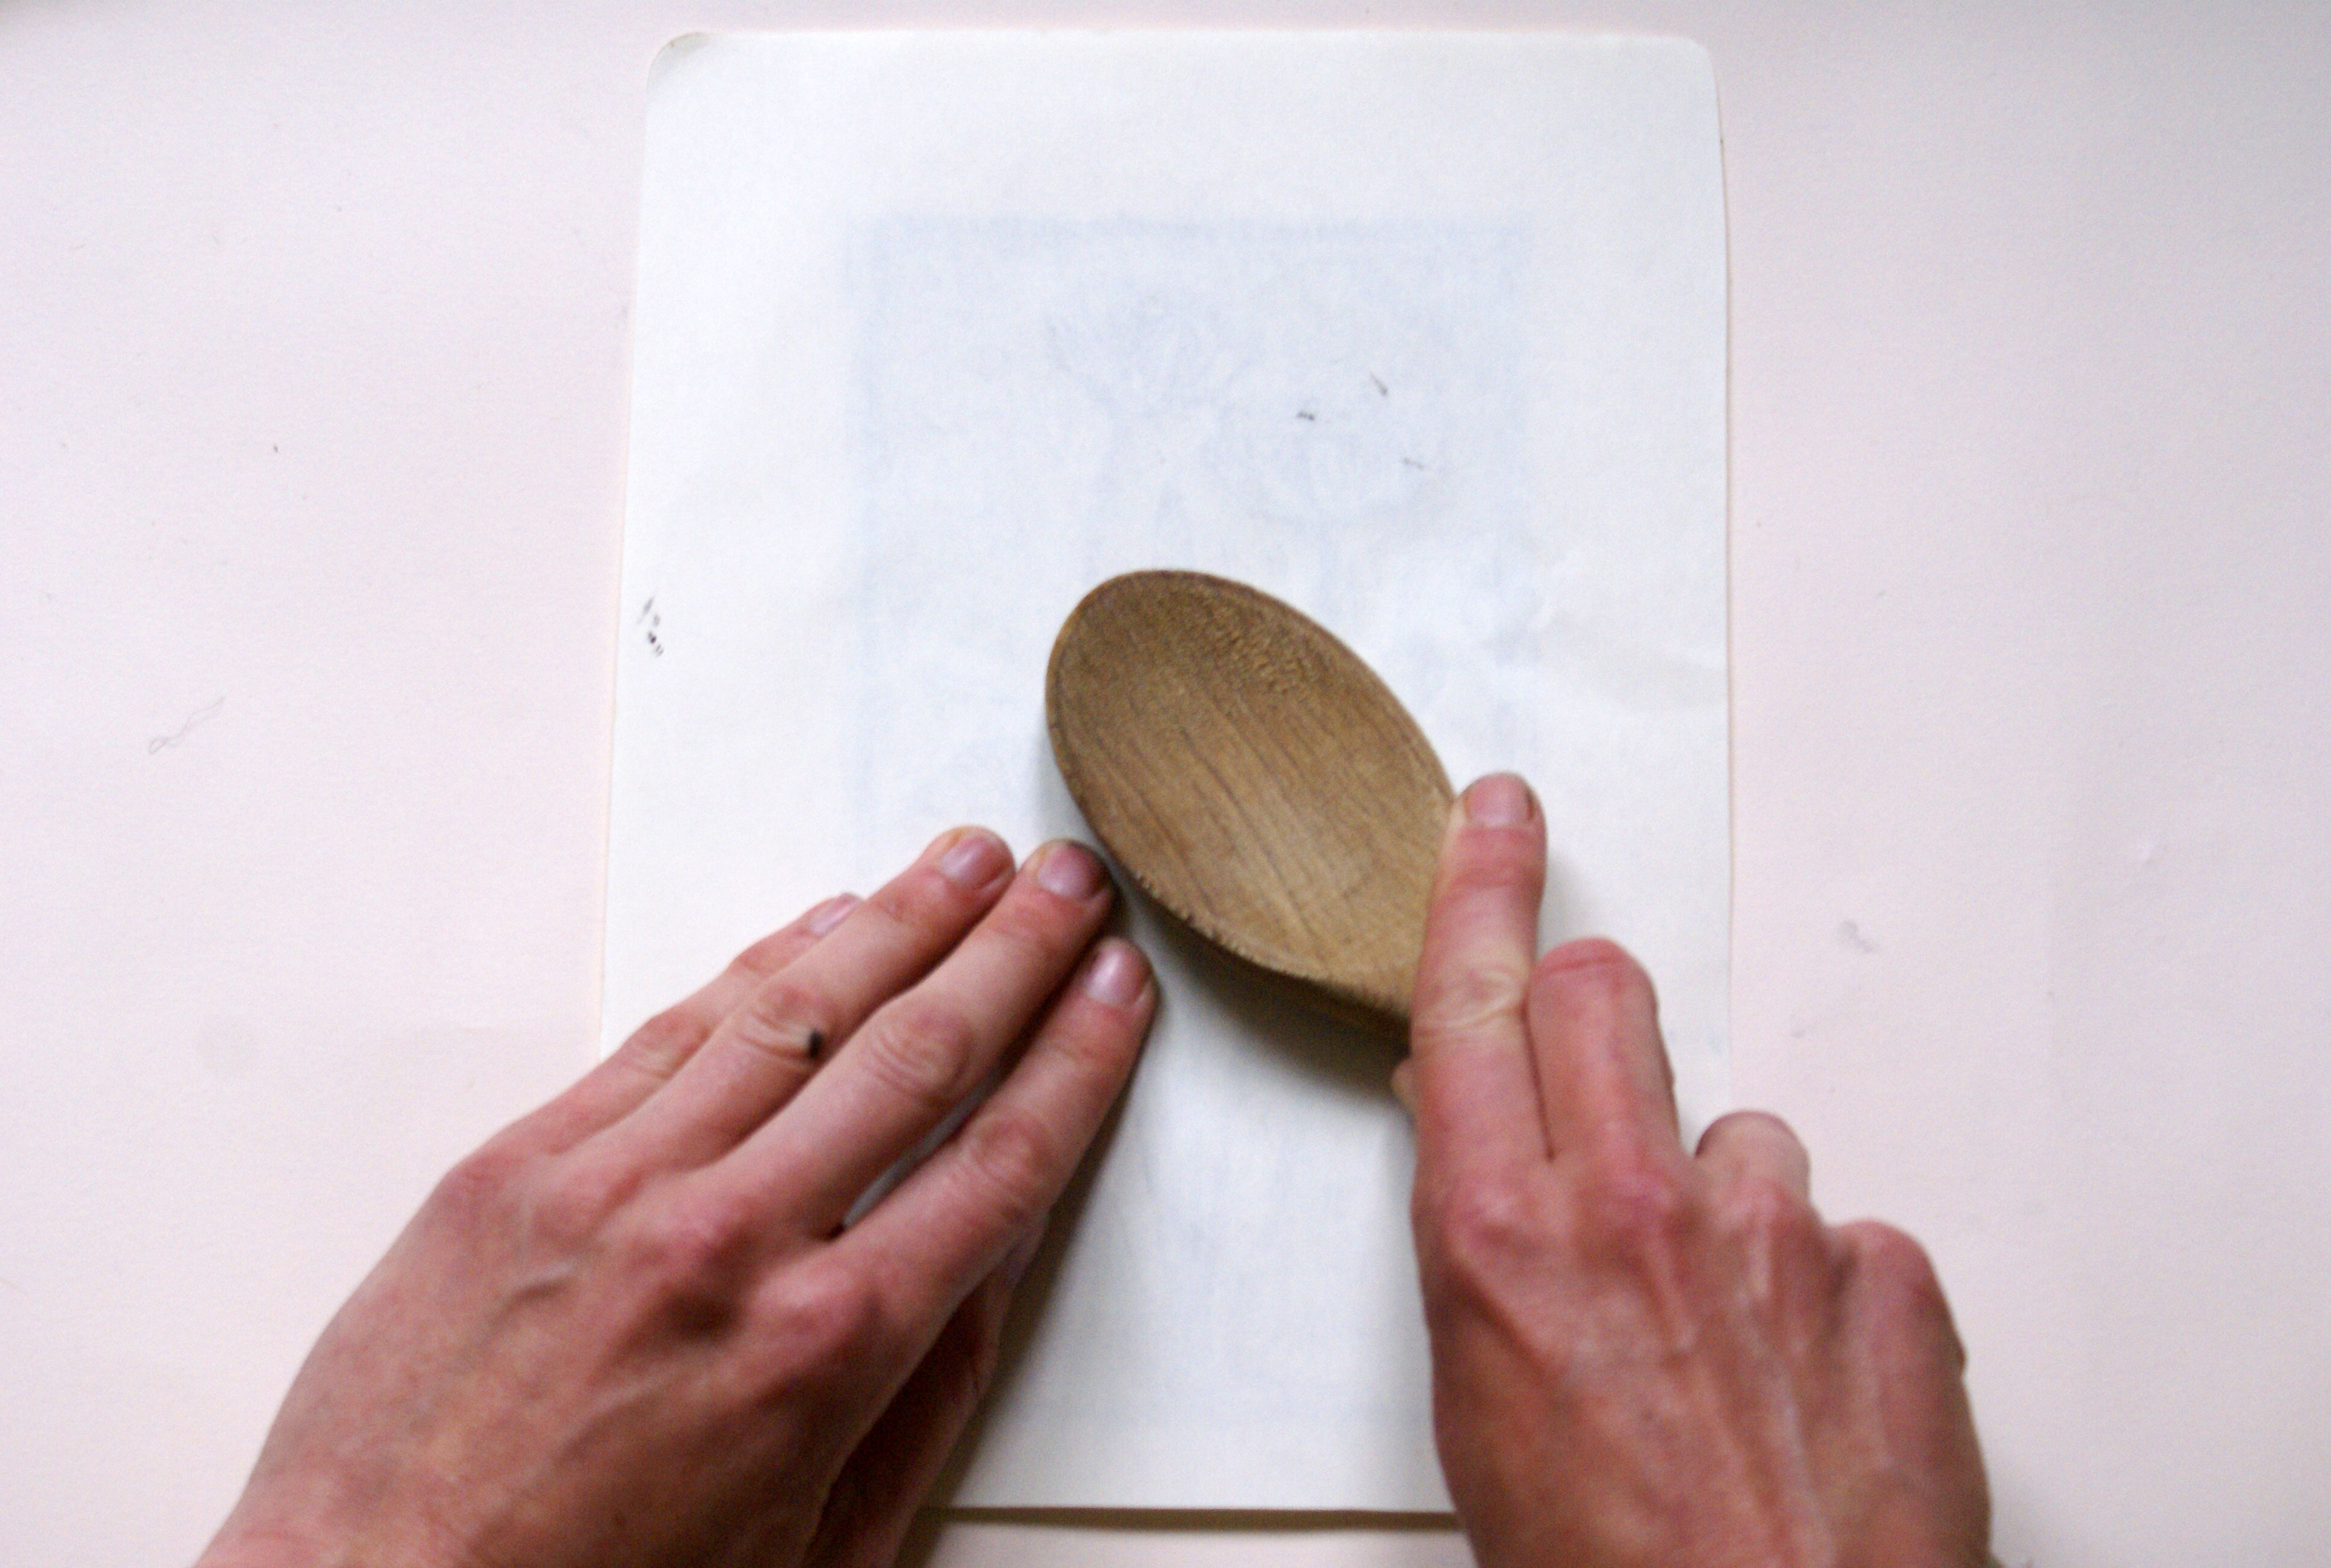
Take a wooden spoon and, starting in the middle of the image, begin rubbing the round base of the spoon in small circles, moving outwards to cover the block, and making sure you reach the edges. You should see the paper go slightly shiny where you have rubbed, and you may see a light embossing from your image. This will help you keep track of where you have covered.
10. Peel off your print
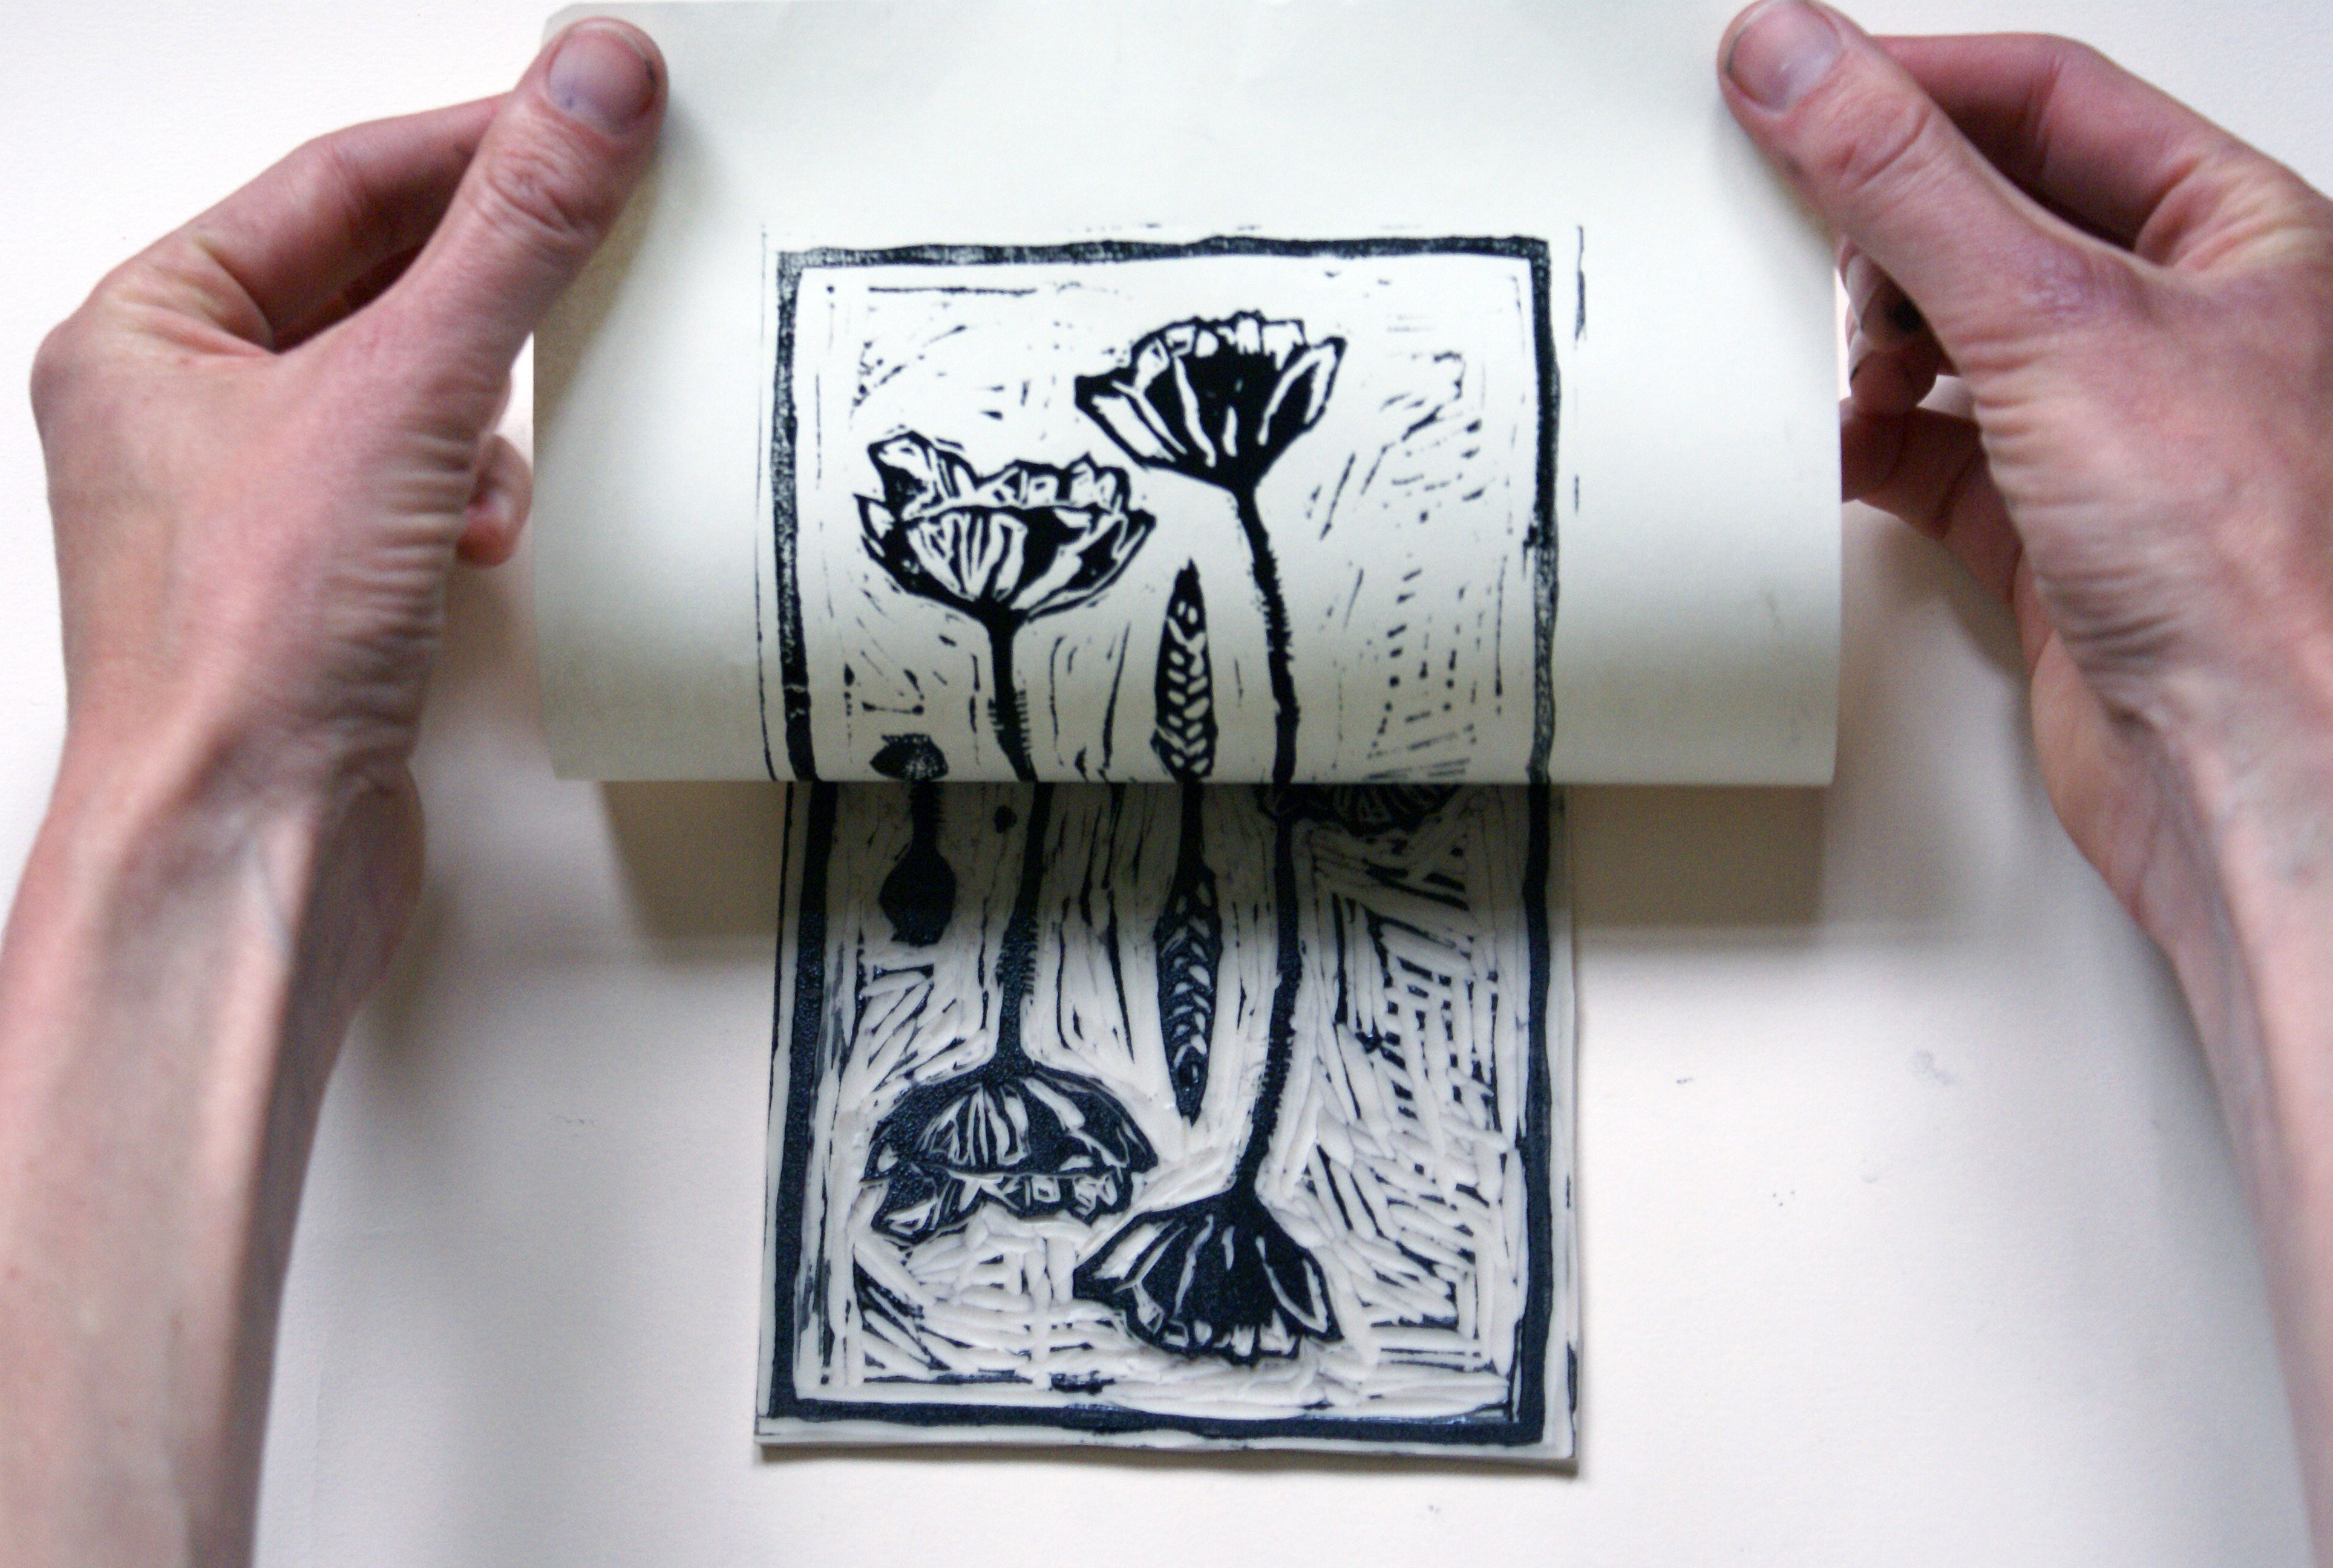
When you think you have printed the whole image, gently peel up the corners and have a peek. Apply further pressure if you think it still looks a bit patchy. Then, take two corners of your paper and gently lift it up from the block. Voilà! You have your first lino cut. Make as many copies as you want.
11. Compare your lino block and your print
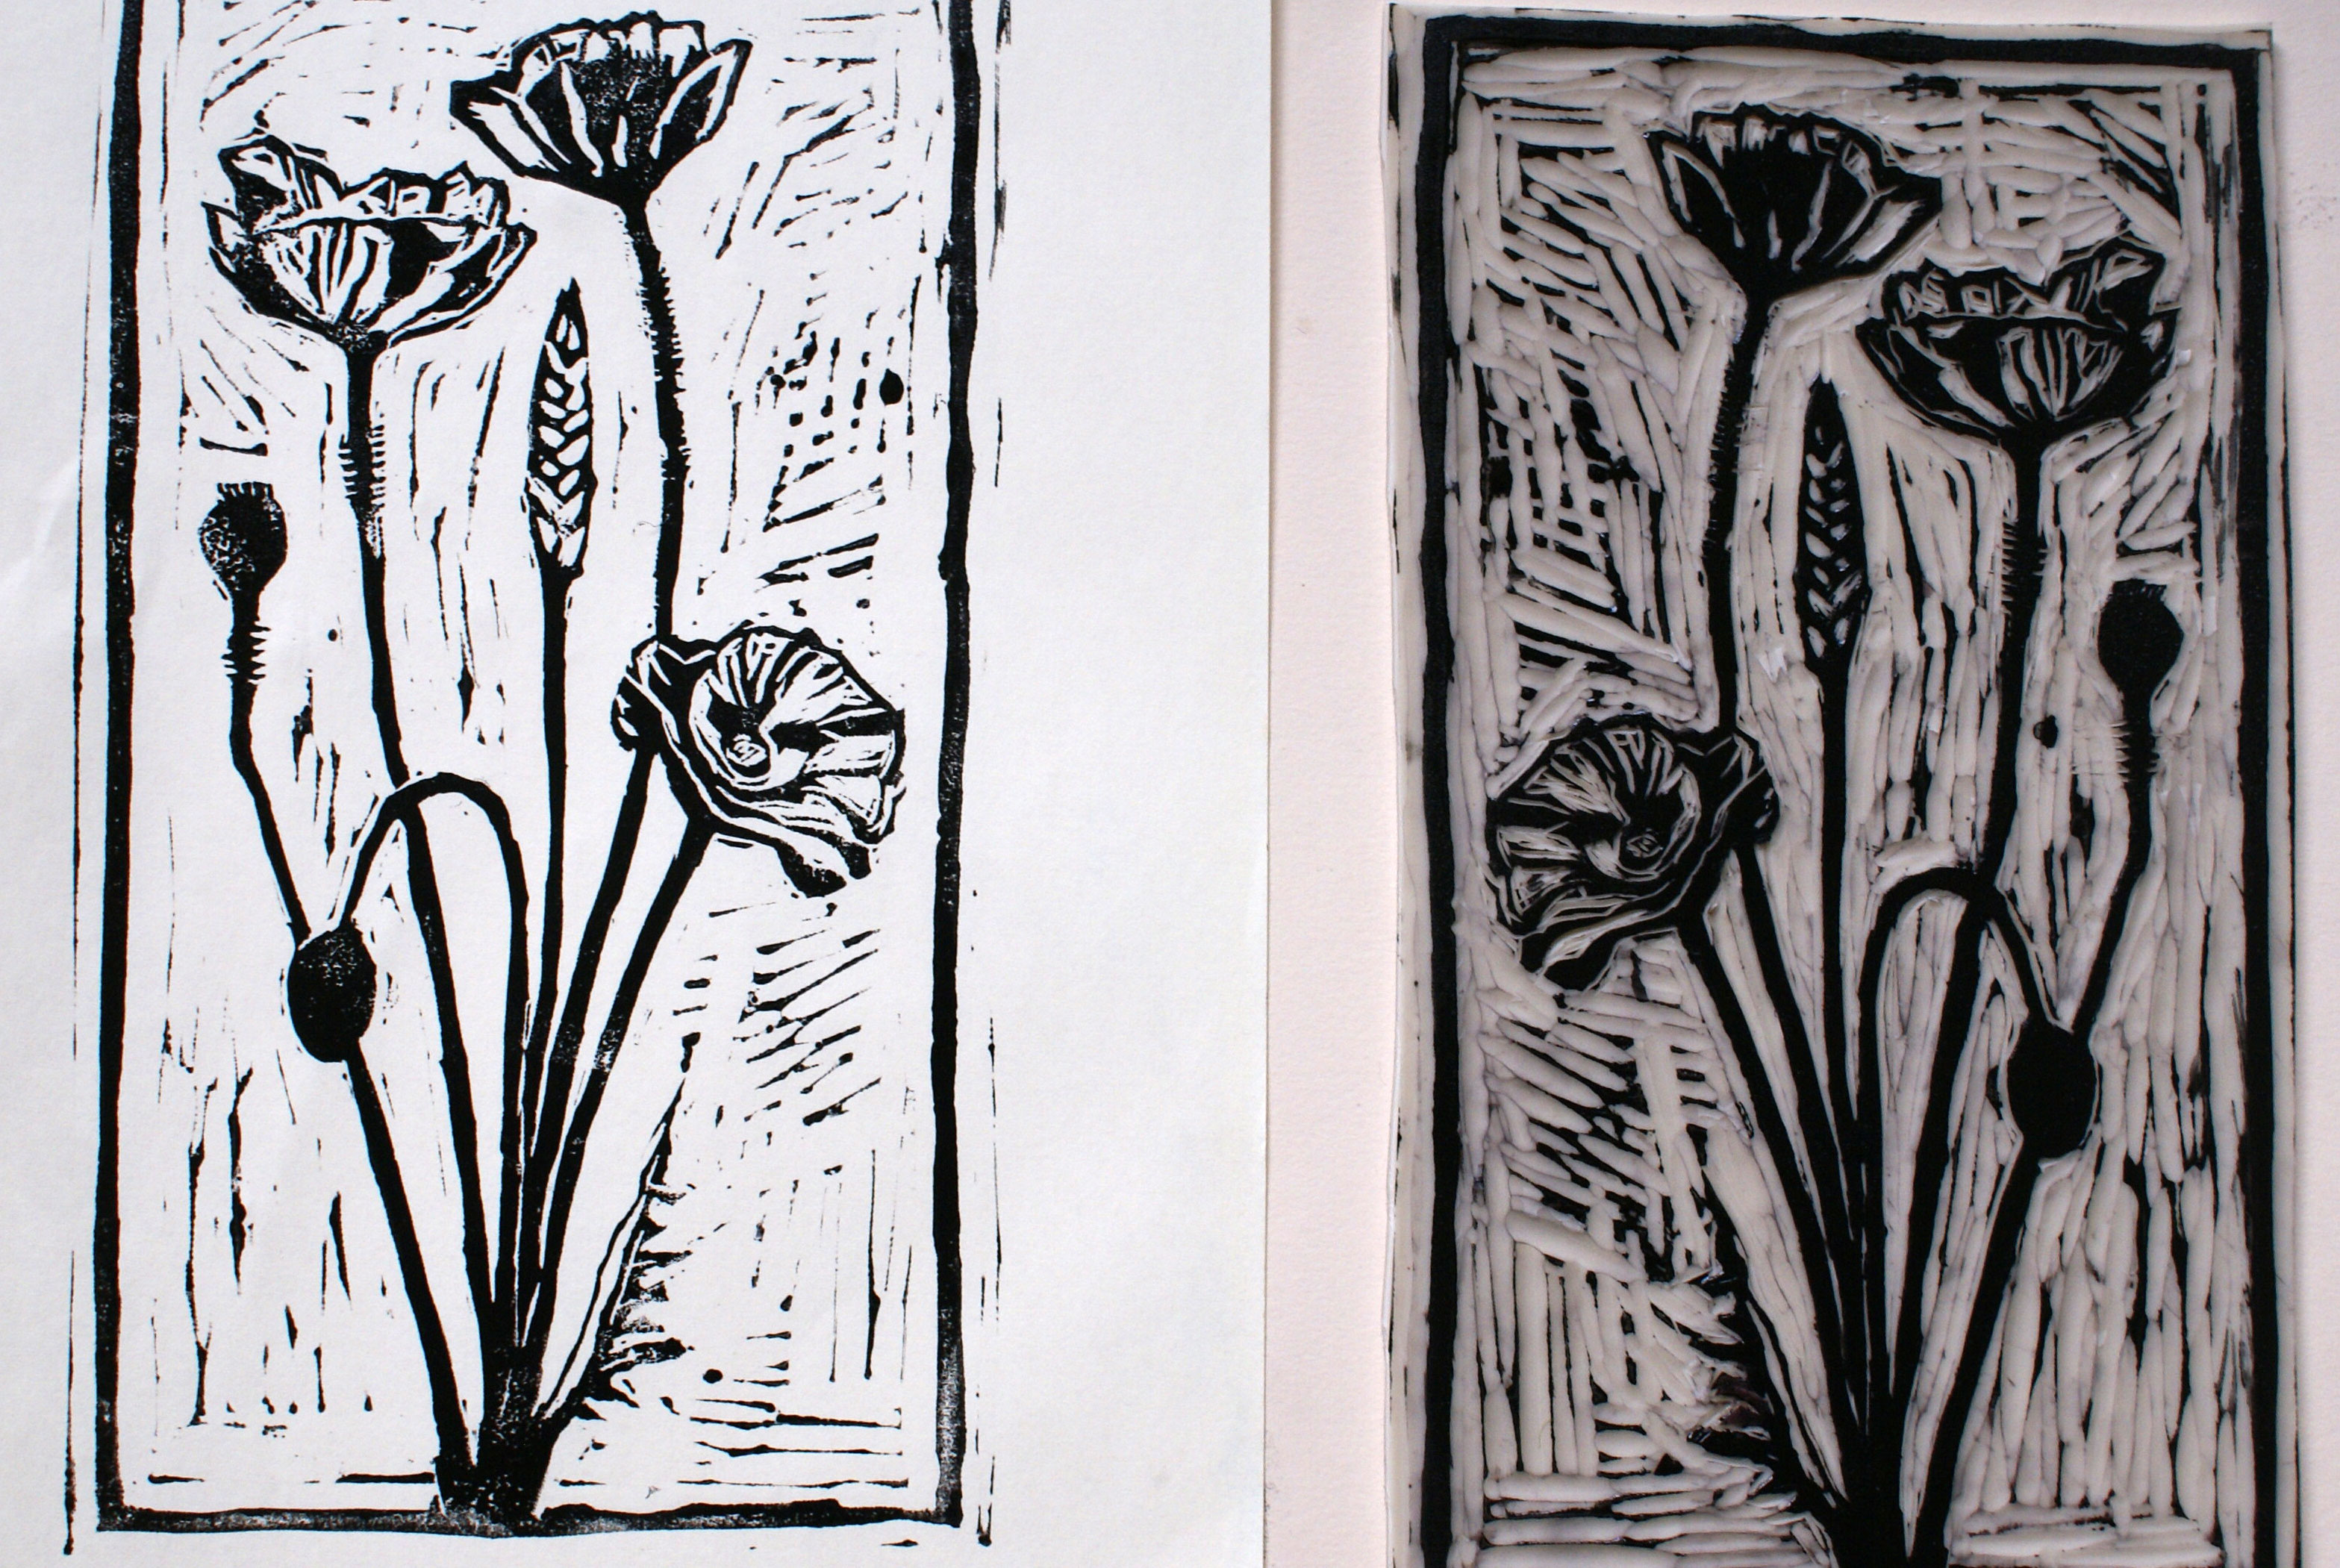
Your final print will be a reversal of your lino block. Look at areas of texture created by the tools where you have carved away and decide if you want to make any changes. You can wash your block and continue to carve if you wish.
12. Leave your lino prints to dry
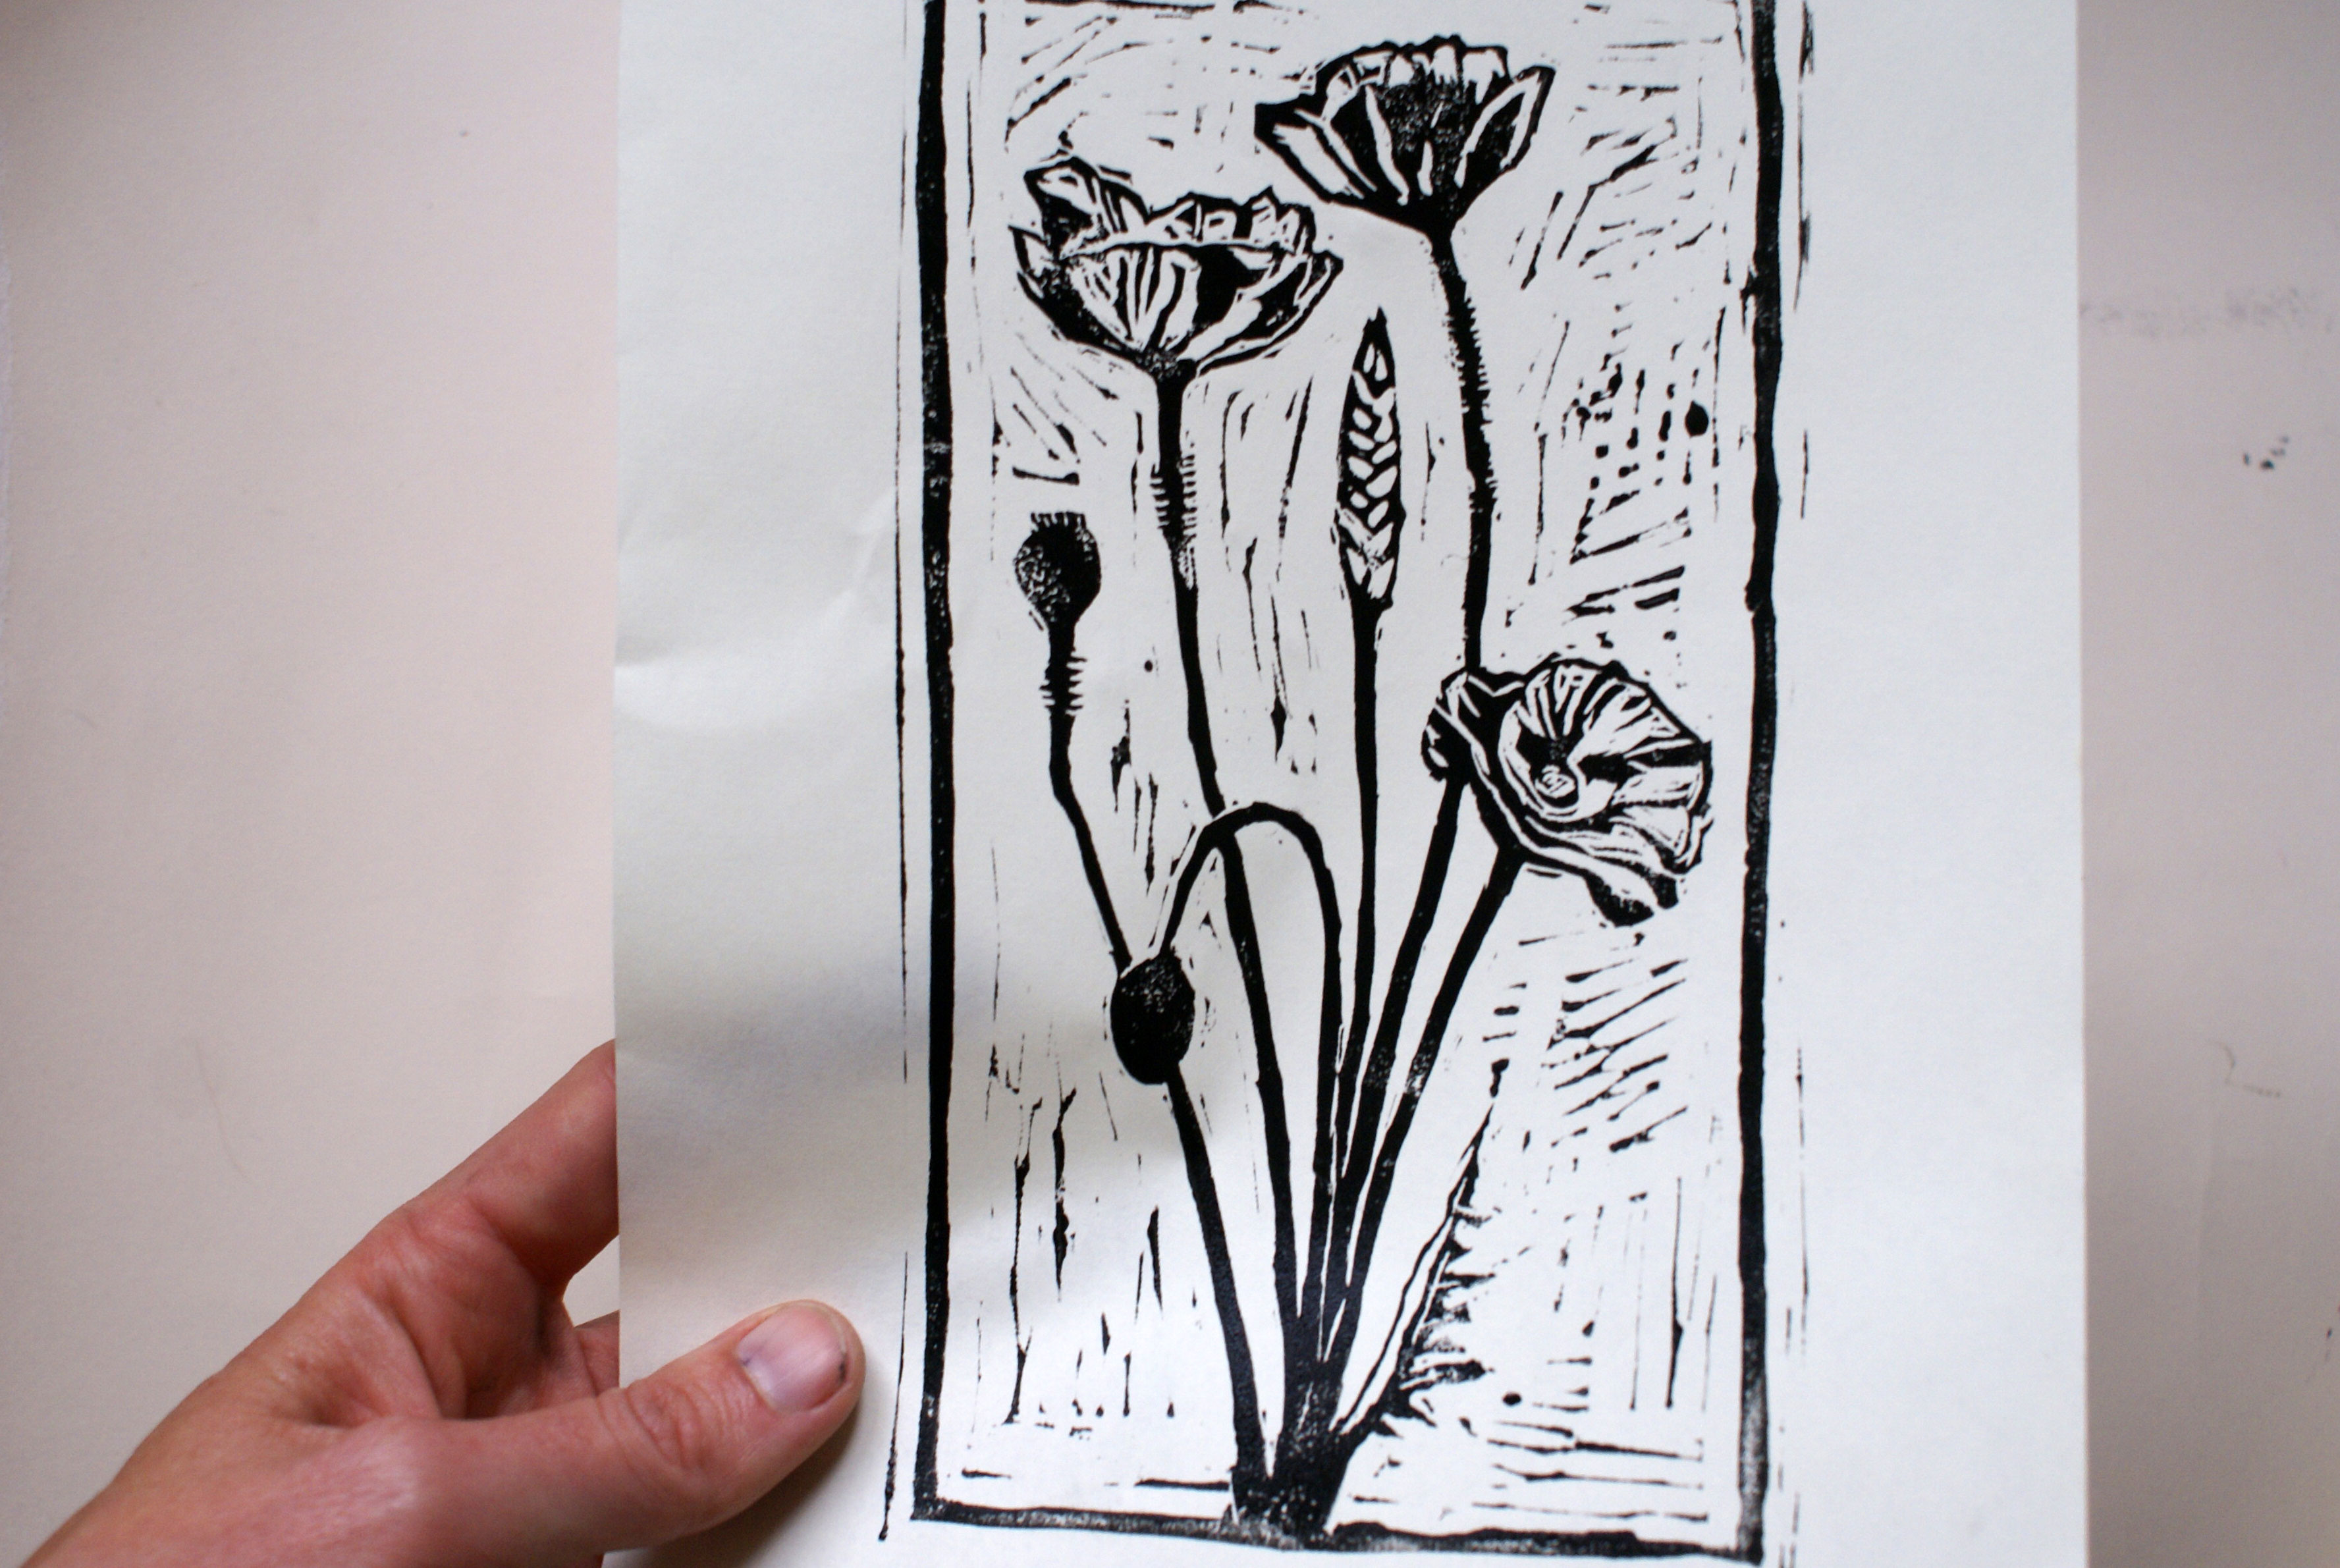
Leave your prints to dry over a few days, by placing them separately somewhere flat and warm. Make sure you wash all your tools thoroughly – you can clean your lino block and inking slab and roller with warm, soapy water and a rag – and you're done.
Cato Press is a printmaking studio in East Bristol that runs courses in lino cut and other printmaking processes. Visit the Cato Press website to find out more.
Read more:

Thank you for reading 5 articles this month* Join now for unlimited access
Enjoy your first month for just £1 / $1 / €1
*Read 5 free articles per month without a subscription

Join now for unlimited access
Try first month for just £1 / $1 / €1
