Level up your VR art
Learn the tricks of importing and setting up your VR models in Cinema 4D and OctaneRender.
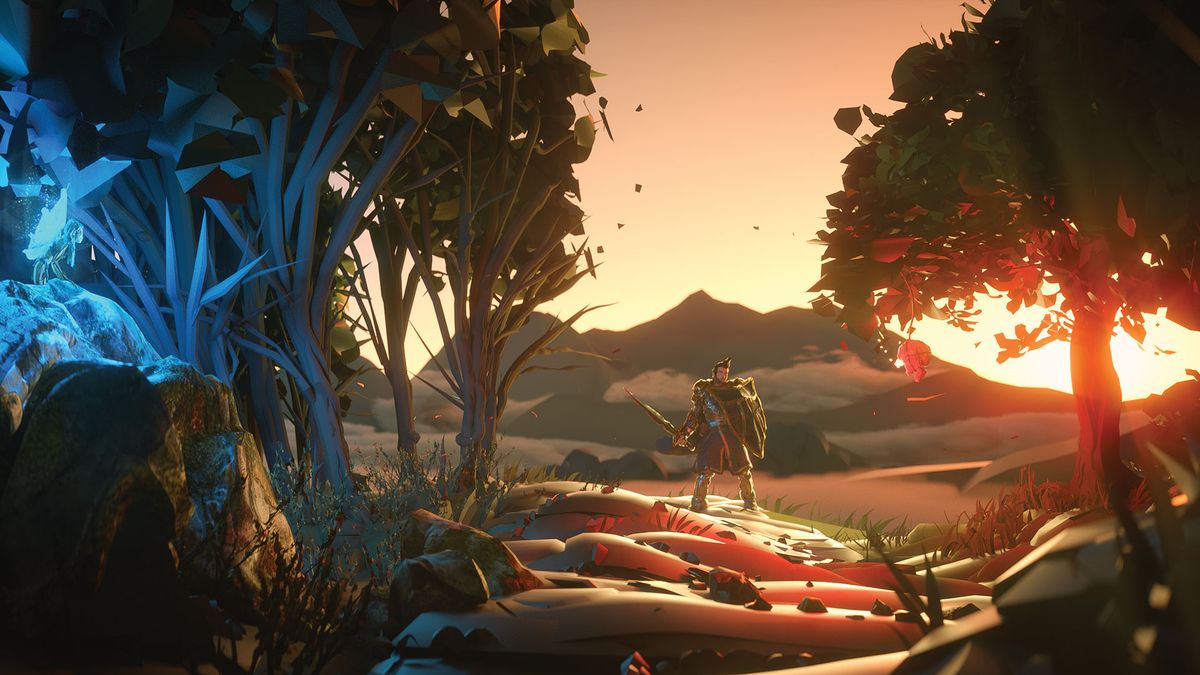
I started using Cinema 4D a few months after getting my VR headset a year ago. Up until then I'd been using Marmoset Toolbag for setting up my VR scenes, lighting them, adding atmosphere and so on. Pretty quickly I felt like I reached the limit of what Marmoset could do, as great a program as it is. I needed a program to handle animation, scene setup, advanced lighting, atmospherics and particles.
My eyes quickly fell on Cinema 4D, a tool that I saw people praise for its ease of use and versatility. I'd been toying around with Octane standalone, and wanted to see how Octane and Cinema 4D would work with my VR sculpts.
For those of you who don't know Octane already, it's a very fast renderer that gives you almost instant feedback on the changes you make to your scene. It's GPU-based and works with NVIDIA GPUs only. I have a NVIDIA 1080 Ti card that performs very well with Octane.
In this Cinema 4D tutorial I'll take one of my VR sculpts and combine it with a VR 'drawing' from Quill, in Cinema 4D. I'll take you through how to set up a material that uses the colour information from your VR scene, and talk a bit about the various techniques I use to improve the VR output. None of the VR programs do rendering at the moment, so you'll have to look to external programs for that.
The first part of the tutorial will very briefly describe the process of exporting and importing your models. The main focus of the tutorial will be on the work in Cinema 4D and OctaneRender.
01. Export and prepare the first model
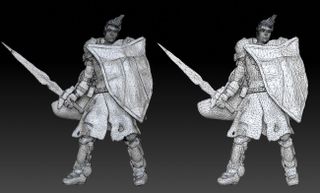
First I import the character I'll be using in my scene. I made a knight in Oculus Medium and exported the model at full resolution as a FBX file to retain layers. I import that FBX to ZBrush. In ZBrush, I make a low-res version of the model using a combination of Decimation Master and ZRemesher. I try to go as low-res as possible, for an easier time UV'ing. I then add UVs using UV Master. Remember to break your model up into polygroups in order to give UV Master an easier time.
Once everything is UV'ed, I export a low-res version of the model, and a high-res for the texture-baking process.
Get the Creative Bloq Newsletter
Daily design news, reviews, how-tos and more, as picked by the editors.
02. Textures or Vertex paint?
I could bypass the process in Step 1 by painting the model in Medium and then use the vertex colour information in Cinema 4D along with the high-res version of the mesh. I decided to do a proper texture pass though, for the higher fidelity it gives and for the added performance you get from using a low-poly mesh with normal maps. I use the Vertex Color workflow for the backdrop for the knight, and I'll go over that later in the tutorial.
03. Move to Substance Painter
I import the low-res knight model to Substance Painter, bake maps using the high-res mesh and paint the model. The important thing here when exporting to Cinema 4D and OctaneRender is to select the PBR metallic export settings. That will export a Base Color map, Roughness Map, Metallic map and a Normal map.
04. Set up knight in C4D
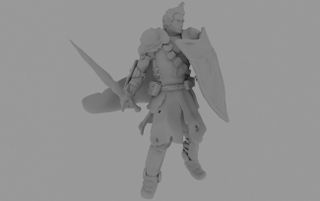
I'll set up the knight in Cinema 4D first, save him and then set up the environment. I do the character and backdrop as separate pieces first, to get better overall performance while testing out material properties.
In the File menu I choose Merge and import the low-poly FBX file. The layers of the FBX file appear in the Object Manager window in the upper-right corner of C4D. I rename layers if needed, select them all, right-click and group to keep things manageable. I open the Octane Live Viewer window through the Octane > Live Viewer Window menu item at the top of the C4D window. In the Live Viewer window, I click the small Octane logo in the top-left corner to activate the live view.
05. Let there be light!
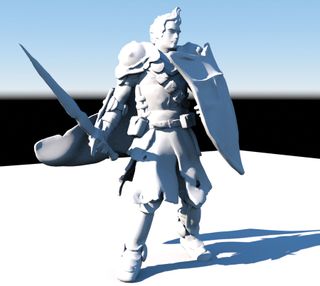
To better see the materials, I have to add a light source to the scene. There's several types to choose from in the Live Viewer window under Objects > Lights. I choose a daylight. This adds a Octane Daylight object in our Object Manager. I select this, and reposition the sun using the rotate tool in the main viewport. I also add a plane object from the command groups in the upper portion of C4D. I reposition the plane to match the feet of the knight.
06. Set up materials
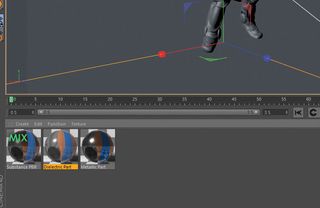
I'll go over setting up only one of the materials, since each will be the same process. I start with the shield and shoulder pads material.
To set up a material from Substance Painter in OctaneRender, the easiest way is to open LiveDB under Materials in the Live Viewer. In here you'll find a large collection of preset materials and template materials like the ones for Substance Painter. The Substance template is under Materials > Misc > Substance PBR. There are a few materials that are named the same; pick the one that has some texture on it. Choosing this will give us a template with materials in the right slots, which means we can just replace those with our own. Easy!
I right-click and select Download, and the material appears in the Materials tab under the main viewport. This actually consists of three materials: a Mix material, a Dielectric part and a Metallic part.
07. Use the node editor
I double-click the Mix material, then click the Node Editor button. I open the folder I saved my textures in, and locate the ones for the shoulder pads and shield. Since I have five material sets, I use the search bar in the Explorer window to speed things up. Then it's just a matter of dragging the Base Color, Roughness, Metallic and Normal maps from the Explorer folder, directly into the Node Editor.
08. Replace materials
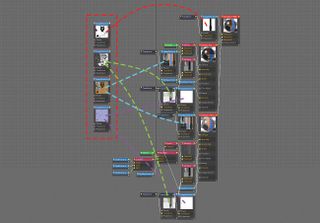
I click the Base Color map I just imported, and copy its path from the Properties panel to the right in the Node Editor. Then I select the Albedo maps in the original Substance material, and paste the new path there.
I do the same for the Roughness, Metallic and Normal maps. Once that's done, I can drag the Mix material from the Material Manager to the shoulder pads. I can drag it either to the object in the main viewport, or to the object in the Object Manager. The node layout is actually a lot less complicated than it looks. It's just a matter of replacing some file paths basically. I hope the process gets even simpler in future versions of Octane.
09. Inspect the result
After setting up all of the materials and applying them to their objects, it's time to inspect the model. I use the Live Viewer for this and play around with the lights to see what the materials look like under different lighting conditions. Once I'm happy with the result, I save the scene.
10. Add rocks
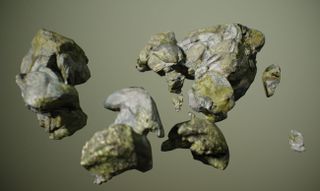
I make some rocks in Oculus Medium, and take them through ZBrush for low-res/high-res and then through Substance Painter for textures. The workflow is exactly the same as that of the knight.
11. Save and import the backdrop
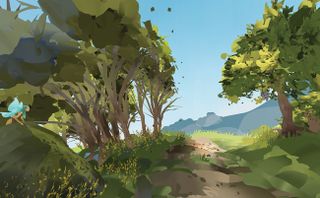
I make a new scene for the backdrop. I've exported the Quill file as an FBX file, which retains the layers and colours. Here's what the background looks like in Quill with flat, unlit colours.
Quill is an amazing tool once you get comfortable with it. It's a very quick way to work, and this backdrop took roughly two hours to do and maybe an extra hour for the fairy character. Everything was made from scratch here. If you use the program a lot for nature scenes for example, you can make a library of plants and elements you could then reuse to make even quicker scenes. I recommend you check out Goro Fujita's Quill videos for more in-depth info on how Quill works.
I choose Merge again from the File menu, and import my scene.
12. Organise Quill scene
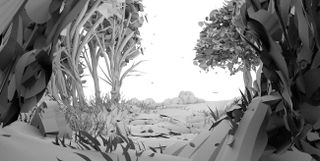
As you can see in the scene hierarchy, all layers from Quill are retained, and each layer has a symbol next to it with nine small dots. This is a Vertex Color Tag and indicates that the object contains vertex colour data. In the scene I've made I have a lot of layers, and I'd have to do a unique material for each to use the respective object's vertex information.
Since most of the layers will have the same material properties, I merge them by selecting all leaves and grass in the hierarchy, right-clicking and selecting Connect Objects + Delete. This will also merge the vertex paint data, and I'll only have to make one material for each group. I then merge all three stems, all layers of the fairy (except the wings which will have a unique material) and so on. By doing this I end up with much fewer vertex colour materials than I'd have if I made one for each Quill layer.
Now it's time to open the Live Viewer window and start it by pressing the Octane logo. Without lights or materials the scene doesn't look like much.
13. Position lighting
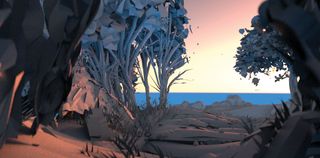
I add a daylight through the Objects > Lights menu in the Live Viewer. I reposition the light using the rotate tool. The Live Viewer gives me instant feedback on what my edits look like. I'm aiming for a sunrise mood in my scene, so I position the sun low on the horizon to the right, just beneath the branches of the tree with the skull.
Once I'm satisfied with the position, it's time to add vertex colour to the elements of the scene.
14. Make a vertex colour material
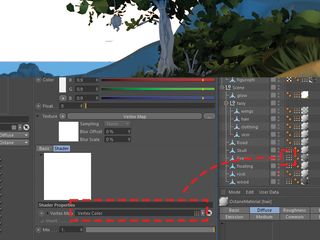
In the Octane Live Viewer window, I select Materials > Diffuse Material. This will add a new material to the Material tab under the main viewport. I double-click this material and open the Node Editor. In here, there's a 'material box' that represents the new material.
In the search bar above the node window, I type 'vertex' to filter out material types I don't need. I then drag out the Vertex Map box into the node window. I drag a node connection between the yellow dot in the corner of the vertex map and the empty circle next to diffuse.
To get the vertex colours from the object to show up in the material, drag the Vertex Tag next to the object in the Object Manager, over to the Vertex Map slot in the material editor.
I rename the material in the Material Manager to 'foliage', and drag the material onto the corresponding object in the scene hierarchy. In the Live Viewer window, I now see my scene come to life material by material. I repeat the vertex colour material process for each element.
15. Create an emissive material

For the magic glow coming from the skull in the tree, I want an emissive material to emit a red magic effect. So in the Live Viewer window, I choose Materials > Diffuse Material. I then open the new material from the Materials tab and click the Emissive category.
Here I select Blackbody Emission which will make the material emit light. I then open the Texture tab, and set Power to around 2 and Temperature in the warm side of the spectrum, which is to the left on the Temp slider. While doing this I constantly check in the Live Viewer window in order to see if the result is as I expect.
16. Add distant mountains
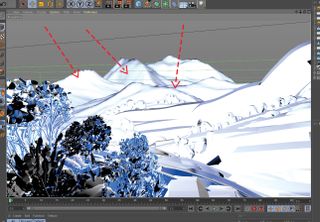
I felt like the scene needed some more depth, so I decided to add some mountains in the far distance. Instead of drawing those in Quill, I just add some quick geometry using the basic object function that you'll find in the top part of the C4D interface. I choose the Landscape function, which gives me a basic mountain that I can tweak and move into place using the position and scale tool. I duplicate this basic mountain multiple times, until I get the landscape I'm looking for.
In the Object Properties for the landscape element, you can change the seed number for each mountain to make them unique.
If you want the Live Viewer to use a fixed camera angle, to make sure your composition looks good while moving elements around, go to the Live Viewer, and under Options, uncheck Check Camera.
17. Include clouds
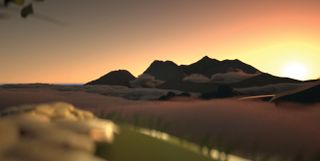
To add some mood and depth to my scene, I decide to add some clouds. They will also help me separate the planes of the background elements. For this, I use the Objects > Octane VDB volume. VDB volumes are a way of storing volumetric data such as clouds or fire. I use a set of cloud VDBs called VDB Clouds Pack.
The Octane VDB object appears in the Object Manager. In its properties, I choose a suiting VDB cloud in the file path. In this scene, the VDB volume is very small, so I have to scale it quite a lot for it to be seen. I make several copies and scale them between 300 and 1,000x in the object coord. settings.
In the Medium settings in the object properties, I play around with the density of the VDB volume until I get a result I like – in this case, around 20.
18. Add the character
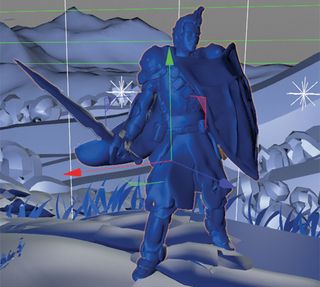
Now that I'm happy with the overall look and mood of the scene, I import my knight model by choosing File > Merge and selecting the C4D scene I saved earlier. All the materials we set up for the knight will be imported along with him.
The pivot point of the character is offset a bit, but that's easy to change in C4D. I press the Enable Axis button in the left toolbar and drag the pivot point to the middle of the knight.
I use the transform tools to move him into place. I place him by the edge of the small forest, and I have him looking directly at the ominous burning skull. At the moment, the knight is totally unaware of the fairy who's looking at him from her hiding place behind a big rock.
19. Set up a camera
To begin playing with camera settings and post-processing, I have to make a dedicated Octane camera for my scene. To do this, I click the Objects > Octane Camera menu item. This adds a camera to our Object Manager. Notice the little open white square with a cross in the middle next to the camera name? To activate the Octane camera, you need to press this symbol. Otherwise you won't see the changes you make in the camera settings.
If you press the camera name, you'll see the standard C4D camera options. The only ones here that I use are the focal length, sensor width and focus object settings. The rest of the changes I'll be doing are under the Octane Camera Tag. Before going into detail about that process, I feel like the scene could use a bit more light.
20. Add more lights
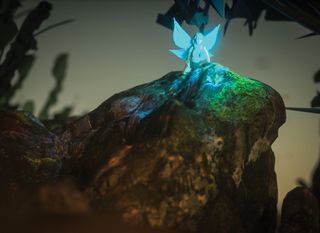
I'd like to have a rim light around the knight to make him stand out more from the background. In the Live Viewer I click Objects > Lights > Octane Area Light and position the light behind the knight. I tweak the size of the light-emitting plane by pulling on the small orange dots at the top/bottom/sides. I make sure the light source is large enough for the light to 'wrap around' the character.
I tweak the power of the light and the temperature until I get a result I like. I also add a light that shines on the road, one that adds more red light around the skull, and a blue light that illuminates the fairy's wings and surroundings.
To hide the light emitter planes in the render, I go to Visibility under the Octane Light Tag and deselect Camera Visibility.
21. Post-process
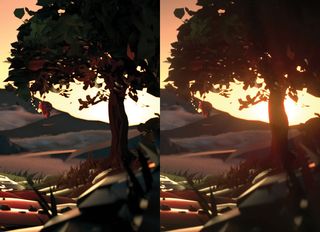
Post-processing can be performed in either the Octane Camera Tag, or in OctaneRender settings. I always do it in the Camera Tag since it's easier to access. If you had multiple cameras and were switching between those, it would perhaps make sense to do it through OctaneRender settings.
I click the Octane Camera Tag next to my camera, and tweak the settings under Camera Imager and Post Processing. In Camera Imager I add a vignette effect, and in Post Processing I add bloom and glare to get a lens flare effect.
22. Render and final tweaks
Go to Render > Edit Render Settings in the C4D top menu. In here I switch from Standard renderer to Octane Renderer. In the Output submenu, I choose the final render size. In the Octane Live Viewer window I switch from Chn: DL (direct lighting) to Chn: PT (path tracing), which takes longer to render but gives a better result. I hit Render > Render To Picture Viewer in the C4D top menu.
Lastly, I take the final render through Photoshop and tweak curves, add a stronger blue glow to the fairy and tweak the overall appearance of the image.
This article was originally published in issue 237 of 3D World, the world's best-selling magazine for CG artists. Subscribe to 3D World here.
Related articles:

Thank you for reading 5 articles this month* Join now for unlimited access
Enjoy your first month for just £1 / $1 / €1
*Read 5 free articles per month without a subscription

Join now for unlimited access
Try first month for just £1 / $1 / €1

Martin is a freelance illustrator living in Denmark, with more than 17 years of professional art and illustration experience. He holds a BA and MA in Digital Design from The Royal Danish Academy of Fine Arts Schools of Architecture, Design and Conservation. Martin's client list includes: Media Molecule, The UN, Sony, Facebook, LEGO, DR (Danish state TV), TV2, Adobe, WACOM, Nestlé, B&O, Spigo, MasterpieceVR, Oculus and various small and large companies.
