Krita tutorials: Learn the basics of the digital art software
These Krita tutorials will help you get started with the free painting program.
Krita tutorial: How to clean up your sketches
This workshop will be simple for any user to follow, whether you're a beginner or expert in Krita. Using only three adjustment layers and one brush, you can achieve a professional and clean edited version of your scanned sketches and drawings.
Begin the process by opening up a scanned image into Krita. For your scan settings, it’s important to scan at 150dpi at the very least. This is what the best monitors (okay, all monitors) use for displaying images. For print, scan at 300 or 600dpi. The former is sufficient, but I always scan at 600dpi to ensure I capture every detail, especially since my drawings are usually on the smaller side. When saving the image, JPEG files are the most convenient. Always make sure to save at the highest quality if you intend to print out or post the final image on social media.
01. Adjust the brightness and contrast of your sketch

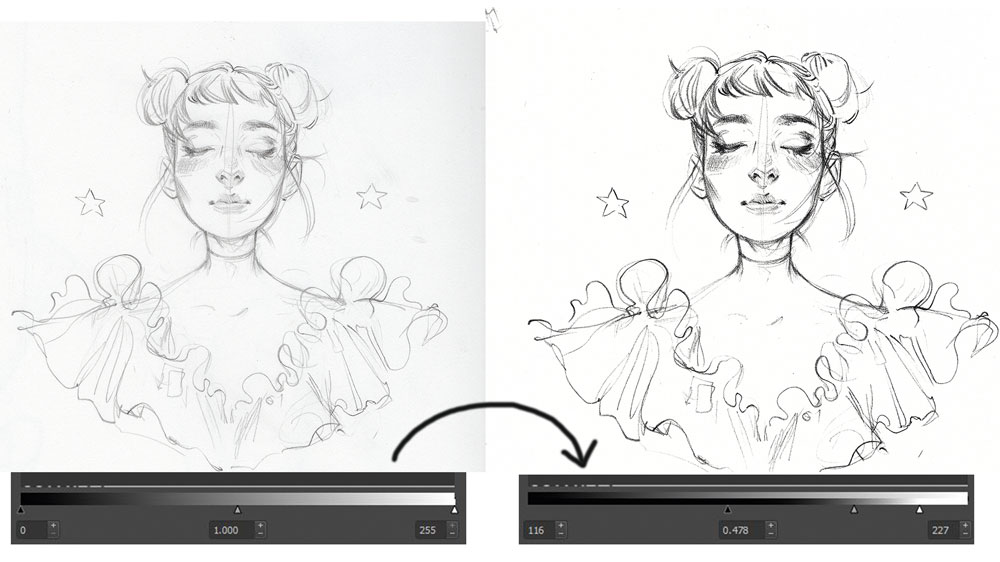
Begin with opening up a scanned image into Krita. For your scan settings, it’s important to scan at 150dpi at the very least. This is what monitors use for displaying images. For print, scan at 300 or 600dpi. The former is sufficient, but I always scan at 600dpi to ensure I capture every detail, especially since my drawings are usually on the smaller side.
When saving the image, JPEG files are the most convenient. Always make sure to save at the highest quality if you intend to print out or post the final image on social media.
02. Use a filter to refine the tones

Create a new Filter layer and select the Levels tab. This will give you an easy way to adjust the brightness and darkness of your image. The first slider controls the blacks, the middle controls the midtones, and the last slider controls the whites. Bring the black and white sliders more towards the centre, until the paper is white and your pencil lines are sufficiently dark enough. If you’ve lost some of the detail, move your midtone slider to the right; this will help you recover some of the finer lines.
03. Desaturate the image for a cleaner finish

Next, open up the HSV/HSL (hue, saturation, value and hue, saturation, lightness) filter and pull the Saturation tab all the way down to -100. Desaturating your sketch will help get rid of any additional colours that the scan has picked up and provides a sleeker finish to your refined pencil sketch.
04. Select an airbrush

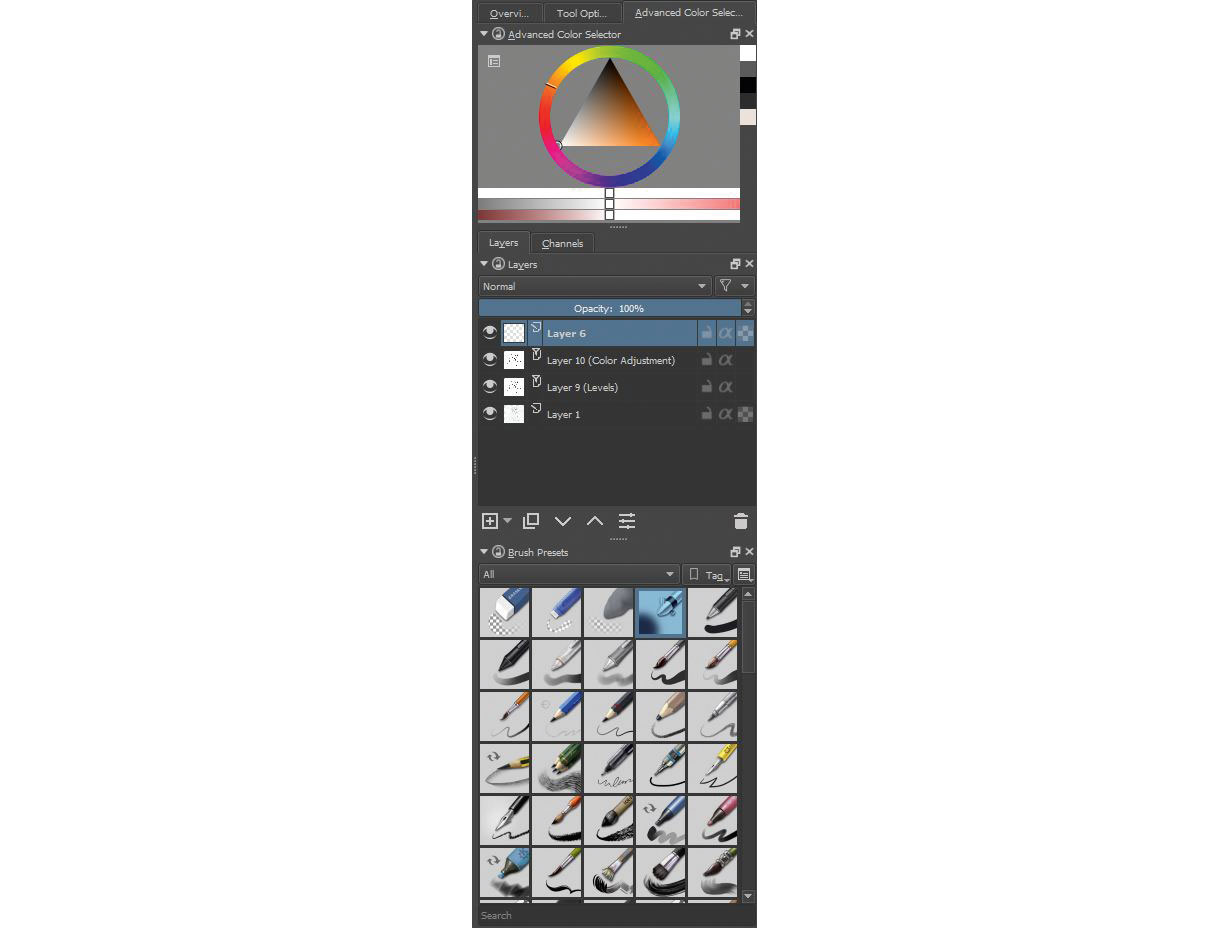
To clean up any dust or unwanted sketch lines from your image, create a new Paint layer and select a fluffy brush: I used Airbrush_ Soft for this. Set the fill colour to white. Using an airbrush will ensure you don’t add any harsh lines when painting over your image.
05. Paint over dust and lines

Zoom into your image and begin painting over the dust or eraser marks that your scanner picked up, as well as any unwanted sketch lines on your drawing. Depending on your desired result, you might want to leave some of the sketchier lines in the image, so only remove the dust if this is the case.
This article was originally published in ImagineFX, the world's best-selling magazine for digital artists. Subscribe to ImagineFX.
Read more:
- New digital art apps will help you relax in minutes
- The best drawing tablet: Our pick of the best graphics tablets in 2020
- The 12 best drawing books
Get the Creative Bloq Newsletter
Daily design news, reviews, how-tos and more, as picked by the editors.

Thank you for reading 5 articles this month* Join now for unlimited access
Enjoy your first month for just £1 / $1 / €1
*Read 5 free articles per month without a subscription

Join now for unlimited access
Try first month for just £1 / $1 / €1
Sara is an illustrator who works with both digital and traditional mediums, and enjoys making YouTube videos teaching on various art topics.
