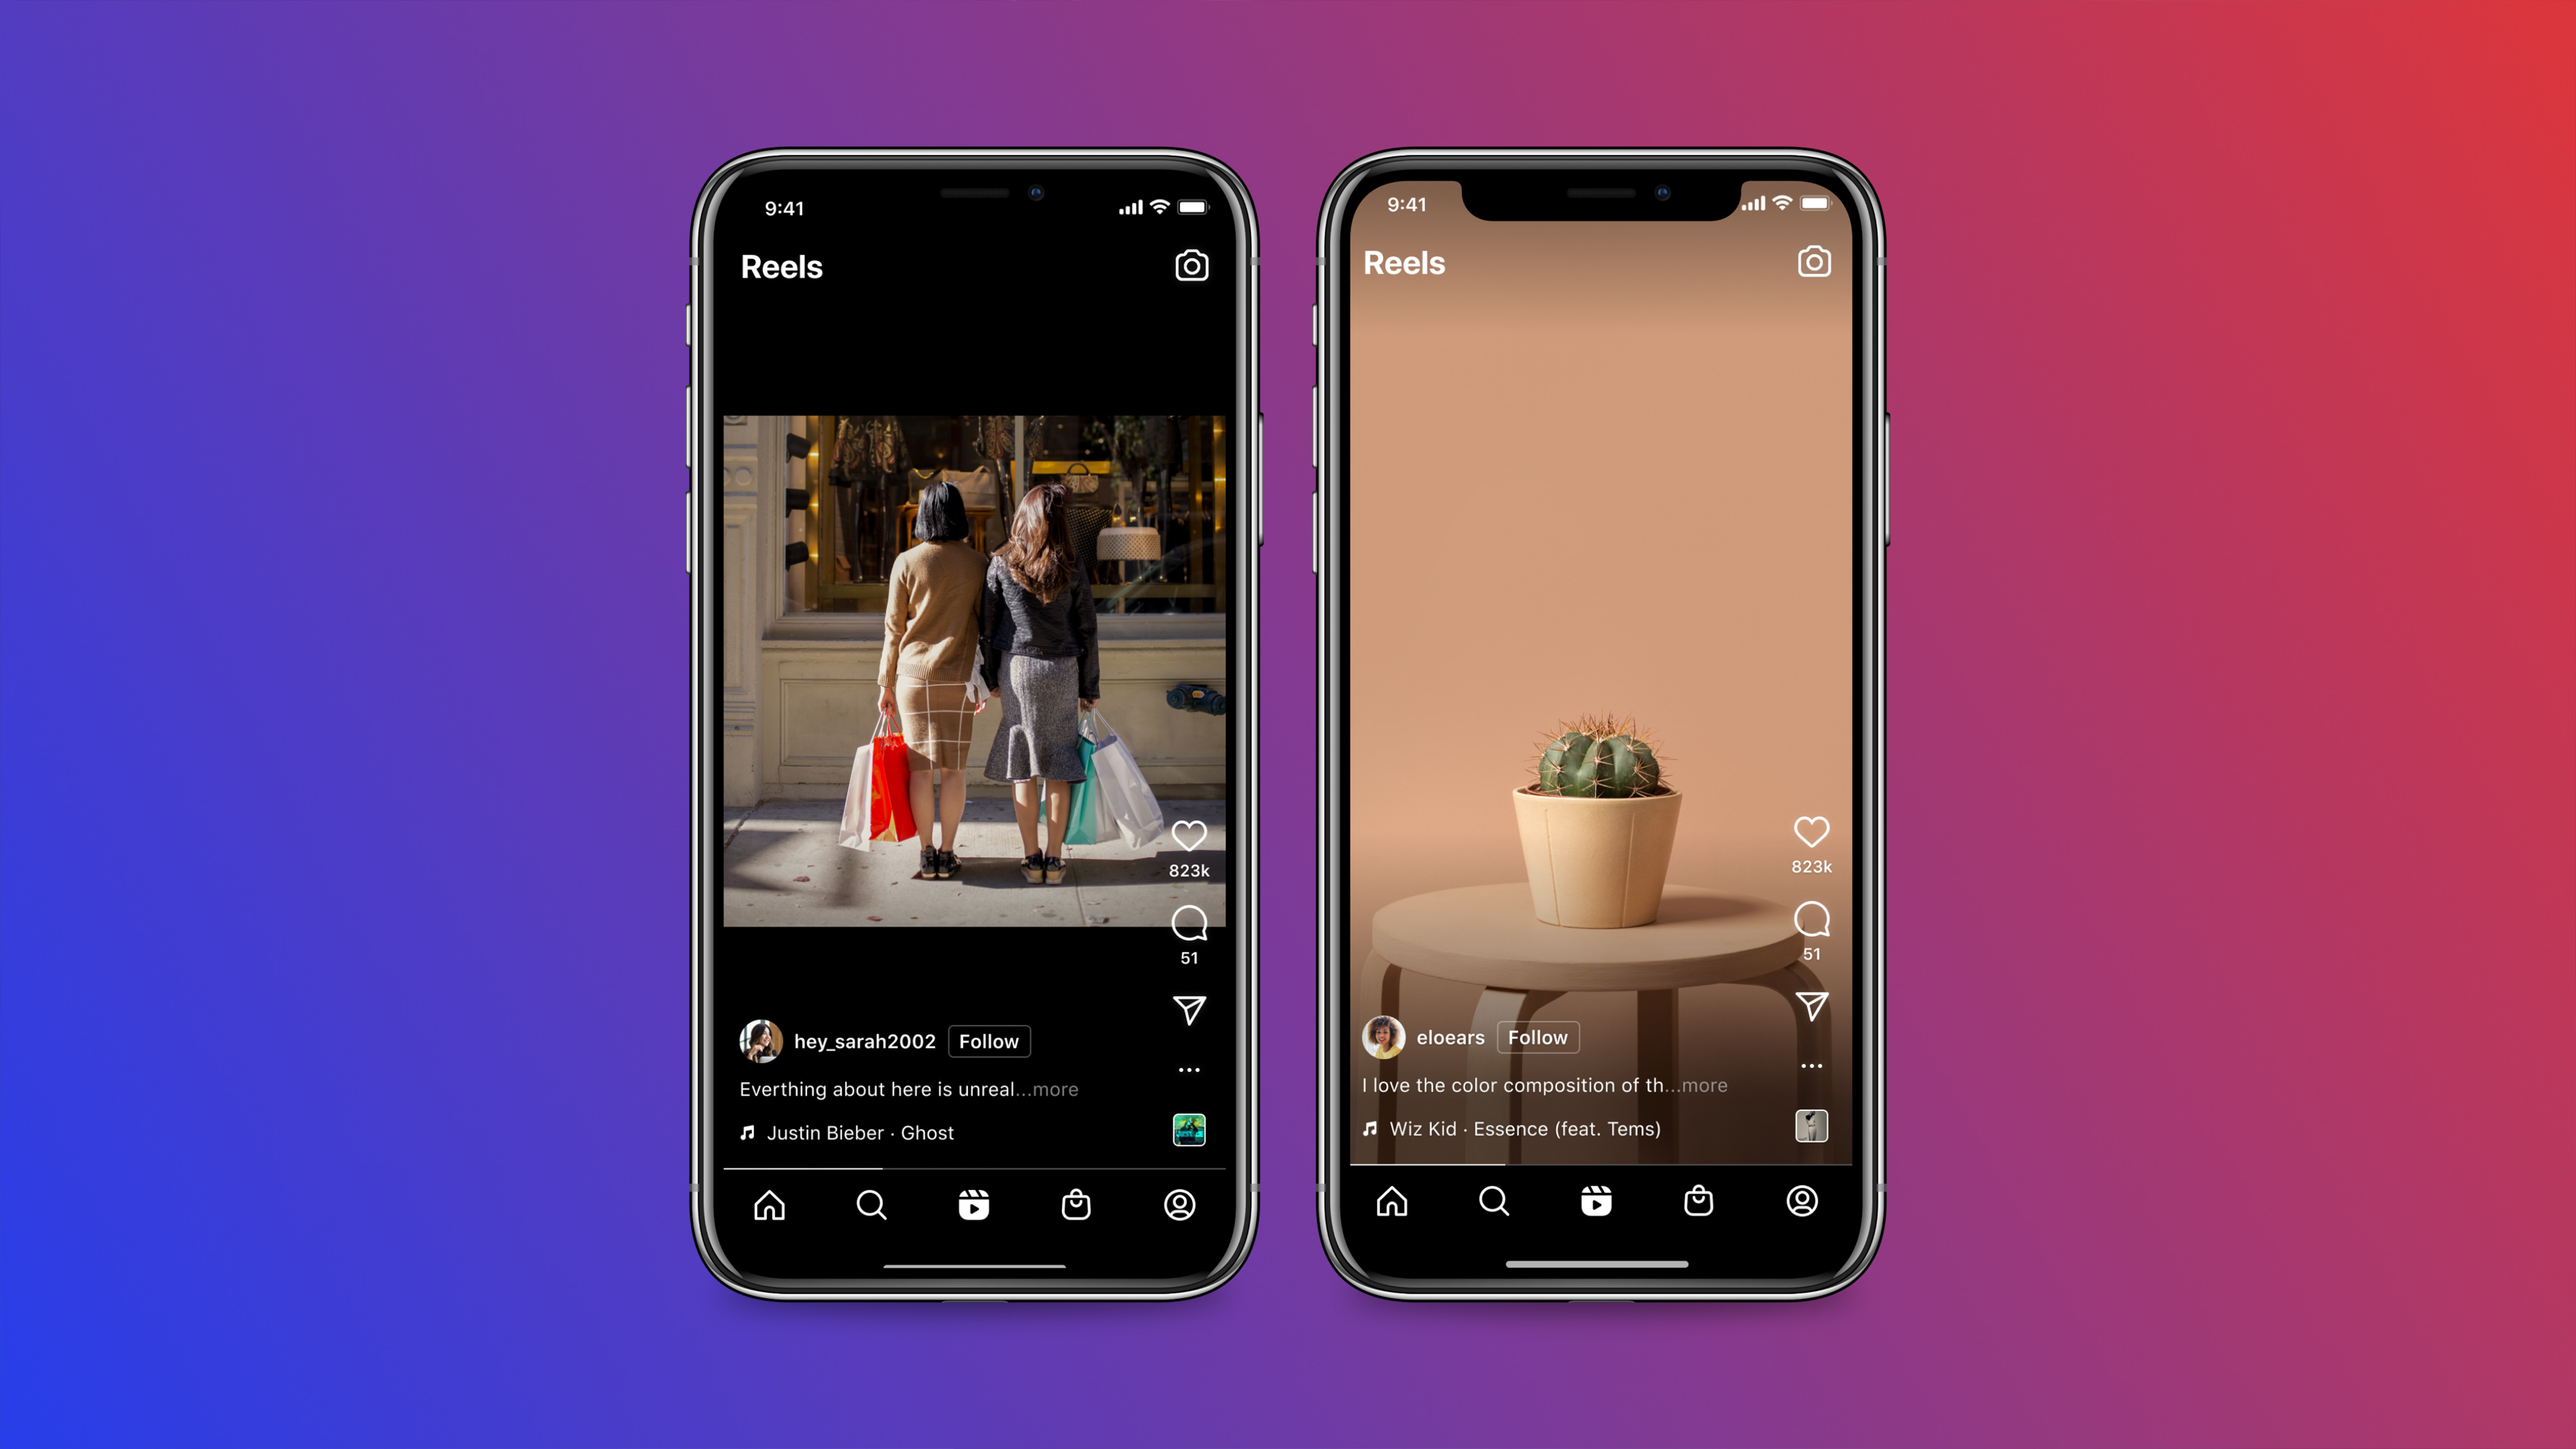
This Instagram Reels tutorial aims to get you up to speed on what is currently one of the most visible formats on Instagram. Instagram's gone all in on video, extending the length of Instagram Reels and offering more features – many of them clearly influenced by TikTok. As a results. Reels are everywhere when you open Instagram, ranging from synchronised dance routines and quickfire wardrobe changes to insights into creative processes.
Meta introduced Reels as a pretty obvious copy of TikTok and the format proved to be such a hit that it's put the short-form video format the centre of subsequent Instagram updates. But with so many formats and features now available it can be hard to keep up – especially if you're trying to work out how to sell on Instagram or how to drive Instagram engagement. In this Instagram Reels tutorial, we'll get you started with a look at how to use Instagram Reels following the latest 2022 Instagram Reels updates.
What exactly is Instagram Reels?
Instagram Reels is a micro-video format that was Instagram's response to the surging popularity of TikTok, particularly among Generation Z. It offers similar tools to TikTok, and it's been making Instagram more and more TikTok-like since it was introduced.
Reels share the full-screen with Instagram Stories, but they can be longer – up to 90 seconds – and they remain on your profile, whereas Stories disappear after 24 hours unless you save them to your Highlights. But the biggest difference is in the in-app editing tools, which allow users to add effects and music and to splice multiple pieces of video (if you'd like something different, though, see our list of the best video editing apps).
Reels matters because the world's second-largest social media platform (Instagram, obviously) is pushing the formal heavily. Unlike Stories, Reels appear in both the general Explore tab and search results, as well as in their own tab on the user interface. This makes your Instagram Reels far more likely to reach non-followers than Instagram Stories.
And there are lots of ways that creatives can use Instagram Reels to share tutorials, behind-the-scenes material, sneak peeks at works in progress and before and after videos. So how do you get started? Read on for our step-by-step guide and if you run into any problems, just check the Instagram Reels troubleshooting section at the bottom.
01. Adjust the settings

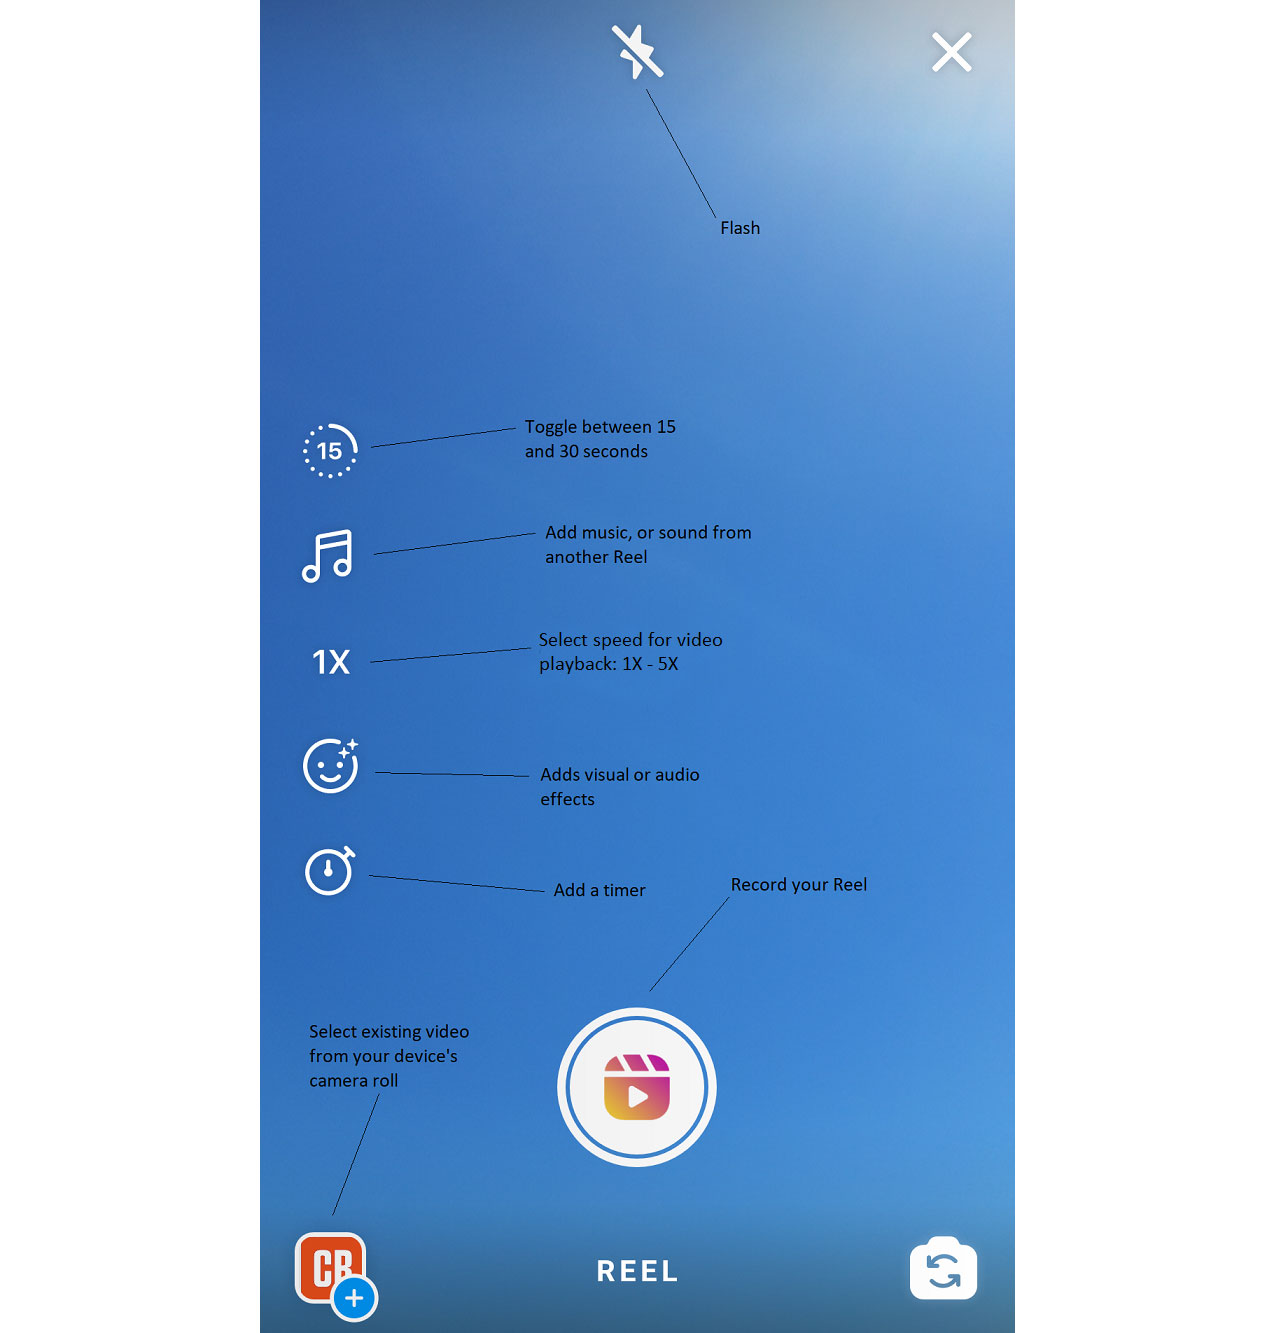
Assuming that you already have the Instagram app installed on your phone. You'll need to open it up to get started. There are two ways to share a video as a Reel on Instagram. The first and more straightforward is to simply use the format to share a video that you've already recorded. To do that simply click on the camera roll window in the bottom left (see step four below). The second way is to record a video in Instagram Reels itself. To do that, first you'll need to choose your settings using the buttons on the left of the interface.
Get the Creative Bloq Newsletter
Daily design news, reviews, how-tos and more, as picked by the editors.
Choose a time limit of 15, 30 or 90 seconds (the final video can be shorter but no longer than the length you select). You can also choose a playback speed from 1X up to 5X, which helps squeeze more footage into the time available. There's also an option to choose a layout. By default, you'll have space for a single 9:16 video, but you can change the layout to enable you to show more than one video at once.
Clicking on the stars icon (it used to be a face, as you'll see in the screengrab above) will bring up a tab with effects options at the bottom of the screen – you'll find everything from sparkles and glitter to colours, glitches, voice changers and a range of Snapchat-like 3D masks and other novelty disguises.
With some of the effects, you'll find that tapping on the screen brings up further options in smaller circles. You can only choose one effect at a time. You can apply an effect now, or alternatively you can wait and apply an effect (if you want to) at the end after you've recorded your vide.
Instagram Reels also has a feature called Dual, which lets you make a Reel using both the front and back cameras of your phone at the same time. This can be used to make reaction videos or blog-like content where you film yourself using your phone's selfie camera as you talk about the scene that you're filming with the main camera.
02. Add music or audio


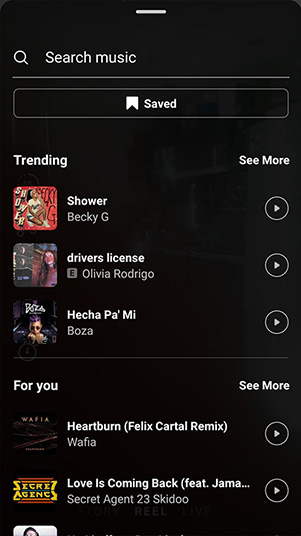
You can record your Reel with the original audio or you can add audio from the app (if you don't need the music while you're recording the video itself, you can always add audio later). If you click on the music icon, that opens the search options, where you can type in the name of an artist or a piece of music. You can also scroll down to browse by genre or by audio that's trending in your area.
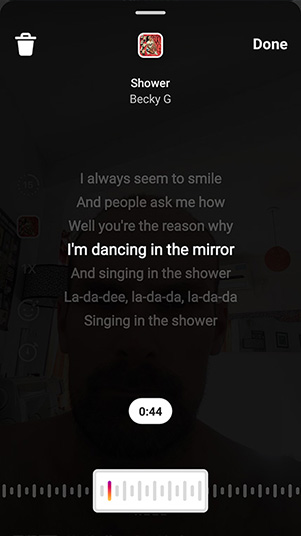
After you click on a piece to select it, the audio will play and you can use the scroll bar at the bottom of the screen to choose a clip to use. If the song has lyrics, the scroll feature will highlight the lyric from the start of the selected clip, although the music tends to be slightly ahead of the lyrics.
Alternatively, you can add audio from other people's Reels. Find and open the Reel that you want to sample, then click on the name of the audio at the bottom left. You'll be taken to a screen showing all the Reels that feature that audio. Click Save Audio. You can then locate it in the Saved section within the audio search options when you record your Reel.
03. Record your video
A post shared by Courtney Quinn 🌈 Color Queen (@colormecourtney)
A photo posted by on
There are now several ways to record a Reel. You can simply press the big Record button to start filming or you can click on the stopwatch icon if you want to add a three-second timer to give you time to prepare. The newest tool is Instagram Reels gesture control. You can click the hand icon – the last of the tools that appear on the left, and this will allow you to start recording by raising your hand – useful if you want to record yourself at a distance from your phone and need more than three seconds to prepare. Raise your hand and a countdown will begin.
You can record as many pieces of footage as you want until you reach the time limit. To stop filming, press the Record button again. Click < to go back and trim (or delete) the footage you just recorded.
After recording your first piece of video, a new icon will appear on the left: the align tool. This brings up an overlay of your last piece of footage so you can line up the image to create a seamless transition when you start recording again. This helps in creating the rapid changes and stop motion-like videos that have become so popular in Reels. If you find you have too much shadow and need an affordable way to light up your Reels, see our guide to the best ring lights for Instagram Reels, TikTok and more.
You don't need to finish the Reel in a single session. If you click > through to the final sharing screen, you can save a work in progress in Drafts and continue it later.
04. Upload a prerecorded video
A post shared by Zak Gruber | Creative (@indiemoto)
A photo posted by on
Like with Instagram Stories, you're not restricted to recording footage in the app itself. If you don't want to use Reels' editing tools but want to take advantage of the format's potential reach, you can upload videos that you've already made.
Simply click on the image of your camera roll in the bottom left and you'll be able to select any video on your device. Many users upload videos made on TikTok in order to share them on Instagram as well.
If you produce your video outside of Reels, just make sure it's in portrait format (9:16). You won't be able to add music or effects to the footage in Reels; only text, stickers and filters.
05. Add text, stickers an effect or a voiceover
A post shared by Logo Designer Inspiration (@logohero)
A photo posted by on
After you've trimmed all the footage you want to use, click >. On the next screen, you can add text, stickers, effects and audio – including the option to add voiceover. For text, the mechanics and the fonts available are largely the same as in Instagram Stories.
The main difference is that you can choose the moment when you want text to appear and disappear. This flexibility can be used to create text narratives for tutorials, work-in-progress videos or video listicles.
Each text you add will create a small black rectangle at the bottom of the screen. To select a particular piece of text, click on the corresponding rectangle, turning it white. You'll then be able drag the entry and exit points on the bar below to choose when you want the text to appear and disappear.
Unlike with Instagram Stories, any tags you try to add in the text won't work. You'll need to add them later in the caption.
06. Write a caption and add tags
A post shared by Tanisha (@handlettering.is.fun)
A photo posted by on
If you want to save your Reel to your device to use elsewhere, now's the time to click on the download icon top centre. Unlike TikTok, Instagram will remove any third-party audio from the downloaded video. On the upside, it doesn't add a watermark.
After that, click > to progress to the final screen. Here you can add a caption, which will appear overlaid at the bottom left of your Reel. It will also appear below your Reel in the format of a standard Instagram post if you toggle on 'Also share in feed'.
As with any content on Instagram, adding mention tags and hashtags in the caption can help your Reel reach to more people.
07. Share your Reel
You can still click on the back arrow at this stage if you want to re-edit anything. Otherwise, click on the Cover to choose the point of the video you want to use as the cover when it appears on your profile, then click Share.
If you have a public account, your Reel may appear on Instagram's Explore page. People will be able to comment on it unless you disable commenting. Open your published Reel and click on the three dots at the bottom right to find the option to disable commenting or to delete your Reel.
If you used original audio, other users will now be able to use that in their own Reels. Users will also be able to use your Reel in their own using the Remix feature (unless you have opted out). Based on TikTok's Duet feature, this allows users to respond to a Reel by recording their own take on the content alongside it. You can enable or disable the option for the public to remix your Reel in Settings. Note that this feature also now applies to standard Instagram posts. You can add any public posts to your own Reel unless the user has disabled the option.
Troubleshooting for Instagram Reels
I don't have Reels
Reels has been available to all Instagram users for some time, so if you find you don't have it or that some of the features are missing, check in the App Store or Google Play to see if an Instagram update is available. Failing that, try uninstalling the app then installing it again.
I can't add music
For copyright reasons, users with business accounts may find they don't have the option to add music in Reels or Stories. This is something Instagram seems to be adjusting. Users in many areas report that the option has now been added. Try updating the app to check if the option has been added in your area. Otherwise, many users get around the issue by pre-editing Reels using a different platform.
Can I include still images in an Instagram Reel
Yes, you can now include still images in a Reel. You can add any still from your phone by clicking on the camera roll at the bottom left when you're in Instagram Reels. You can also add other people's Instagram posts to a Reel (you'll find this option by clicking on the three dots that appear at the top right of every Instagram post – just choose 'Remix this photo', providing that the user has enabled this feature).

Thank you for reading 5 articles this month* Join now for unlimited access
Enjoy your first month for just £1 / $1 / €1
*Read 5 free articles per month without a subscription

Join now for unlimited access
Try first month for just £1 / $1 / €1

Joe is a regular freelance journalist and editor at Creative Bloq. He writes news, features and buying guides and keeps track of the best equipment and software for creatives, from video editing programs to monitors and accessories. A veteran news writer and photographer, he now works as a project manager at the London and Buenos Aires-based design, production and branding agency Hermana Creatives. There he manages a team of designers, photographers and video editors who specialise in producing visual content and design assets for the hospitality sector. He also dances Argentine tango.
