How to use blend shapes to animate characters
Discover how to use blend shapes in Maya to easily animate your 3D character's face.
While rigging your 3D models using bones can be very effective, sometimes that method just isn’t suitable – and facial expressions is one of those times. In cases like this, you will find that it can be more efficient to create a few blend shapes than try to make weight maps work properly for every situation.
So leave the bones behind and discover how to set up some simple blend shapes and use them effectively in your animations.
01. Start with the final geometry
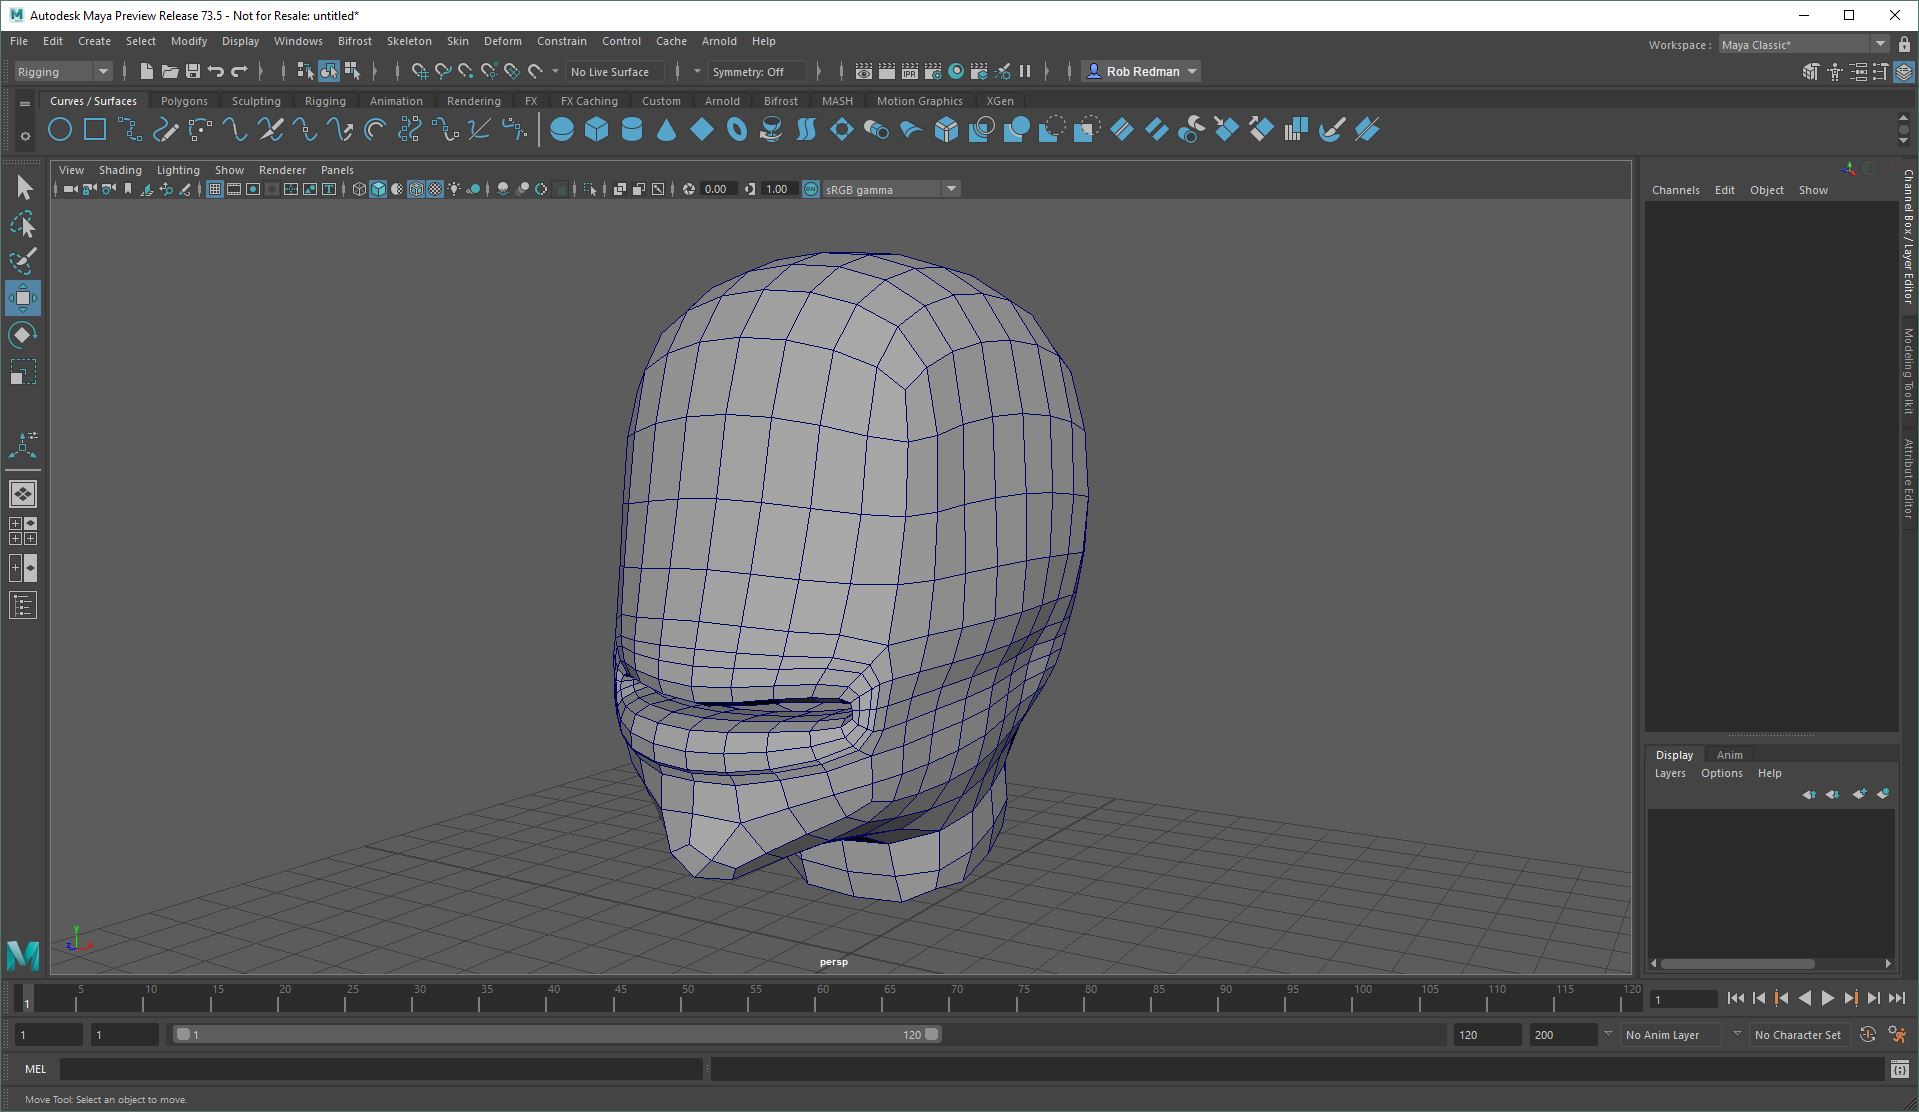
To start with you need your mesh. You want to have the final geometry in place before you start, to make sure your vertices in the duplicates you are about to make match the original. I’m using this simplified head to help make the tutorial easier to follow but you can use the same method no matter how complex your character is.
02. Create duplicates
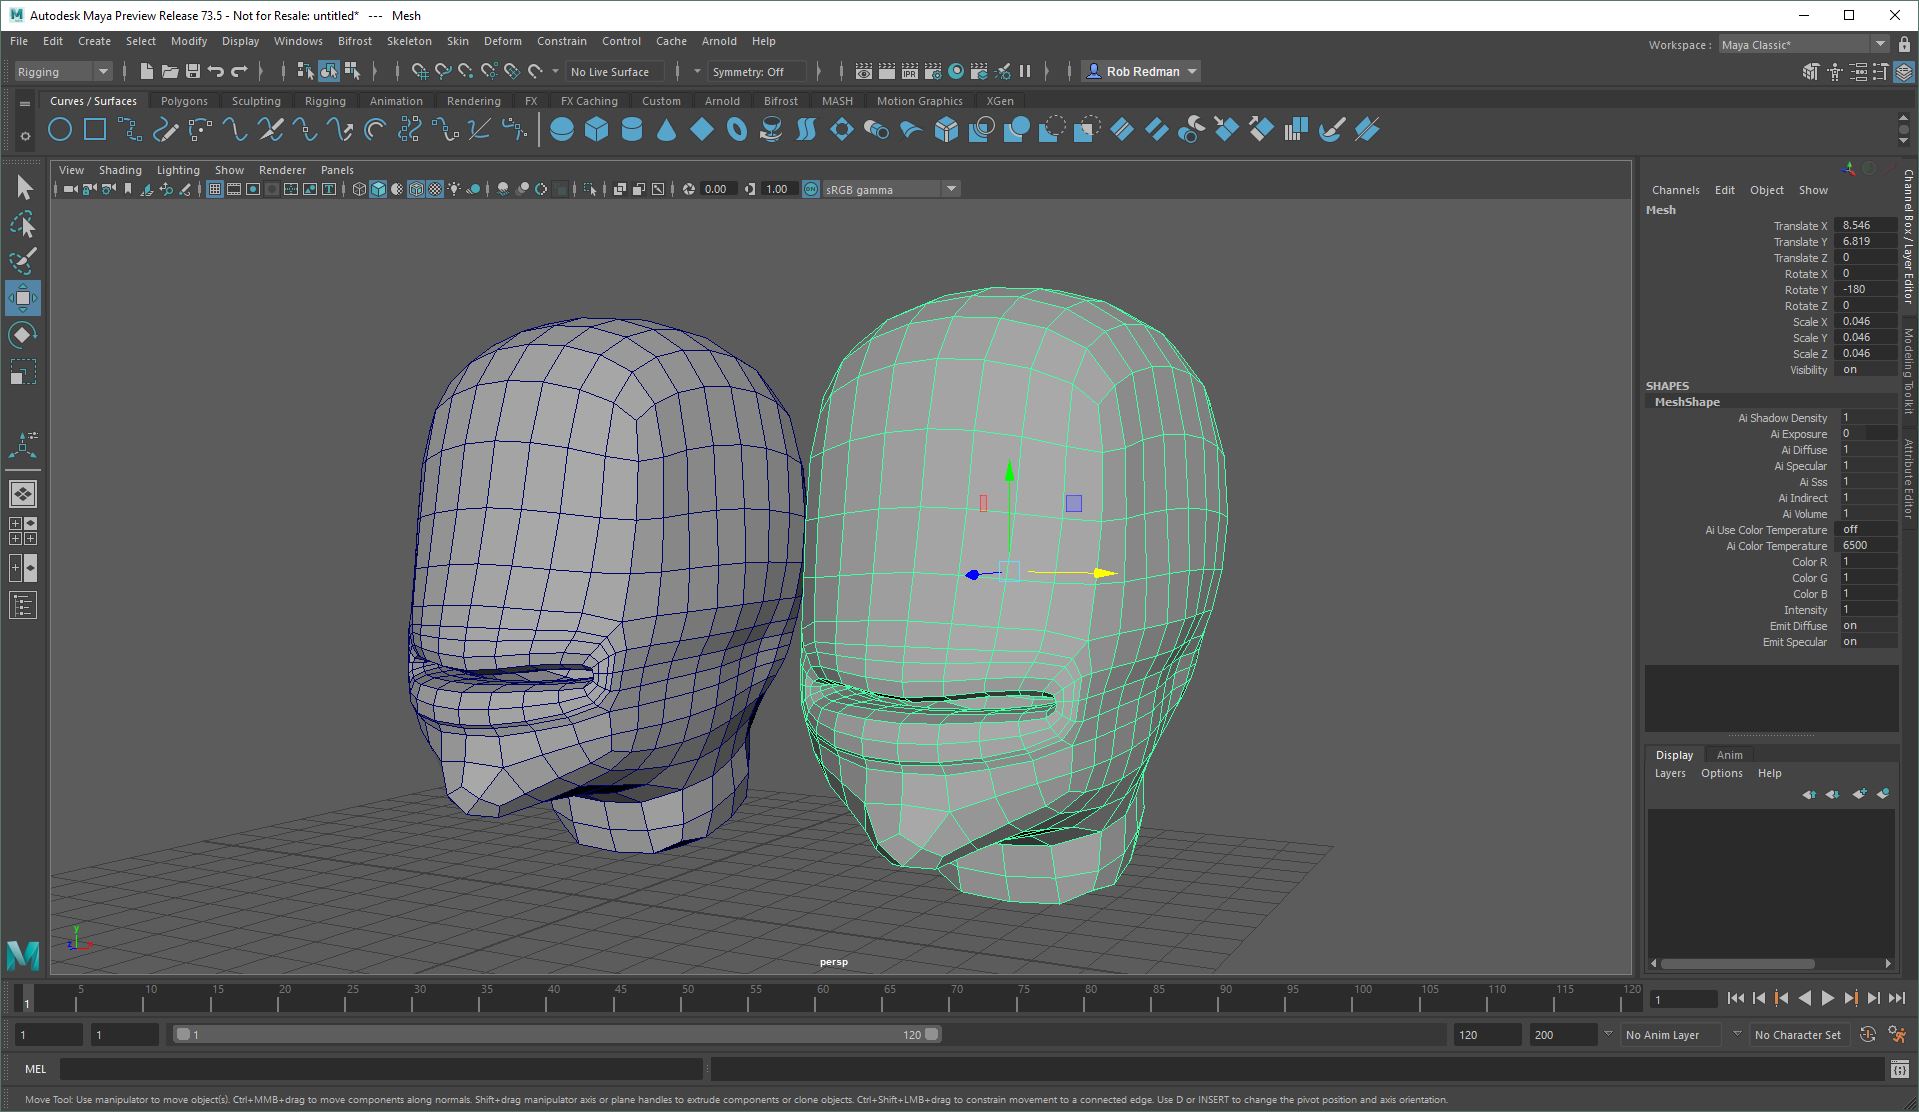
Blend shapes work by changing the mesh on a duplicate of your base mesh, so make sure the original is in the default pose, then duplicate it by pressing ctrl+D. Move this copy to the side so you can better see and compare the two versions. You can make as many of these duplicates as you need to cater for each expression.
03. Use soft selections

I won't go too much into the modelling side of things here, but it is worth noting that soft selections work well for defining expressions. In many cases, leaving the selection set to volume is best, as this helps the mouth cavities move along with any lip movement, which can prevent unsightly mishaps with overlapping polygons.
04. Choose expressions or controls
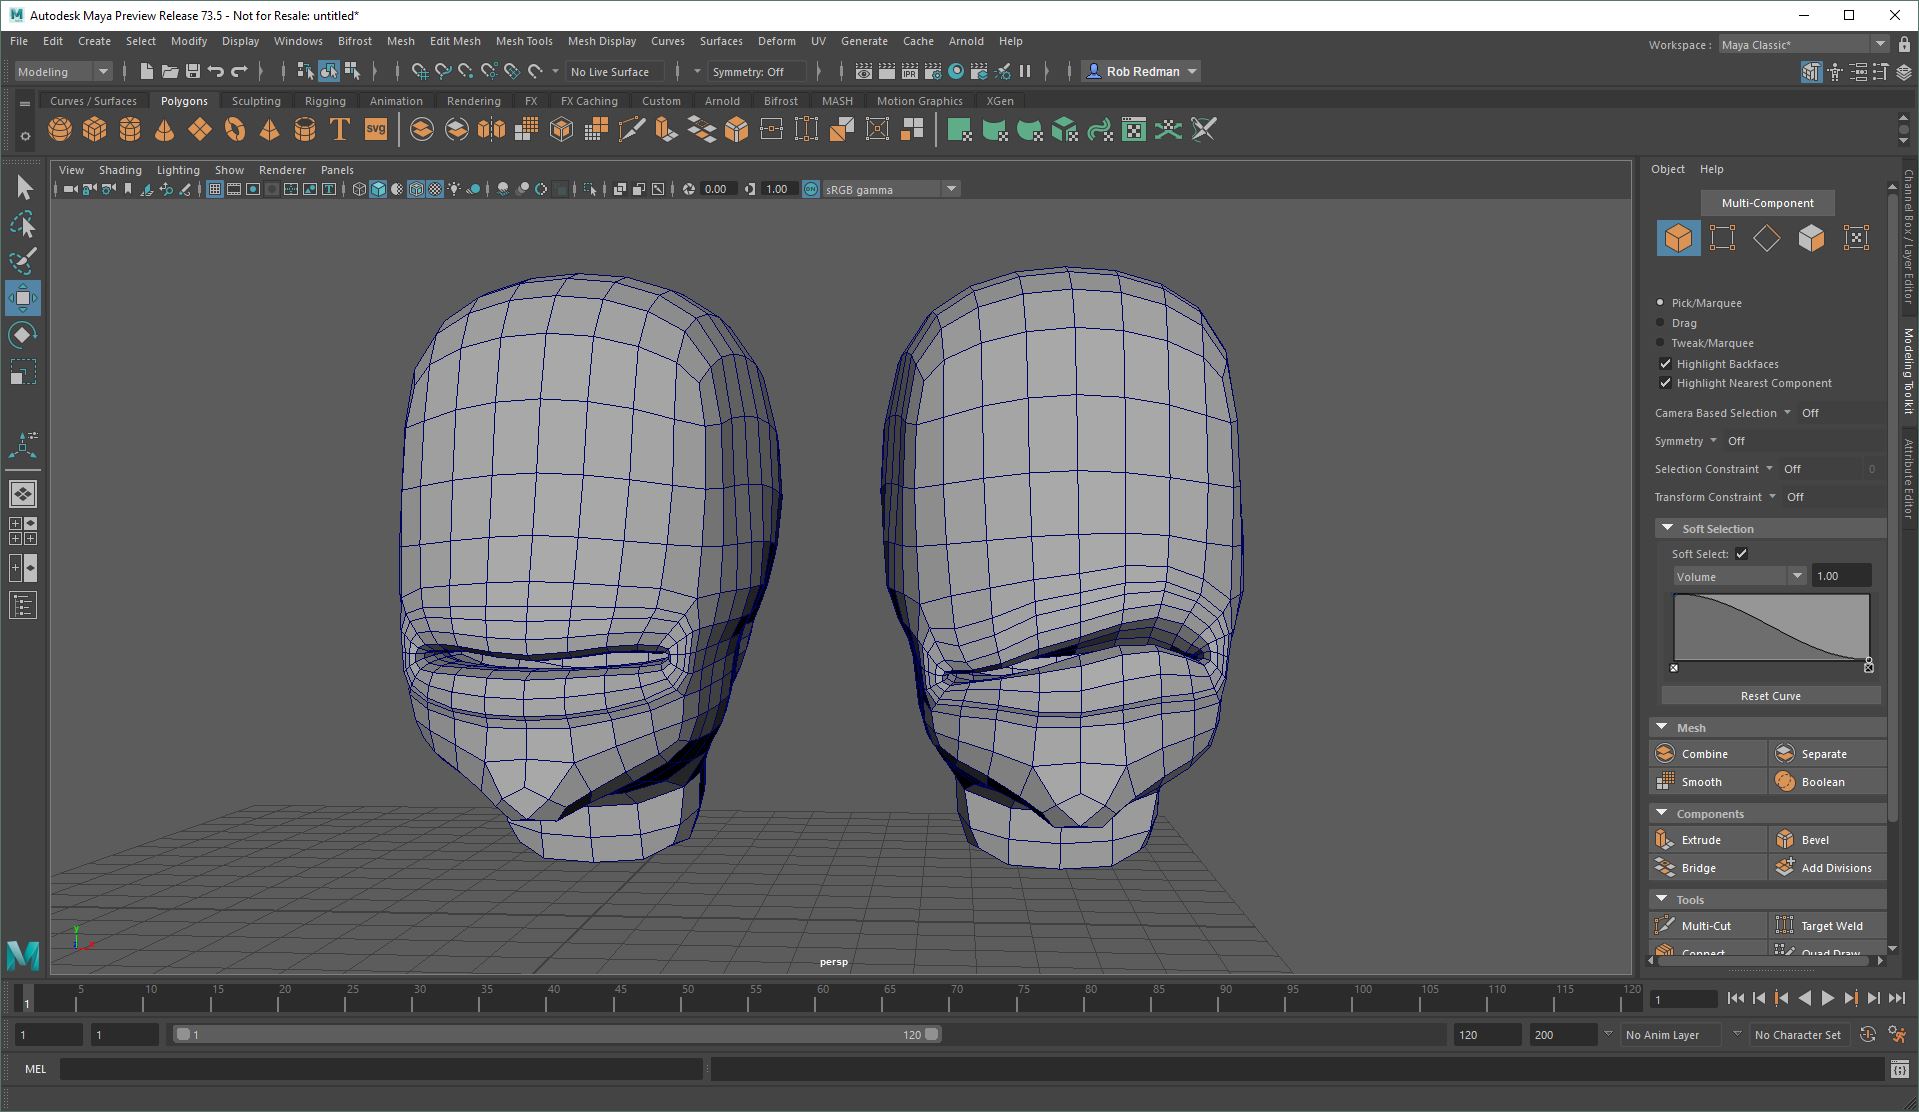
Above you can see I’ve created a scowling pose. You can choose at any point, but it’s worth deciding up-front if you want to create expressions or controls. You can mix blend shapes as you animate, so try to think about whether you want expressions or things like 'top lip curl’ or ‘brow right down’. Both are useful but a little planning can go a long way.
05. Name your duplicates

To name your duplicates, select them in turn and in the attributes editor type a new name in the Mesh field. You can, of course, do this at any time but it’s worth naming things up as you work, to aid in scene management later. Finding a mesh in the outliner is so much easier if you remember to name everything.
Get the Creative Bloq Newsletter
Daily design news, reviews, how-tos and more, as picked by the editors.
06. Create blend shapes

To create the blend shapes themselves, select the expression mesh, followed by the base mesh (which you always pick last, as it’s the target). Then go to the Deform menu and click the box next to Blend Shape to open the Options dialogue.
The defaults are fine for this, but if you have a rigged model, go to the Advanced tab and swap Automatic to Pre-deformation so it doesn’t mess with your mesh.
07. Test them out

Once you have created all your blend shapes it’s time to test them out. Open up the mixer by choosing 'Windows > Animation editors > Shapes' and you will see a set of sliders. There are two for each expression.
With an eye on your original mesh, try adjusting the sliders to see how the mesh takes the shapes, either in full or any percentage. Note how they can work individually or in tandem.
08. Let the fun begin!

Now the fun begins: you get to animate. All that’s left is to scrub through the timeline, moving the sliders as needed and clicking the circle under the ‘Key’ column to record keyframes.
Remember you can mix your blend shapes – that really is the power behind this method, as it can make for some very natural looking results. Lastly, don’t forget you can use this technique for anything, not just facial expressions. It's great for car suspension, springs, and all manner of things.
Related articles:

Thank you for reading 5 articles this month* Join now for unlimited access
Enjoy your first month for just £1 / $1 / €1
*Read 5 free articles per month without a subscription

Join now for unlimited access
Try first month for just £1 / $1 / €1

Rob Redman is the editor of ImagineFX magazines and former editor of 3D World magazine. Rob has a background in animation, visual effects, and photography.
