How to take your vector logo from 2D to 3D
Want to give your logo that extra dimension? Here's how.

In this tutorial, we're looking at how you can take your vector-based logos from Illustrator and Photoshop into Cinema 4D and give them shape, texture and lighting. Surprisingly, it's easier than you think and it'll only take 30 mins with some basic knowledge of C4D. If you need to bone up on your C4D skills, we've got a brilliant selection of Cinema 4D tutorials to help you out. But for those of you who are ready to go, let's get started...
Step 01
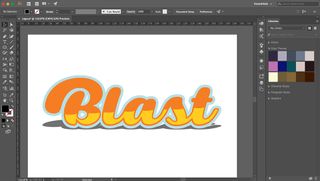
Once you have your design nailed in Illustrator, break it down into its basic shapes. If you still have any live text, you'll need to create the outline (Cmd+Shift+O) to convert everything to a path. In this case, I've three main shapes – the blue outline, the main orange type and the yellow detail – we're ignoring the shadow, which we'll add later in C4D.
Step 02
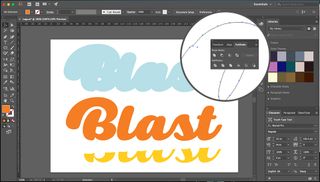
Once you've got your basic shapes separated, select each shape and combine them together with the Pathfinder (Cmd+Shift+F9) Union button, this is the one with two squares merge together. In the case of my logo, an example would be joining the B and the rest of the character in the orange type. Another good tip is to look closely at your paths in Outline mode (Cmd+Y) and redraw any wonky points because these will show once you start modelling in CD4 later.
Step 03
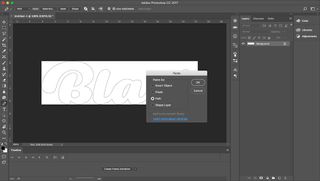
The easiest way to get a path in Cinema 4D is to go through PhotoShop. So Copy (Cmd+C) one of you shapes from Illustrator and Paste (Cmd+V) directly into PhotoShop. Once copied, create a new document the size of the clipboard and paste (Cmd+V). When the Paste prompt box appears select Path. Once in PhotoShop, go to File/Export/Paths, and then to Illustrator, this vector file is compatible with all versions of Cinema 4D. Create .Ai files for all parts of your logo.
Step 04
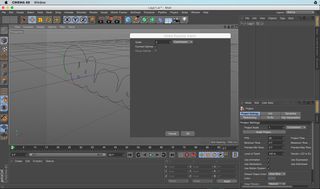
Open all the .Ai file into Cinema 4d, once prompted by the Adobe Illustrator import box, make sure the Connect Splines box is ticked. What you need to do now is to cut and paste all of these Splines (paths) into the same document. The easiest way to do this is to select the shape icons from the object panel (normally in the top right of the interface) this will select all the elements with each Spline.
Step 05
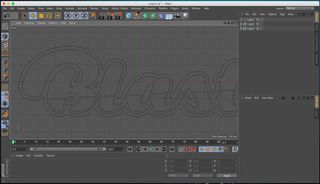
Once you have all the elements in one document, press (F4) for the front view and rearrange each one to rebuild your logo. Press (F1) to go back to the main Camera. A quick tip: to move around Cinema 4Ds camera, use (1), (2) and (3) keys.
Step 06
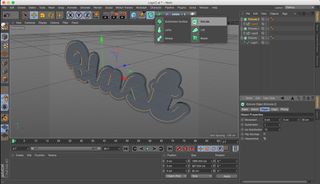
Select the Extrude tool (see screen) for each part of your design. They will appear in your object panel with you splines (paths). To get them to work, grab your splines and move them inside the Extrude icons. If this doesn't seem to work, select Extrude, then in the attributes panel below, click the Object tab and make sure the Hierarchical box is ticked. To alter the depth of each part change the third Movement figure on the same tab. By default, this is normally 20 cm, but try a minus figure.
Get the Creative Bloq Newsletter
Daily design news, reviews, how-tos and more, as picked by the editors.
Step 07
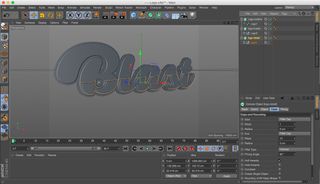
To give slightly curved edges to parts of the logo, select the Extrude tab in the object panel, then click the Caps tab in the attributes panel below. In the Caps panel change both Start and End attributes to Fillet Cap, then Fillet type to Convex. You can alter how curved it is by changing the radius values. While you're here, try altering the Fillet type for different edges.
Step 08
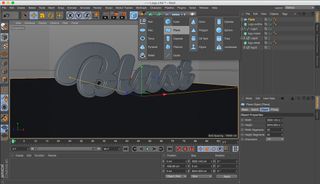
It's time to put this on something. Select a plane from the shapes menu (see screen). For a quick tip, there are three quick keys that allow you to move an object in the scene: (E) allows you to move on an XYZ axis, (R) allow you to rotate and (T) allows you to change the scale. So grab your plane and move and scale it underneath your logo. To get a better idea of how your logo is looking press (Shift+R) to render it in a window to view.
Step 09
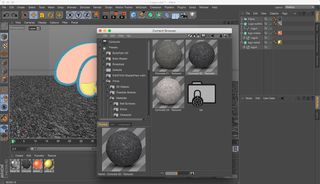
A great place to start with Material in Cinema 4D is by looking at its preset library. To find this go to Windows/Content Browser, a window will pop up and in the side panel go to Present/Prime/Material. To apply the material just drag it from your material panel to the object in the object panel. A great tip: there's a lot of free material out there on the web and which is easy to install in the plugin folder.
Step 10
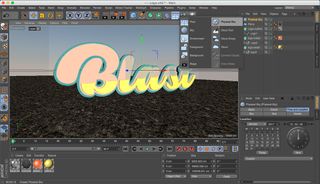
For the lighting, I've kept it simple by using Cinema 4D's Physical Sky lighting. It's found under the menu with the floor icon (check out the above screenshot). To alter the time of day, select the Physical Sky icon in the object panel and then the Time and Location tab in the attributes panel. For longer shadow, think later in the day. To check the light and shadows, render it in a window. (Shift+R)
Step 11
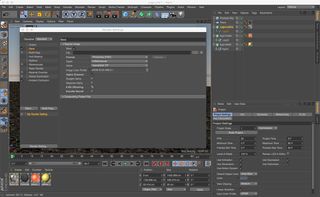
Go to Render/Edit My Render setting menu. On the left-hand side of this window, there's a lot of different attributes for rendering, but we're only dealing with two. First, click output, this panel allow you to alter the resolution of the final image. Second, click Save, this panel allows you to change the format of the file. If you're looking for a more realistic render, try Ambient Occlusion, this is a setting from the Effect button on the left-hand side. But be warned, this will take longer to render.
Step 12
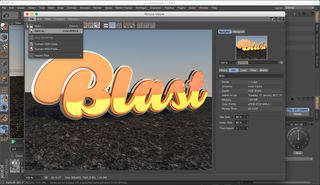
Once all your settings are good, start your render (Shift+R). This will render your image in a different window, as before, which is good because it allows you to still tweak your scene if you need too. Depending on resolution and the speed of your machine, the rendering can take some time. Once it's finished in the picture viewer window, go to File/Save as. Easy when you know how.
Related articles:

Thank you for reading 5 articles this month* Join now for unlimited access
Enjoy your first month for just £1 / $1 / €1
*Read 5 free articles per month without a subscription

Join now for unlimited access
Try first month for just £1 / $1 / €1
