How to speed up and optimise WordPress sites
Diagnose and fix slow load times by using the latest server tech and asset optimisation plugins.

WordPress began as a simple blogging platform but evolved into the content management system that now powers a large percentage of websites. As the most popular CMS, its rapid success is likely down to it being a fantastic general-purpose tool in the web development world.
A low barrier for entry and large ecosystem of plugins and free WordPress themes allow less technically proficient users to build complex systems. But this can be a double-edged sword if a WordPress website gains traction, scaling beyond the occasional visitor and leading to problems.
Not sure about WordPress? Explore other options with our list of top web hosting providers. And if you want to design a site easily, try these brilliant website builders.
The first signs of trouble appear when a new user lands on the website: load times can be excruciating and elements jump around the page as separate stylesheets load, one by one. It isn't long before the server runs out of memory, causing the database to crash, requiring a server restart to bring the website back up.
By default, when a user lands on a page provided by a WordPress website, the back end runs through the theme and any plugins before rendering the page. If lots of plugins are used or the theme is poorly written, this can result in lengthy database queries and inclusion of JavaScript and CSS where it isn't needed.
Thankfully, many of the major issues causing slow speed can be addressed, and in this tutorial we will look at how you can optimise even the clunkiest of WordPress websites. To boost your skills further, take a look at our roundup of WordPress tutorials to try.
01. Test the current speed
The first step in speeding up a website is to find out how well it's performing to start with. An array of tools exists to help with this, including Google's Pagespeed Insights and Pingdom's page load checker. We will be using GTmetrix as it combines several checks; go to the site and enter the URL for the website.
Get the Creative Bloq Newsletter
Daily design news, reviews, how-tos and more, as picked by the editors.
02. Examine the results
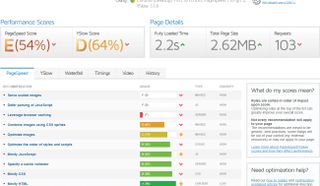
After a short delay GTmetrix will display the results of the check and give several scores from A – F. It will also give a fully loaded time and total page size. Below this, a breakdown of several elements is given.
03. Identify the largest files
One of the most important metrics is the total page size. This is the filesize of all loaded elements on a page, such as images, video, CSS and any scripts that are included in the page. Using GTmetrix, open the Waterfall tab and sort the table by size to find the largest elements on the page.
04. Compress media to reduce size
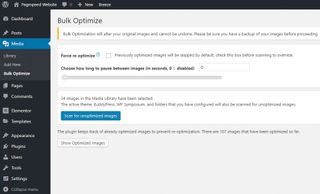
Images and video are usually the largest items on a page. Eliminate unnecessary background videos and ensure to encode video at a low bit-rate if it plays automatically. Install the plugin EWWW Image Optimizer. From the Media library, a new bulk optimise option is available. Run this.
If you've got a lot of media to store, stash it safely in these excellent cloud storage options.
05. Resize images
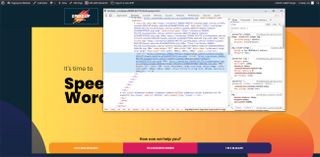
Sometimes images added to a page are at a high resolution and then scaled down with CSS. This wastes bandwidth as the larger size is never used. Go to the dashboard > Settings > Ewww Image Optimiser and select resize. Tick "Resize detection". Now, pages viewed by an admin will highlight images that need to be resized. Resizing these images in an image editor or using a CDN with automatic sizing will fix this issue.
06. Minification of CSS, JS & HTML
This is the process of removing the characters in code that make it human-readable to reduce the size of the page. When using a third-party theme, a plugin such as Autoptimize is perfect for this. Install it, go to settings > Autoptimize > scroll down to CSS options and tick "optimise CSS code". When working with a theme that has been custom-made, minification is done with build tools such as gulp.
CSS:
a {
    -webkit-box-shadow: none;
    text-decoration: none;
}

Minified:
a{-webkit-box-shadow:none;text-decoration:none;}
07. Combine CSS & JS files
When using a third-party theme, the Autoptimise plugin can cover most scenarios by enabling the "Aggregate CSS files" option. This combines all the CSS for each page into a single file instead of many smaller ones.
08. Defer external JavaScript
Live chat, analytics and tracking tools can bundle large JavaScript files that add entire seconds to the time the page takes to become interactive. Add the defer attribute to these scripts so that they're not executed until the DOM has finished loading.
<script src="path-to-file.js" defer></script>09. Examine the plugins

Too many plugins can cripple WordPress. With so many plugins being free, developers are under pressure to push premium versions of their software and include unnecessary, bloated features such as pushing notifications to the admin dashboard. Disable and remove any plugins that aren't being used – they can be installed again later if needed again.
10. Check web server power
The engine of a website is the server it runs on. If its cheap, underpowered and badly maintained it will run poorly. Go to Google PageSpeed Insights and enter the URL of the website. In the results look for "reduce server response time". If this appears on the report, it's likely that a slow server is to blame for the performance.
11. Enable Gzip compression
Gzip can decrease the size of your website before it's sent to a user. The user's web browser then decompresses the data automatically and displays it to them. With no drawbacks, it's important to ensure Gzip is enabled. There are several tools to check whether Gzip is enabled; try GiftOfSpeed.
12. Upgrade to PHP 7
Within the WordPress dashboard open Tools > Site health and click the info tab. Open the "Server" accordion and check the value for the PHP version. If this is any less than 7.x.x it is highly recommended to upgrade to at least PHP 7.1. Tests show changing this allowed handling of over double the simulated visitors.
13. Set up page caching
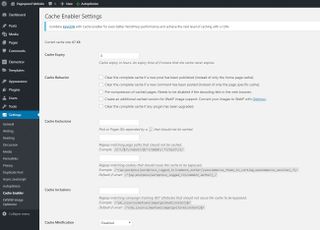
Go to plugins > Add new plugin and search for "cache enabler". This lightweight plugin stores pages in a cache so a visitor browsing at the same time as another doesn't cause the website to render the page twice. Instead, the plugin renders the page to a static HTML file once then serves this file to subsequent users.
14. Photon
Different devices render images at different sizes, making it difficult to size images exactly as they display. Using the free "photon" service, included in Jetpack, images are automatically served at the right size.
15. Set up browser caching
Browser caching tells a user's browser that certain elements don't need to be re-downloaded every time they reload a page on the website or come back and visit again. This can be done manually in .htaccess, or alternatively a plugin such as "Leverage Browser Caching" can be used.
16. Load testing with virtual users

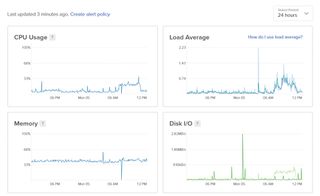
To simulate real users using the website and put the website under stress, load testing should be conducted. While monitoring the server for load impact, use a service such as Loader to send traffic to the website. The CPU and memory of the server should stay within safe limits.
17. Recheck performance
Once the optimisations have been carried out, you should test and gauge the improvement to the website. Run GTmetrix again and use the history tab to see the difference in page load time. If caching has been enabled, make sure that you visit the website at least once in order to "prime" the cache before carrying out testing.
This article was originally published in issue 292 of creative web design magazine Web Designer. Buy issue 292.

Join us in April 2020 to see our lineup of JavaScript superstars at GenerateJS – the conference helping you build better JavaScript. Book now at generateconf.com
Related articles:

Thank you for reading 5 articles this month* Join now for unlimited access
Enjoy your first month for just £1 / $1 / €1
*Read 5 free articles per month without a subscription

Join now for unlimited access
Try first month for just £1 / $1 / €1
