How to rig a face for animation
Learn how to create a full facial rig with this workflow using Maya’s powerful utility nodes.
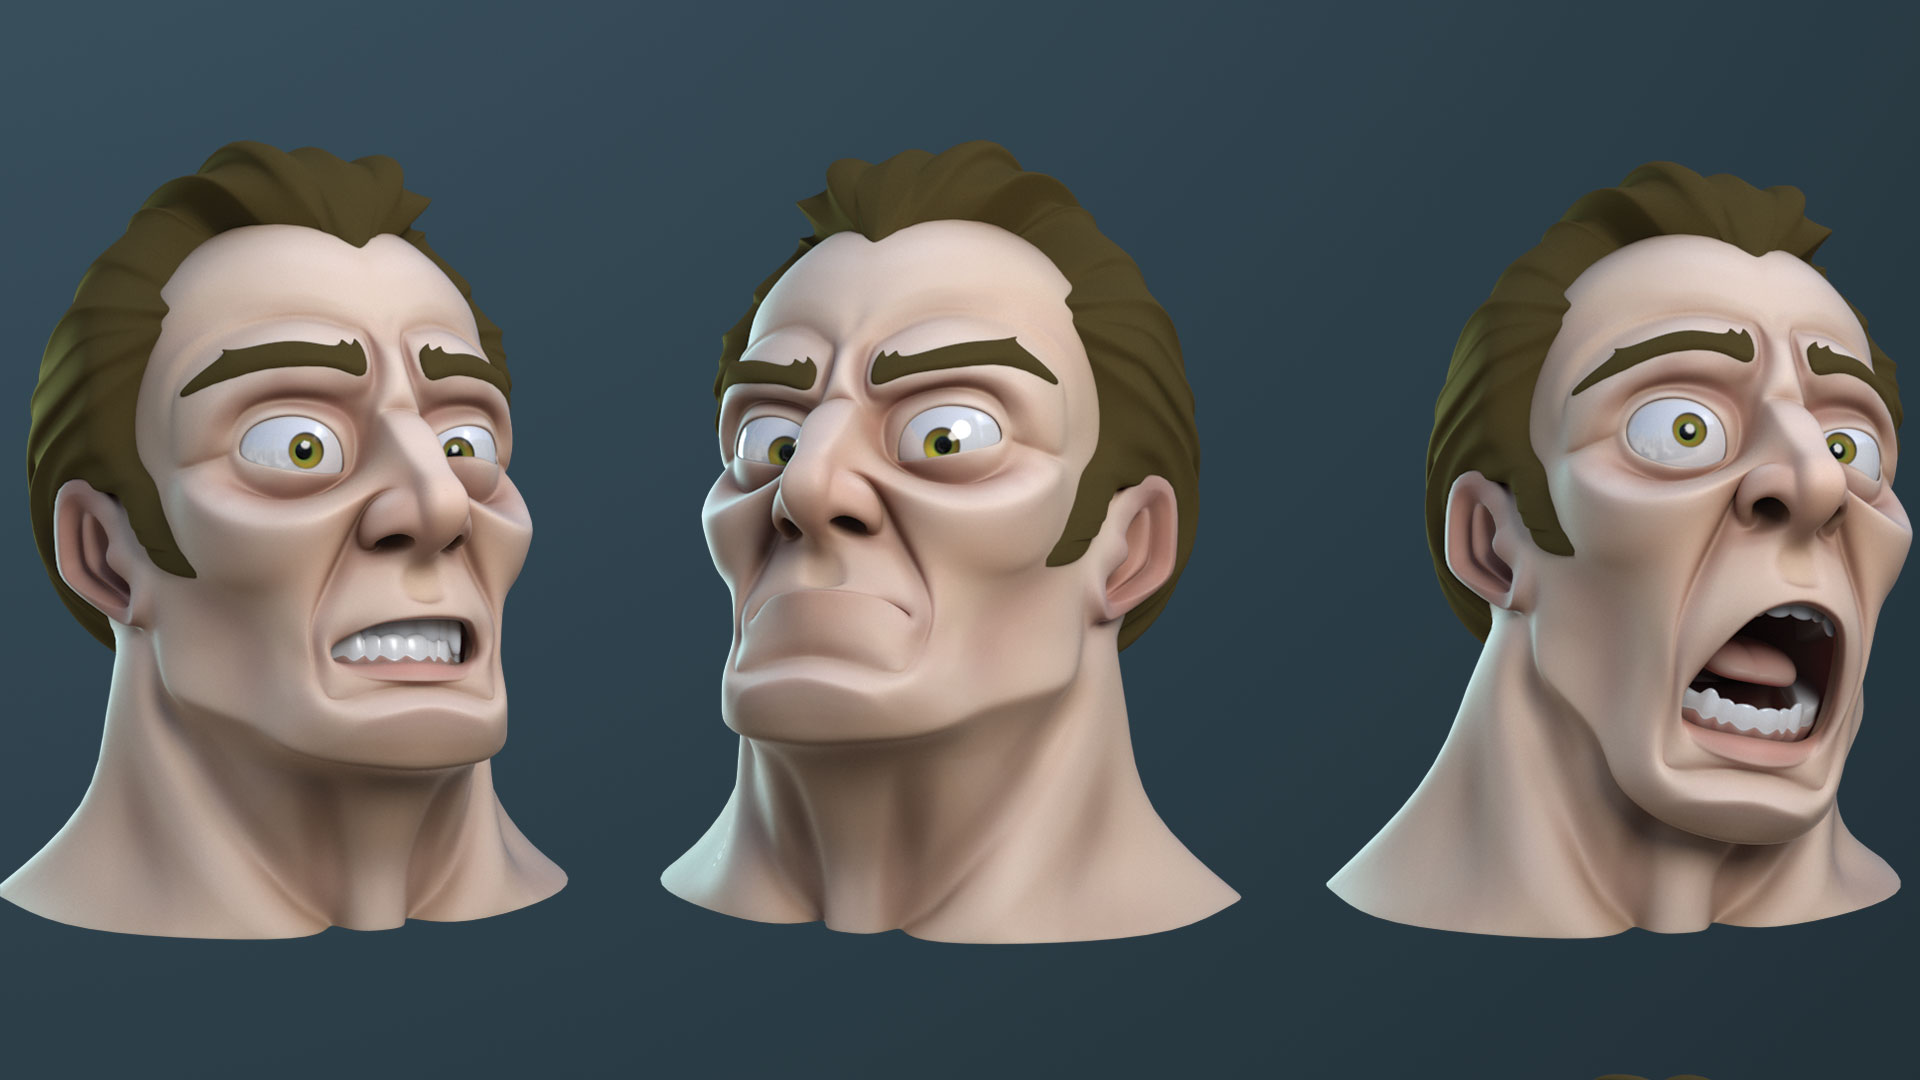
When I was first learning to create character rigs in Maya way back in 2002 while working on the Playstation 2 title Superman: Shadow of Apokolips, the rigs we used weren't most efficient, and Set Driven Keys (SDKs) were used for nearly everything.
The hands were driven by them and so were the facial expressions, in fact nearly every control had some sort of SDK involved. Don't get me wrong, the Set Driven Key is a powerful tool in Maya, but you might have to plough through a load of Maya tutorials to figure it out. It can be time-consuming to set up, and is easy to break and a pain to fix. Plus, your scene size can end up bloated by animation curve data.
Over the past few years I have been experimenting with another approach in Maya, but this time for more high-end rigs as opposed to game ones. One which is more efficient and in most cases easier and much quicker to implement into a rig. The process should give you the basics of rig creation.
In this tutorial, I will be taking you through the steps of rigging a character's face, but rather than focusing on the more basic areas like joint placement and weight painting, we will be looking at an often overlooked aspect of Maya… the utility nodes.
The word nodes can seem like an intimidating one and be associated with highly complicated rigs involving locators, splines and other complex systems, but don't worry. With this setup you will be using a combination of blendShapes, joints and nodes to make a highly flexible character capable of a wide range of emotions.
Once you have followed this process you can then adapt this rig for another character, adding more controls to simplify animation and make it easier to create 3D art. There's also a video to accompany this tutorial.
Find all the assets you'll need here.
Get the Creative Bloq Newsletter
Daily design news, reviews, how-tos and more, as picked by the editors.
01. Create mesh topology
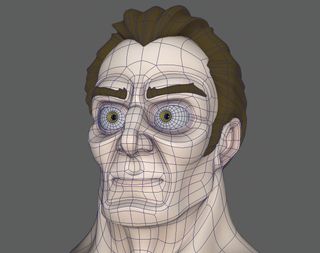
Before you start to build your rig, you need to do some investigation work. The model you are rigging and its topology are critical to how well the character will move, especially if, like in this instance, you are focusing on the face. It's important that the topology is not only clean but that the edge loops follow natural muscle lines. If they do the face will deform in a much more realistic way.
02. Make foundation shapes
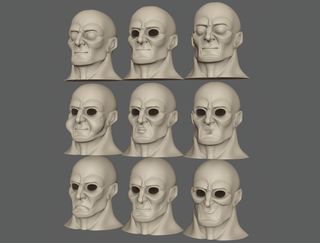
Once you are happy with the topology it's time to start creating your first batch of blendShapes and doing this now will also highlight any trouble areas with the mesh early on. These blendShapes are full facial poses covering all the main expressions needed, but sectioned into key areas like the mouth and eyes. We are looking for the fundamental shapes here like a smile, frown and so on, as well as the upper and lower eyelids fully closed.
03. Add more shapes
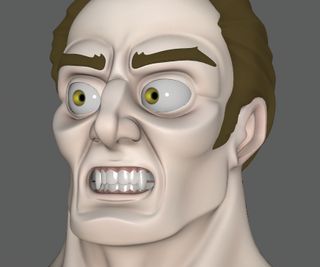
With this rig you are going to rely on eight main controls to manipulate the lips so it's important to also add blendShapes for a wide mouth as well as a narrow one which could also double as the pucker. This is so manipulating a single control can essentially pull around the corner of the mouth to achieve a wide number of expressions and move between all four blendShapes at once.
04. Split the blendShapes
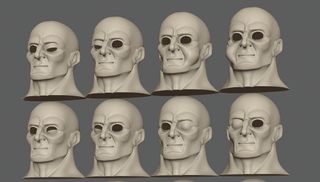
With the main shapes created, it's time to move to phase two. What you need to do next is split them into left and right sides meaning you can pose them independently. A quick way to do this is to create a blendShape node and then edit its weights, as illustrated in the box on the left. This will limit its influence to just one side of the model meaning you can then duplicate it and keep this copy to create your specific side.
05. Build the skeleton
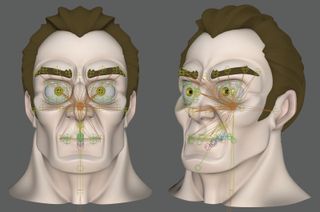
The next stage in the facial rig is to build your skeleton and as mentioned earlier, for this setup we are going to be using both joints and blendShapes to pose the characters features. I like to use blendShapes as they can give you more precise shapes, but then the joints can help to push and pull areas of the face around to give you more flexibility.
06. Controls or a UI?
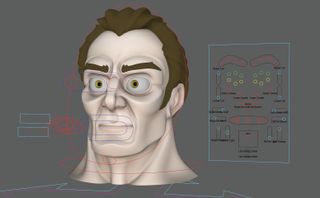
Whether you create controls which float in front of the character's face or use a separate user interface is up to you, or more likely up to the animators who will be using your rig. Now it's time to start creating these controls and for this tutorial we will be using a combination of the two. A main UI will be used to control the majority of the blendShapes, but a series of controls will also help to manipulate the rig in places where it needs to move in all three axes.
07. Use direct connections
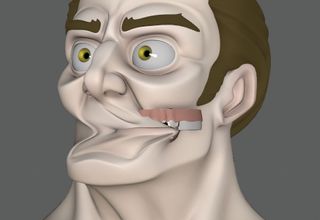
When using a separate UI as we are, you have to approach the rig differently. Traditionally you could use Constraints to tie a specific joint to its master control and in turn this control would naturally follow the head. With a UI, the controls are static and don't follow the head so using Constraints will lock the joints to the controls meaning if you move the head the joints stay where they are. A way around this is to use direct connections instead of constraints.
08. Driver locators
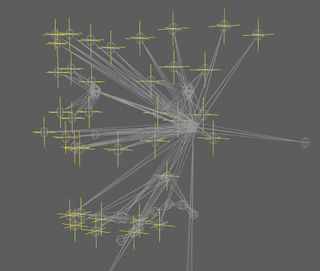
But using direct connections via the Connection Editor will force the translations, rotations and scale attributes to match those of the controls. Your joints inherently have translation values applied which will end up changed when connected. You could work on an offset system or you could create a locator in the place of each joint, freeze its transforms and then Parent Constraint the joint to the locator. So the locator, now with zero attributes, will drive the joint.
09. Connect the locators
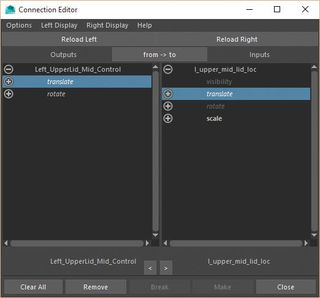
With the locators now in place and the joints parent constrained to them, you can connect the controls from the UI's attributes to the locators using the Connection Editor. If the locators are also parented to the head control they will follow its movement regardless of where the UI controls are. Also, the joints will now move relative to the head's position and not be locked to the UI meaning you can also place the UI anywhere in the scene.
10. The condition node
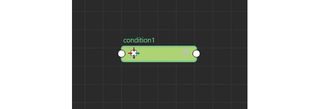
It's time to start connecting the blendShapes and introduce the first utility node, which will be the Condition node. This is my favourite utility node and what it does is take a value, like the Y translation of a control and, if it goes over or under a specific value it outputs another value. As an example, if the control goes over 0 in the Y translation then we can trigger the smile blendShape, if not, it is ignored. So let's set this up.
11. Bring everything in
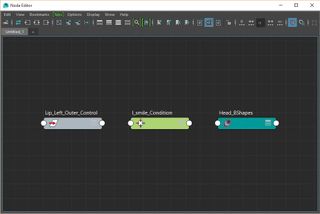
Open the Node Editor and select the Lip_Left_Outer_Control, clicking the Add Selected Nodes to Graph button to bring it in. Now press Tab in the Node Editor and start typing Condition in the small window and select it from the menu below to create it. Finally select the main blendShape node on the character's head model, called Head_BShapes, and follow the first step again to bring it into the Node Editor.
12. Connect the node
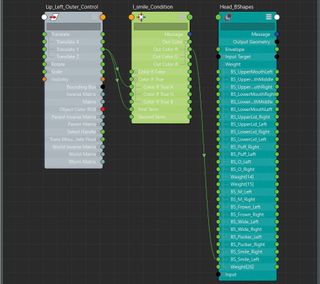
Now connect the Lip_Left_Outer_Control.translateY attribute to the First Term attribute in the Condition node.
Leave the Second Term as 0 and change Operation to Greater Than.
Next connect Lip_Left_Outer_Control.translateY to the ColorIfTrueR. (This means when the First Term is Greater Than the Second Term it will use the true value.)
Connect the OutColorR attribute to the Left Smile blendShape attribute and move the control to see what happens.
13. MultiplyDivide node
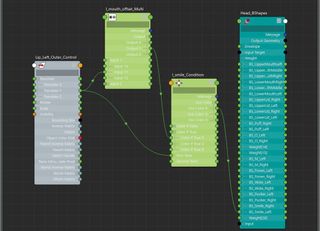
The smile blendShape is now triggered only when the control is moved in the Y axis, but it may be influencing it too much. You can use a multiplyDivide node to reduce its influence and slow down the movement. In the Node Editor press Tab and create a multiplyDivide Node.
Connect the Lip_Left_Outer_Control.translateY attribute to the input1Y attribute in the multiplyDivide node and its OutputY attribute to the ColorIfTrueR attribute on the Condition Node.
14. Adjust values
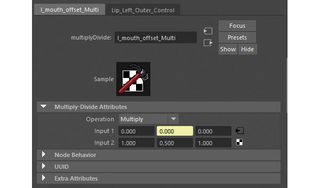
When you move the Lip_Left_Outer_Control, the smile will look no different, that is until you adjust the Input2X attribute in the multiplyDivide node, which is the amount the Input1X value is being divided by. Changing this to 0.5 will halve the amount the blendshape moves because it's halving the Y translation value. Equally, a value of -0.5 will reverse it and half it, which is important to remember when you connect future controls.
15. Connect more controls
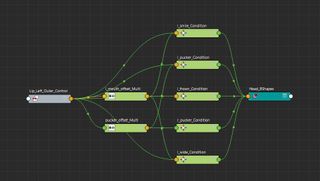
That's just the smile blendShape added, but you can now follow the same process to make the X translation of the control trigger the wide mouth blendShapes. With the opposite directions, so a minus X and Y movement, trigger the pucker and frown shapes, making sure you also change the Operation in the Condition node to Less Than. This will ensure that those blendShapes are triggered only when the value drops below 0 rather than above.
16. UnitConversion node
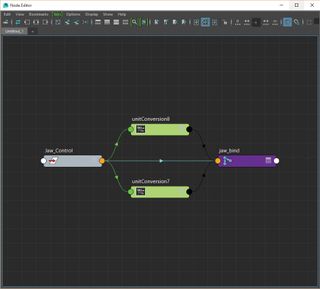
You don't always have to create a new node to edit the influence a control has over something. With the jaw movement, rather than use a utility node you can use a simple, direct connection to make the translations of the control effect the jaw joints' rotations. When connected Maya will automatically create a unitConversion node by default between the connections which you can use to your advantage.
17. Slow the jaw
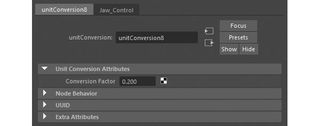
If you find your jaw is rotating too quickly you can then edit the Conversion Factor attribute found in the unitConversion node, rather than introducing another multiplyDivide node to slow it down.
18. BlendColors node
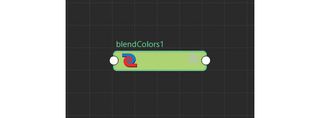
With just these few nodes you can see how much we have achieved and from here you could happily work your way around the face and connect up the remaining controls. We can, however, do more with the help of the blendColors node. Even though this can work with your typical RGB values, you can also utilise this node to blend between two other values or controls, making switching and blending easier.
19. Make sticky lips
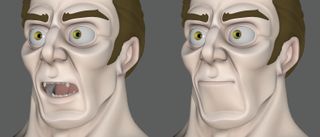
An important part of any mouth rig is for it to have the ability for the lips to stick together, regardless of where the jaw is. Imagine the character needs to chew something, even though the jaw is moving the lips need to remain sealed. To help achieve this you can use the blendColors node to dictate whether the lower lip driver locators follow the jaw or the upper lip control.
20. Lip groups
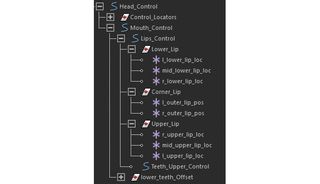
First you need to divide the lip control locators into three groups. Upper_Lip, Lower_Lip and Corner_Lip and make sure their pivots are in the same place as the jaw joint. This is so they rotate around the same point. Next bring the StickyLips_Control, Lips_Control, Lower_Lip group and also the Jaw driver locator into the Node Editor and create a new blendColors node.
21. Connect the lips
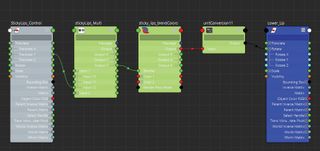
Connect the Lips_Control.rotate attribute to the blendColors.color1 attribute. Repeat with the jaw locator connecting its rotations to the blendColors.color2 attribute.
Connect the blendColors.output into the Lower_Lip group's rotation attribute. If you manipulate the Blender attribute on the blendColors node the lower lips will blend between the two values.
Connect the StickyLips_Control's Y translation into the Blender attribute so the control drives it.
22. Blink-tween shape
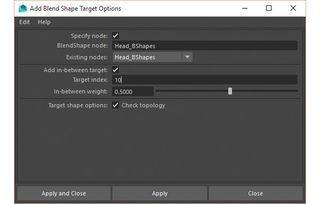
As an extra tip you may find that due to the linear nature of blendShapes, the eyelids move through the eyes when activated rather than over them. In this instance you may need to create a halfway point blendShape for when the eyes are partially closed. This can then be added as an in-between target on your blendShape node, which is then triggered up to a specified point before the main shape takes over.
23. Honorable mention
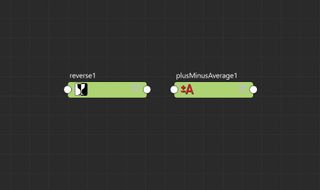
I couldn't end the tutorial without mentioning a couple of other handy utility nodes which have helped me over the years. These are the Reverse and plusMinusAverage nodes. The names are pretty self explanatory with the Reverse node effectively inverting a given value, the plusMinusAverage node is similar to the multiplyDivide node, except it allows you to perform different mathematical equations.
24. Time to experiment
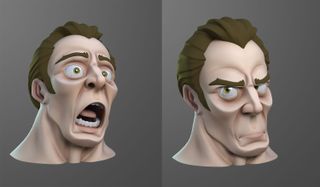
If you would like to see more of this rig, download the accompanying video and associated files, and feel free to take a look at how the rest of the character has been set up.
This article originally appeared in 3D World magazine, the world's best selling magazine for CG artists. Subscribe here.

Thank you for reading 5 articles this month* Join now for unlimited access
Enjoy your first month for just £1 / $1 / €1
*Read 5 free articles per month without a subscription

Join now for unlimited access
Try first month for just £1 / $1 / €1
