How to remove a background in Photoshop
Four different techniques to remove backgrounds effectively.
All the tools and techniques mentioned up to this point can be very effective for removing a background in Photoshop. But if you want to really up your game and have ultimate control over your cutout, you need to master the Pen tool. Although this approach can be a lot more labour-intensive, with a bit of time and practice, using the Pen tool will become second nature.
01. Draw a path
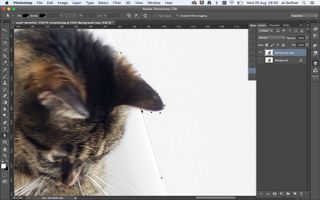
Open your image and repeat the process of duplicating and hiding your background layer. Select the Pen tool (shortcut P) from the Tools panel. Chose a point on the edge of the foreground object, and start drawing your path.
If you're new to the Pen tool, you may find you get a very angular path that doesn’t mirror the shape of what you’re trying to cut out. To create curves in your path, as you add an anchor point, hold down the mouse key, click and then drag.
This creates adjustment handles either side of the anchor point. By holding and dragging these in different directions you can adjust and control the shape of the curve. If you get to a point where you want to go from a curved line to a straight line, alt+click on the anchor point – this will remove the curve between the point and the next anchor point you add.
02. Save a Path
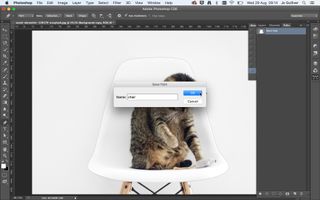
Once you’ve completely drawn around your foreground item, you need to close the path. Do this by clicking on your first anchor point. You will see a small circle appear next to the cursor to show you the point is selected; click and the path is closed. Your path will automatically appear in the Paths Panel found under Window > Paths. Double-click on the Work Path to name and save the path.
03. Edit a path
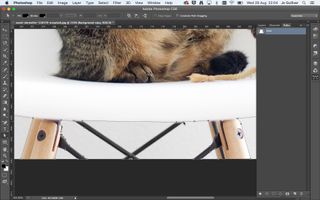
The great thing about creating paths is that they don’t need to be perfect right away – you can easily go back and edit the path by selecting the anchor points with the Direct Select tool. Once you have anchor point selected (selected points will turn black), you can make adjustments to the handles to change the shape of the curve.
Add points by selecting the Pen tool and clicking on the path, remove points by clicking on the anchor point with the Pen tool, and convert a curved point into a straight point (or vice versa) by alt+clicking.
Get the Creative Bloq Newsletter
Daily design news, reviews, how-tos and more, as picked by the editors.
04. Convert a path to a mask
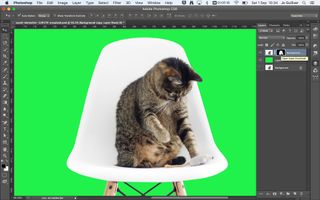
Now to convert the path to a Layer Mask. Do this by selecting the path in the Paths panel, and once it’s highlighted, hitting the Load Path as a Selection button at the bottom of the paths panel.
Then, as before, open your Layers panel, select the duplicate background layer and hit the Add Layer Mask button. Create a new layer and add a bright, contrasting fill colour below your Layer Mask layer. Now you can check how your cutout looks.
05. Finesse your mask
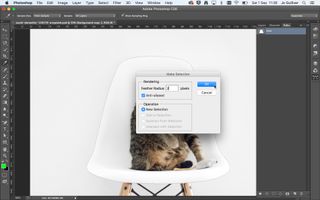
The great thing about creating a paths is that the information is there to use again. If the edges appear to harsh and don't reflect the original image, you may want to soften your cutout.
To do this, duplicate the background layer and move it to the top of your Layers panel, making sure the layer is visible. Select your path in the Paths panel and hit ctrl+right-click. Select Make Selection from the flyout menu. Here, you'll see an option to add a feather (I’ve added a feather or two here). With the selection still highlighted, switch over to your Layer panel and add a Layer Mask.
06. Merge techniques
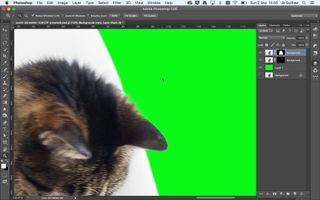
The final thing we're going to do is to create a better cutout of the cat's fur around its right ear. To do this, we'll use the Refine Edge tool we covered earlier. Duplicate the background layer and create a rough cutout of ear and fur in that area. With the selection active, open the Refine Edge tool in your control panel.
Increase the Edge Detection until some of the finer detail of the fur is visible. Don't go too far, as this area of the image is really soft. Increase the level of detail using the Refine Radius tool. Once you're happy, you can select your two Layer Masks (ctrl+click) to merge the layers together.
Read more:

Thank you for reading 5 articles this month* Join now for unlimited access
Enjoy your first month for just £1 / $1 / €1
*Read 5 free articles per month without a subscription

Join now for unlimited access
Try first month for just £1 / $1 / €1
Jo is group art director on the events team at Future and has worked on a number of magazines and brands, including Computer Arts, What Hi-Fi? and T3. She recently led the redesign of Creative Bloq's sister site, TechRadar.
