How to get your ZBrush model into Maya
Learn how to transfer a ZBrush model into Maya with these four simple tips.

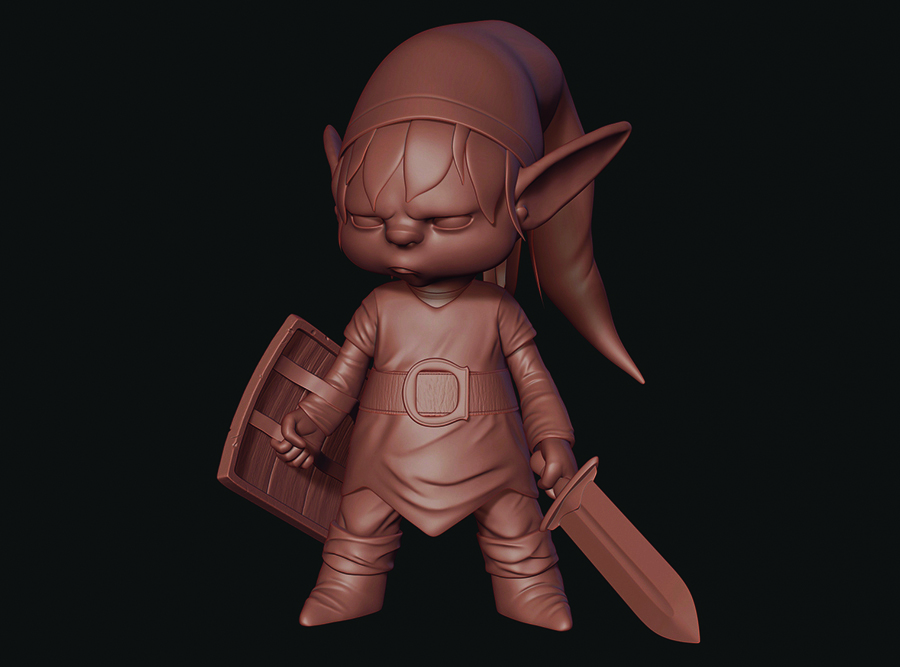
For this Maya tutorial I’m going to show you how I got this Grumpy Link model from ZBrush into Maya for rendering.
There are a few ways of doing this, you could create some quick UVs in ZBrush using the UVmaster plug-in, then decimate the mesh, but keep the UV option on so when you export into Maya you can render without having to worry about retopology and precise UVs. This option will not work for production though as you need clean topology for animation. It is fine for still images and look development though.
Another way would be to get your high-resolution model retopologised. You could use retopology programs like Topogun or 3d Coat, or use the native tools in Maya. Quad Draw has improved greatly and is more than adequate for retopology.
When creating retopology, it is important to keep the texture pipeline in mind. If the production is using displacement maps and skin shaders, it’s a good idea to keep the scale of the model in line with world units. This will help the shader calculate the sub-surface amount properly. If you don’t use world units, you’ll need to spend a lot of time tinkering with values trying to get your shaders looking right.
When creating retopology, it is important to keep the texture pipeline in mind
Francis-Xavier Martins
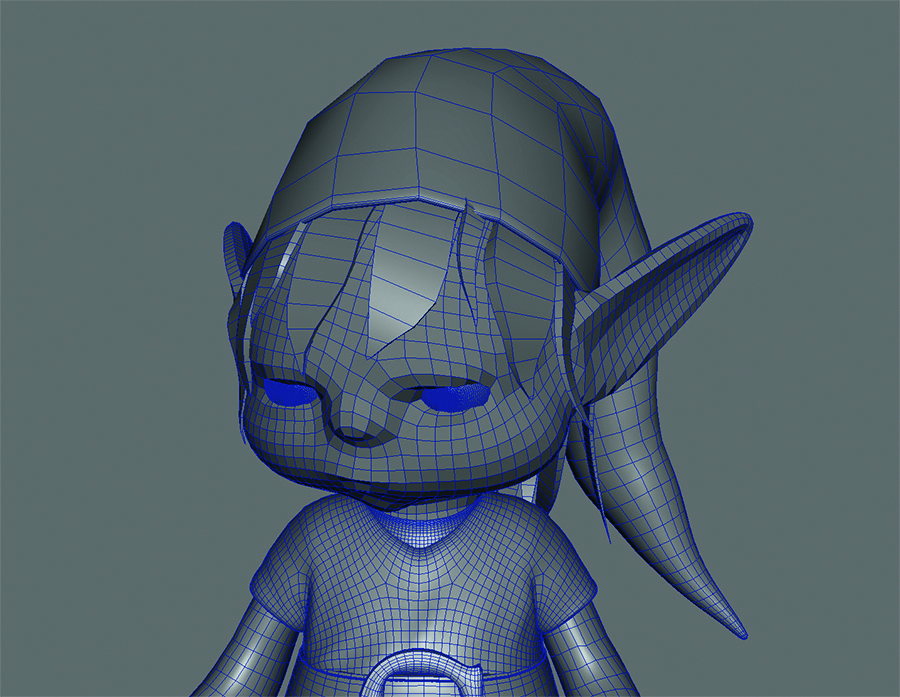
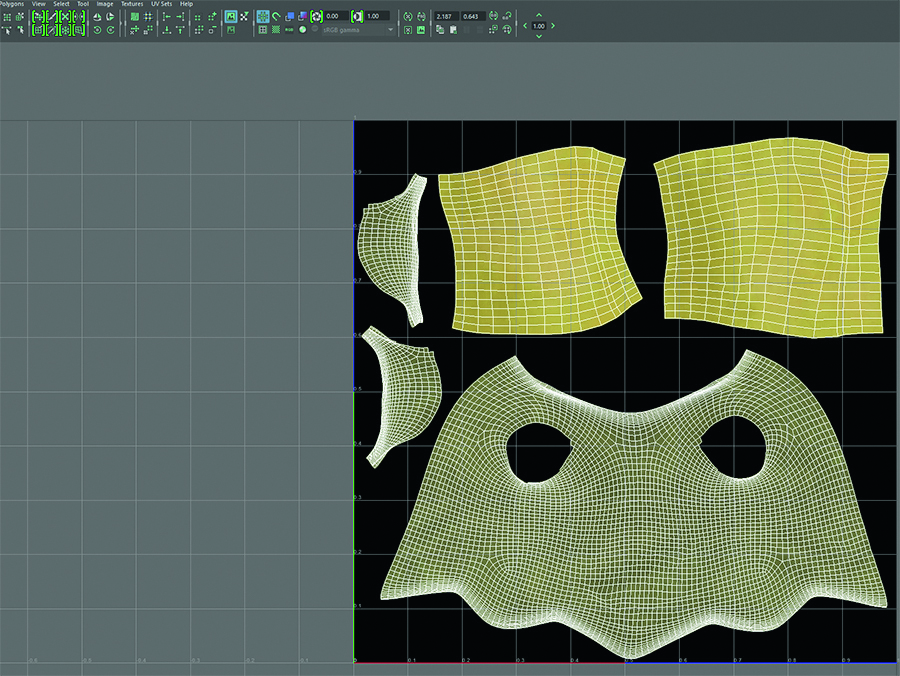
Try and keep your quads square and avoid n-gons, this will help when it’s time to UV your model and eliminate stretching and texture distortion. Once you’re done with retopology, it will be time to UV the model. It is important to keep the texel density constant. So if you have cotton detail on the shirt, it has to be the same scale for the trousers or it will look odd. Using a chequered pattern will help with this. Layout your UVs, try to use as much space as possible, make sure parts that won’t be seen often like soles and under the hair have less priority. If you plan to group models together, it’s a good idea to have them grouped by material type, clothes, leather, skin, that kind of thing.
Once you have laid out all your UVs, you can bring your model back into ZBrush to generate the displacement maps and the textures by projecting from the high-res sculpt onto the model with UVs. The Multi Map Exporter in ZBrush is very handy for this.
You can tweak your textures using Photoshop, ZBrush or Mari, creating bump and specular maps and then use them in your final render.
Get the Creative Bloq Newsletter
Daily design news, reviews, how-tos and more, as picked by the editors.
01. Duplicate and decimate
Duplicate all the parts you know you will need to retopologise, and fire up The Decimation Master under the Zplugin menu. You can use Keep and Use Polypaint if you want to maintain your polypainted detail. Click on the Pre-Process Current button, when it’s done, click on Decimate Current. A percentage of 15 to 20 is usually sufficient for models with a high poly count.
02. Export and retopologize

Once you have decimated all the subtools, you’ll need to export the model. You could do this from the Export all Subtools button under the Decimation tab, one by one under the tool tab or using the GoZ plug-in under the Tool menu. Once in Maya, fire up the Modelling toolkit. Make the high-resolution model live and start retopologising. It can be a tedious process so have lots of coffee and music!
03. UVs and projection

Once all the topology is done, UV your model, making sure you have your shells grouped properly according to material type. I find the new UV tools in Maya’s Bonus Tools are excellent for UVing and will speed up your workflow immensely. Import the UVed model back into ZBrush and project the details back on to the divided model, using the Project All button. Ensure the high res is on top and colour information is on.
04. Maps, shaders and render

You can now export colour information, displacement and any other maps you need from ZBrush for further tweaking in a 2D program of your choice, such as Photoshop. Get them into Maya, plug them into the correct slots, set up your lights and start testing the renders. Because you have UVs, you can go back to ZBrush and make changes to the high-res model if you need to.
This article was originally published in 3D World magazine issue 209. Buy it here.

Thank you for reading 5 articles this month* Join now for unlimited access
Enjoy your first month for just £1 / $1 / €1
*Read 5 free articles per month without a subscription

Join now for unlimited access
Try first month for just £1 / $1 / €1
