How to create furry cartoon characters
Tips for how to master Yeti to create cartoon fur.
Character design is an art. Swiff is the story of a dirt-hating extraterrestrial who is travelling in space. He breaks down and crashes on Earth in the countryside. In this 'terra incognita' adventure Swiff goes looking for a compatible fuel source for his spaceship. During his quest, he finds himself face-to-face with a hyperactive little boy who is definitely going to give him a hard time.
While working on the short film, I had the opportunity to use Peregrine Labs' Yeti and Pixar's RenderMan (RIS). In this tutorial, I will explain some of the key techniques used in Yeti to make the sheep's wool (fur), and an instancing solution for Maya.
I needed to learn Yeti for Swiff, and along the way picked up some useful tricks that I hope you will find equally handy for your animated film projects. Here I will share my process for setting up and combing fur in Yeti, as well as how we created the scene for our short.
01. Prepare the terrain
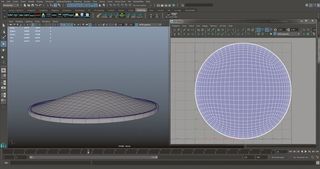
The first step is to establish a good cartoon environment for the character we'll create and add later on. I tend to work in a different, smaller scene to the final scene, and when I'm happy with the look of the object or terrain that I'm working on, I reimport the asset into the final scene. For the grass, I create a basic terrain in Maya and I import my own light rig, which contains multiple lighting conditions for different times of day.
02. Create the terrain and unwrap UVs
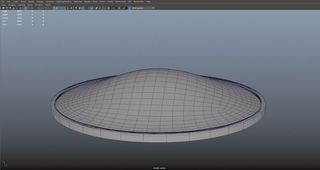
For this terrain, as I want to work in a smaller area than my actual terrain, I create a rounded surface with just a few polygons, where I can populate some grass. Yeti uses a cache system and it can take a long time to generate if you're using big terrain. By using a smaller version of the surface, I make sure that the caching time doesn't exceed a few seconds. The goal is to define the look of the grass so there's no need to waste time on a big surface. Once I model the basic terrain, I unwrap the UVs using Maya's default tools.
03. Adding the stripes

We wanted everything in our short film to be striped. To do this I use Ramp, Maya's procedural texture solution. I create a ramp in Maya and plug in a PxrDisney shader. It's just for preview so you can use any shader. Use the place2dTexture to repeat your ramp as much as needed. In my example, I do it directly in the ramp to add a bit of variation in the stripe width. I also connect a PxrConstant in every colour of the ramp for more control.
04. Prepare the geometry for instancing
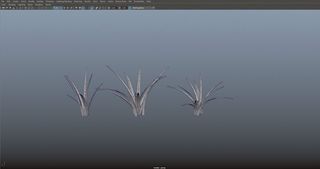
We decided to instance polygons in order to get more control over the look of the grass, but you can also create a fur system in Yeti and use it as grass. If you decide to use polygons, create a few bundles of grass in Maya using basic modelling techniques. There is no need to add a lot of polygons as the tiny details will get lost. You also have to make sure that your grass is at the centre of the world in Maya to make it work with Yeti.
Get the Creative Bloq Newsletter
Daily design news, reviews, how-tos and more, as picked by the editors.
05. Open Yeti
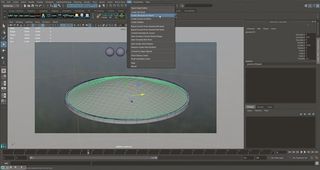
Yeti is very powerful and offers great optimisation possibilities. It allows you to instance millions of polygons very easily. Start by selecting your terrain and go to Yeti>Create Yeti Node On Mesh. Open the Yeti Graph Editor. In order to control the stripes separately, create multiple Yeti systems corresponding to the different areas of grass. I convert my coloured Ramp to a black and white ramp in order to use it as a density map in Yeti.
06. Nodes in Yeti
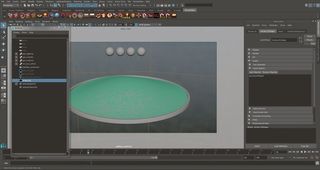
Next, select your Yeti node in the Outliner, and go to the Attribute Editor. You should see your terrain in the Input Objects tab. If you don't, add it. Add the objects you want to instance and make sure that they are at the centre of the grid in Maya.
07. Setting up nodes
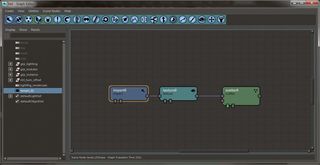
In the Graph Editor, create an Import node, a Texture node and a Scatter node. The texture node will be used to control the density of our instanced geo. In order to do so, I bake my ramp into a texture. It allows me to retouch the map afterwards if necessary. I use Nightshade Blockout to bake the Ramp. It's free and available on www.creativecrash.com.
08. Instance your geometry
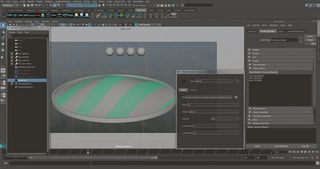
Once you've connected your densityMap in the Texture node, add 'density' in the attribute of the node. Create an Instance node and another Import node. Use the Import node to choose the geometry to instance and connect it to the second input of the Instance node. Set the Instance node to Element and add scale and twist variation; use the Scatter node to change the density. For more variation, add a custom attribute, create a few graphs with different types of grass and merge them.
09. Adding shaders
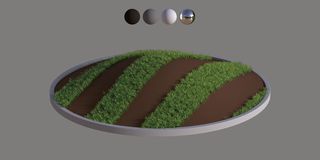
We used RenderMan RIS for rendering. The materials available in RenderMan are physically plausible and offer great possibilities. I use a Pxr LMDiffuse as a base and connect different variations of the texture for the front and the back. Then I use a LMLayer to add a specular layer over it. I've also played with the translucence of the LMDiffuse to get a softer look. Simply assign the shader to your Yeti node to make it work with the instances.
10. Creating the sheep
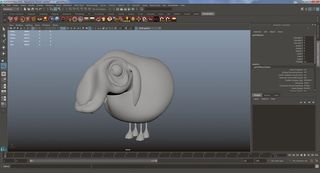
Select your mesh and go to Yeti>Create Yeti Node On Mesh. Do the same with Yeti>Create Groom Node On Mesh. This will create a pgYetiNode and pgYetiGroom in your Outliner. Select the pgYeti and go to the Yeti Graph Editor. Click on the Import Button and double-click on the node Yeti has created. This will pop up in a window. Make sure the type is set to Geometry, then click the button on the right of the Selection field.
11. Apply fur

In the new pop up, select the object you want your fur to be applied to and click Select. If you need to manually add objects in the list, select the pgYeti, go into the Attribute Editor, under Graph>Input Objects and click on Add Object. Weirdly, sometimes the list doesn't seem to update after adding a new object. Select anything else in the Outliner and then select your pgYeti again to see the new object correctly added to the list.
12. Import your groom
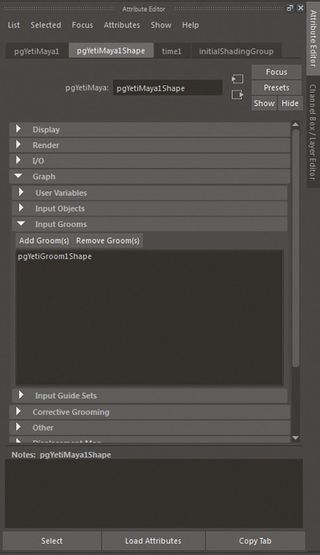
Select your pgYeti node and go to the Attribute Editor (Ctrl+A). Under Graph>Input Grooms click on Input Grooms. In the list, select the groom that you've previously created. Now, go back to the Yeti Graph Editor and click on Import. Select and double-click the new Import node. Set the type to Groom and select the groom like we did previously with the geometry. You now have two import nodes in your graph. Keep your graph organised and name your Yeti node correctly.
13. Start grooming
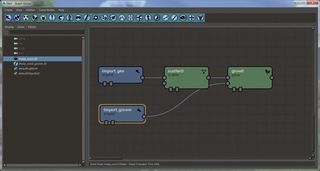
In the Yeti Graph, create a Scatter node, connect the import_geo to the first input of the Scatter. Select the scatter and create a Grow node. If you double-click on the Scatter, you will be able to increase the density. Connect the import_groom to the second Input of the Grow. Select the Groom node in your Outliner and go into the Attribute Editor. You will find a wide range of tools that you can use to create various hair effects.
14. Populating strands
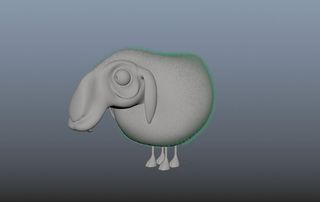
Start by pressing the + button. This will allow you to populate your mesh with strands that will be used to create the hair in the pgYetiNode. Under the Brush tab, you will find Radius and Strength parameters. Under the Strand tab, there is a slider called Initial Strand Length. Increase this a little bit if the default parameter doesn't fit what you need. Click on your mesh to populate strands.
15. Control the length
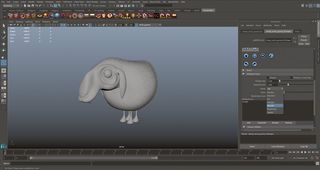
You can easily control the length of your strands by going to the Attribute Paint tab. Simply double-click on the Length parameter, set the Value to the number you want and set the Mode depending on what you want. The Multiply and Randomize modes can help you create a lot of cool variations. For my sheep, I increased the length of the head area to match the original design.
16. Using the comb node
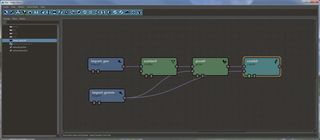
It's time to create a bit of mess. Create a Comb node. Connect the Grow to the first Input of the Comb and connect the Groom to the second Input. At this stage, I play with the different tools in Yeti to create variations. Take your time, especially if your character will be seen from different angles. When I am done tweaking the strands, I add a Curl node. It creates some nice curling effects in every strand. This adds a lot of variations and makes your fur look more realistic.
Next page: the final steps to creating furry cartoon characters...

Thank you for reading 5 articles this month* Join now for unlimited access
Enjoy your first month for just £1 / $1 / €1
*Read 5 free articles per month without a subscription

Join now for unlimited access
Try first month for just £1 / $1 / €1
