How to capture movement in your 3D renders
Discover how to create a unique and dynamic car scene, focusing on harnessing the speed of a Formula One car into a still shot.
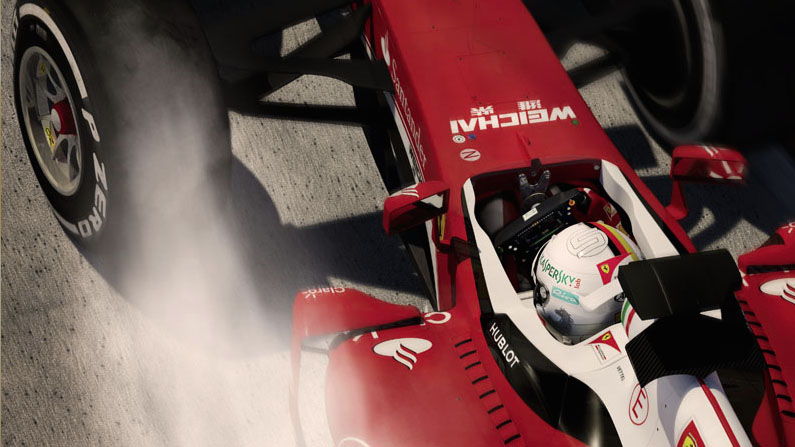
Being a freelance artist I work on a variety of small projects, most of which involve creating and texturing 3D art and assets. For as long as I can remember, I’ve been a huge fan of Formula One, and so many of my personal projects revolve around that subject.
This image took about a week to complete. I created all the modelling for the scene using 3ds Max, which is my preferred modelling software. I unwrapped UVs using the Unwrap UVW Modifier in 3ds Max, with textures being created in Photoshop, and in some cases, painted onto models using Mudbox.
For the rendering I used mental ray. This was the first renderer I ever used and it has become my go-to renderer; the results you can achieve when using Arch & Design materials and the Daylight system are of a very high quality. Also, you can get very realistic results with little adjustment, and with no additional plug-ins required for 3ds Max, mental ray is a great renderer to use.
I want the viewers of this scene to feel that the driver is pushing and is on the limit; perhaps pushing a little too hard. I focus on the movement in the scene and the lock-up of the front wheel. It’s the detail and the viewing angle that contribute a great deal to the action in the render.
Find all the assets you need here.
01. Begin modelling
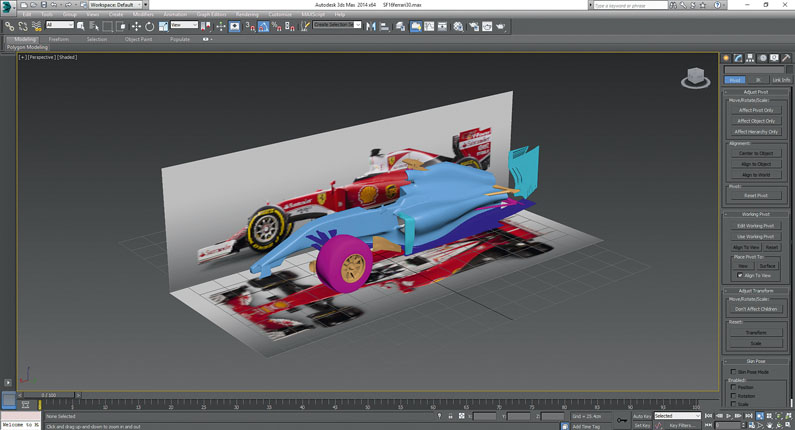
Using plan views of the car gathered from the internet, I begin modelling in 3ds Max. I choose to add as much detail into the model itself as possible, as opposed to detailing with Bump or Displacement maps. This way I can get a realistic appearance and save time in post-production. I model the panel joints and bolts. Although the final scene will not have the full car in view, I like to model the full vehicle to enable real-life reflections and shadows.
02. Preferred tools
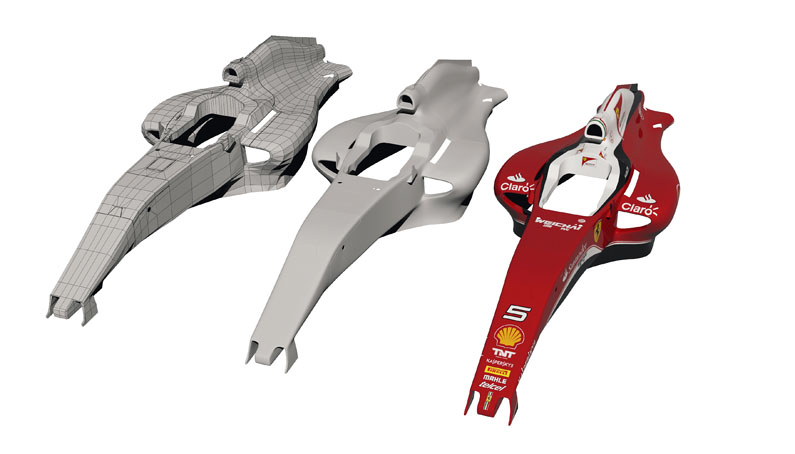
When creating the various parts of this model, I start with a 3ds Max standard primitive or extended primitive that is the closest to the object I wish to create. For instance, for a tyre I begin with a cylinder. For some larger objects, however, I start with a box or a plane then convert them into editable polys. Once it’s an editable poly, you can easily add extra edges using the Connect option, or manipulate the vertices and edges as you require.
Get the Creative Bloq Newsletter
Daily design news, reviews, how-tos and more, as picked by the editors.
03. Using complex textures in mental ray
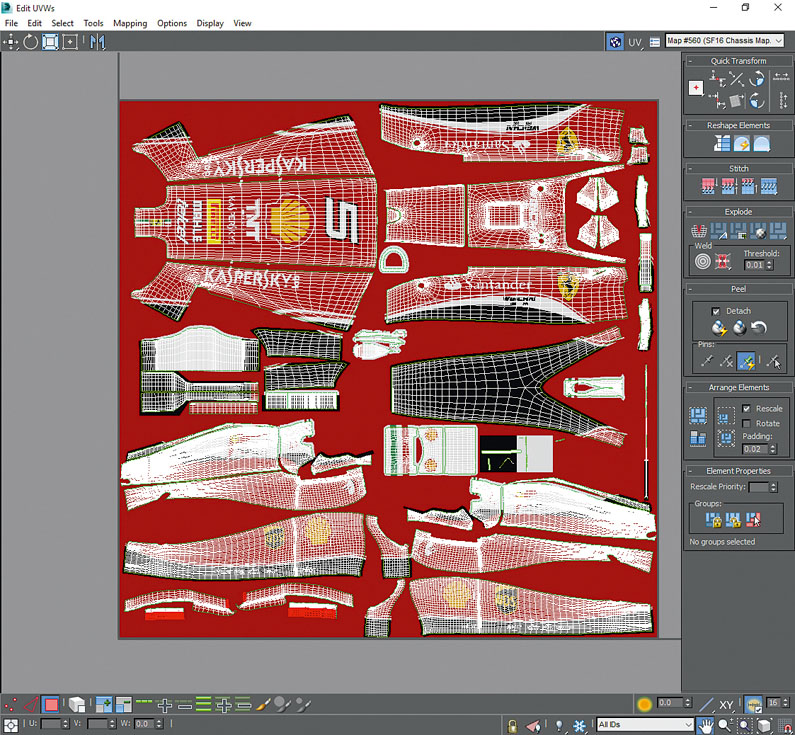
I unwrap the model using the Unwrap UVW Modifier in 3ds Max. When it comes to creating UVW maps on Formula One objects, it’s vital to keep in mind where things such as sponsors’ logos go and body lines are, so that they aren’t split up – and also to ensure a less pixelated result. In some instances I export various parts of the model into Mudbox and paint textures directly onto the model, making it easier to get the position materials if the UVW is not straightforward.
I keep the areas containing sponsors’ logos as large as possible in the UVs, but this can result in having to use more textures, as multiple objects can’t share one map – so it’s about finding a balance. In mental ray, the textures are set up using Arch & Design materials with multiple rollout parameters. These enable me to refine the reflections and glossiness of the car. Arch & Design has great presets like water and rubber, to which you can add your own maps.
04. Setting the animation
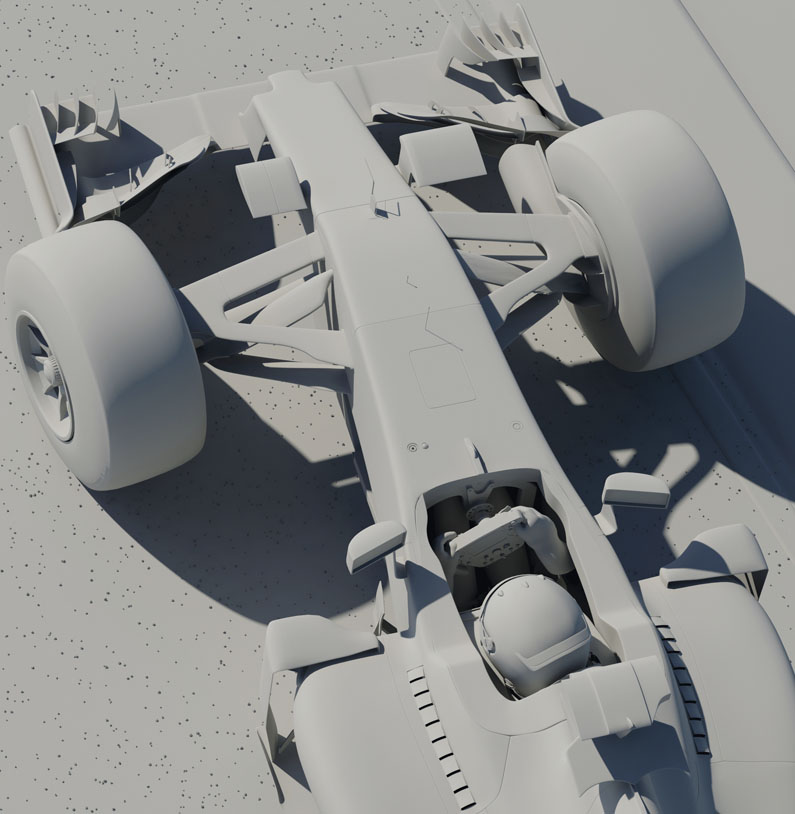
After the models are in position, I set up the scene’s animation. The right front wheel has a forward rotation, the left wheel (due to locking), has little rotation and more of a sliding motion, but as a driver would release the brake in increments, there would still be some rotation. The car also has a forward motion. I create the animation by linking all the relevant parts together, then use the Auto Key function by positioning the start and finish points with the required rotations.
05. Adjusting the driver
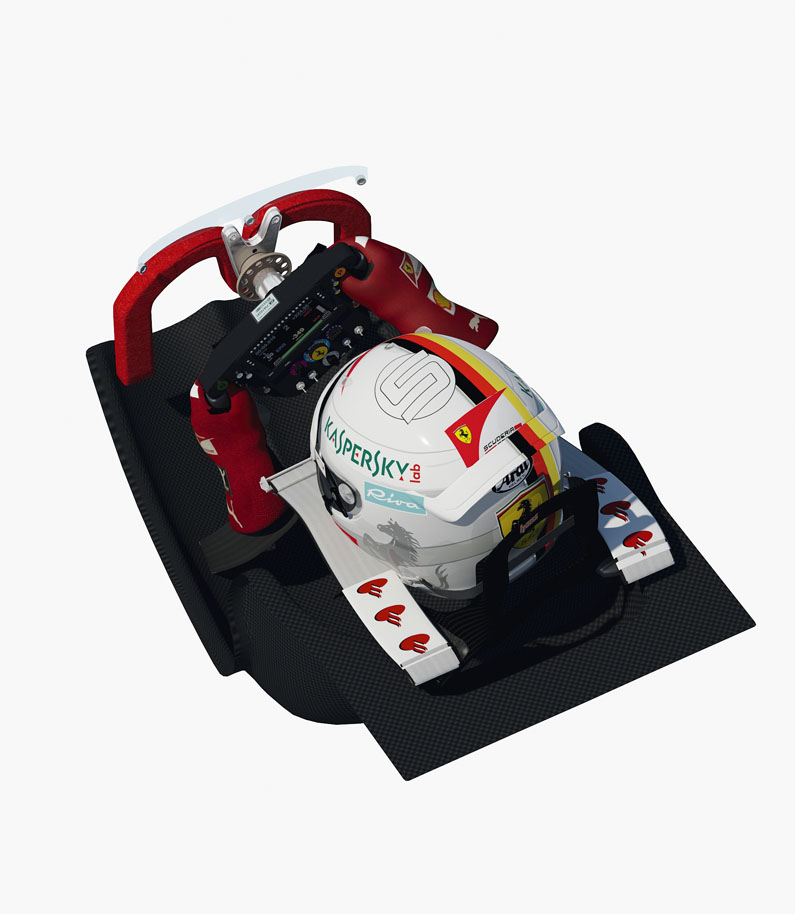
With the wheels set, I need to adjust the driver’s position. Again by referring to reference material, I adjust the positions of the driver’s helmet, the steering wheel and the driver’s arms and gloves. The hardest thing I find at this stage is trying to convey the strength of the driver and the work that the driver is doing, as well as the g-force under braking, as drivers use such small movements and very little can be seen from the outside.
06. Setting up the tyre smoke simulation
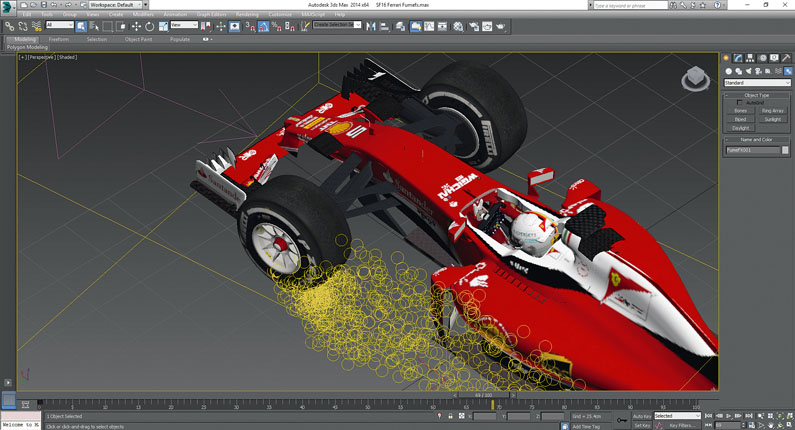
A focus of the scene is the race car locking its front wheel, with smoke wrapping around the tyre, so I spend some time trying to present it properly. I create the base smoke using the FumeFX plug-in.
I use a Particle Flow (PF) source and FFX particle source with FumeFX to create the smoke, and by linking it with the front locking wheel, it follows the same animation path to ensure a realistic flow of smoke up and around the tyre. Due to the amount of options in both FumeFX and the PF source, I spend quite a bit of time trying to achieve what is right for the scene. And as no two lock-ups are the same, it really is about making small changes to things such as the radius of the smoke particles or wind strength and turbulence, until it fits with the overall direction of scene. After each change, I create a test render to see if I am going in the right direction. This whole process is about trial and error.
07. Using camera parameters
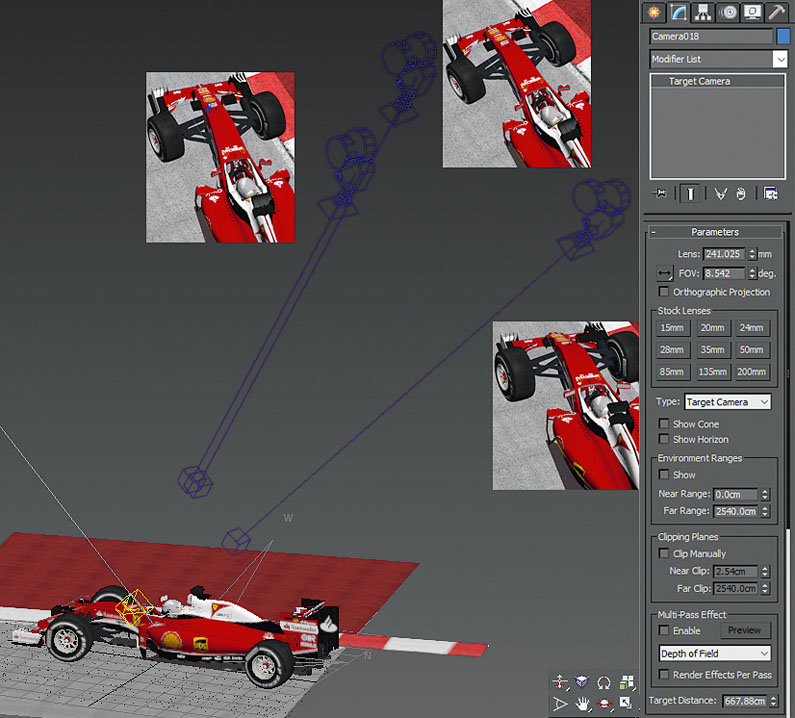
With the Parameters you can really make the scene stand out. I find using the perspective, dolly and roll cameras is a simple way to make it look more dynamic and add action to a scene. It’s also a good way to work on other areas of the model, and by selecting the camera you can quickly check how the scene will look. Throughout the process, I set up a couple of these cameras, as even a small difference in angles can change the viewers’ perspective dramatically.
08. Setting the lighting
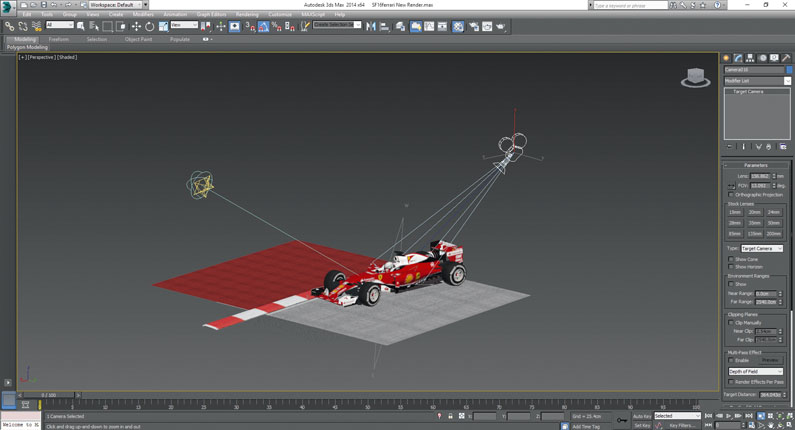
To set the light, I prefer to use mental ray as I think it’s very easy to use and you can achieve high-quality results quickly. When I started out, it was what I found most comfortable for me and so as a result, it’s become my go-to renderer. When using it with Arch & Design texture maps, the model really stands out. To set the scene lighting, I always start by setting up a Daylight system as this creates good quality shadows when rendering with soft shadows.
09. Use the environment
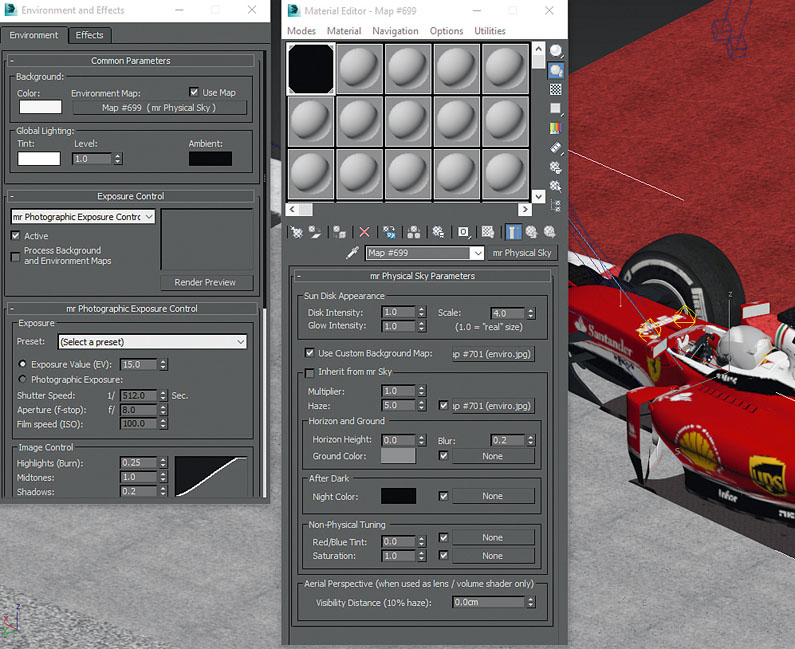
The environment is important for realistic reflections. F1 cars feature subtle reflections, be it clouds, bodywork or grandstands, which make the car come alive. As I use a Daylight system and mental ray, a great feature in 3ds Max I like to use is the mr Physical Sky mental ray map for the environment. It’s ideal as you can add your own material map to it, such as a picture of clouds, and then adjust it using the haze and sunset effects. These impact the lighting and make the scene voluminous.
10. Rendering
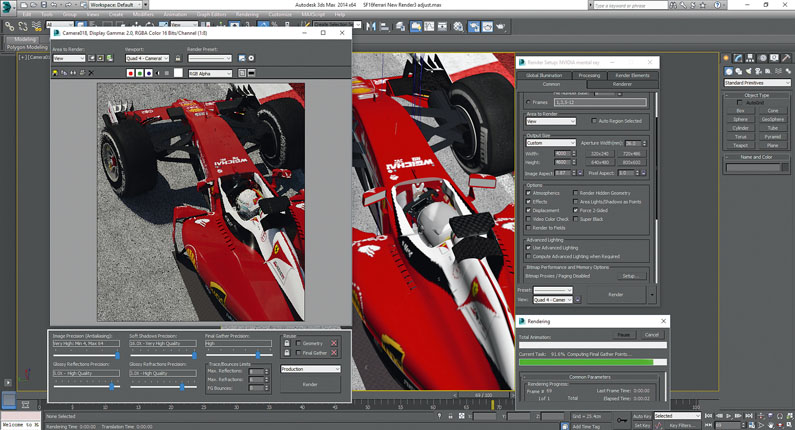
The main scene is rendered using mental ray with most settings set to a minimum of 2x high. Although on my system it took a long time to render, the results are worth it if you can set the Image Precision, Soft Shadows, and so forth as high as you can possibly go. After I have the main image rendered, I choose to do a few more render passes on various elements of the car.
11. Refine the motion
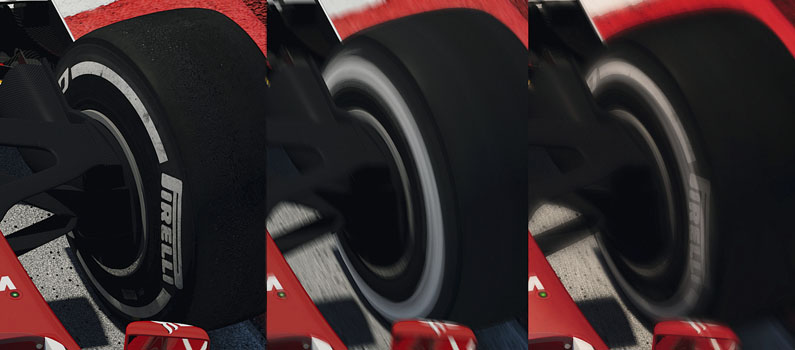
To refine the motion in the scene, I composite still renders with renders containing the motion blur effect. I also tend to render as large an image in a much larger pixel size than the end composite will be, as you never know what you may use the piece for. If you have to increase the size, you will decrease its quality, so I find it much better to render bigger and reduce down.
12. Tweaks in Photoshop
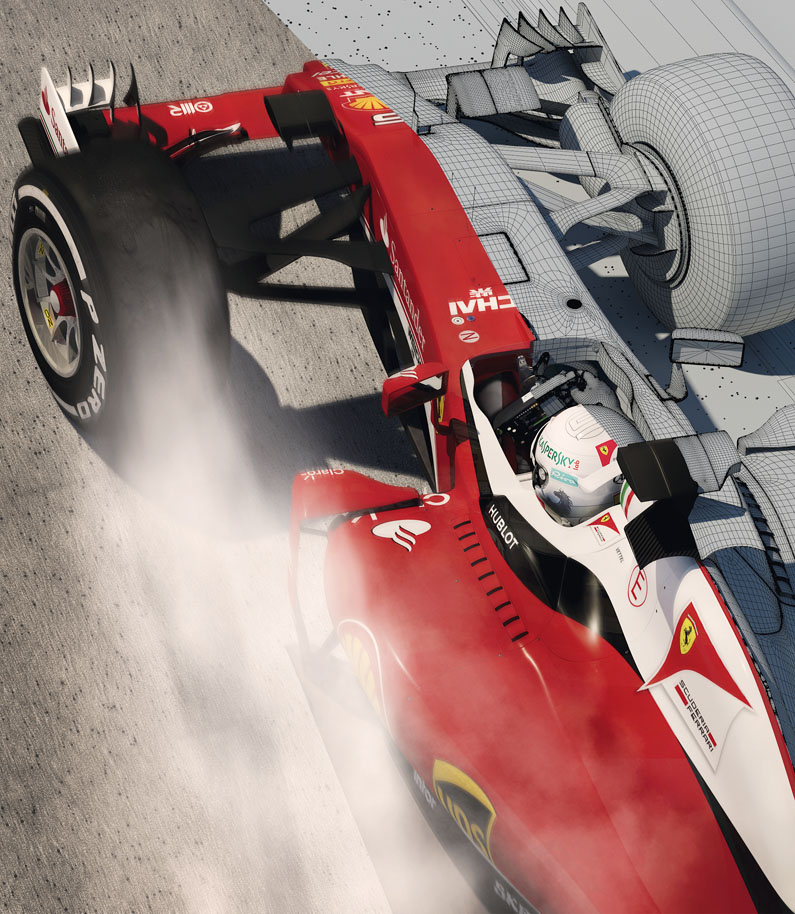
Using simple composite ideas, I layer the different renders and use various blend modes and layer masks, such as for hue and saturation and curves to create my desired effect in Photoshop. I also use the Dodge and Burn tools to add more depth to the final image. In addition, I do some work on the lock-up smoke here to try to get it to resemble that of real life smoke.

Thank you for reading 5 articles this month* Join now for unlimited access
Enjoy your first month for just £1 / $1 / €1
*Read 5 free articles per month without a subscription

Join now for unlimited access
Try first month for just £1 / $1 / €1
