How to build a full-page website in Angular
Follow these simple steps to create a fully functioning website using Angular.
07. Set up routing
Now that our content is abstracted into a service, let us set up routing so we can navigate from page to page and dynamically pull the content from our service.
Routes are often broken out into their own module for portability and architecture reasons. To that end, we will start by creating our app-routing.module.ts file. Generating routes is not something the CLI supports, so we will have to resort to old fashioned means.
touch src/app/app-routing.module.tsDescribing how routes work in Angular can be reduced to the process of assigning a component to a particular URL. There are some nuances within this, but at its core the URL of an application represents a specific state we want it to be in, and the component we want to use to display it.
In the Routes array below, we have our default route which redirects to the /home path, and a catch-all or wildcard route that also redirects to /home if no route is found.
That said, if someone were to navigate to http://localhost:4200/home, Angular would recognise that route and load the PageComponent into the router-outlet element.
// app/app-routing.module.ts

import { NgModule } from '@angular/core';
import { RouterModule, Routes } from '@angular/router';

import { PageComponent } from './page/page.component';

const appRoutes: Routes = [
  {path: '', redirectTo: '/home', pathMatch: 'full'},
  {path: 'home', component: PageComponent},
  {path: '**', redirectTo: '/home', pathMatch: 'full'}
];

@NgModule({
  imports: [RouterModule.forRoot(appRoutes)],
  exports: [RouterModule]
})
export class AppRoutingModule {
}
We can expand our routing table to include the 'about' and 'contact' page. You will notice that we are mapping each path to the PageComponent. How do we distinguish one page from the other? As it stands now, the same content will be rendered for each page.
const appRoutes: Routes = [
  {path: '', redirectTo: '/home', pathMatch: 'full'},
  {path: 'home', component: PageComponent},
  {path: 'about', component: PageComponent},
  {path: 'contact', component: PageComponent},
  {path: '**', redirectTo: '/home', pathMatch: 'full'}
];
We solve this problem by adding a custom data property to our route to indicate what page we are on. This also illustrates the power of component-driven architecture, as we are reusing the same component and just modifying the data going into it.
Daily design news, reviews, how-tos and more, as picked by the editors.
// app/app-routing.module.ts
const appRoutes: Routes = [
  {path: '', redirectTo: '/home', pathMatch: 'full'},
  {path: 'home', component: PageComponent, data: {
    page: 'home'
  }},
  {path: 'about', component: PageComponent, data: {
    page: 'about'
  }},
  {path: 'contact', component: PageComponent, data: {
    page: 'contact'
  }},
  {path: '**', redirectTo: '/home', pathMatch: 'full'}
];
08. Register the route module
To expose our routing table to our website we will update our application module to include the AppRoutingModule in the imports collection.
// app/app.module.ts
...
import { AppRoutingModule } from './app-routing.module';
@NgModule({
  declarations: [...],
  imports: [
    ...
    AppRoutingModule
  ],
  providers: [ContentService],
  bootstrap: [AppComponent]
})
...
09. Update the page component
We are going to update our page component to read the page property of the current route and use that as a key to pull the corresponding content from our server. To do this, we need to inject ActivatedRoute into our component. This will give us information about the currently activated route – such as route.snapshot.data, which has our page property on it.
// app/page/page.component.ts
...
import { ActivatedRoute } from '@angular/router';
...
export class PageComponent implements OnInit {
  page: Object;

  constructor(private route: ActivatedRoute,
              private contentService: ContentService) { }

  ngOnInit() {
    const pageData = this.route.snapshot.data['page'];
    this.page = this.contentService.pages[pageData];
  }
}
Once we have the page value off of the route, we will access the pages object on our content service to get the relevant content.
10. Verify a route
You can verify that our routes are working by first going to app.component.html and deleting everything in it and adding <router-outlet></router-outlet> to the template.
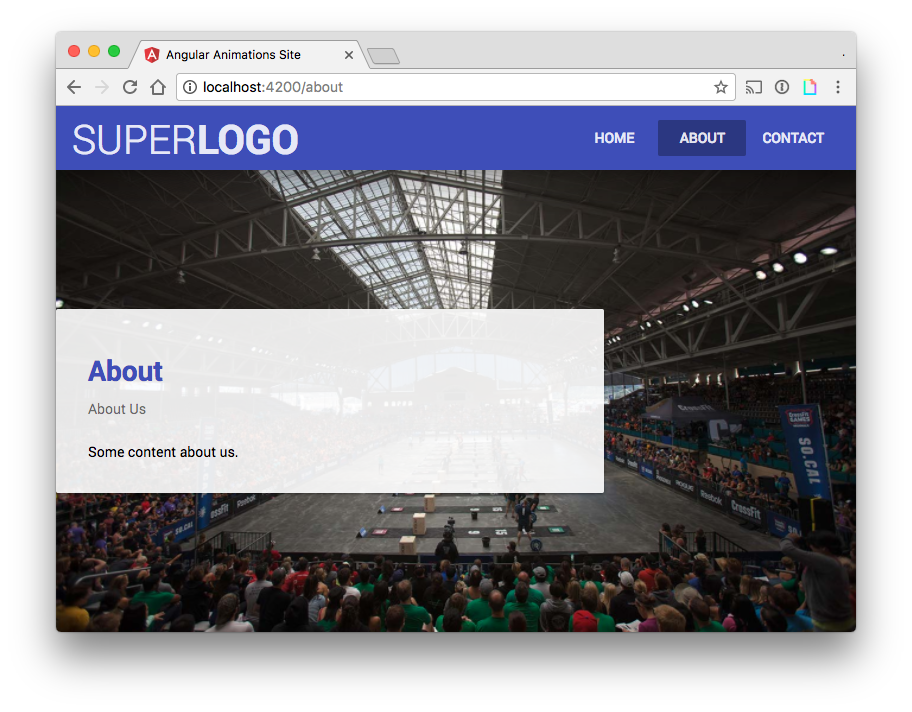
From there, if you go to http://localhost:4200, it should redirect you to http://localhost:4200/home and display the home content. You can then change the URL to http://localhost:4200/about or http://localhost:4200/contact to verify the content updates.
11. Create some navigation
Manually typing in URL routes is not what most would consider a good user experience, so let's create some navigation to make things easier. We are going to add in an Angular Material toolbar and three buttons for our pages.
<!-- app/app.component.html -->

<md-toolbar color="primary">
  <h1><span class="light">SUPER</span>LOGO</h1>
  <span class="spacer"></span>
  <a md-button>HOME</a>
  <a md-button>ABOUT</a>
  <a md-button>CONTACT</a>
</md-toolbar>
Using the routerLinkDirective, we define the route each button is supposed to link to. There are a few ways to define the value of what goes into a router link, but the safest is to use an array that takes multiple parameters which is why our values take the form of ['path'].
<a md-button
[routerLink]="['home']"
routerLinkActive="active">HOME</a>
<a md-button
[routerLink]="['about']"
routerLinkActive="active">ABOUT</a>
<a md-button
[routerLink]="['contact']"
routerLinkActive="active">CONTACT</a>
The router also knows when we are on a particular route and we can assign a special class to an element with routerLinkActive.

Page 3: Make your homepage image resize responsively
