How to build a full-page website in Angular
Follow these simple steps to create a fully functioning website using Angular.
The latest version of Angular is often thought of as a framework that comes from the enterprise side of the tracks and generally enjoys the company of line of business applications. While it is true that Angular has indeed evolved from a framework to a platform that supports all sorts of applications, there are a lot of really amazing features that exist for developers to create immersive experiences for their users.
This is the first part in a series on how to build a full-page animated website in Angular. We will start by building out a full-page website, and then animate it in the following instalment.
In this tutorial, we are going to focus primarily on the Angular pieces and forego talking about the HTML and CSS parts that do not directly relate to the construction of the application. Please download the source code to follow along. Not sold on Angular? Find the perfect website builder here (and the best prices below). However you build your site, you'll need decent web hosting and cloud storage.
01. Create a project
There are a lot of moving parts that go in to a non-trivial web application. What dependencies does your application have? How are you going to run it locally? How are you going to test it? How are you going to bundle your assets
Thankfully, the complex process of compositing of these elements is dealt with out of sight, in the @angular/cli. In just a few commands from our terminal we can have a fully functional Angular application ready for us to work with.
The first step to working with the CLI is to install it. For this, use the command below:
npm install -g @angular/cliOnce the CLI is installed, from the command line we can navigate to the folder we want to install our project in. From there we will run ng new with the name of our project. This will create a folder with that same name, which we will navigate into once the project is completed.
Get the Creative Bloq Newsletter
Daily design news, reviews, how-tos and more, as picked by the editors.
cd <your-projects-folder>
ng new angular-animations-site
cd angular-animations-site
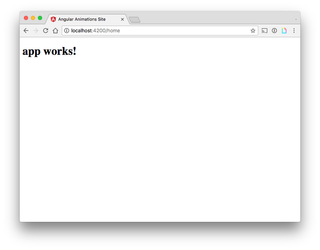
And that is it! Our Angular application is ready to run. You can either start your application with npm start or ng serve. I prefer to use npm start because it is more conventional and enables me to add in additional commands. You can then navigate to http://localhost:4200 to see the application running.

02. Include animations and Angular Material
Because we like beautiful things, we are going to make a few small additions to our application by adding and installing the @angular/animations and @angular/material packages:
npm i --save @angular/material @angular/animationsWe can let Angular know about these dependencies by adding them to our app.module.ts file. We are going to be using Angular Material button, card and toolbar, so we will import their respective modules as well as the BrowserAnimationsModule.
// app/app.module.ts
...
import { MdButtonModule, MdCardModule, MdToolbarModule } from '@angular/material';
import { BrowserAnimationsModule } from '@angular/platform-browser/animations';
We can then add them to the imports array with our NgModule declaration.
// app/app.module.ts
...
import { MdButtonModule, MdCardModule, MdToolbarModule } from '@angular/material';
import { BrowserAnimationsModule } from '@angular/platform-browser/animations';

@NgModule({
  ...
  imports: [
    ...
    BrowserAnimationsModule,
    MdToolbarModule,
    MdButtonModule,
    MdCardModule
  ],
  ...
})
And for one final addition, we will import the indigo pink theme into our styles.css file.
/* styles.css */
@import '~@angular/material/prebuilt-themes/indigo-pink.css';
Up to this point, we have focused entirely on setting up the application so we could start developing. These commands may feel clunky at first, but once you’ve got used to them you’ll find it only takes a couple minutes to have a fully built-out environment with all the bells and whistles we need to build a sweet website.
03. Introduce a page component
Because we are building a website with Angular, we will need to introduce a mechanism to display our pages. In Angular, the atomic building block of an application is the component. By architecting our application with well-defined, encapsulated components, we are able to easily reuse functionality, as well as compose new functionality, by introducing new components.
The CLI ships with generator support right out of the box, and this is what we use to create our page component. We can generate our page component by running the command below (the g command is shorthand for generate).
ng g component pageNote: I recommend taking the time to learn how to build the major Angular pieces by hand until you have built up your muscle memory. It is only when you really understand what is happening that you should optimise your workflow with generators.
The CLI will generate a folder in the src directory named page with an HTML, CSS and Typescript file as well as a spec file. In our page.component.ts file, we have the basic structure of a component. Our component references our template and style files in the @Component metadata and has our constructor and ngOnit methods stubbed out.
// app/page/page.component.ts

import { Component, OnInit } from '@angular/core';

@Component({
  selector: 'app-page',
  templateUrl: './page.component.html',
  styleUrls: ['./page.component.css']
})
export class PageComponent implements OnInit {

  constructor() { }

  ngOnInit() { }
}
Along with generating our component, the CLI will also modify our app.module.ts to include a PageComponent entry in our declarations array. This means our page component is now available throughout the entire module.
// app/app.module.ts

@NgModule({
  declarations: [
    AppComponent,
    PageComponent
  ],
  ...
})
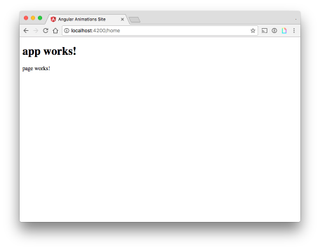
As a sanity check, we can hop into our app.component.html file and add <app-page></app-page> to the bottom. Notice that the element tag we are using corresponds to the selector property defined in our @Component metadata.
<!-- app/app.component.html -->

<h1>
  {{title}}
</h1>

<app-page></app-page>
04. Build out your page component
With our page component alive and well, we can build it out so it starts to look like an actual webpage. We will introduce a page object with title, subtitle, content, and image properties.
// app/page/page.component.ts

export class PageComponent implements OnInit {
  page = {
    title: 'Home',
    subtitle: 'Welcome Home!',
    content: 'Some home content.',
    image: 'assets/bg00.jpg'
  };

  constructor() { }

  ngOnInit() { }
}
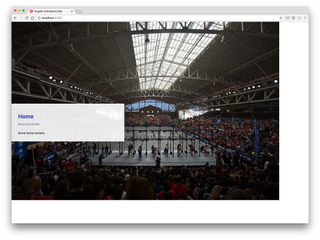
We will update our template to bind to the page object. There is an image element that will eventually be augmented to fill up the entire browser window. We are also going to add in an Angular Material card component that we will bind the rest of our page object to.
<!-- app/page/page.component.html -->
<img class="fullBg" [src]="page.image">

<md-card>
<md-card-header>
<md-card-title><h1>{{page.title}}</h1></md-card-title>
<md-card-subtitle>{{page.subtitle}}</md-card-subtitle>
</md-card-header>
<md-card-content>
{{page.content}}
</md-card-content>
</md-card>
Our page component is starting to look a lot better! Our next step is to add in the ability to have multiple pages and navigate between them.
Page 2: How to create multiple pages

Thank you for reading 5 articles this month* Join now for unlimited access
Enjoy your first month for just £1 / $1 / €1
*Read 5 free articles per month without a subscription

Join now for unlimited access
Try first month for just £1 / $1 / €1
