Grow plants in Houdini
Here's how to use Houdini to create procedural plant growth for games and animation.
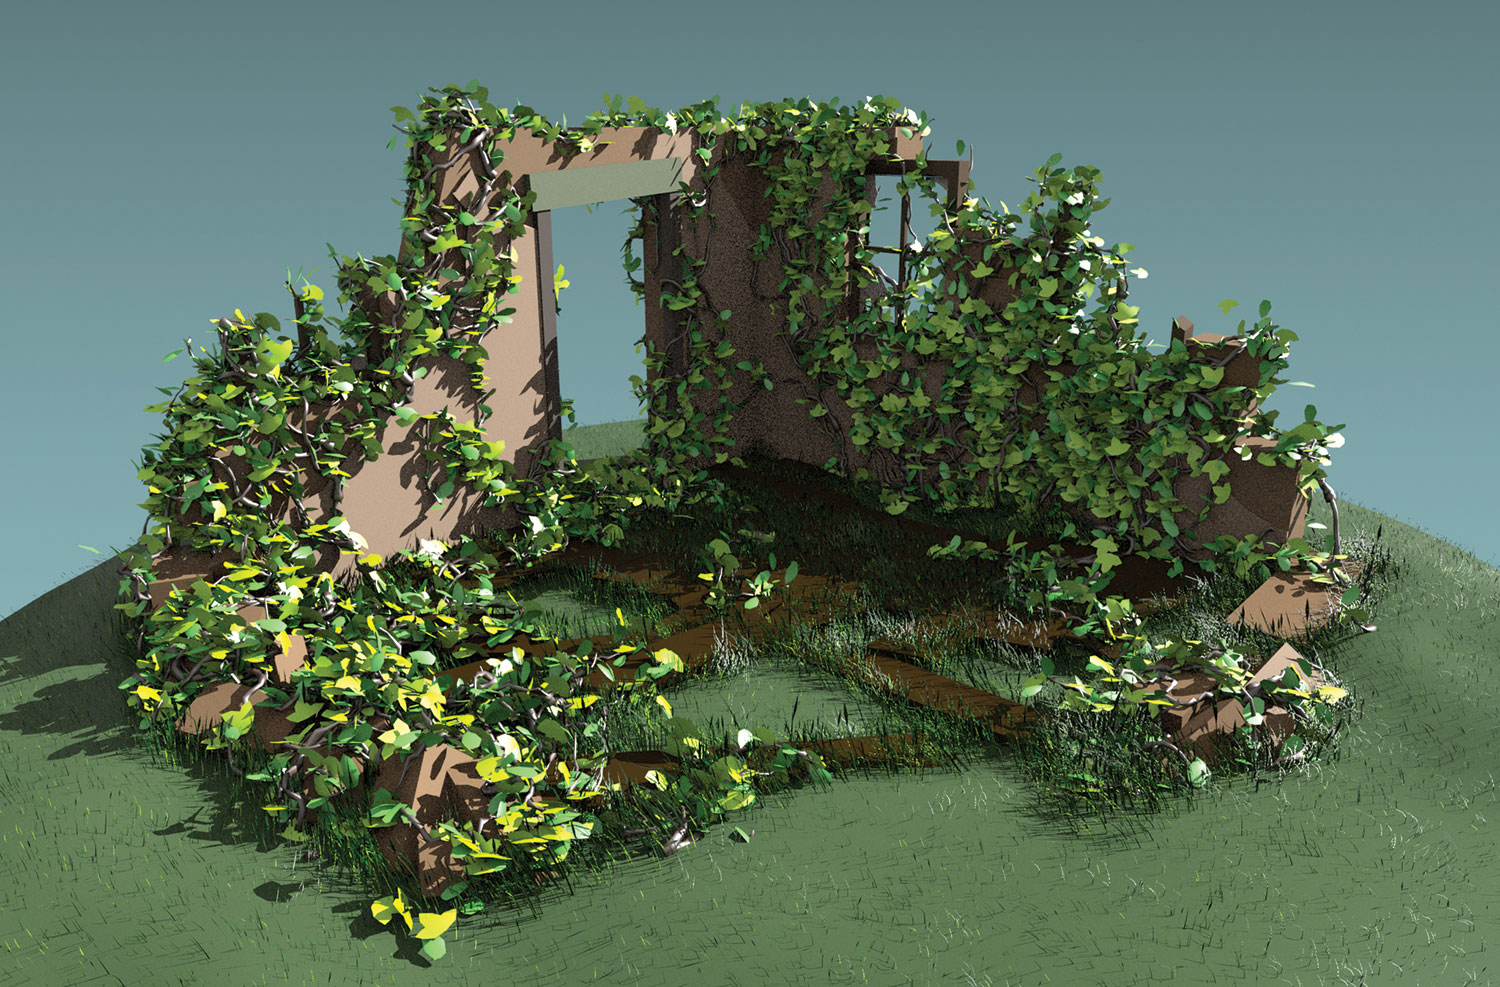
Houdini's strong point has always been its procedural nature. With a few nodes and a small set of expressions, you can create complex and naturalistic results – models and scenes that would take forever to create in traditional ways.
For a long time Houdini has been the backbone of many large-scale productions in the visual effects industry. However, because of its procedural approach, it's often claimed to be too difficult to learn.
While this might have been true a few years back, things have changed. With more accessible licensing schemes and a complete revamp of Houdini's interface, it continues to open up to small studios, artists and enthusiasts. Coming from other packages, it's still is a very different way of thinking, though.
Article continues belowIn this tutorial we will give an overview of the program. We will start off with basic modelling techniques for leaves and grass. We will cover sampling VDB volumes to distribute plant growth and eventually use VEX code and wrangle nodes to generate geometry on the fly.
We're going to see if what everyone says about Houdini is true: once you go procedural, you will never look back!
Download the files for this tutorial.
01. Get organised
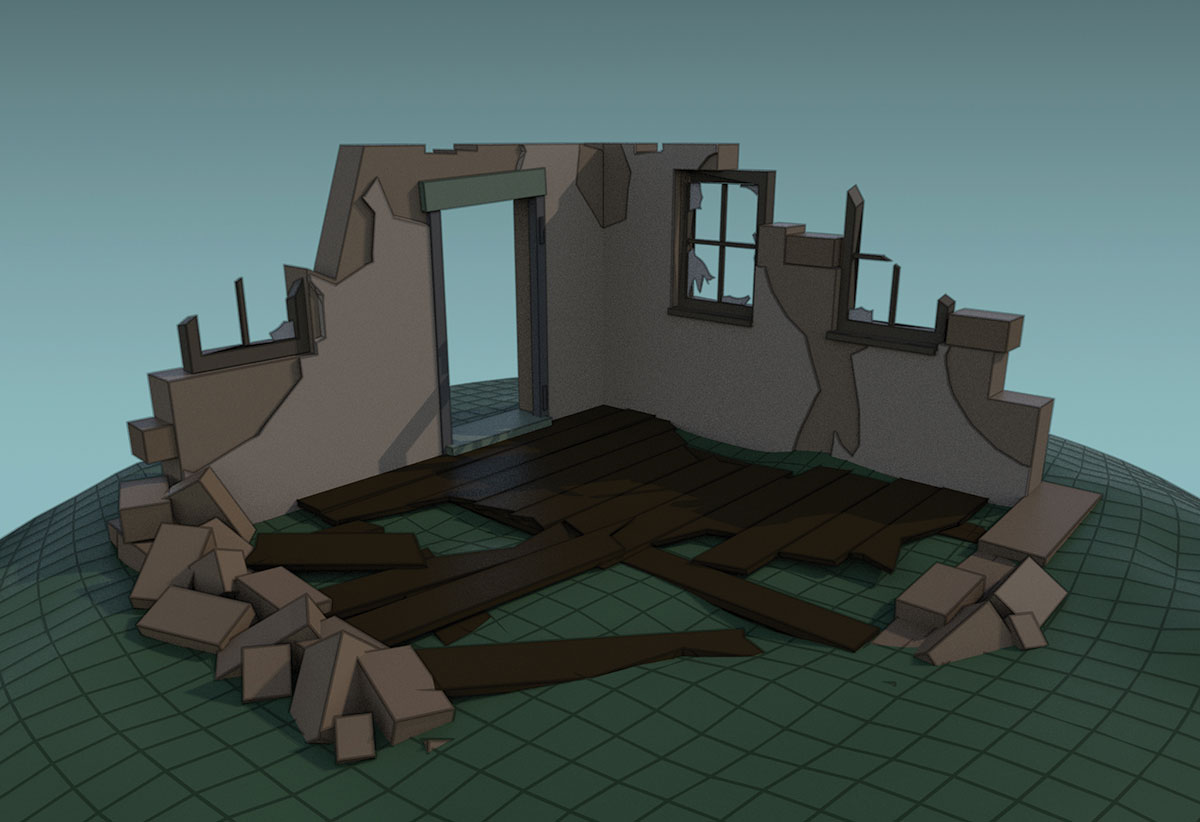
Start with a model of a ruin you want to cover in foliage. Make sure you name your shapes in a meaningful way. This allows easy grouping of the geometry for different purposes later. Split it up into walls, planks, bricks, windows and glass. Houdini alembic import will set a path attribute on import. You can then easily use a split or blast node to select the pieces you want.
Sign up to Creative Bloq's daily newsletter, which brings you the latest news and inspiration from the worlds of art, design and technology.
02. Create the leaves
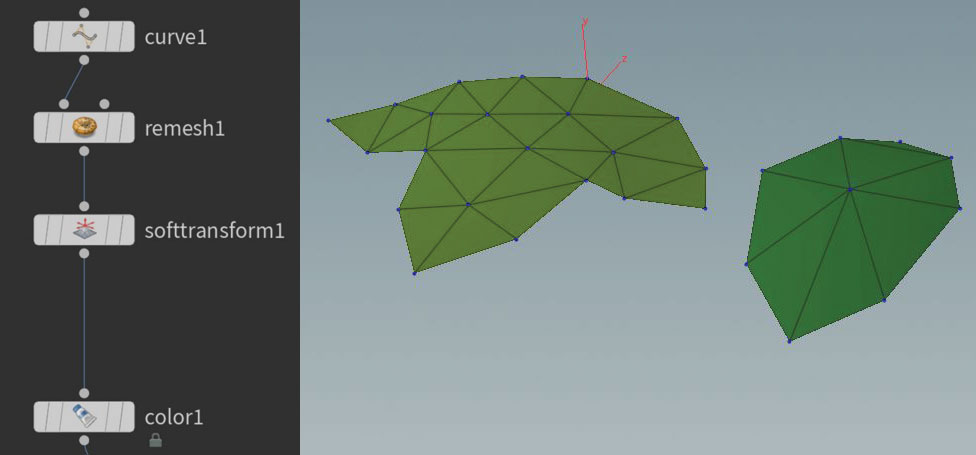
With the ruin in place, it's time to begin creating individual leaves to use later for instancing. Always work with reference images from nature if you want more realistic results. We need the leaves to be single-sided and of fairly low poly count. Start off by making a curve to resemble the outer leaf shape. Use a remesh node to add some surface tessellation. With a soft transform, slightly lift out the centre at the stem. Also add a colour attribute with different shades of green.
03. Grass strands
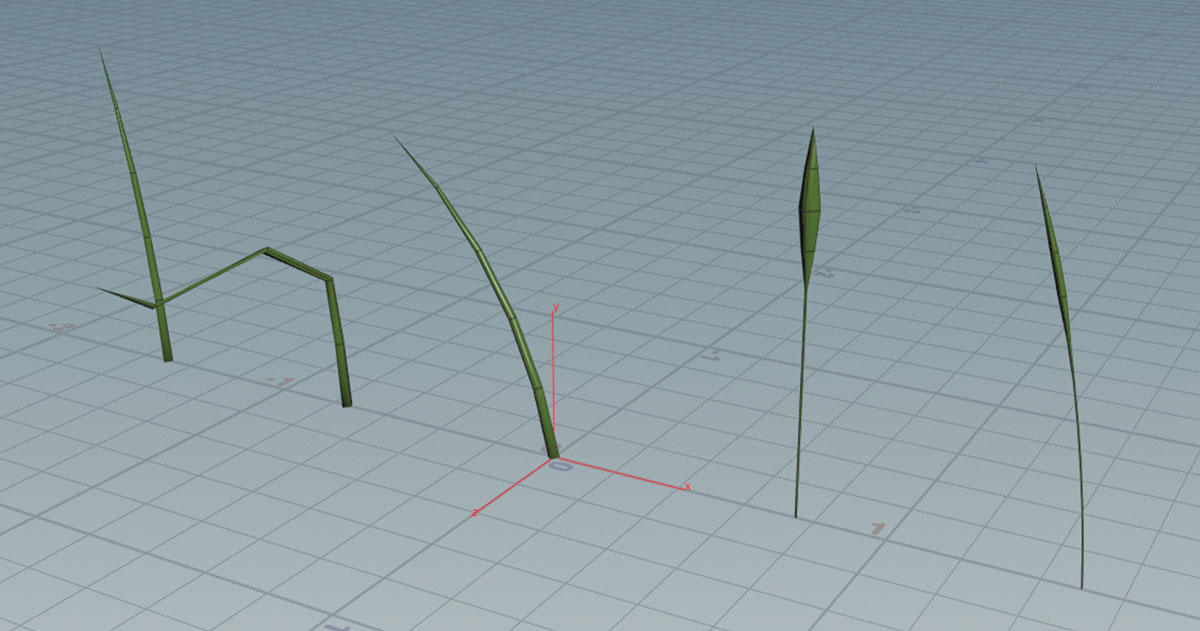
We also need individual strands of grass to cover the floor. Again, simple one-sided polygonal strands with varying width are sufficient. Generally speaking, more variation is always better. But even with just five different shapes, you will achieve quite realistic results. As our setup is procedural, more can easily be added later. It's important to make sure all meshes are centred at the origin with the pivot at their foot. This way we can use them as instances straight away.
04. Natural distribution
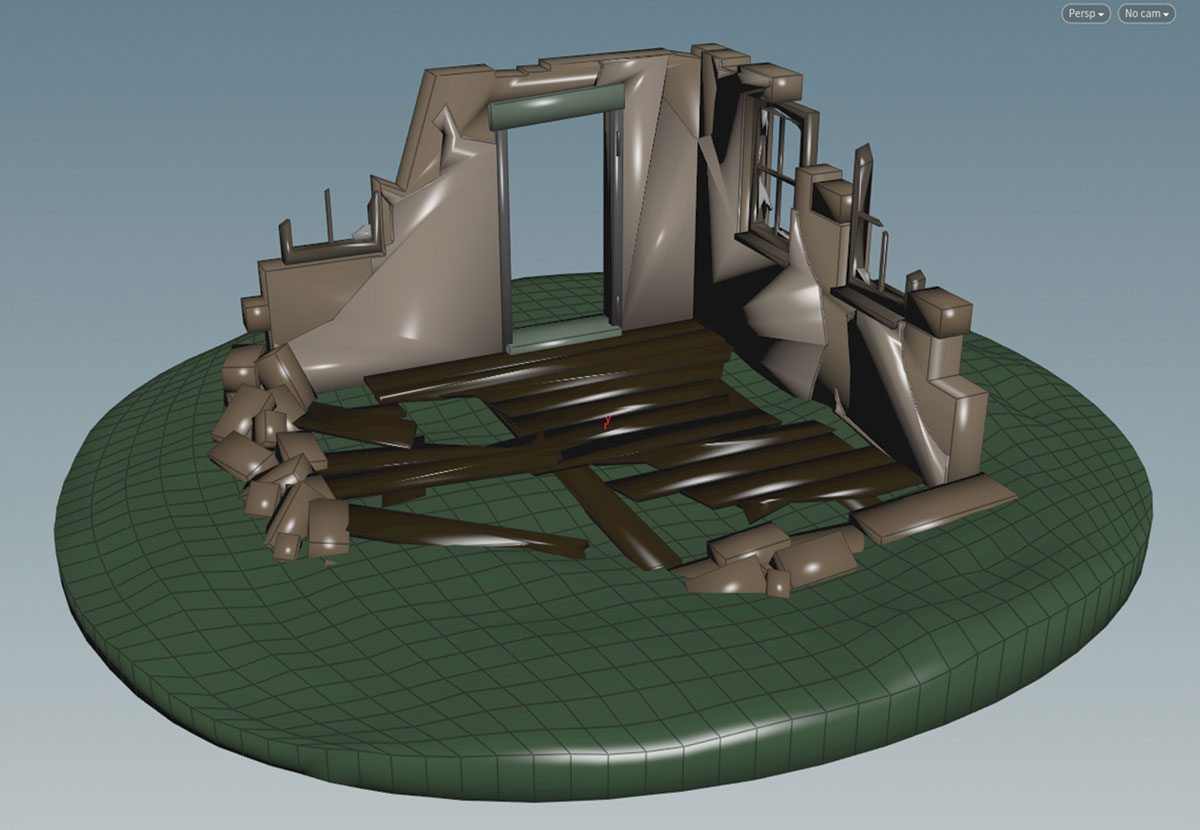
There are many ways to decide where grass will grow. Find a rule that resembles a natural distribution. We will make grass grow everywhere on ground that is not covered by the building or rubble. Growth needs to be denser and longer along walls and rocks. Isolate the ground from our geometry and use a remesh node to gain a fairly high level of subdivisions.
05. AttributeTransfer
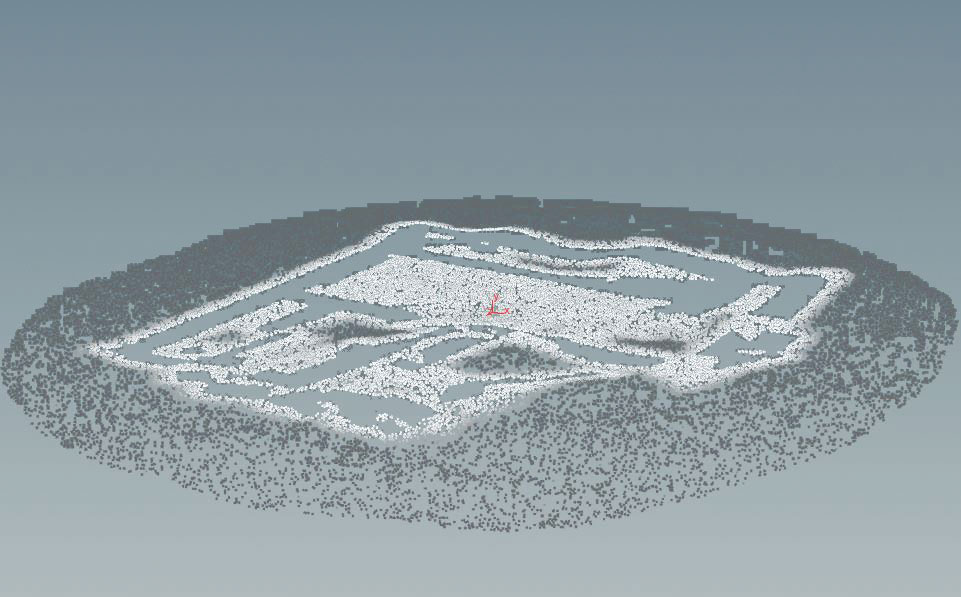
Add a white point colour to the walls and a grey to the ground. Use AttributeTransfer to map the wall colour onto the ground. Tweak the blend radius on the node to fit around the base of the walls. Turn the walls into a VDB with VDBfromPolygons. In an AttributeWrangle, get the VDB value at each point with the volumesample function. Remove points with a negative value.
06. Prepare attributes
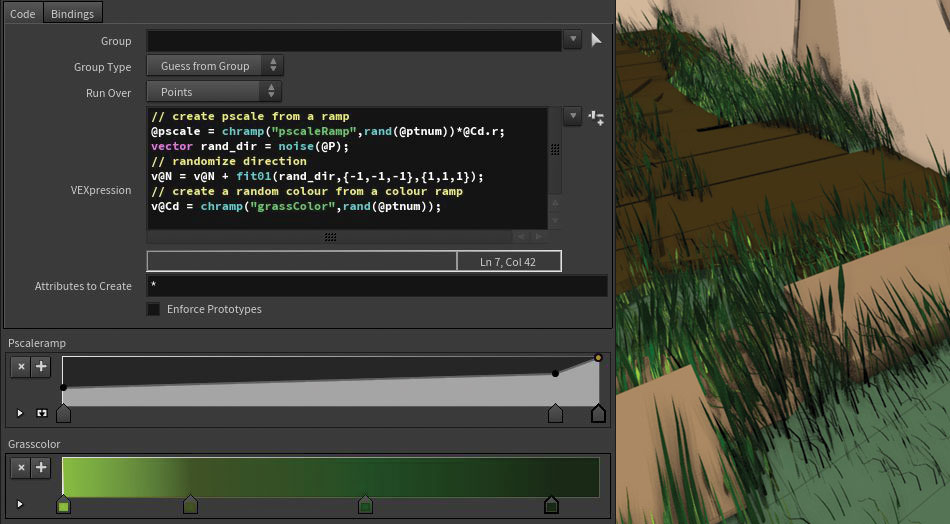
Before using Copy Stamp, some attributes need preparation. In VEX use a random number to drive a ramp of a random number. This is a visual way to control scale distribution. In the same way, set the colour to a random green. To make the strands point in slightly different directions, change the normal by adding a random offset in X and Z direction. Voila, you grew grass!
07. Climbing plants
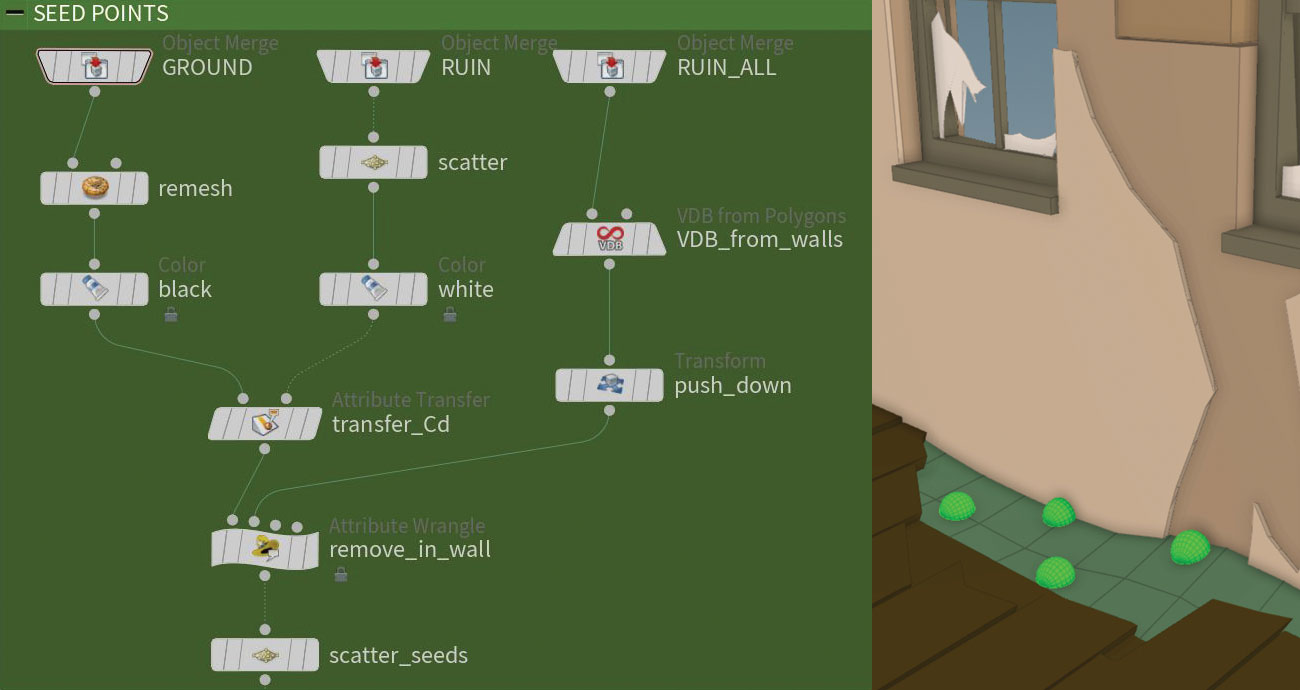
For the climbing plants, we need to write our own solver in VEX to mimic a growth mechanism. It might sound daunting, but we go step by step all the way. Don't forget to also use the Houdini Reference on VEX. To find the root points we go with the same mechanism we used on the grass. Start off with a few points on the ground, close to the wall.
08. Plant forces
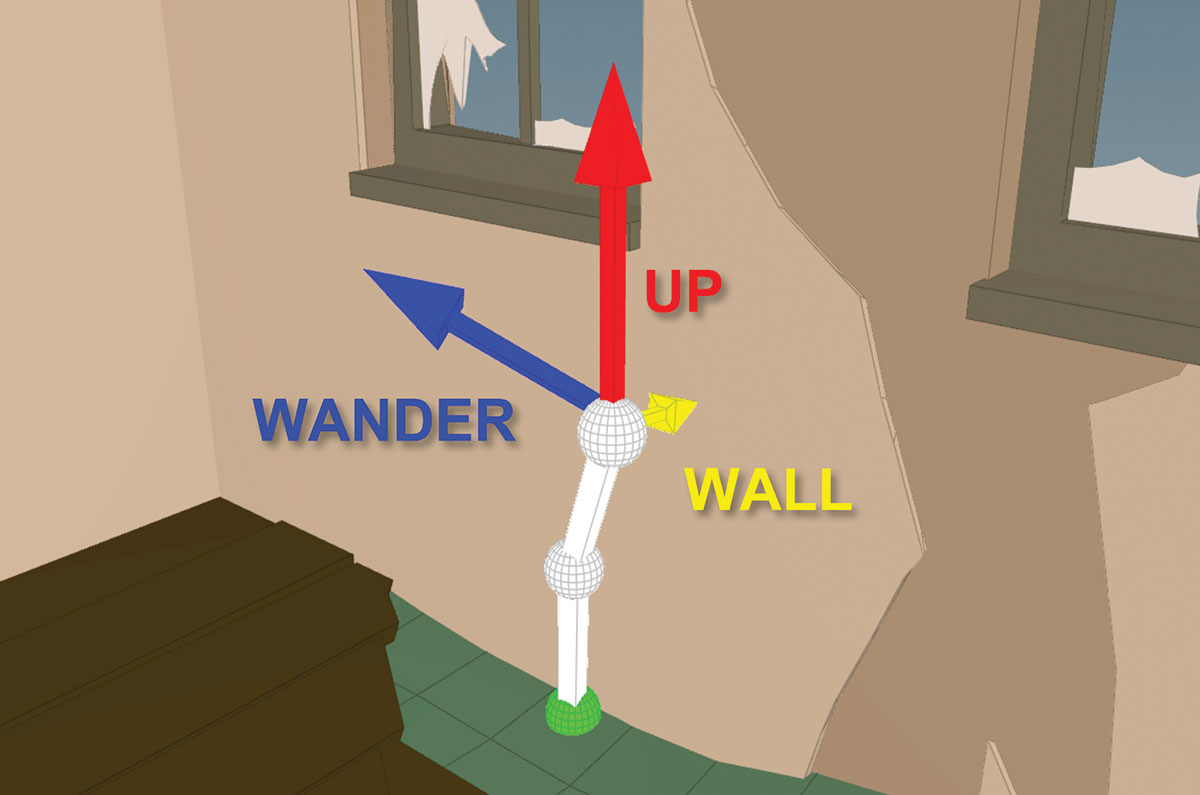
We have three forces at work. The first we'll call UP, pointing away from the ground against the gravitational pull. The second is a vector named WANDER, pointing in a random direction along the wall. The third force is called WALL, pointing towards the closest obstacle. This emulates the plant's desire to climb. We will use all three forces on each growth iteration.
09. Grow the seedling
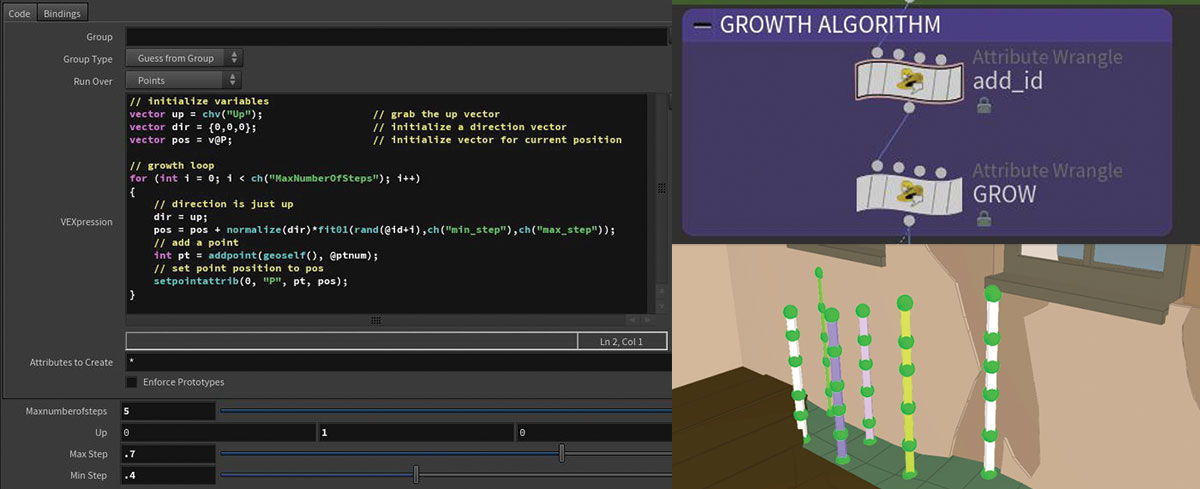
Now comes the time for us to dive into VEX using a point wrangle. In a for loop we grow the seedling in short segments by adding to the variable pos, which has been initialised with the start position. For now, only grow along the UP vector.
It's good practice to make use of the ch() and chv() functions, to expose parameters to the interface. You then can easily experiment with the result of the algorithm by interactively changing those values.
10. Natural effects
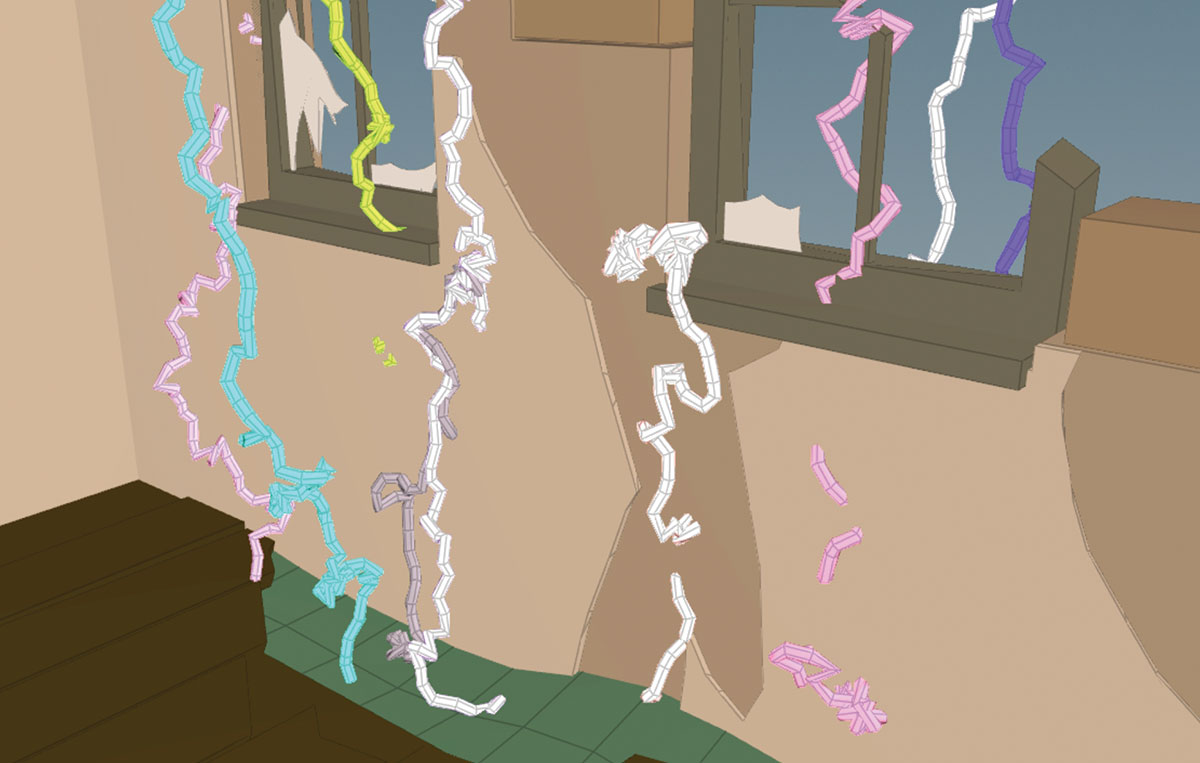
For a more natural look, add the WANDER force. On each step calculate a random direction based on a noise function. This random vector adds to the direction the seed gets moved. For better balancing, also introduce two weighting factors to the interface, scaling our forces up or down. The result is vines growing with a lot more variation, but they now penetrate obstacles they meet. To avoid this, the third type of force comes in handy, the WALL direction.
11. Final force
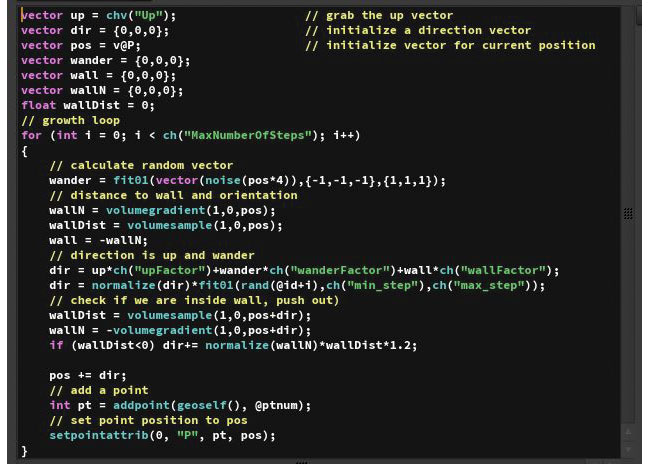
Add the last force to the VEX loop by sampling the value and gradient VDB of the ruin. This gives you the distance between point and wall as well as the wall's normal direction. Calculate a force that points towards the wall and add it to the grow direction. Sample the VDB a second time in the new position to check if the point is inside the wall. If so, just push it out along the normal.
12. Soften the change
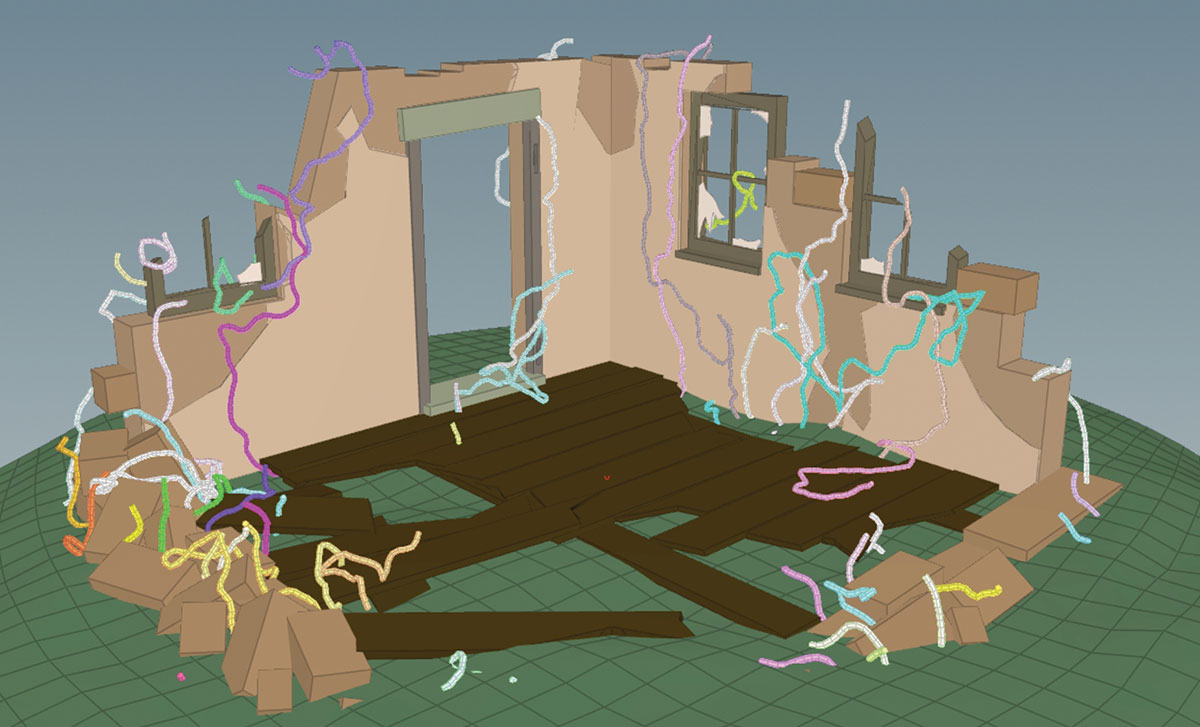
The vines still don't look natural. This is because they can change direction rapidly on each step. Soft blend between the directions of the previous and the current step to smooth that out. You also want to stop growing if the position moves too far off the walls. See if the wall distance you get from the VDB sample exceeds a certain threshold. Just break out of the for loop if it does.
13. Branching behaviour
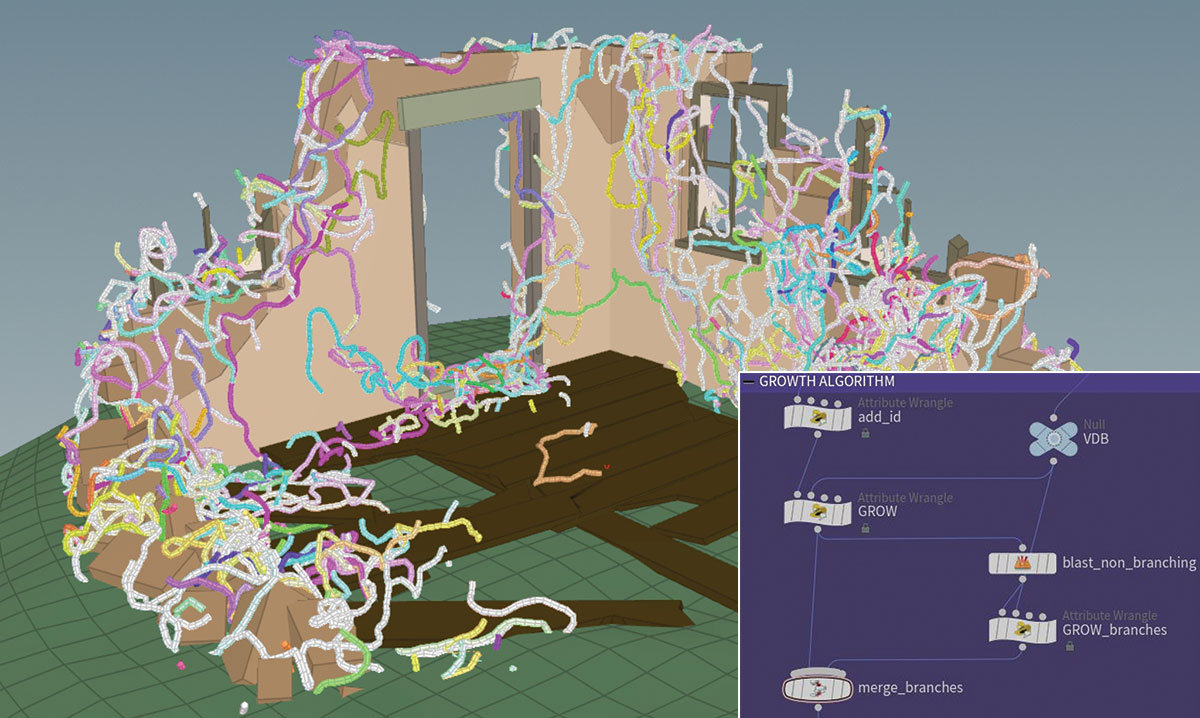
Another aspect of climbing plants we still have to add – branching. But this is very straightforward to achieve. Tag each growth step with a certain probability to be a branch point. Then run the growth algorithm again on each of those marked points, using the point itself as the root.
It's a good idea to tweak the growth parameters on the second pass in order to be more wandering and less upwards, to fill up the areas along the walls.
14. Finish the branches
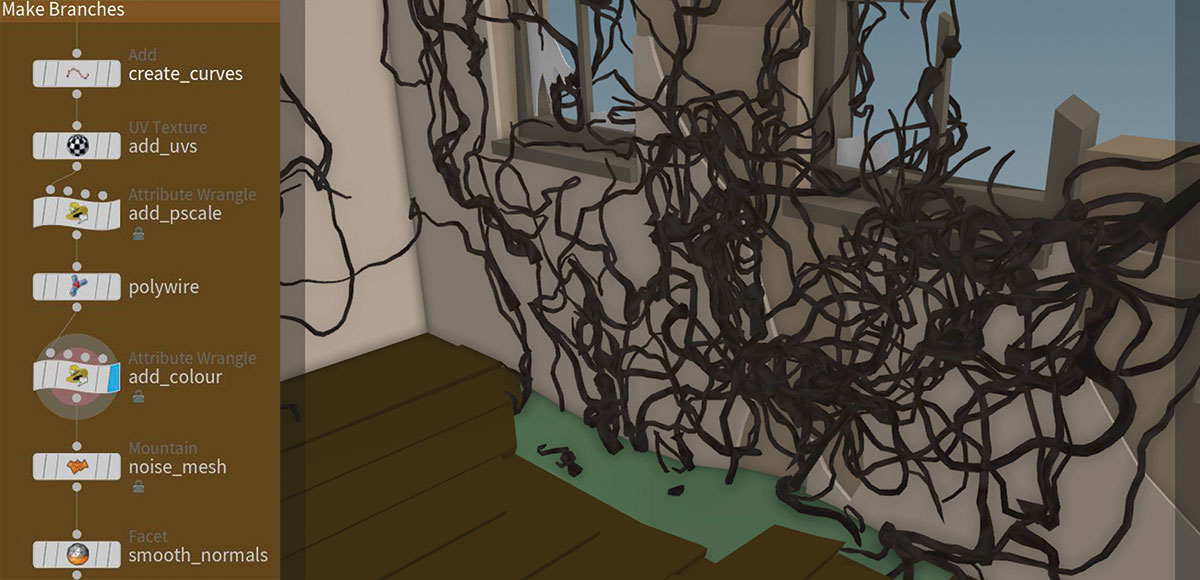
We now have created sequences of points resembling branch growth. Make use of the id attribute on the point and create an Add node to turn them into individual curves.
A UV Texture set to Rows&Columns will provide UVs along the curve length, which you then ramp along their individual length to an attribute called pscale. A Polywire node turns curves into tubes where you use $PSCALE for thickness. Add a Mountain and a Facet after, to finalise the branches.
15. Instance the leaves
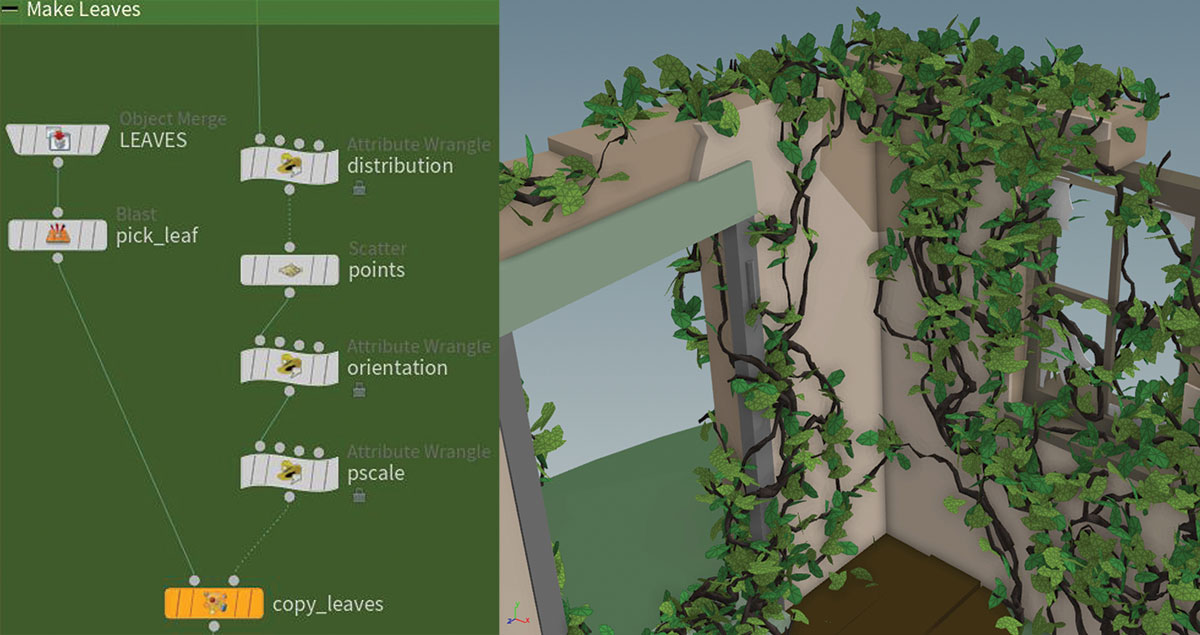
Instancing leaves works a bit like the grass strands earlier. We define a distribution attribute along the curves coming out of the growth algorithm. This is zero at the start of each branch and then 1 at the tip. Use a scatter to place points along the curve based on that attribute. It looks better to vary the pscale. Use a copy stamp to instance the prepared leaves onto those points.
This article originally appeared in 3D World issue 225; buy it here!
Related articles:
