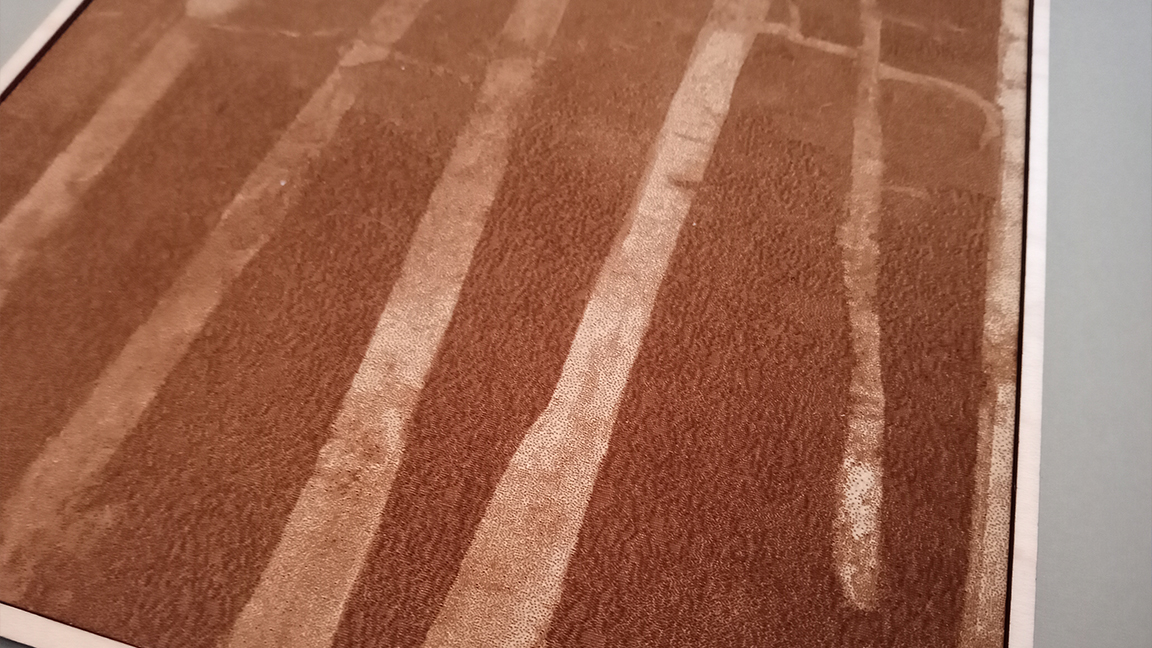
This Glowforge tutorial will take you through engraving a digital painting onto wood. If you're new to Glowforge or just looking for a sprinkle of inspiration then my tutorial for engraving a digital painting onto wood will hopefully fit the bill. Below I will share my process for uploading, preparing and engraving a piece of digital art, but by and large the same process can be used for most image engraving, such as from photos.
If you've not caught up on this brand of high-spec laser cutters just yet then read my guide to the best Glowforge machines and catch up with my Glowforge Pro review, the maker's highest-spec machine. These laser 'printers' can engrave, cut and score on countless materials to create professional grade art, gifts, models and more.
If you have Glowforge Premium, the brand's subscription service, then it's a lot easier to use the Glowforge app as there are simple shortcuts to creating Cut paths and adding shapes. If you don't have Premium then you'll need to do more prep work in software such as Illustrator, Inkscape and Affinity Designer.
While Glowforge Pro could be too pricey for many, the mid-range model, the Glowforge Plus, is an excellent option. Take a look at our regularly updated deals tracker for the best Glowforge Plus price in November. Now scroll down for my Glowforge tutorial for engraving a digital painting onto wood.
Glowforge tutorial: engrave a digital painting
01. Setting the file format
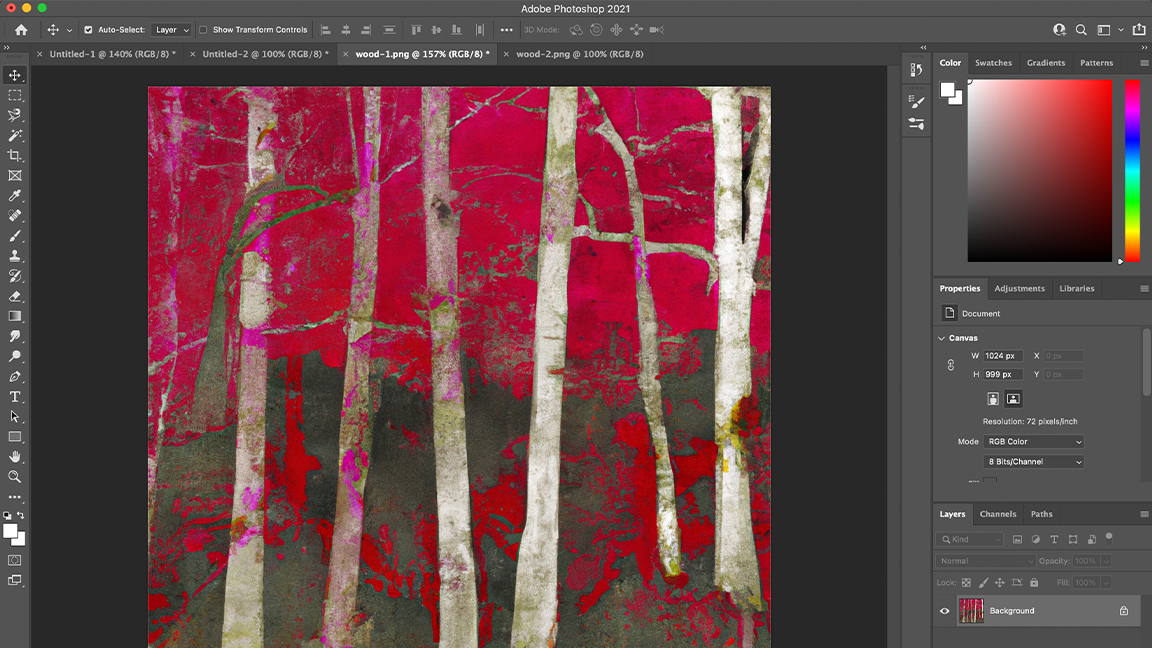
To begin with you need to ensure your image file is saved to the correct format for the Glowforge app to recognise. I save my digital painting of a wood as a PNG, but if you have Illustrator or Inkscape you can save this out as an SVG file. Glowforge also supports JPEG and PDF formats. I created this art in Rebelle 5 and converted the file in Photoshop to be safe. I have two images I want to use, so I do the same for the second.
02. Uploading the file
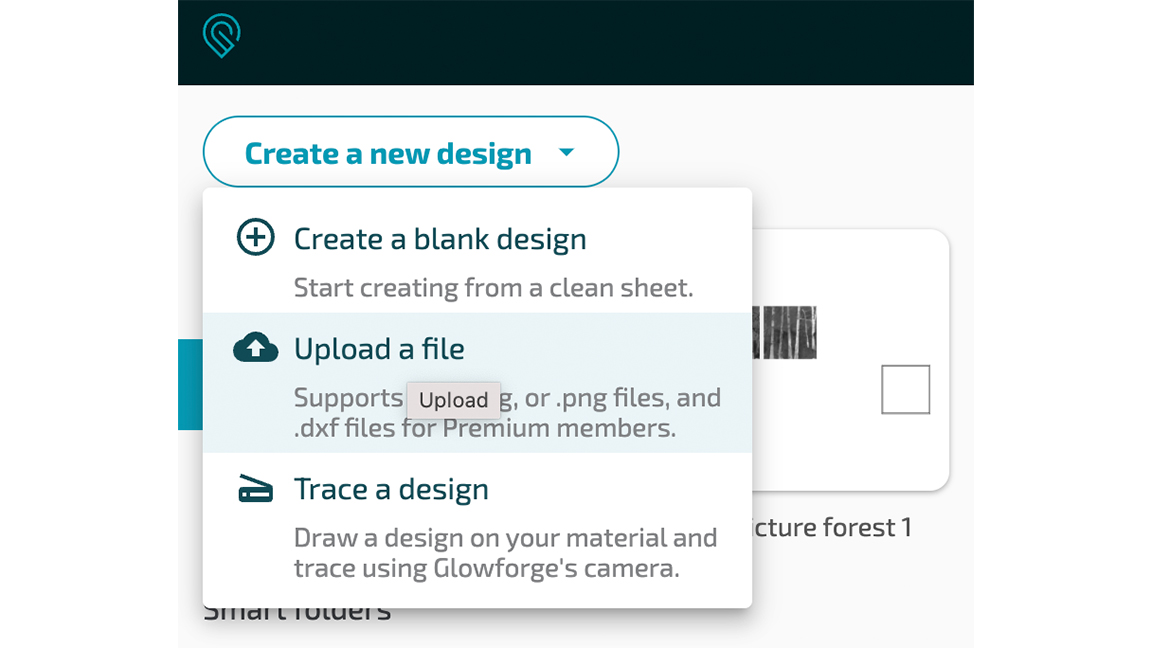
In the Glowforge app I select Create A New Design and from the dropdown menu I choose Upload File and select the two images from the on screen menu. The Glowforge app is actually quite flexible and you can upload art by selecting the Create A Blank Design option and then dragging and dropping an image into the workspace.
Even easier, you can Select All in your digital art software and then paste using the keyboard shortcut (Mac Command + V) to add the image directly into the Glowforge app's workspace.
03. Resizing the image
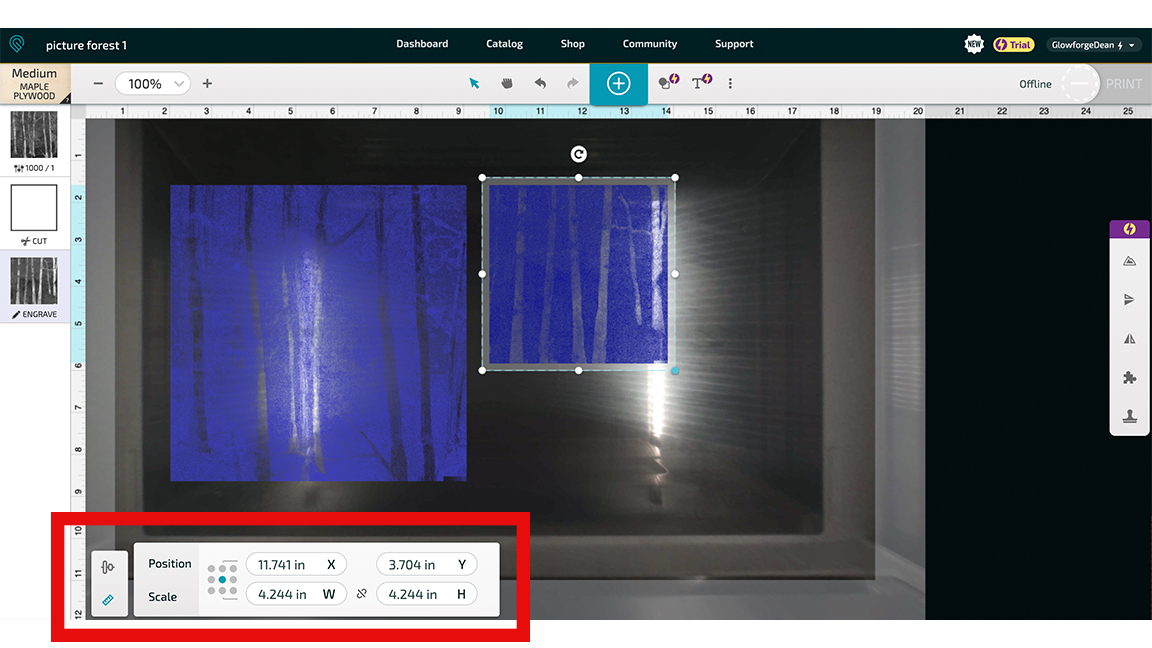
With your art in the workspace it's worth noting some little features the Glowforge app offers. If an image is outside the printable area of the laser cutter it will turn red, and then blue when inside the cutting area. The rulers along the side and above the work area also show this, and they include an 'excess area' or a buffer zone.
I resize the images to fit the space by simply dragging corners. I have Aspect Ratio automatically on so the images retain their scale. If you wish to turn this off and resize manually you need to click the ruler icon bottom left and untick the chain icon. Here you can also scale and position images more accurately using numbers.
I also have Snap Align and Distribute turned on. This ensures my two images snap to an invisible grid and keeps them the same size, and makes life easier. This is a Glowforge Premium feature, so keep that in mind.
04. Setting the material type
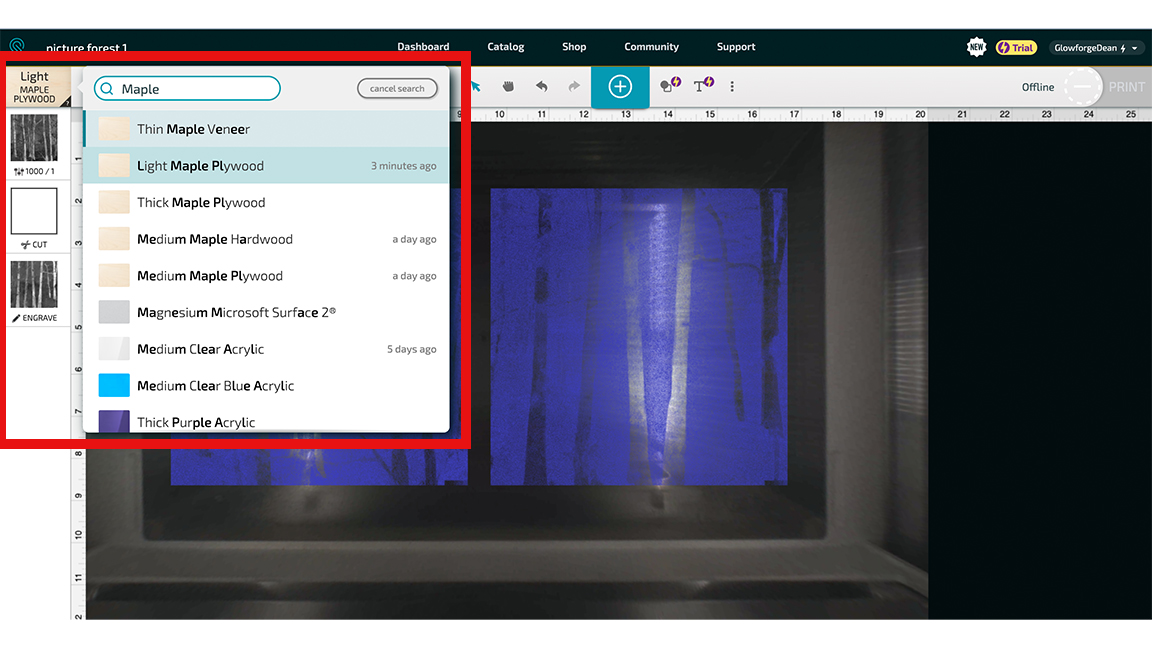
If you're using Proofgrade materials then this step is as easy as loading the material into the Glowforge and letting the machine scan the QR code. If you're using your own material then you'll need to click on the Find Your Material option in the top left corner of the app – I choose the Maple. You can search by material type and select the required one.
The advantage of using Proofgrade materials is they are coded with the correct speed, power of the laser and thickness of the material. Using your own materials creates a little trial and error, though you can begin with those materials in the menu and tweak the settings.
Proofgrade materials also come pre-masked, meaning there's a layer of thick paper covering the material that protects it and prevents scorching. When engraving a detailed painting like this it can be fun to try with and without masking to see how the scorching brings out the depth of the image and the patterning of the material.
05. Creating the Cut path
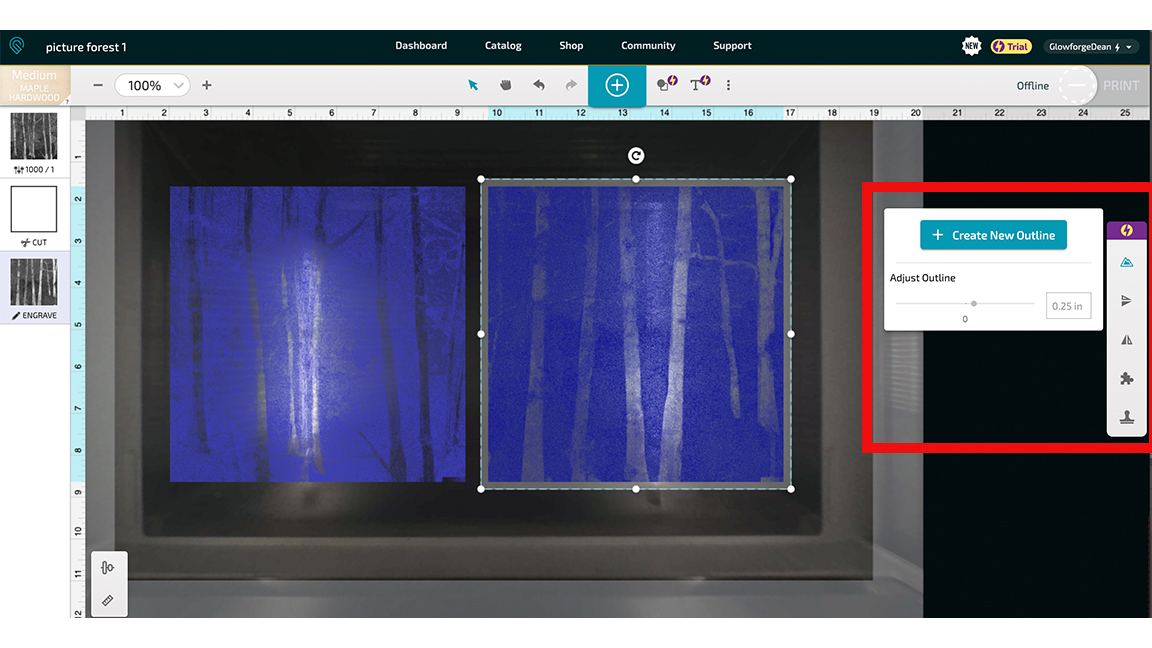
Now to create the cut path. If you have Glowforge Premium then this step is super easy. You simply need to click on the art and the Premium menu to the right appears, clicking the Create Outline option will generate a cut path around the art at around 0.25 inches, the slider enables you to extend or decrease this distance.
If you don't have Glowforge Premium then you'll need to create the cut path in a vector app, such as Illustrator or Inkscape, by creating an Offset path. This would need to be done ahead of uploading your art.
06. Creating a frame
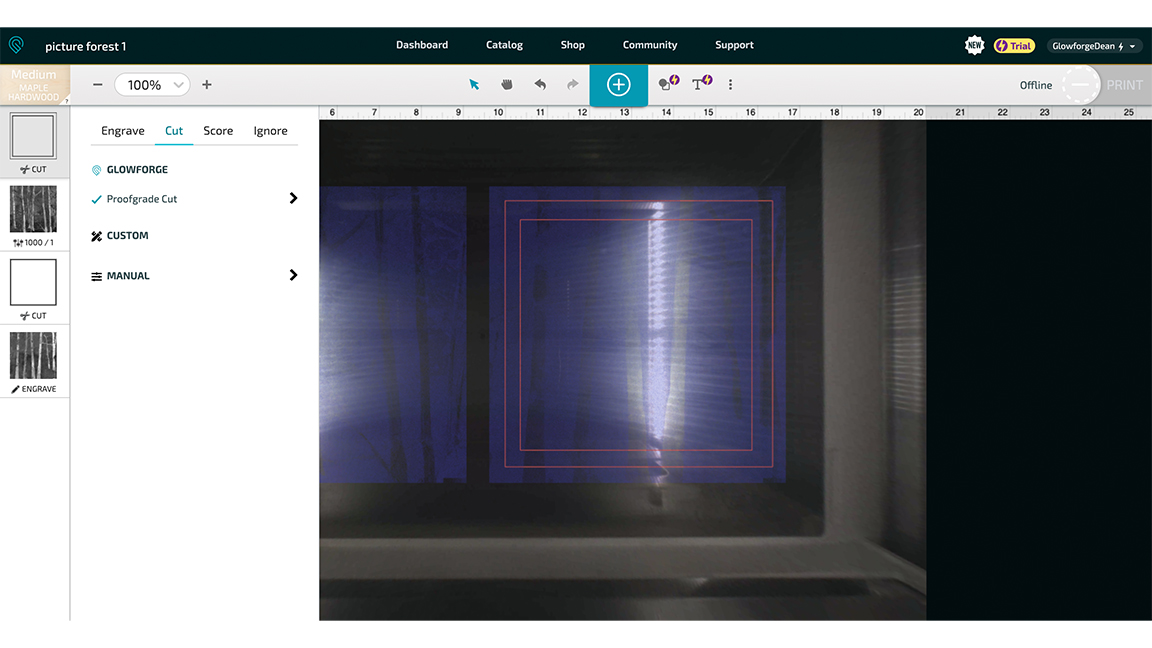
For this project I want to take the painting/engraving to the edge of the cut panel, so I don't want the Cut Path to sit outside of the image. I could fiddle with the path's Adjust Outline settings to manually move it closer but I find it easier to create a frame using the Insert Shape option (Premium only) and then set this to Cut. I duplicate this frame and resize to make it slightly smaller and this cuts a thin frame from the wood, I plan to reverse this so the bare Maple sits against the engraved image.
07. Understanding Engrave settings
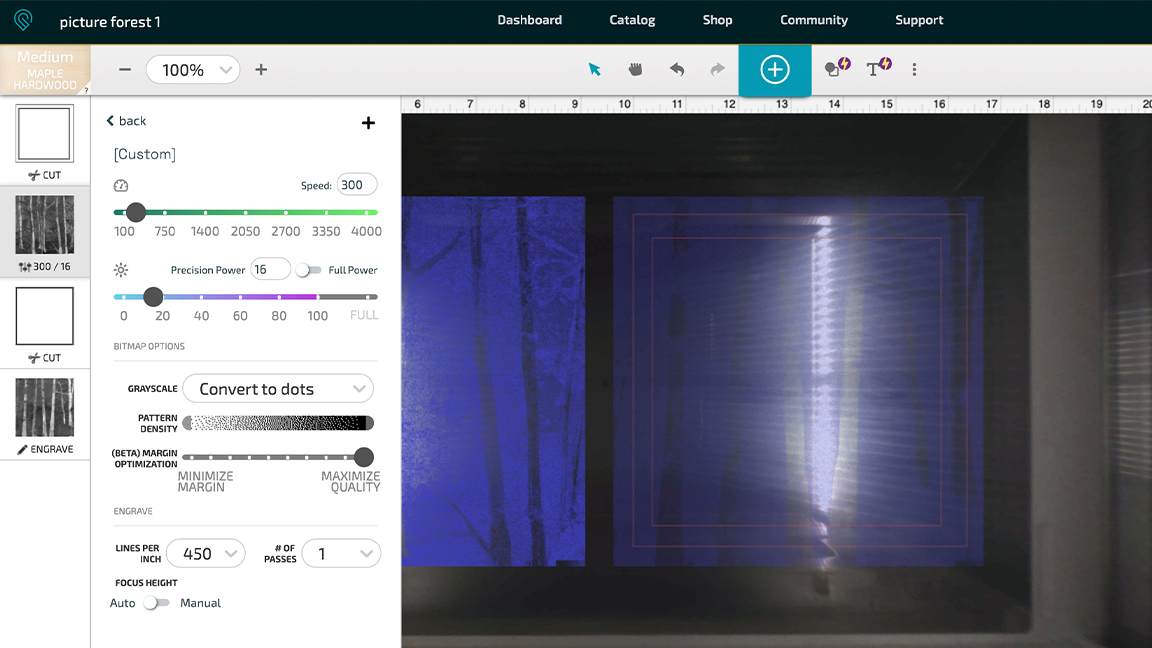
In the left panel, clicking Engrave under the small image brings up the settings menu. Here you can decide the quality of the engraving by adjusting the resolution and Lines Per Inch (LPI). The basics are as follows: Draft Graphic uses a low LPI, which makes the process faster but less detailed, and can result it jagged edges, this is best for simple line art. SD Graphic is slightly higher but still best for line work. HD Graphic uses a high LPI so it's slower but offers deeper and and cleaner marks because it's using a lower power overall. My original painting is splashy and rough, and has some nice depth, so I select HD Graphic – this means the two engravings will take one hour and thirty minutes.
Note also, this converts the image to half-tone, and there's a tag in the Manual settings called 'Convert To Dots' that shows the vary-tone; essentially, the density of the dots means the darker it will burn.
08. Pressing print
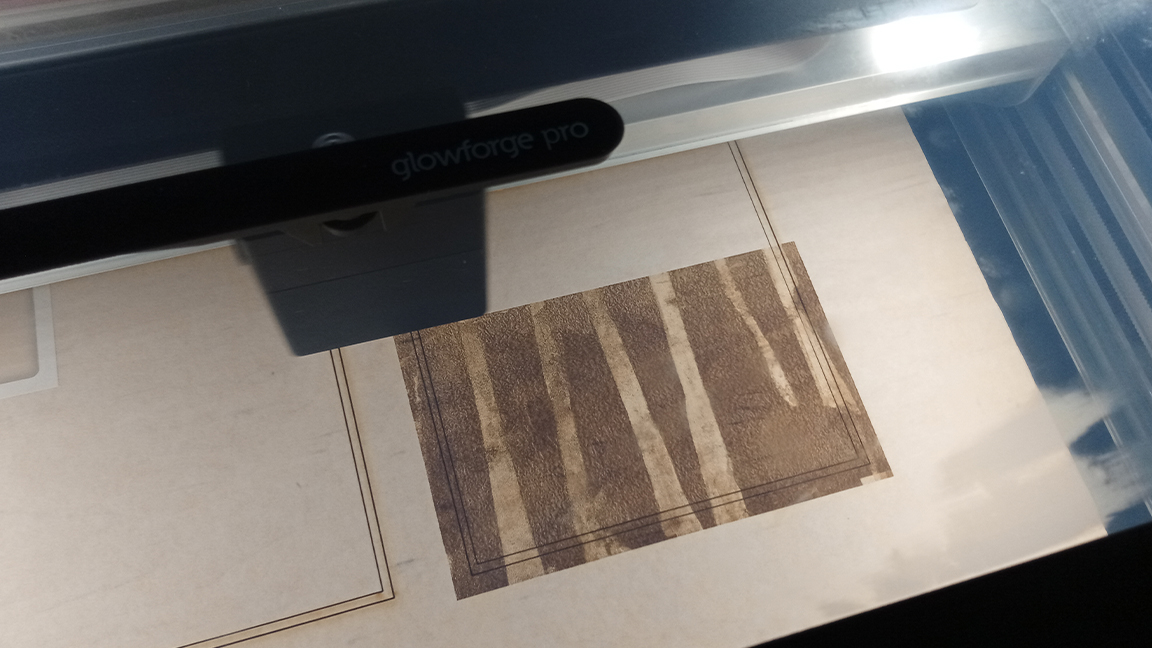
It's now simply a matter of pressing the large glowing 'Print' button on the Glowforge and sitting back and watching it work. Even though this project will take a while to print I like to keep watching and checking it's working properly. I actually did two passes, one with the Proofgrade masking on and one without, the difference was stark: with masking it came out lighter and a little washed out, without it is darker and the slight scorching offers a leathery texture that I like. So experiment!
Tip: the masking paper can be removed with duct tape.
09. Finishing touches
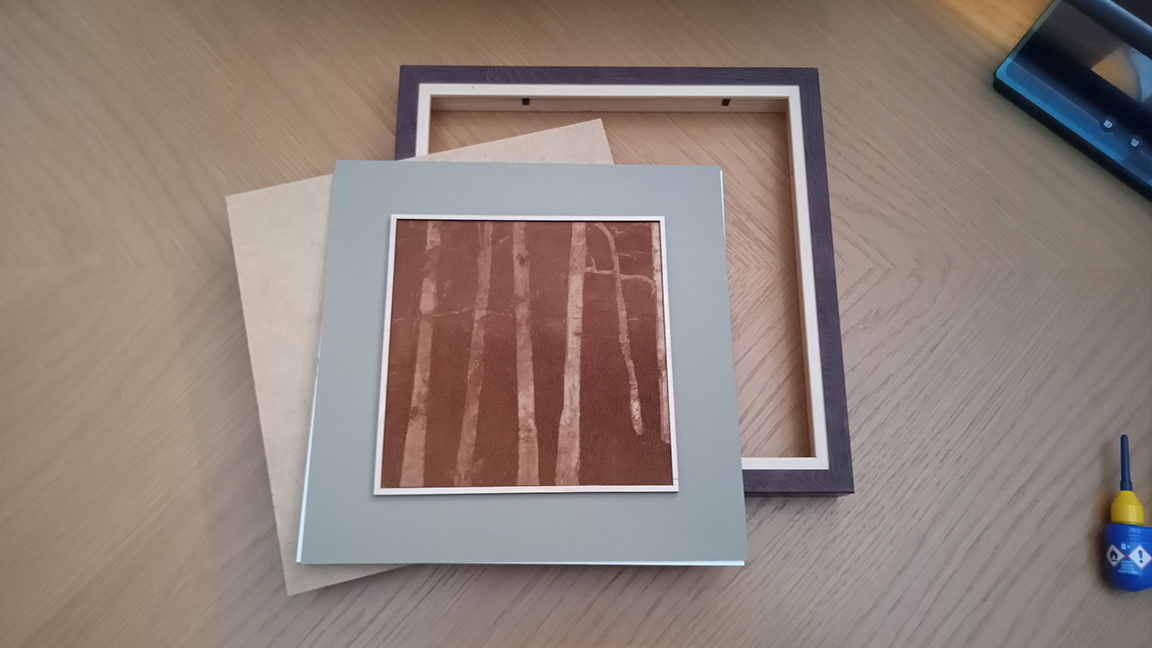
Once complete I decide to mount and frame the engravings. The small, narrow maple frames I created in Glowforge oppose the dark, deep engraving. I mount this on a complimentary dark green paper and frame in maple and oak frames. While I bought these I can now make easy templates from these frames and mounting boards for any future projects.
Read more:
- The lowest Glowforge Pro price we've found
- The best Glowforge Basic price for you
- These are the best laser cutters
Get the Creative Bloq Newsletter
Daily design news, reviews, how-tos and more, as picked by the editors.

Thank you for reading 5 articles this month* Join now for unlimited access
Enjoy your first month for just £1 / $1 / €1
*Read 5 free articles per month without a subscription

Join now for unlimited access
Try first month for just £1 / $1 / €1

Ian Dean is Editor, Digital Arts & 3D at Creative Bloq, and the former editor of many leading magazines. These titles included ImagineFX, 3D World and video game titles Play and Official PlayStation Magazine. Ian launched Xbox magazine X360 and edited PlayStation World. For Creative Bloq, Ian combines his experiences to bring the latest news on digital art, VFX and video games and tech, and in his spare time he doodles in Procreate, ArtRage, and Rebelle while finding time to play Xbox and PS5.
