Get creative with portraits and Face-Aware Liquify
Use Photoshop's powerful face recognition tool to exaggerate facial expressions.

We’ve all had a play with the liquify tool in Photoshop, but in the latest iteration of Photoshop CC, Adobe has introduced some powerful face recognition tools to add to the fun. With the Face-Aware Liquify tool, Photoshop will automatically detect areas of the face including the eyes, mouth, nose and overall face shape, enabling you to adjust and tweak them to your hearts content.
These tools can be used subtly to enhance and heighten already animated areas of the face or, as in the example above, to more comic effect creating a caricature look and feel to the portrait. So whether you’re tweaking a professional shot or simply having fun with a family portrait, the new Face-Aware Liquify tool is a powerful new addition to your arsenal.
01. Choose an appropriate image

Begin by choosing the image that you wish to distort and exaggerate. It goes without saying that the clearer and higher resolution the image is then the better the results will be. It will also help if the subject is already striking quite an animated pose as the results will seem more believable and less forced. For example, if someone is frowning, if you try then to make them smile it will simply look wrong, which may or may not be the look your going for.
The above image was sourced from iStock.
02. Duplicate or convert the layer
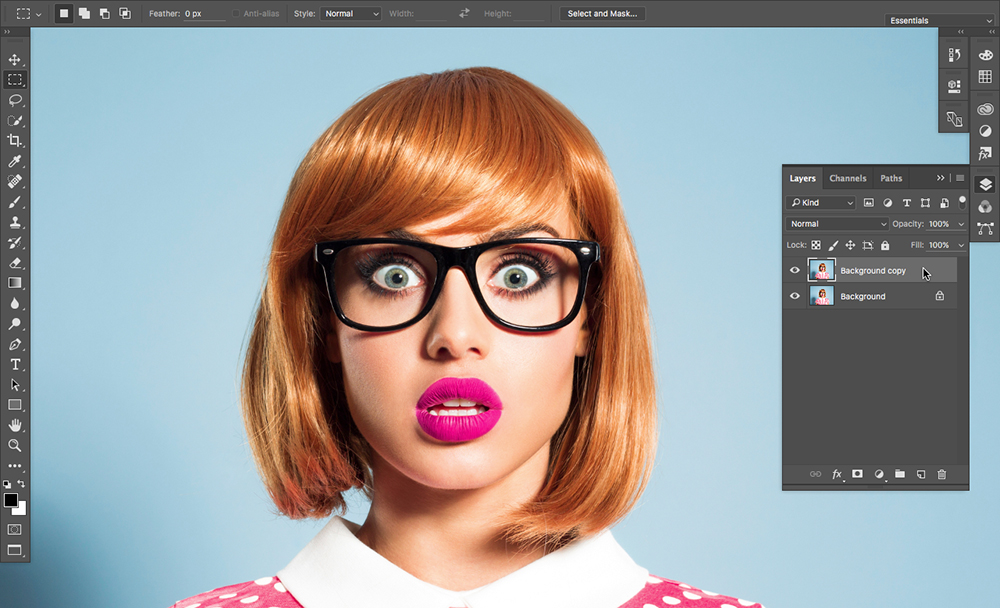
At this point if you want to retain the original image then you may want to duplicate the layer so that you have the original unaffected portrait to refer back to later. Alternatively you could convert the layer to a smart object which would enable you to re-open the image in liquify at a later time and either further edit it, or simply reset it back to the original. Now navigate to Filter —> Liquify to bring up the liquify filter panel.
03. Enlarge the eyes
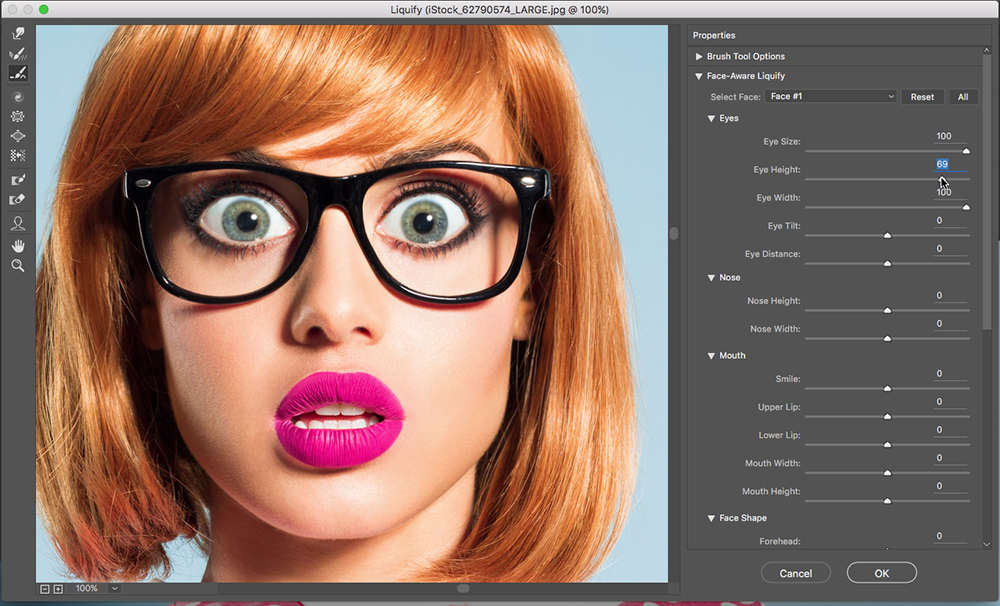
Navigate to the Face Aware Liquify Drop down and then the eyes drop down to adjust the size of the eyes. Photoshop will automatically detect the correct area of the face so simply adjust the sliders for the eye size, height, width, tilt and distance until you’re happy with the results.
If there is more than one face within the composition then you can select which face that you’d like to adjust from the Select face drop-down at the top.
Get the Creative Bloq Newsletter
Daily design news, reviews, how-tos and more, as picked by the editors.
04. Adjust the mouth
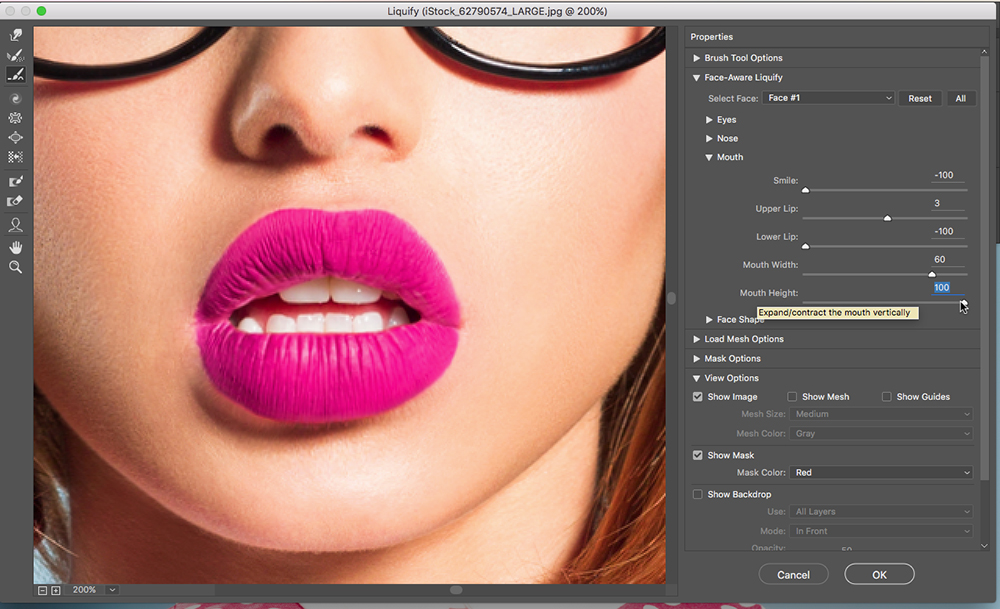
Now move on to mouth and repeat the process adjusting the sliders as you go until you’re happy. The image I’ve chosen is a good example of where a smile would look abnormal as she already has a surprised look with a down-turned mouth. The key is to accentuate and exaggerate the expressions that the subject already has for a more believable look.
05. Manual adjust
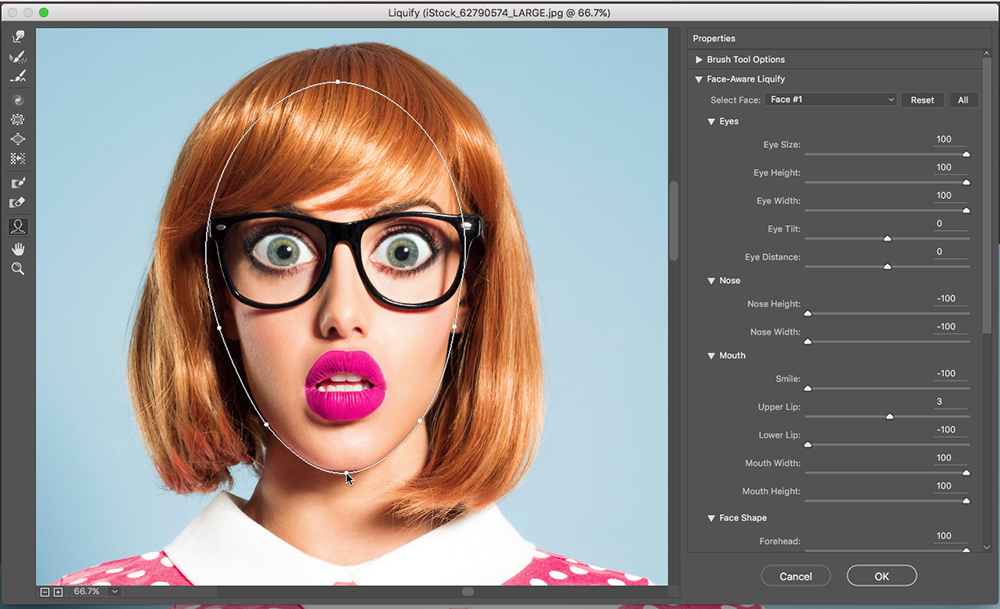
Finally, if you wish to manually adjust the features of the subjects face then simply click on the Face Tool in the tool bar on the left hand side and hover over the area of the face that you want to adjust. You’ll then be able to click on the adjustment tools and easily adjust all areas of the face. Once happy, simply click OK and if you’ve duplicated the layer then you’ll be able to easily see the before and after results.
Of course if you want to really distort the face then you could run the filter again and again until the subject is completely unrecognisable.

Thank you for reading 5 articles this month* Join now for unlimited access
Enjoy your first month for just £1 / $1 / €1
*Read 5 free articles per month without a subscription

Join now for unlimited access
Try first month for just £1 / $1 / €1
Luke is a creative director, visual designer and digital artist, who works at THG Studios in Manchester as creative director of beauty. He previously worked for Future Publishing, where he was art editor of leading magazines such as Guitarist, T3 and Computer Arts.
