How to render a photorealistic sky
Learn how to create a realistic cloud-filled sky using Vue xStream.

For this tutorial, we'll be using Vue xStream to create a sky full of clouds. While you could choose to recreate the look of clouds by using smoke sims, for example FumeFX and the Phoenix FD plug-in for 3ds Max 2014, Vue xStream is great as it has a special section for clouds, with lots of parameters to adjust – that's why it's used by many animation and VFX studios.
Vue is based entirely on real-world clouds, so it's very easy to get up and running in this software because it has many default cloud set-ups to help you understand the parameter settings. These settings also help when you're making your own clouds.
Before you start working on this kind of effect, you should have a good understanding of what kind of clouds you want to create. You need to know what density you'd like, what the shape of the clouds should be, what height is correct for your chosen type of cloud, how sunlight affects cloud shading, and so forth.
I can't teach you every parameter of this software, as there are many and this would take a lot of time. Instead, we'll focus on the key stages and settings you need to know to create a believable cloudy sky.
This is very interesting subject, because you can't define one fixed process when creating this effect. As much as you will use your creativity and tools, you will create different types of effects every time you approach the subject. Follow my tutorial, and then you can use it as a base to begin experimenting yourself.
Being familiar with software is the key to getting great results. Start by clicking Create New>Empty file to launch the software workspace. On the right hand side, you can see Object Properties and Camera Control; inside Camera Control you can see the small render preview. World Browser includes all of the layers, (such as Geometry, Camera, Sun Light and Clouds) so you can add or remove layers easily using this browser.
Download the files and accompanying video for this tutorial.
Get the Creative Bloq Newsletter
Daily design news, reviews, how-tos and more, as picked by the editors.
01. Create a cloud layer
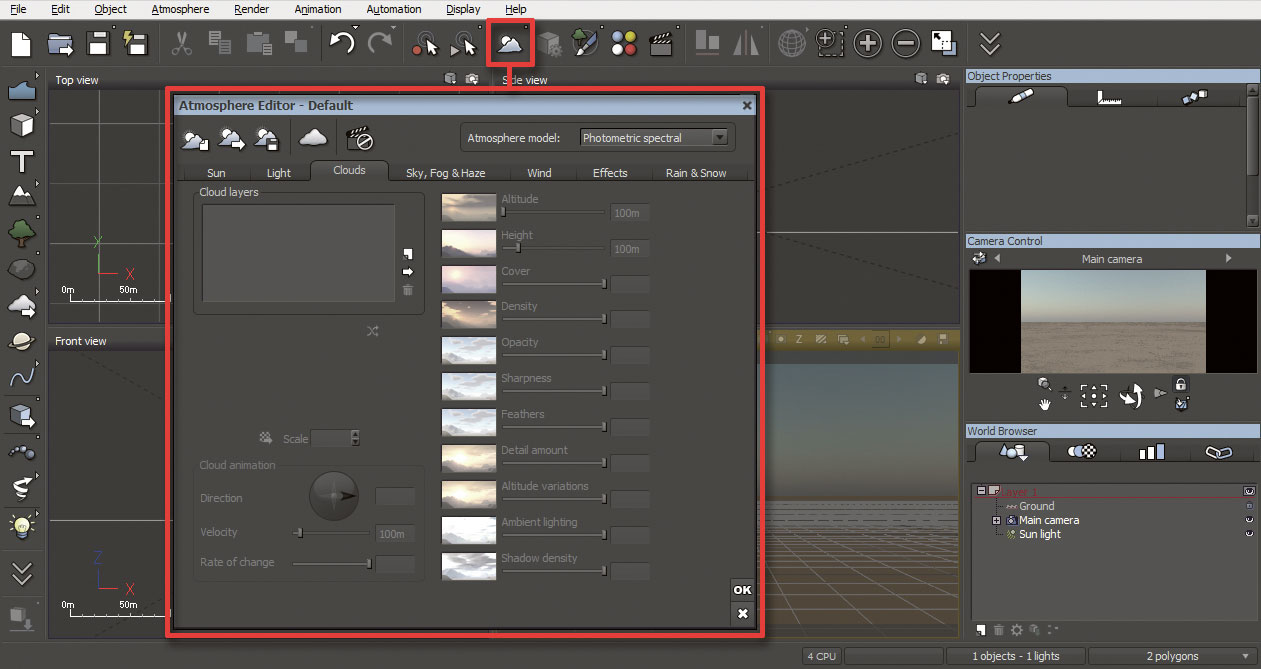
To start, go to Create New>Empty file and add a cloud layer. As we aren't going to see the clouds from the ground, it's important to adjust the cloud layer to get the correct perspective for a sky view. I place the camera on top of the clouds (for a dense view, place it inside the clouds). To do this, go to the Object Tool Bar and click Cloud>Atmosphere Editor>Clouds.
02. Set the cloud parameter
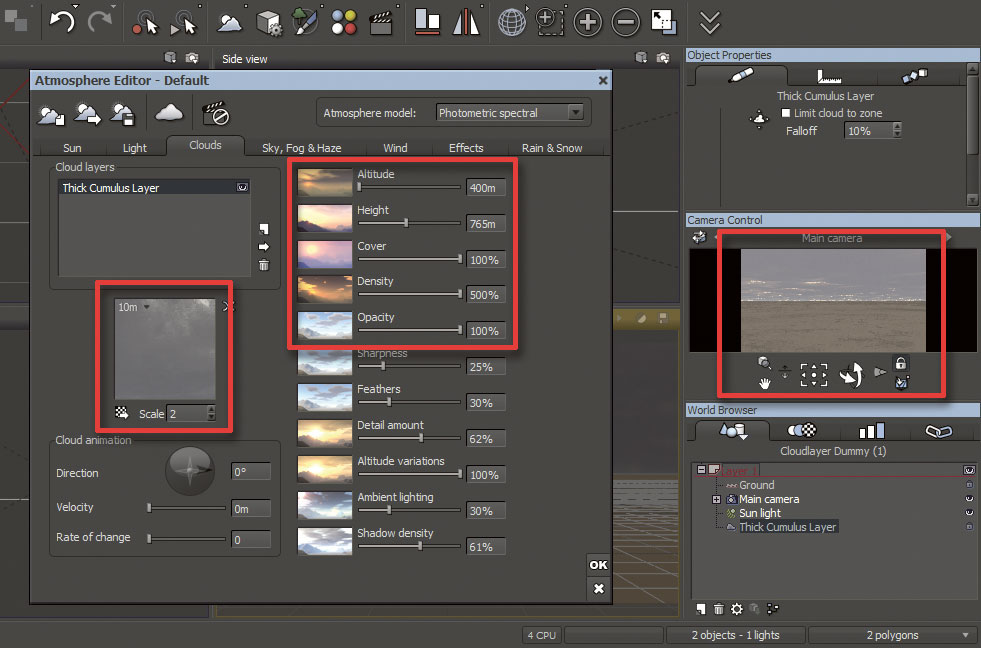
Now go to Atmosphere Editor>Clouds>Cloud Layers and click the Load button (Arrow Icon). A Materials window will appear stocked with ready-made cloud presets, so just select any one cloud layer. I choose Thick Cumulus Layer and set the Parameters as: Cloud Scale 2.0, Altitude 400m, Height 765m, Cover 100%, Density 100%, Opacity 100%. Now click OK and you will see a preview appear in Camera Control window. After setting the Clouds Layer, it's time to work on Camera Properties and set up.
03. Set the camera height
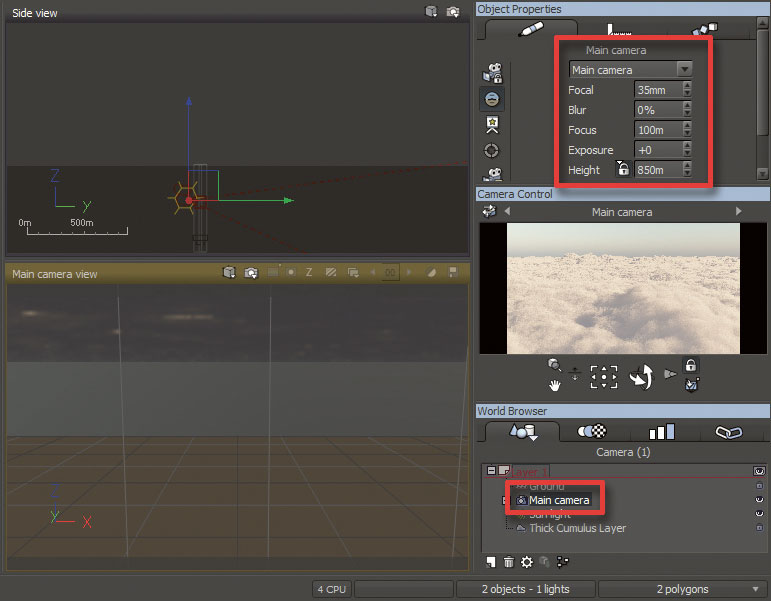
First, select the Camera from World Browser, and you'll see the camera properties menu appear in Object Properties. If you want, you can make changes in all parameters, but I only want to change the height of the camera, so just set Height to 1.05km. Now you'll see the view from the top of the clouds. The next step is to set up our sun to light the scene.
04. Sunlight settings
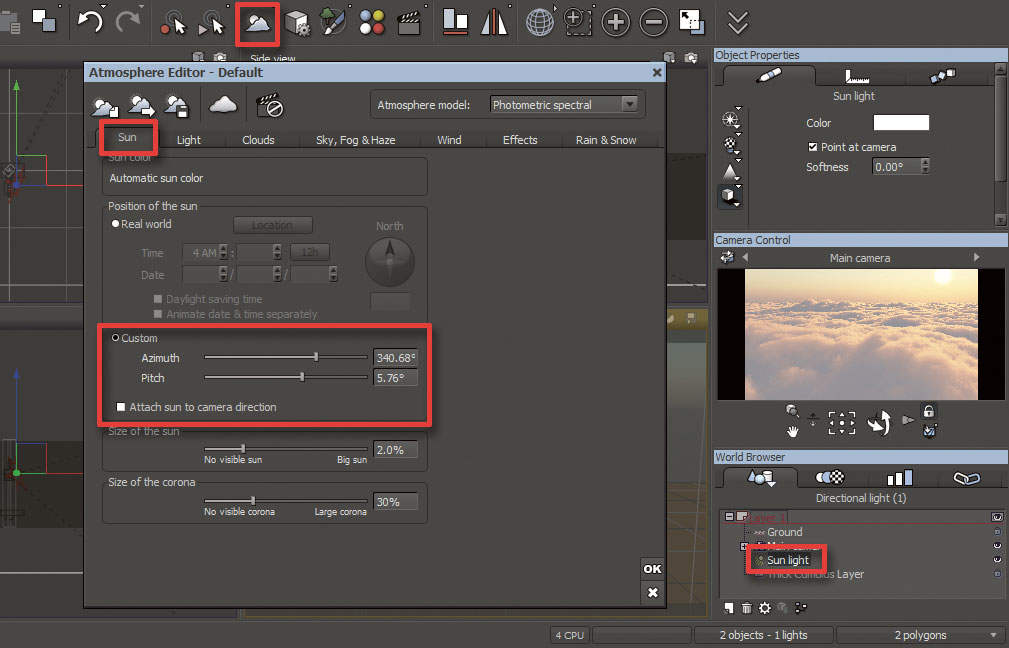
To set up the sun, start by selecting Sun Light and clicking Atmosphere Editor>Sun>Position of the Sun, and adjust the Azimuth and Pitch parameters – these dictate the horizontal and vertical position of the sun. Make sure to untick the Attach Sun to Camera Direction, otherwise your sun will move with the camera angle, which will create problems when working with an animated camera.
05. Render setup
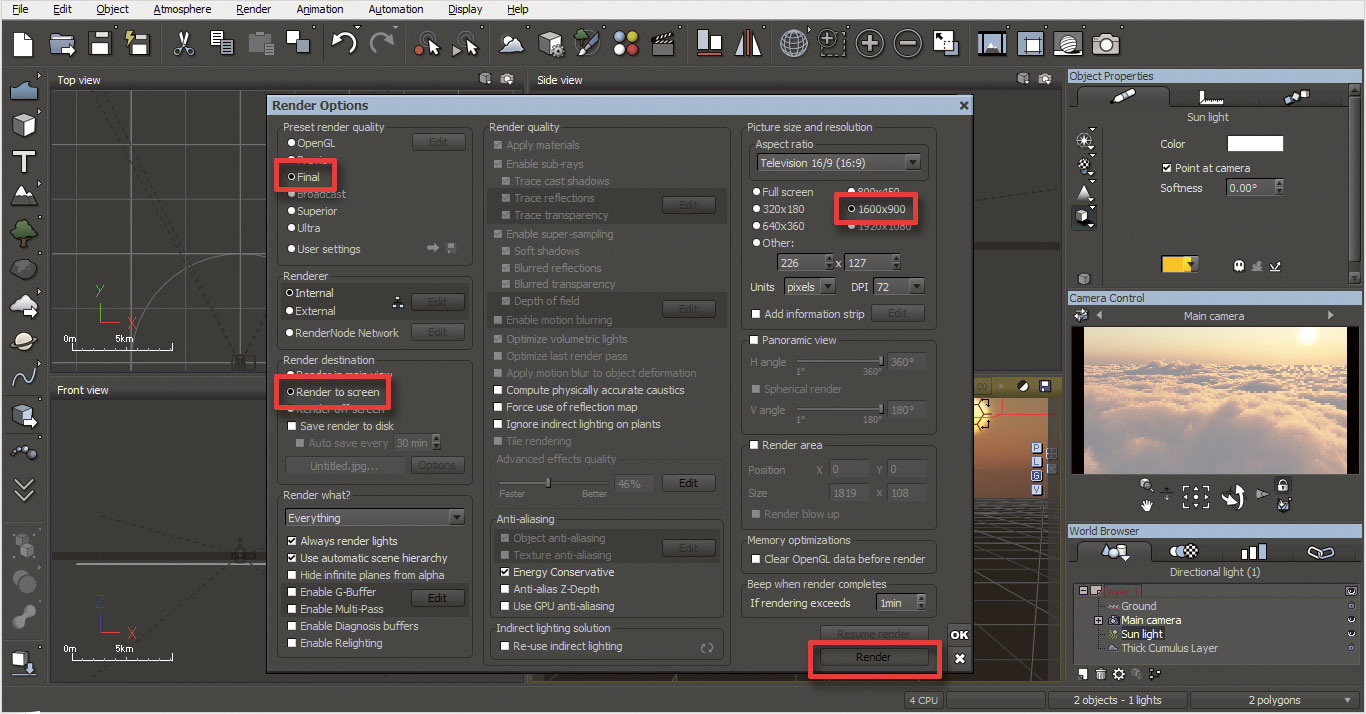
Before rendering, check your scene in the preview window. Now right-click on the camera icon (top right): A settings window will appear. Make these changes: set the Preset Render Quality to Final, Render Destination to Render to Screen, Picture Size & Resolution to 1600x900. Now click Render. It will take 15 minutes to an hour to render a single frame, once it's finished, save it manually.
06. Composite in Photoshop
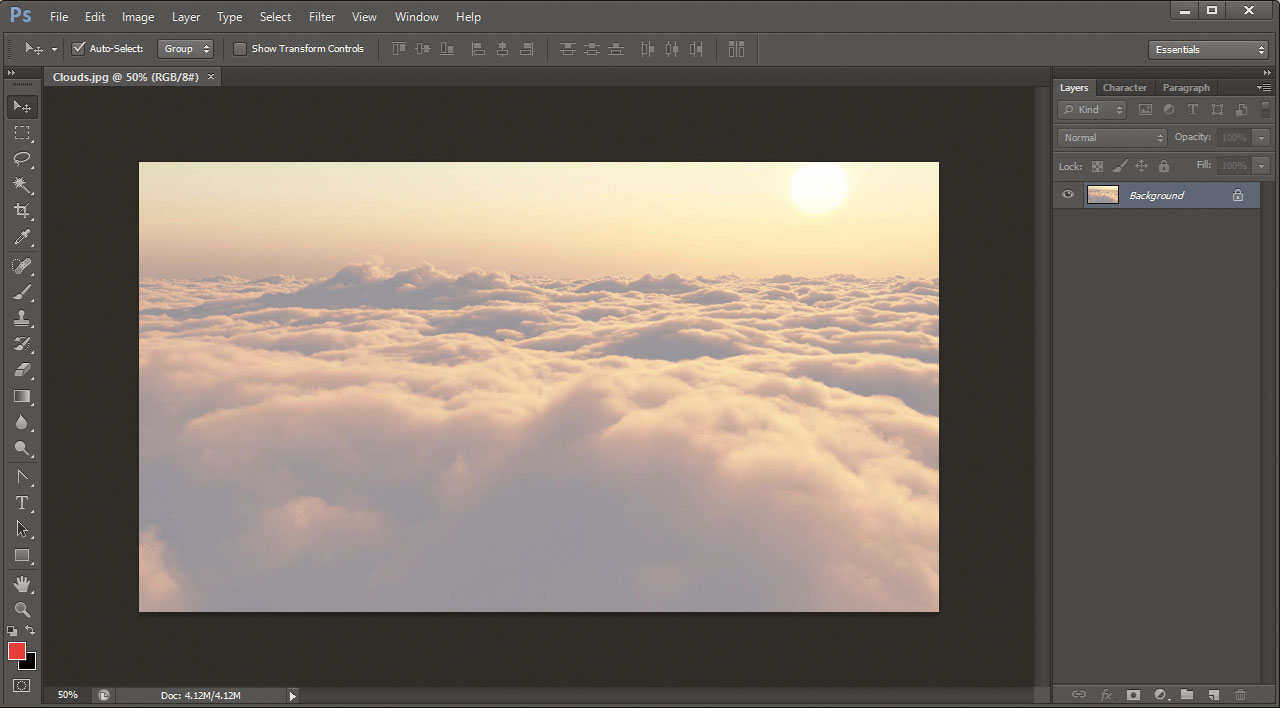
Once the render is finished, you can import it into picture editing software, such as Photoshop, as a single frame, or if it's a sequence then import into After Effects (or any other compositing software). I'm using Adobe Photoshop, so I import the element and then drag it into Time Line. I select my cloud layer and go to Filter, then click Color Correction and select Brightness & Contrast, Color Balance and Sharpen. Now make modifications in parameters as per your requirements, and you have your cloudy sky.
This article originally appeared in 3D World issue 214; buy it here!
Related articles:

Thank you for reading 5 articles this month* Join now for unlimited access
Enjoy your first month for just £1 / $1 / €1
*Read 5 free articles per month without a subscription

Join now for unlimited access
Try first month for just £1 / $1 / €1
