
If you're wondering what foreshortening in art is, we're sure you're not alone. Hopefully, by the end of this post, you'll know exactly what it is and how to create believably foreshortened images. It's a technique that is extremely difficult to master. In fact, artists have struggled with foreshortening since its first reported use by Florentine artist Fillipo Brunelleshi back in 1415, so if you're having trouble getting to grips with it, you're in good company.
Thankfully, there are a few easy steps to follow that will help you get to grips with the basic principals of foreshortening. We'll share those with you, plus we'll show you a few drawing techniques that will help you 'sculpt' your subject's dimensions using pencil or brush. Underpinning foreshortening is perspective – you can take a look at our article on one-point perspective for more information on that.
To hone your skills further, check out our guide to the art techniques you need to know, or our roundup of how to draw tutorials.
What is foreshortening in art?
If you’re having trouble portraying depth in your drawings and paintings then chances are you’re struggling with something called foreshortening. Foreshortening is all about realistically conveying three dimensions in a 2D medium by showing objects moving away from the viewer. Being able to accurately draw objects receding in space will make your drawings and paintings more realistic and help pull your viewer in to the scene you want to set.
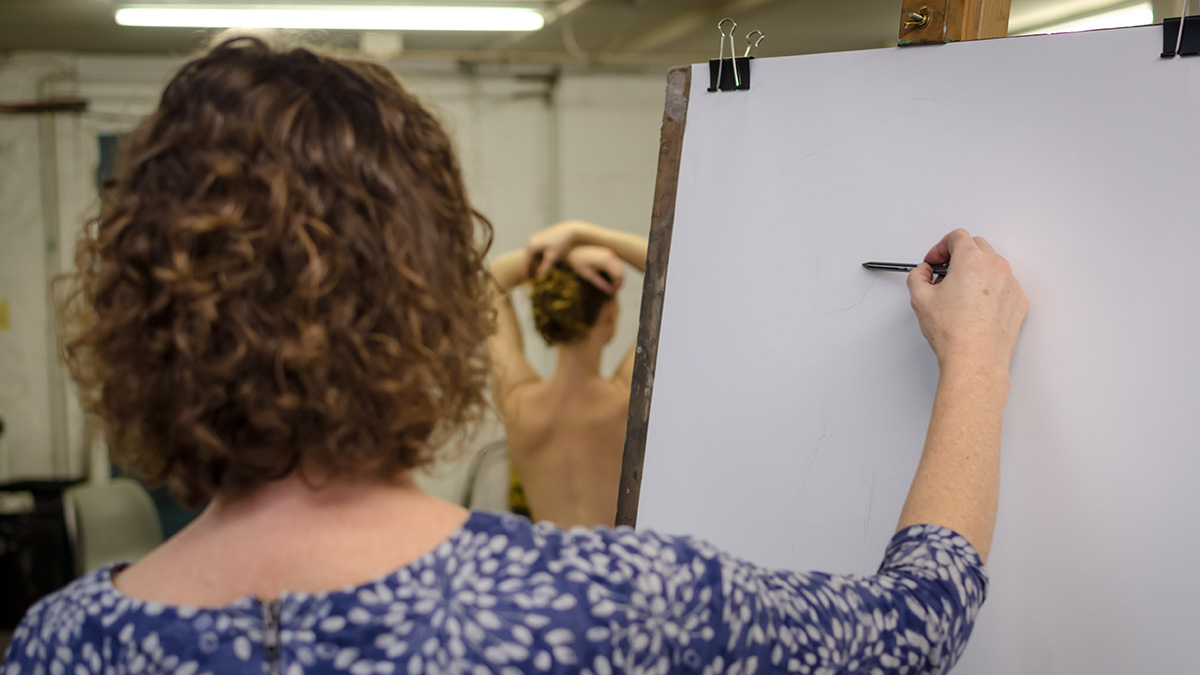
We’re going to look at foreshortening in the environment most people first come across it: the life drawing class. We'll focus on a figure reclining in strong foreshortening to really push this theory, but the same techniques can be used whatever your subject might be.
01. Plan your space
First, you need to set out your subject's boundaries on your chosen support (i.e. your paper or canvas). It’s all too easy to start drawing a foot at the bottom of the page, only to find out later that the head actually ends about six inches above the top of the page.
The tendency is for the artist to try and correct this by squishing the figure into the page, which completely throws out any realism in your picture. If, further on in the process, you notice you’ve done this, then it's much better to start again.
02. Add guidelines
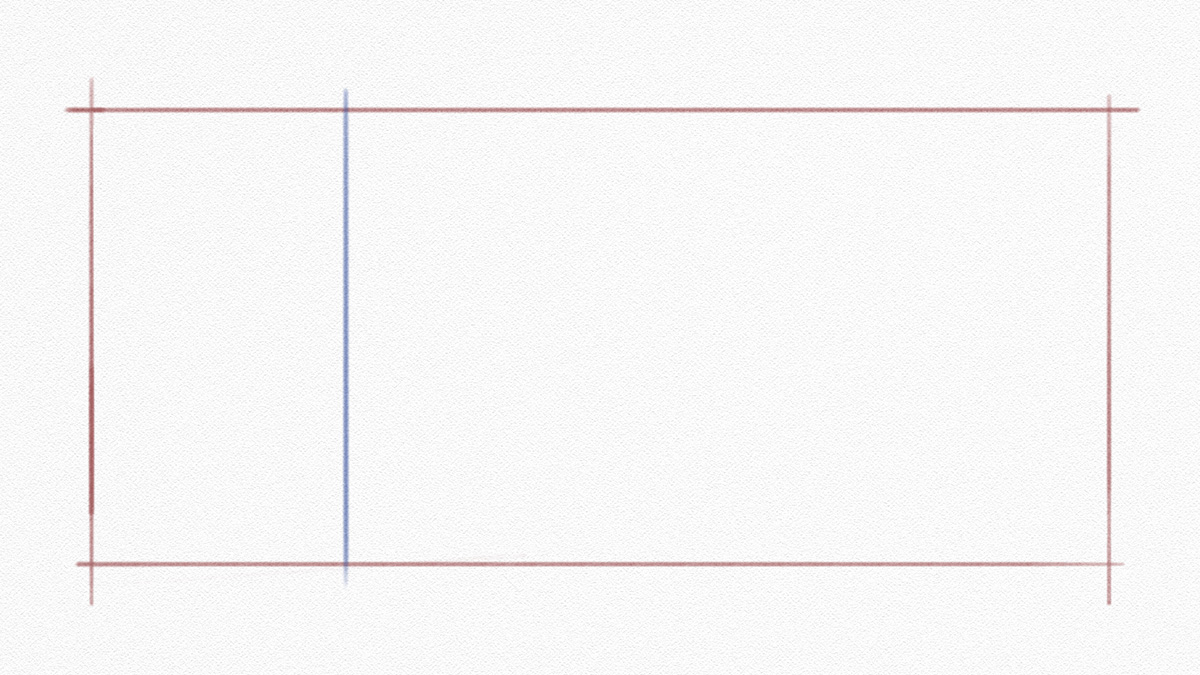
Try and fit your figure into a rectangle/square and draw it on the paper lightly so it’s easy to amend or delete later. Use measuring techniques to make sure this is as accurate as possible.
Next you’ll want to draw in a plumb line. This is a vertical line that will act as a marker to measure against throughout the building of your composition. It doesn’t necessarily have to be the centre line of of your composition (all will become clear soon).
03. Forget everything you think you know
Forget all your preconceived mental images of how you think the human form should look. Observe and draw what you see, not what you think you should see. This sounds simple, but it’s the number one stumbling block for every artist that attempts foreshortening.
Measure, measure and measure again, and trust your measurements. In strong foreshortening the human form does not fit into our preconceived ideals.
04. Block in the large forms
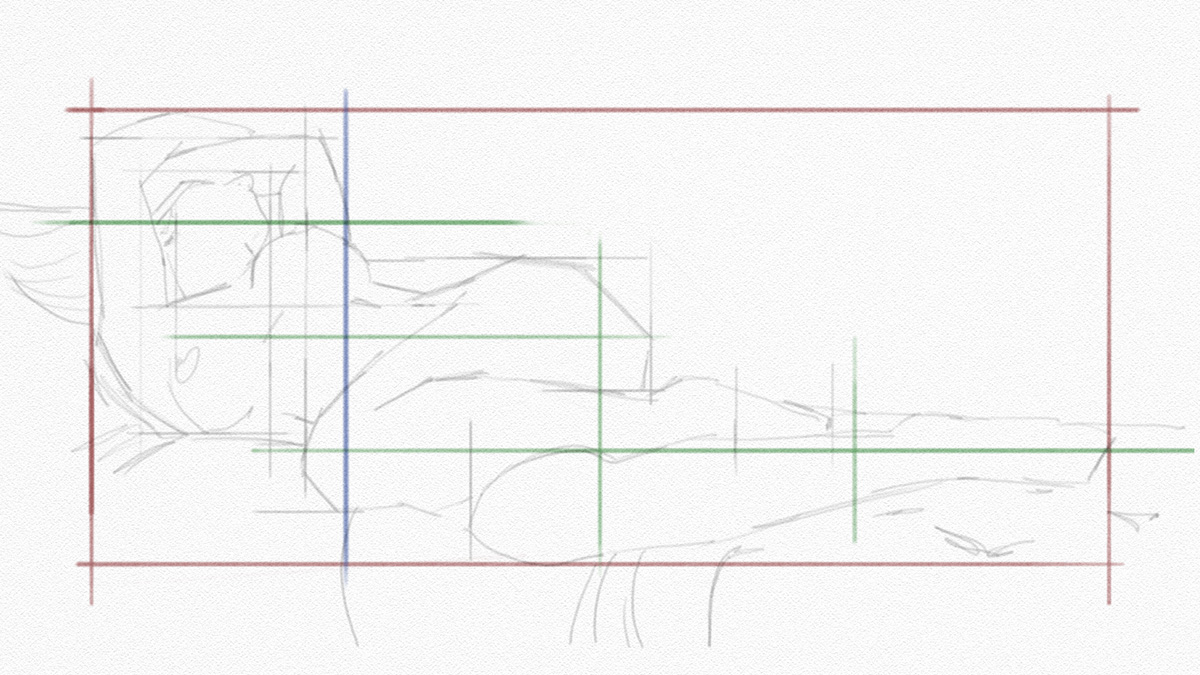
Start off by drawing in the large form shapes and ignore any type of detail. Using your plumb line to measure off, you can see how the main anatomical structures interact with each other.
Measuring absolutes can be helpful – halfway, quarter way points and so on. Mark halfway up your vertical line from the bottom of your form to the top and see where this falls on your subject – it might not be where you imagine it is. Keep things light and simple so they’re easy to amend, and keep measuring.
05. Pull everything together
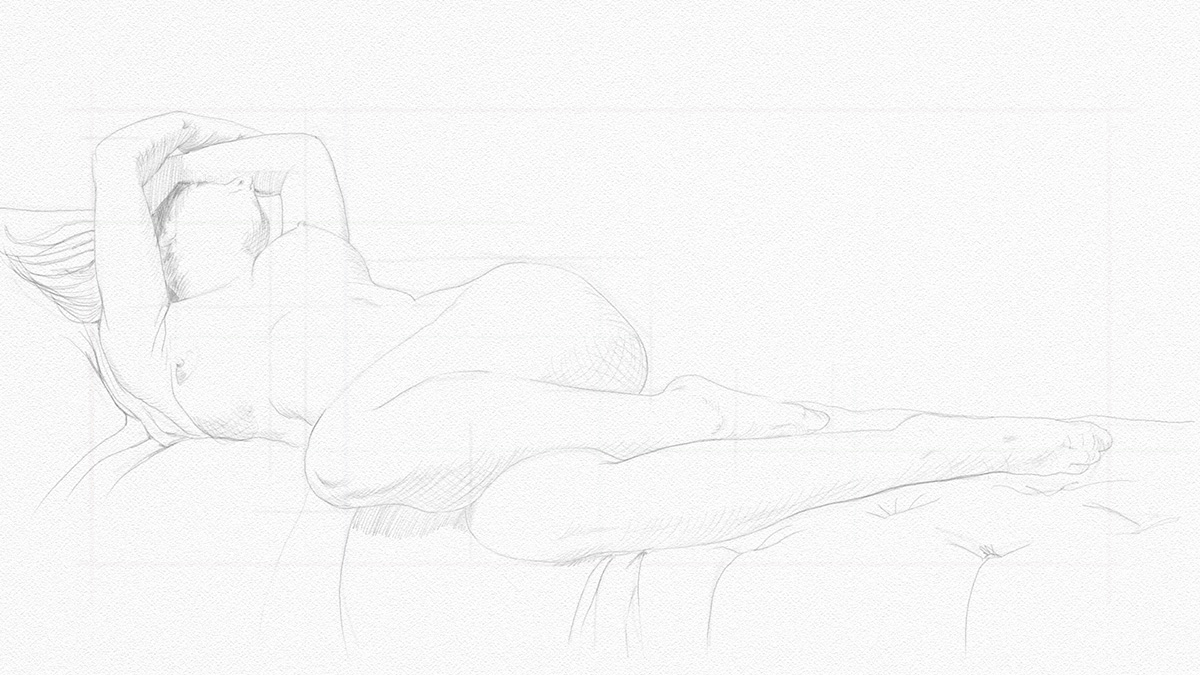
Once you’ve got the main large areas of anatomy in place it's time to start pulling everything together. It’s vitally important to try and think of your subject in terms its sculptural three dimensions at this point.
You have to see, and importantly draw, how the anatomy stacks together, flesh in front of flesh. Feet in front of calves, calves in front of thighs, thighs in front of buttocks etc. Let your pencil or paintbrush travel on a journey across the landscape of the flesh, following its undulating plains and describing them with your marks.
Foreshortening techniques to try
In the next steps we'll outline a couple of techniques to help you bring flesh to the bones of your construction drawings. Experiment and see what works best for you. As long as you have a strong foundation to build upon you shouldn’t go far wrong. If you do find things are looking wrong, go back to your main large shapes and make sure they’re 100 per cent accurate.
Whichever technique you go for, a good working knowledge of human anatomy can be really helpful. Take a look at our anatomy masterclass to help you get started. We'd also recommend investing in a good anatomy book like Anatomy for the Artist by Sarah Simblet or Gray’s Anatomy (take a look at our guide to the best figure drawing books for more options). The greater your understanding of how the human form is constructed, the easier you’ll find foreshortening.
Get the Creative Bloq Newsletter
Daily design news, reviews, how-tos and more, as picked by the editors.
01. The geometry technique
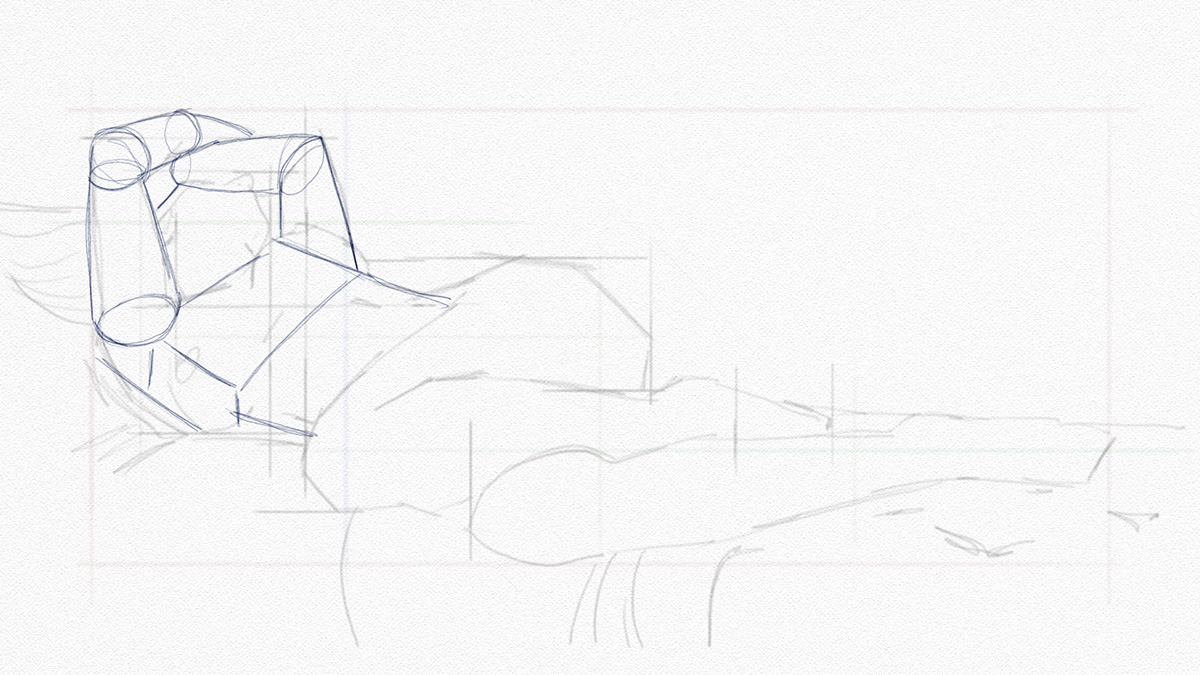
Breaking the human form down into simple geometric shapes can be really helpful when you’re trying to get your head around anatomy, especially with a foreshortened perspective. Imagine the limbs are tapering cylinders and the torso is a selection of cuboids. Also, try and imagine how these geometric shapes fit together and fit accordingly. Once you have these simple shapes in place and the proportions are working, it can be a simple matter of knocking off the edges to reveal the human form underneath.
02. The coil (or spiral) technique
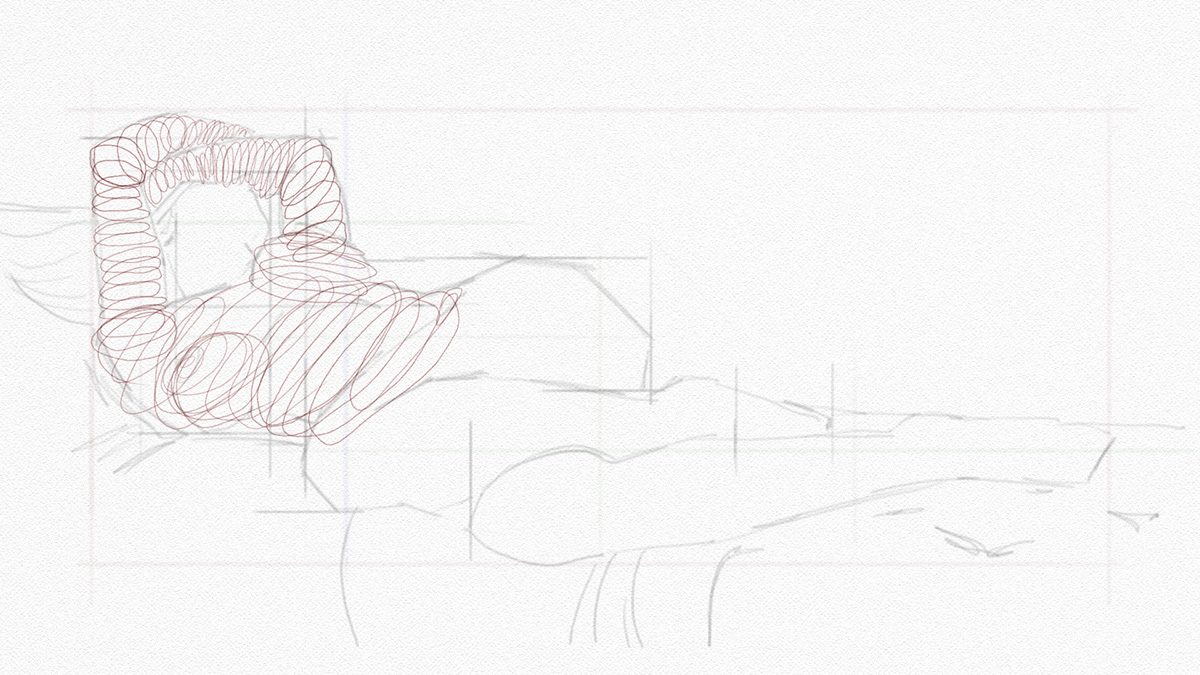
The coil (or spiral), technique is all about building three dimensions by drawing form through the application of concentric eclipses, or spirals, that follow the contours of your subject. It's definitely best to use a pencil quite lightly when applying this technique as it can become rather messy and you’ll need to do a fair bit of rubbing out.
When describing form that is vertical or horizontal, the coils will appear almost flat or as simple lines. As soon as the form moves away from you or towards you then the coils open up, morphing from lines into eclipses and on into near circles before flattening off again when the form changes direction. It's a great technique for feeling out your form.
Read more:

Thank you for reading 5 articles this month* Join now for unlimited access
Enjoy your first month for just £1 / $1 / €1
*Read 5 free articles per month without a subscription

Join now for unlimited access
Try first month for just £1 / $1 / €1
Rob Lunn is a self-taught painter, and loves to paint in oils. His influences are Vincent van Gogh, Caravaggio and Ilya Repin. He has taught art workshops since 2012 and gets a real buzz from teaching people to draw and paint. He has contributed to Paint & Draw magazine and bookazines, and has also provided traditional art tutorials for Creative Bloq.
