Elementor tutorial: how to get started designing your own website

Elementor for WordPress is a great way to create a website. Using a codeless, drag-and-drop editor, you can customise pretty much every aspect of your website’s design. There are more than 90 widgets to choose from – including text, images, buttons, and dynamic content – that you can drag and drop to any location across your website’s pages and posts for the most visually stunning combination.
Elementor is available as a free plugin, but the best features, including premium support and the ability to build a whole template from scratch, are locked behind a premium subscription. Elementor Pro helps you design not only posts and pages but also headers and footers using the same drag-and-drop interface. Elementor Free, however, is limited to only post and page customisation.
Regardless of which version you choose, Elementor is a robust and flexible plugin that lets you create beautiful designs that can either enhance your existing theme or help you build a new one from scratch. In this article, we take a look at everything you need to know to design your website with Elementor and WordPress. Also see our best website builders list for more options, or our list of WordPress tutorials for more on mastering WordPress.
Elementor tutorial: Preparation

Before you start using Elementor, you must have a website that’s running the latest version of WordPress. You can make your own WordPress website by following the step-by-step instructions from our beginner’s guide. Once done, you’re ready to move on to the next step and begin installing Elementor.
01. Install the Elementor plugin for WordPress

Elementor is a free plugin with an optional paid version for WordPress. To download and install the plugin on your WordPress website, you will need to either visit Elementor.com or access the WordPress plugin repository. Note that the paid version of the plugin is available exclusively on Elementor.com.
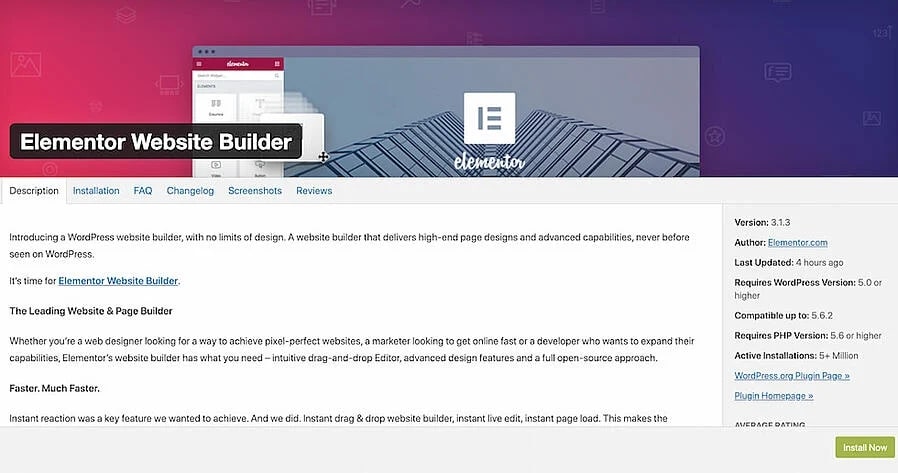
If you just need access to the free version of Elementor, you can download and install it directly from the plugin repository. Just visit the admin page of your WordPress website (usually www.yourwebsite.com/wp-admin.php). From there, navigate to Plugins > Add New and search for Elementor Page Builder. Once the plugin shows up in the search results, you can click on Install and then Activate Plugin.
You can also download the plugin from Elementor.com. Just visit the website and click on Get Started. From there, you can follow a simple wizard that will help you choose the plan that’s right for you (free or paid) and provide you with a downloadable ZIP file. You can upload the ZIP file to your WordPress website by navigating to Plugins > Add New > Install Plugin in your WordPress Admin.
Daily design news, reviews, how-tos and more, as picked by the editors.
If you have subscribed to the paid version of Elementor, you will need to install an additional plugin called Elementor Pro in addition to Elementor. It’s available for download only on Elementor.com once you have paid for a premium plan and can be installed by uploading to your WordPress dashboard.
02. Create your first page or post with Elementor

Irrespective of which version you subscribed to, Elementor will allow you to edit individual pages and posts using a drag-and-drop editor. Just navigate to the post or page you wish to edit by visiting your WordPress dashboard and navigating to Pages > Add New or Posts > Add New. Once you’re inside the page or post editor, click on Edit with Elementor to switch to the Elementor UI.
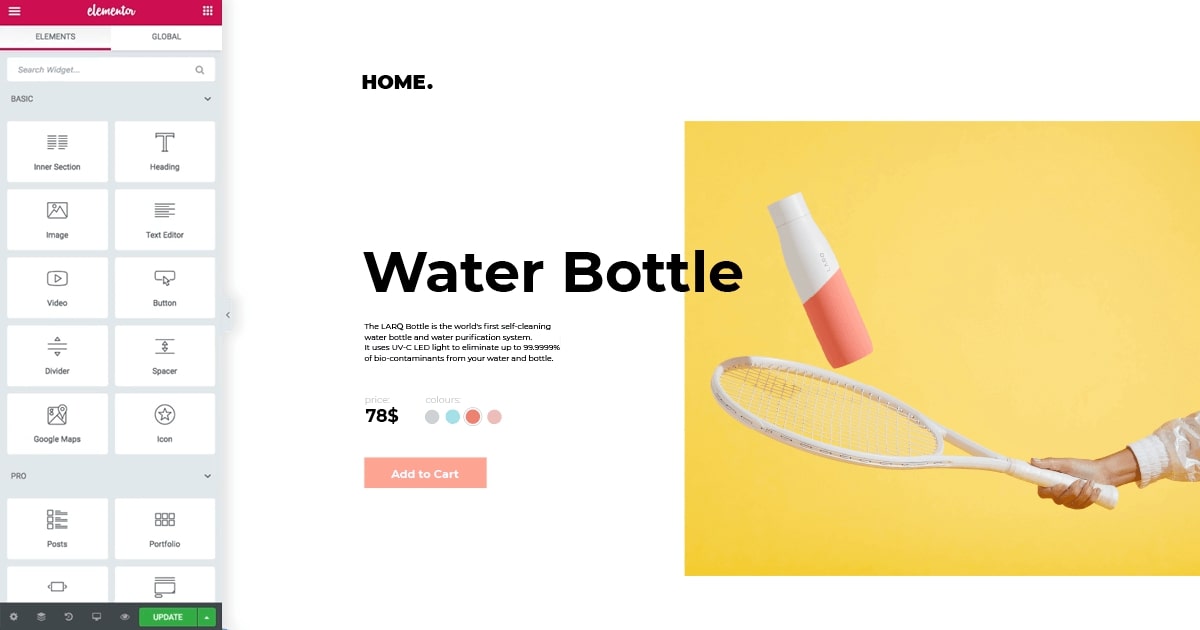
Elementor features a minimalistic drag-and-drop interface that lets you customise your pages and posts using columns or grids. There’s a sidebar on the left with a series of elements that you can drag and drop onto your page to the right. These elements include sections, headings, text, images, buttons, and more. Of course, the paid version comes with more elements than the free version of Elementor.
From here, it’s pretty self-explanatory. Just click and drag the elements you need to create the desired layout for your page. You can also choose from one of the many pre-made templates available via the template library if you don’t feel like creating a custom layout. To access the template library, you can click on the small folder icon in the content area of your page.
03. Work with the Elementor theme builder

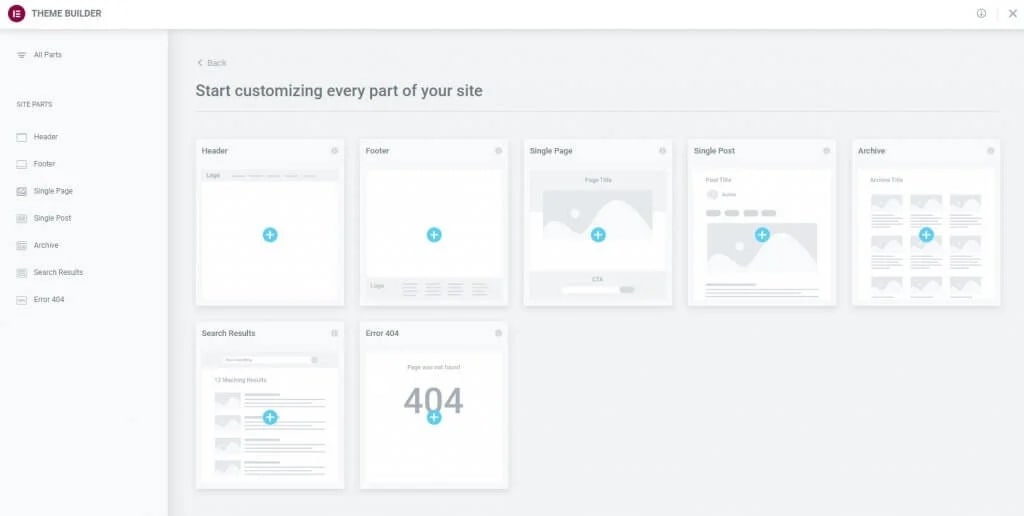
The Theme Builder can be accessed from Templates > Theme Builder on your WordPress dashboard. It unlocks additional options to customise your website and lets you build an entire theme from scratch in WordPress. It’s available only on the pro version of Elementor. Using it, you can add an unlimited number of templates and set them to display under specific conditions on certain areas of your site.
There are several types of templates you can create, including Header, Footer, Single Page, Single Post, Archive, Search results, and Error 404. Elementor recommends adding at least one template to each of these template types in order to create a complete theme for your website. You can also create multiple templates of the same type. For example, you can create a separate header for your landing page and another one for your posts.
The Theme Builder utilises the same user interface as the post and page editor. You can drag and drop elements to customise the design of each template and set it to publish under certain conditions on your website. Elementor’s Theme Builder is easily the most versatile and remarkable aspect of the plugin.
04. Build an ecommerce store with Elementor
WooCommerce is the ultimate ecommerce plugin for WordPress. It is currently used by over 2 million online stores all over the world. Together with Elementor, it can be used to build the ultimate ecommerce website, with an intuitive interface and excellent user experience design.
Once you have installed and activated both WooCommerce and Elementor from your WordPress dashboard, you can customise each and every page of your online store using custom templates. To do this, go to Elementor > Theme Builder and create a new template under Single Product.
This will enable you to customise the product description page of your online store. Just design your page using the drag-and-drop site editor or choose from one of the many available templates to get started. Elementor is fully compatible with WooCommerce and automatically applies the layout changes to all product descriptions across your website.
Read more:

Ritoban Mukherjee is a tech and innovations journalist from West Bengal, India. He writes about creative software, from AI website builders, to image manipulation tools, to digital art generators, and beyond. He has also been published on Tom's Guide, Techradar, IT Pro, Gizmodo, Quartz, and Mental Floss.
