Draw a figure in under five minutes
Get the most out of your life drawing sessions with these 10 simple tips for quick figures.
Sketching a five-minute pose is a lot of fun because it offers just enough time to capture a strong sense of the pose, but not enough time to overwork (or overthink) the drawing. Keeping things simple and being economical is a recurring theme throughout the five-minute process.
The main thing to remember for a successful quick pose is to keep the gist of the subject, so we'll build it up bit by bit, adding tone right at the end. Want more? Check out our roundup of how to draw tutorials. But for now, let's get started!
01. Construct the torso
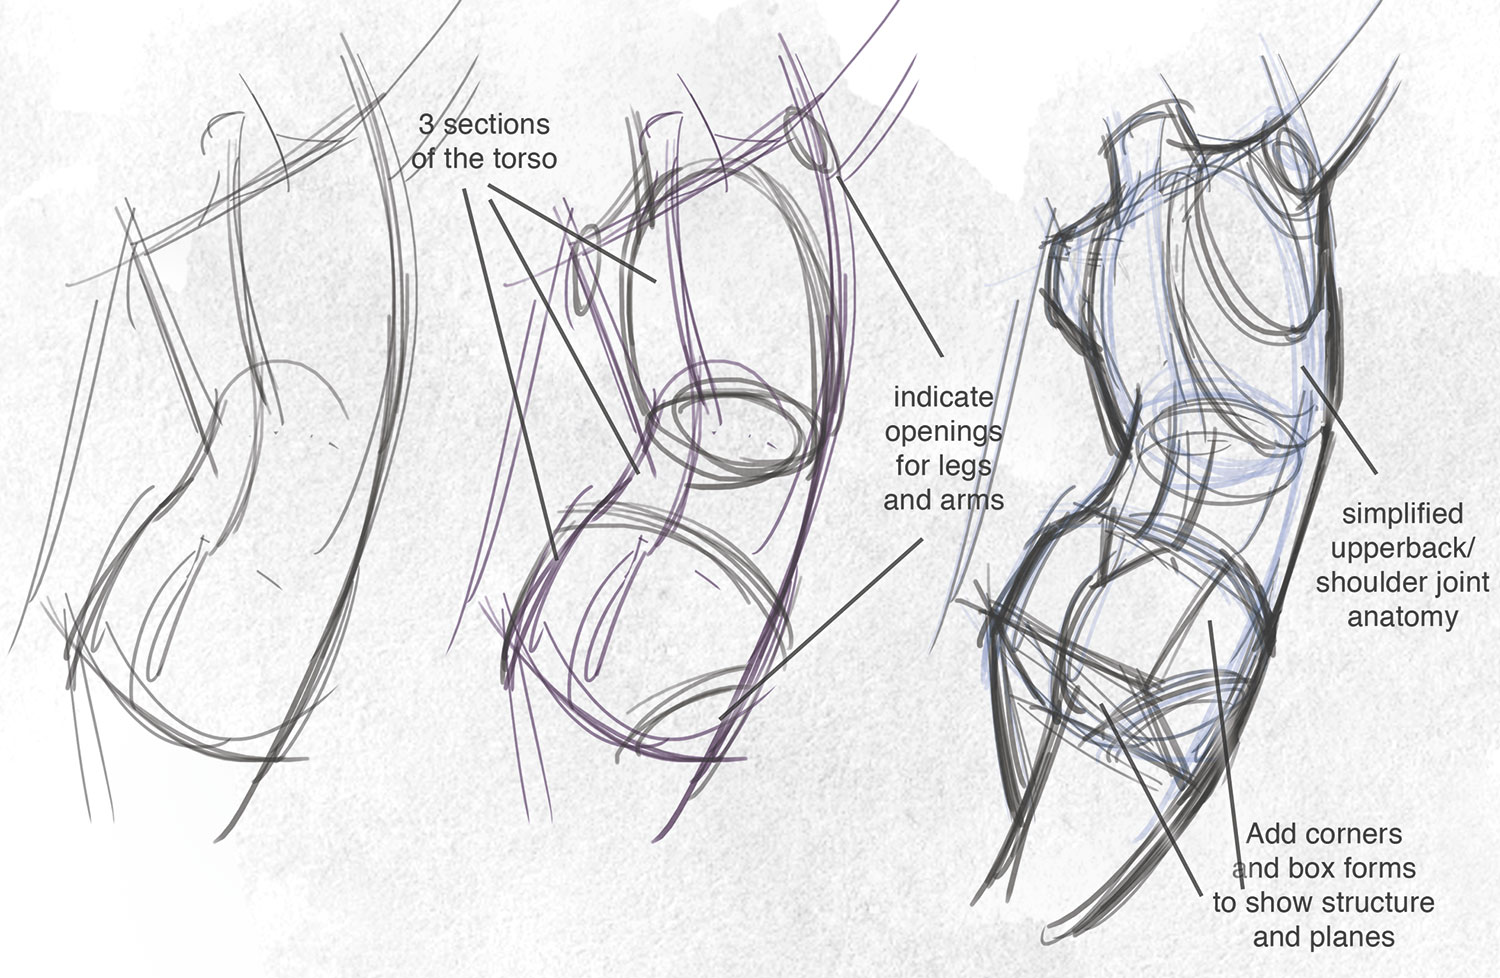
Once the gesture is established, separate the torso into rib cage, abdomen and hips. Then, indicate the openings for the limbs. Next, group the muscles using simple forms. Finally, suggest planes to give the torso structure.
02. Define the limbs
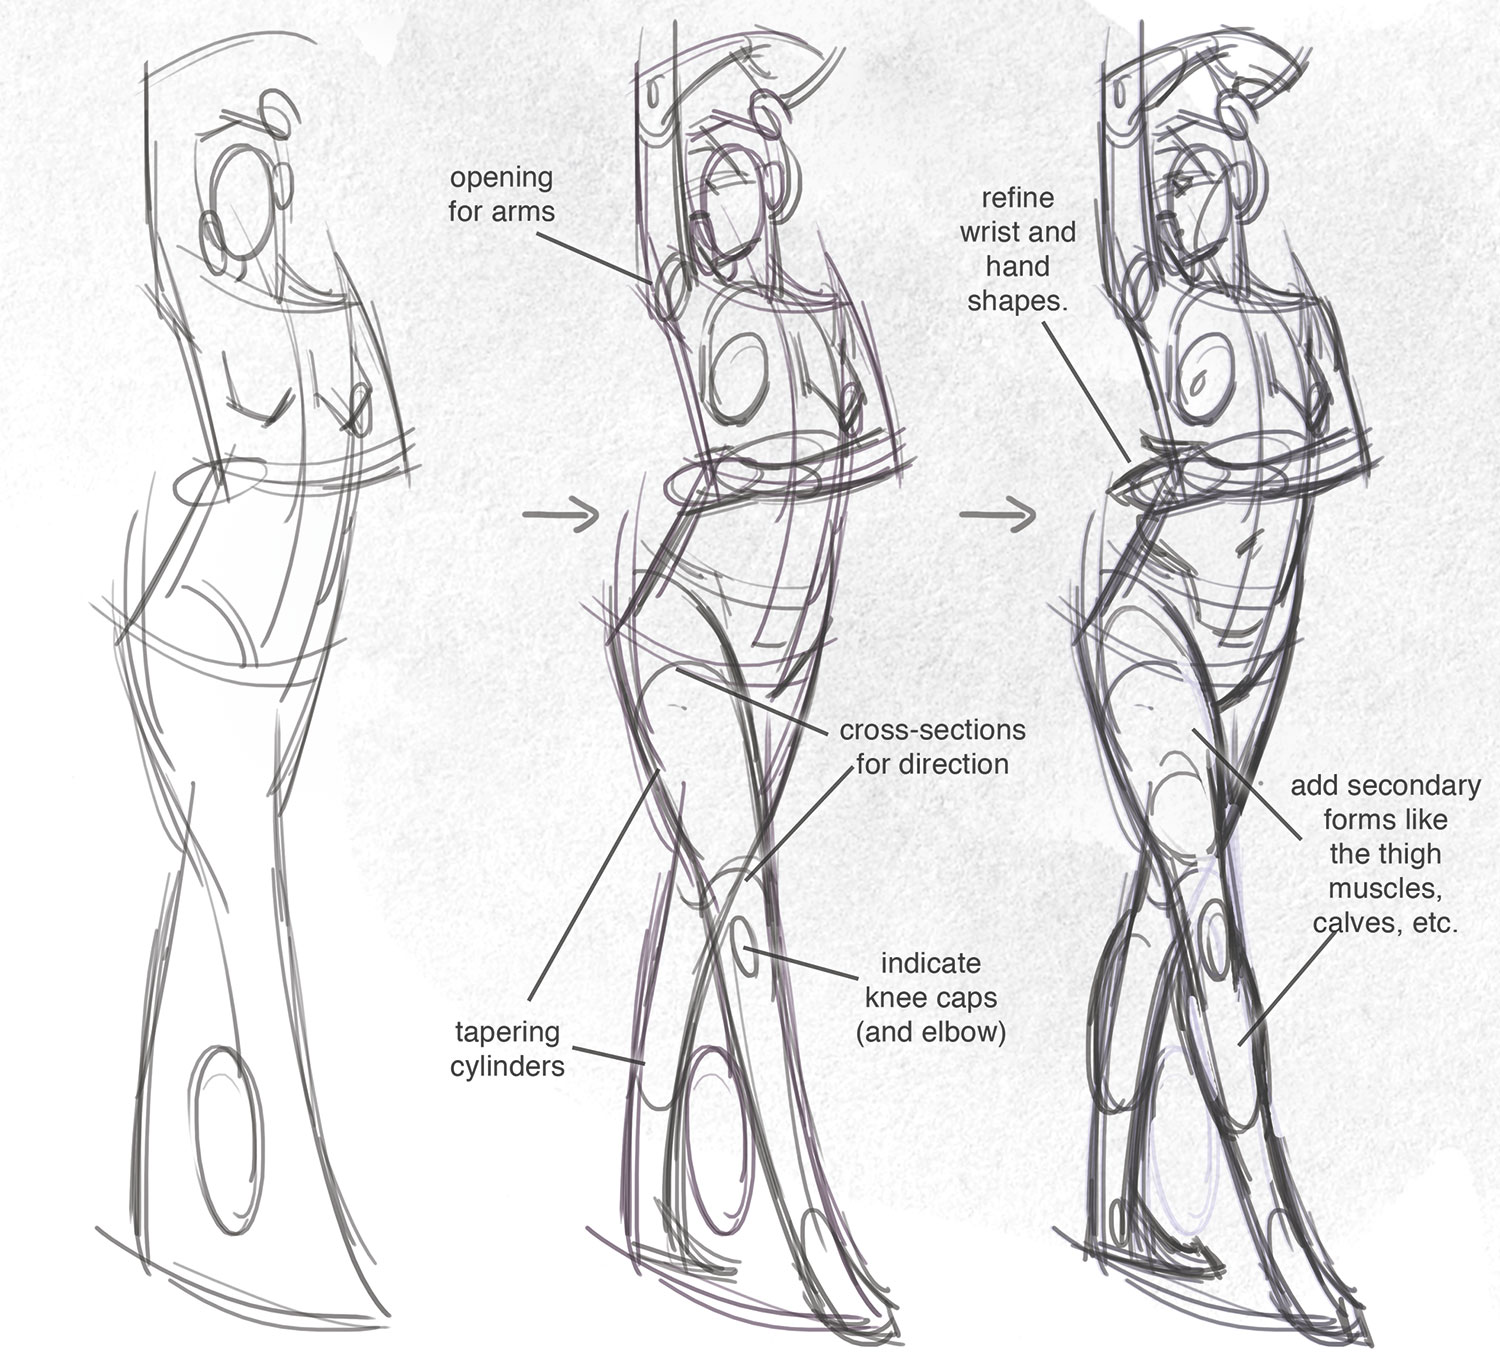
Start the limbs as long, tapering rectangular shapes that flow from the torso down to the fingers or toes. Next, add cross-sections to indicate their position and direction of movement. Finally, use simple ovals to add muscles and indicate kneecaps and elbows.
03. Simplify the anatomy
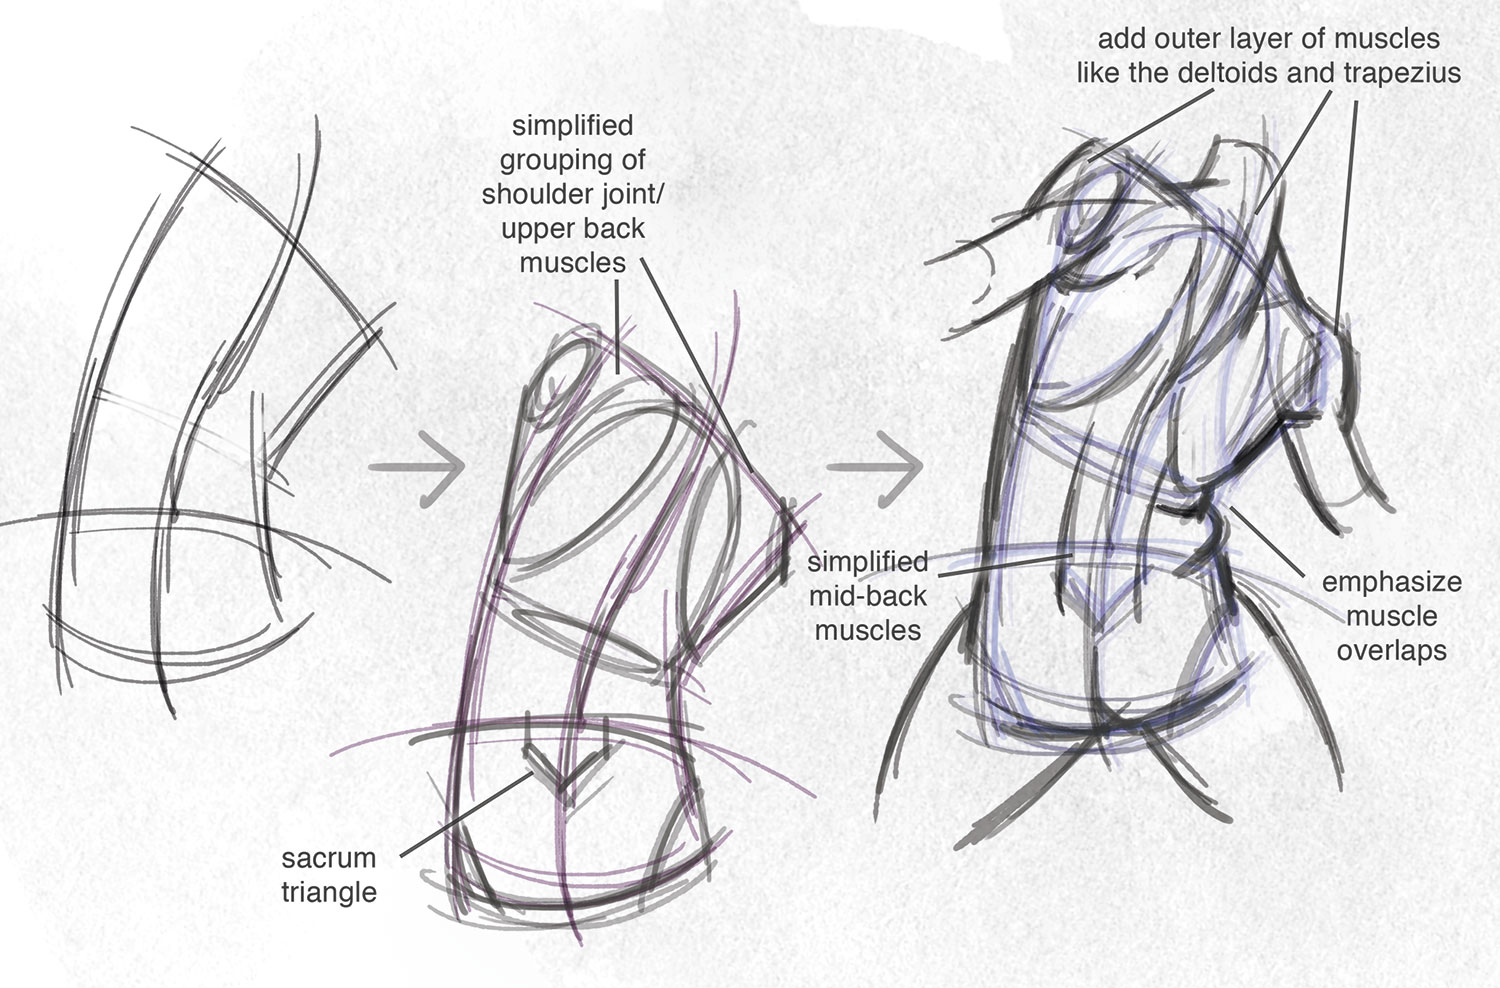
Starting with the torso, group the upper-back muscles (which surround the shoulder) into simple forms. Where visible, emphasise hip bones, knees and elbows. Finally, emphasise the parts where muscles overlap, as this creates the illusion of more detail and brings the drawing to life.
For advanced anatomy tips, try these articles:
04. Begin the head
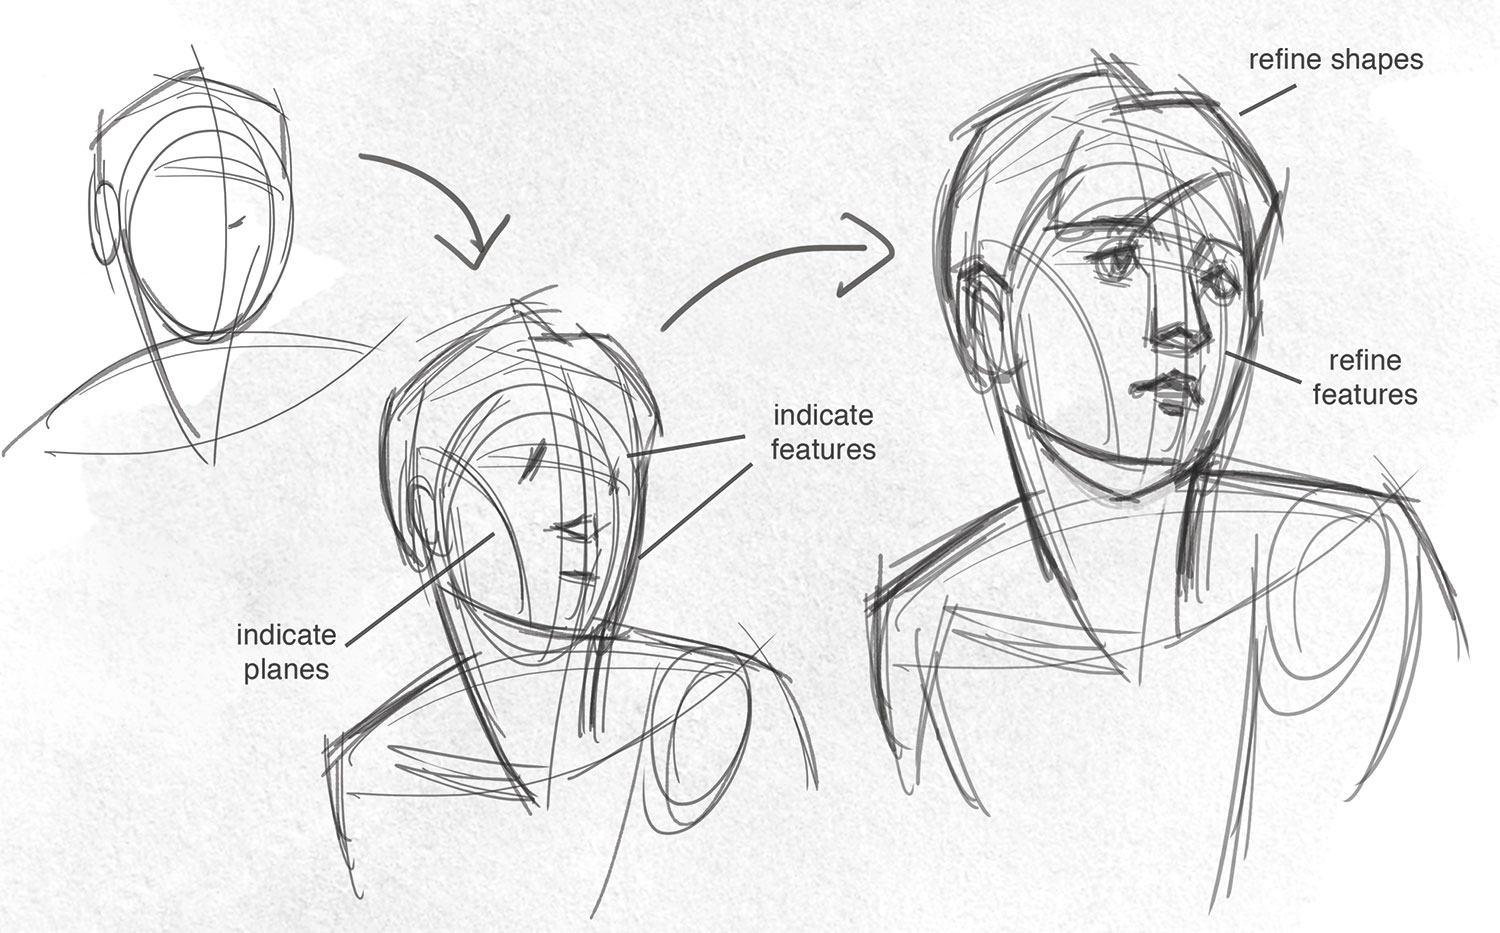
For quick head sketches, begin with the gesture and outer shape, making sure the tilt and rotation is correct. Next, add the major planes, such as the side of the head and brow. Finally, add in the features and define the neck muscles.
05. Sketch the hands
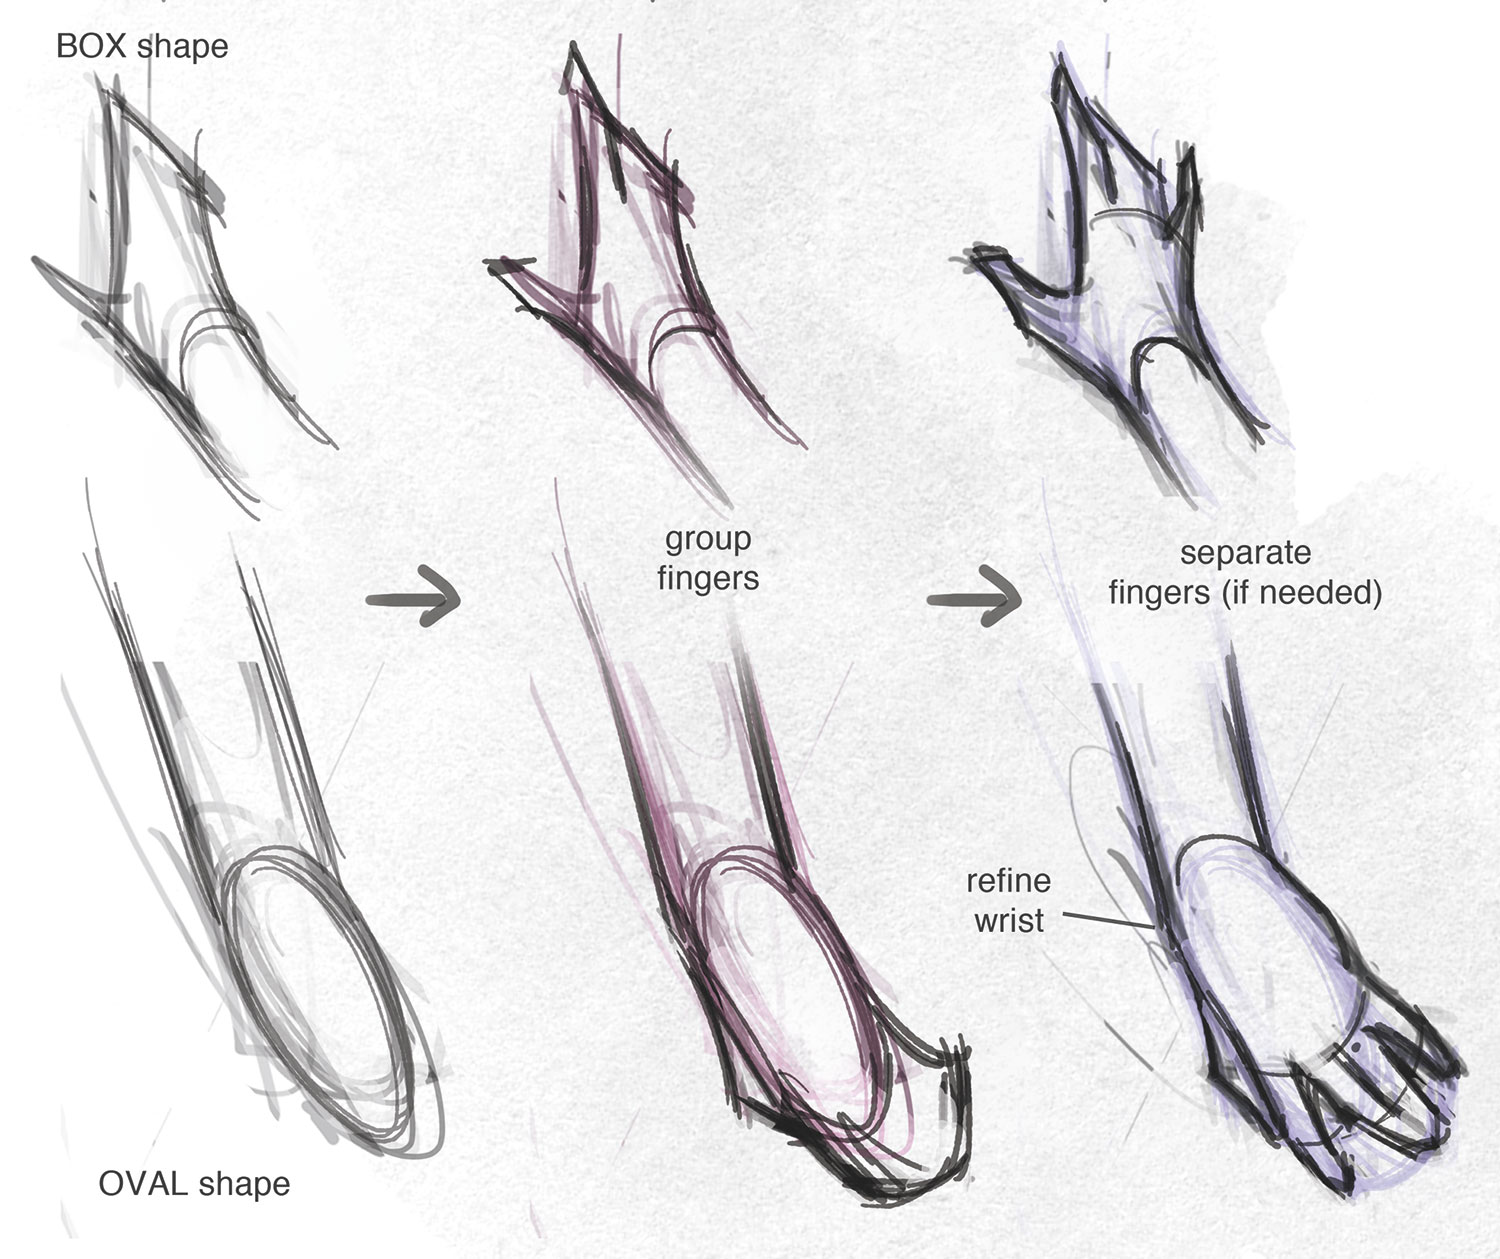
Hands can be complex, so start with either a box or oval shape, depending on how the fingers are arranged. Next, refine the shape, but keep the fingers grouped. To finish, separate the forefinger and thumb, or any finger necessary to make the hand come to life.
06. Sketch the feet
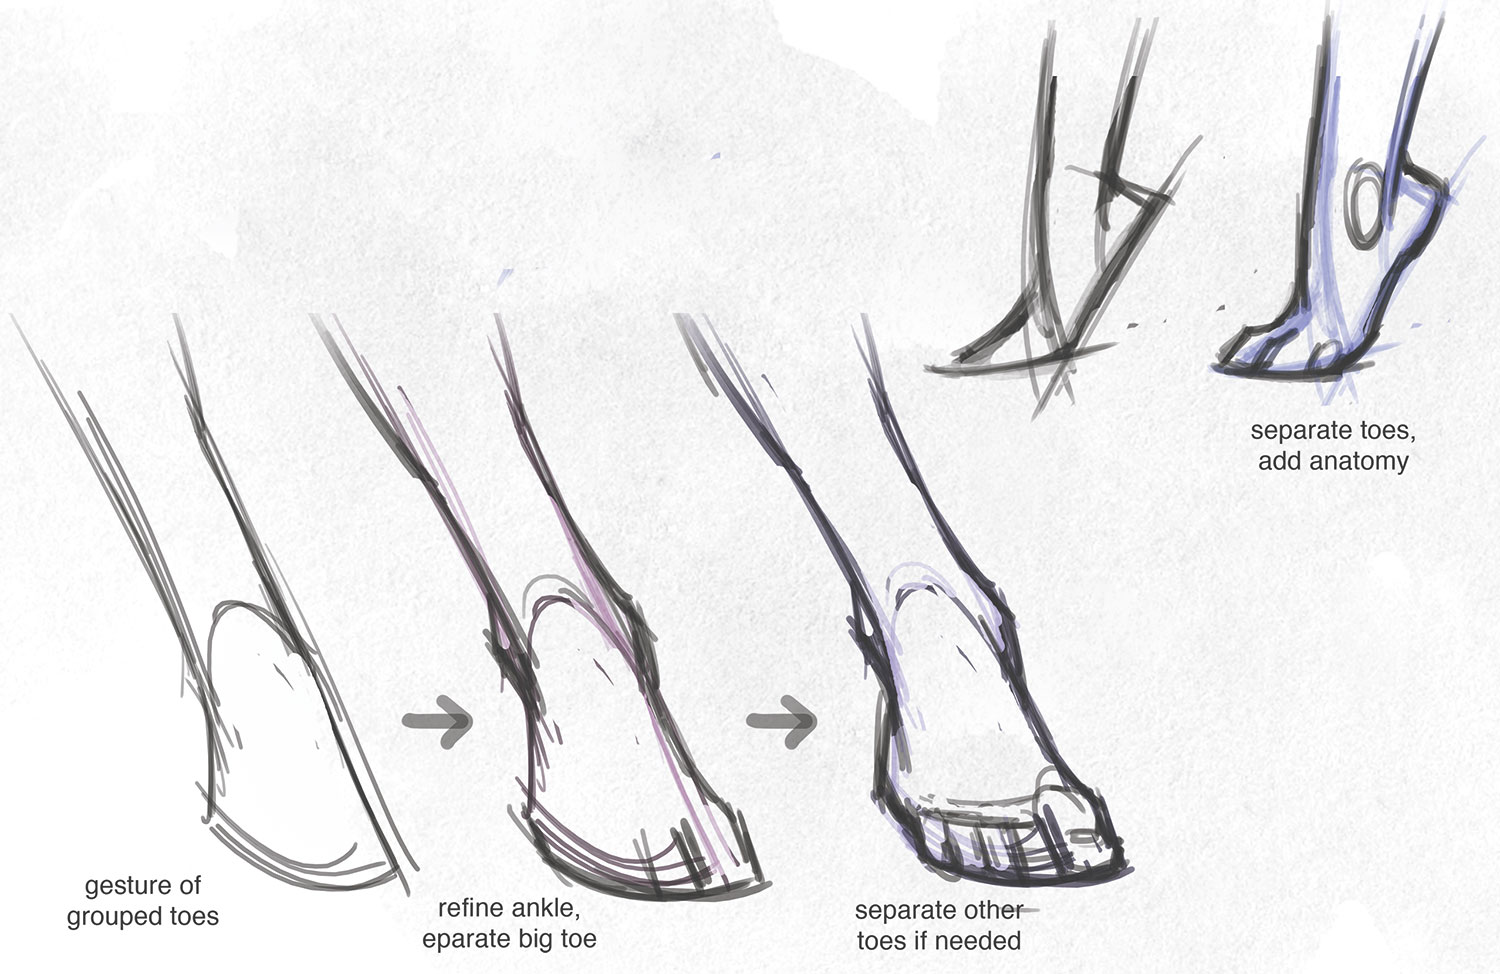
The feet are fairly easily to simplify since the toes are short and clustered together. Start with a triangle shape to capture the gesture, making sure to emphasise the contact point. Next, refine the ankle and shape of the grouped toes. Finally, separate the big toe, or any other toes as needed.
07. Exaggerate overlaps in side view poses
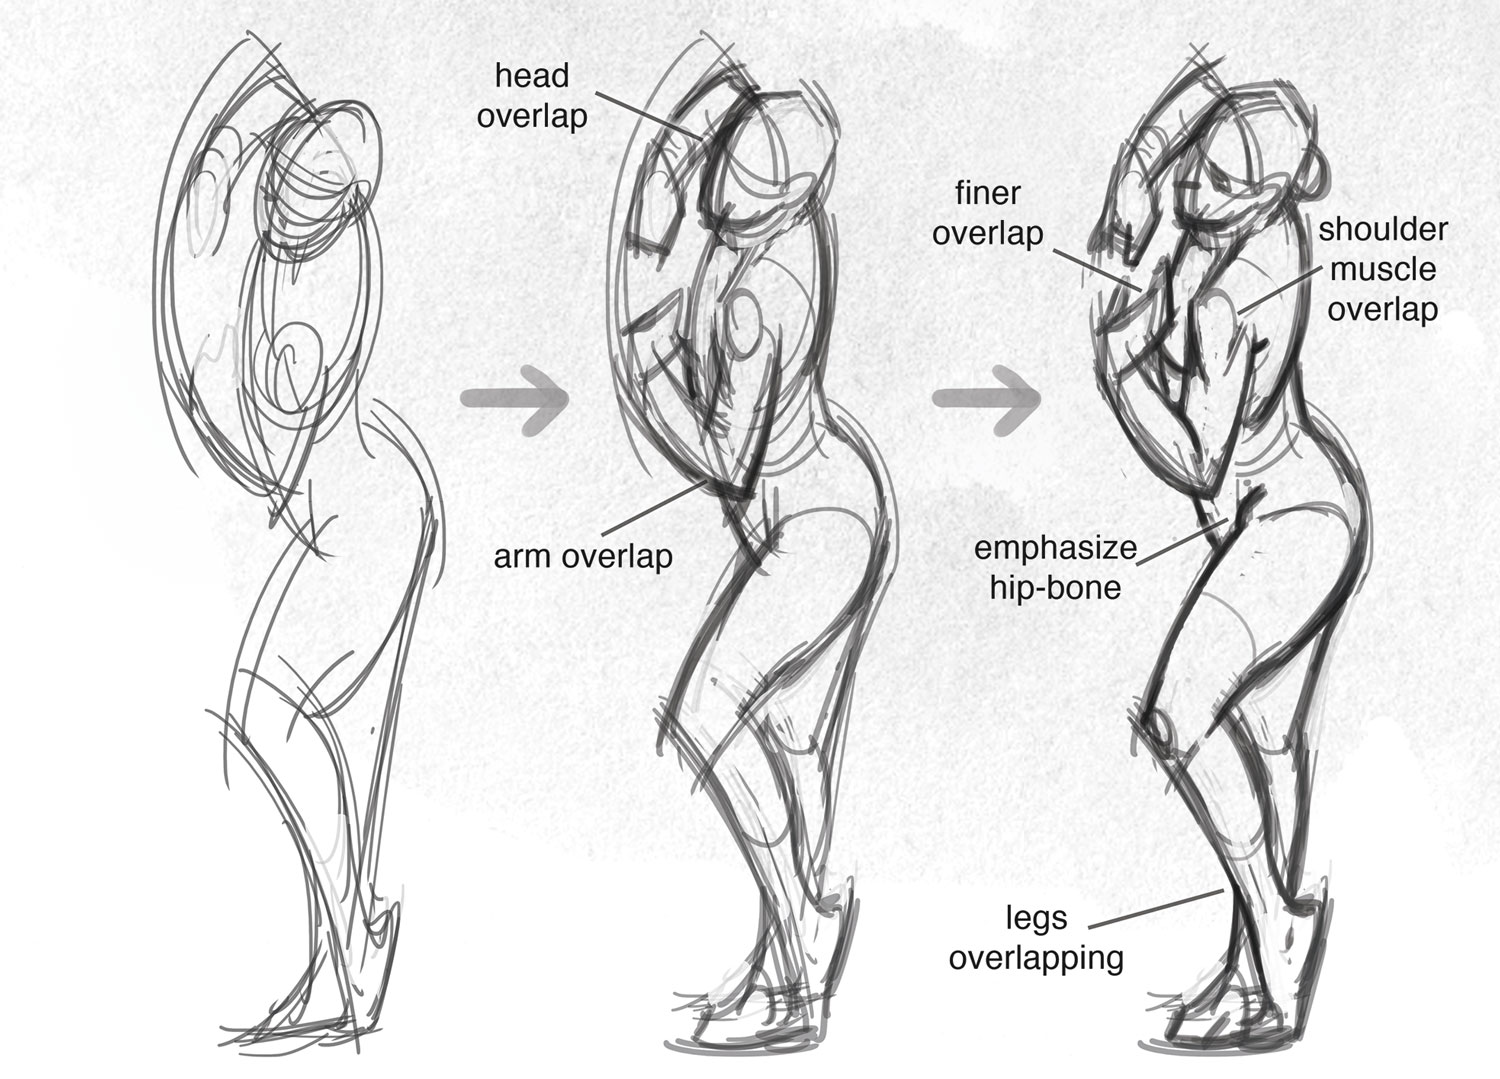
In a side view, much of the figure is hidden. To make the drawing work, emphasise and exaggerate overlaps. When available, the limbs are also great tools for creating overlaps at the torso. For more depth, exaggerate the top layers of anatomy, such as the shoulder muscles and hip bones.
08. Use overlaps in foreshortened poses
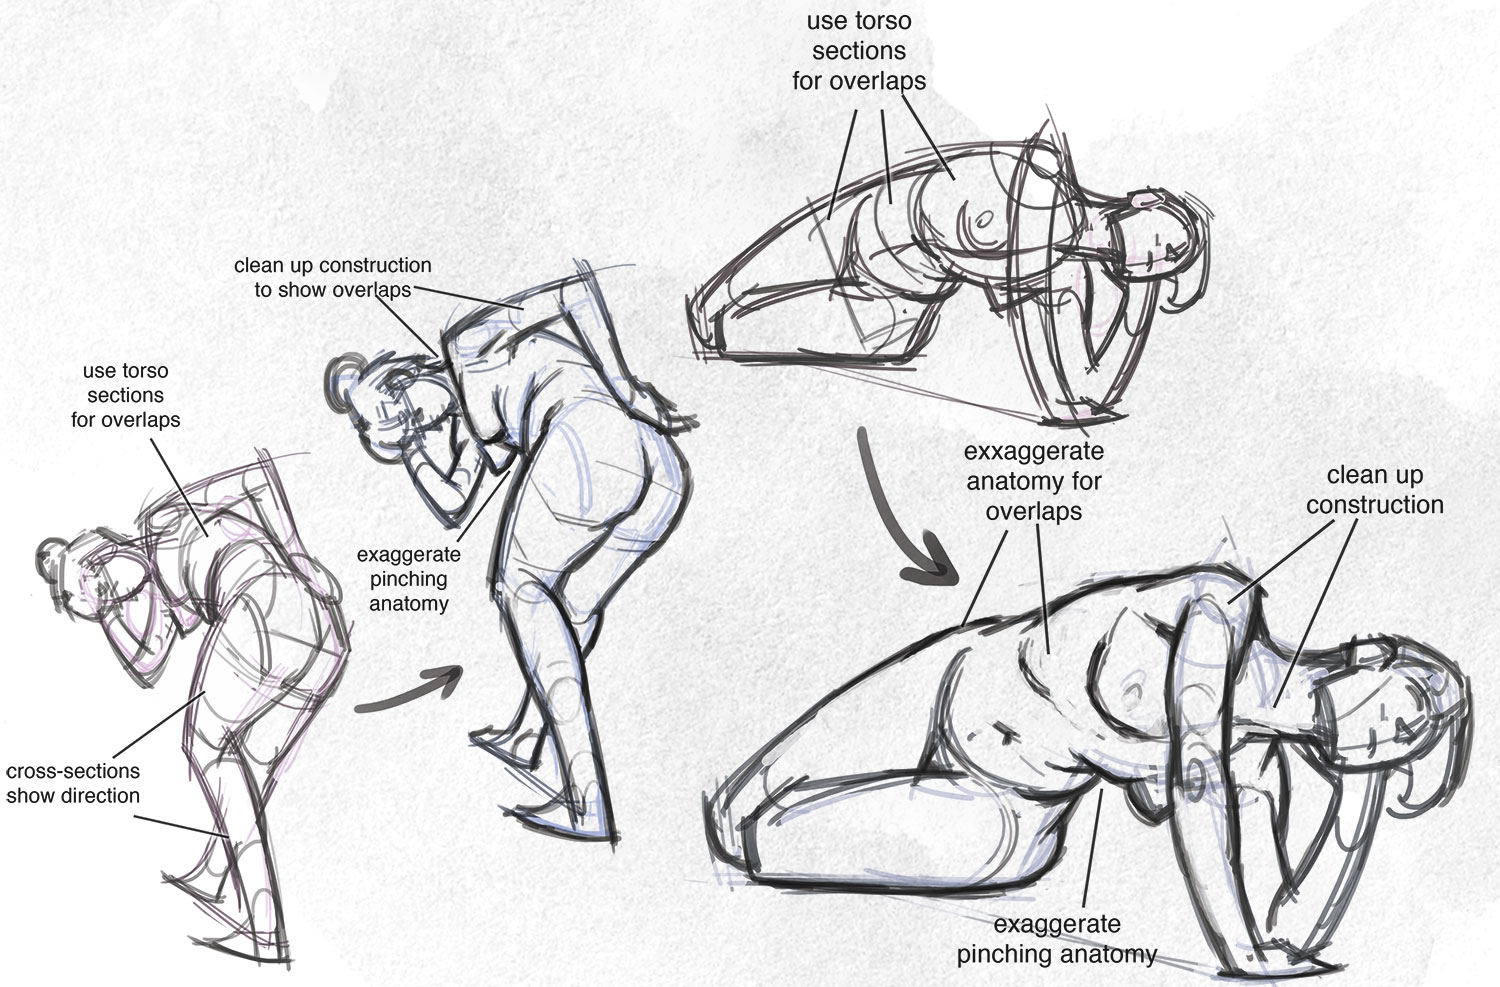
Similar to a side view, emphasise overlaps for foreshortened poses. If the torso is moving away, emphasise the overlap of the hips and abdomen. If the torso is coming toward you, use the rib cage and anatomy to create overlaps. If visible, the limbs drawn with good cross-sections can also create depth.
09. Focus on contact points in reclining poses
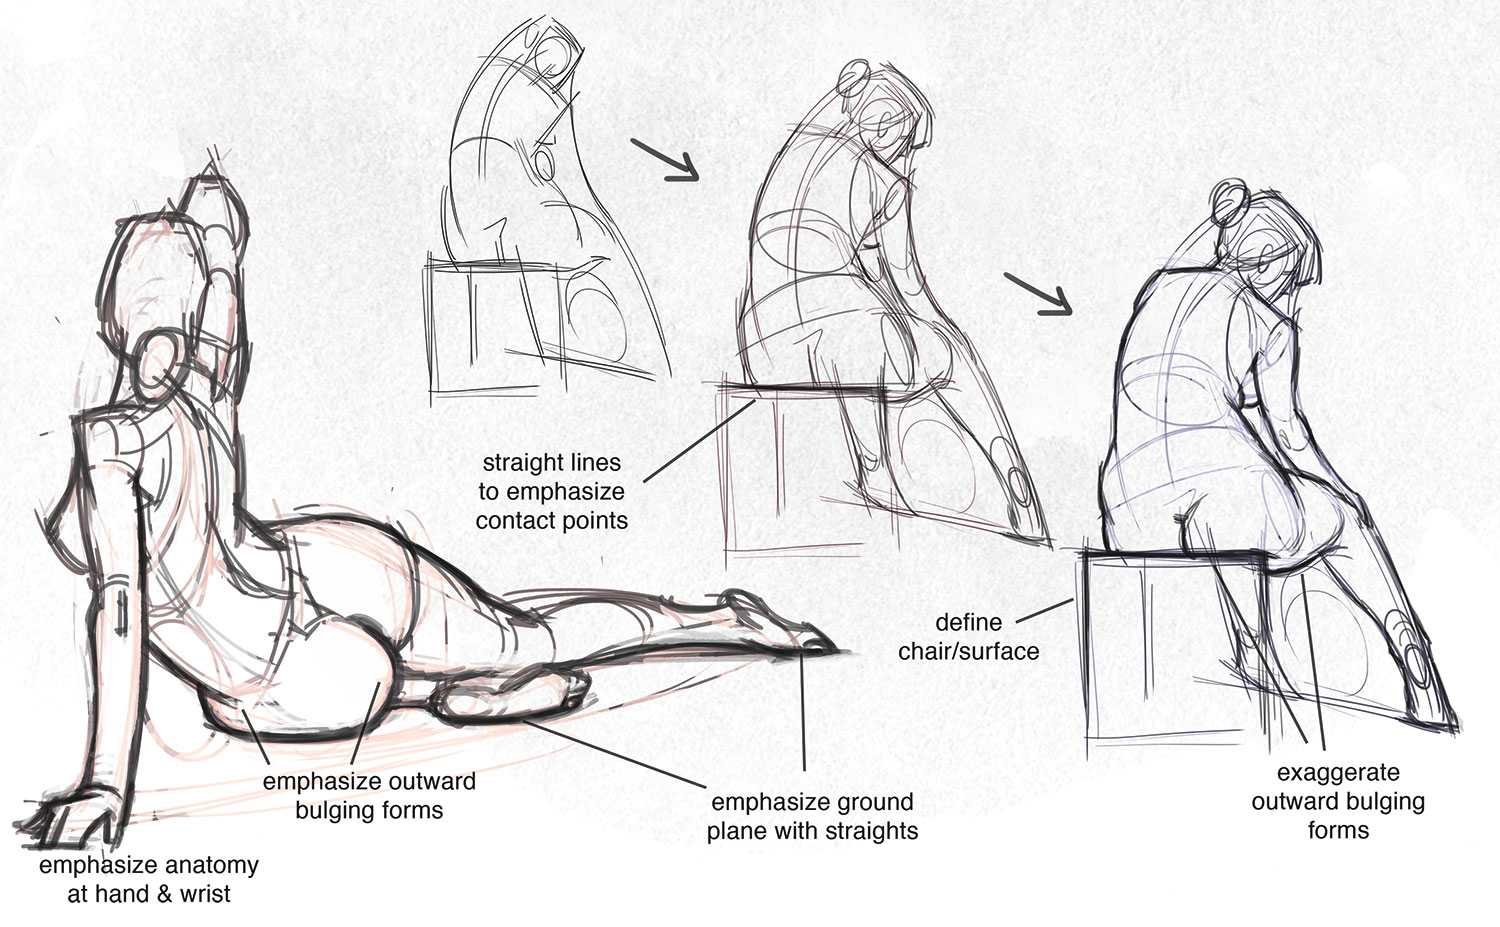
For reclining and seated poses, you can exaggerate the anatomy that makes contact with the surface. When visible, emphasise the hands making contact by adding more detail at the fingers and wrist.
10. Add tone
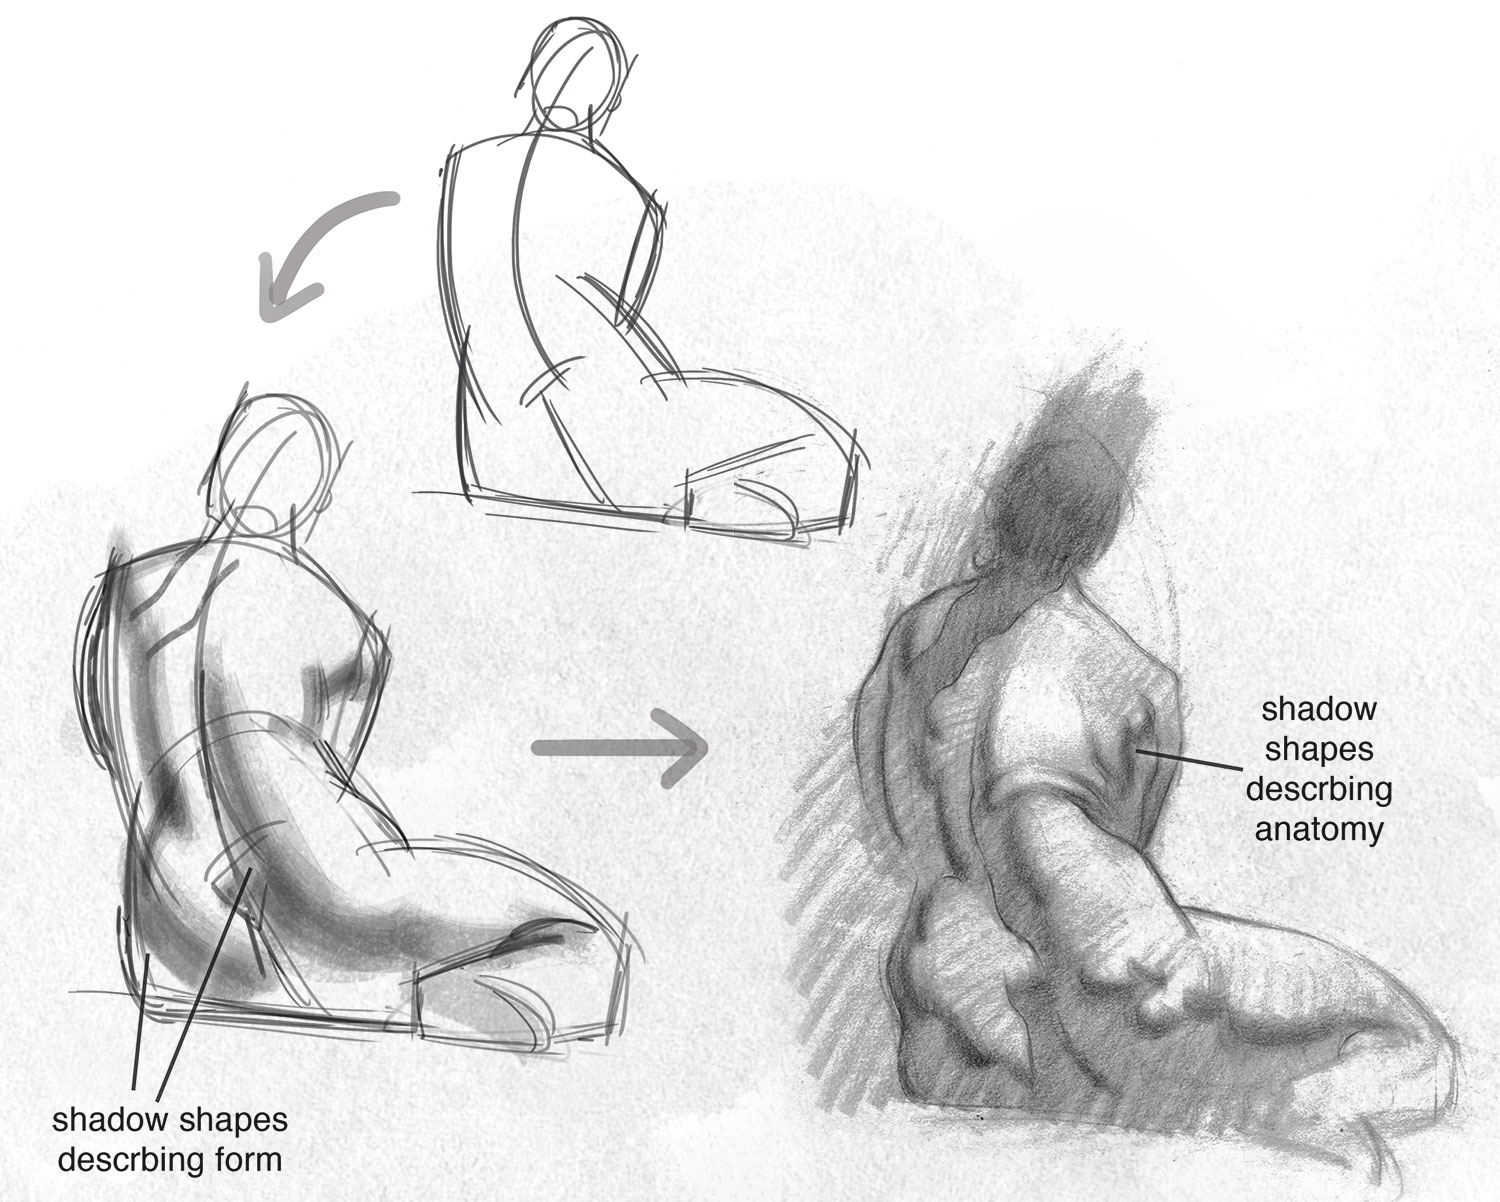
If the lighting is good, finish your sketch with tone. One way to do this is by blocking in the shadow and filling in the shape with a suitable tone.
Related articles:
Get the Creative Bloq Newsletter
Daily design news, reviews, how-tos and more, as picked by the editors.

Thank you for reading 5 articles this month* Join now for unlimited access
Enjoy your first month for just £1 / $1 / €1
*Read 5 free articles per month without a subscription

Join now for unlimited access
Try first month for just £1 / $1 / €1
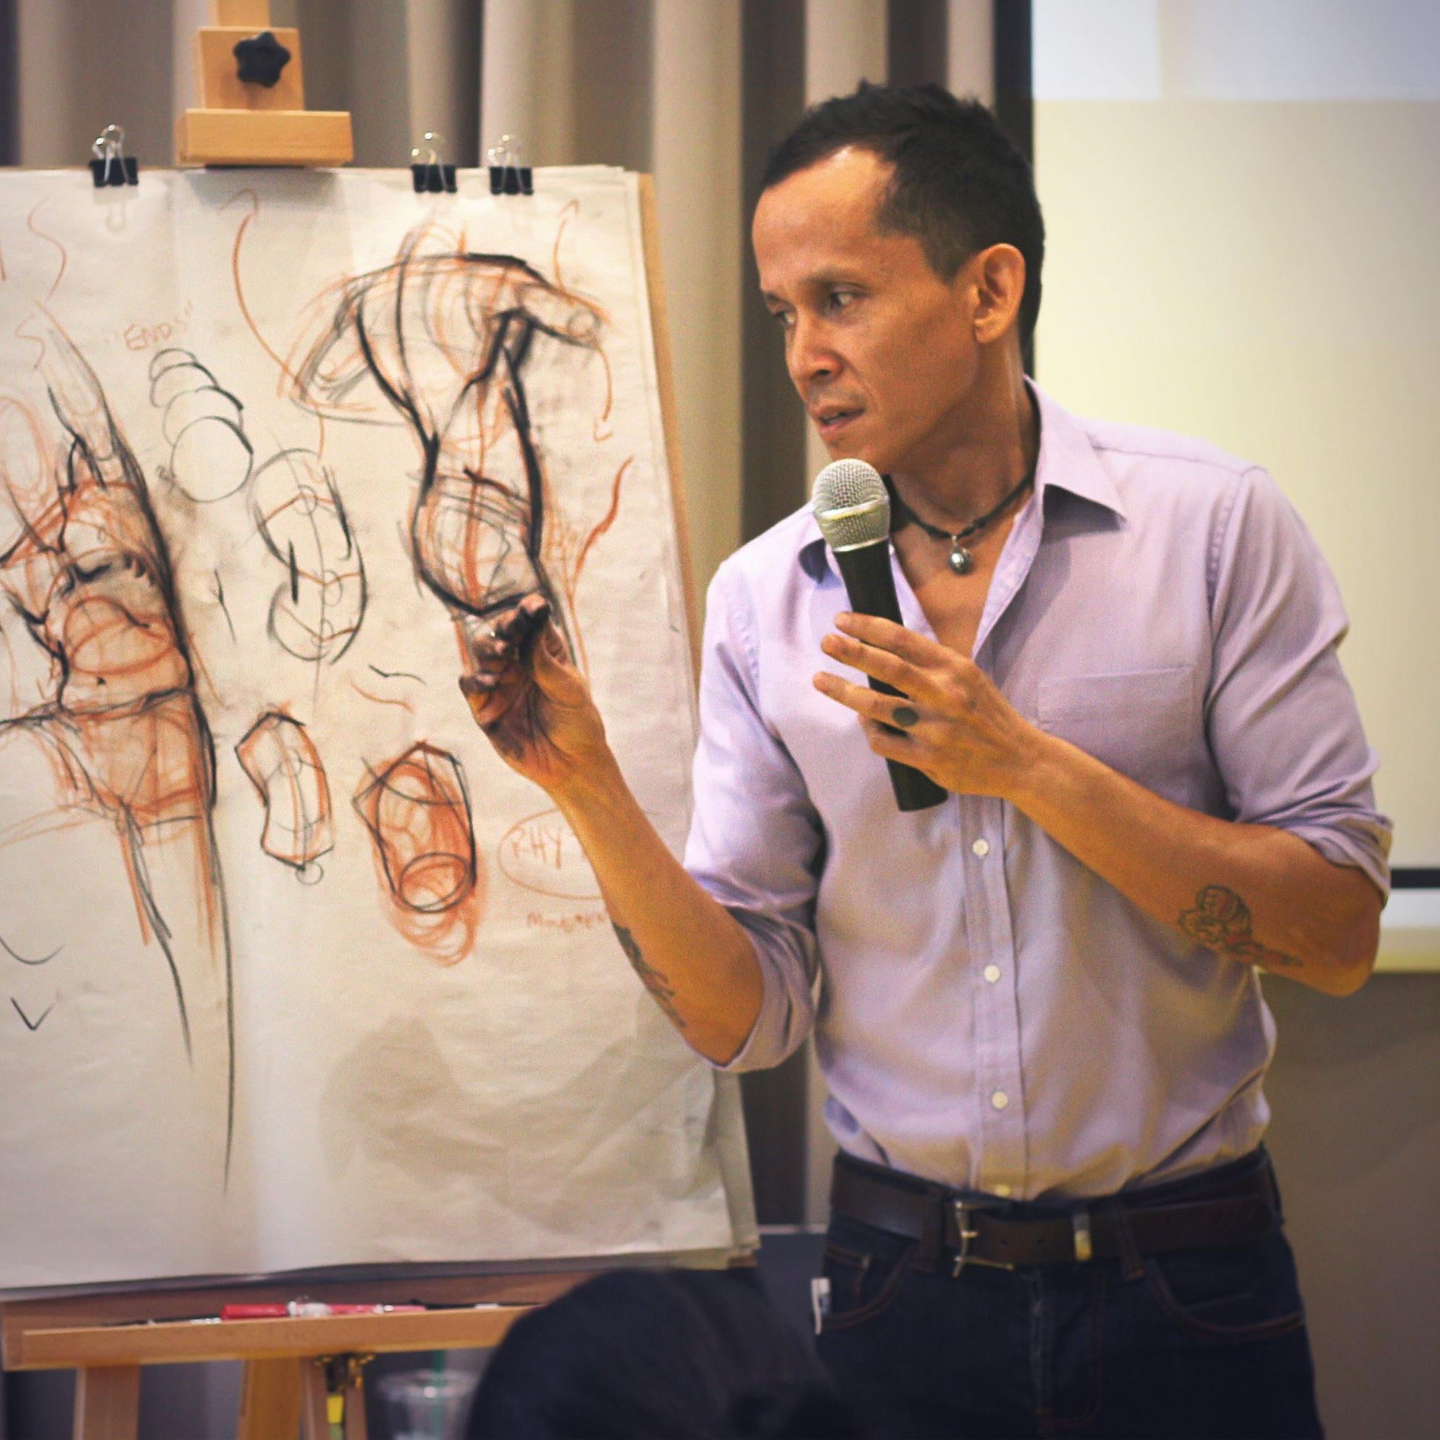
Chris is obsessed with figure drawing and painting. He loves sharing great information on art, picture-making and topics like which paint brush to use.
