Create your own Calligraphic brush in Illustrator
Develop your art style with custom vector Calligraphic brushes.

One of the best things about Illustrator is the ability to create your own brushes. You can find some amazing free Illustrator brushes online, but sometimes designing your own is the better option. I created my own shading and line work brushes to give my Spider-Man image (above) a more natural feel, while still keeping it 100 per cent vector-based.
Over time, I've developed a library of Illustrator brushes. This means I have precise control of drawing with the Pen tool, but I can also give my linework a more natural, hand-drawn appearance.
Here's how to create your own vector Illustrator brush in three simple steps...
I create all my work in Adobe Illustrator CC. Getting to grips with the software can be tricky, but there are a lot of brilliant Illustrator tutorials around to help hone your skills.
01. Start with weighted lines

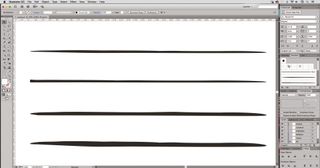
Create custom brushes by drawing your own weighted lines, either with a drawing tablet in Photoshop, the Blob brush tool in Illustrator, or good old-fashioned pen and paper.
Then, bring your linework into Illustrator and create outlines from the strokes by selecting them, and navigating to Object > Path > Outline Stroke.
02. Refine your lines

Once you have your brush stokes outlined, use the Pen tool or Anchor Point tools to refine any part of the line to get it just how you want it.
Get the Creative Bloq Newsletter
Daily design news, reviews, how-tos and more, as picked by the editors.
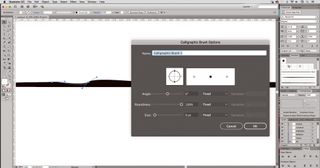
Next, create a new Calligraphic brush by selecting the shape you want to make into a brush. Open the Brush panel (Windows > Brush), click Create New Brush and select Calligraphic brush.
03. Create a brush library

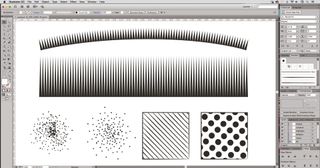
You can follow this technique to create a library of different brushes and effects to suit your style. To create a new brush library, add the brushes you want to the Brushes panel (Window > Brush Libraries).
Then, in the Brushes panel, click Save Brush Library, and put the new library file in one of the following folders so that it will appear in the Brush Libraries menu when you restart Illustrator.
You can also use this technique to create Pen brush strokes, as well as shading effects such as stippling or half-tone effects – and you can create ‘fills’ as well as ‘strokes’.
This article was originally published in issue 156 of ImagineFX, the world's best-selling magazine for digital artists. Subscribe to ImagineFX here.
Related articles:

Thank you for reading 5 articles this month* Join now for unlimited access
Enjoy your first month for just £1 / $1 / €1
*Read 5 free articles per month without a subscription

Join now for unlimited access
Try first month for just £1 / $1 / €1
