How to create stylish hand-painted character art in 3D
Weston Reid uses ZBrush, Marmoset Toolbag, Substance 3D Painter, Modo and more to create vivid character art.
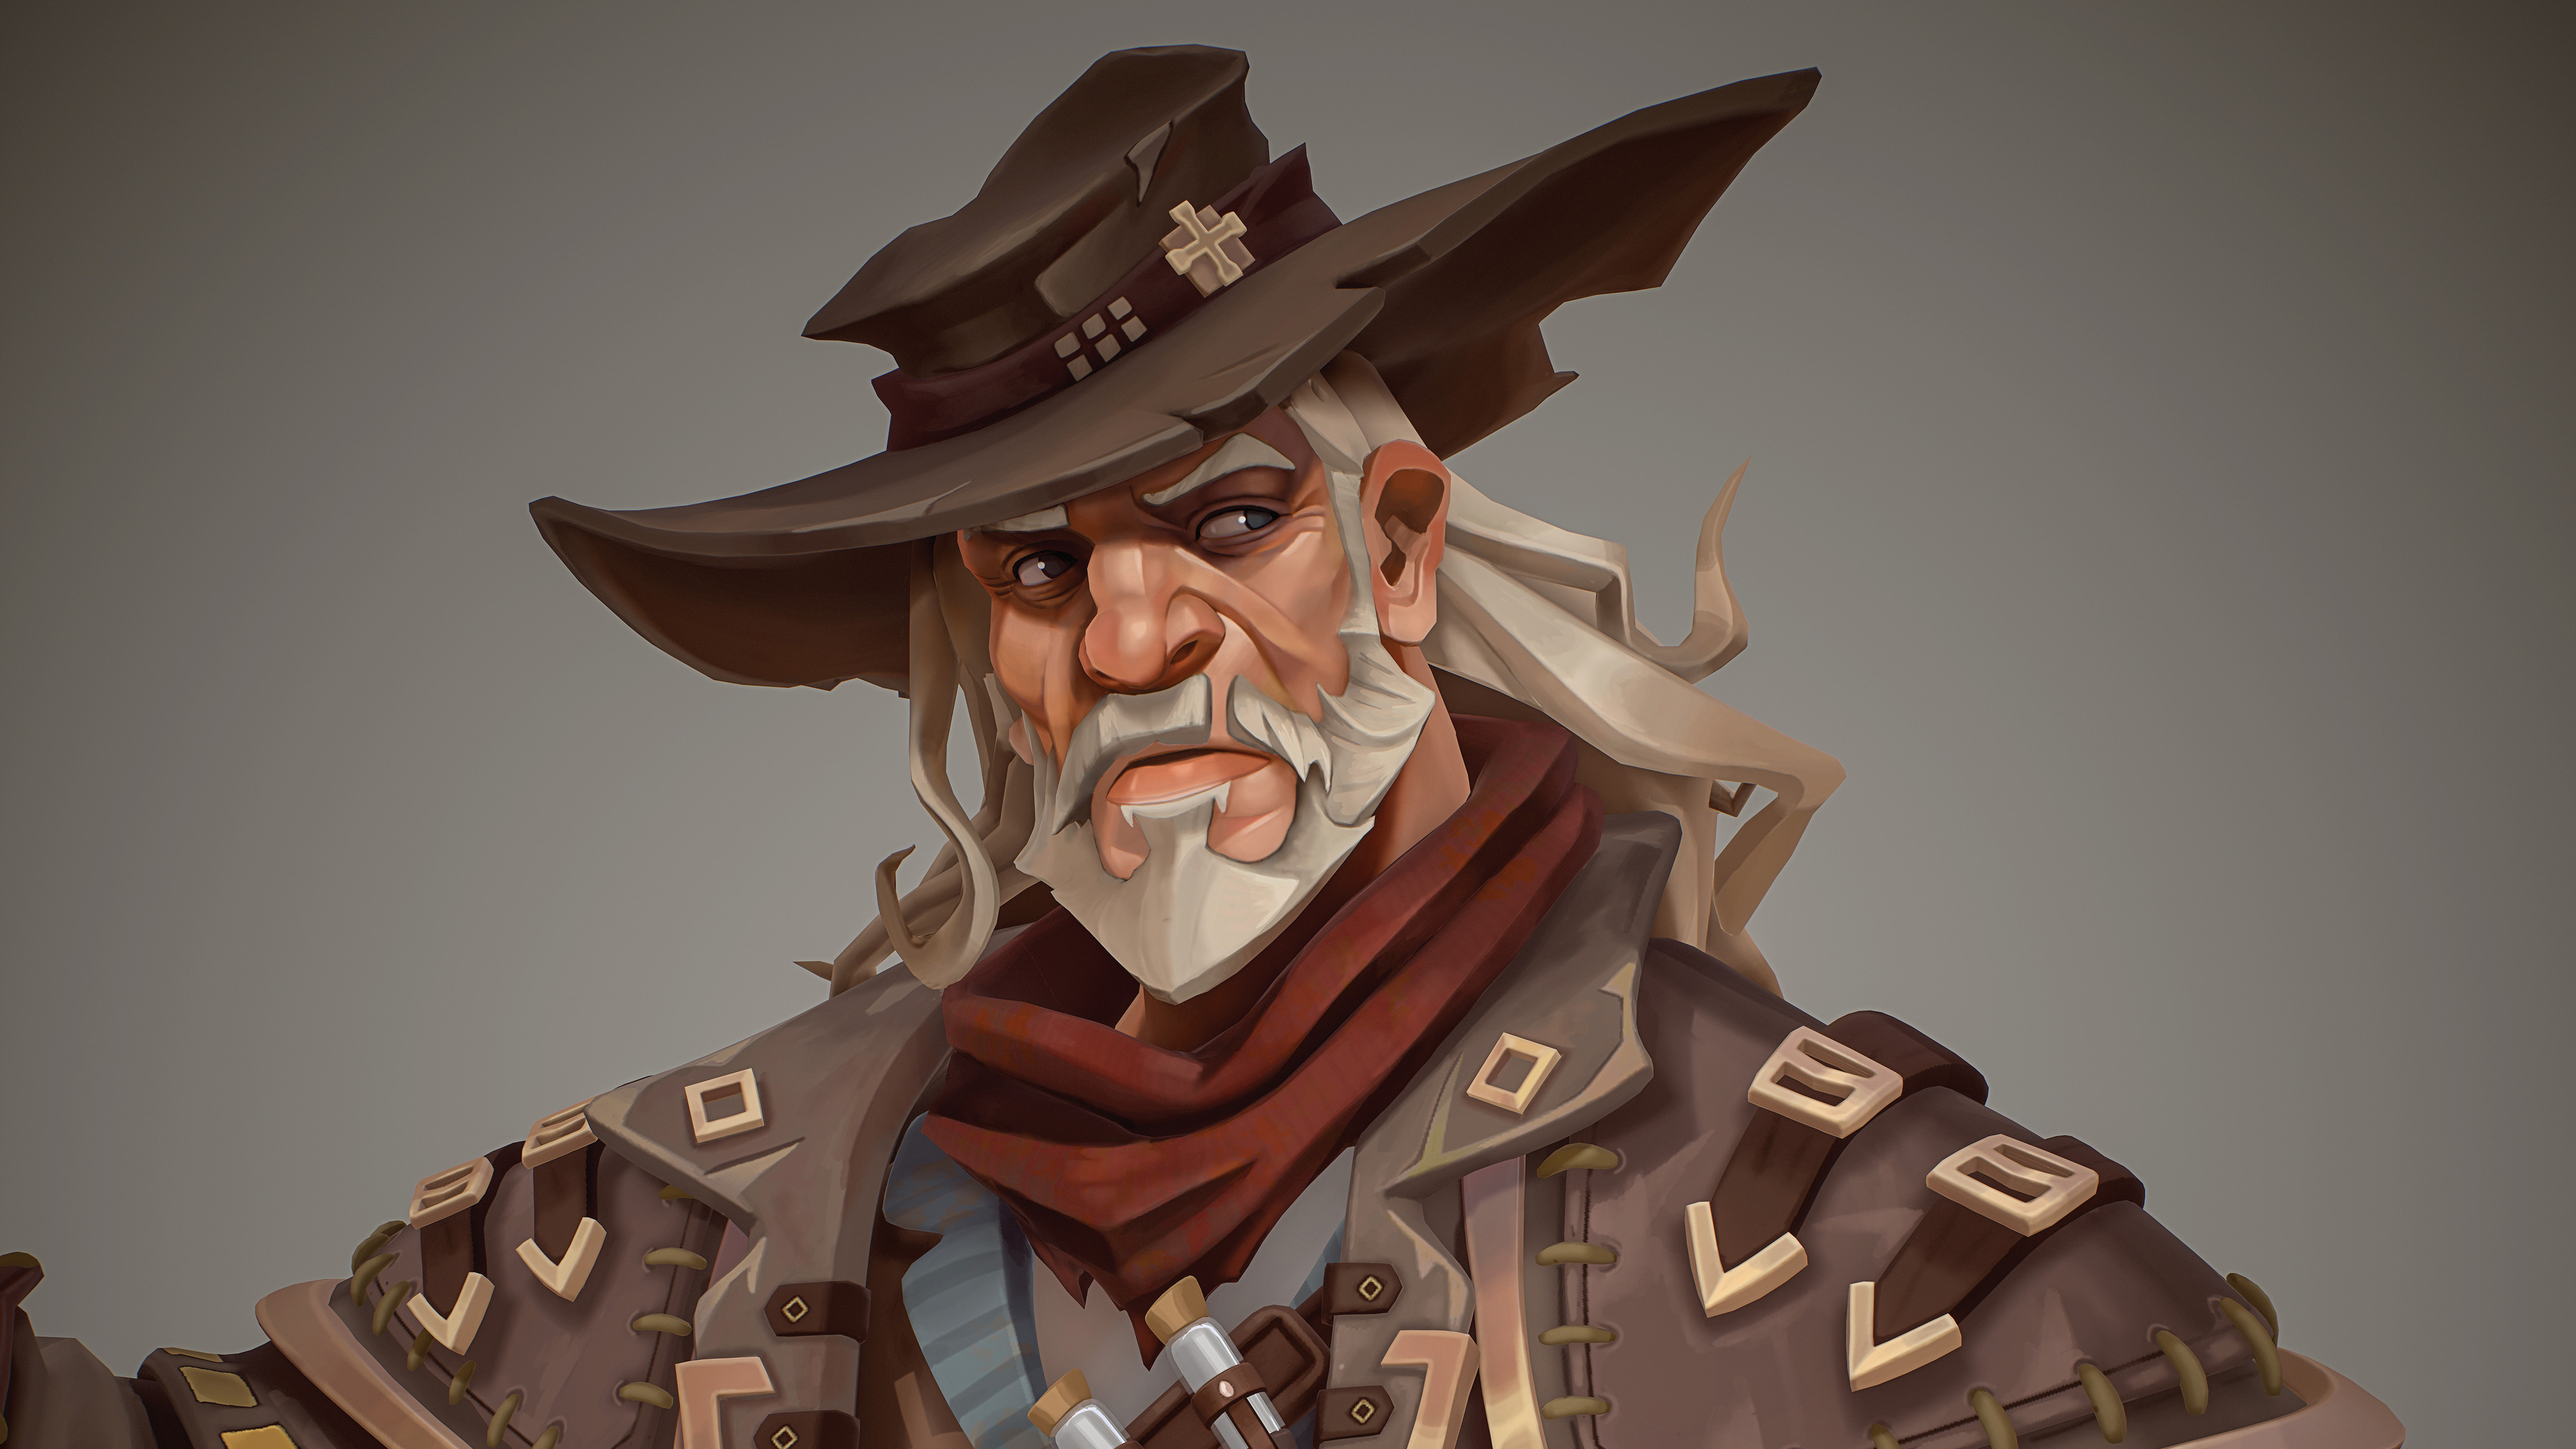
Stylised characters are my passion, and in this 3D art tutorial I’ll go through my steps for creating a high-quality unlit and hand-painted character from start to finish. If you're new to this kind of workflow, consider a new laptop for 3D modelling or one of the new iPads.
This process will involve using ZBrush for the high-poly creation, Modo for retopology and UVs, Marmoset Toolbag for baking and final rendering, and both Substance 3D Painter and 3DCoat for the texturing process. You’ll be able to use this workflow for any hand-painted characters, props or environment pieces.
The aim here is to leverage the strength of several pieces of software to create quality models and textures efficiently. I’ll use ZBrush and lots of ZModeler, plus Dynamic Subdivision workflows to create clean meshes, as well as DynaMesh and basic primitives to generate the organic shapes needed in my concept.
Substance 3D Painter will be my central software for all of the texturing work
ZModeler will help create clean topology that can be reused in the low-poly stage, which will speed up our retopology and get us to the texturing quicker. I'll also make use of Substance 3D Painter for the initial greyscale creation of our texturing, before going to 3DCoat to add in the hand-painted element.
Substance 3D Painter will be my central software for all of the texturing work, where I can use masking and generators to always have control over elements, while 3DCoat will be used for its natural brush quality and flexibility in painting. Each step is intended to be non-destructive and provide flexibility that can be applied in personal or professional settings.
How I create stylish hand-painted character art in 3D
Here's how I went about creating this Wild West-themed character in 3D. If you'd like to follow along with this tutorial for yourself, you can download the relevant assets here.
01. Finding your reference
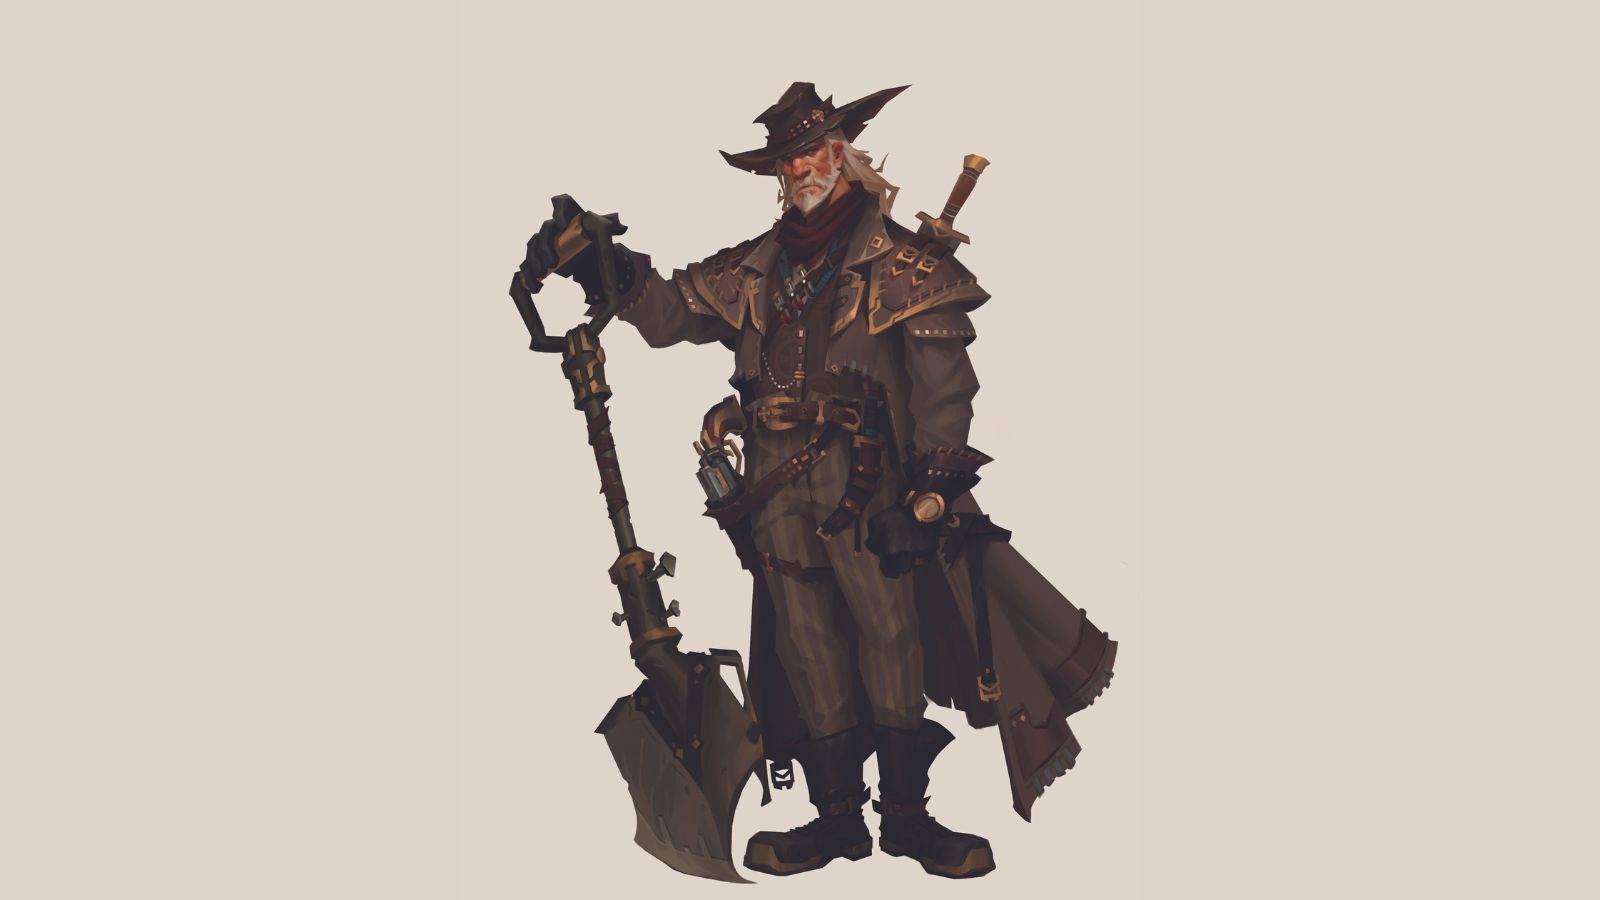
Before starting work on any model, I first find a concept to model and texture from. For this project, the original concept was designed by JohnnyD and found on ArtStation. With the concept found, I begin by opening ZBrush and loading one of the default male or female ZTools, which will only be used for scale reference before being deleted.
02. Using ZTools
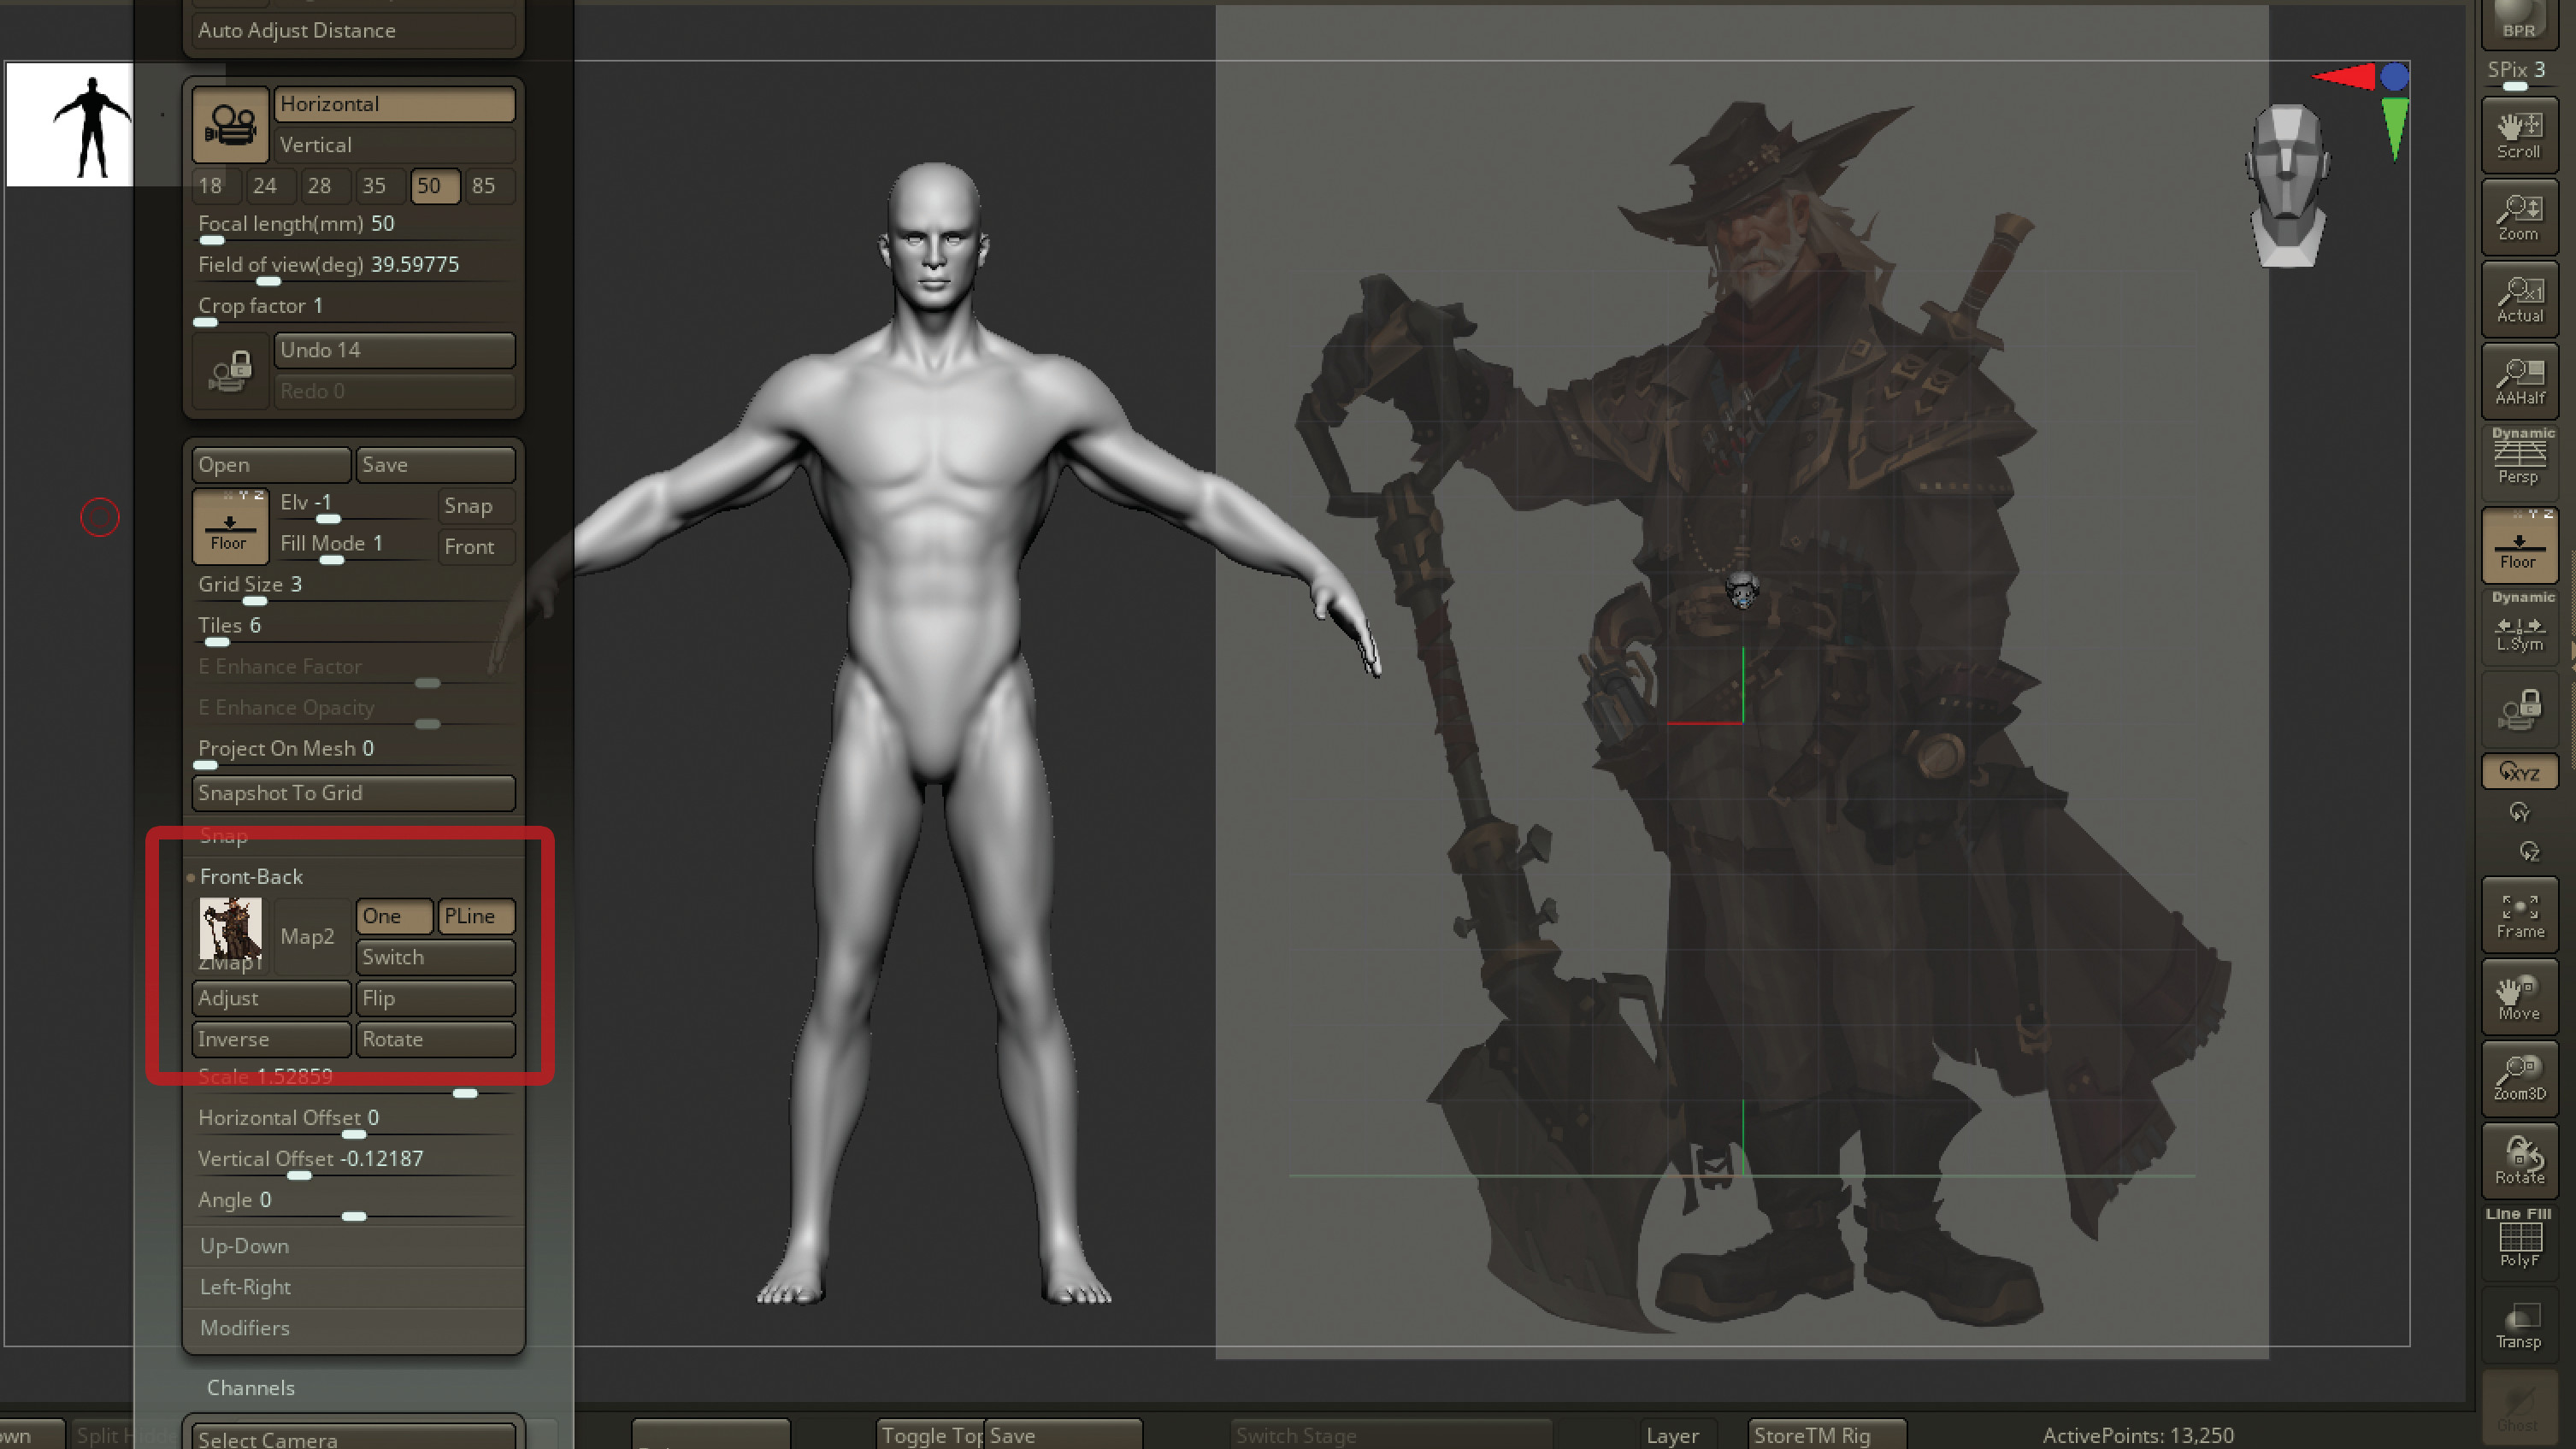
I import the concept art and turn on the Draw functionality (Shift+P). Navigate in the Draw menu to the Front/Back palette, load the concept into the front view, and scale the concept to roughly the height of the default ZTool loaded. The concept will serve as my model to roughly blockout the shapes. When that’s completed, I can delete the ZTool character.
03. Using primitive shapes
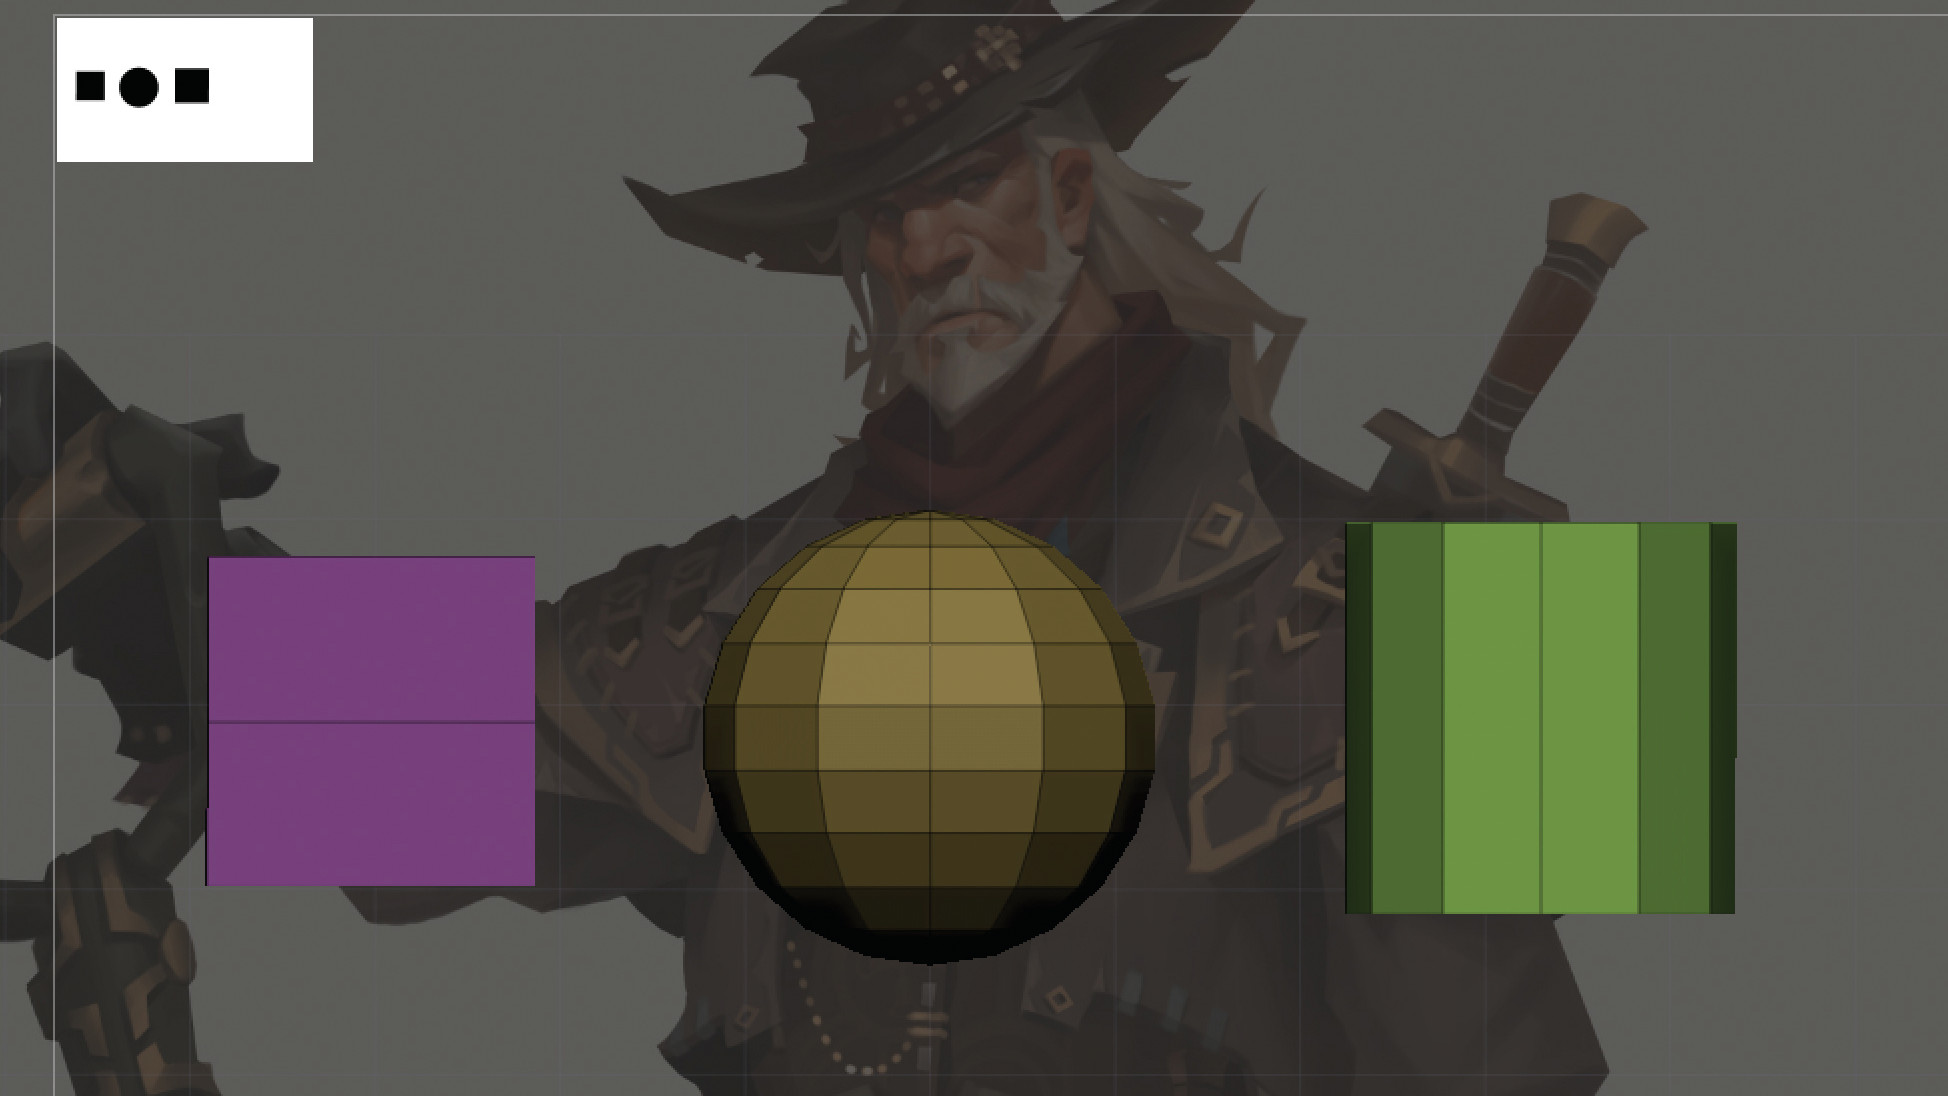
For this project, I build a blockout model in a general T-pose. Once all the pieces are in place, I pose it via Transpose Master and then further sculpt and model to completion in an asymmetrical pose.
Next I begin by selecting a sphere primitive and go to Initialize and set the Spans low, around 12 and 12, and click Make 3D Model. I use base primitive shapes to build the rough body for this character. I then do the same for other primitives as needed, always using the least amount of geometry.
04. Basic body building
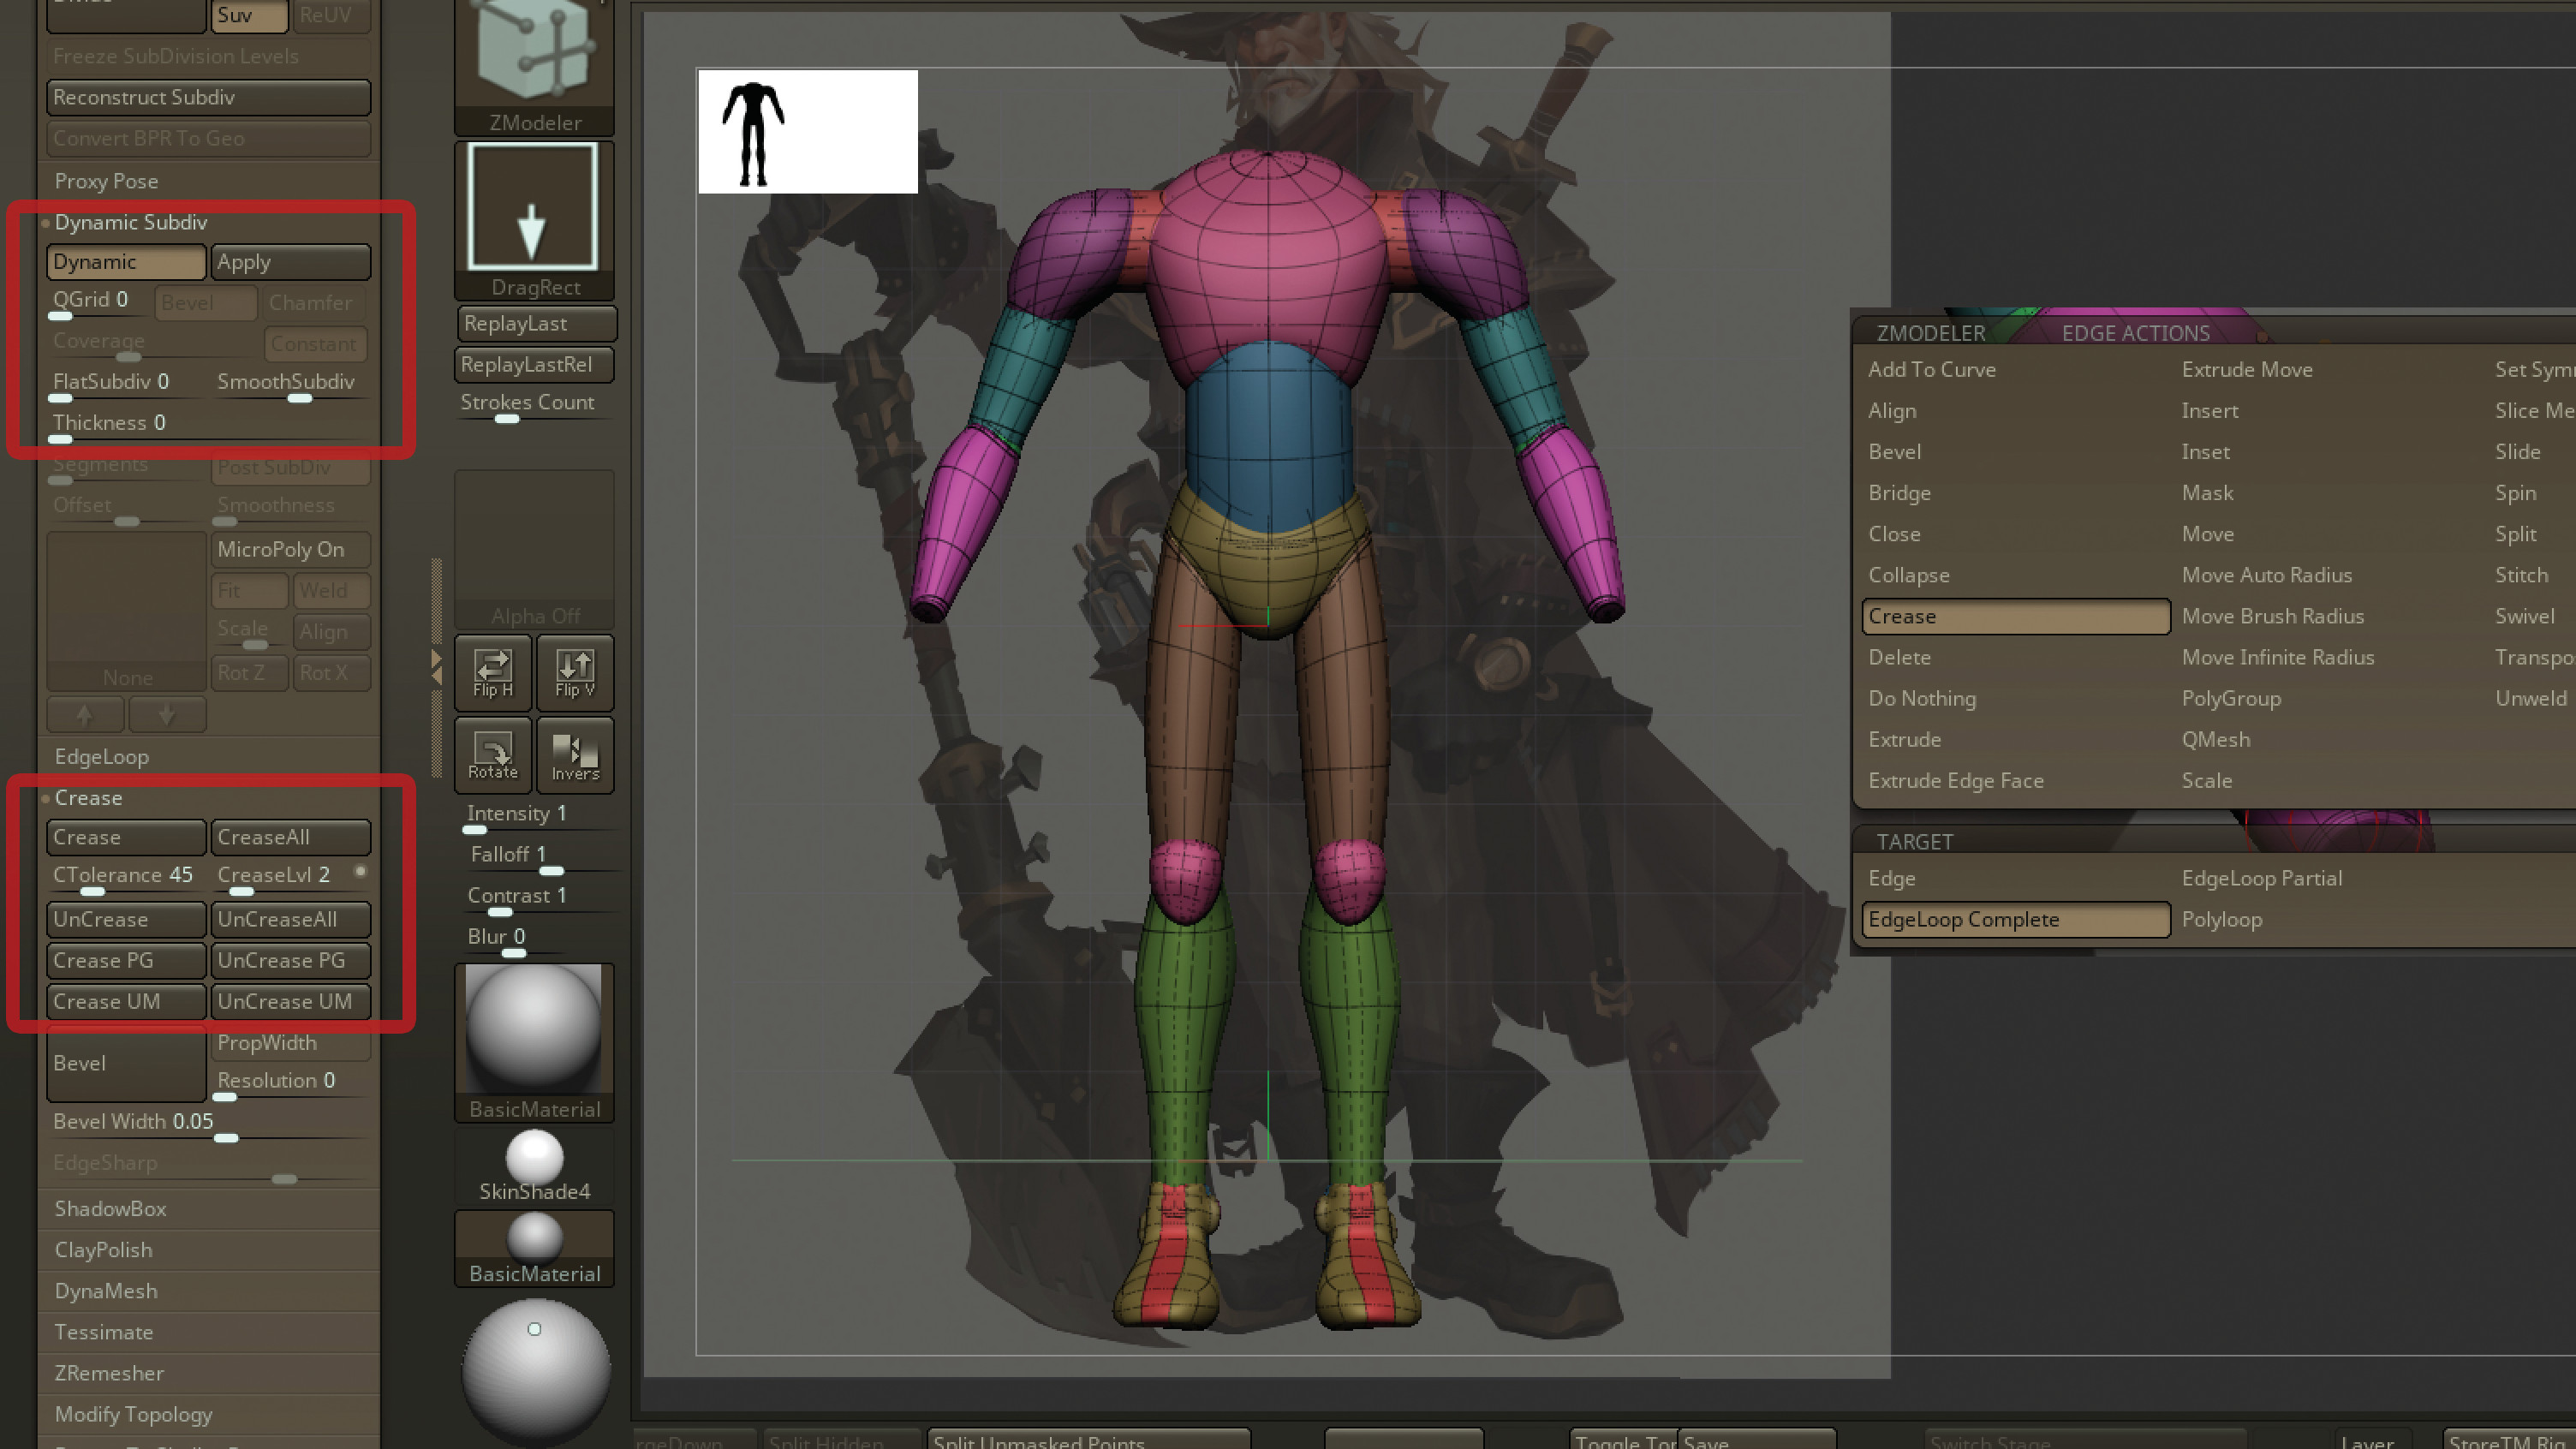
I now start using these primitives to blockout the large proportions of the model. My advice is to try using a sphere for the rib cage, a cylinder for the torso, a sphere for the head and a cylinder for the neck as examples. Because the primitives are low in geometry, I can use a mix of crease edges, Dynamic Subdivision, modifier functions like Bend Curve and Taper, and the standard Move brush to shape them as needed.
I then set my Dynamic Subdivision level to '4' and then apply crease edging where it’s needed to hold shape, such as the top edge loops of a cylinder, and set the Crease Edge Level to a value that’s lower than the Dynamic Subdivision, for example '2-3'. Do this until the full body is blocked out in a primitive state.
05. Creating the clothing
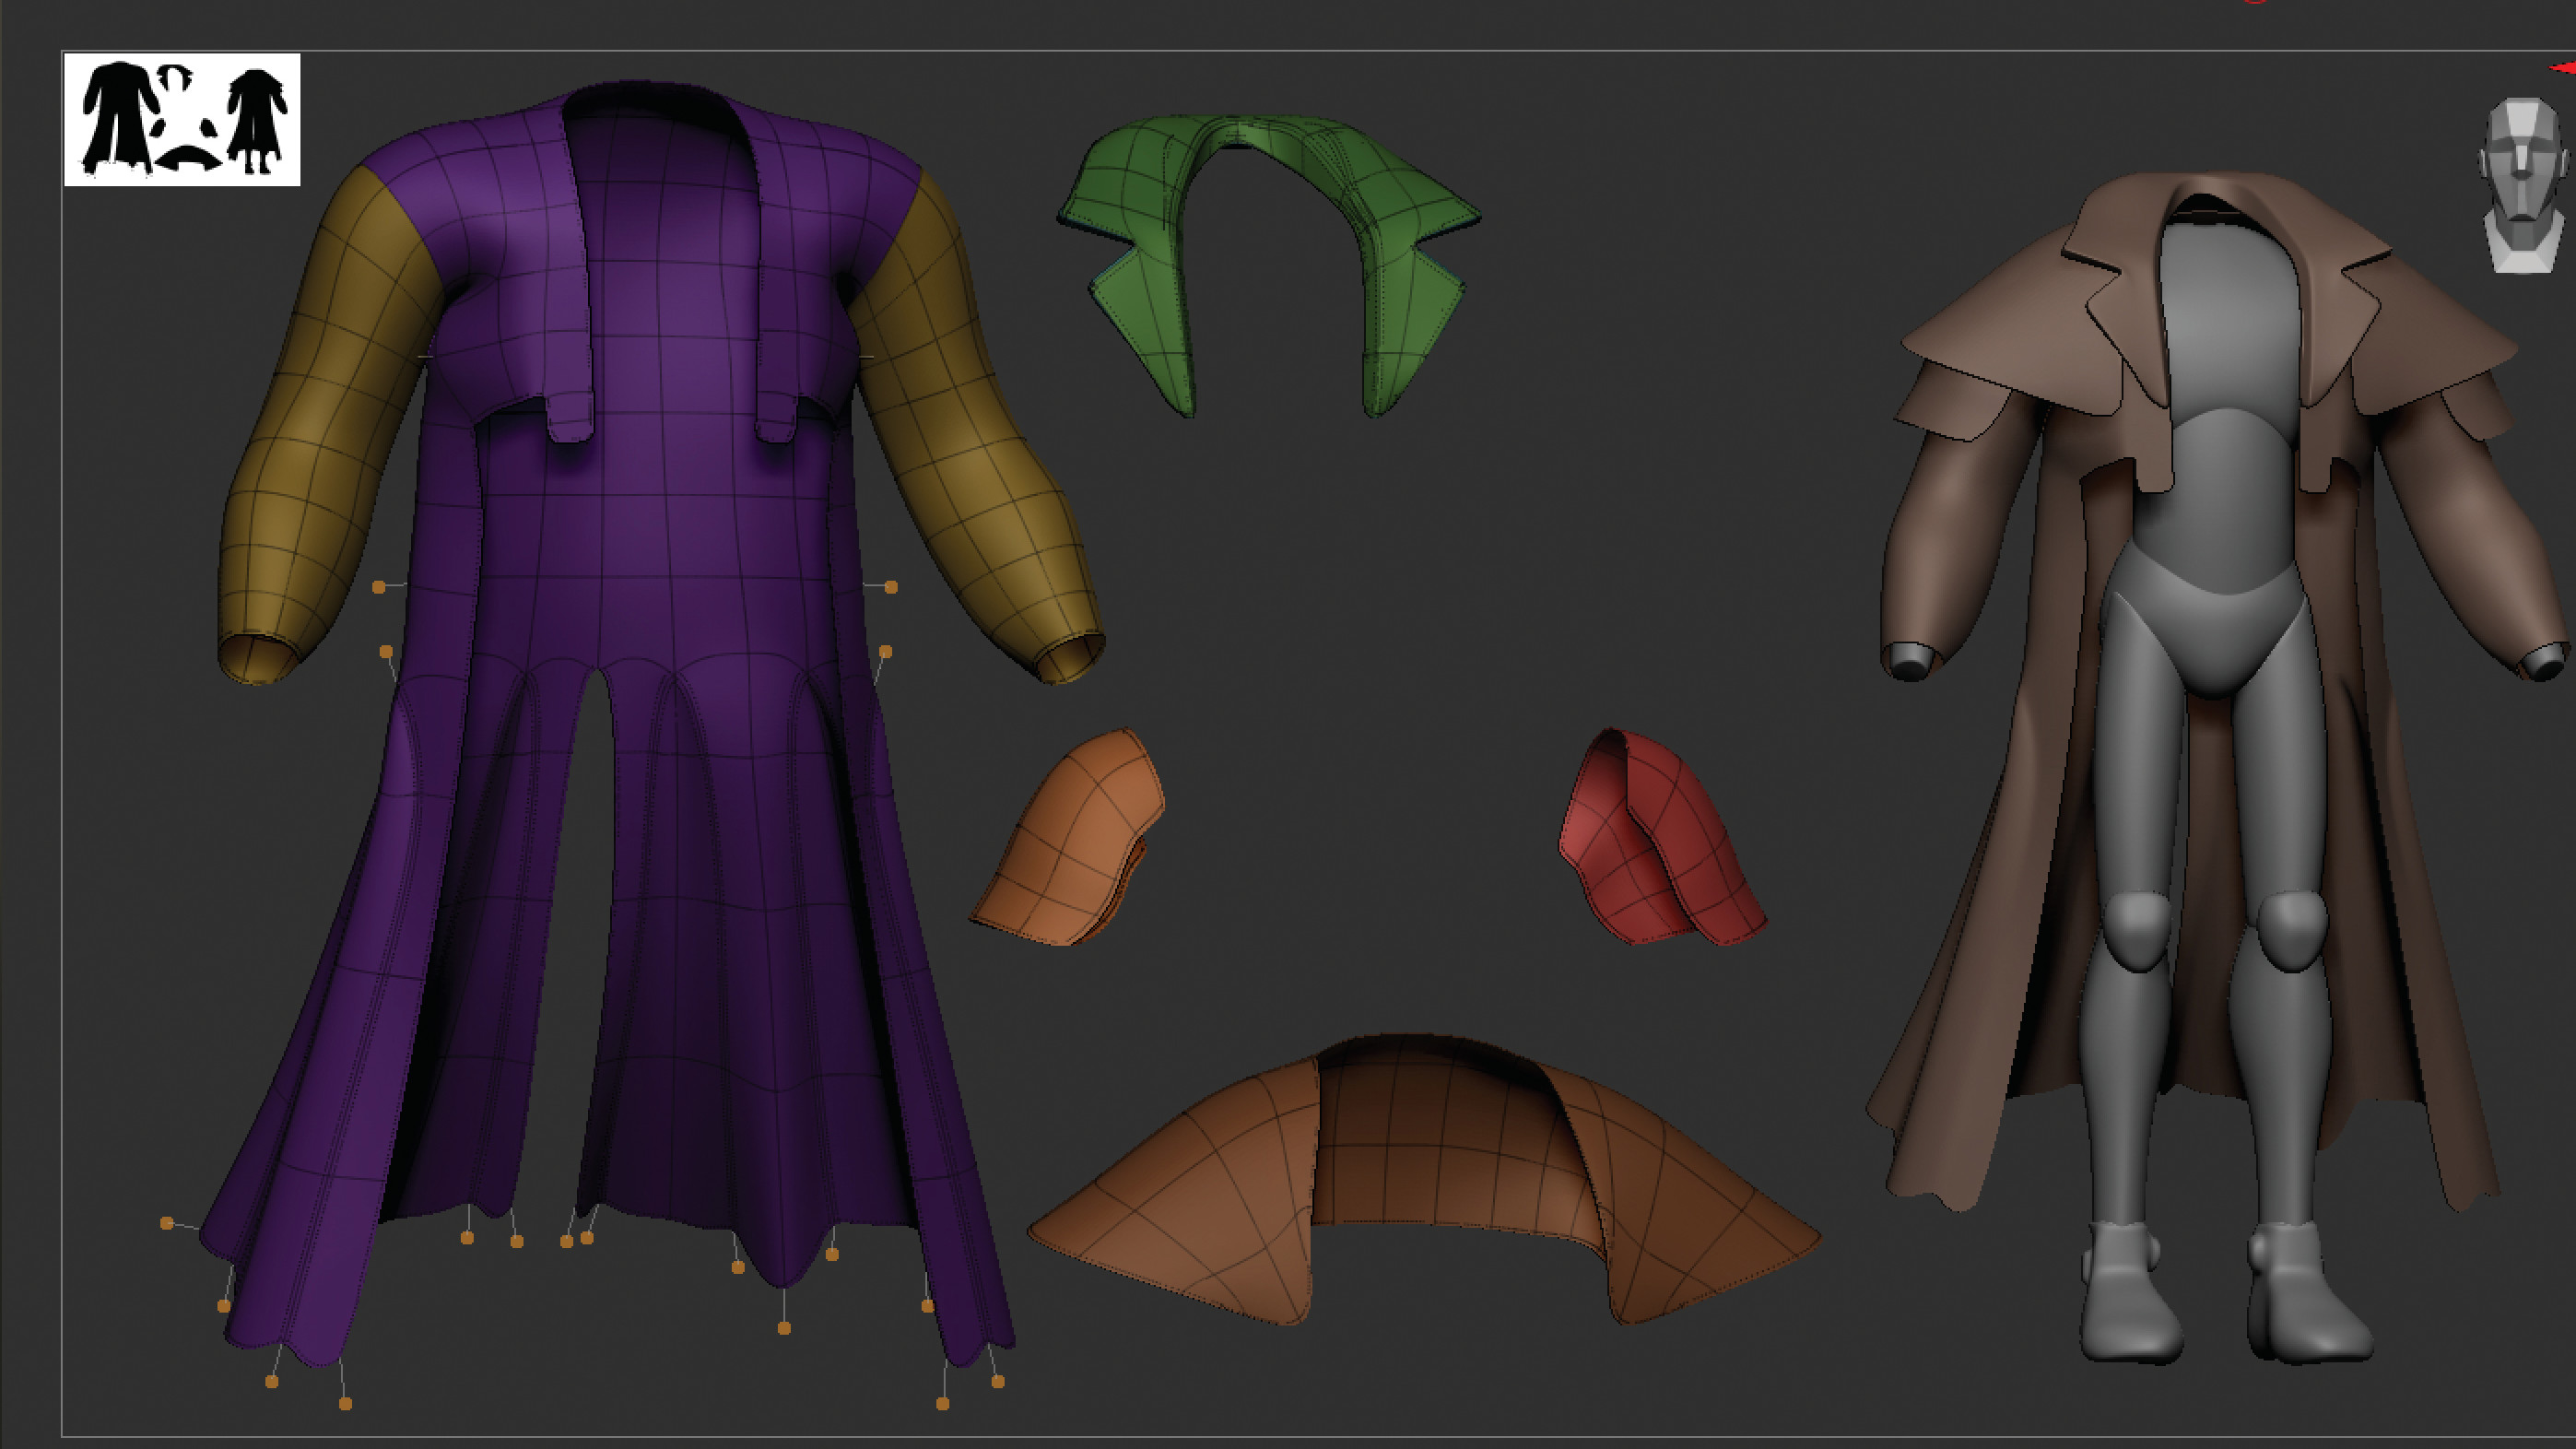
With the base body now blocked out, I can begin building the clothing and supporting elements from the concept. I start again with a cylinder, generally shape the primitive to match a clothing element like a jacket or pants. At this point I can begin using ZModeler to further support our modelling work.
06. Blocking out the character
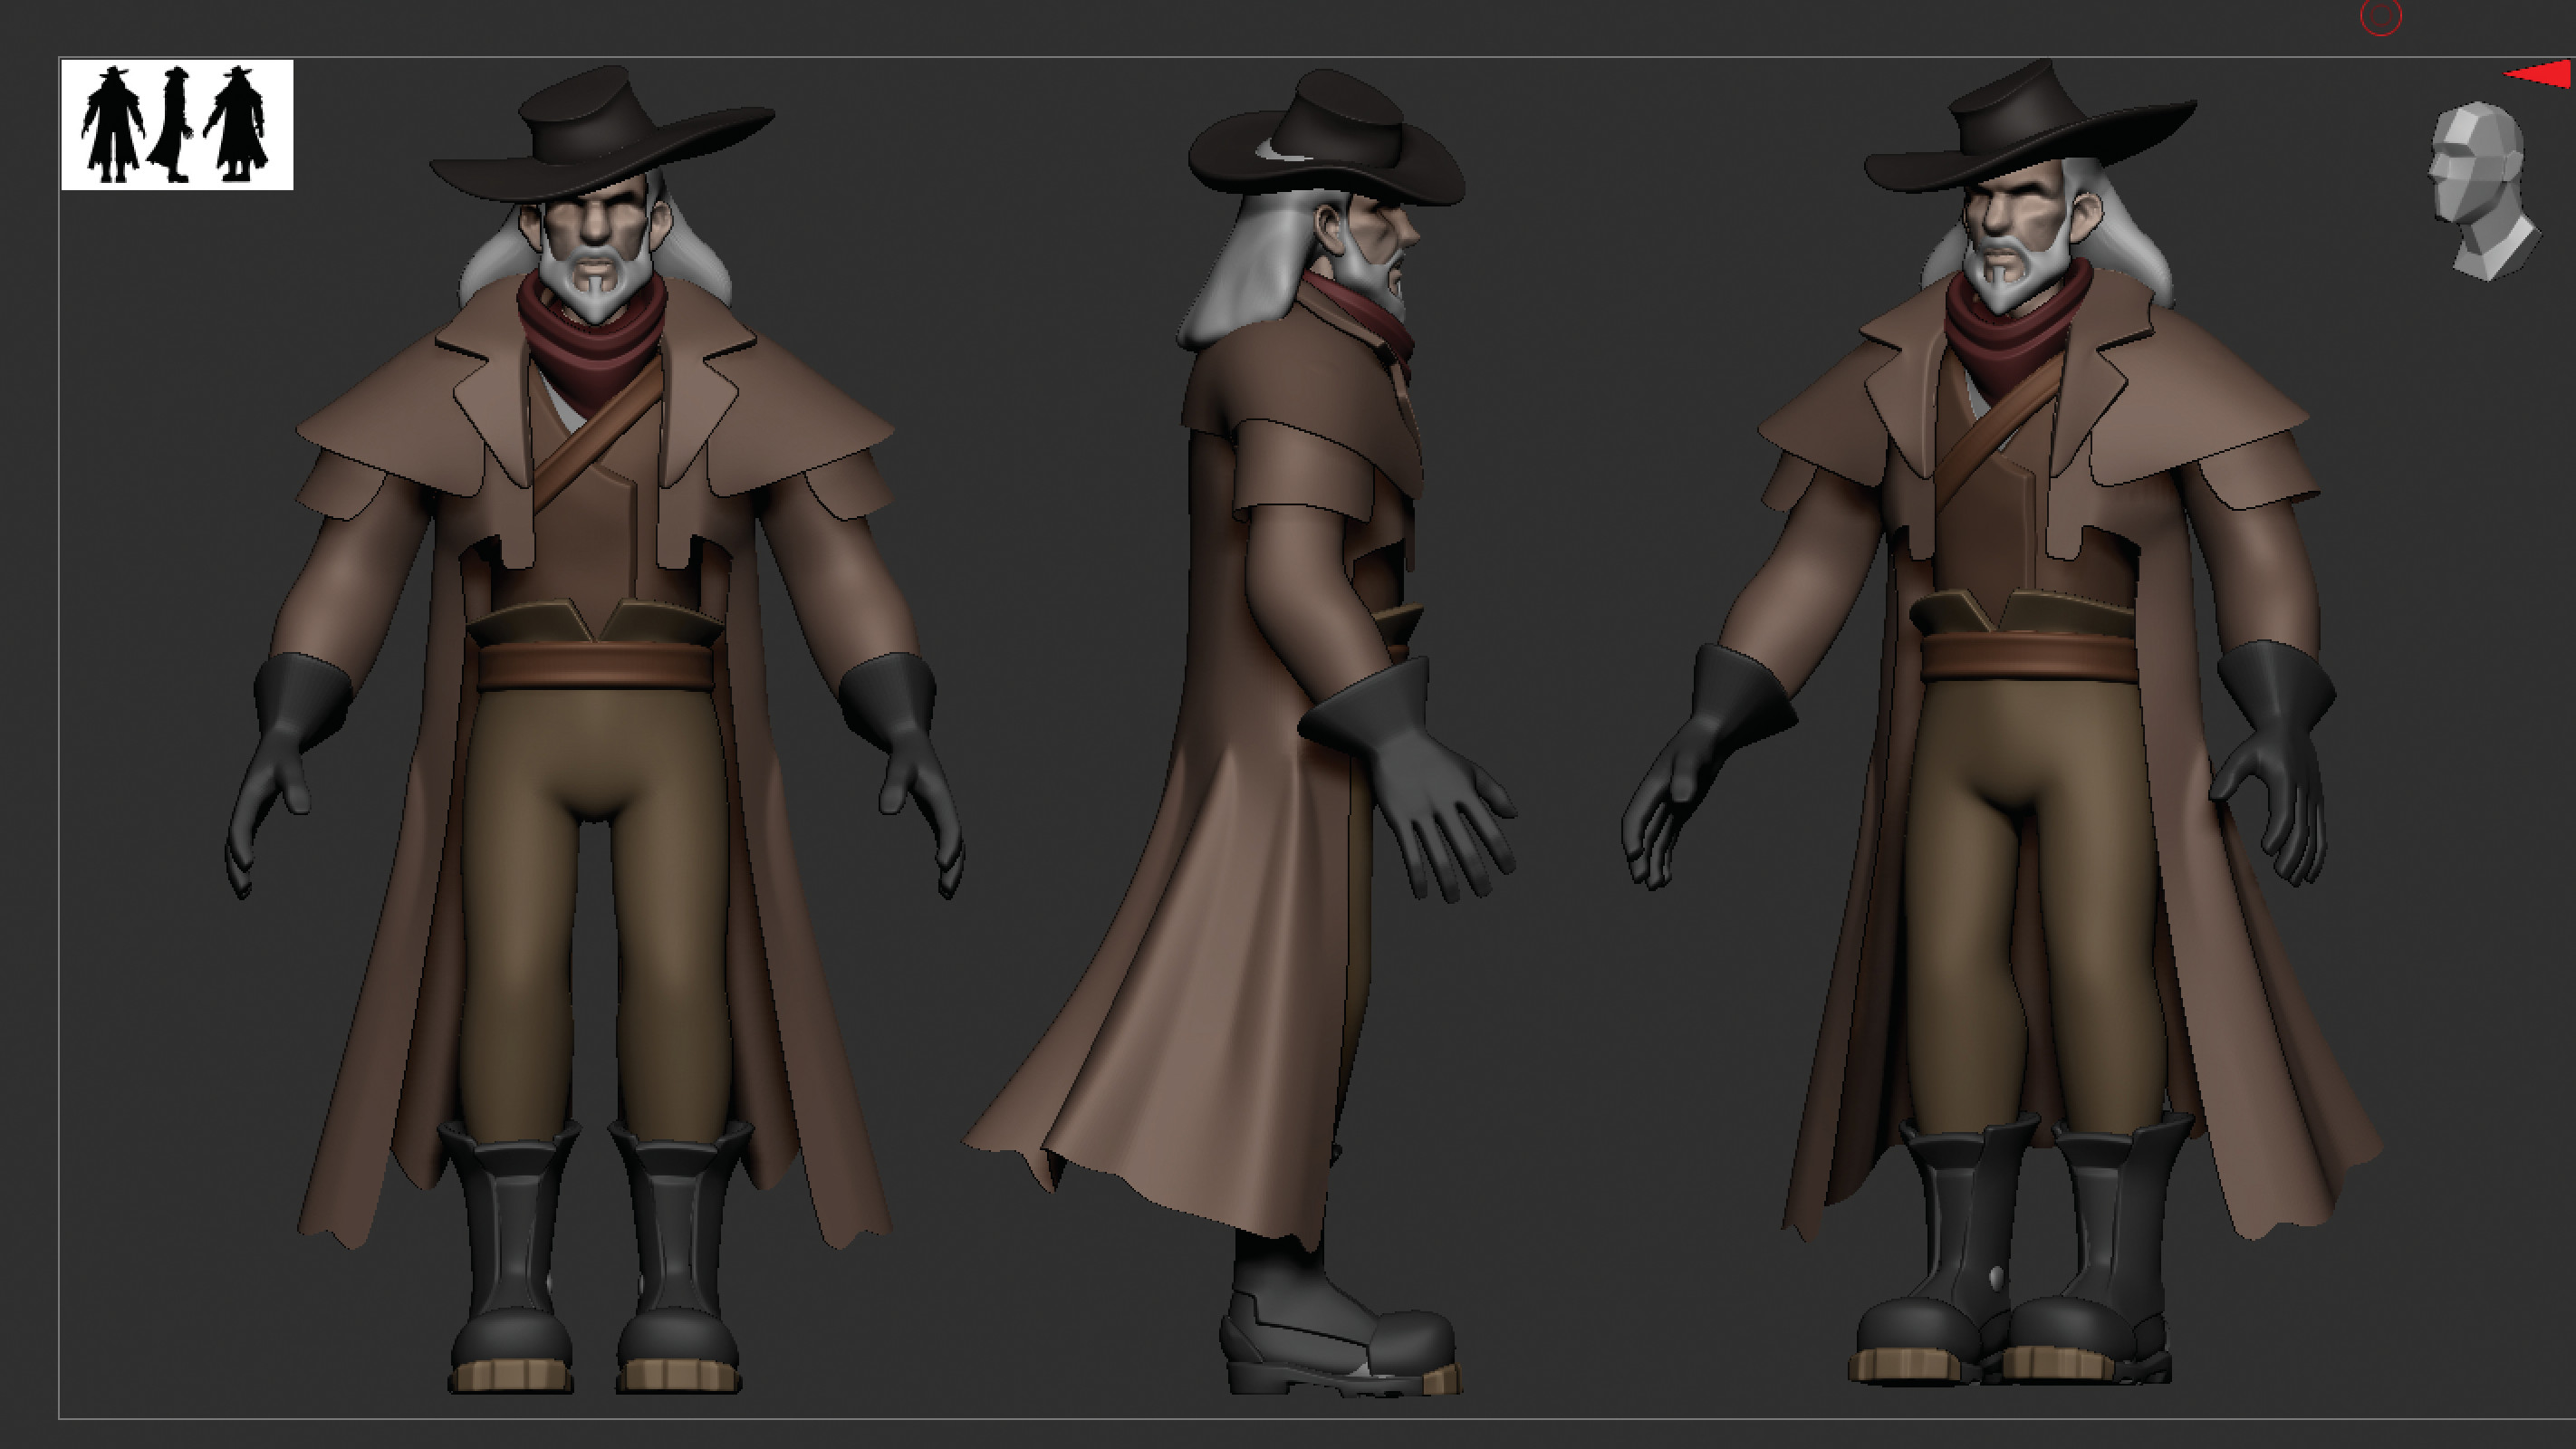
Now I can add edge loops, Weld vertices, use QMesh and Extrude, among many other functions, to build a low-poly model that can have crease edging applied for a clean subdivision model.
In the case of complicated elements such as a shirt, you may need to use multiple cylinders for the torso and sleeve, then merge the SubTools together and weld vertices.
Try to not introduce any thickness until the outer shell is complete. Once the shape is defined, I use Extrude or QMesh to add thickness as needed.
07. Defining the initial pose
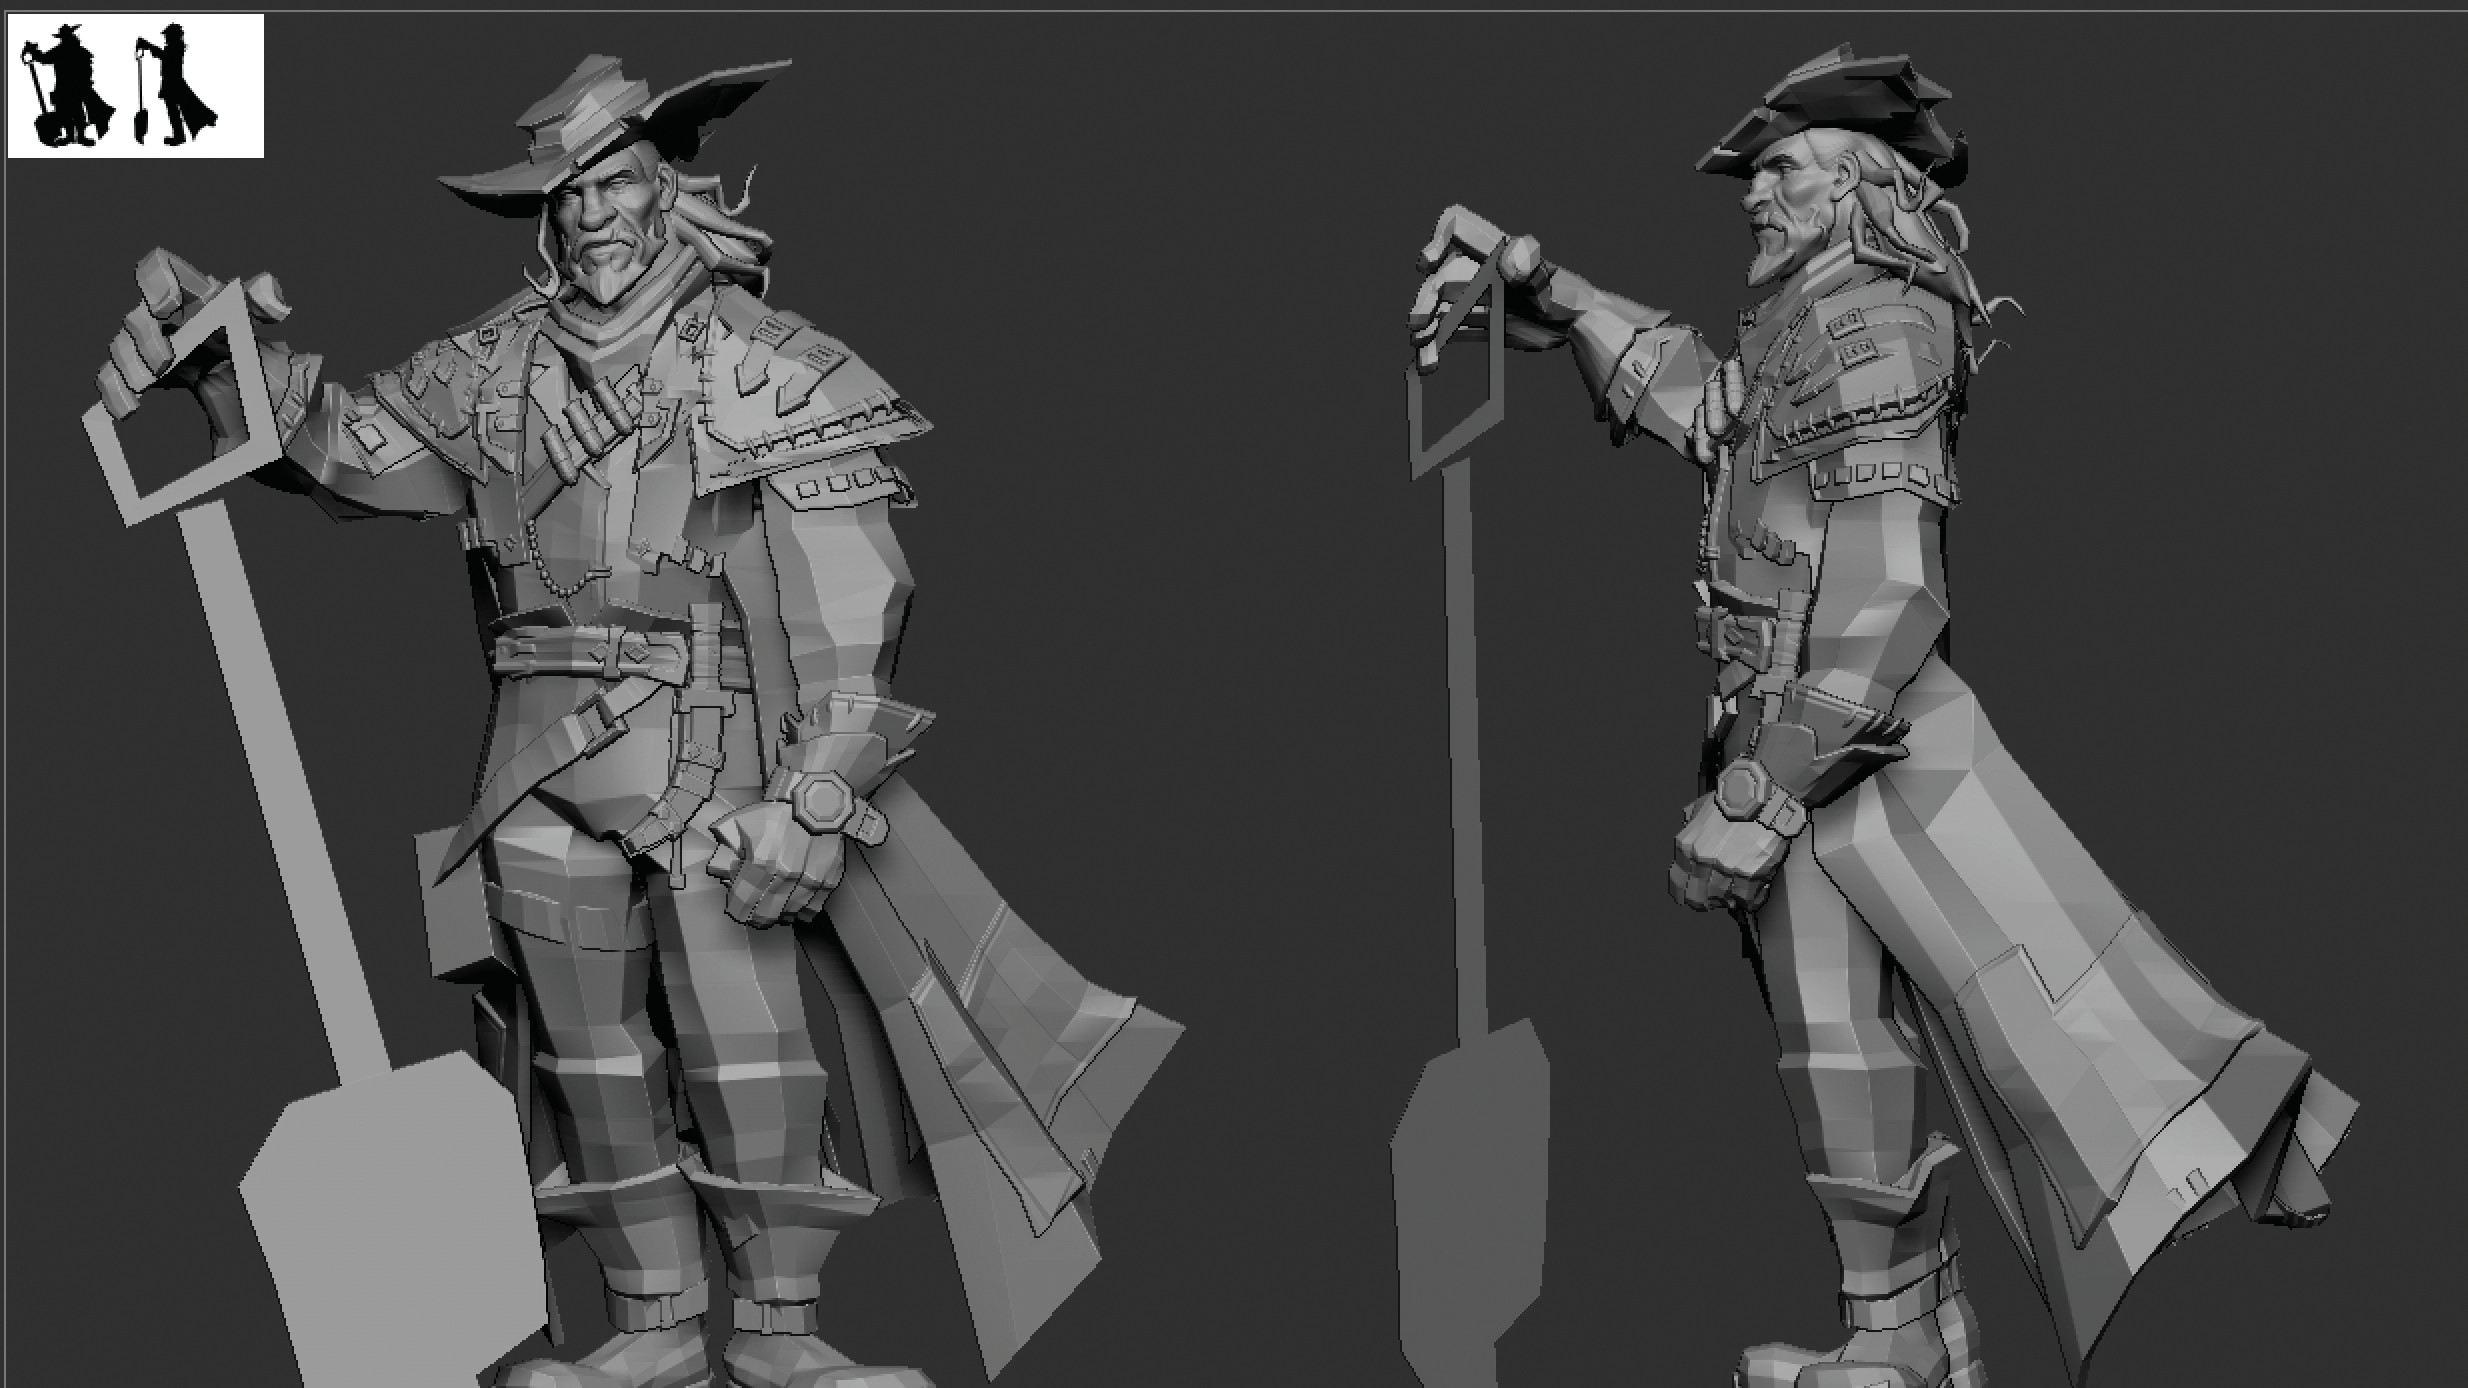
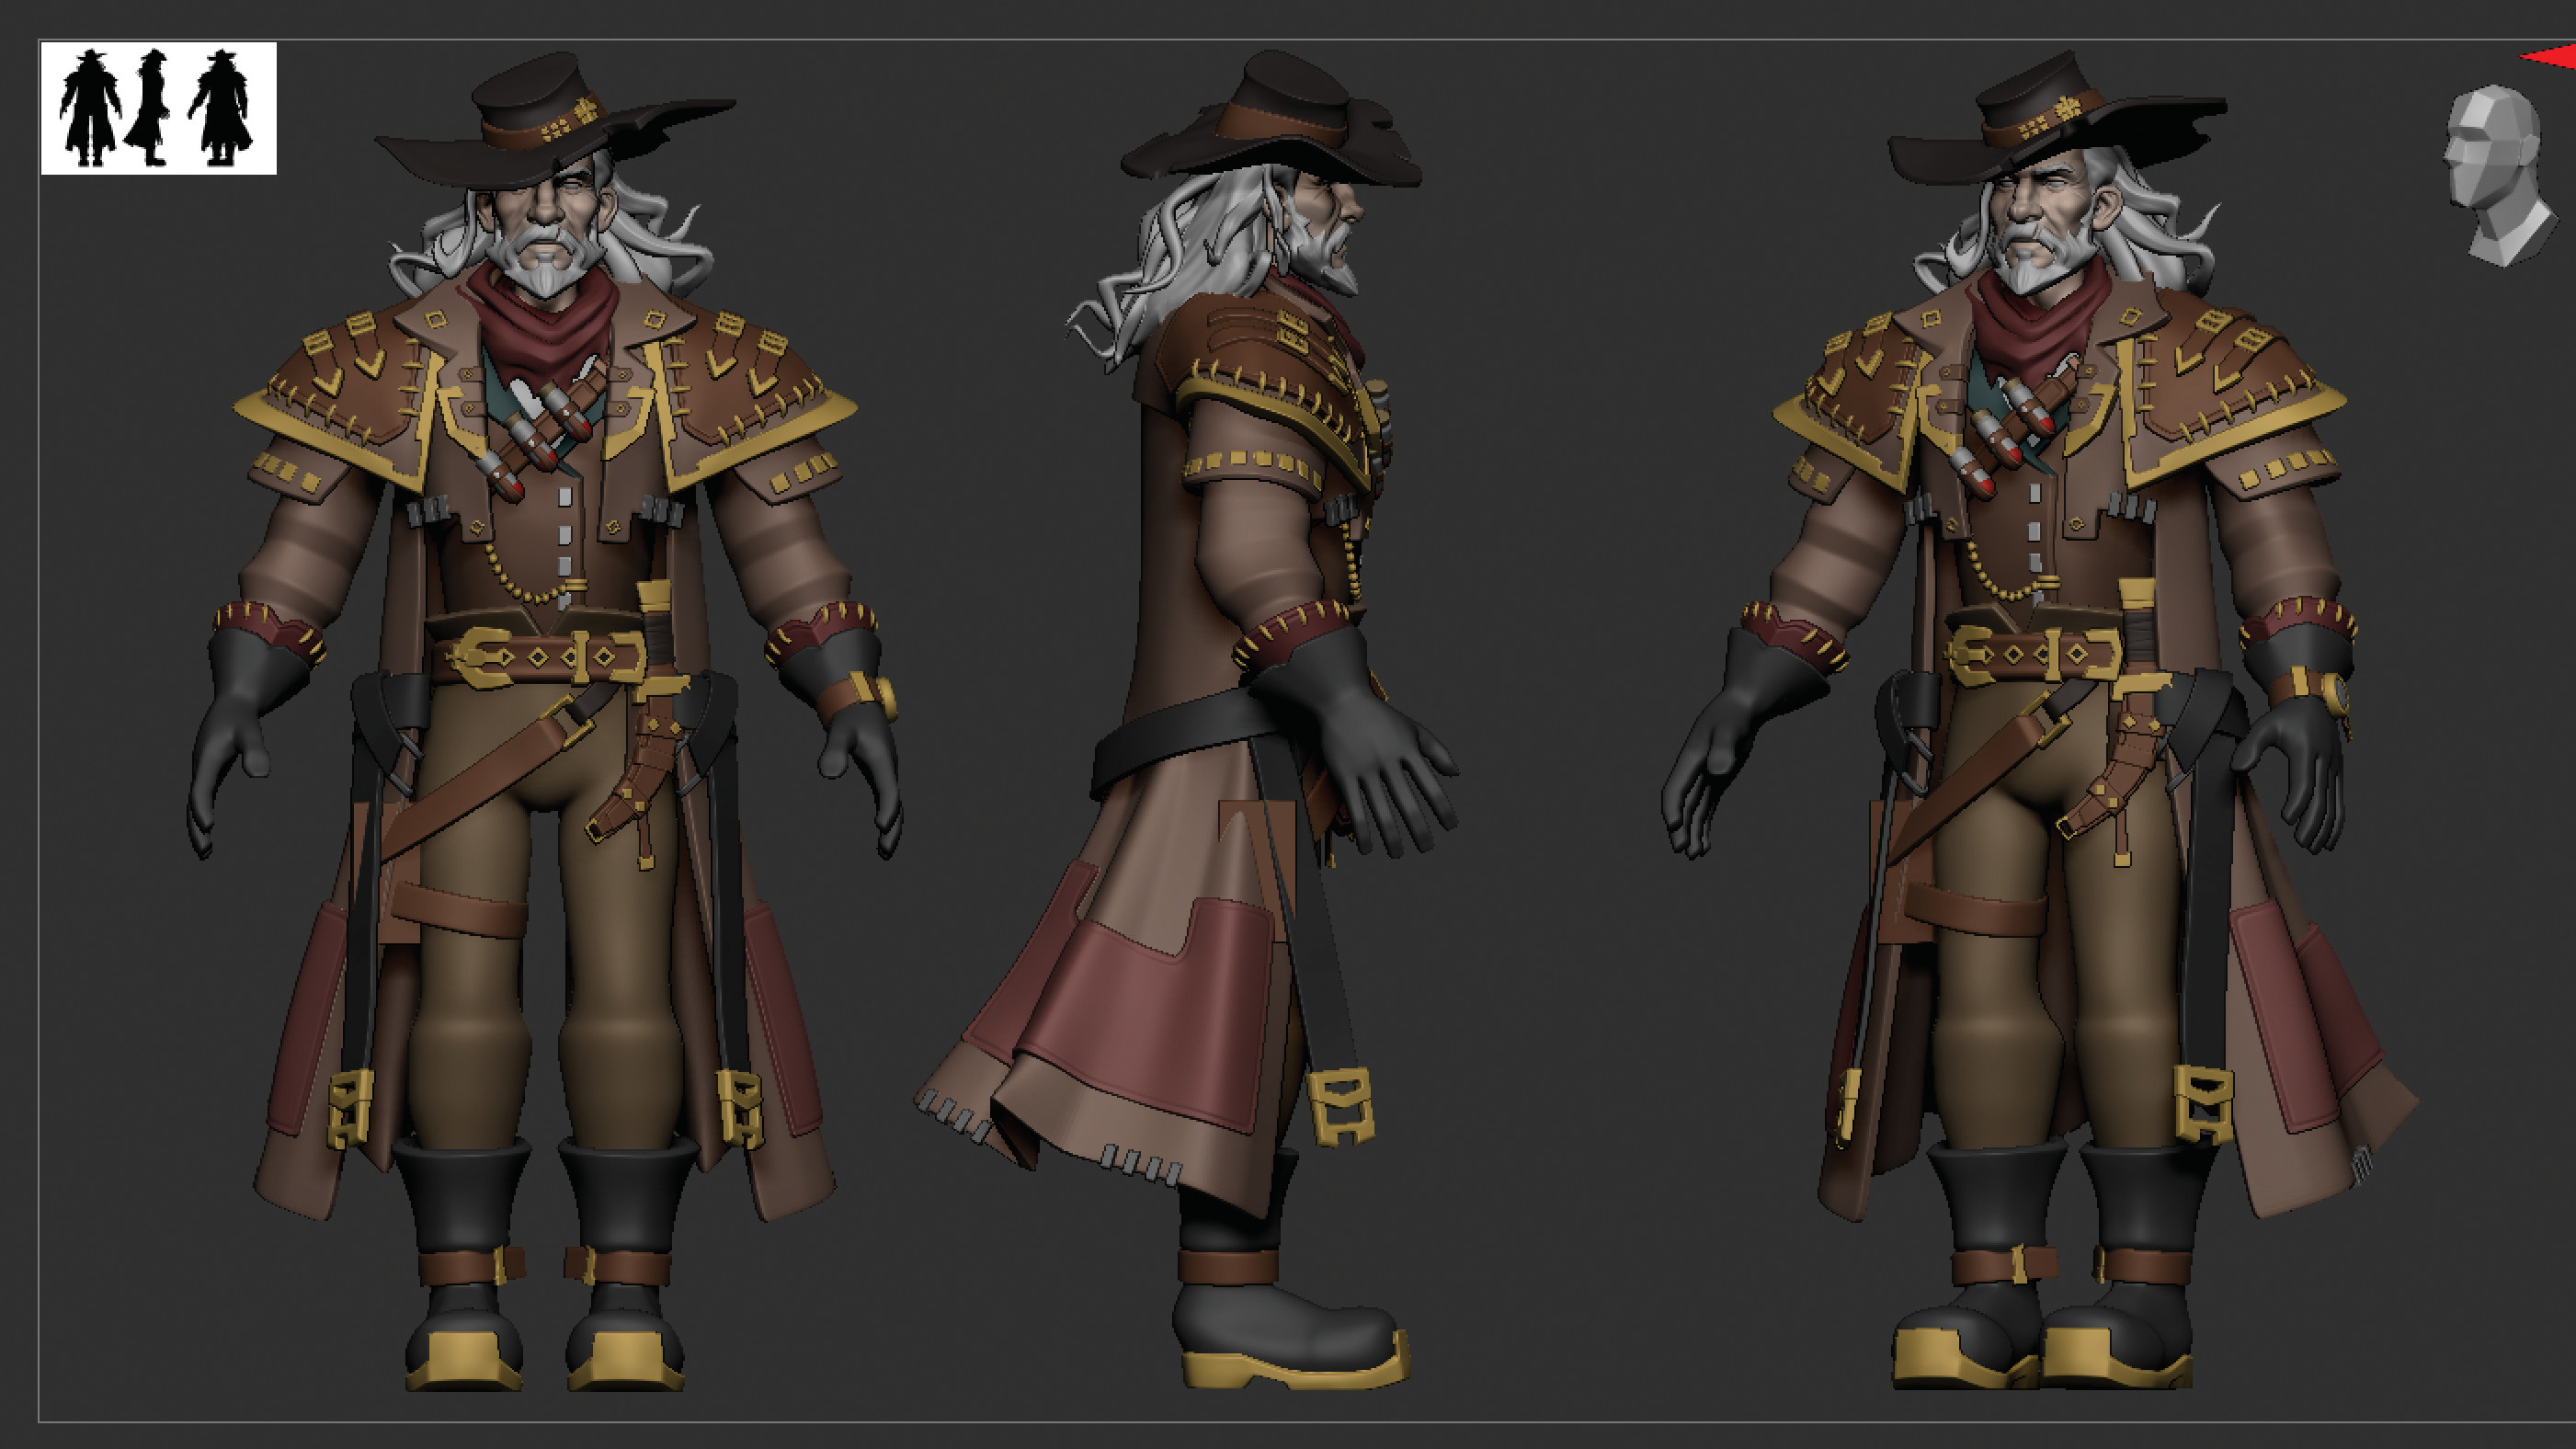
Once all the elements in my concept are blocked out, I can pose the character before committing to the final sculpting. Now I use Enter Transpose Master and make sure to turn on my front draw view for reference. If you're following, and because the geometry used to build this figure is extremely low-poly, you may need to turn on Dynamic Subdivisions for the entire transpose mesh to have an accurate idea of shape.
08. Finishing the pose
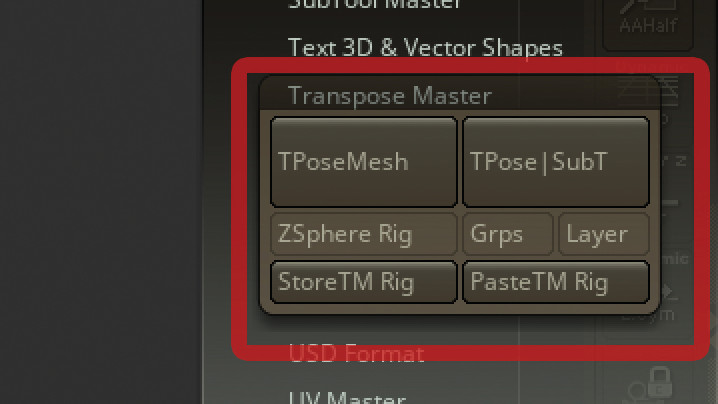
Now I use Transpose controls, the Gizmo and masking to translate, rotate and scale the shapes as needed to have my character match with the posing in concept.
I start by placing the full character in a general pose, followed by larger elements, such as the limbs and torso, before focusing on any tertiary elements such as pouches and jewellery. When the character is fully posed, I select TPose|SubT to propagate all the changes back to your model.
09. Applying subdivisions
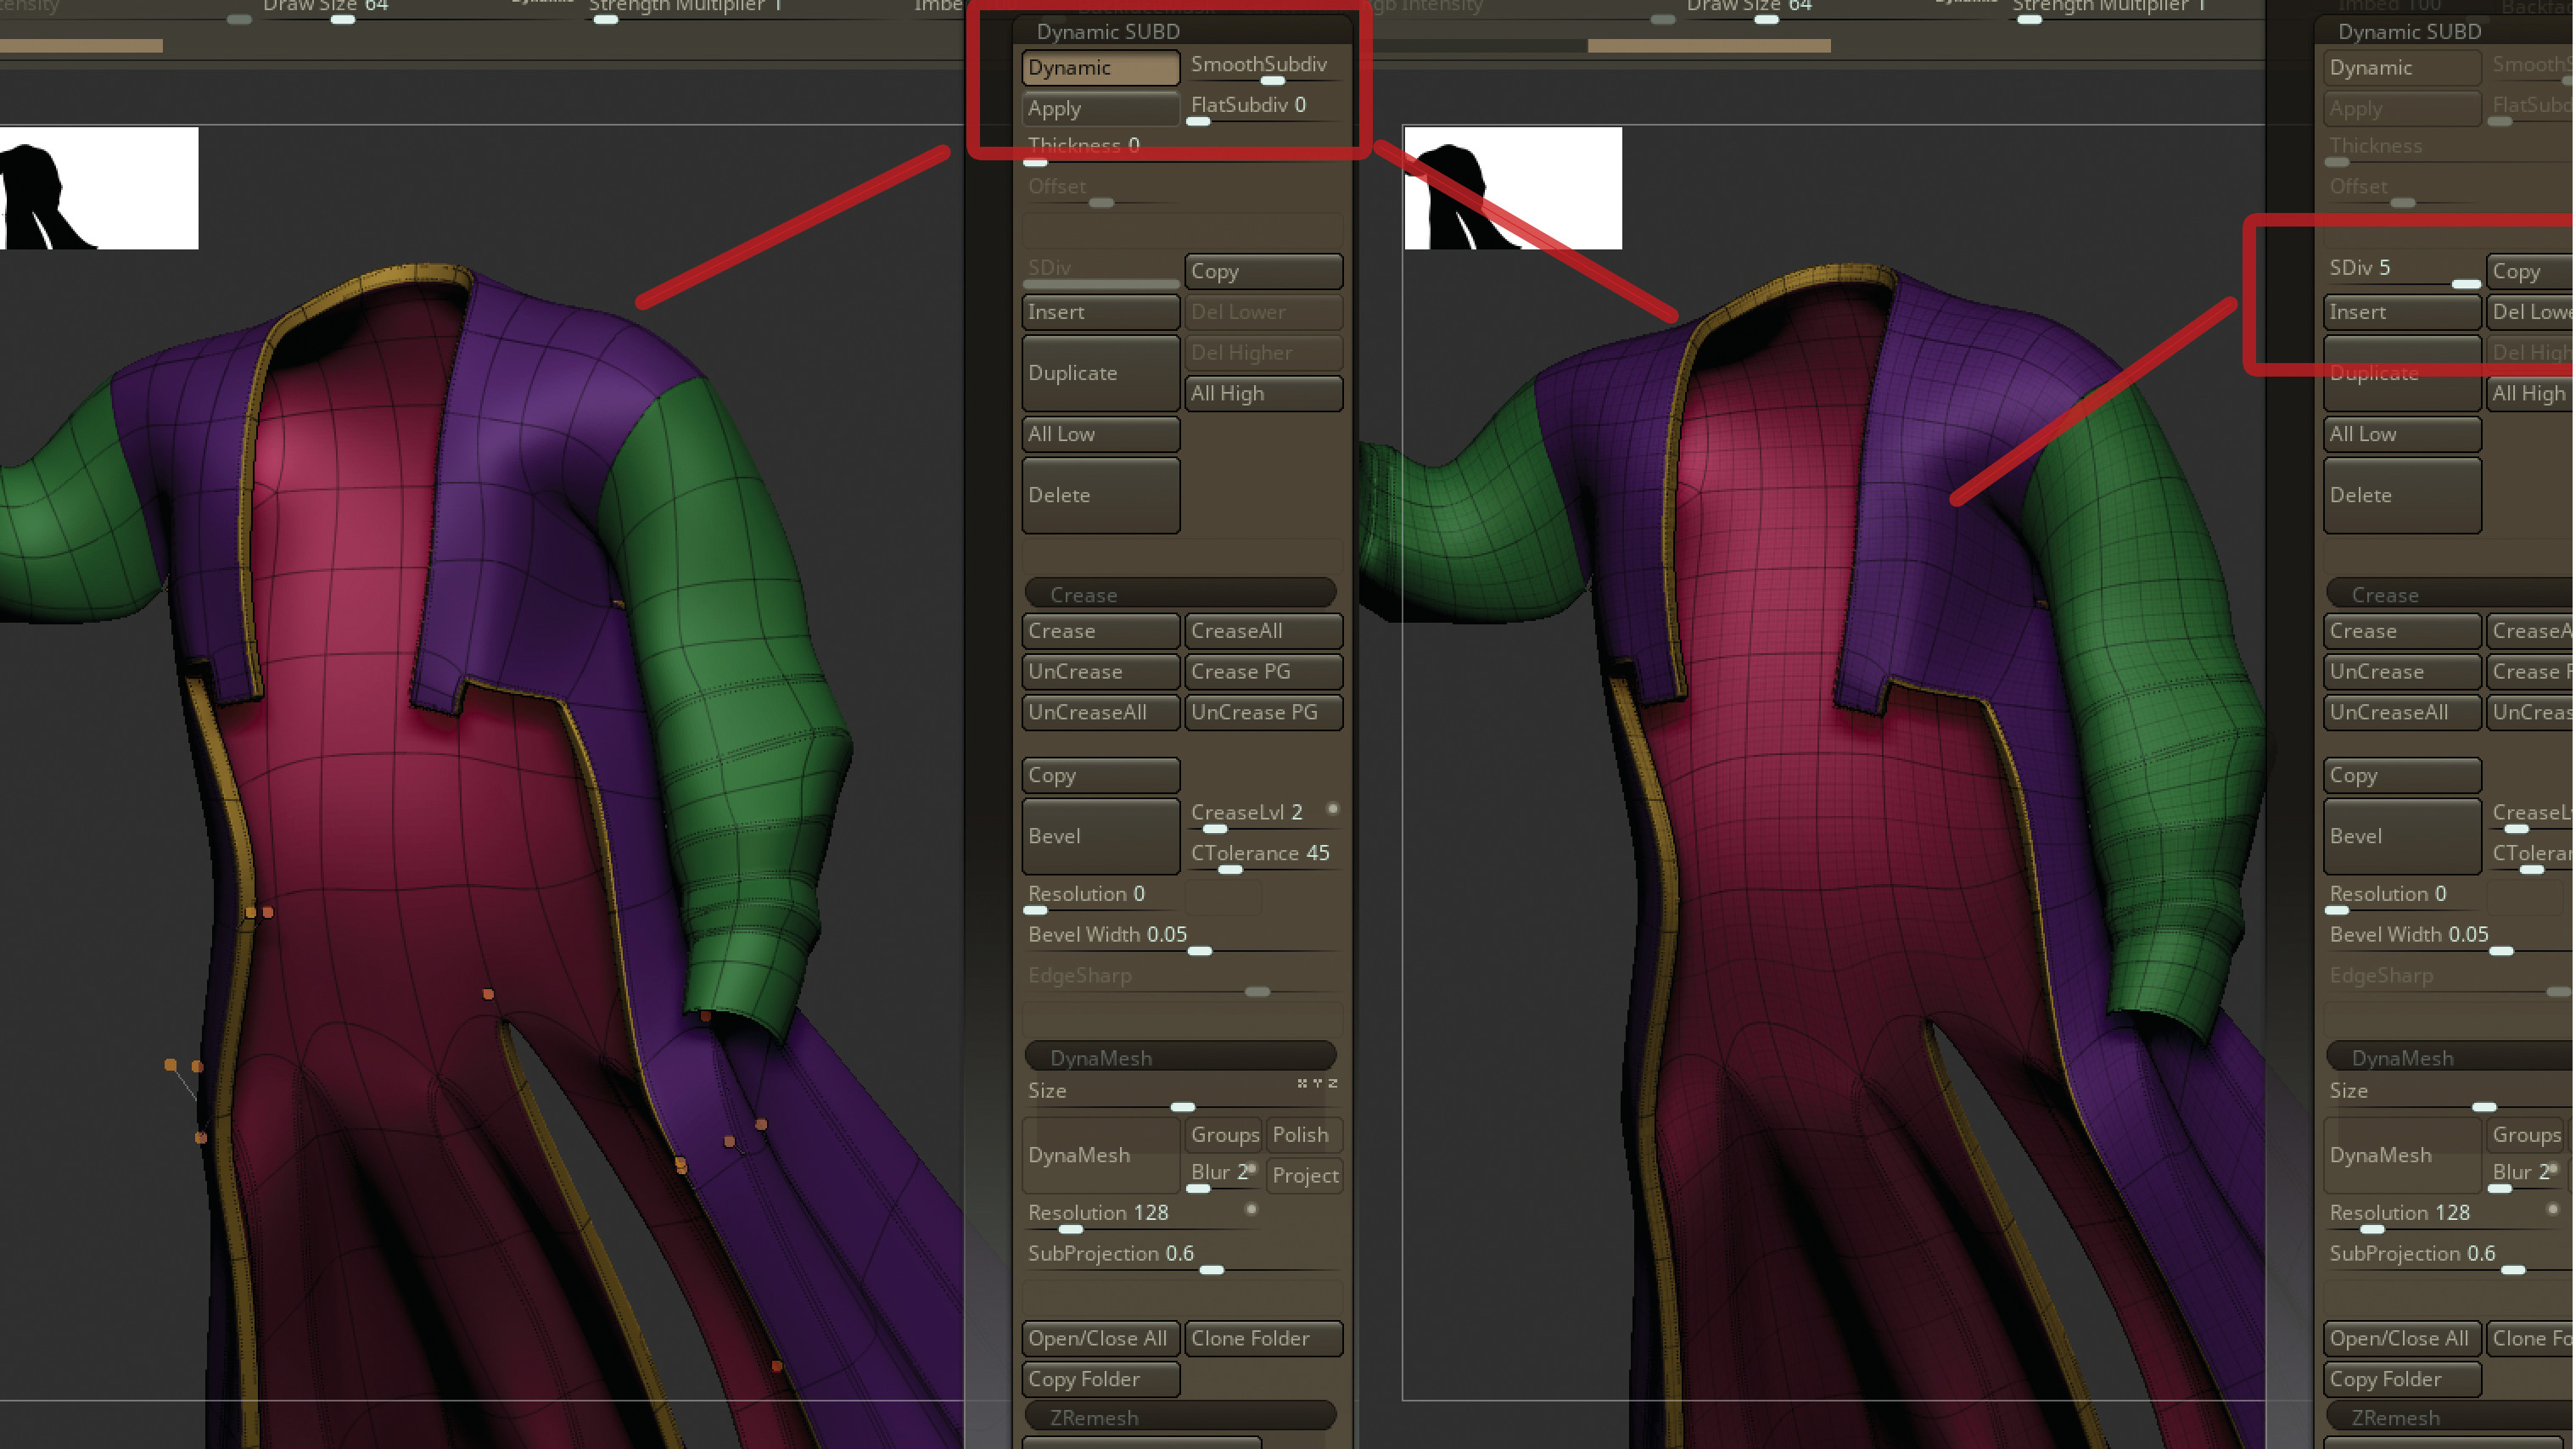
With the blockout now fully posed, I can begin more finalised modelling and sculpting. I start by applying the subdivisions in Dynamic Subdivision, which will create real geometry and provide actual subdivision levels for each respective portion.
10. Using Dynamesh for organics
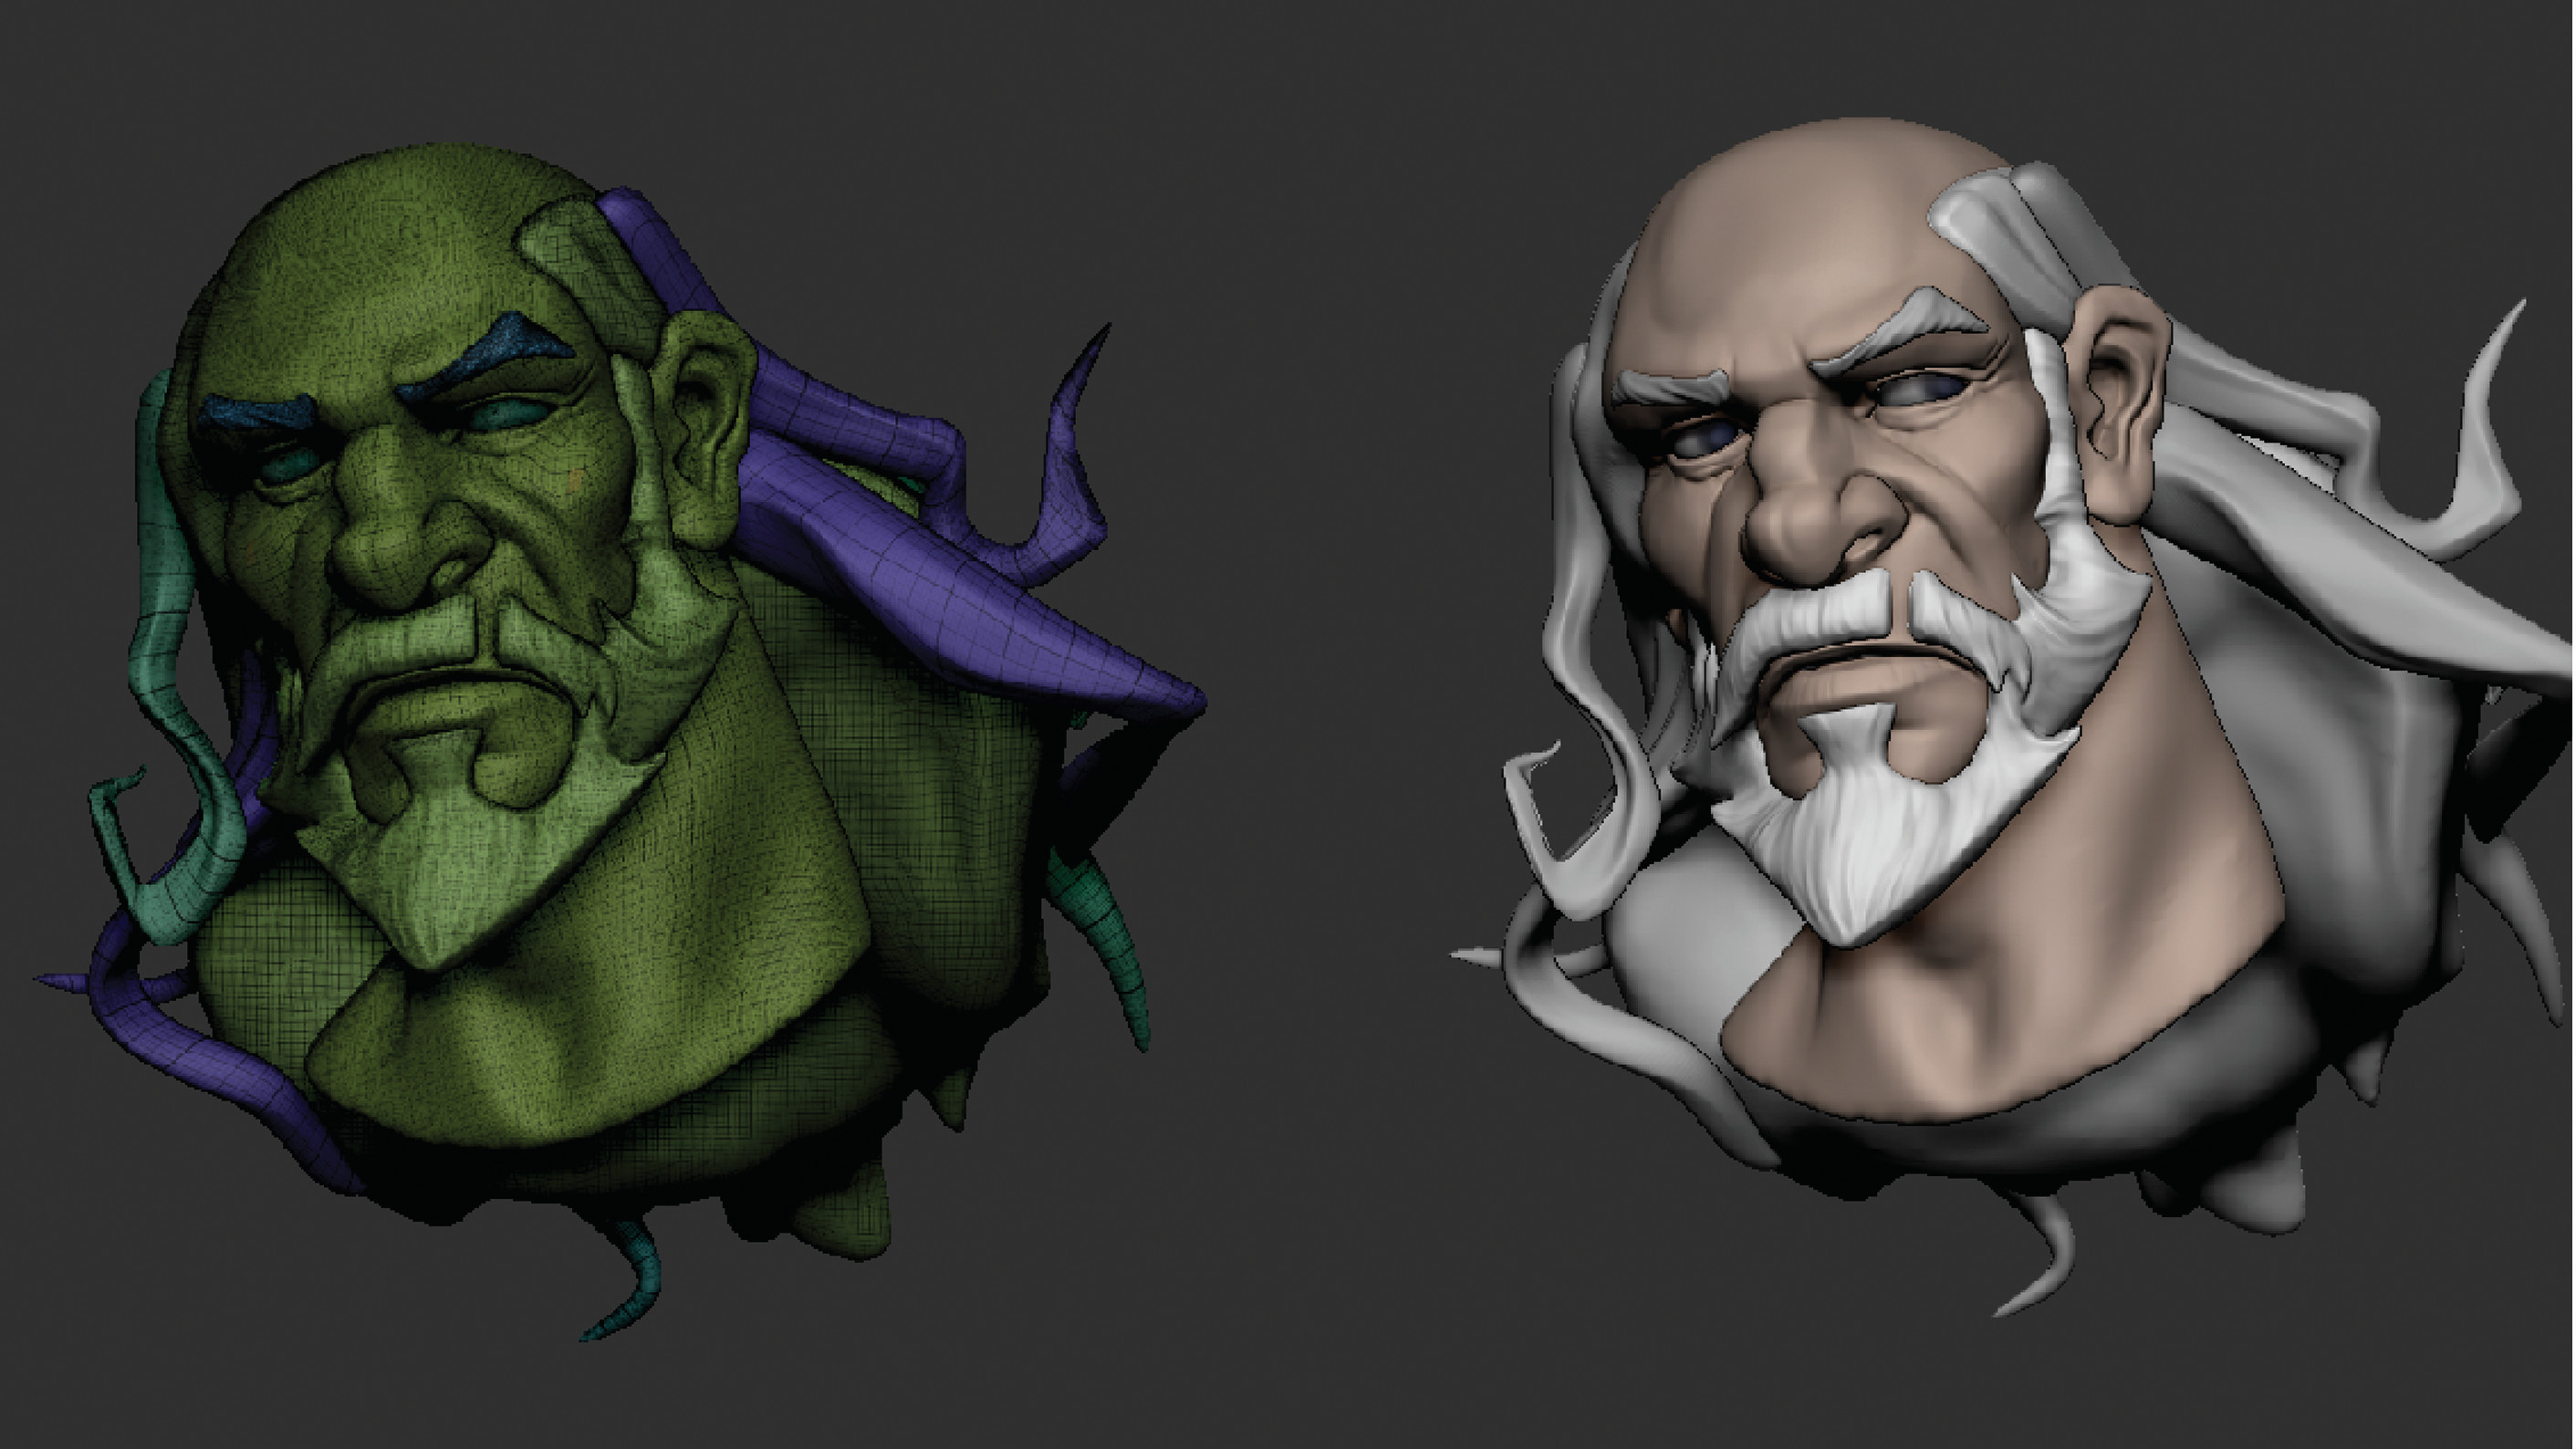
For organic elements like the body, I need to merge these SubTools together. Sculpt on the shapes to match the forms and shapes of the concept. After finishing the sculpting phase, but before any polish pass, DynaMesh the organic elements together as needed, for example the head, ears and neck, at a resolution that will retain most of the detail.
It all comes down to personal preference when to DynaMesh these elements together. Non-organic shapes that have been modelled correctly, like armour trims or any clothing elements, shouldn’t be DynaMeshed, as I want to use that geometry again for portions of our low-poly, so preserving the topology for these elements is important.
11. Creating the low-poly retopology
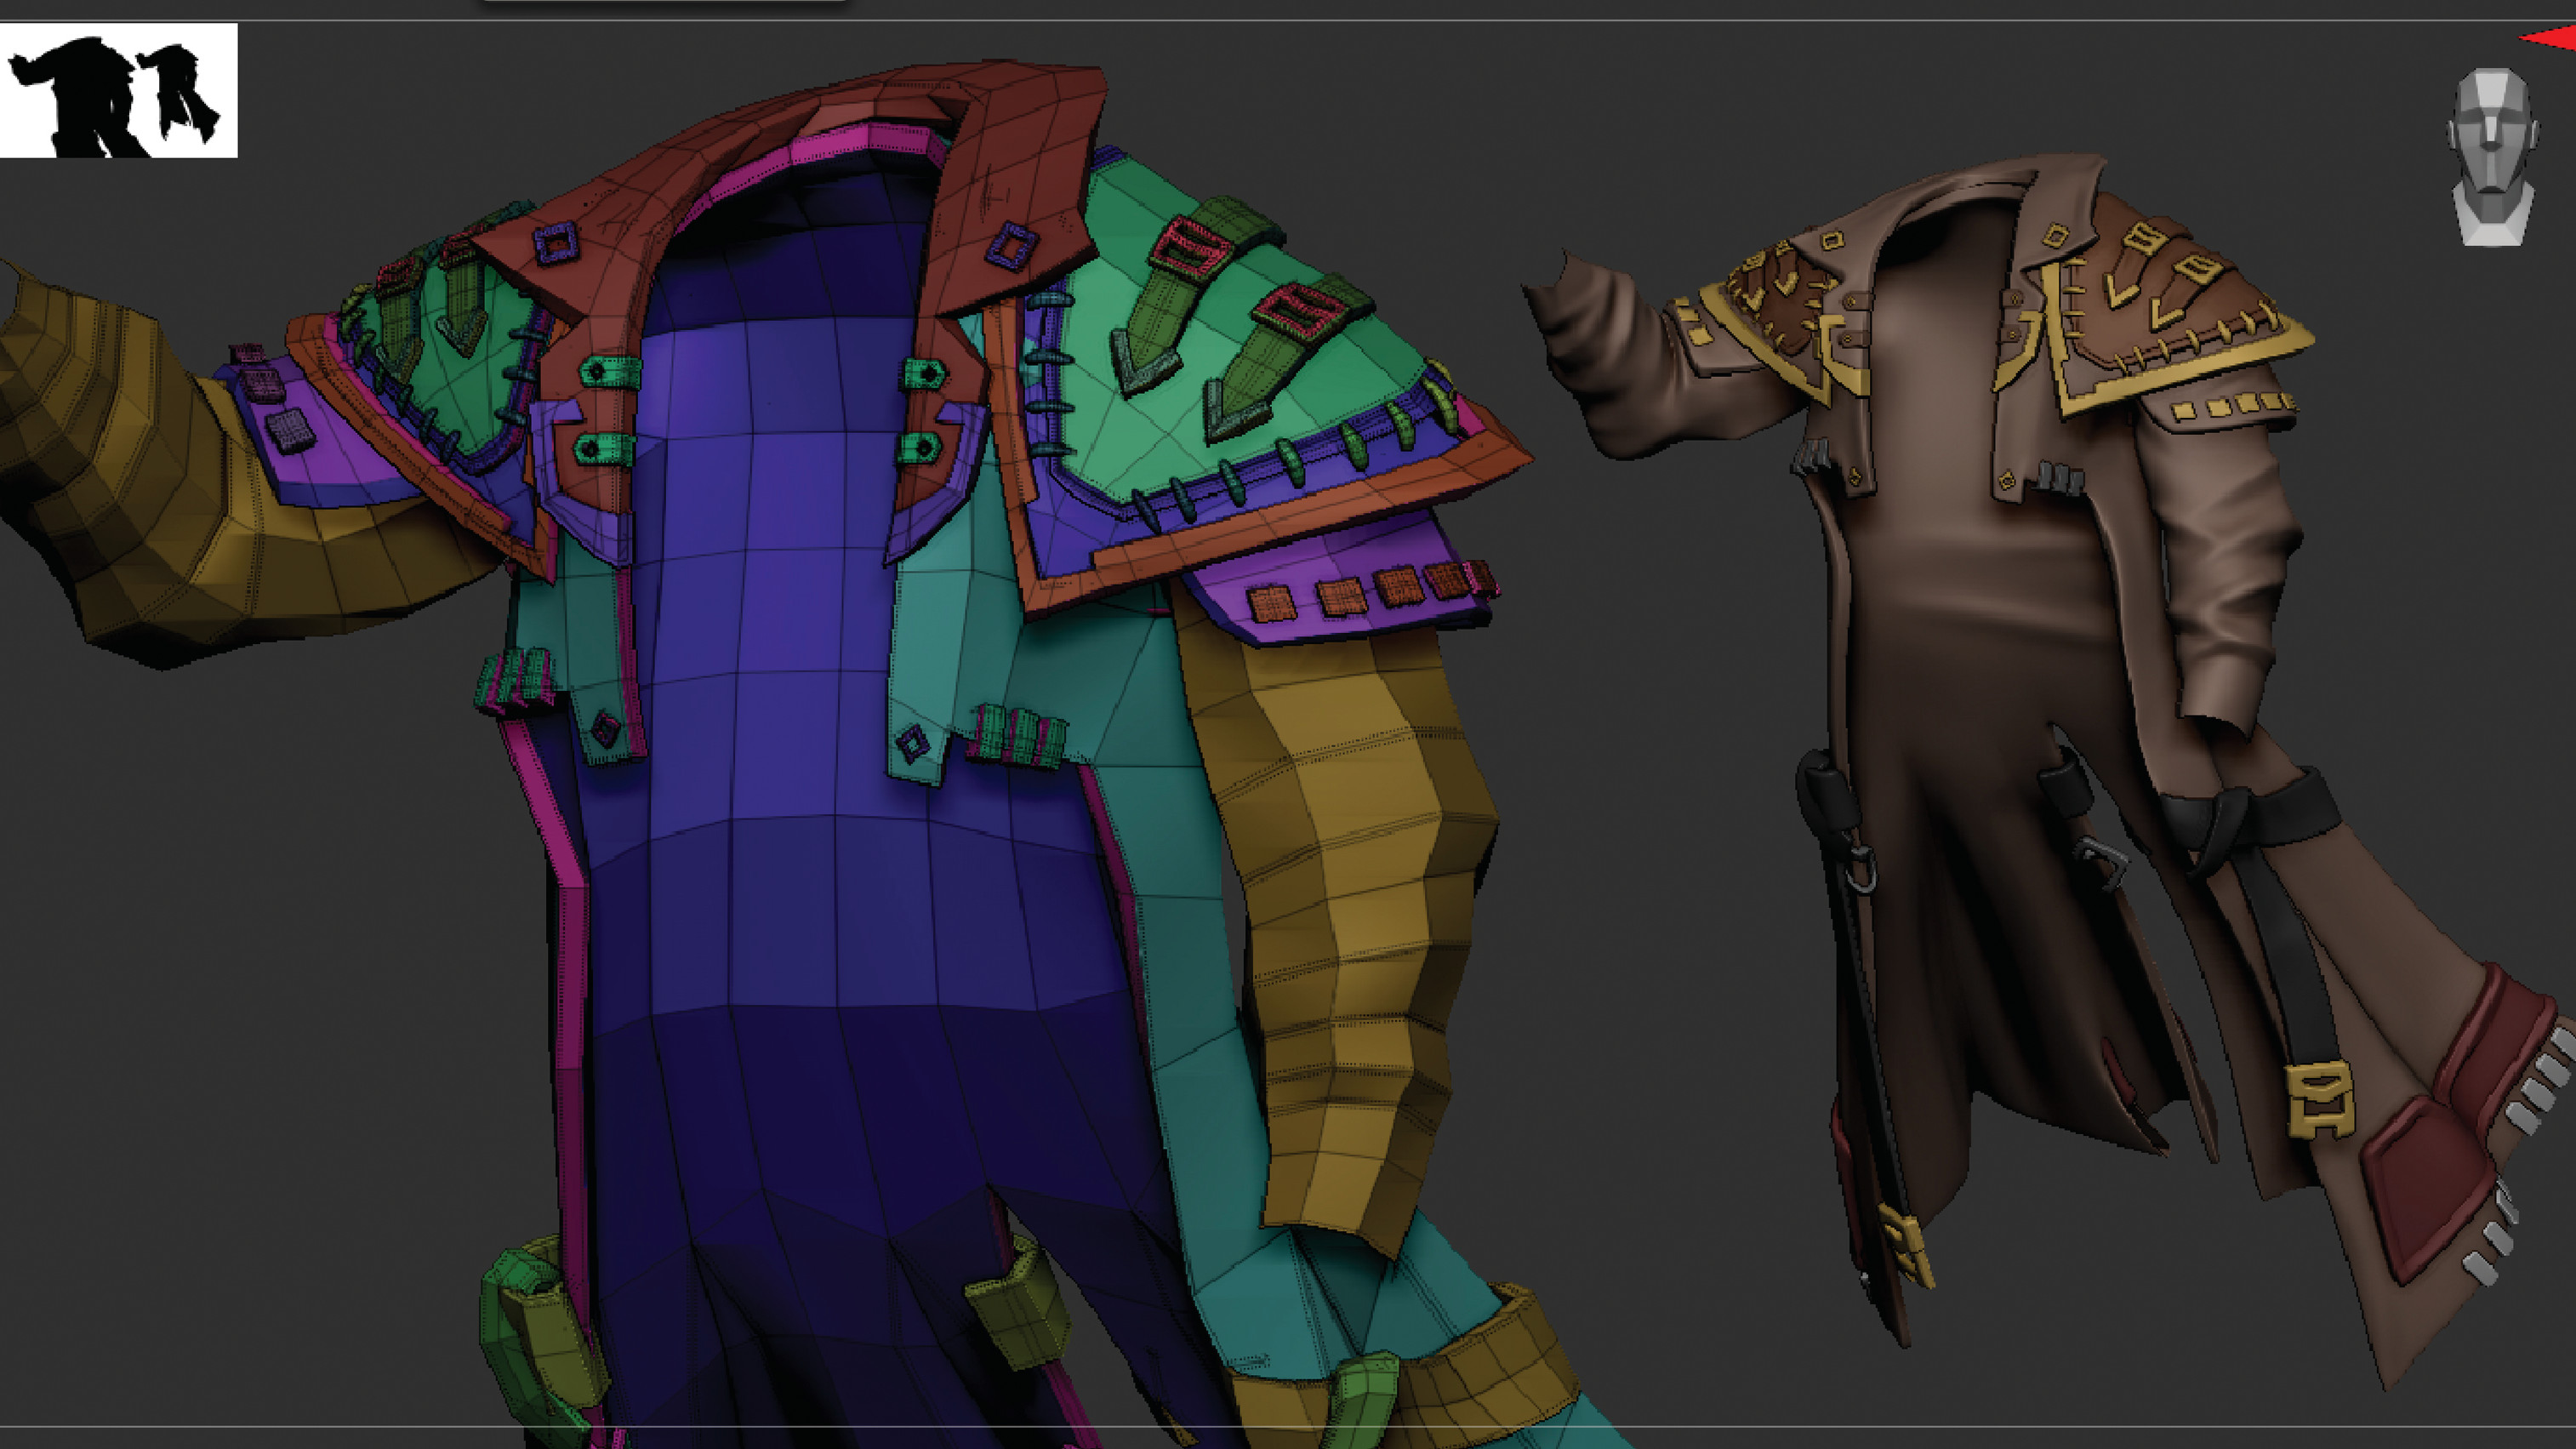
With the character fully sculpted and finished, I can export it and begin on the lowpoly retopology. First, I make sure Polypaint is applied to the elements that are similar, for example gold trims getting a specific flat colour value and hue, and trousers, hair, eyes and so on getting different flat colour values and hues. Use the ‘Merge Visible’ option on the entire high-poly character.
12. Decimating the model
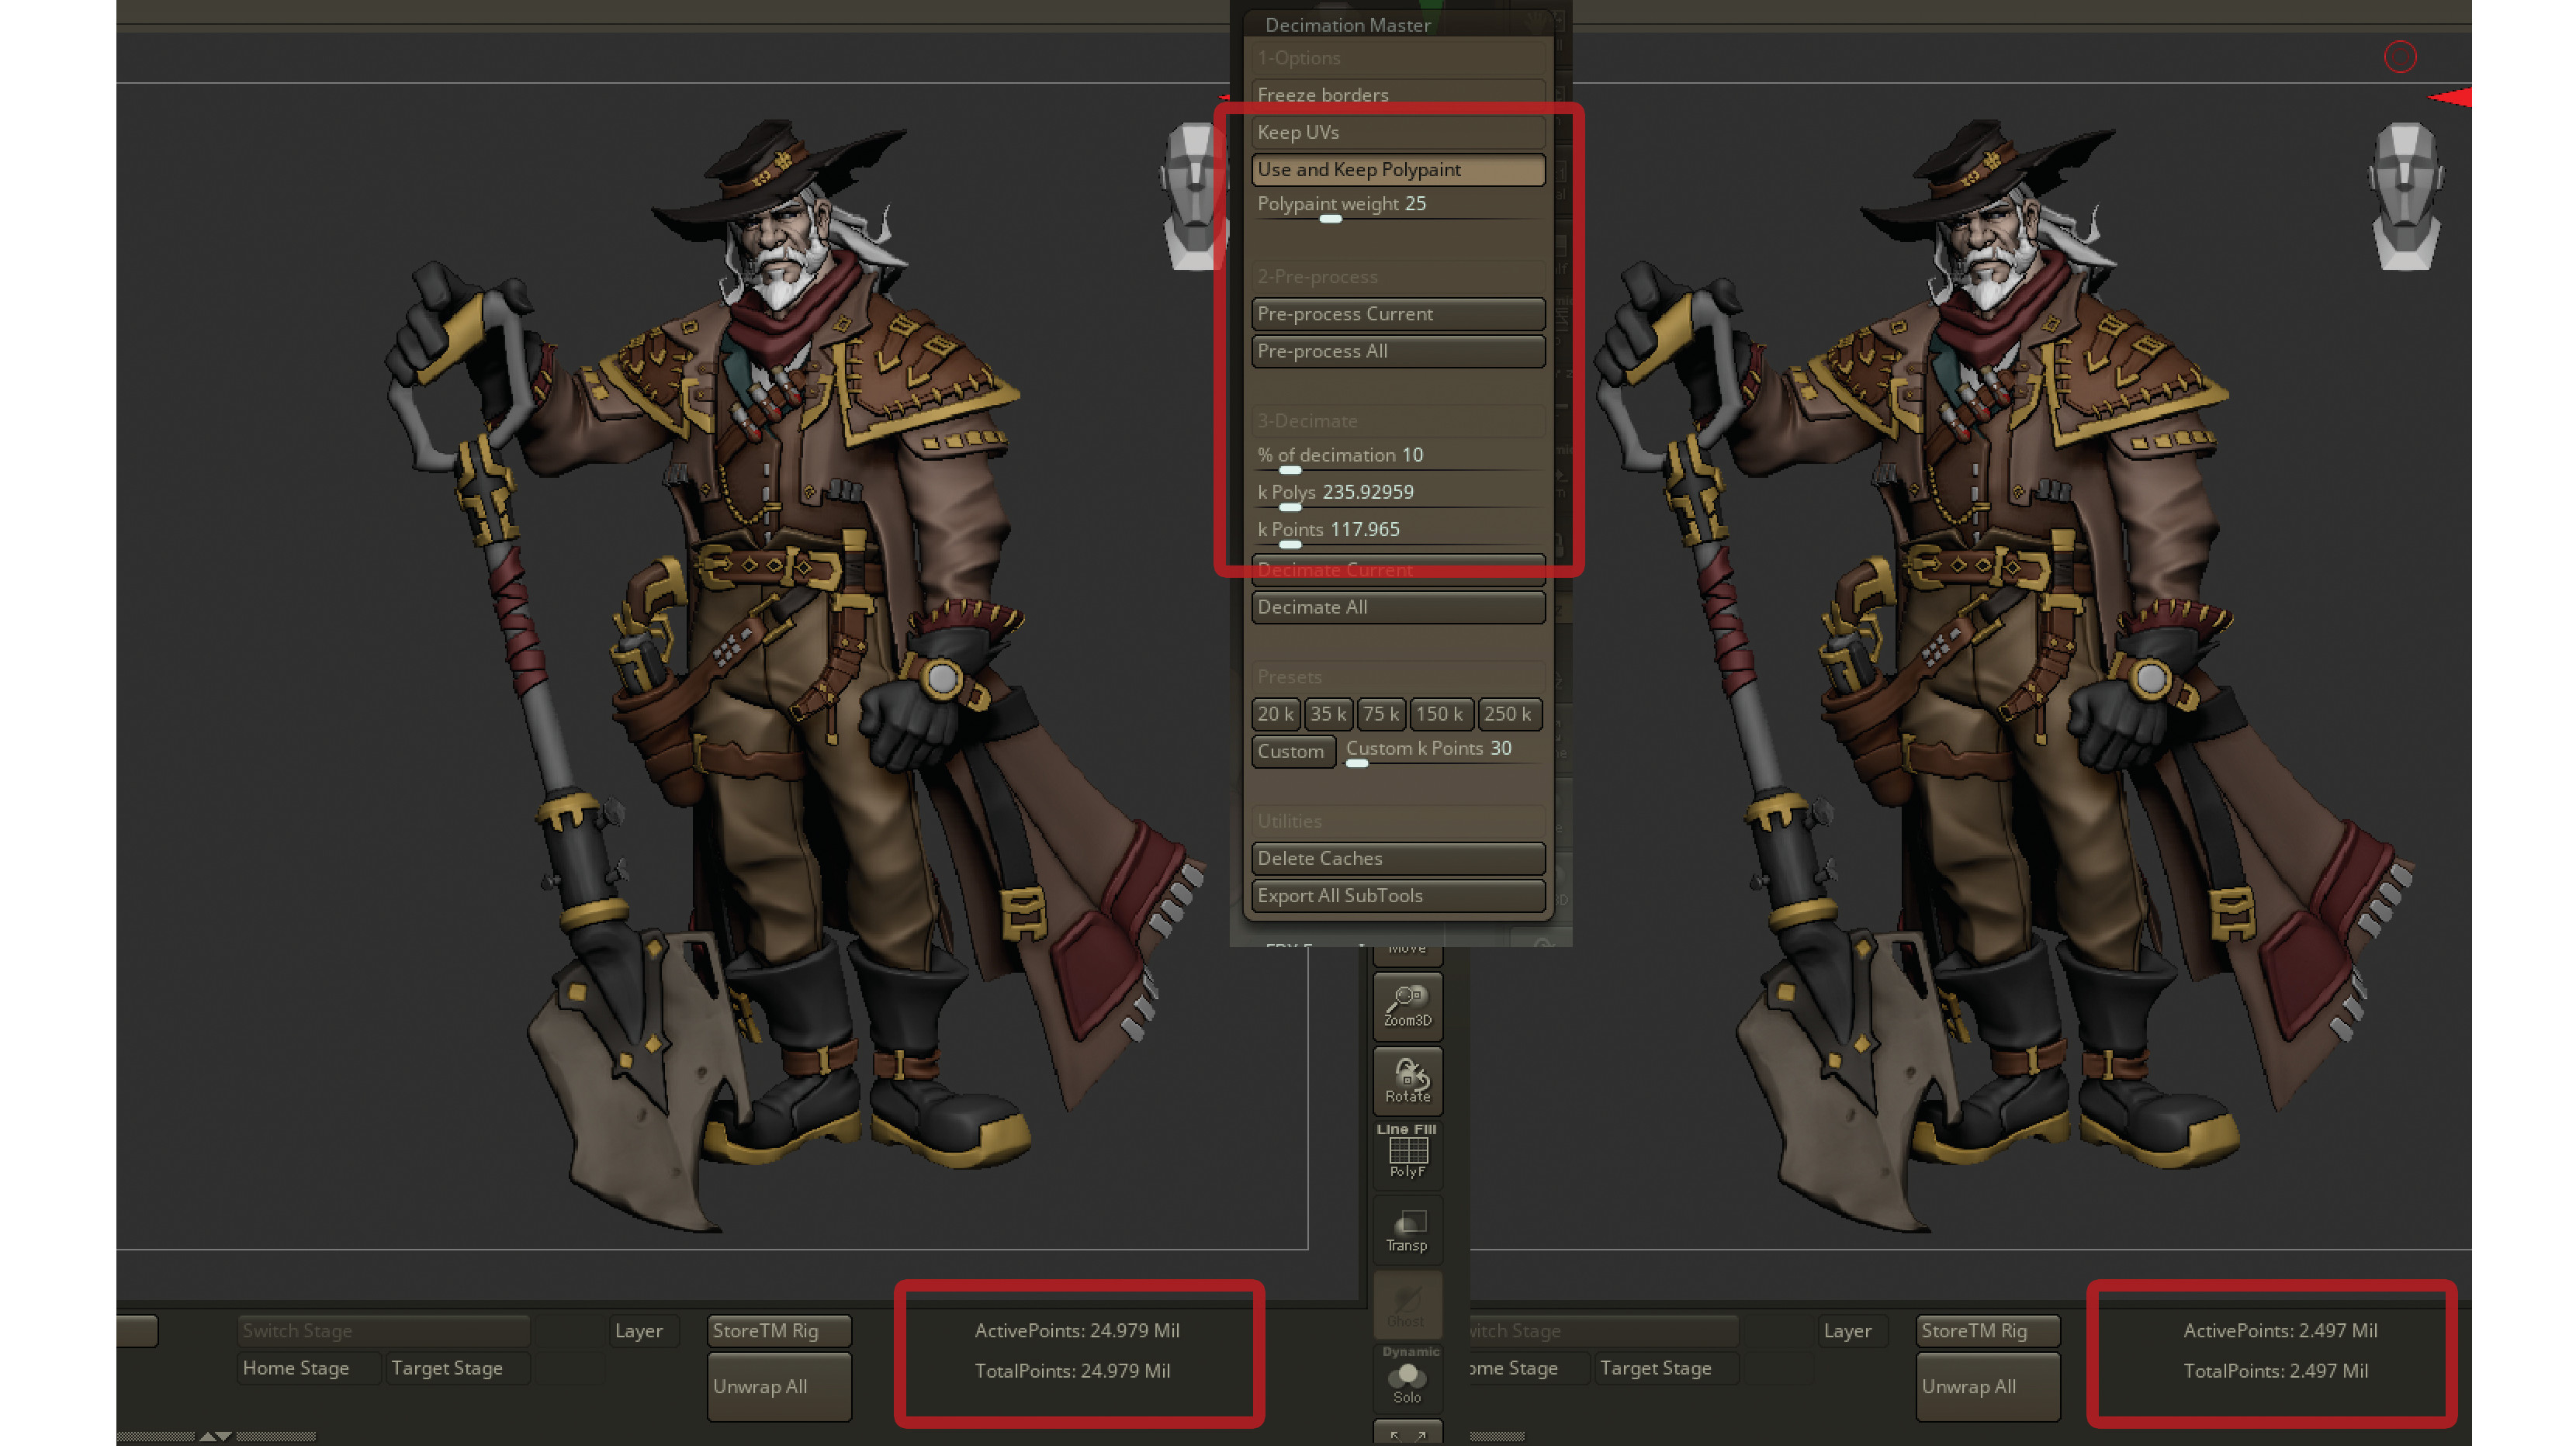
Here I select the merged mesh and go to Decimation Master. How much to decimate depends on the model’s total polycount and your system’s performance.
Make sure to turn on ‘Use and Keep Polypaint’, and then click ‘Pre-Process Current’. ZBrush will analyse the model and then you can decimate by a percentage. Once the model is decimated, I make sure to auto-group the entire decimated high-poly and then export, with OBJ or FBX fine.
For the portions of the model on which I use ZModeler and didn’t DynaMesh, I circle back to the original ZTool and lower the subdivisions as needed to a manageable topology, then export these elements. If the geometry is model led well, we can likely use the entire mesh, or portions, as my low-poly model.
13. Loading for retopology
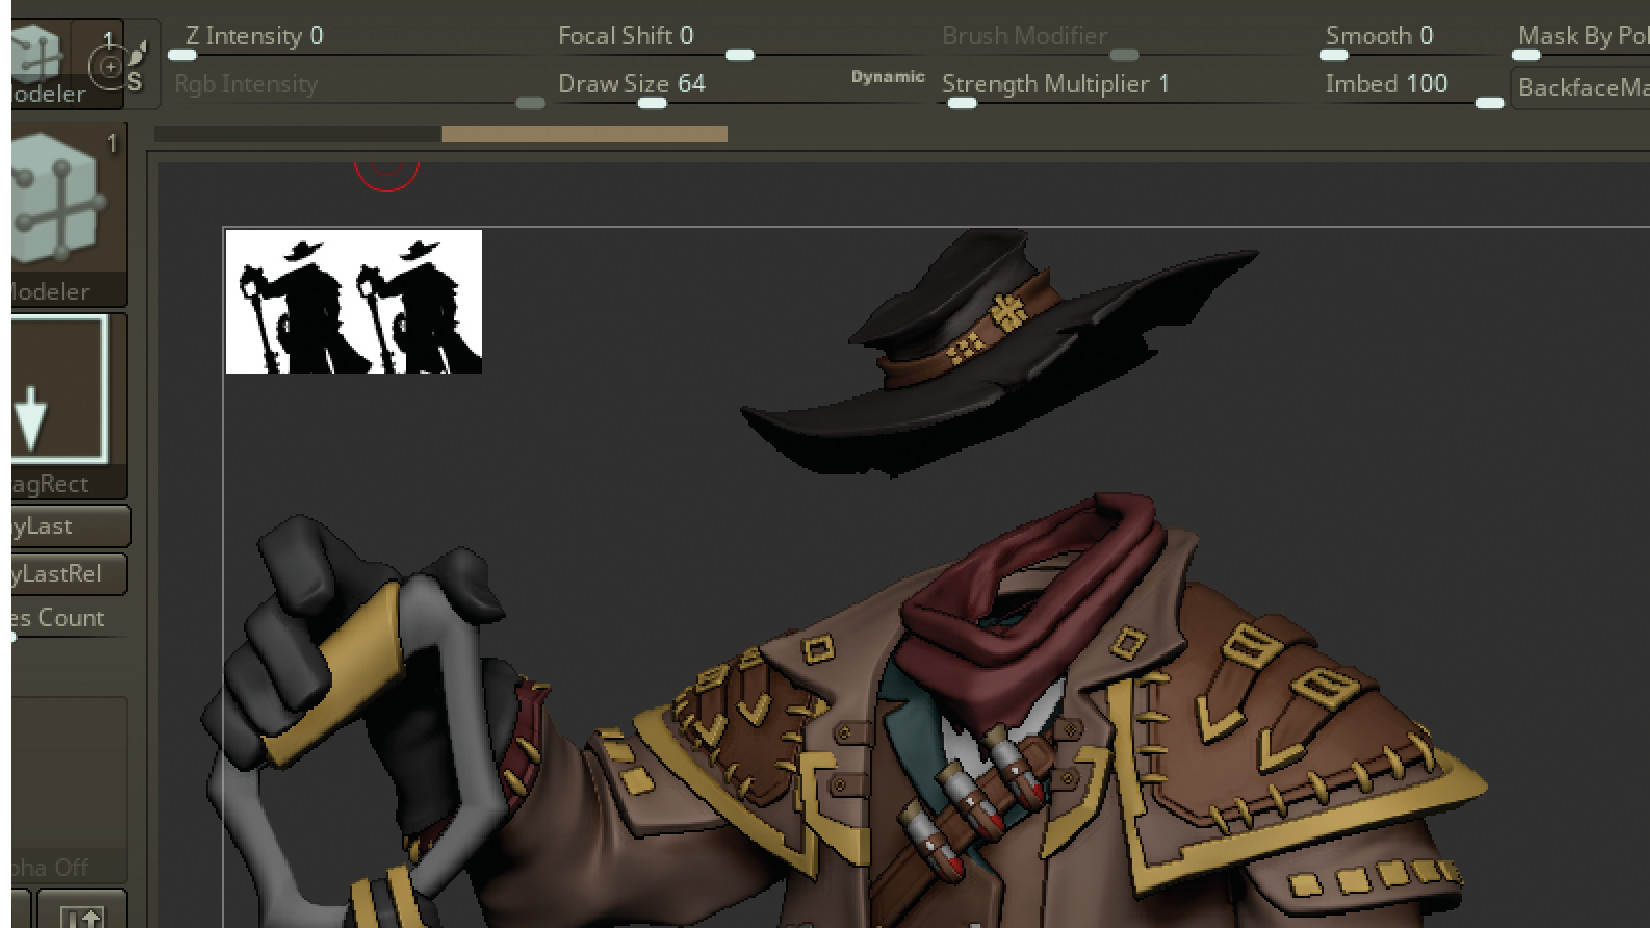
For the retopology, begin by loading the decimated model into your modelling package of choice. Most software will have a proper suite of retopology tools. You can also use standalone apps like TopoGun as needed.
14. Finishing the retopology
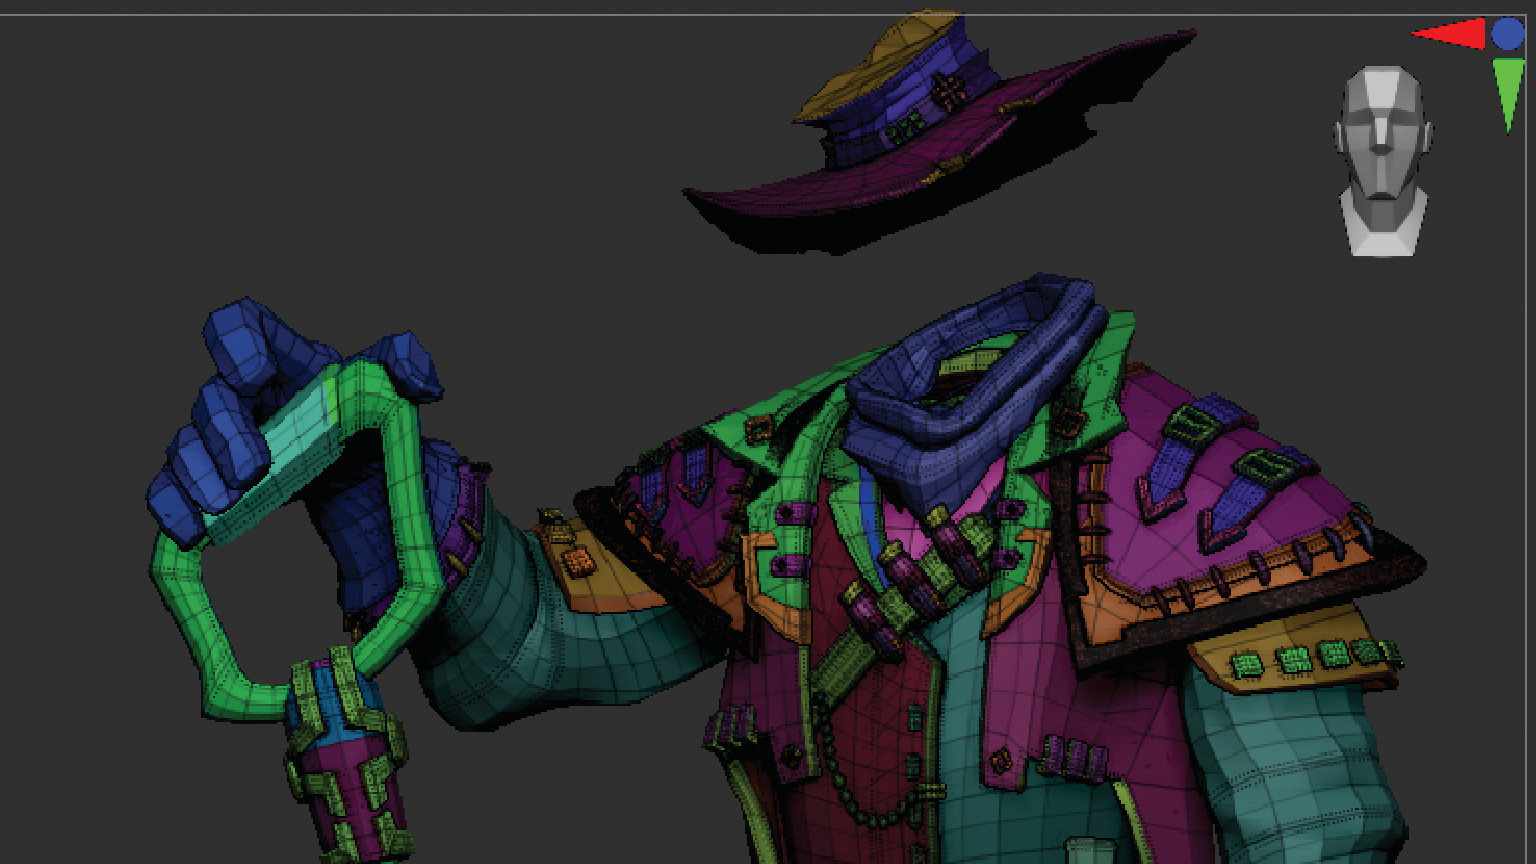
The organic portions of my model will need to be retopologised. Using standard topology principles, I Extrude the edges and define proper edge loops as needed to model the shape in a clean fashion.
I import the lower subdivision portions of the model that were exported from ZBrush and clean these up as needed, removing edge loops, weld vertices and the like.
With a combination of retopology for the portions requiring it, as well as using the geometry model led in ZModeler as a basis for the rest of the model, I now have our full character retopologised.
15. Unwrapping for baking
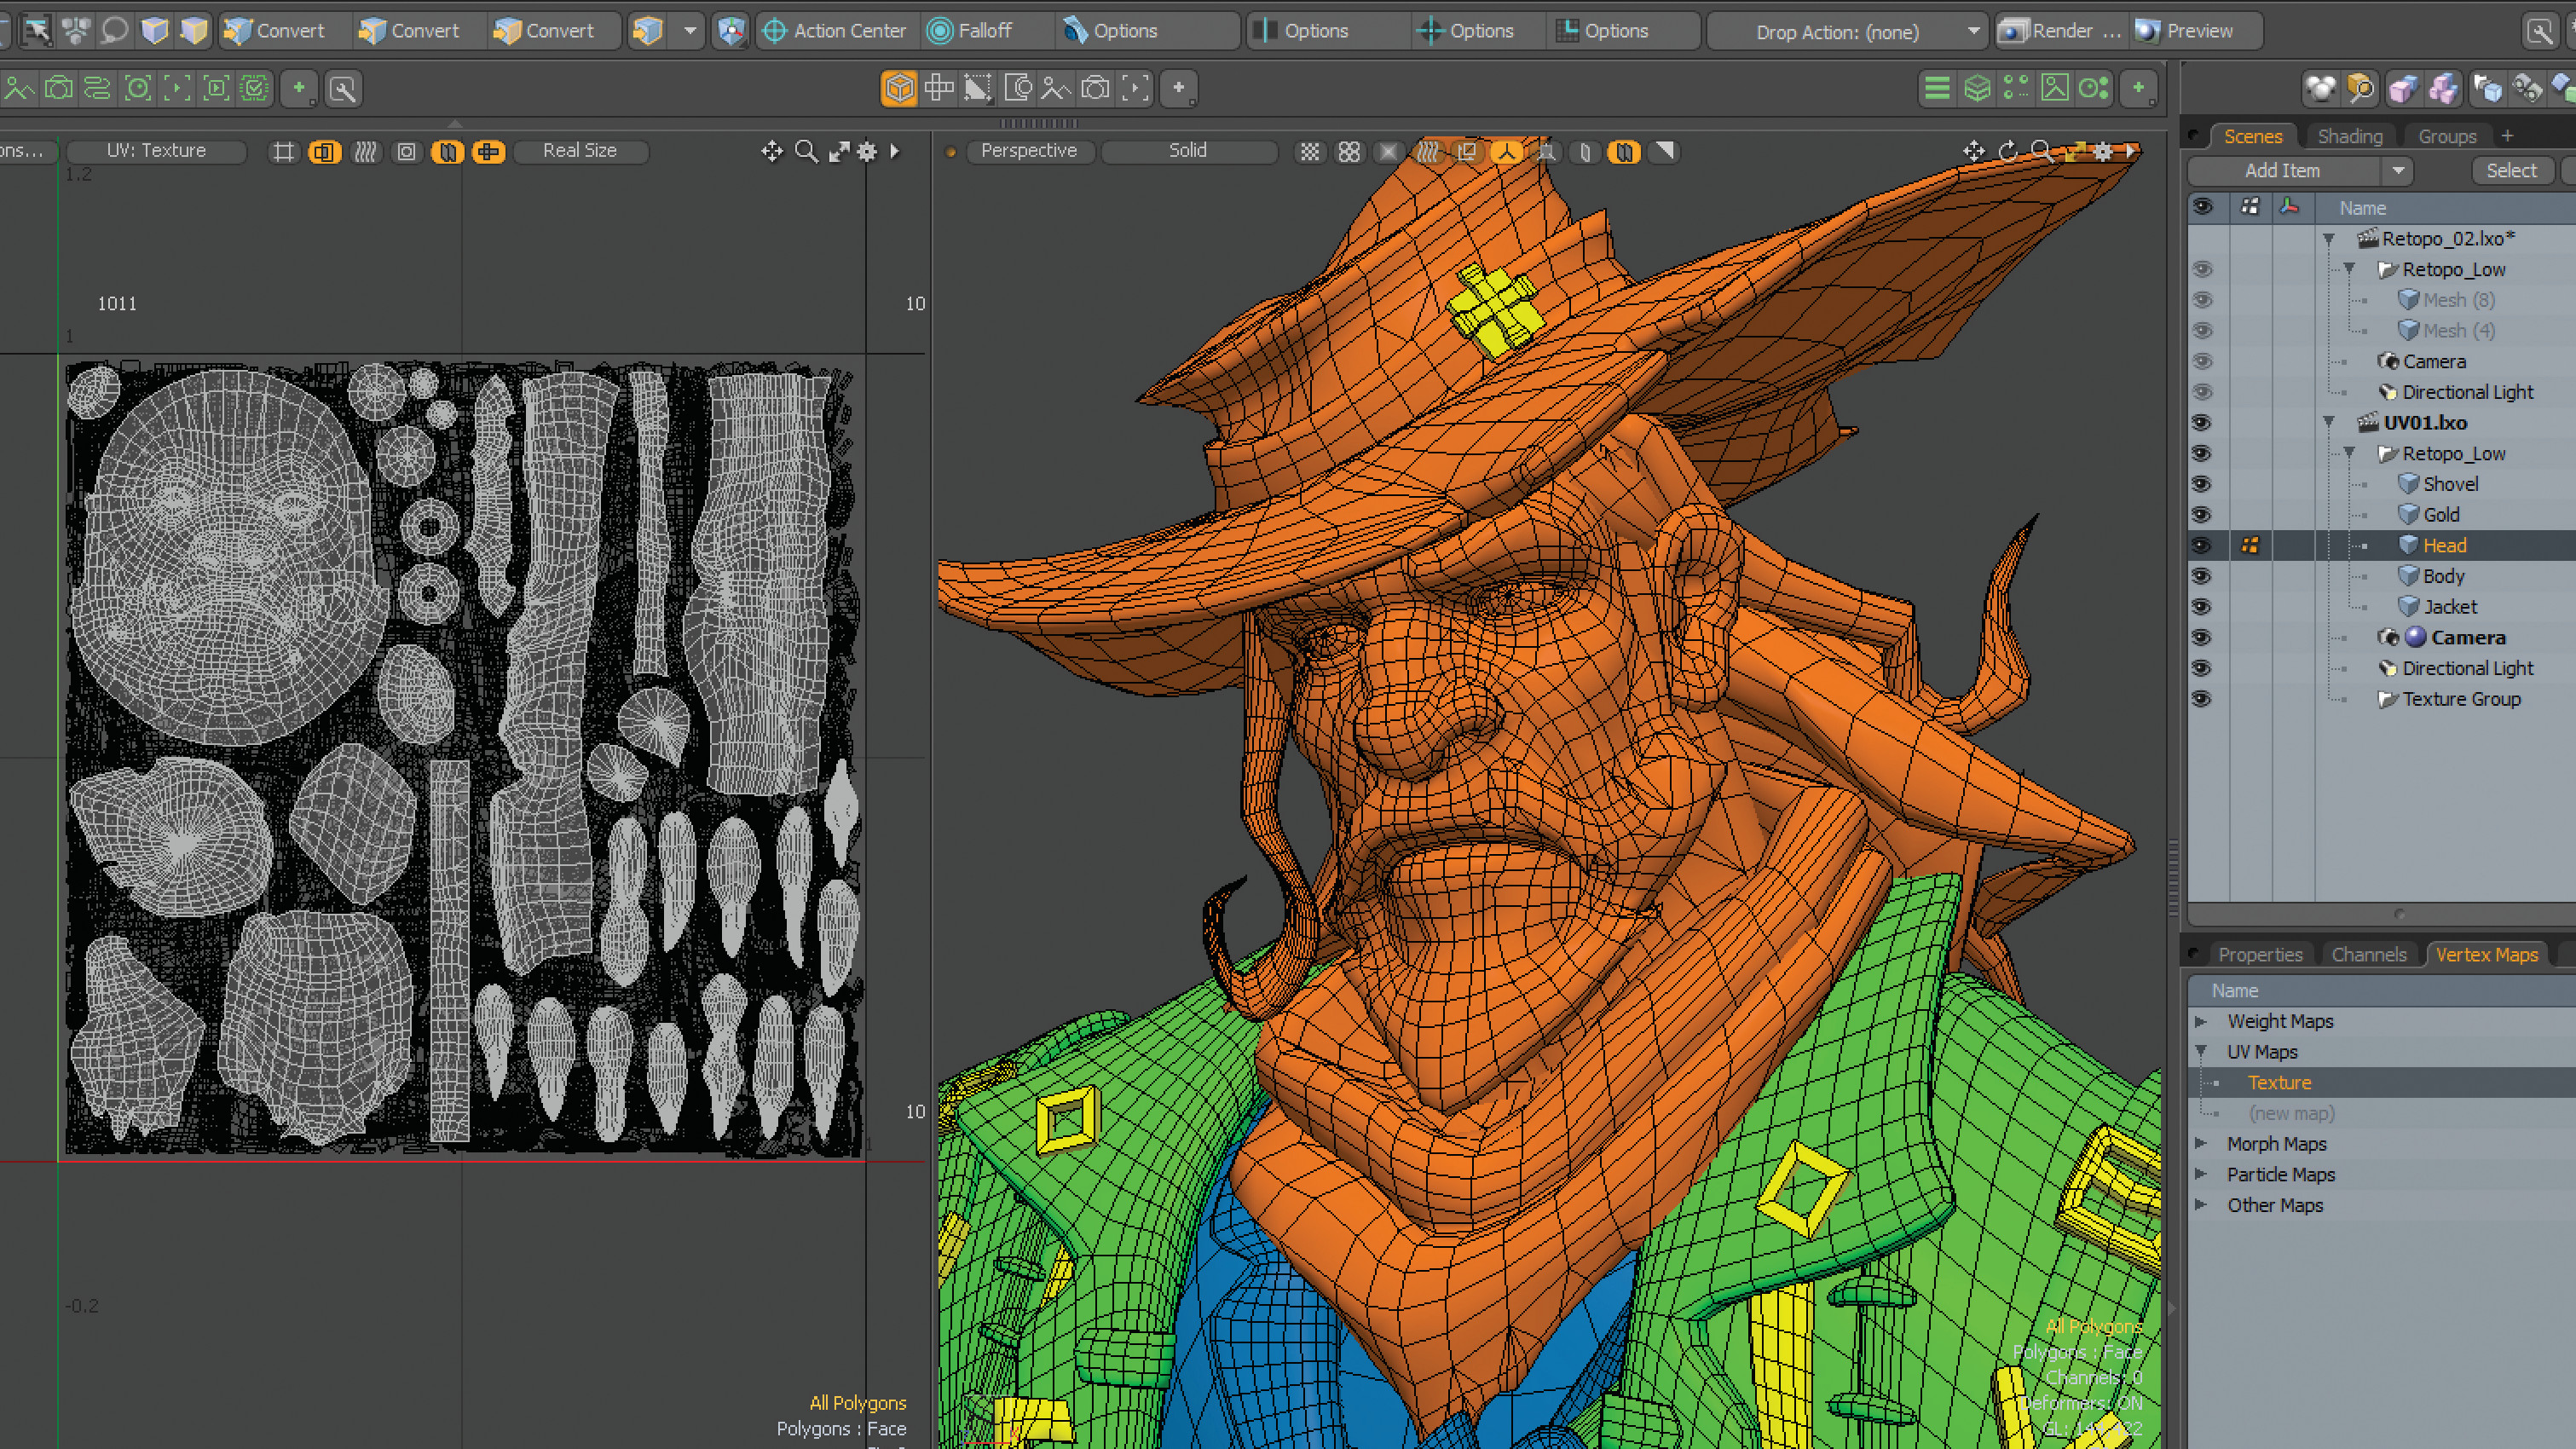
Next I UV unwrap my model for baking. Using a combination of planar and pelt mapping to unwrap the model. I want maximum resolution, so use multiple texture sets and UDIMs as necessary to ensure the texturing will hold up in close views and large pixel renders.
16. Baking the model
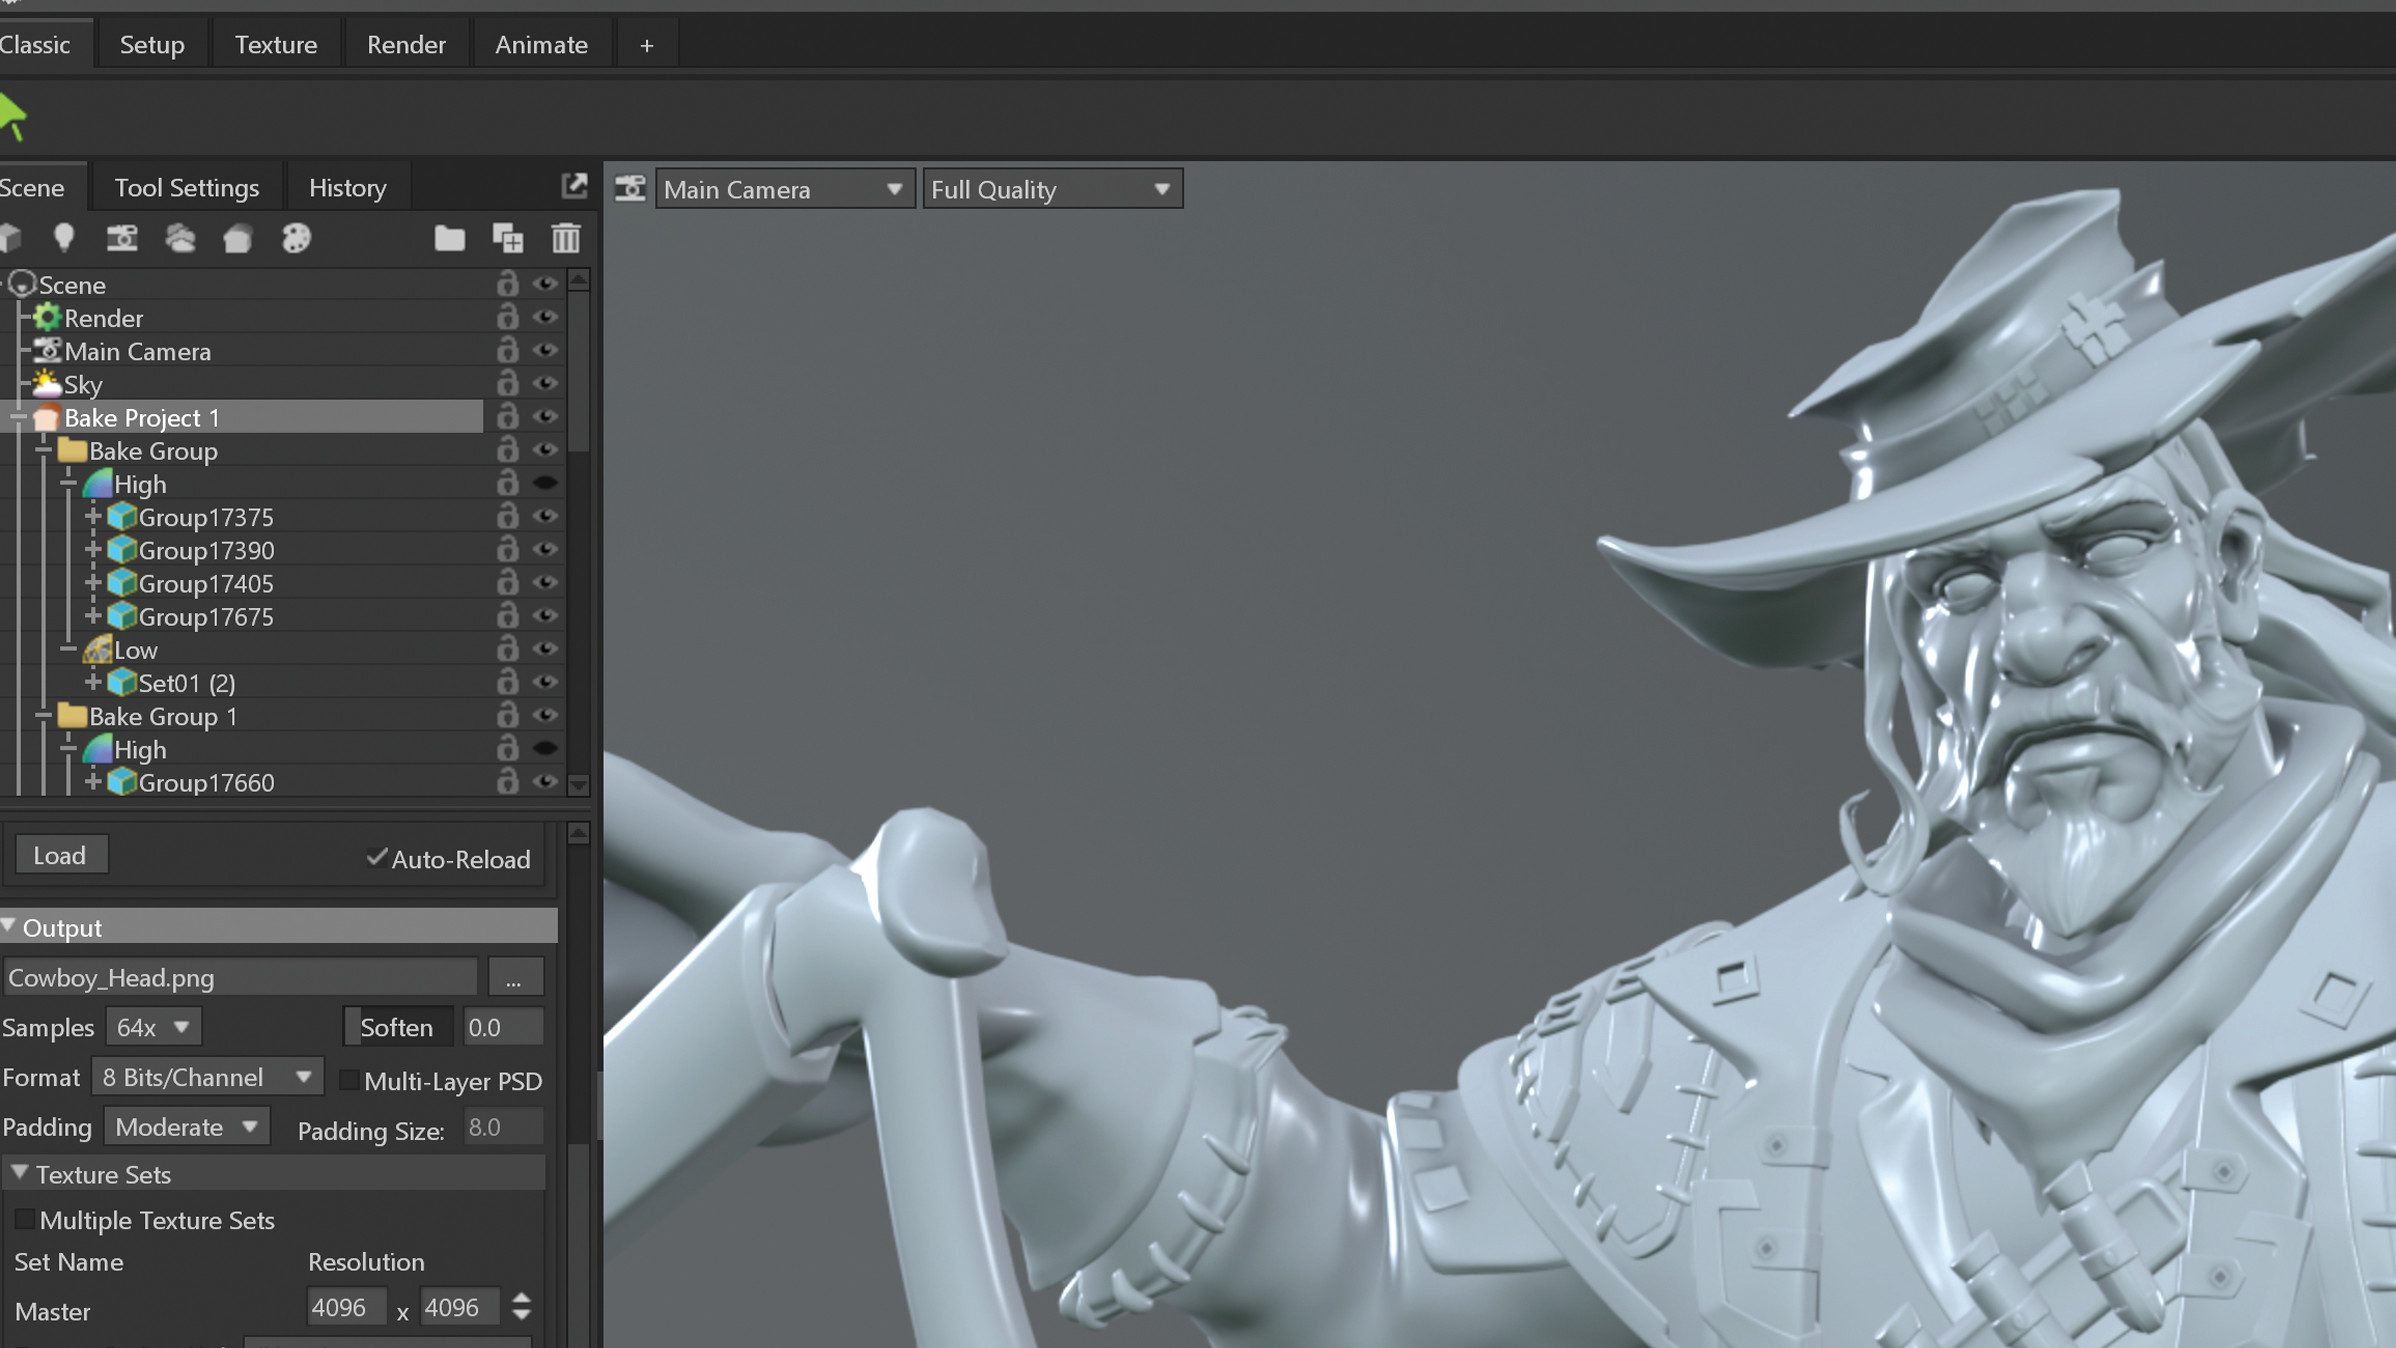
To bake my model, I use Marmoset Toolbag. I begin by exporting the low-poly model, making sure that it’s broken up into separate mesh groups so they can be easily placed into bake groups inside Marmoset. Open Marmoset , click the baking icon, and load the low and high-poly models. If the auto grouping in ZBrush was successful, the high-poly will have multiple mesh elements nested underneath its name in the Scene Outliner.
Apply your material across the entire high-poly model and set its Albedo as Vertex Color for the Polypaint to visualise in the Viewport. I create multiple bake groups and then assign the corresponding high and low-poly elements to each; this will ensure you have no raycasting or bake errors on your maps.
17. Baking settings
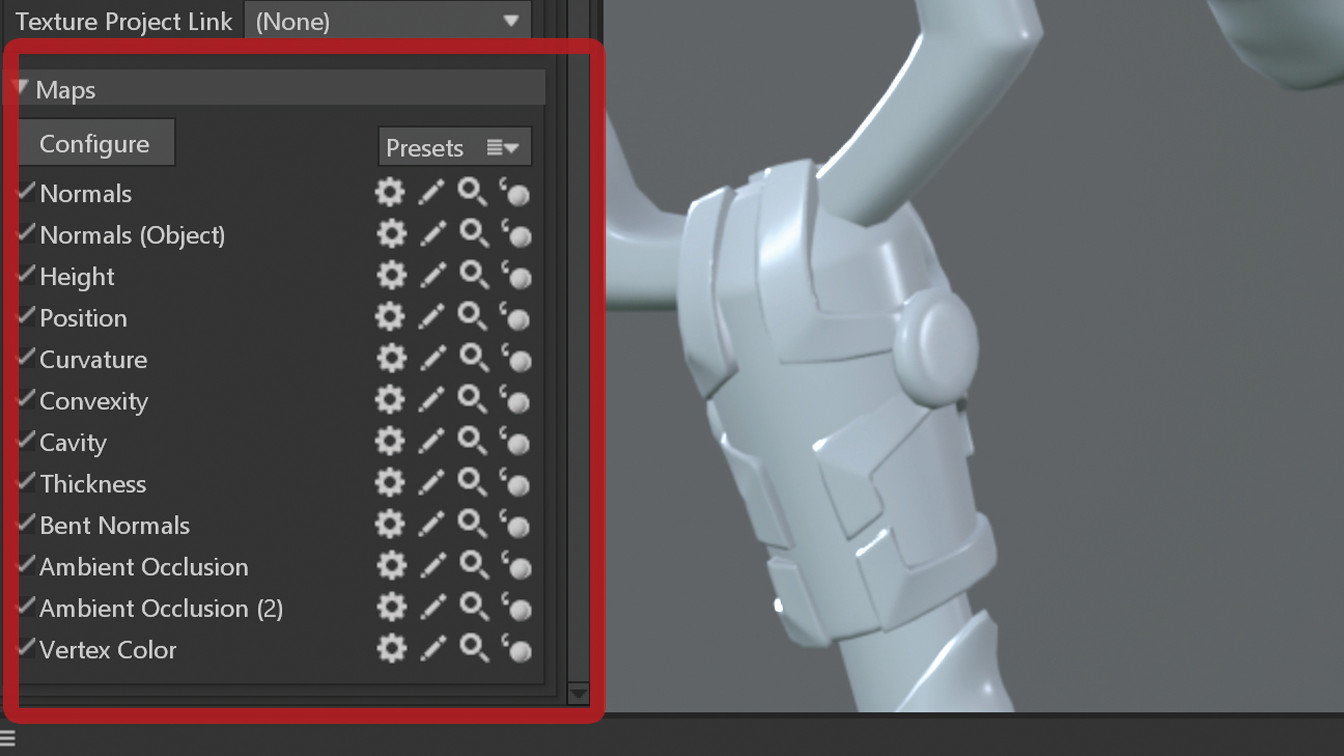
In the Bake project, I specify the bake settings I use. Here I can set the texture sampling, resolution, naming, and the maps you want to bake. At a minimum bake Normal, Ambient Occlusion, Position, Curvature and Vertex Color maps.
Once all our maps are baked, I can hit the Preview button found at the top-right of the Bake Project window to see the Normal map and Ambient Occlusion applied to the low-poly model.
Make sure that there are no bake errors, and adjust offsets to each group as needed to have the cleanest bakes possible.
18. Setting up a base texture
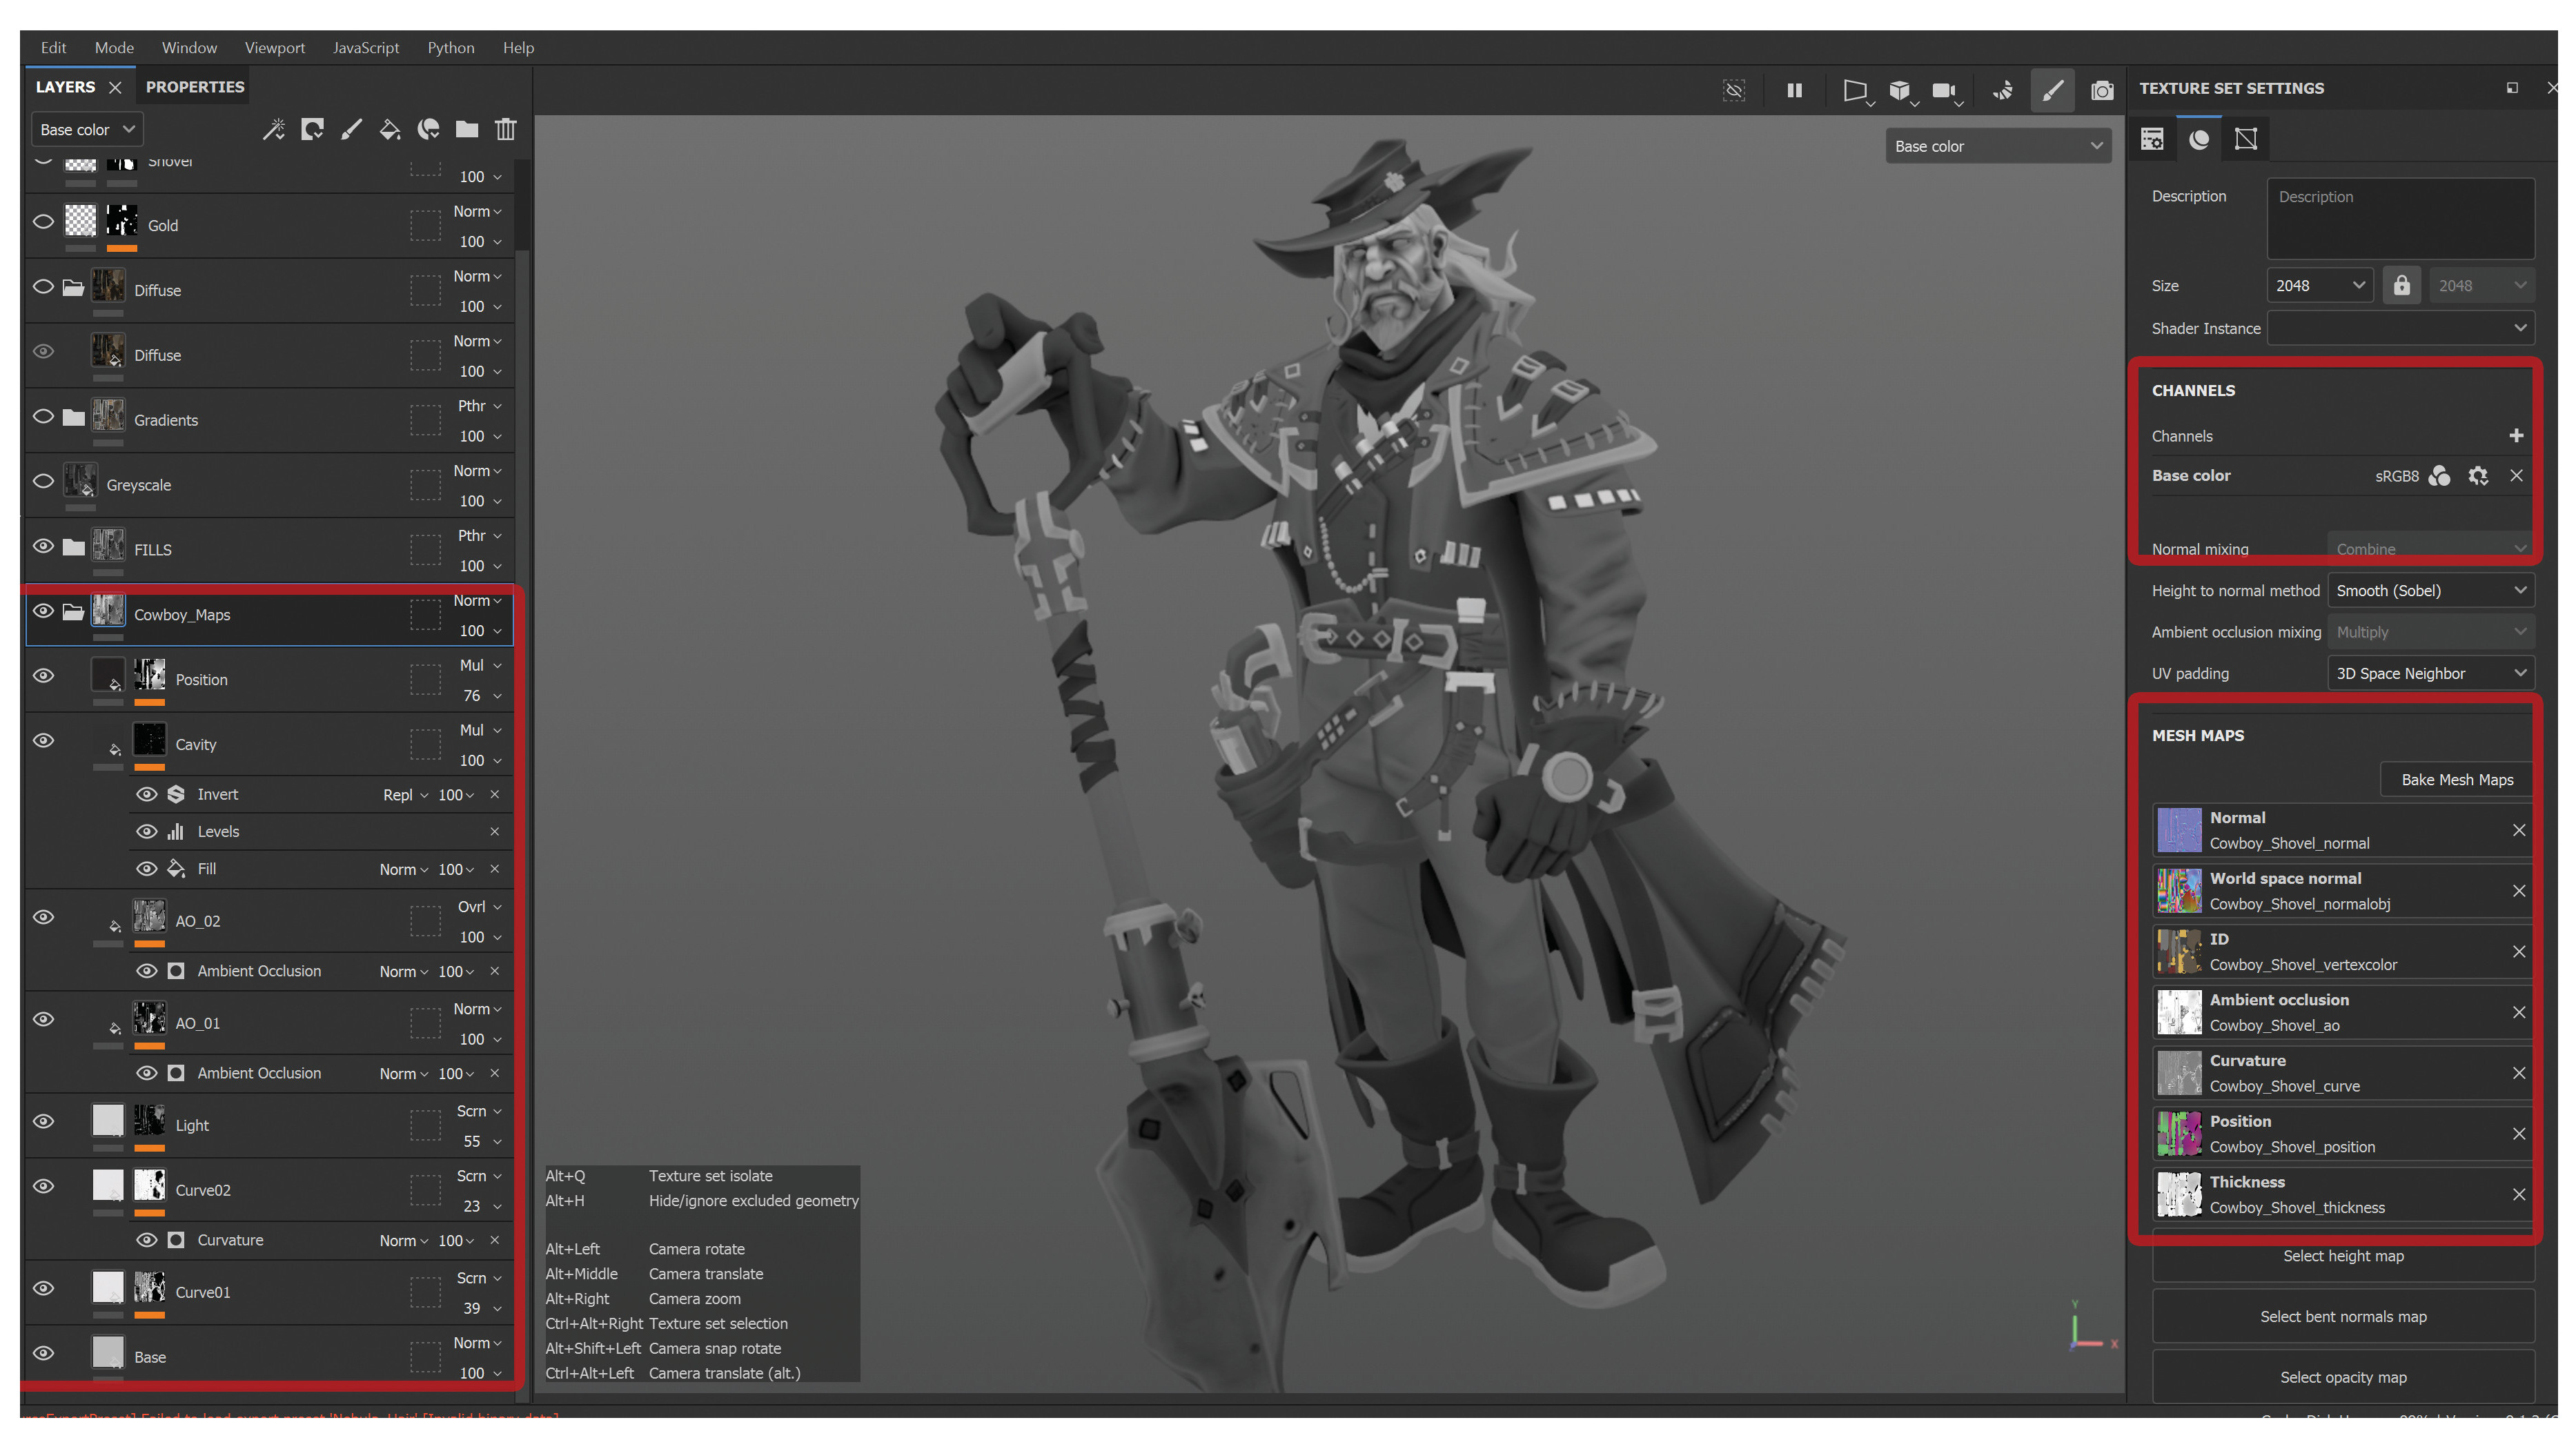
It’s time to build a base greyscale texture to paint on. I open Substance 3D Painter and create a new scene. I load the model and its bake maps, and assign them to the corresponding mesh maps within the Texture Set settings.
Then I delete all channels except the Base Color, as this is the only channel I likely need, although you may need to keep Opacity or Emissive depending on the concept. Now you can begin your base greyscale.
19. Creating the greyscale
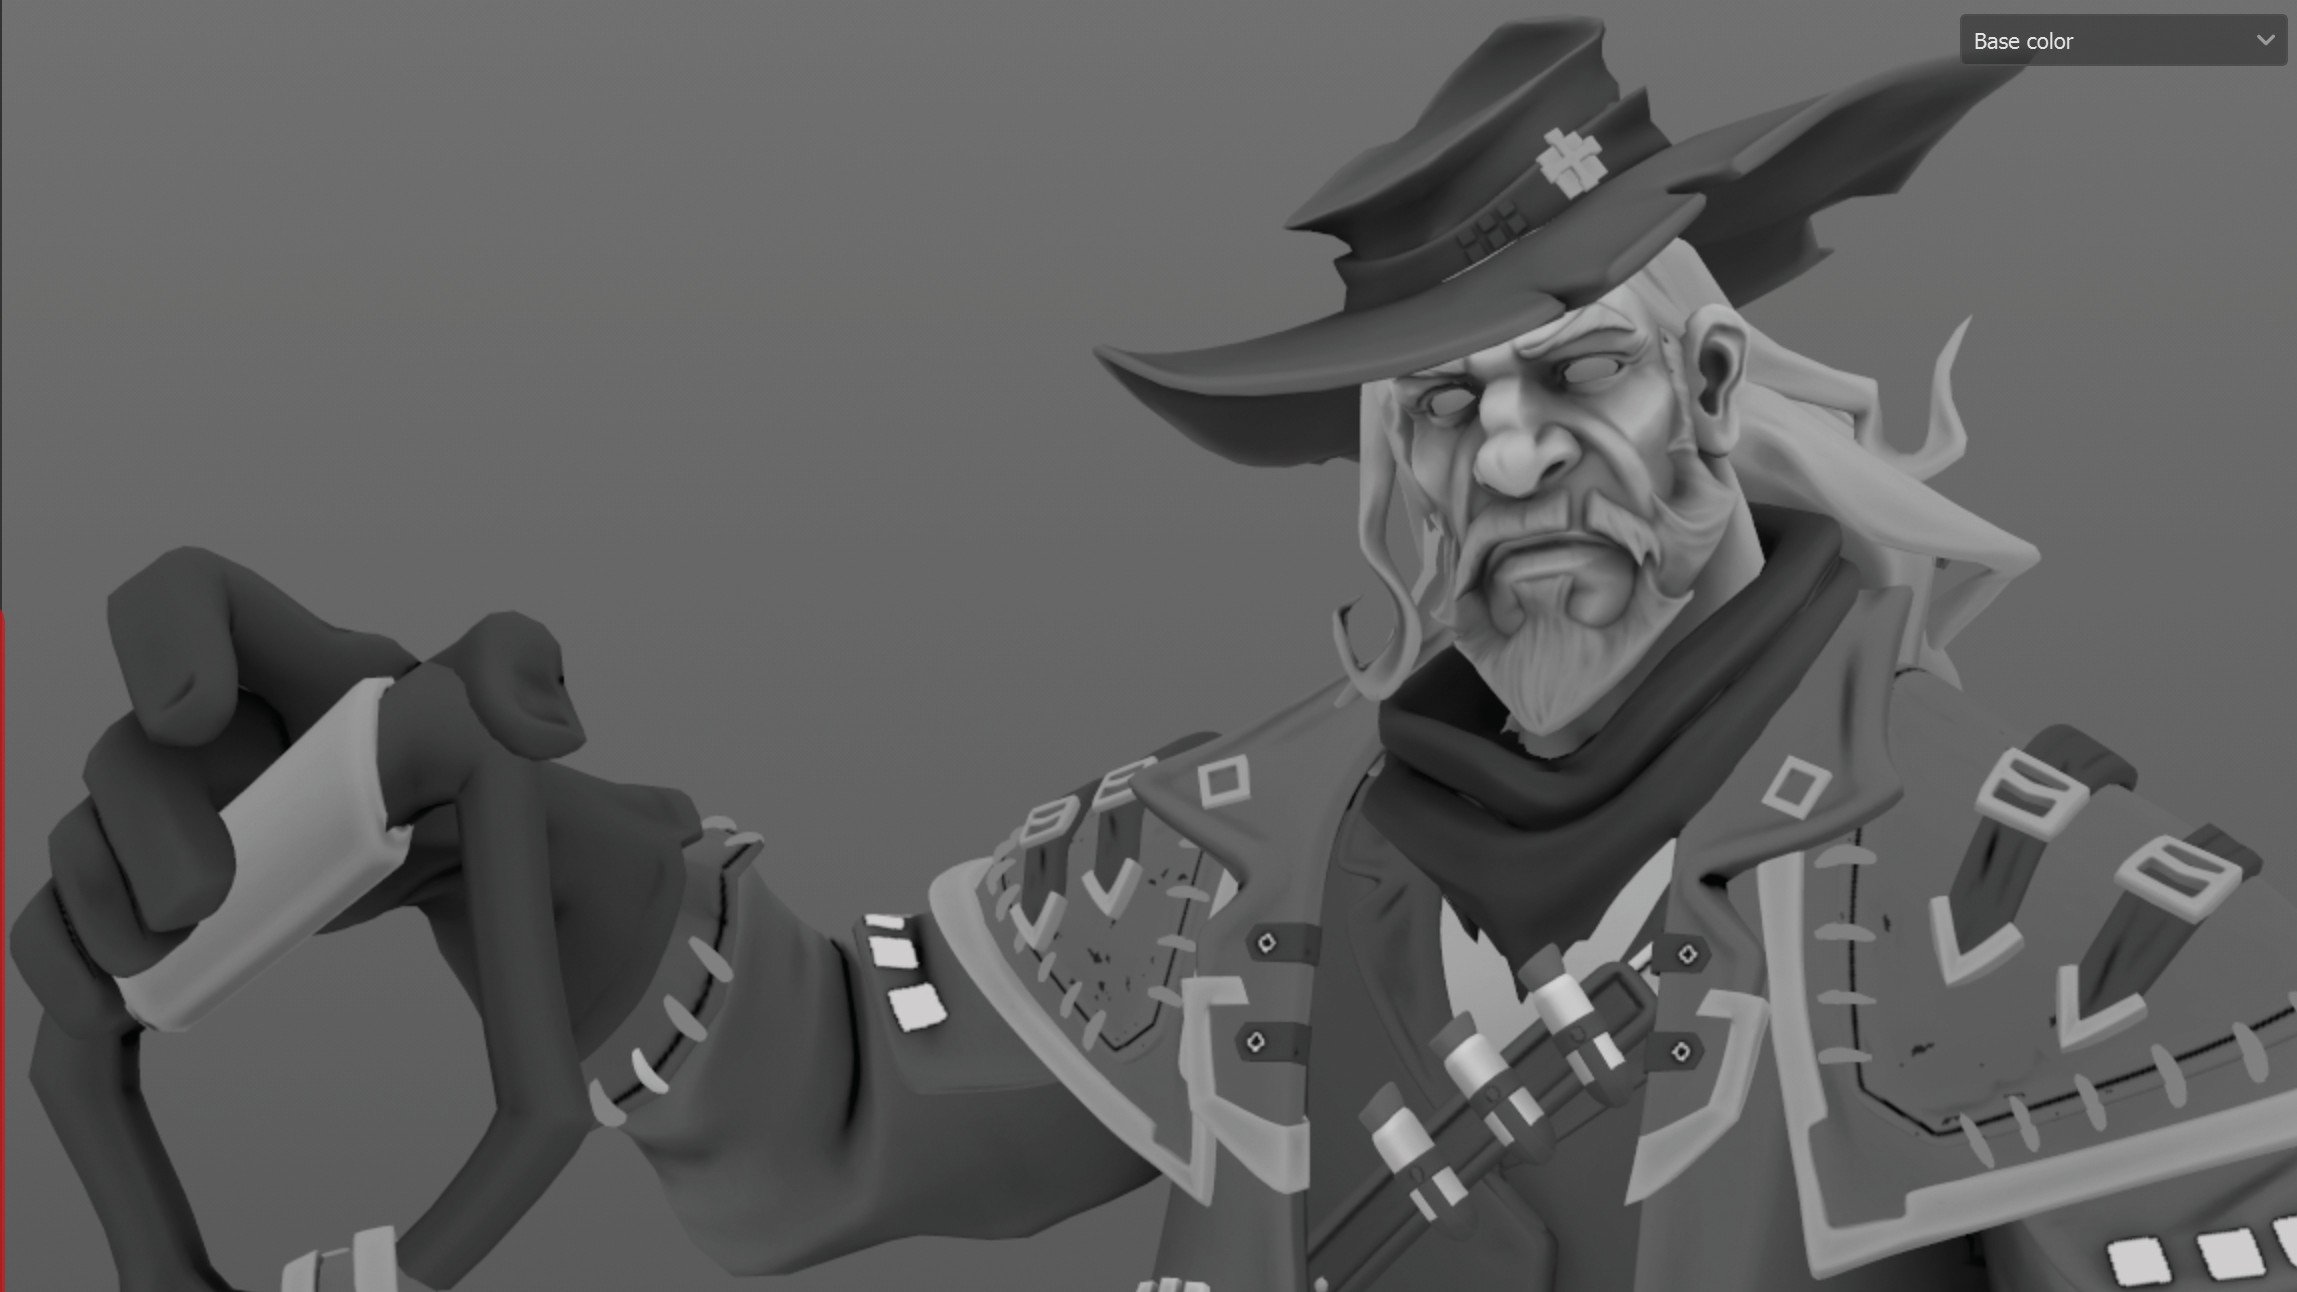
Now I make a flat fill layer and set this to a value of 0.5; this will be my neutral grey. I make a darker fill layer above and add a black mask. From the mask, I select Add Generator and pick the Ambient Occlusion generator, and then Alt+right-click on the mask to visualise it in the Viewport. I can adjust elements like Contrast and Blur to find a desirable effect here.
I use Global Invert on the mask and hit ‘C’ to see it applied back to the Base Color channel in the Viewport. Continue building the greyscale stack using the other maps and generators. Common generators that I can use at this stage are Curvature, Position, World Space Normal, and Light.
20. Masking materials and exporting texture
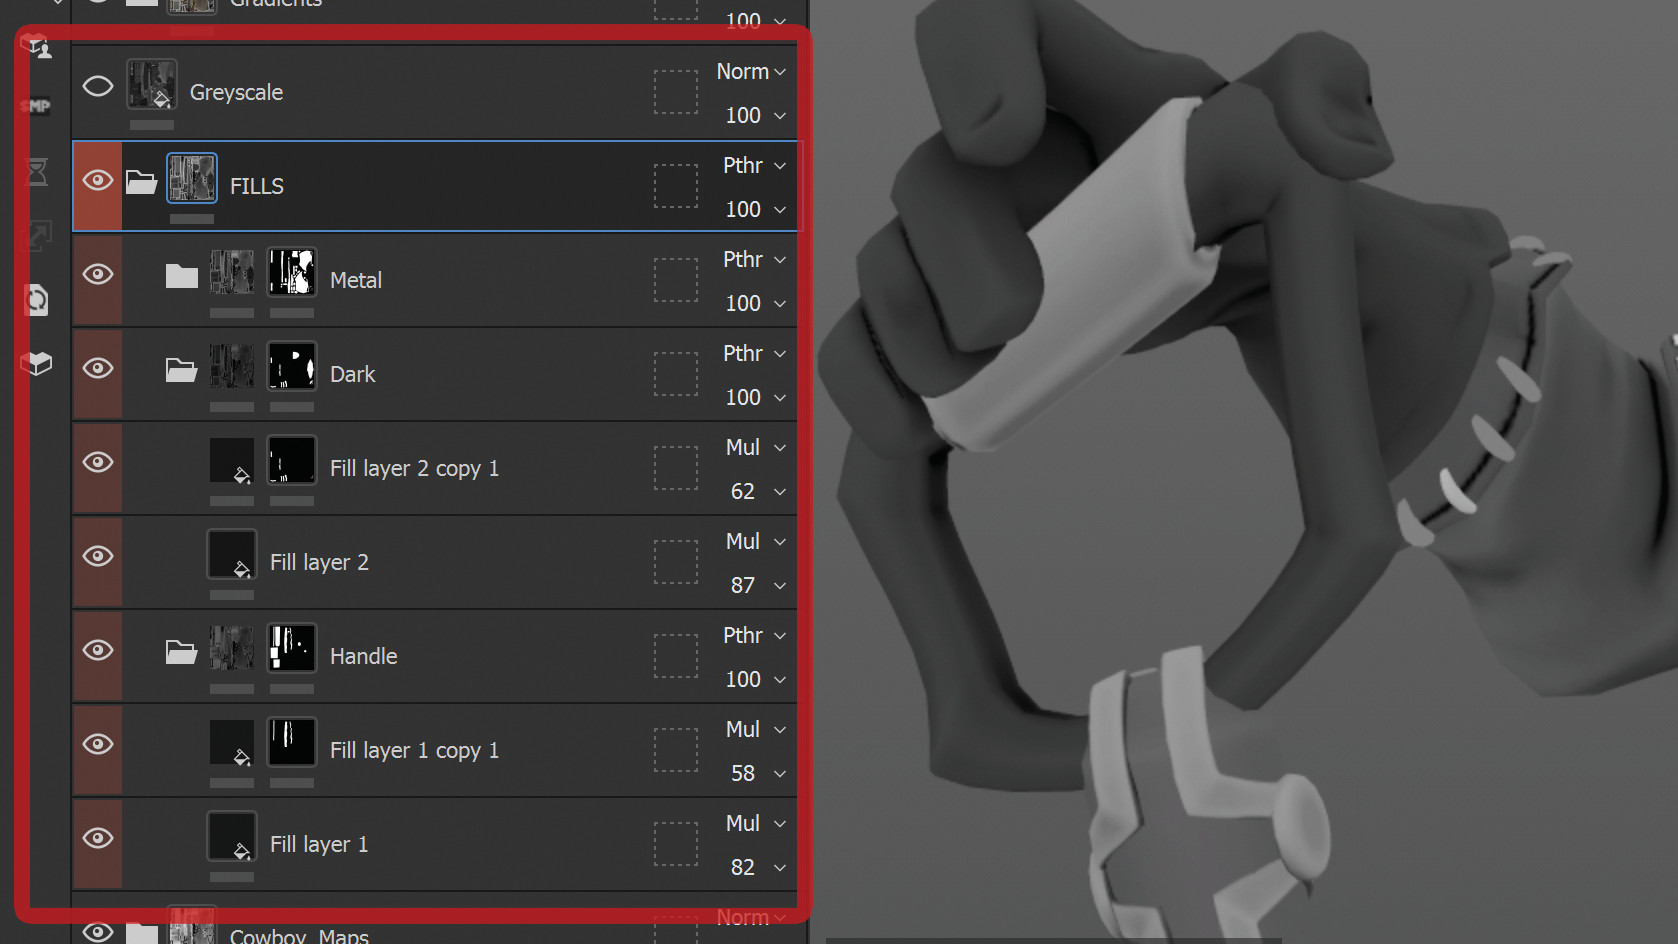
When all of the mesh map generators have been created, I make a folder above them, as well as subfolders for each, and mask those folders based on the material type.
You can use ‘Mask by Color Selection’ to use the Vertex Colors we baked in Marmoset to do this easily. Inside the material folders, create new Fill layers that match closer to the value blocking in the concept.
I desaturate my concept and place it on another monitor to help with this portion. Adding in these additional fills helps better set me up for painting in 3DCoat.
Once all the fill layers are created and applied as needed, I can export my current texture to 3DCoat for the full hand-painted greyscale pass.
21. Setting up 3DCoat
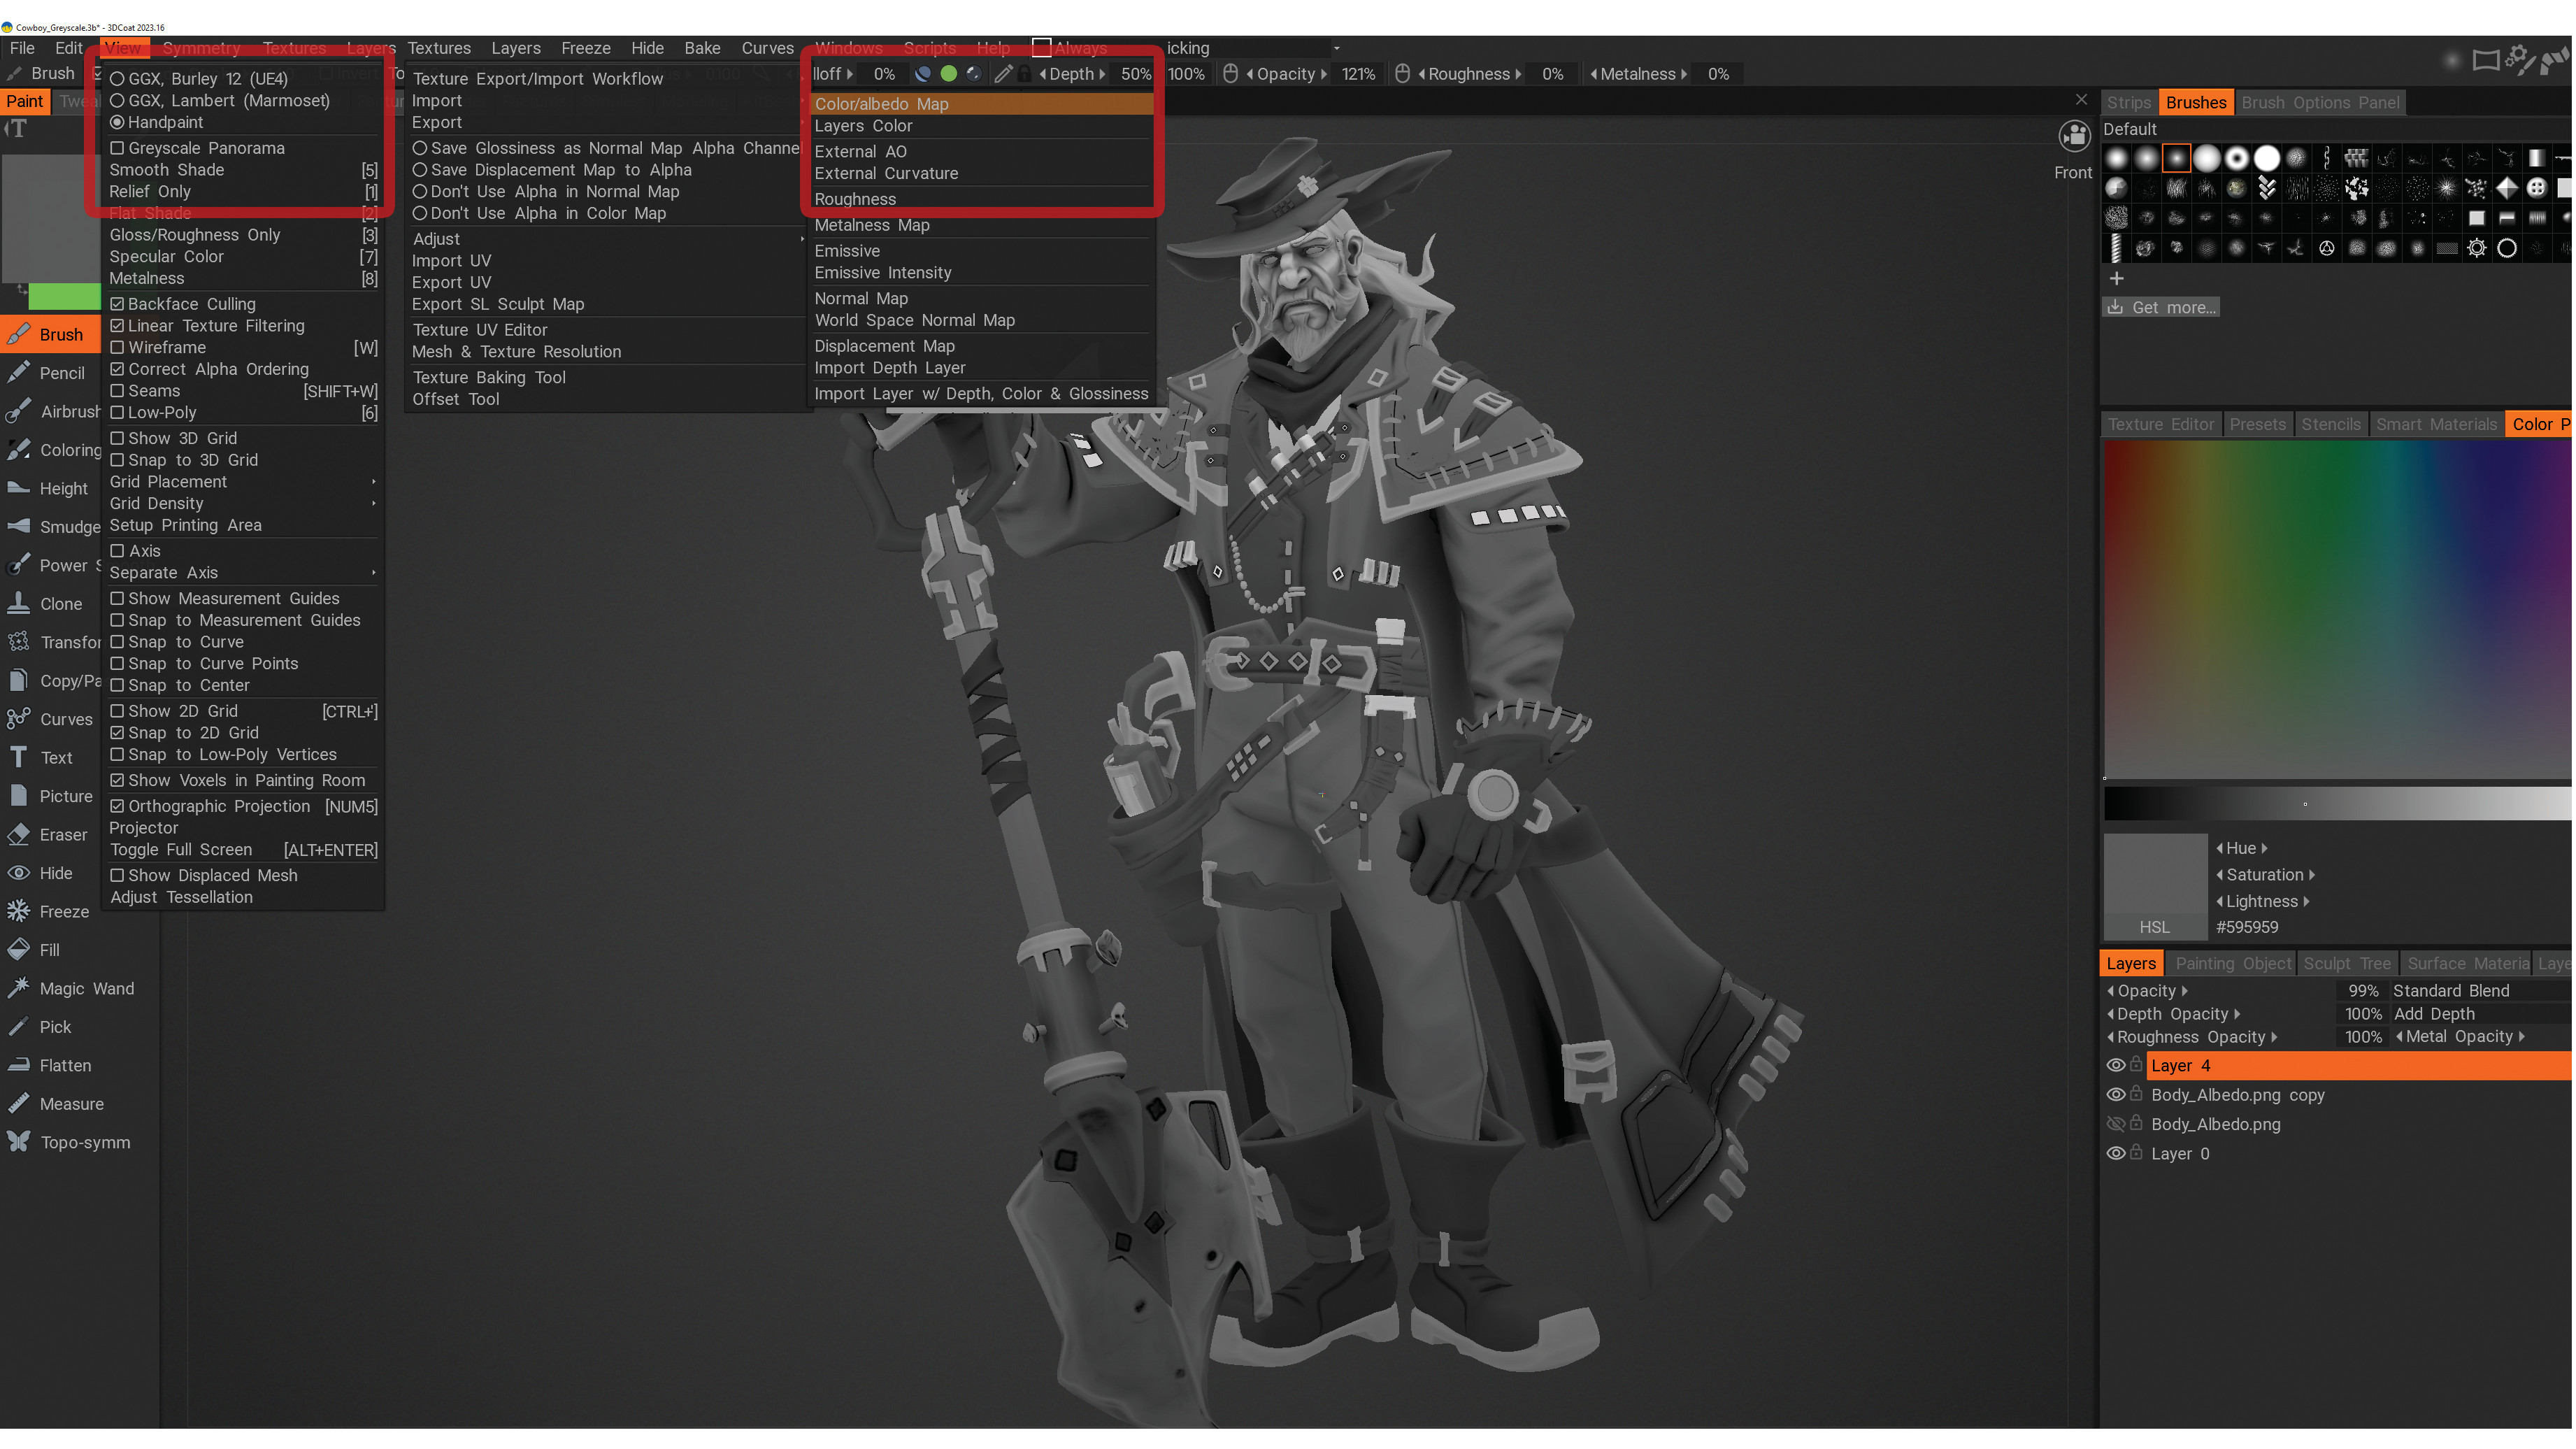
I open 3DCoat and import my model. Go to the Texture window, select Import and bring in the diffuse texture exported from Substance 3D Painter. When you do this, make sure you’re in Flat Shaded Mode (the hotkey for this is ‘2’) to ensure there’s no external lighting information influencing our texture. I can now begin texturing the greyscale.
22. Texture painting the greyscale model
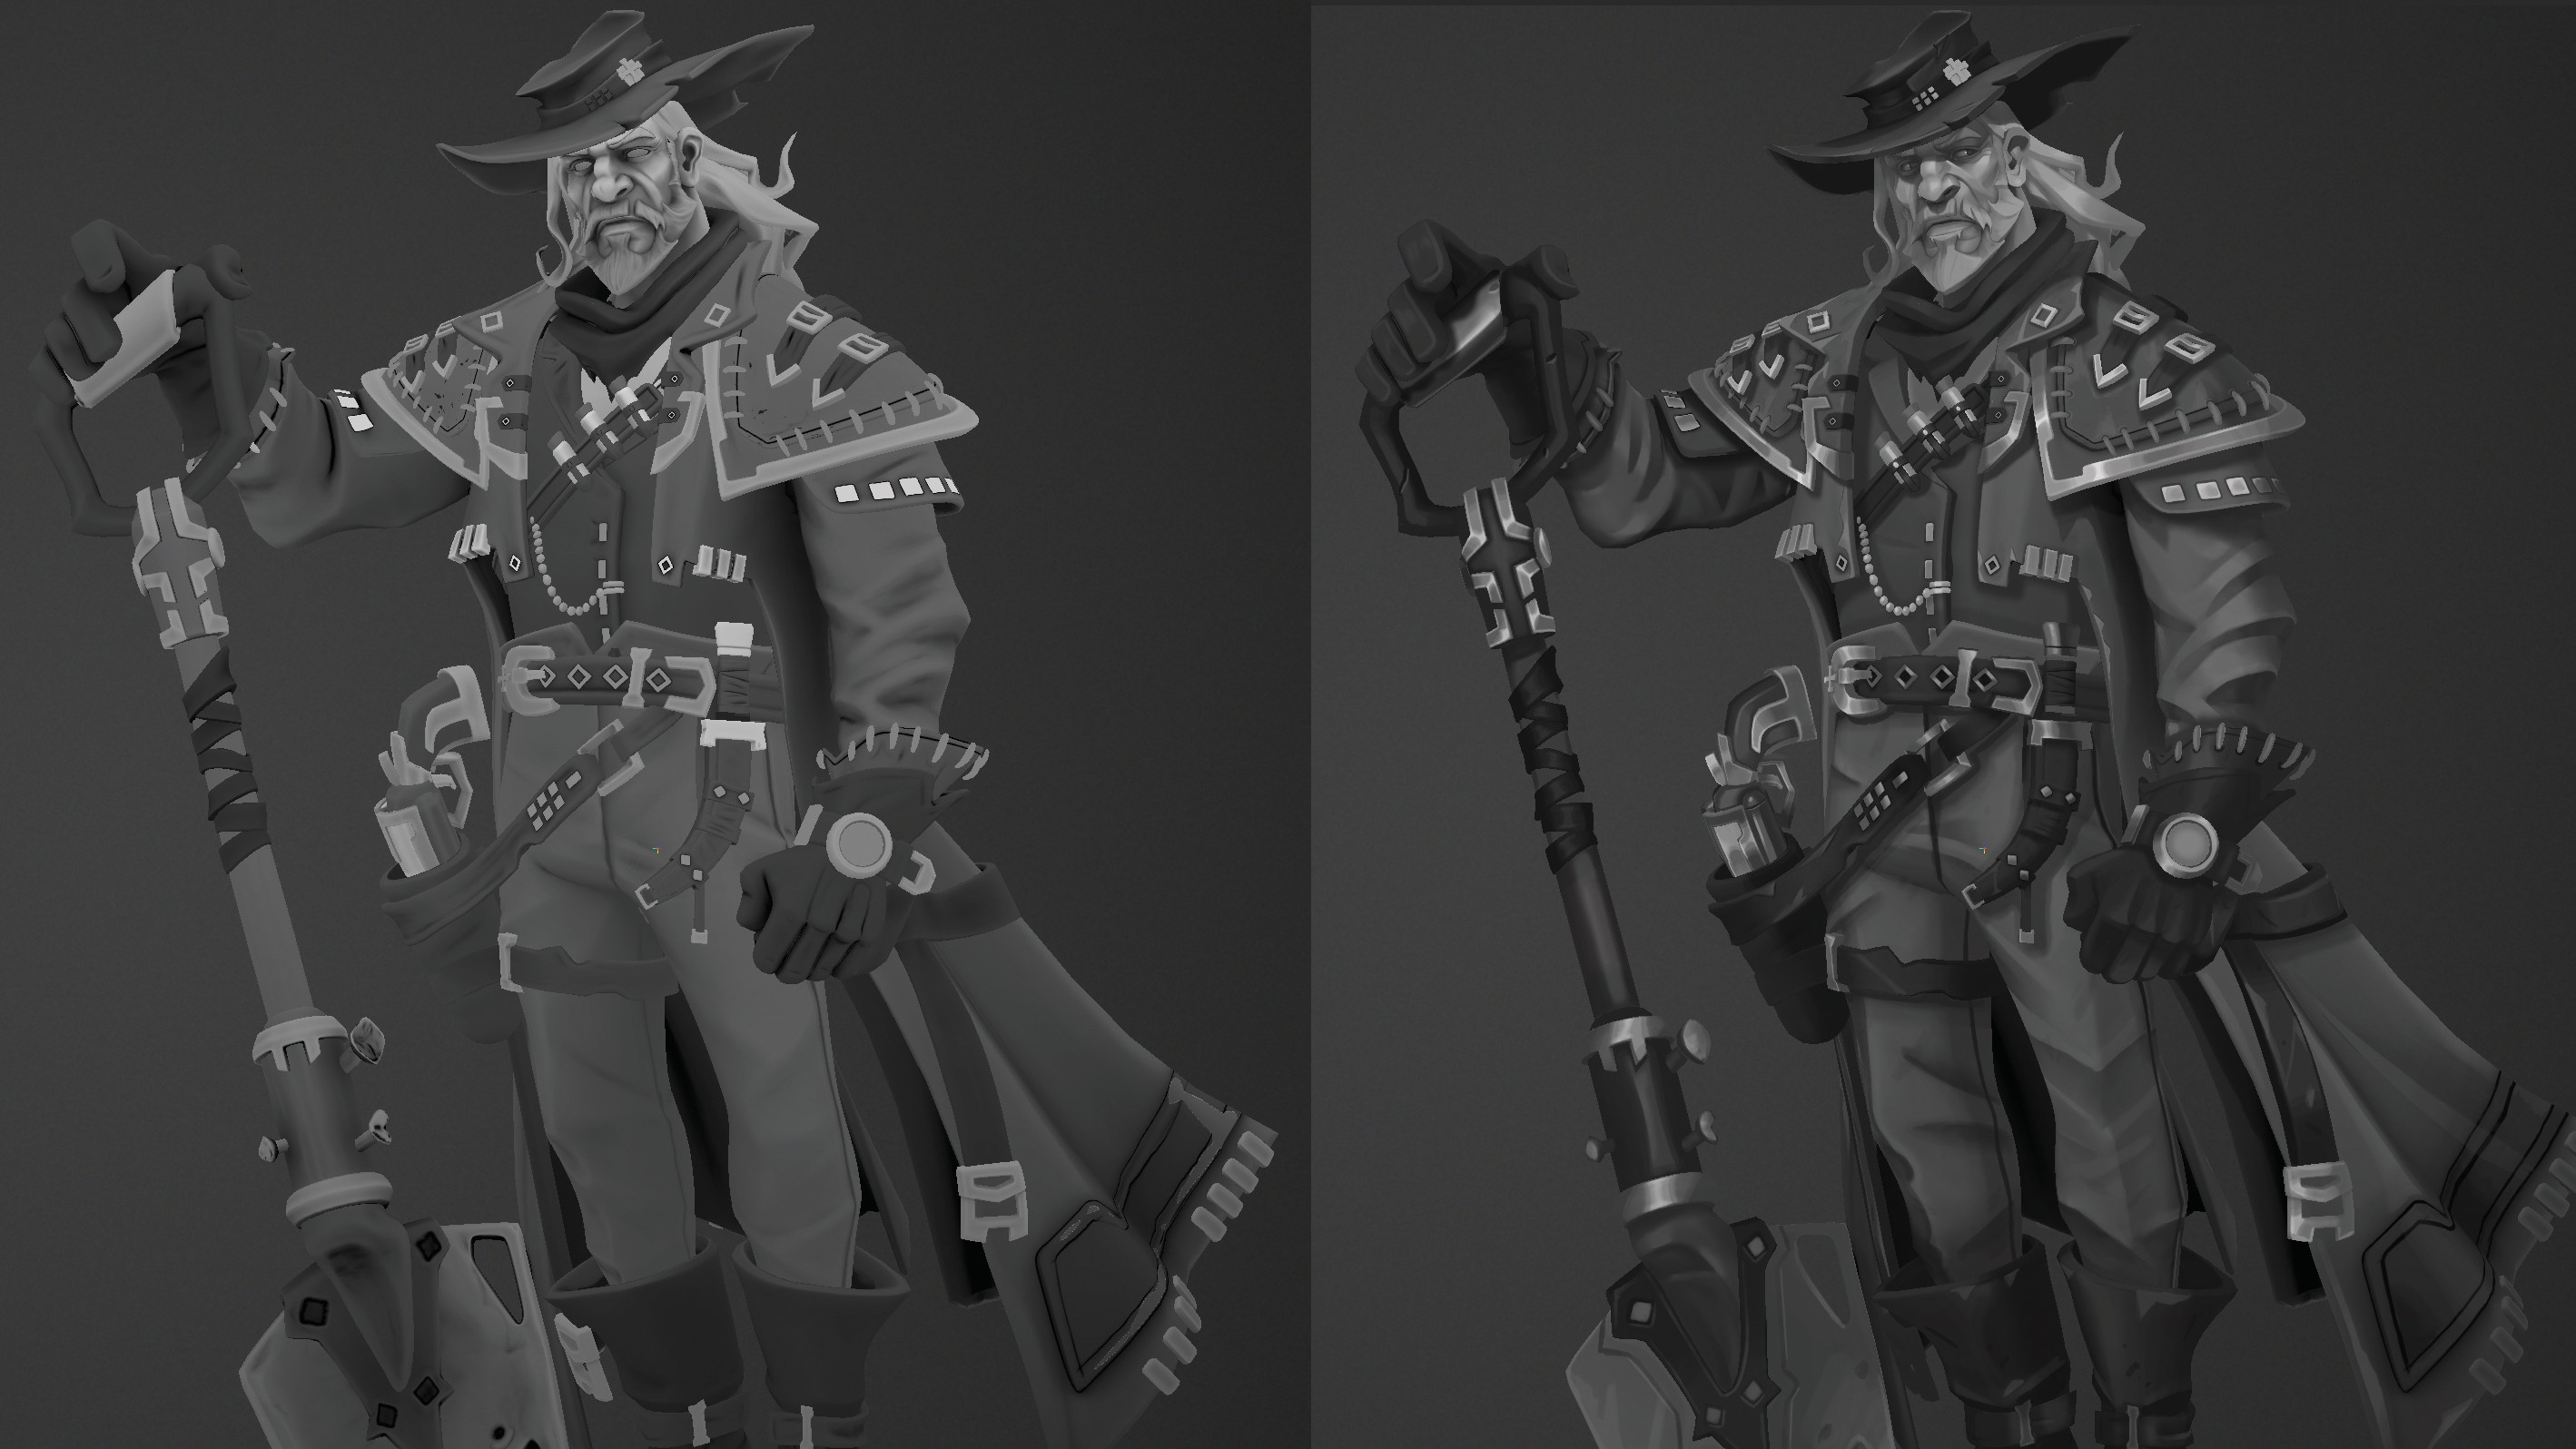
A tip during this process is to keep the concept on another monitor to make sure you're painting what you see. With this setup I Color Sample from both the concept and the existing model using ‘V’. The goal here is to treat the greyscale from Substance 3D Painter as an underpainting of sorts, but try not to use a huge number of layers.
I make a layer and start to paint, lowering the Opacity and changing the Layer Style as you need, but beyond four or five layers get into the habit of collapsing them with the Merge Visible option.
This is important for two reasons. First, it will keep you in the mindset of illustration, as you're now essentially painting on a 3D canvas, so don’t be afraid to paint a fix over any elements that look bad. The second reason is to make sure the system and software aren’t hindered by too many layers. You could always make a duplicate of your current layers and turn off the visibility for a backup.
23. Build-up the details
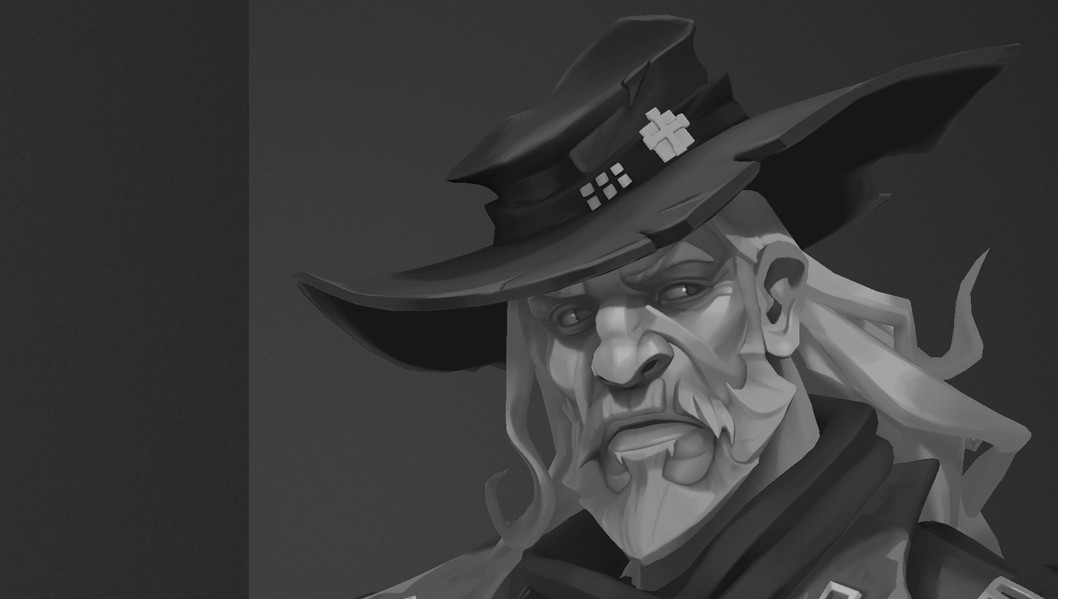
I use a combination of the Brush, Pencil, Airbrush, Fill and Power Smooth tools to make the best greyscale you can. This may be the most important part of the painting process, as if I can easily describe form, light, shadow, material type and value blocking at greyscale, the colour portion will be much easier.
Starting broadly and working down to smaller details with a focus on capturing broad lighting directionality, I follow how that impacts the forms of the model, the material definition and secularity, and lastly the smaller details. Once our greyscale texture is finished, I can export the texture for the gradient mapping process back in Substance 3D Painter.
24. Creating folders and using blending mode
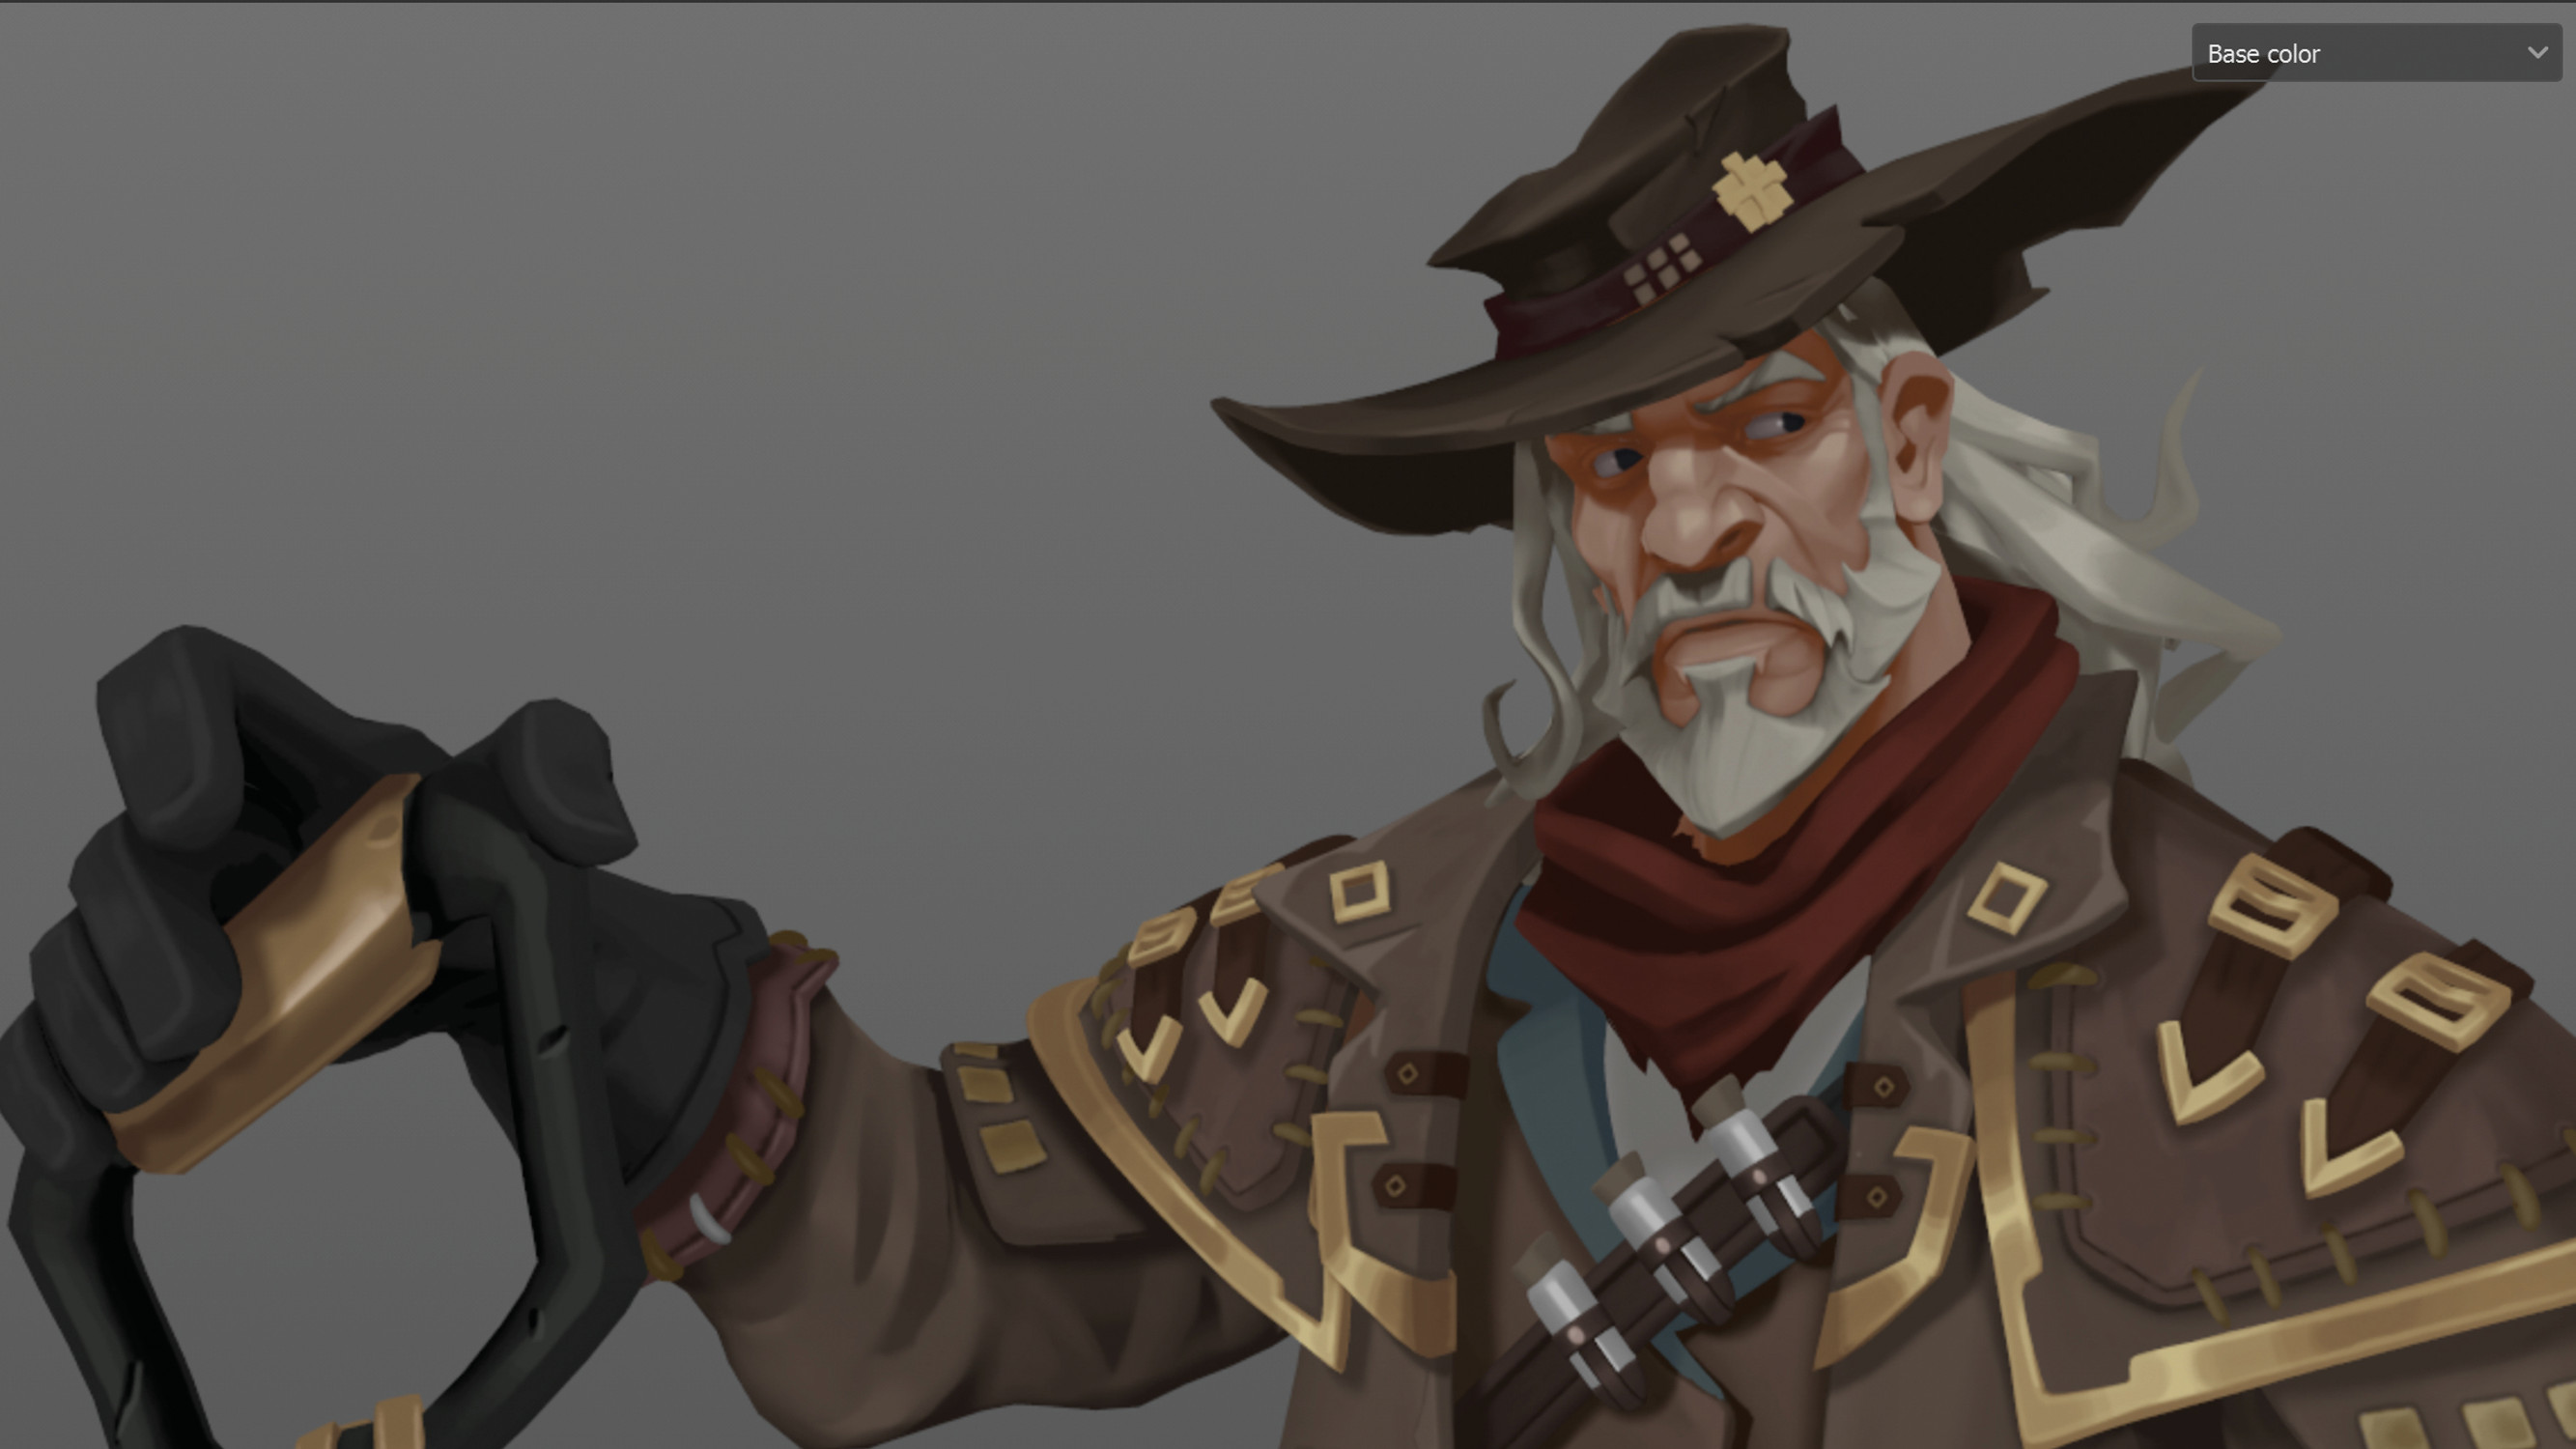
Reopening the previous Substance 3D Painter scene I select Add Resources. Here I can locate the fully painted greyscale texture we made in 3DCoat. Now I create a new Fill layer above all the previous layers and drag the new greyscale into it.
Next select all the folders created earlier and duplicate them. Set each folder’s Blending Mode to Passthrough, delete the Fill layers in each folder, and make an empty Paint layer inside each folder group that’s also set to Passthrough. If done correctly, the thumbnail for the empty layer should change to that of your underlying 3DCoat greyscale.
25. Applying gradients
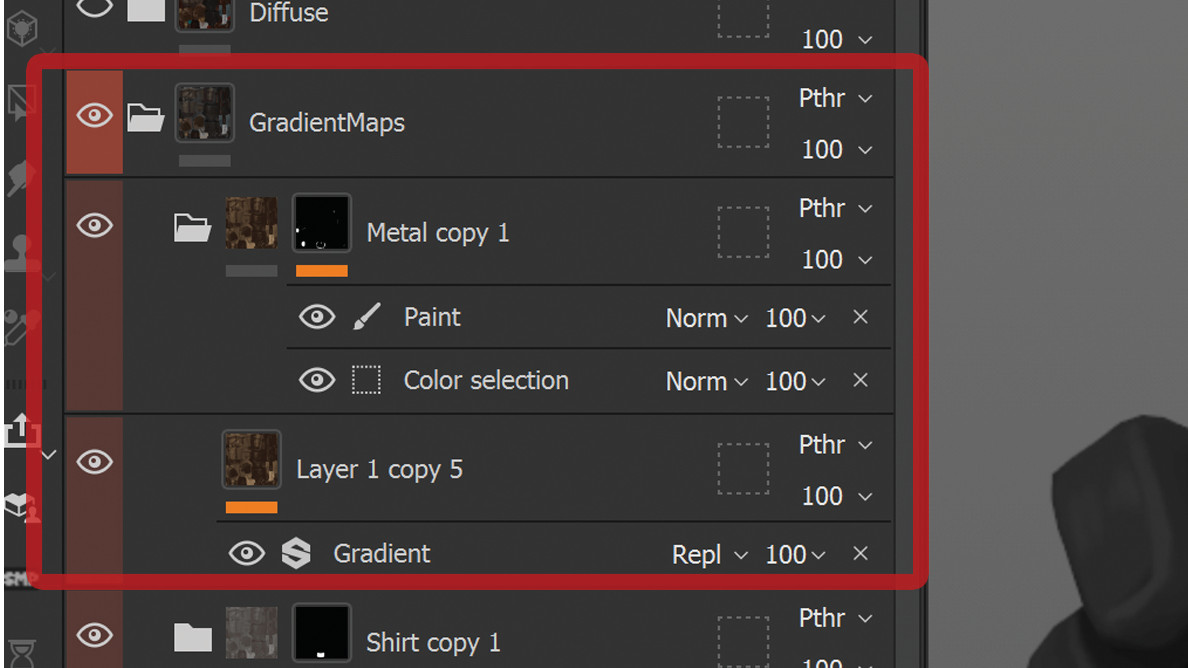
By right-clicking on each layer and choosing Add Filter I can search and apply the Gradient filter to bring up the controls for remapping the greyscale to different colours.
With my concept on another monitor, I select the median value in the Gradient Controls and then Eyedrop onto the concept to get its colour information. Do the same for the darker and lighter portions of the gradient. This won’t be exact, so some tinkering with both the slider values of the gradient and the colours will be needed.
Once all the elements are fully gradient mapped and I have colour represented, I can now go back to 3DCoat one more time to finalise the texture.
26. Completing the texture
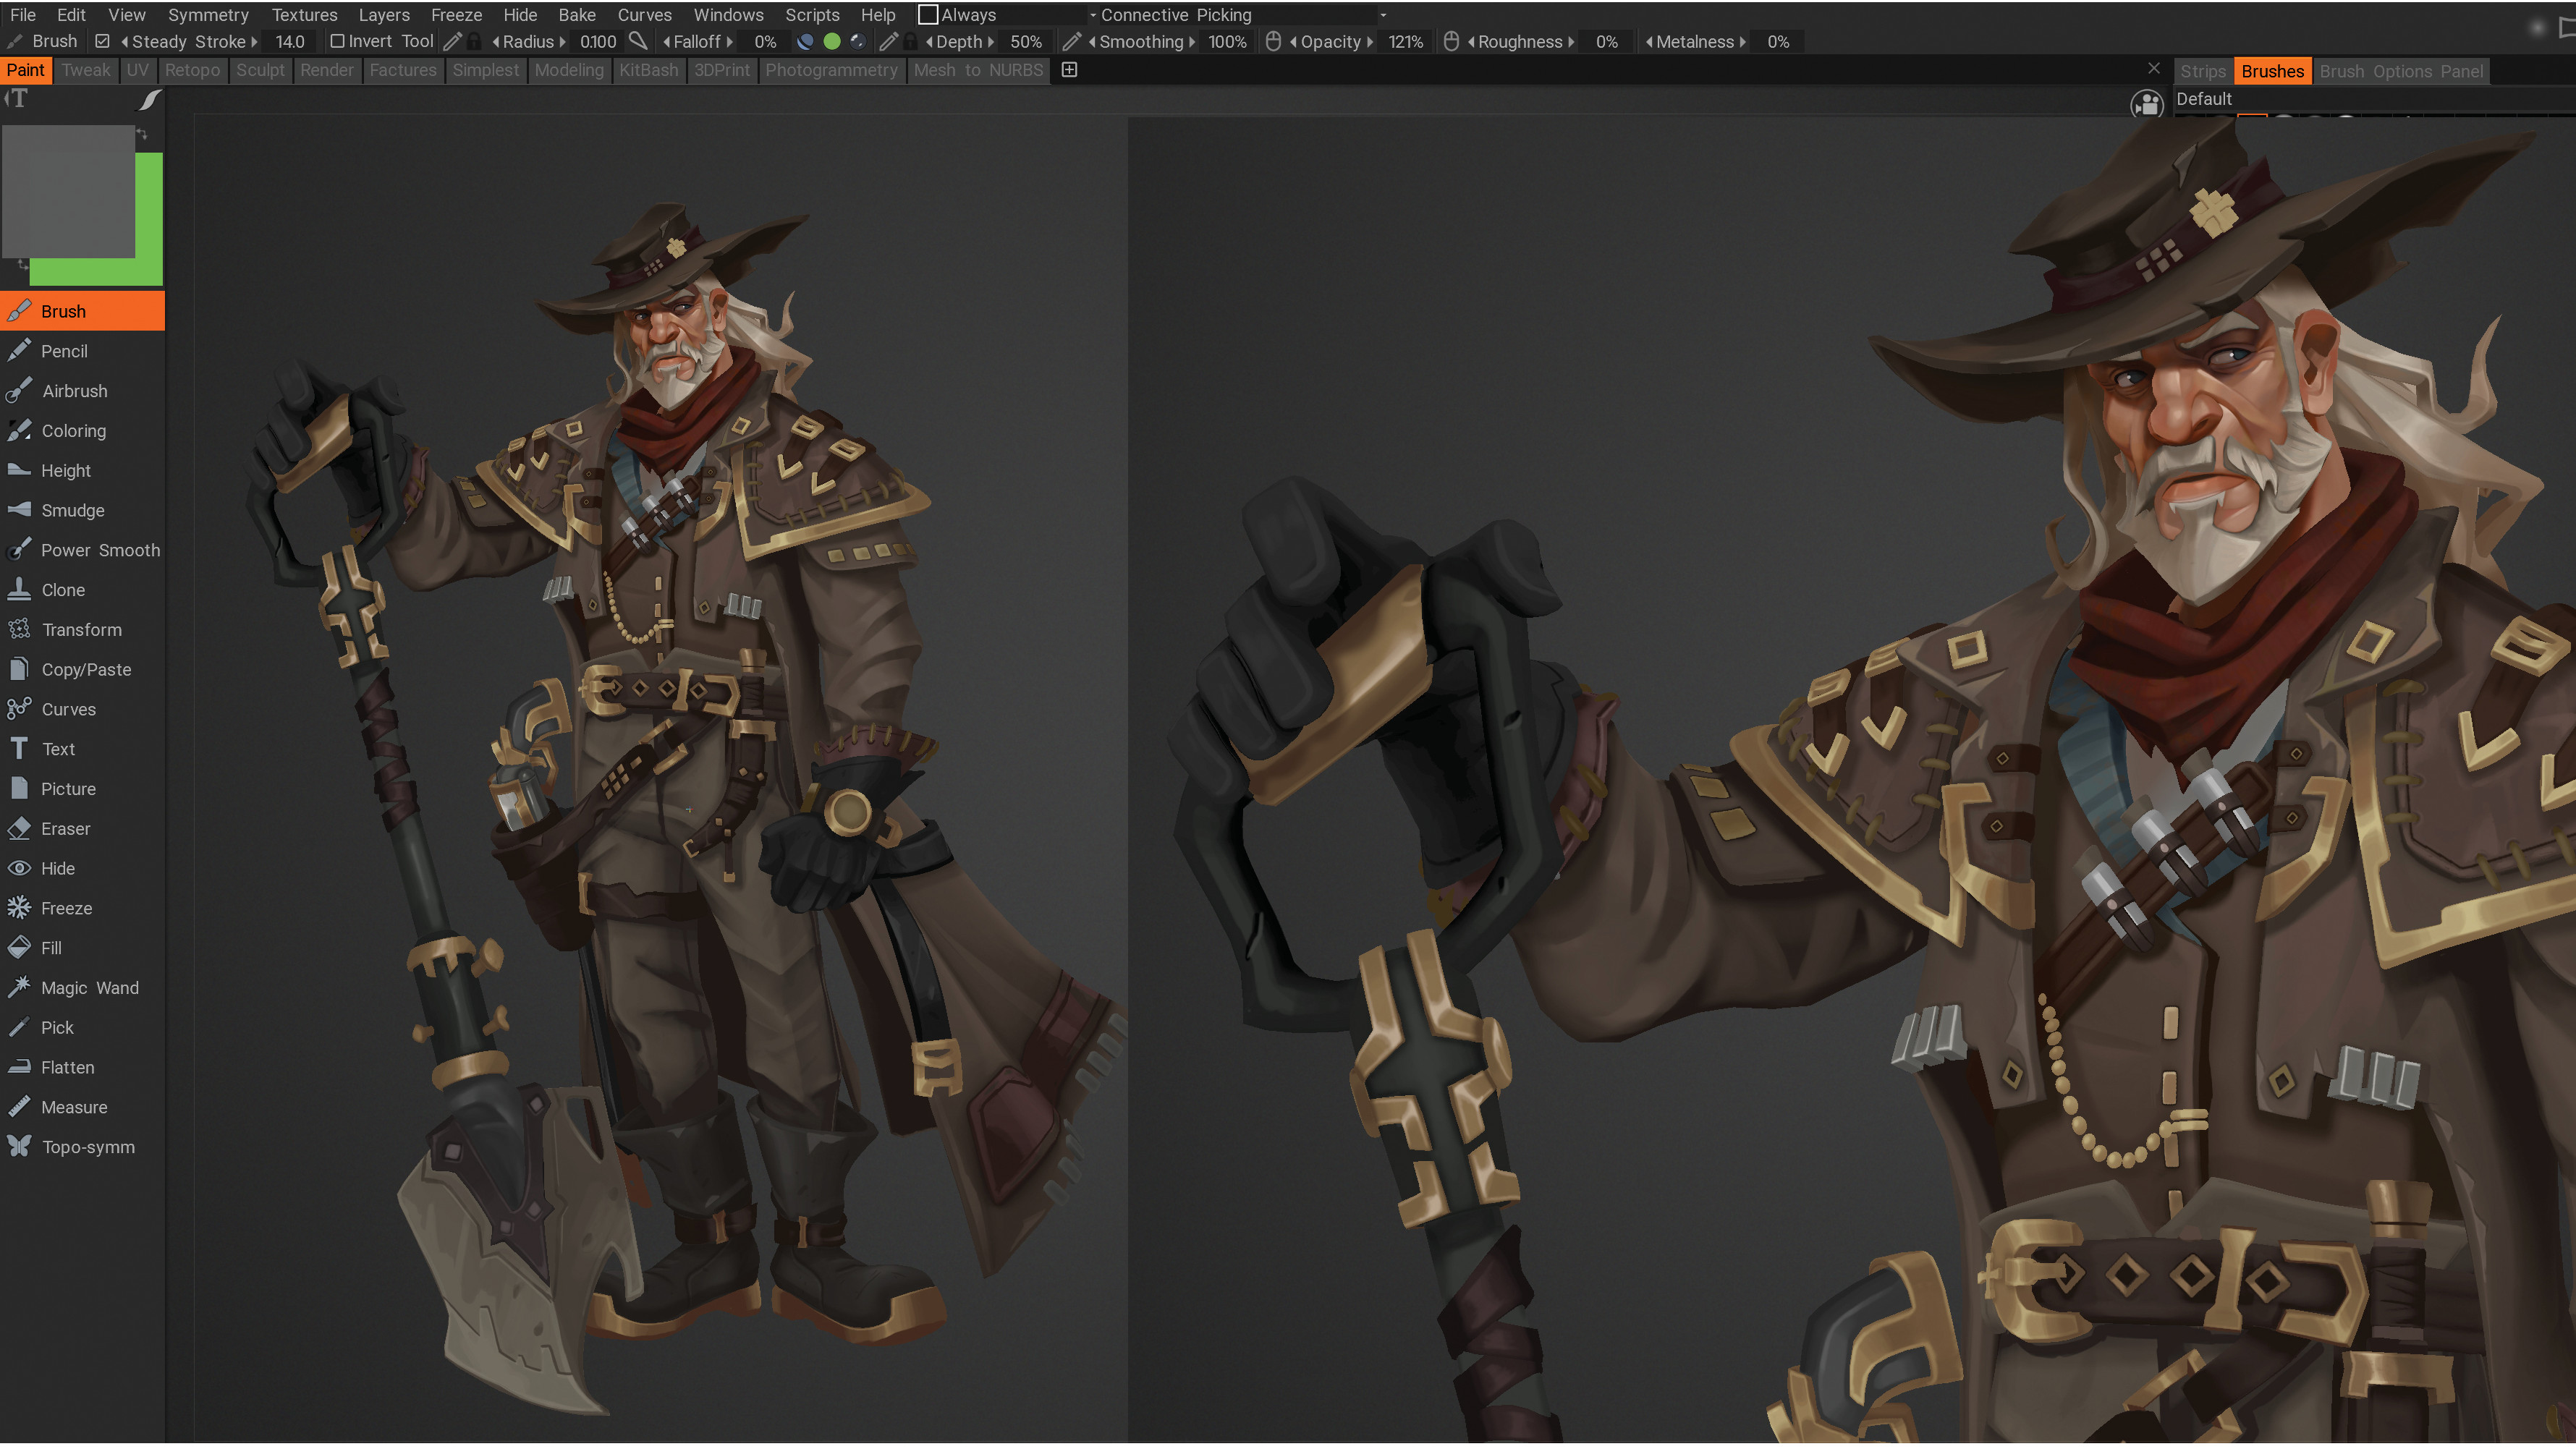
Back in 3DCoat, I import the new colourised texture. Just like I did with the greyscale, I paint on this using the same methods. This time around I can nuance the hues, saturation, and values to complement the gradient mapping.
27. Setting the scene
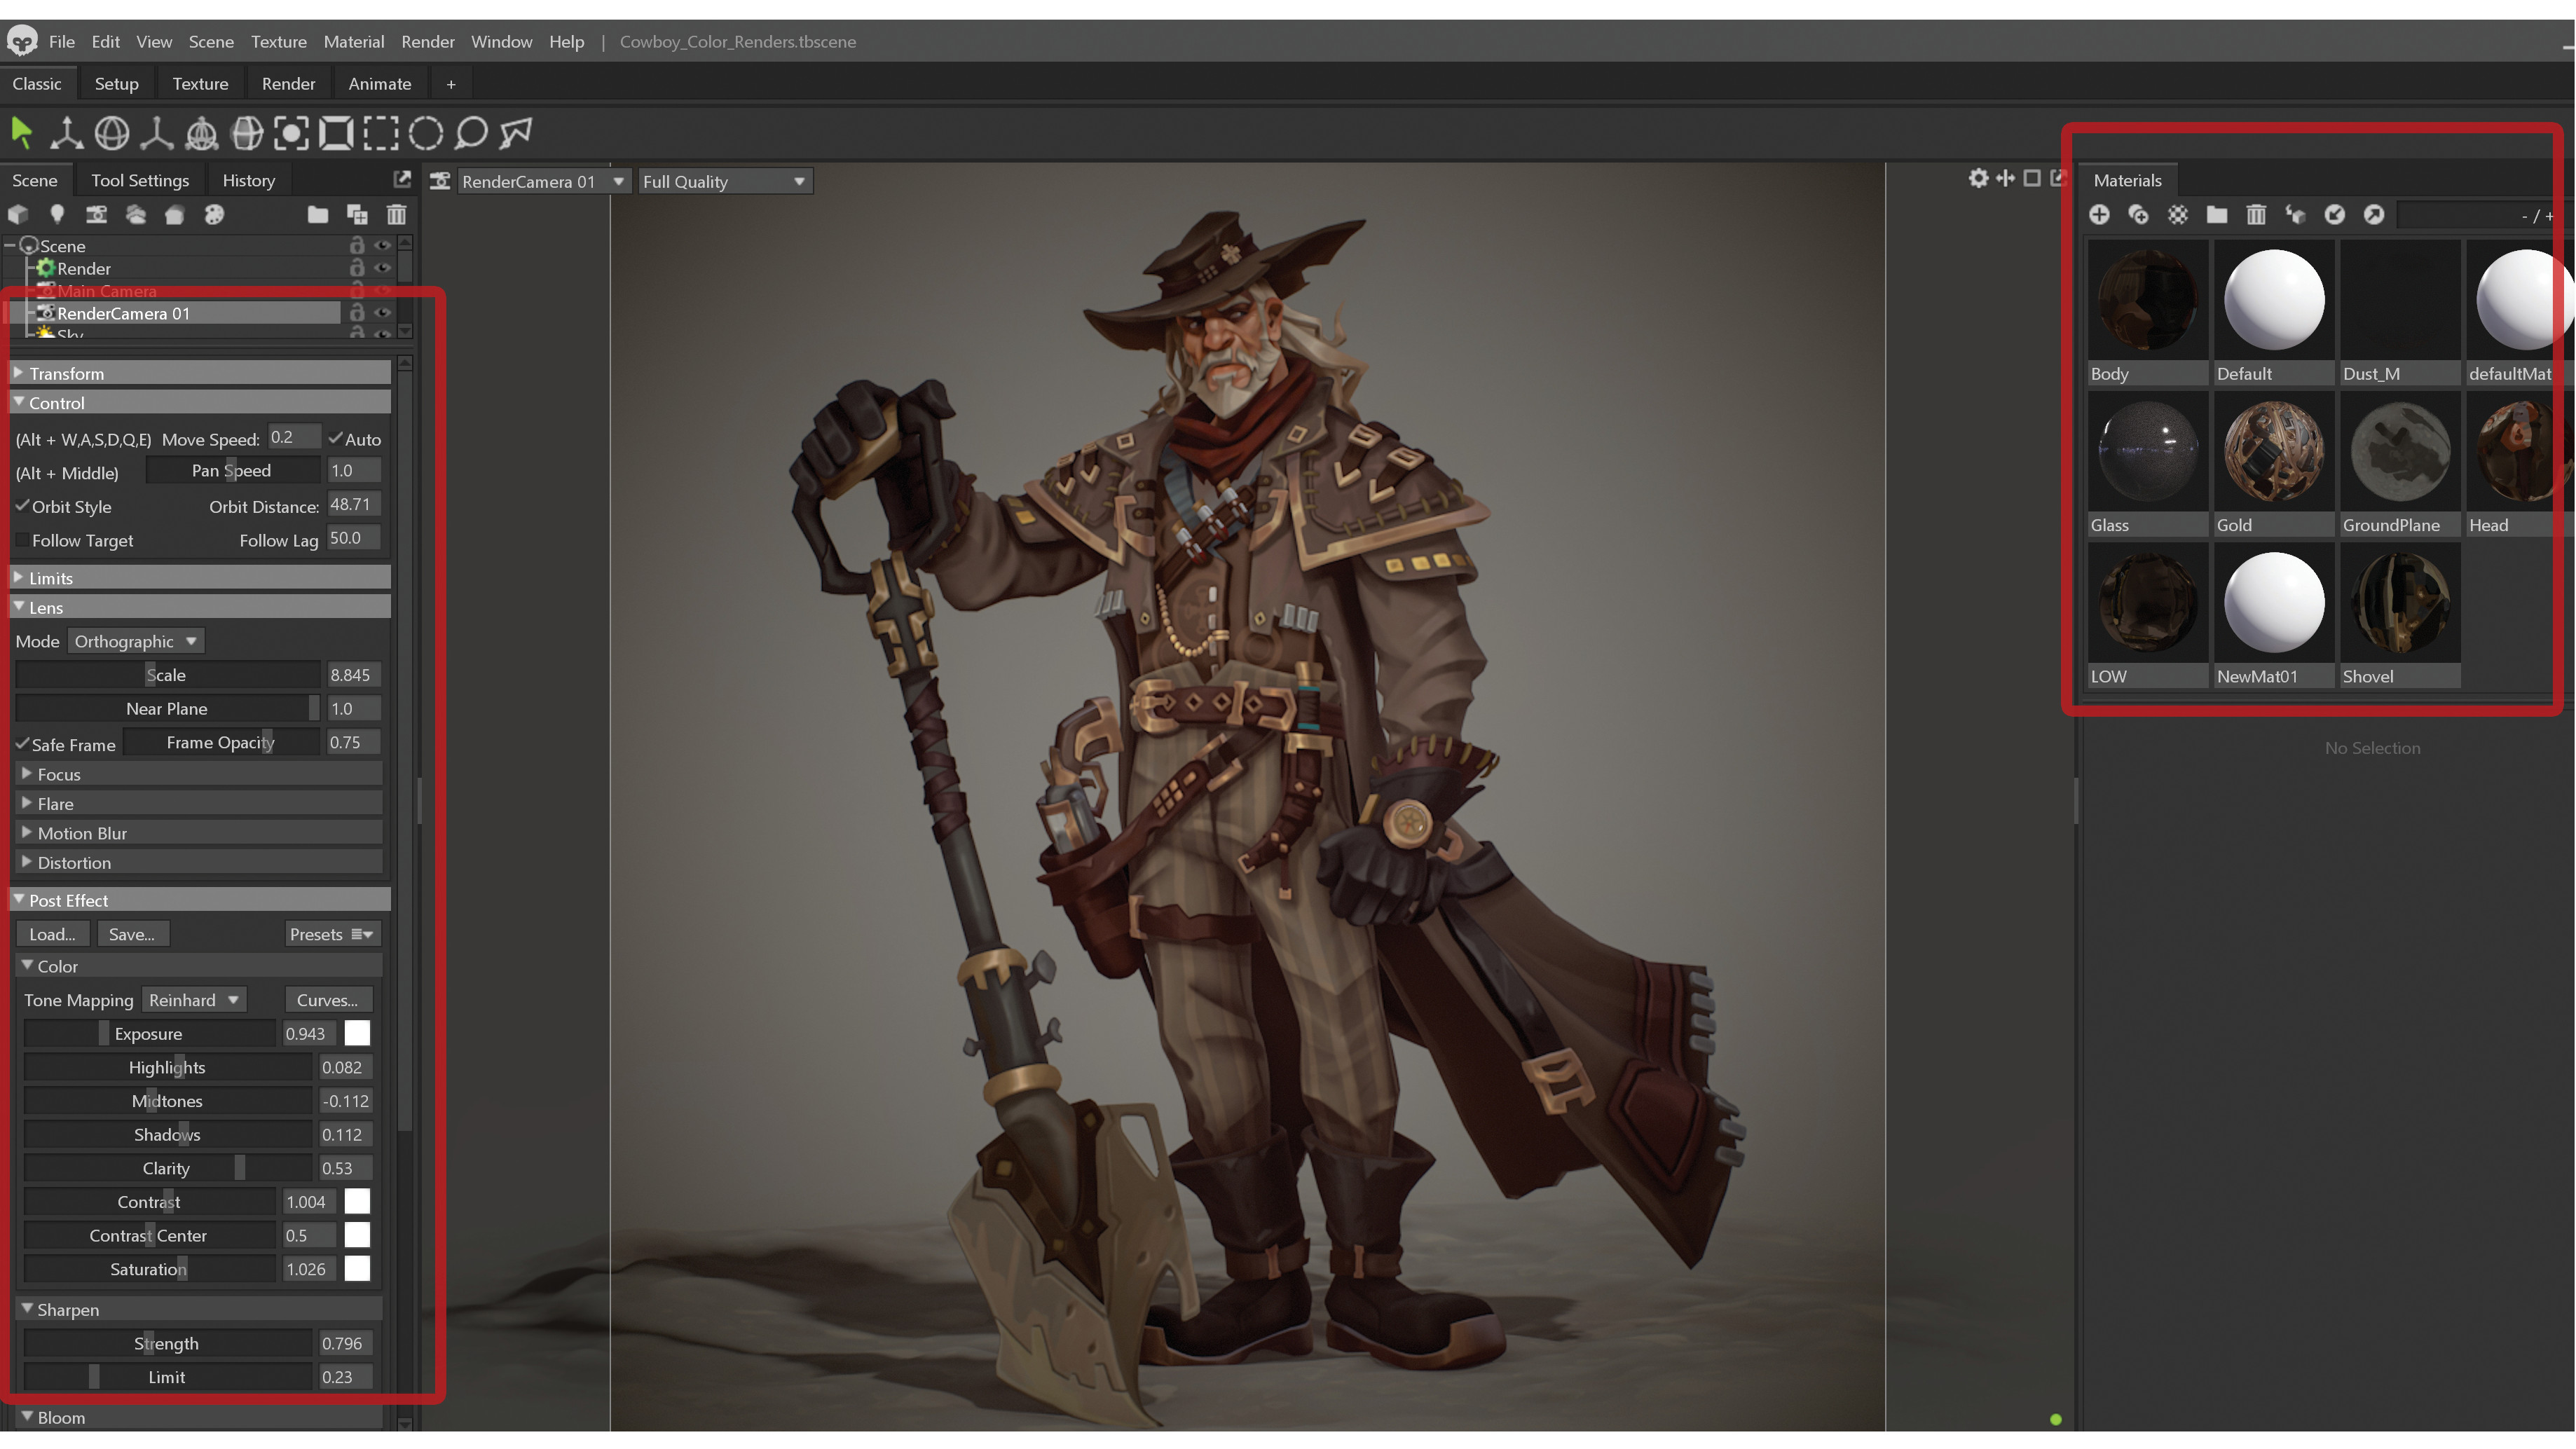
At this stage I create a new scene in Marmoset Toolbag and import the low-poly model. I make a new material for this, set its Diffusion mode to Unlit, and turn off all other material functionality. There shouldn’t be any need for Normal, Reflection, Roughness or Metalness, so only use Emissive or Opacity if they are required.
I then apply material to my model and load up the final coloured texture into the Albedo slot. You should now see your model in a full, unlit rendering.
Next, I make a render camera and make a few adjustments to pop my renders. I adjust the Field of View on the camera to a low value, like 10-20%.
Here you can also adjust the tone mapping to something that will complement your piece. Some experimentation is worthwhile for a good result; play with the Sharpen and Vignette controls to help push the render even further.
28. Rendering the final shots
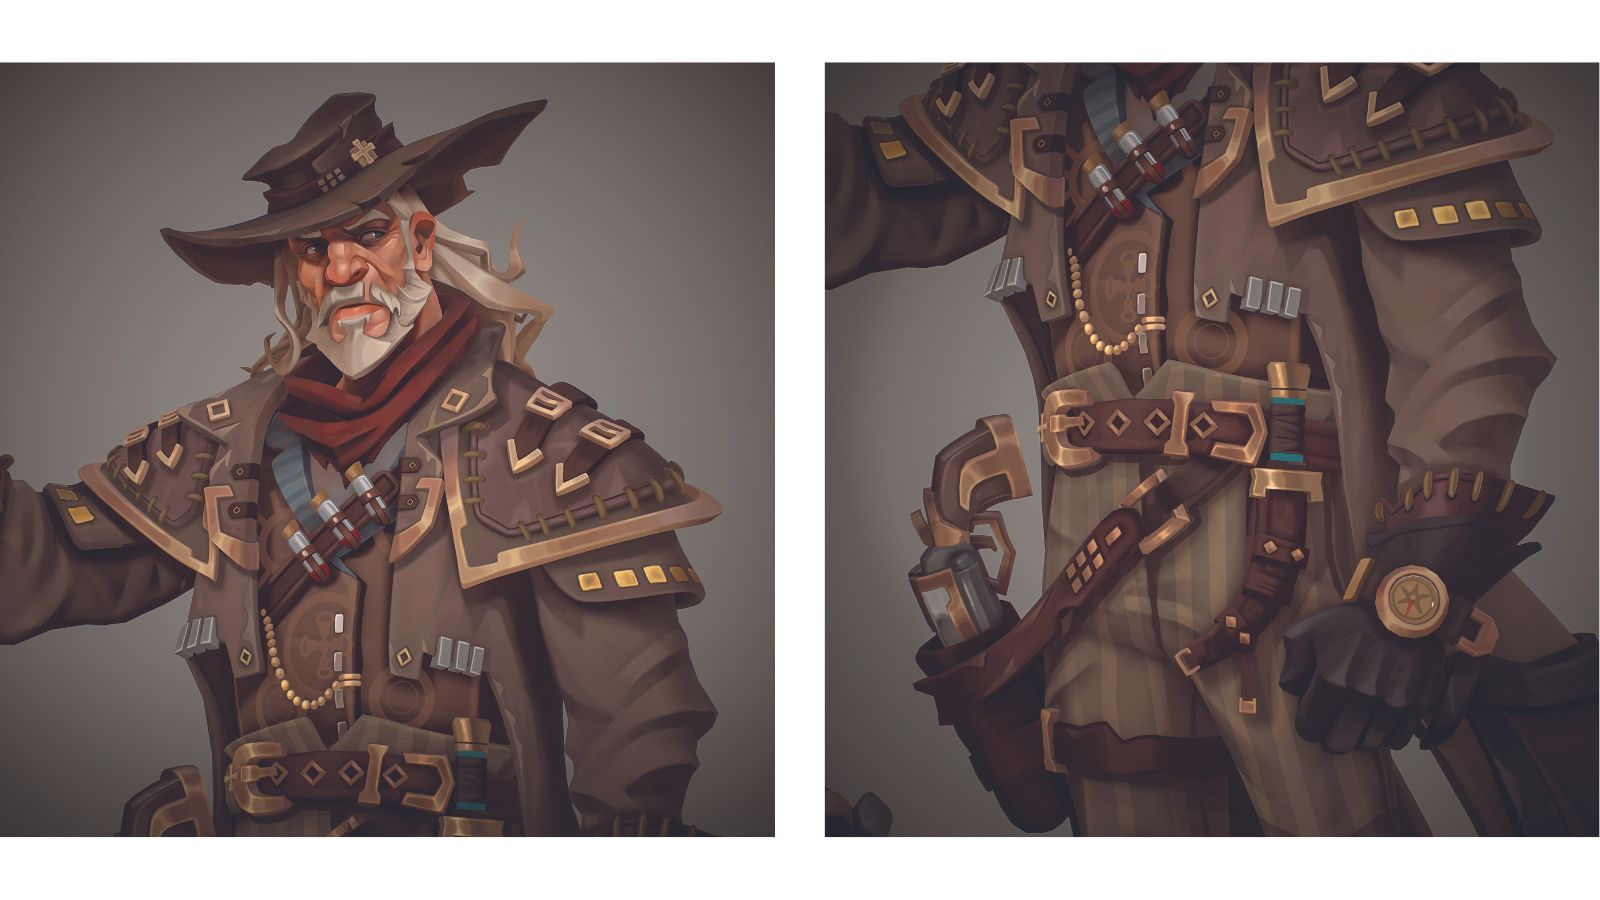
I go into the Render tab, turn on Ambient Occlusion and set this to Screen-space and then add some colour into the Ambient Occlusion and adjust its influence on the diffuse as needed, but I don’t go overboard and keep it subtle.
With all this done it’s time to render. I make duplicates of the camera as needed for additional shots, so making any minor level adjustments in Photoshop afterwards isn’t too demanding.
Creating stylish character art: quick tips
Here are a few quick tips to keep in mind throughout the process:
Sign up to Creative Bloq's daily newsletter, which brings you the latest news and inspiration from the worlds of art, design and technology.
01. Restrict your geometry
For any ZModeled elements, try and use the least amount of geometry needed. Dynamic Subdivisons with crease edges will make the model more flexible for adjustment and look high-poly at the same time.
02. Keep it clean
Refrain from sculpting lots of tertiary details such as scratches or adding fabric details, as these are best left to texture in the lowpoly. We want a clean palette to paint on.
03. Paint freely
Give yourself the freedom to paint elements and details in and out. This is where the real artistry and handcrafted look will become apparent. You can reshape many elements from painting alone.
04. Keep contrast low
Don’t make anything too contrasted in step 19. Instead of pushing too dark or light, stay between the 15-85% value range.
05. Grab attention with colour
Spend time using colour to add some interest to your texture. Don’t be afraid to push a little contrast where needed later on as well.
Get more software tutorials at 3D World
This content originally appeared in 3D World magazine, the world's leading CG art magazine. 3D World is on sale in the UK, Europe, United States, Canada, Australia and more. Limited numbers of 3D World print editions are available for delivery from our online store (the shipping costs are included in all prices). Subscribe to 3D World at Magazines Direct.
Winston is a lead character artist at Moonshot Games, with 17 years of professional experience in the games industry and a passion for stylised characters.
