Create special print finishes in InDesign
Special finishes can transform a print project.
Die cuts and folding

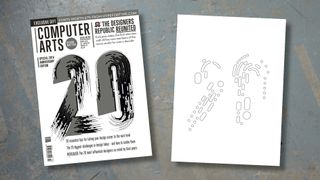
As with foil blocking, for the best result you want to create your die lines as a vector graphic. I use solid lines for areas that need cutting, and dotted lines for the areas that need to be folded. Once again, you want to work over the top of your print document.
When designing your artwork, remember you'll get the best results if you don't try to align the die to a printed image, as there is always the chance of a slight misregistration.
Best practice for die cuts and folding

There are some general rules of thumb to take into consideration when creating your artwork.
- Mark up die cuts with solid lines and folds with a dotted line.
- Die cut holes need to be at least 4mm, and the lines at least 1pt thick.
- Leave at least 2mm space between the die cut holes.
- Remember, the more holes or the larger the holes, the weaker the paper/card will become.
- Consider the shape of your die cut – be wary of anything that could easily catch and rip.
If you're attempting to create anything complicated, it is always best to contact your printer/die cutter first. Every design has the potential for unforeseen problems.
Next page: Emboss and deboss
Get the Creative Bloq Newsletter
Daily design news, reviews, how-tos and more, as picked by the editors.

Thank you for reading 5 articles this month* Join now for unlimited access
Enjoy your first month for just £1 / $1 / €1
*Read 5 free articles per month without a subscription

Join now for unlimited access
Try first month for just £1 / $1 / €1
Jo is group art director on the events team at Future and has worked on a number of magazines and brands, including Computer Arts, What Hi-Fi? and T3. She recently led the redesign of Creative Bloq's sister site, TechRadar.
