Create ornate tiles in Substance Designer
Make realistically textured and intricately patterned 3D materials.
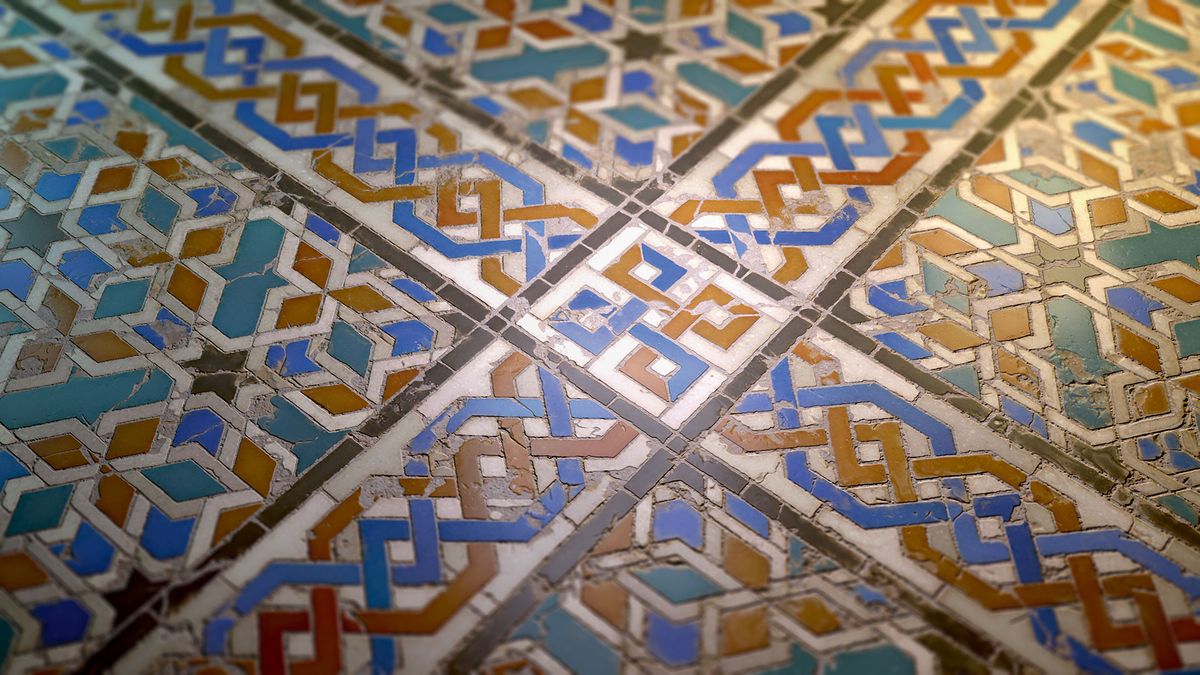
Substance Designer is a great 3D tool for creating realistic tiled floors, as the huge array of noises, patterns and generators available give you lots of creative freedom.
However, Substance Designer is a program that plays well with others, as height, mask and other texture maps can be easily imported and used to springboard your texturing process, especially if you have something specific in mind.
- Download the files for this tutorial
Over the course of this tutorial, we will show you how to combine mask textures created outside of Substance Designer to generate a modifiable ornate tiled floor. We will show you how to create a striking albedo map, believable tile damage, and how to realistically age your texture through the use of subtle surface details and blends.
We'll also cover some tips and tricks to help you generate masks and interesting details that will aid you in creating believable, high-quality materials. For a deeper look into the texturing process, head over to my Gumroad page.
01. Gather material references
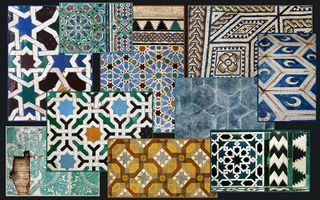
Before creating any Substance material, gather a body of high-resolution reference images of your chosen material, preferably in different lighting conditions.
For this tiled material, looking on Shutterstock, Google images and Flickr uncovered 10 images that show close and medium distance detail. It can help to create a mood board to refer to, perhaps on a second monitor.
02. Create the input patterns
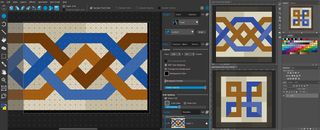
To generate the various tile patterns, use Hexels then clean up in Photoshop. Create three different patterns, each made of solid blocks of colour defining each tile in the texture. It's important to ensure that no two adjacent tiles have the exact same colour, or the Edge Detect node in Substance will merge them together, giving oddly shaped tiles.
Get the Creative Bloq Newsletter
Daily design news, reviews, how-tos and more, as picked by the editors.
Import the patterns into Substance Designer, where you can swap and replace them with others, which is part of what makes the program so powerful.
03. Combine the input patterns
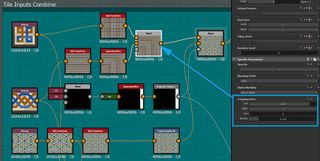
Combine the patterns using Safe Transform, Transform 2D and Symmetry Slice, plus a few simple blend nodes. Use the cropping and mask functionality of the blend nodes to mask each pattern together.
The combined patterns are used as the initial base colour for each tile in the albedo map, with a mask for tile Edge Detect and warping of grunge and noise information.
04. Create the tile height
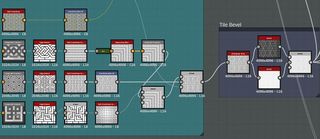
Make a greyscale version of the images, Edge Detect (to keep the masks' sharpness) then combine them. This gives you a black and white mask of each tile with a black border that you then need to bevel for tile height.
To vary tile size, use two Histogram Scan nodes with different values then blend the result using a mask generated from a Multi Directional Warped fractal sum pattern.
05. Add tile edge damage
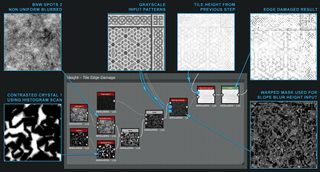
To give the tiles some age and character, add damage to the edges. The Slope Blur node pushes detail from one input down the slopes of a second height input for this.
Combine some grunge and patterns to generate a heightmap with varied detail, allowing for large and small edge damage. The heightmap also contains areas of solid black where edge damage will not occur.
06. Cause surface damage
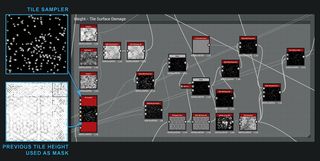
Now that the tiles have damaged edges, add some surface damage to remove larger chunks. To generate the damage, use a Tile Sampler node scattering Gaussian shapes. To make sure the damage originates from the edges of each tile, use the tile height from earlier in the graph as a mask.
The other nodes in this step Slope Blur and Warp this data with grunge and noise to get a more detailed damage map. This helps to ensure that each tile looks uniquely worn.
07. Add tile cracks
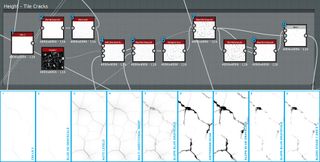
To make the tiles look like they have undergone years of foot traffic, blend in cracks using the Darken blend mode over the unbroken tiles. The Cells 3 node is a great place to start when building cracks, but is too uniform without some modification.
After Warping the cracks, use consecutive Slope Blurs with Grunge/Noise inputs and a blurred version of the input itself. Slope Blur an input by itself at low intensities to give the effect of the inflated details.
Next: grout and finish off your tiles

Thank you for reading 5 articles this month* Join now for unlimited access
Enjoy your first month for just £1 / $1 / €1
*Read 5 free articles per month without a subscription

Join now for unlimited access
Try first month for just £1 / $1 / €1
- 1
- 2
Current page: Design and texture 3D floor tiles
Next Page Grout and finish off your 3D floor tiles