How to create a super-realistic fantasy creature
Learn how to make an awesome creature using Photoshop.
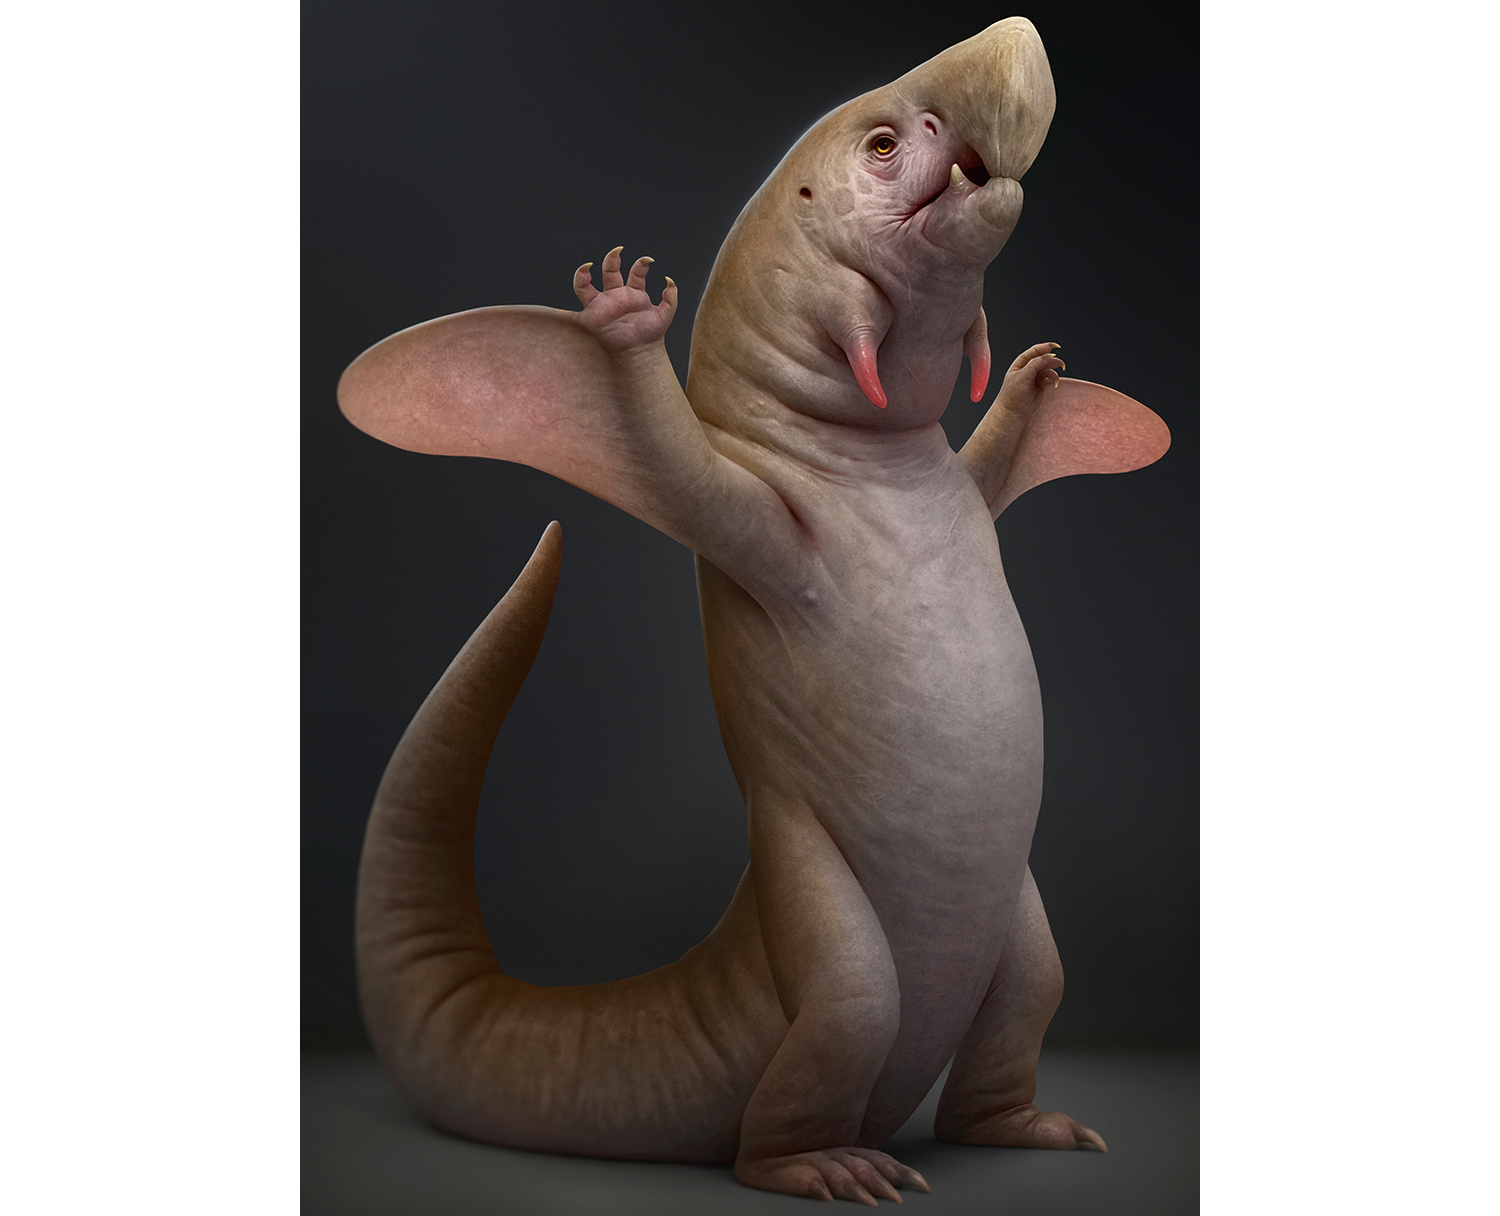
Painting a fantasy creature can be a lot of fun. In my opinion, you’ll struggle to find any subject that gives you more freedom to explore your ideas than creating a creature. Yet it’s this same freedom that can overwhelm many artists and lead to some serious design issues. Once you accept the fact that you’re not bound by previously established notions of how your painting should look, you then become responsible for defining every single detail about this life form.
Where does it live? What does it eat? How does it move? Where does it sit in the food chain? It’s in this moment that most mistakes are made. The two most common ones are either copying a real-life animal too much and ending up with something that, say, looks like a horse in a different colour, or creating something so alien-looking that no one knows what it is. For more creature design considerations, see our creature design tips piece.
The key to solving these problems is information. Study as many types of animals as you can, and their evolution process will give you the understanding that you need to apply this same logic to your creature’s development. You’ll then be able to create something new, yet relatable. In this workshop, I’m going to discuss my design choices as well as my painting process and by the end of it I’ll have painted a cool-looking creature using Photoshop CC.
Click on the top-right icon of the picture to enlarge it.
01. Establish the origins of the creature
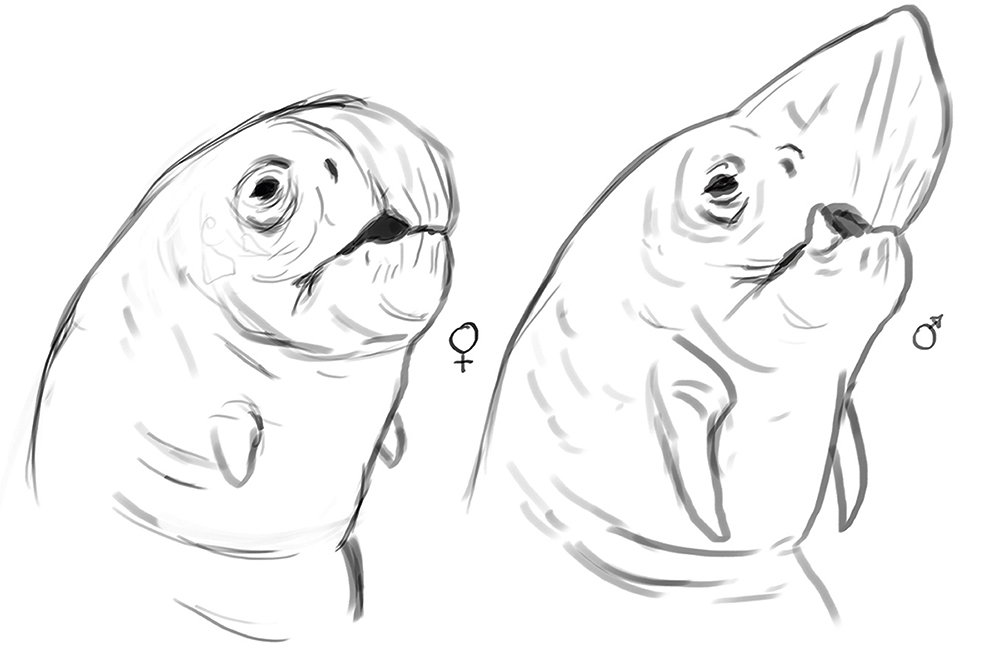
The first thing I need to do is to define my creature. I want to paint a small creature, somewhere between an iguana and a medium-sized dog. I also want it to have a beak to feed on the shellfish that it hunts for on beaches and shallow waters. Finally, I want to it to be a male.
02. Use real creatures as a reference
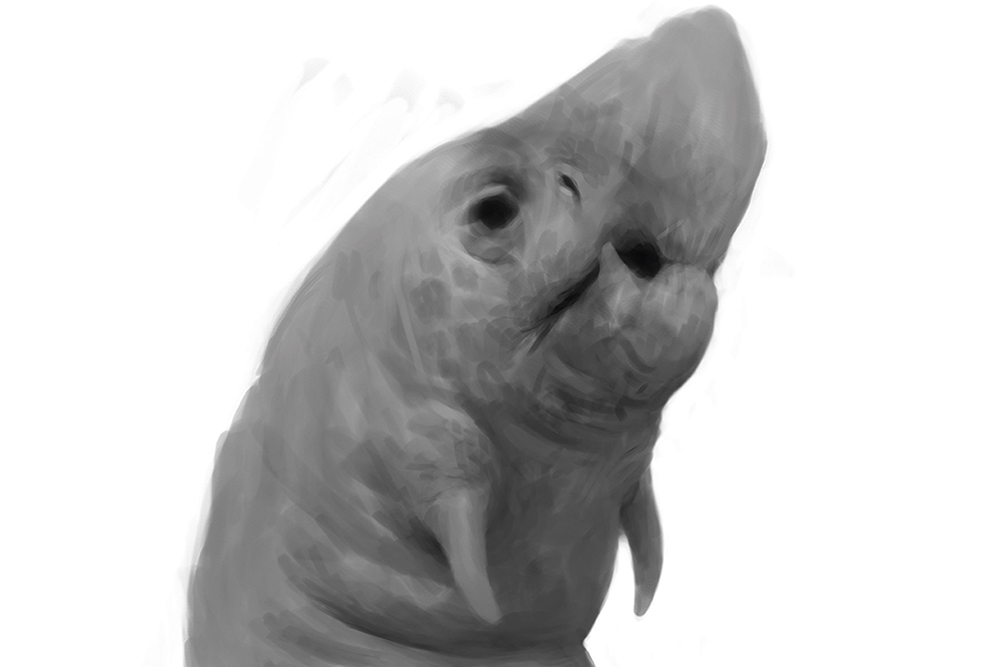
Try and imagine a new colour that you’ve never seen, that isn’t the mix of any colours you recognise. It’s impossible, right? Same thing with creatures. I need to base my creature on creatures that I already know. So I design my creature while thinking of monitor lizards, otters, macaws and other types of parrots as reference.
03. Fear the chimera
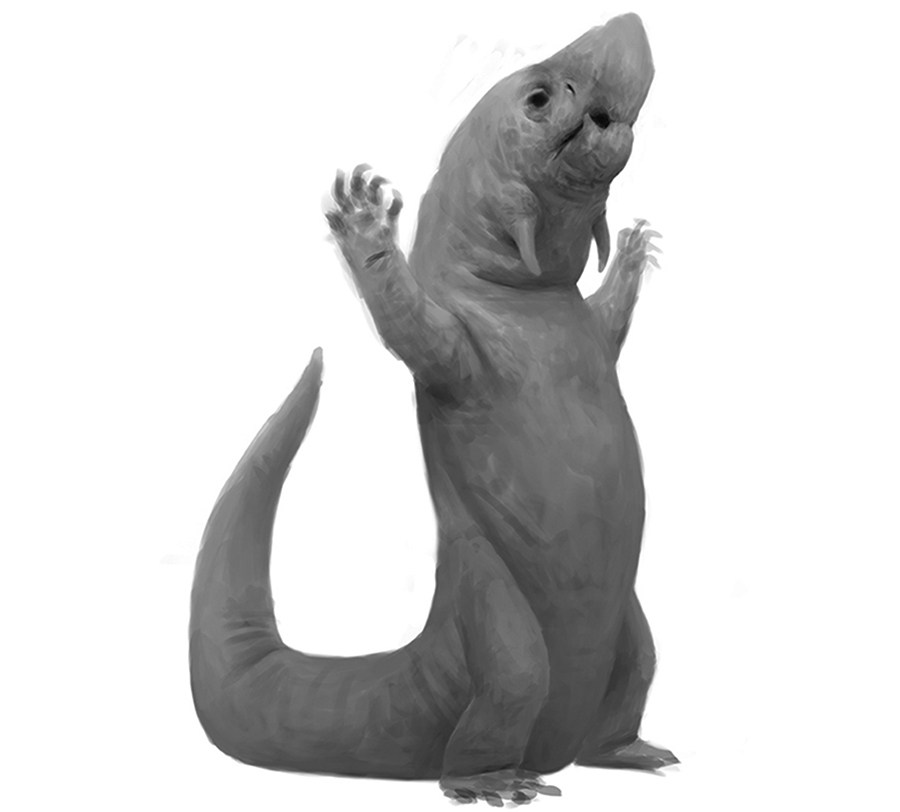
While I use these existing animals as references I try my hardest not to just copy them. It would be easy for me to just select elements of real animals, put them all together and call it an original creature, but that’s just a chimera. I’m not Doctor Frankenstein or an alchemist, and simply mashing pieces together isn’t good design.
Get the Creative Bloq Newsletter
Daily design news, reviews, how-tos and more, as picked by the editors.
04. Strike a pose
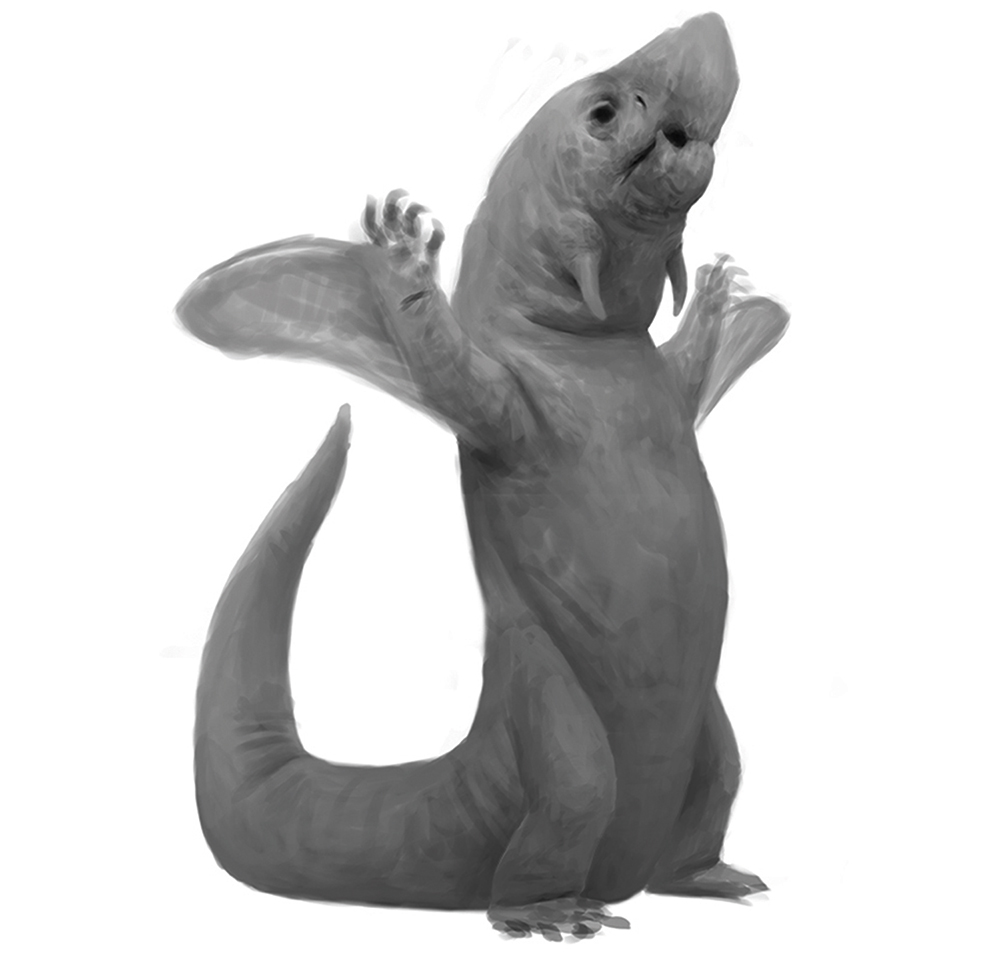
Posing a creature can be tricky. With the exception of a few photogenic animals, most critters just don’t care about looking good in photos! So I decide to pose my creature as if he’s showing himself off, using his chubby tail to balance his body on his hind legs. He’s also opening his decorative 'wings'; to attract females while scaring off rival males.
05. Set up a background
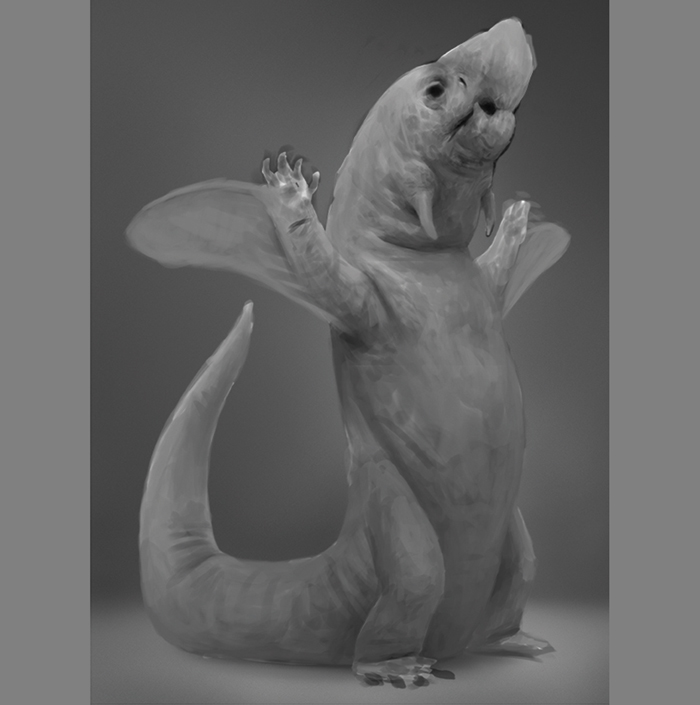
Because the main focus of this workshop is the creature, I decide to paint just a simple background, similar to a studio photo shoot. But don’t mistake its simplicity for irrelevance – even the simplest of backgrounds can and will affect your entire final image. So I treat it with the same respect as I treat my creature.
06. Start the heavy lifting
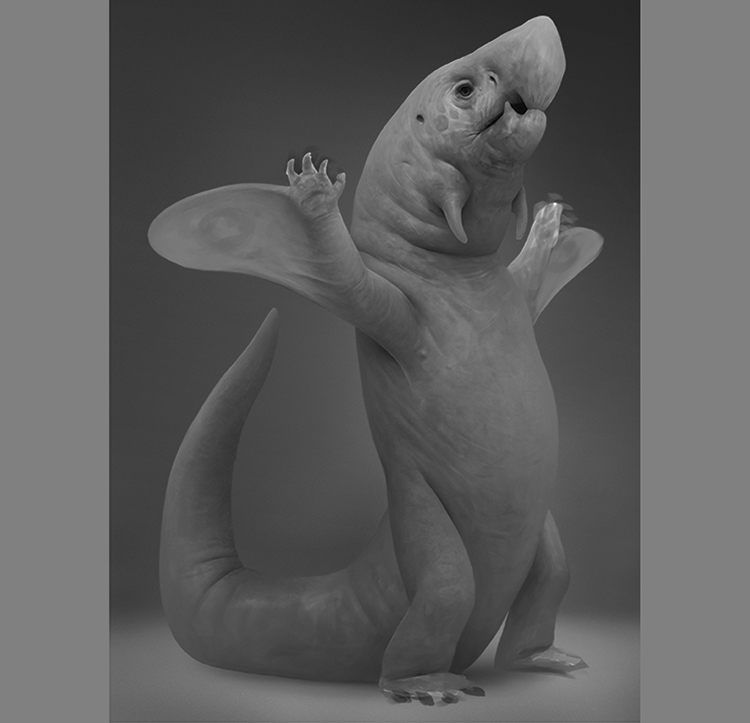
Now that the design, pose and background have been decided, it’s time to get to work. Whenever I’m painting I focus on three main things: shape, values and edges. A well-defined shape, control and understanding of values together with well-placed hard and soft edges is essential if you’re aiming for a realistic 3D look.
07. Adjust the shape of the creature
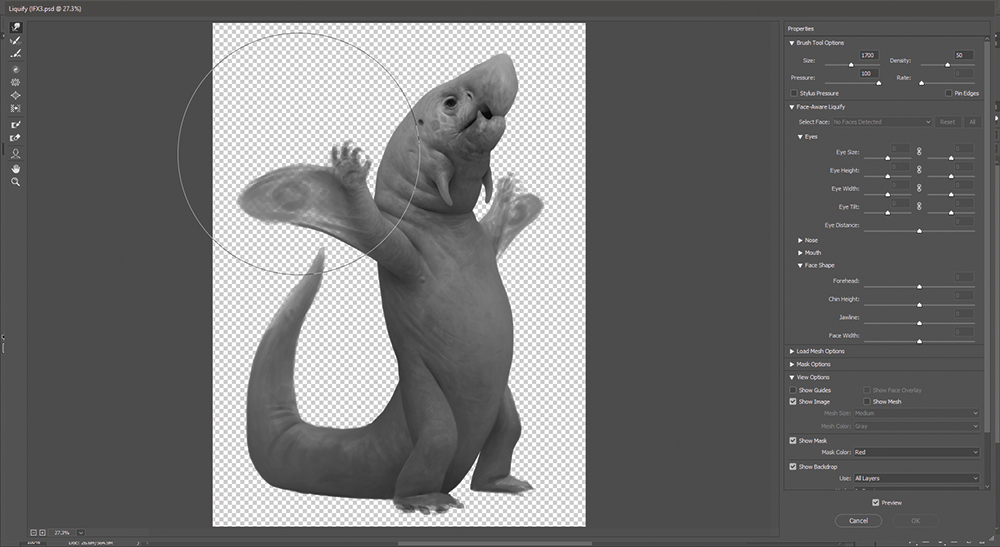
During this process I often use the Liquify filter (Ctrl+Shift+X or Cmd+Shift+X) to make adjustments to the shape of my painting. I also use Preserve transparency (/) and clipping masks to prevent me from painting outside the limits of my creature when I don’t want to lose the shape that I already have. I also duplicate my main layer before making any big changes.
08. Work in greyscale
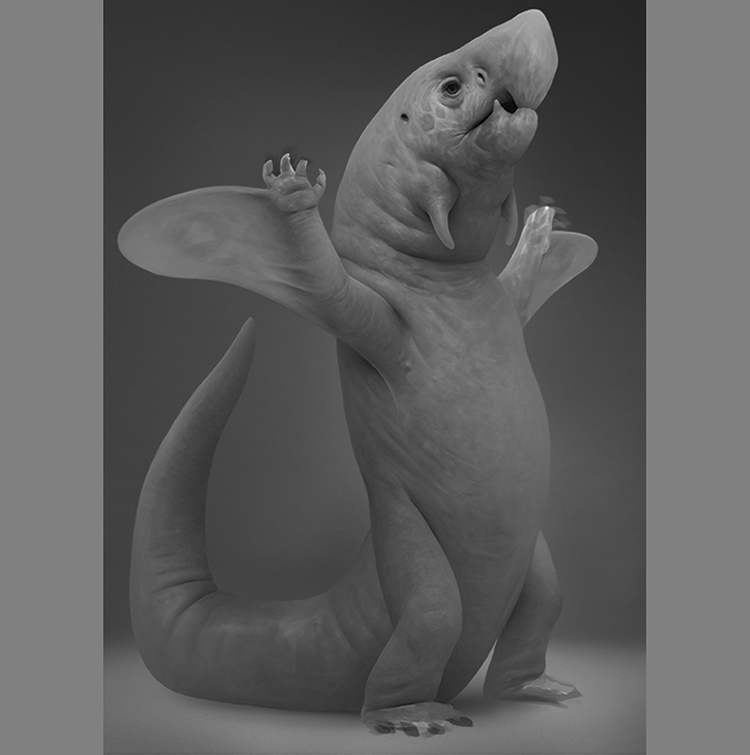
For this part of the process I prefer to work in greyscale. This means I don’t need to worry about colours or saturation – I just focus on my values as I define the shapes, create textures and work on the lighting. Trying to fight a war on too many fronts is a sure way to lose. Minimise the problems you have to deal with.
09. Finish the base painting
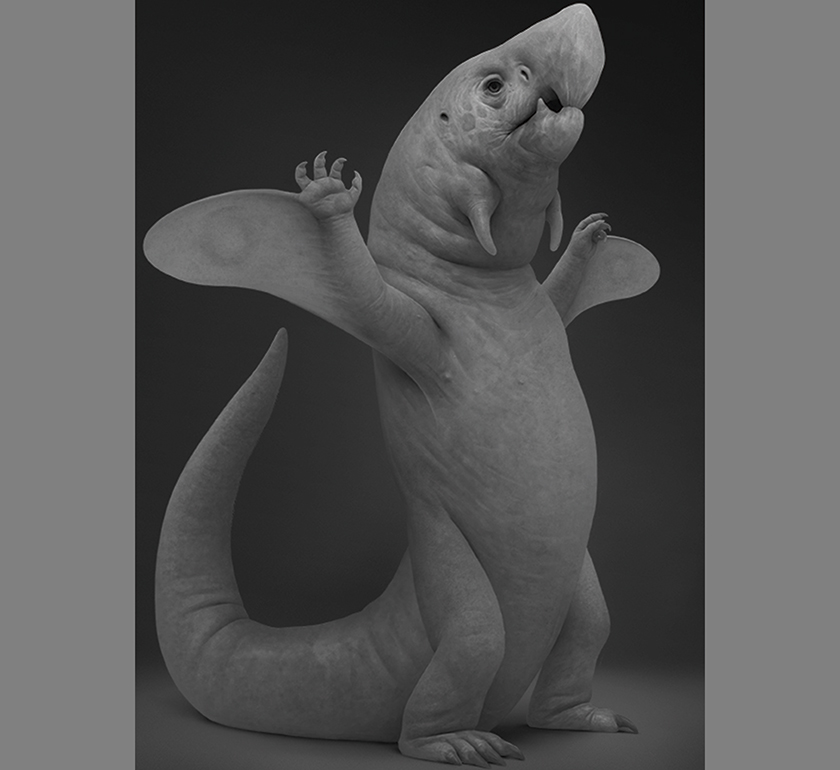
I now paint the hands and feet, tidy up areas that might have been left too loose and build up the textures and different materials. I paint most of the textures by hand, but also use an Overlay layer together with my texture brushes on a low Opacity level to build subtle variations and to add interest to my painting.
10. Introduce some colours
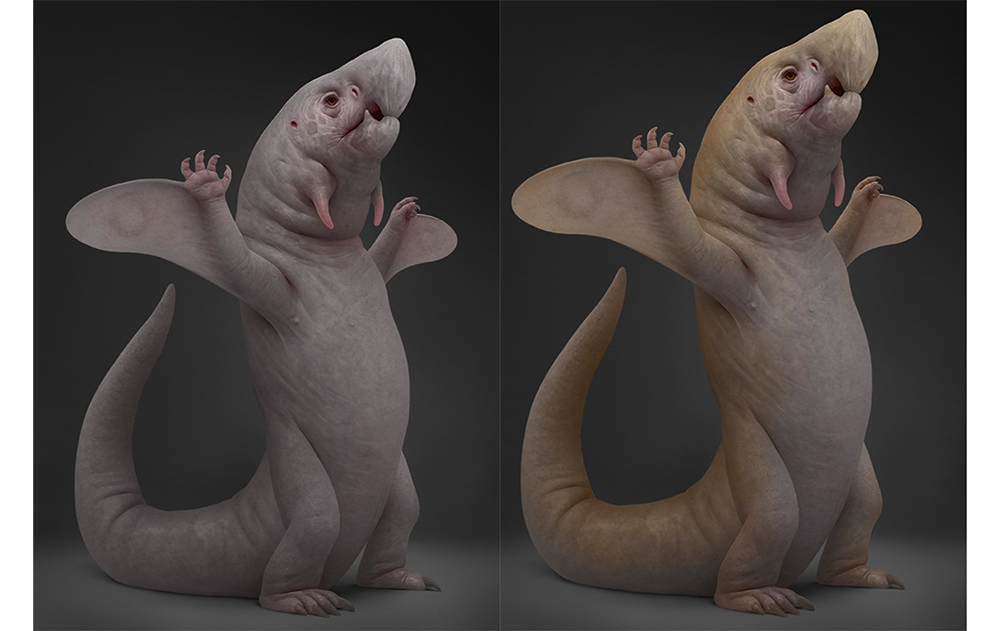
Now all that greyscale painting pays off. Using a new layer set to Color mode, and with a clipping mask to avoid spills, I start painting the colours. First I do some underpainting with some reds, particularly on areas with high concentration of blood vessels. Then, on another Color layer, I paint the colour scheme that I’ve chosen for my creature.
11. Use adjustment layers
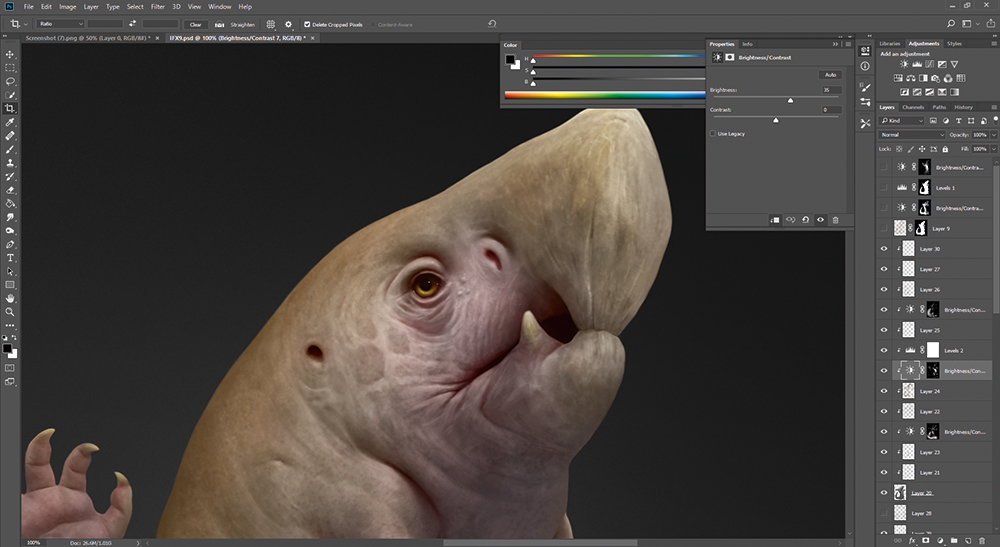
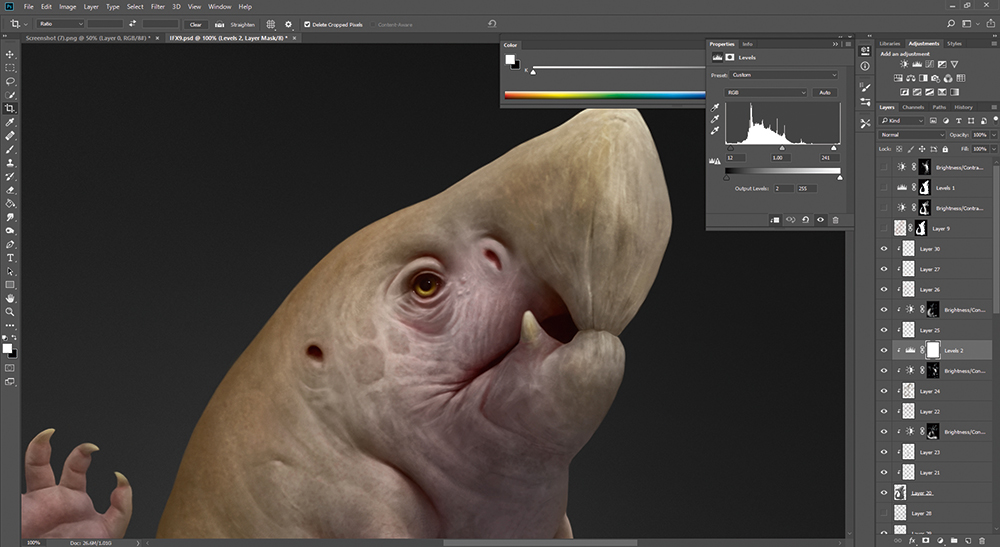
I like to use adjustment layers, especially Levels and Brightness/Contrast, to further enhance my values and lighting. And the best part is that they already come with their own masks so I can control which areas of my painting I want them to affect. I then create a new Normal layer on top of everything and start rendering again. This helps me blend in all the new visual information
12. Play around with lighting
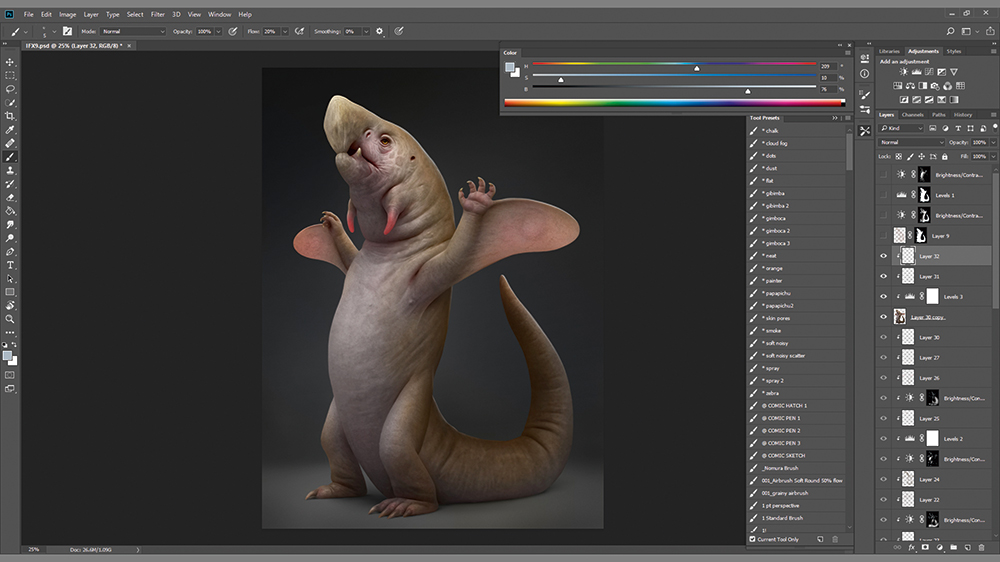
Now it’s time to fix any lighting problems that have occurred and make the whole lighting scheme coherent for both the background and foreground. Multiply and Overlay layers are great for this. I then paint a subtle rim light to help my creature pop, making it more 3D. I also use a layer set to Screen underneath my creature to paint in some very faint glow emanating from the rim light.
13. Apply favourite filters
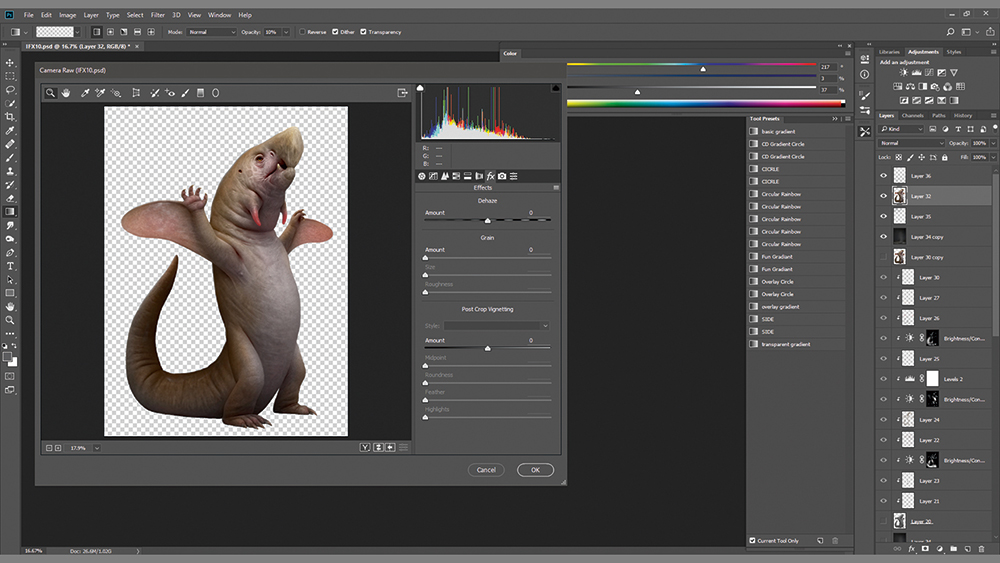
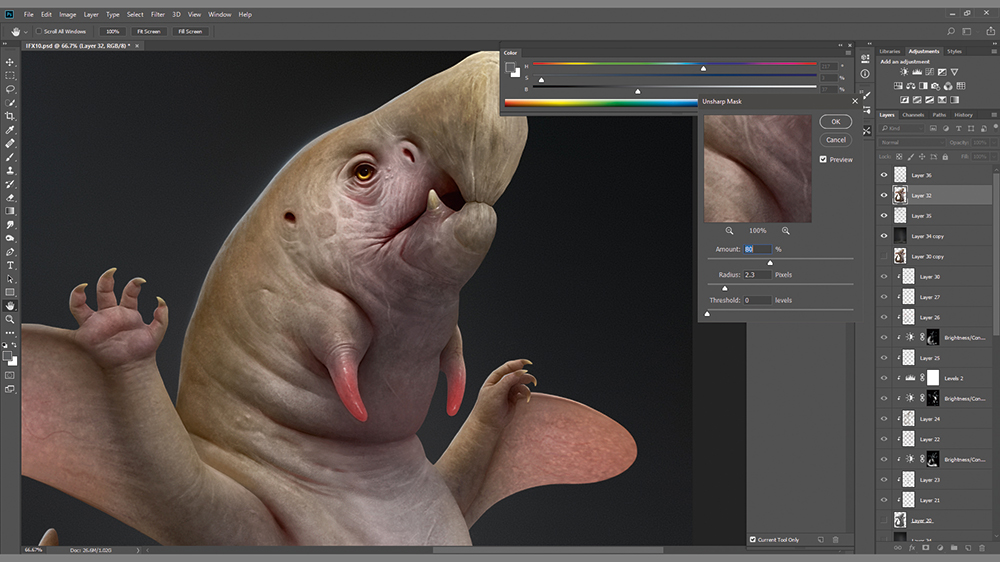
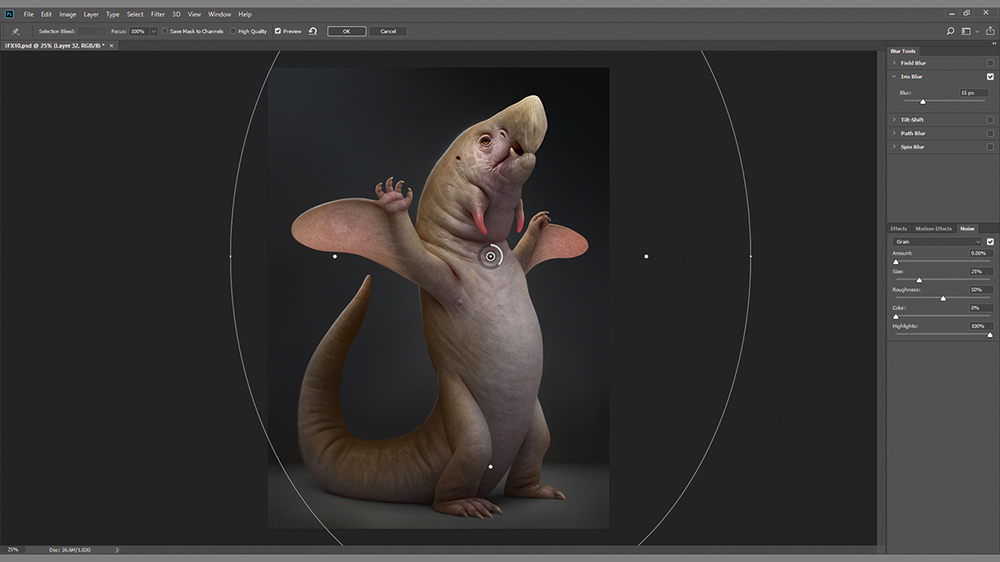
I’m almost done now, so it’s time for filters. First I add some grain with the FX tab of the Camera Raw Filter (Shift+Ctrl+A or Shift+Cmd+A) and then fade it (Shift+Ctrl+F or Shift+Cmd+F) until it’s looking subtle enough. Then I use the Unsharp Mask to sharpen my painting: 80 per cent is enough, and finally a soft Iris Blur helps to direct attention to the focal area.
14. Add final touches
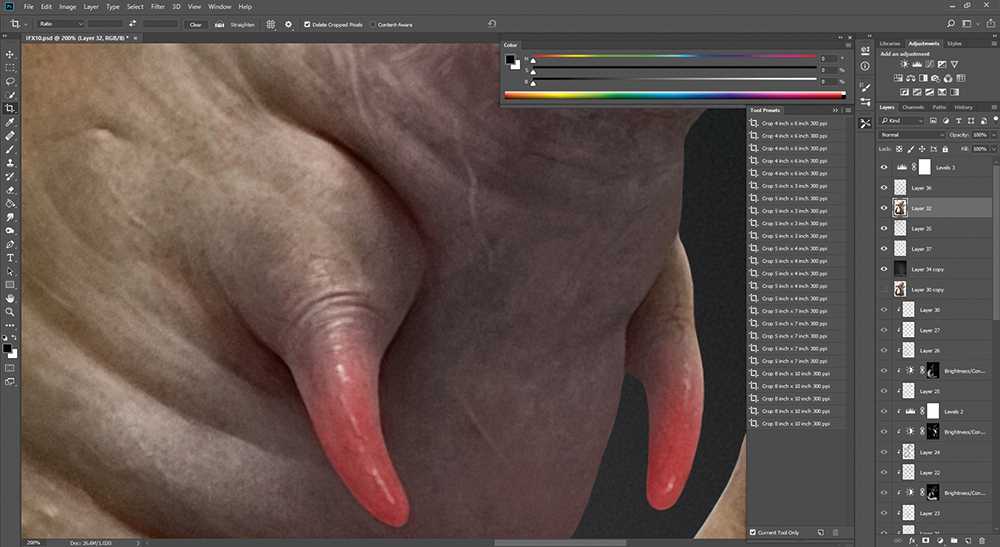
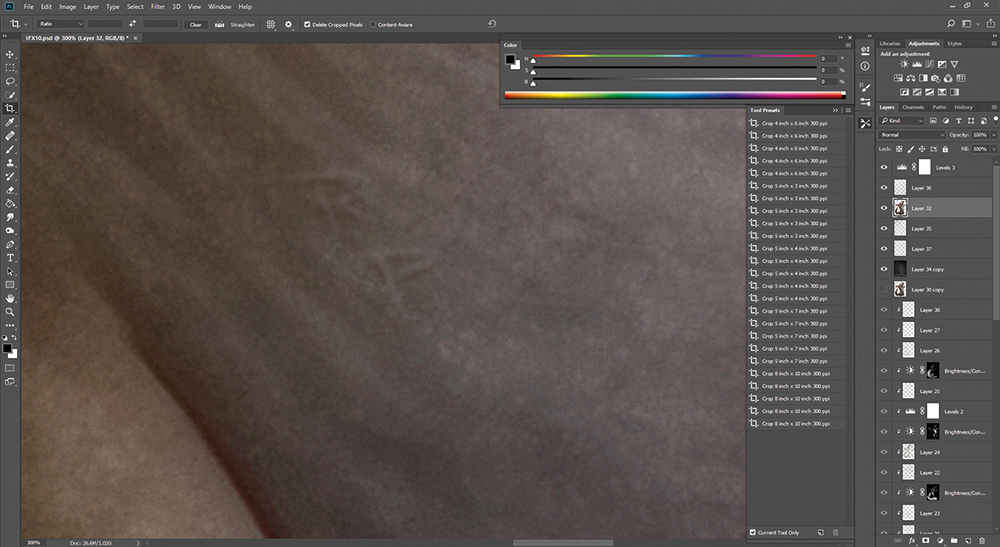
I check that my highlights are set correctly, whether I need to add more veins or wrinkles, and if my most vibrant colour is on the neck tendrils that he uses to attract mates. I then add scars of fights against rivals and sneak in my initials just for fun – shhh, don’t tell anyone! I add a final Levels adjustment layer on top of everything and it’s done. It was fun, and I hope you enjoyed reading about it!
This article was originally published in issue 169 of ImagineFX, the world's best-selling magazine for digital artists. Buy issue 169 or subscribe to ImagineFX.
Related articles:

Thank you for reading 5 articles this month* Join now for unlimited access
Enjoy your first month for just £1 / $1 / €1
*Read 5 free articles per month without a subscription

Join now for unlimited access
Try first month for just £1 / $1 / €1
