Create a pouring water effect in RealFlow
We explain how to simulate realistic pouring water using 3ds Max and RealFlow.
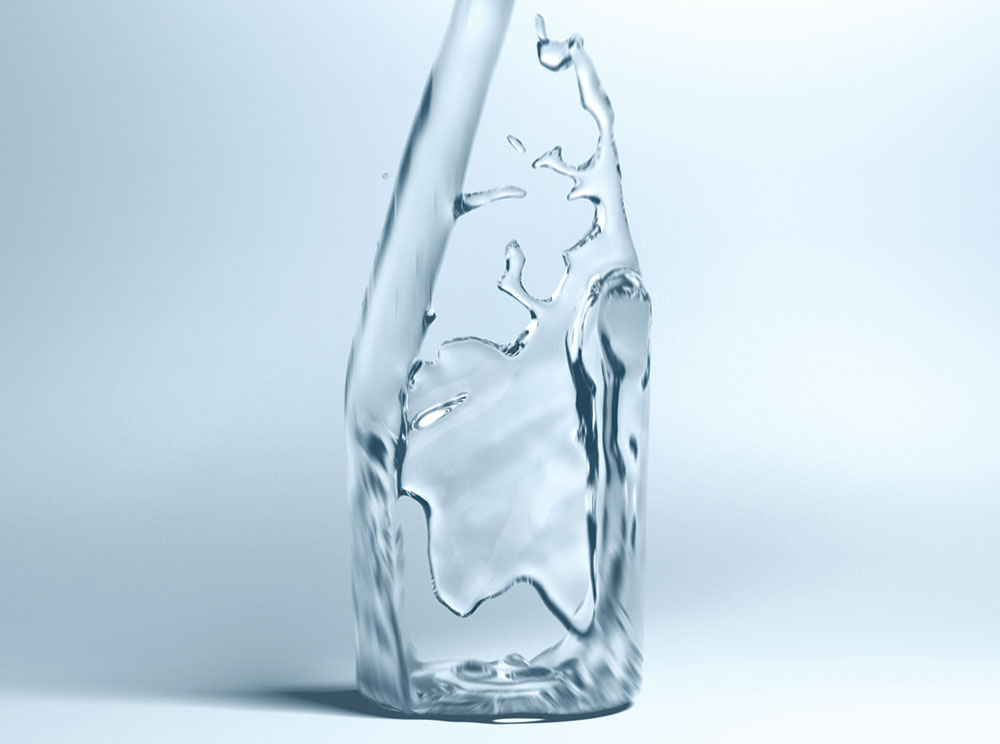
This tutorial show you how to simulate a liquid pouring effect. There are various software and plugins you can use to create liquid effects, but I've chosen to use RealFlow as it's accessible and delivers consistent results.
Before you start, you'll need to do some research. You should have a good knowledge of the properties of liquid – for example, you should know what viscosity is and what surface tension is, and how they affect the liquid. Different types of liquid have different properties, and knowing these means you can tweak this workflow to create different types of liquid.
Download the setup files for 3ds Max and RealFlow, as well as a video walkthrough of my process.
01. Create a glass shape
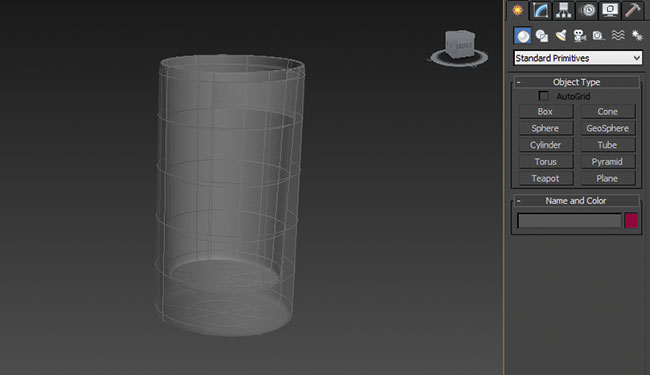
In 3ds Max, create a container from geometry into which we'll be pouring the liquid. Create a cylinder by going to 'Create Panel > Geometry > Standard Primitives > Cylinder' and change the parameters to Radius 1.0, Height 3.0, Height Segments 5, Cap Segments 2 and Sides 8.
Set the Position to X: 00, Y: 00, Z: 00. Next, convert this geometry into Editable Poly and delete the upper part or polygons, so it looks like a glass.
02. Export geometry from 3ds Max
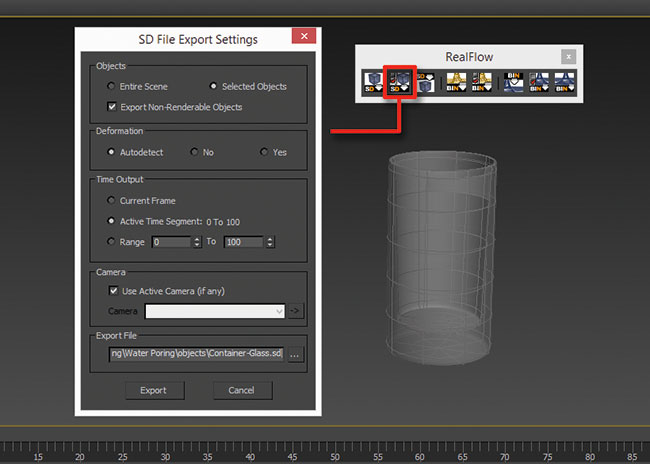
When we've finished modelling the geometry, it's time to send it into RealFlow. Select the geometry and go to the RealFlow tab in 3ds Max, then click on SD File Export Settings. A new window will appear. Select the Selected Objects option, set the path to save my geometry and click the Export button. Our geometry is now saved in the .sd format.
03. Set up a RealFlow scene
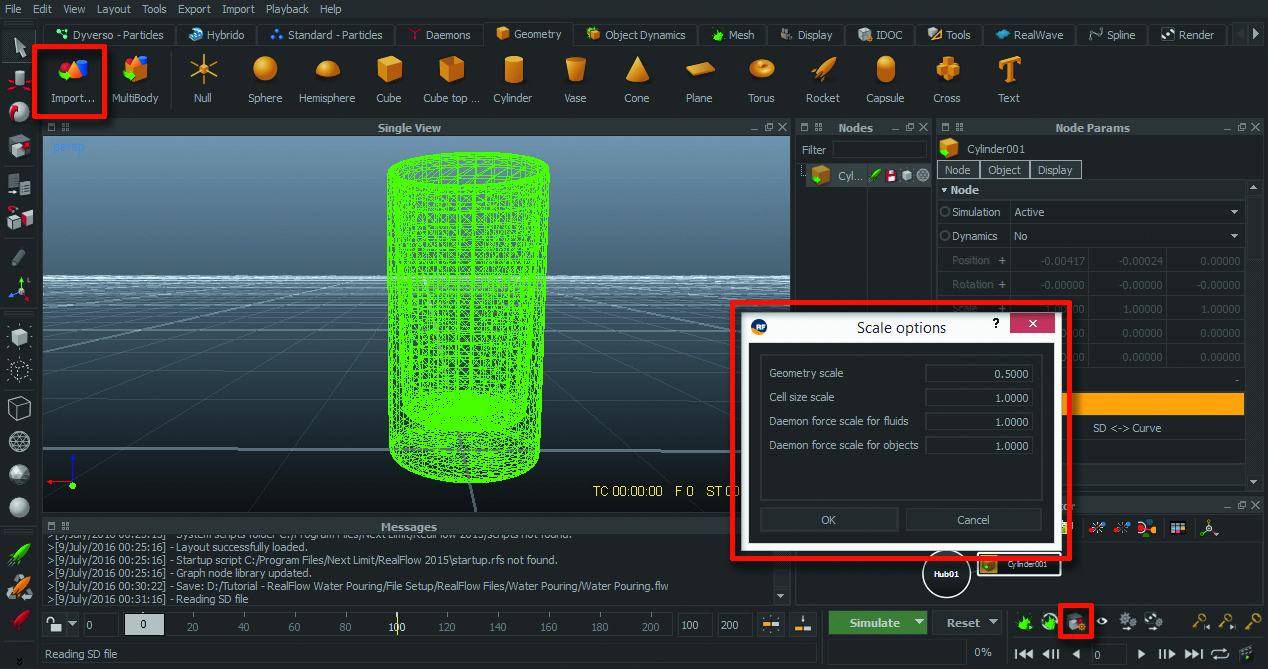
We’ve exported our geometry, now we need to import it into RealFlow. Open RealFlow and create a new Project. Be sure to check the Scale options, and set the Geometry scale to 0.5. Next, go to the Geometry section and click on the Import Geometry button, then select the .sd file we saved earlier, without changing anything in the parameters. We’ve now created a basic scene.
Get the Creative Bloq Newsletter
Daily design news, reviews, how-tos and more, as picked by the editors.
04. Create a map in Photoshop
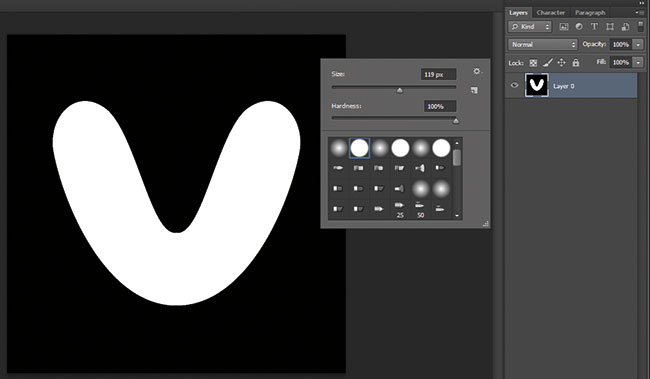
In this step we need to create a map that will used in RealFlow to emit particles or liquid. Open Photoshop and create a New File with a resolution of 1000x1000 pixels and a black background. Select the Brush tool and create a 'V' shape, making sure this shape fills the black background area almost completely. Refer to the video tutorial for a better understanding of how to do this. eate a 'V' shape, making sure this shape fills the black background area almost completely. Refer to the video tutorial for a better understanding of how to do this.
05. Use a Bitmap emitter in RealFlow
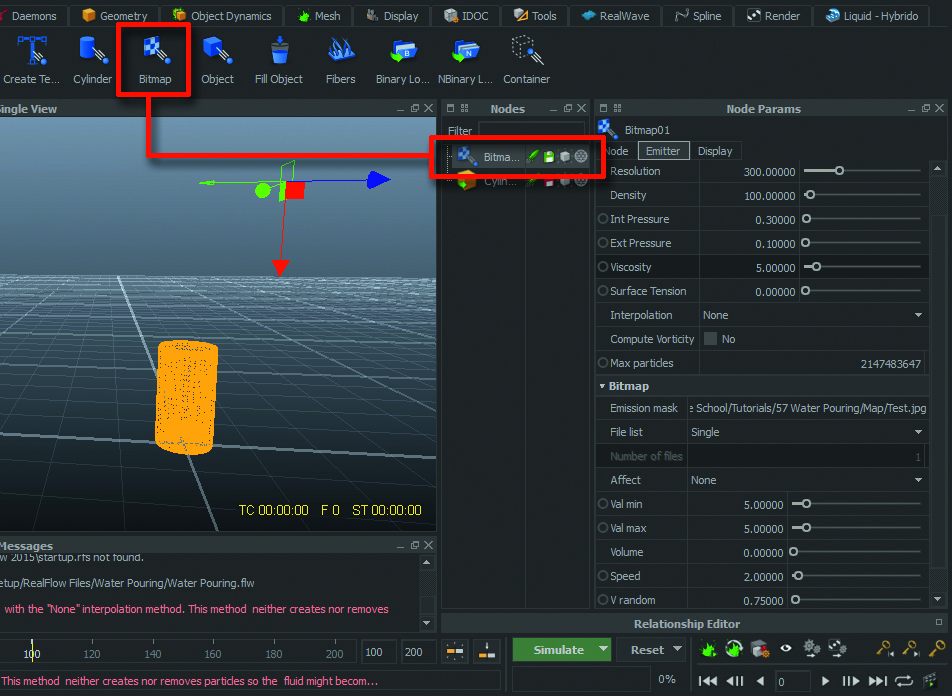
Next, go to Standard Particles and select Bitmap. Place this Bitmap emitter on top of the glass, so we can pour the liquid in. Go to ‘Node Params > Nodes’ and scale the size to 0.5 x 0.5 x 0.5, then go to Emitter in Node Params and make the same changes in parameters.
Select Emission mask in Emitter, go to Particles and set Resolution: 300.00, Density: 100.00, Int Pressure: 0.30, Ext Pressure: 0.10, Viscosity: 5.00, Surface Tension: 00.00.
06. Add a gravity daemon
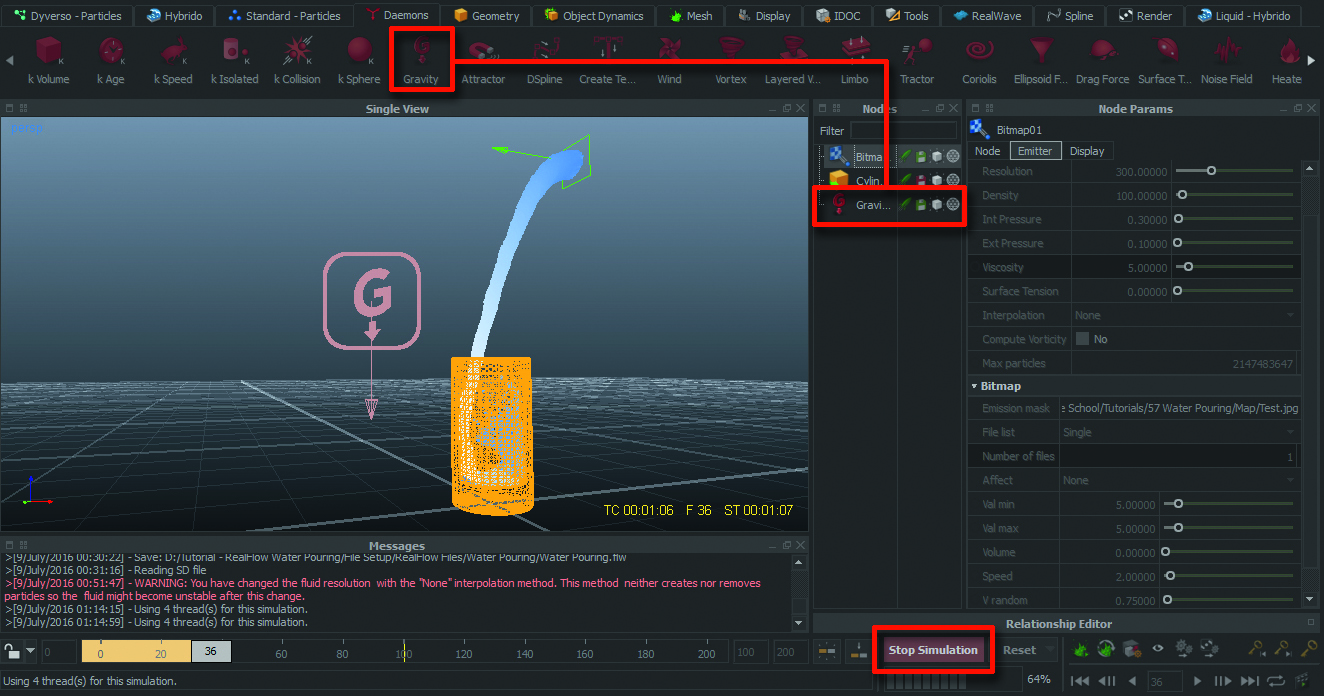
Now we need to add some daemons to ensure the physical properties of my liquid work correctly. To add a Gravity Daemon, go to ‘Daemons > Gravity Daemon’. Keep all the parameters as they are (leave Gravity at 9.80). After setting the Geometry, Particles and Daemons, it's time to click Simulation – it will take around two to three hours to complete the process.
07. Set up your mesh
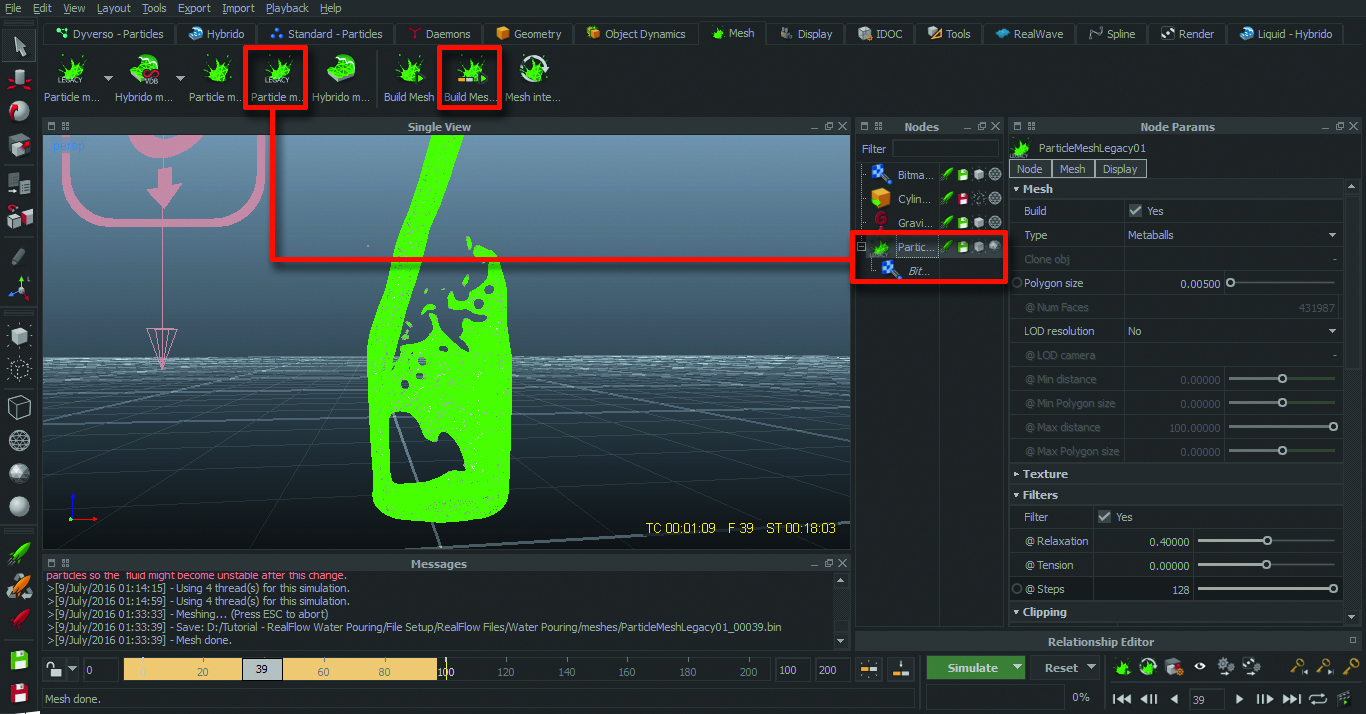
To create a mesh, select ‘Bitmap > Mesh > Particle Mesh Legacy’. The Particle Mesh option in Nodes now has one more Bitmap. Next, select Particle Mesh and set the Polygon size to 0.005. and turn on the filters Relaxation: 0.4, Tension: 0.0, Steps: 128.
Then select Bitmap (inside the Particle Mesh), and set the Blend Factor to 95.0 and Radius to 0.0075. Select ParticleMeshLegacy, then go to the Mesh section and check the Build Mesh Sequence.
08. Import mesh into 3ds Max
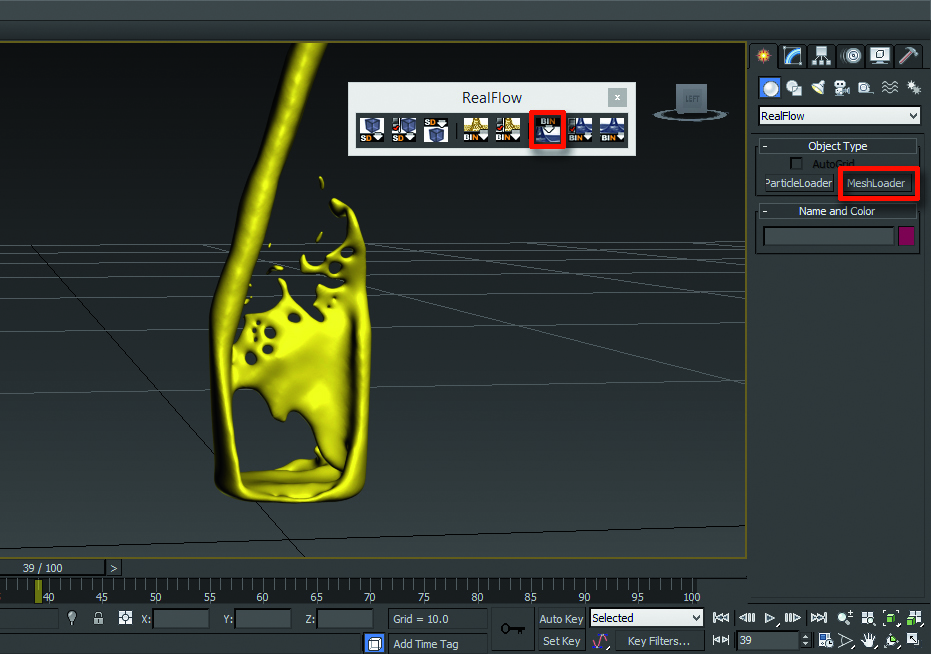
In a moment, we’ll work on shading, lighting and rendering, but before that we need to import the mesh into 3ds Max. In 3ds Max, go to the RealFlow tab and click Create BIN Mesh Object, a new window will appear. Go to the folder where our file is saved, then go to the Meshes folder, select .bin file and click on Open. Our mesh is now in 3ds Max.
09. Adjust shading in V-Ray
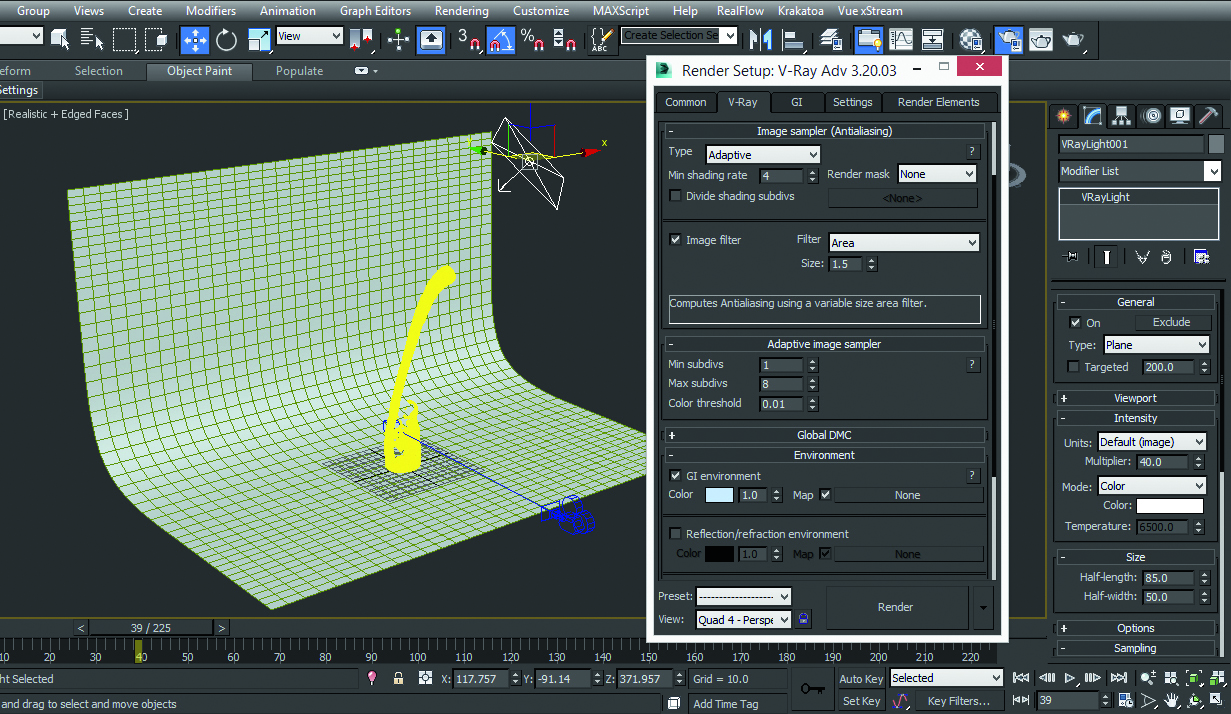
Change the renderer to V-Ray and go to Material Editor. Create a V-Ray light and place it on the liquid then set Multiplier to 40. Then press F10 to bring up the Render Setup, set the Image sampler Type to Adaptive; Min shading rate to 4, turn off image sampler, then go to the Adaptive image sampler and set Min subdivs to 1, Max to 8. In Environment, tick GI Environment and add motion blur. Set the output resolution and path and click Render.
10. Composit your design
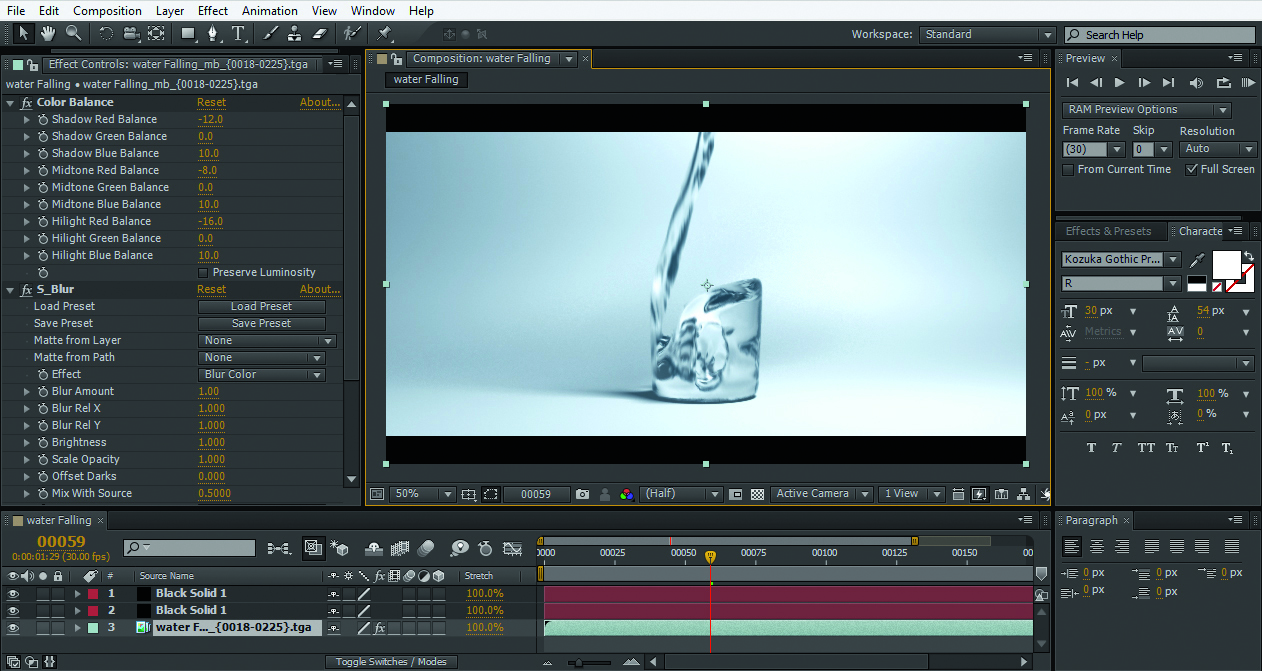
After finishing the rendering, import the render elements into After Effects and drag them into the timeline. Then select Liquid Element and go to the Effect section in the header, go to ‘Color Correction > Brightness & Contrast’, and set them as per your requirements. Next, add Color Balance. To do that, go to ‘Effect > Color Correction > Color Balance’. Finally, render the composition into your required format.
This article originally appeared in 3D World issue 215; buy it here!
Related articles:

Thank you for reading 5 articles this month* Join now for unlimited access
Enjoy your first month for just £1 / $1 / €1
*Read 5 free articles per month without a subscription

Join now for unlimited access
Try first month for just £1 / $1 / €1
