Create 3D fire effects
Discover how to use Fusion to create 3D fire effects and composite them into your footage.
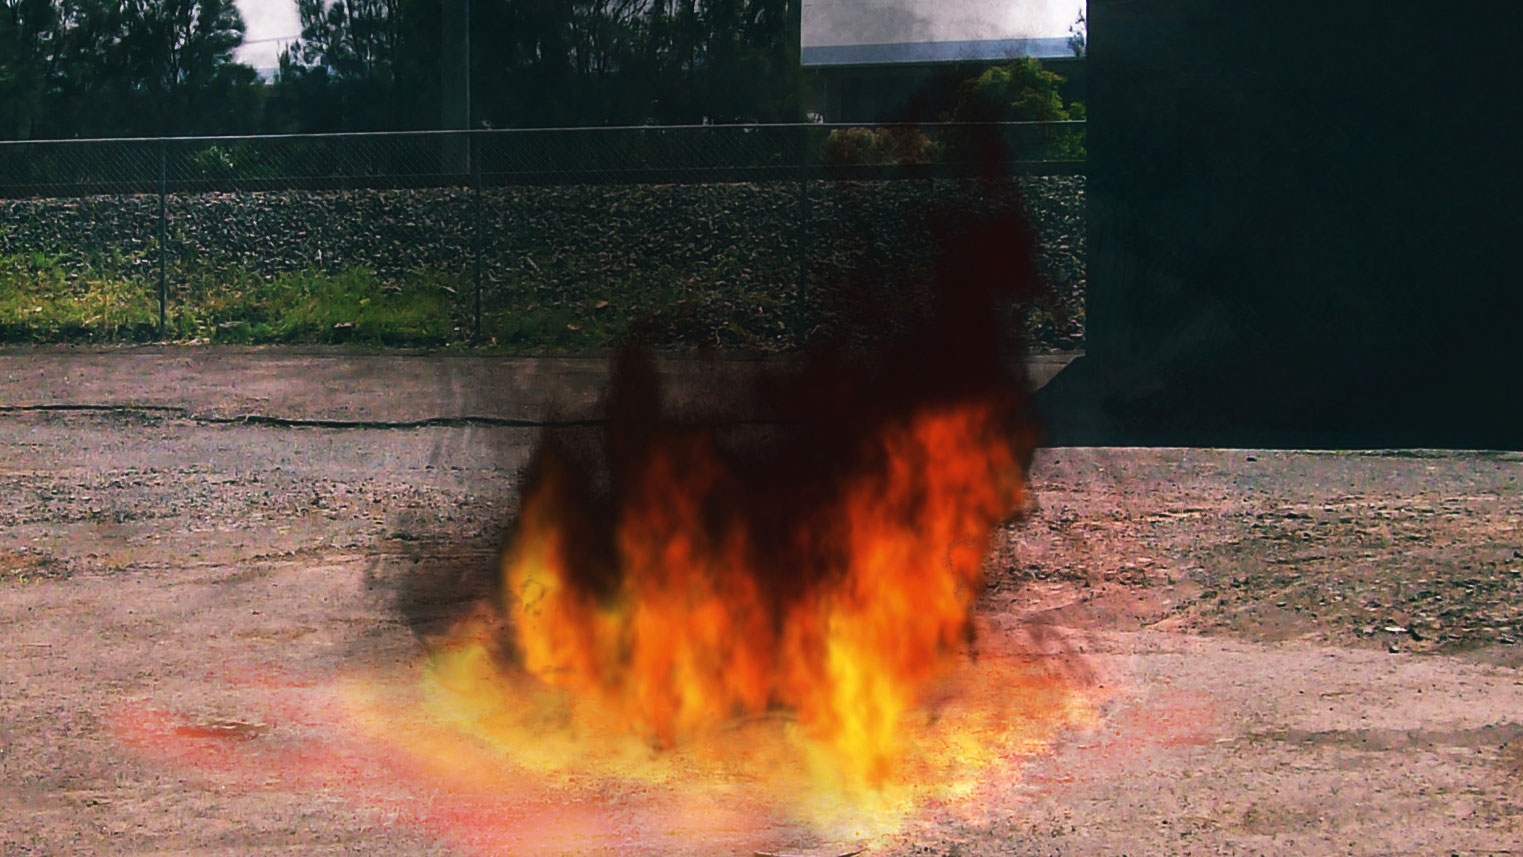
Fire, floods and destruction are some of the most common tasks given to VFX artists and in this 3D art tutorial I'm going to show you how you can quickly create a plume of fire that is ready for compositing.
Fusion has so many tool options it can be tricky knowing where to start with any given effect, but in reality there is no proper answer. The beauty of this kind of application is that it frees the artist up to work in a way that suits them. So if you find a different method that you are more comfortable with then that's great.
The result I'm looking for here is one of a large smoky fire that can be saved as a preset to get me started whenever I need to burn something, and it should work as a base for interior and exterior scenes, so I won't light it for the preset; that should be saved for the actual compositing job. A fire effect can be made with just two nodes. In fact, you have to use a pEmitter and a pRender node or it won't work. That said, the effect will be a little too basic so we will add some more detail with a few extra nodes, just to help sell the effect.
I'll also show you how to emit from a texture as well as from the default geometry options that Fusion provides. This allows you to generate very specifically shaped fires, when needed.
Download the assets you'll need here.
01. Pre-requisites
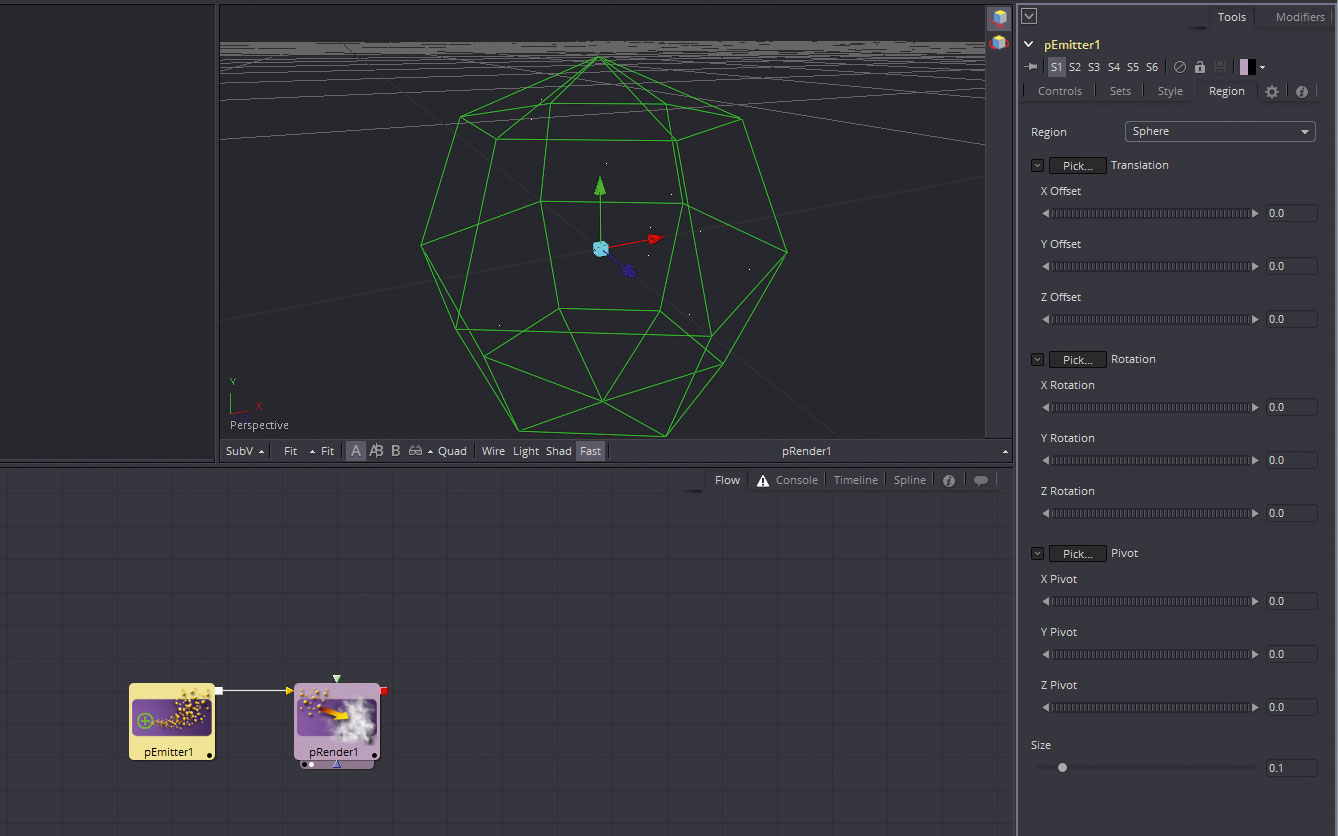
Fusion can't do anything with particles without two nodes, so add both a pEmitter and a pRender node. They can be found by the usual methods but as they're common tools they also have shortcut buttons on the menu bar, where they are labelled pEm and pRn. Once done, drag the pRender node into the right hand viewer window.
02. Depth of emission
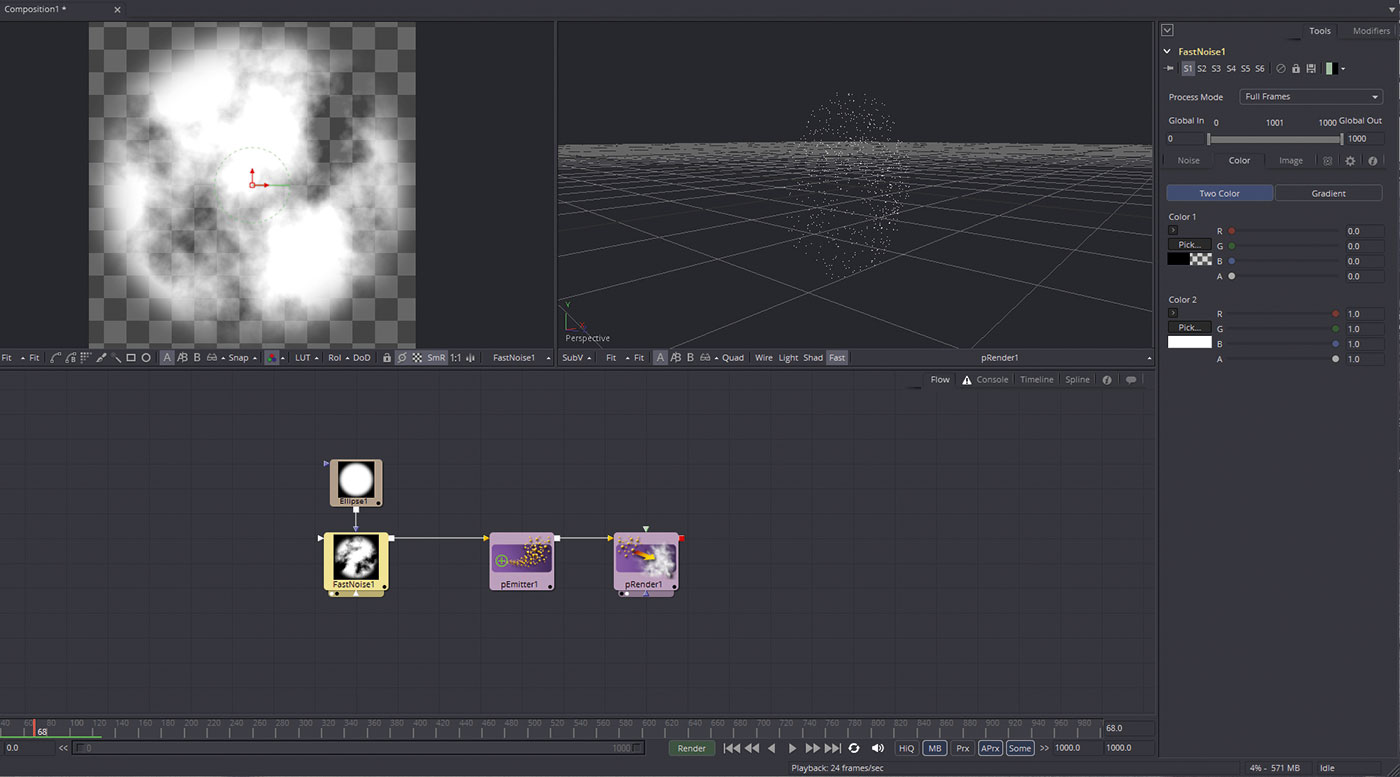
In the region section of the emitter, choose Bitmap as the Region type. An input will be added to the node, where you can hook up an image to drive the particles' spawn position. I added a Fast Noise node with a spherical mask, to soften the edges. The greyscale nature of Fast Noise makes it easy to work with.
Get the Creative Bloq Newsletter
Daily design news, reviews, how-tos and more, as picked by the editors.
03. Initial styling
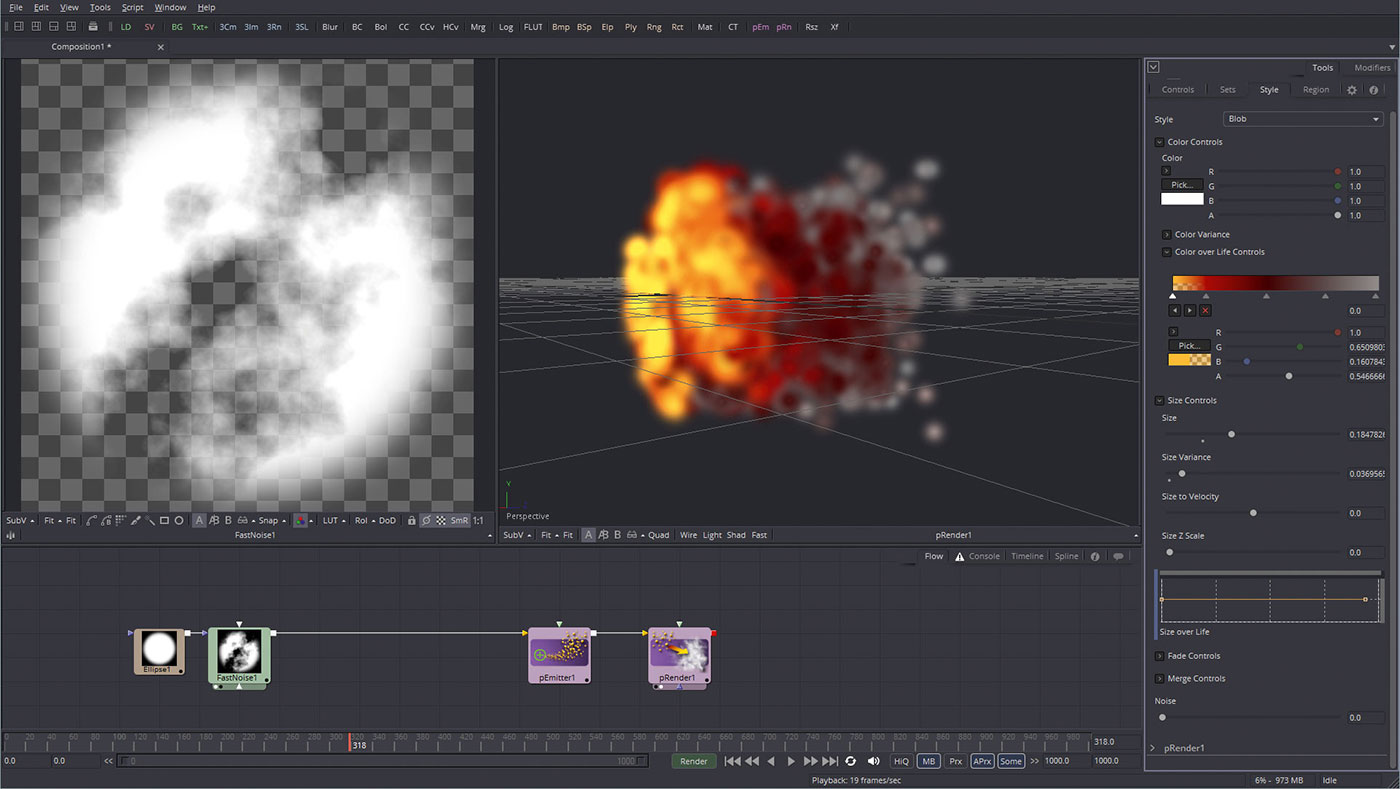
Select the emitter and head to the Style tab. Here you can unfold the colour over life controls, and add a few knots of your chosen colour. I've gone for very obvious yellow/red/grey, but you can do anything you like for fire or electric energy particle beams, and so forth. I reduced the alpha of the yellow knot to add some brightness.
04. Add flame detail
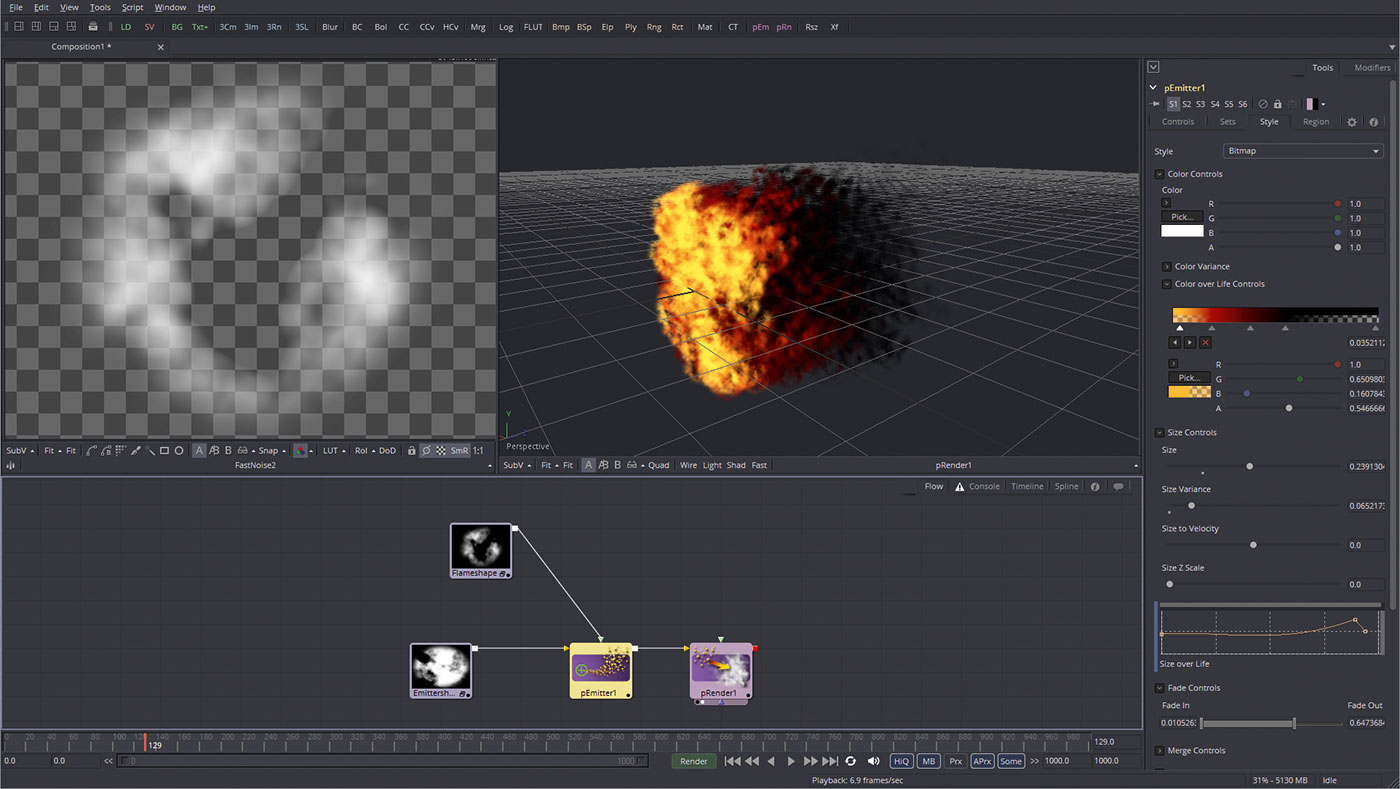
For more realism and detail we can use another masked Fast Noise node, so add them to your workspace and in the emitter style change it to Bitmap and plug in the Fast Noise to the newly created input on the emitter – adjusting noise settings to taste. I also grouped and renamed the paired Fast Noises with their masks to help keep things tidy.
05. Animation detail
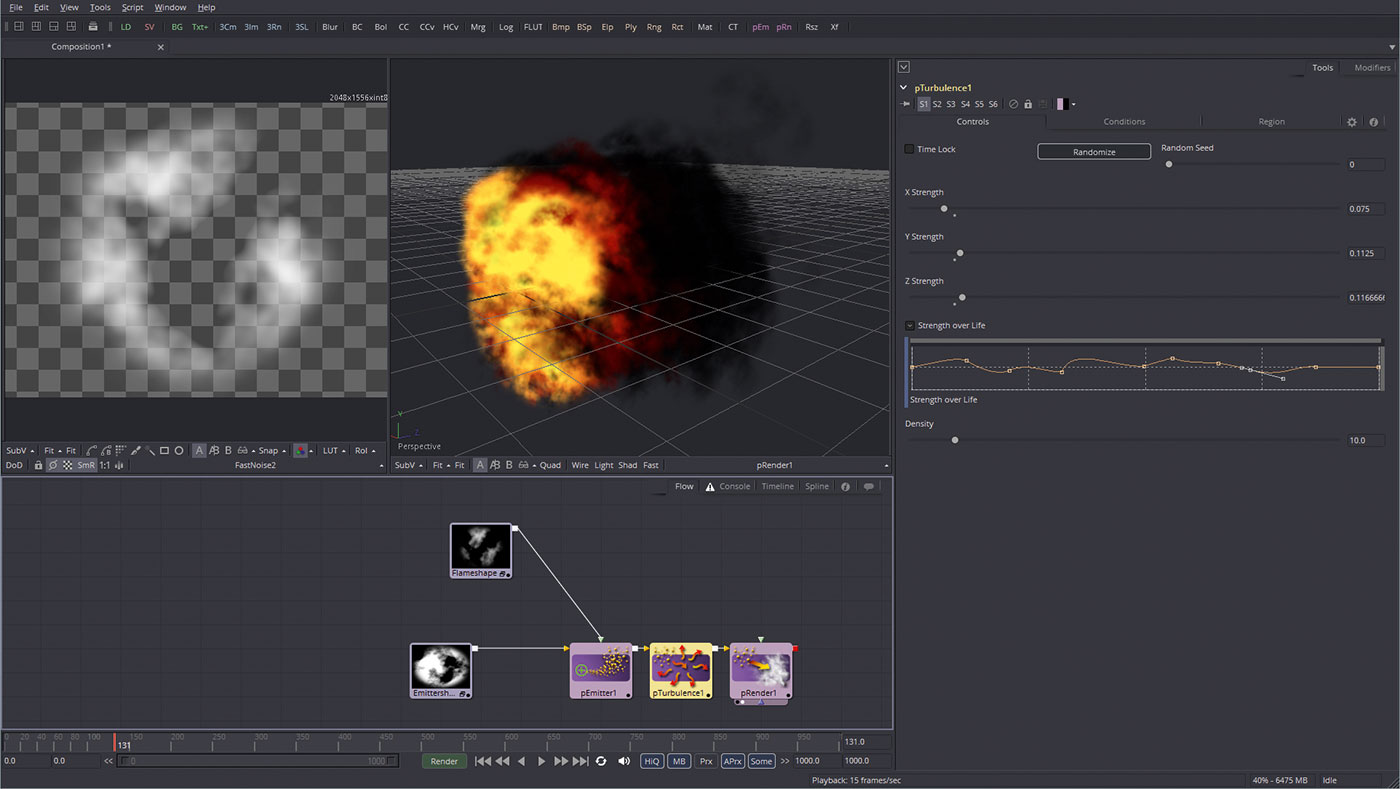
Fire moves in a very organic way and a great method of animating this is to add a pTurbulence node but rather than let it be constant, open the Strength over Life controls and click on the spline to add points, moving them and their handles to make a random strength profile, which will imitate gusts and eddies.
06. Prep to render
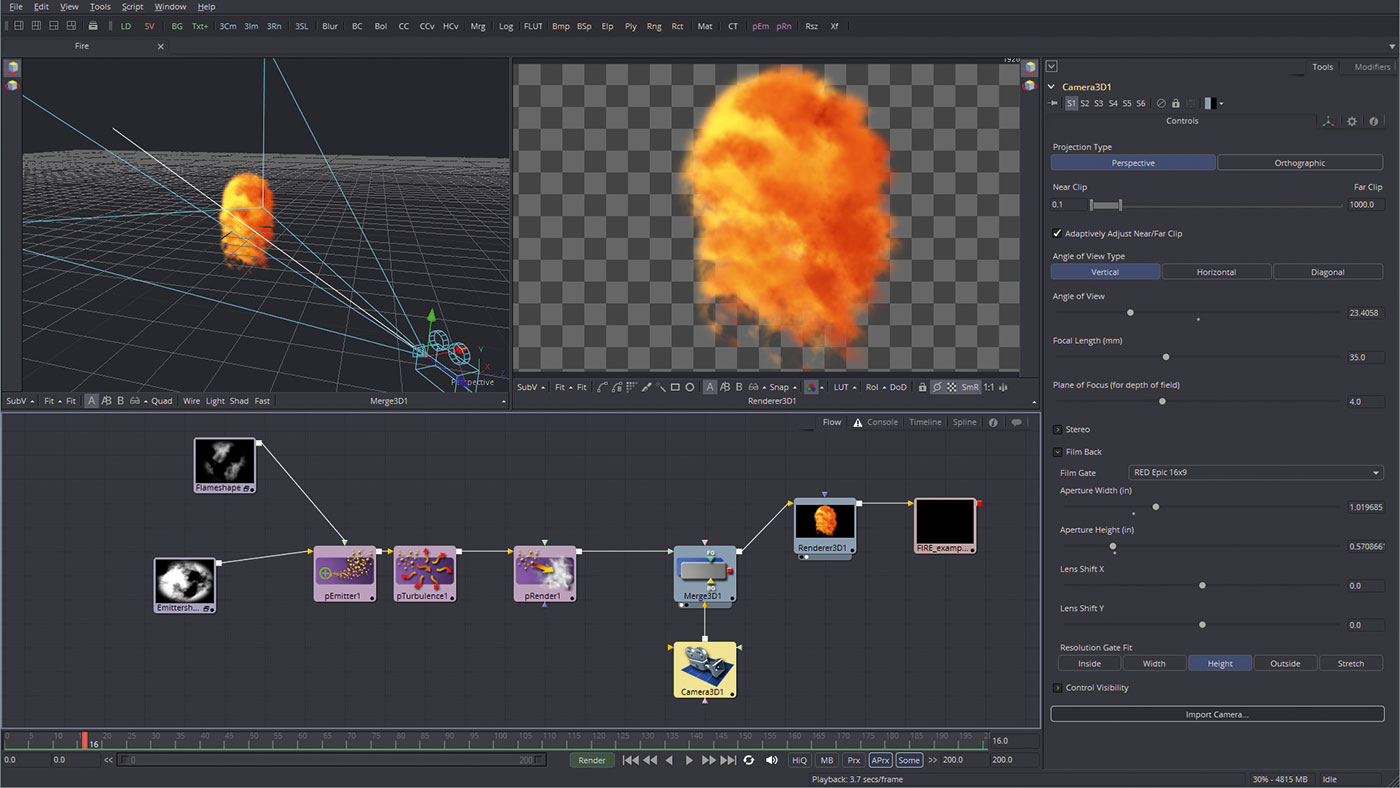
Of course you'll want to render this out to see the finished result. To do so, I ungrouped my nodes then linked them up to a Merge3D, which was also connected to a Camera3D and then on to a Renderer3D, which output to a Saver node. I set the render and saver as 16:9 and render out as a simple quicktime.
This article originally appeared in 3D World issue 208; buy it here!

Thank you for reading 5 articles this month* Join now for unlimited access
Enjoy your first month for just £1 / $1 / €1
*Read 5 free articles per month without a subscription

Join now for unlimited access
Try first month for just £1 / $1 / €1

Rob Redman is the editor of ImagineFX magazines and former editor of 3D World magazine. Rob has a background in animation, visual effects, and photography.
