Create custom brushes for Corel Painter 2022
Learn Corel Painter 2022's new custom Dabs tools to give your art a personal touch.
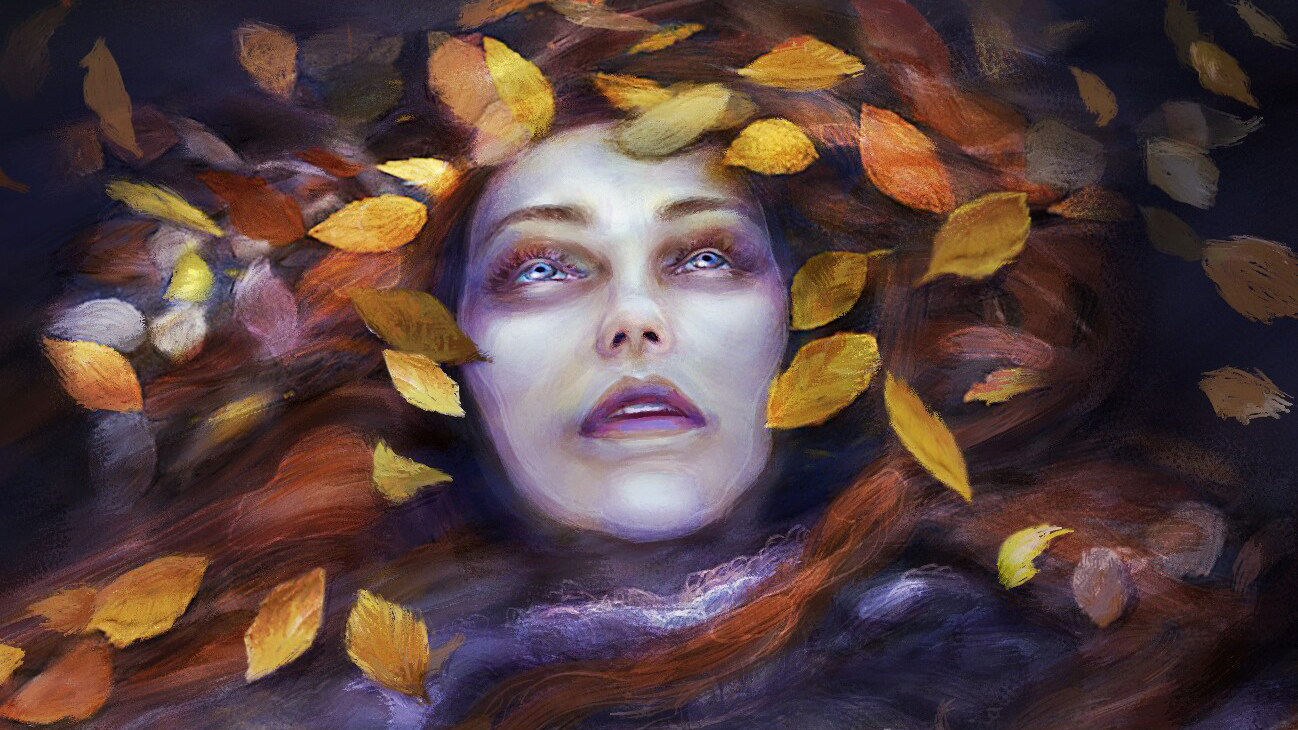
Creating custom brushes, called Dabs, in Corel Painter 2022 is fun and easy, but it can be daunting at first. Launch Painter and you come across hundreds of brushes, across the various categories of the New Brush Library. There’s plenty of material for you to experiment with.
However, for many artists, being able to fine-tune a particular brush that meets their requirements or even create their own custom brushes – which is a fun, creative process in itself – is an important step for their artistic expression.
There are several ways you can take advantage of the software’s robust Brush Engine, especially when customising your own tools. Just to give an example, when you select a brush, depending on the type or category, let’s say, Sargent, in the Sargent Category, you can have up to eight drop-down menus on the Basic settings bar. These sub-menus provide further options on Stroke, Size, Opacity, Blending, Impasto, Dab Profile, and finally, the extensive Advanced Brush Settings!
If you’re a digital art beginner or new to Painter, knowing where all these Brush Settings options are located and how to use them can be initially daunting. That’s why we’ll be covering the quickest ways that you can alter a brush dab as well as how to create a brand new one. For brushes in other software, see our best Photoshop brushes roundup, or see how Corel Painter measures up to other options our best digital art software roundup.
Scroll down to watch Isis Sousa's video tutorial or below you can read her step-by-step process and insights into custom brush creation.
Corel Painter 2022 Custom brushes: Watch the video
After watching Isis Sousa's video scroll through the steps below to catch up on what you've learned! These are a handy crib sheet for learning how to create your own custom brushes and Dab strokes. Have fun!
01. Understand the menus
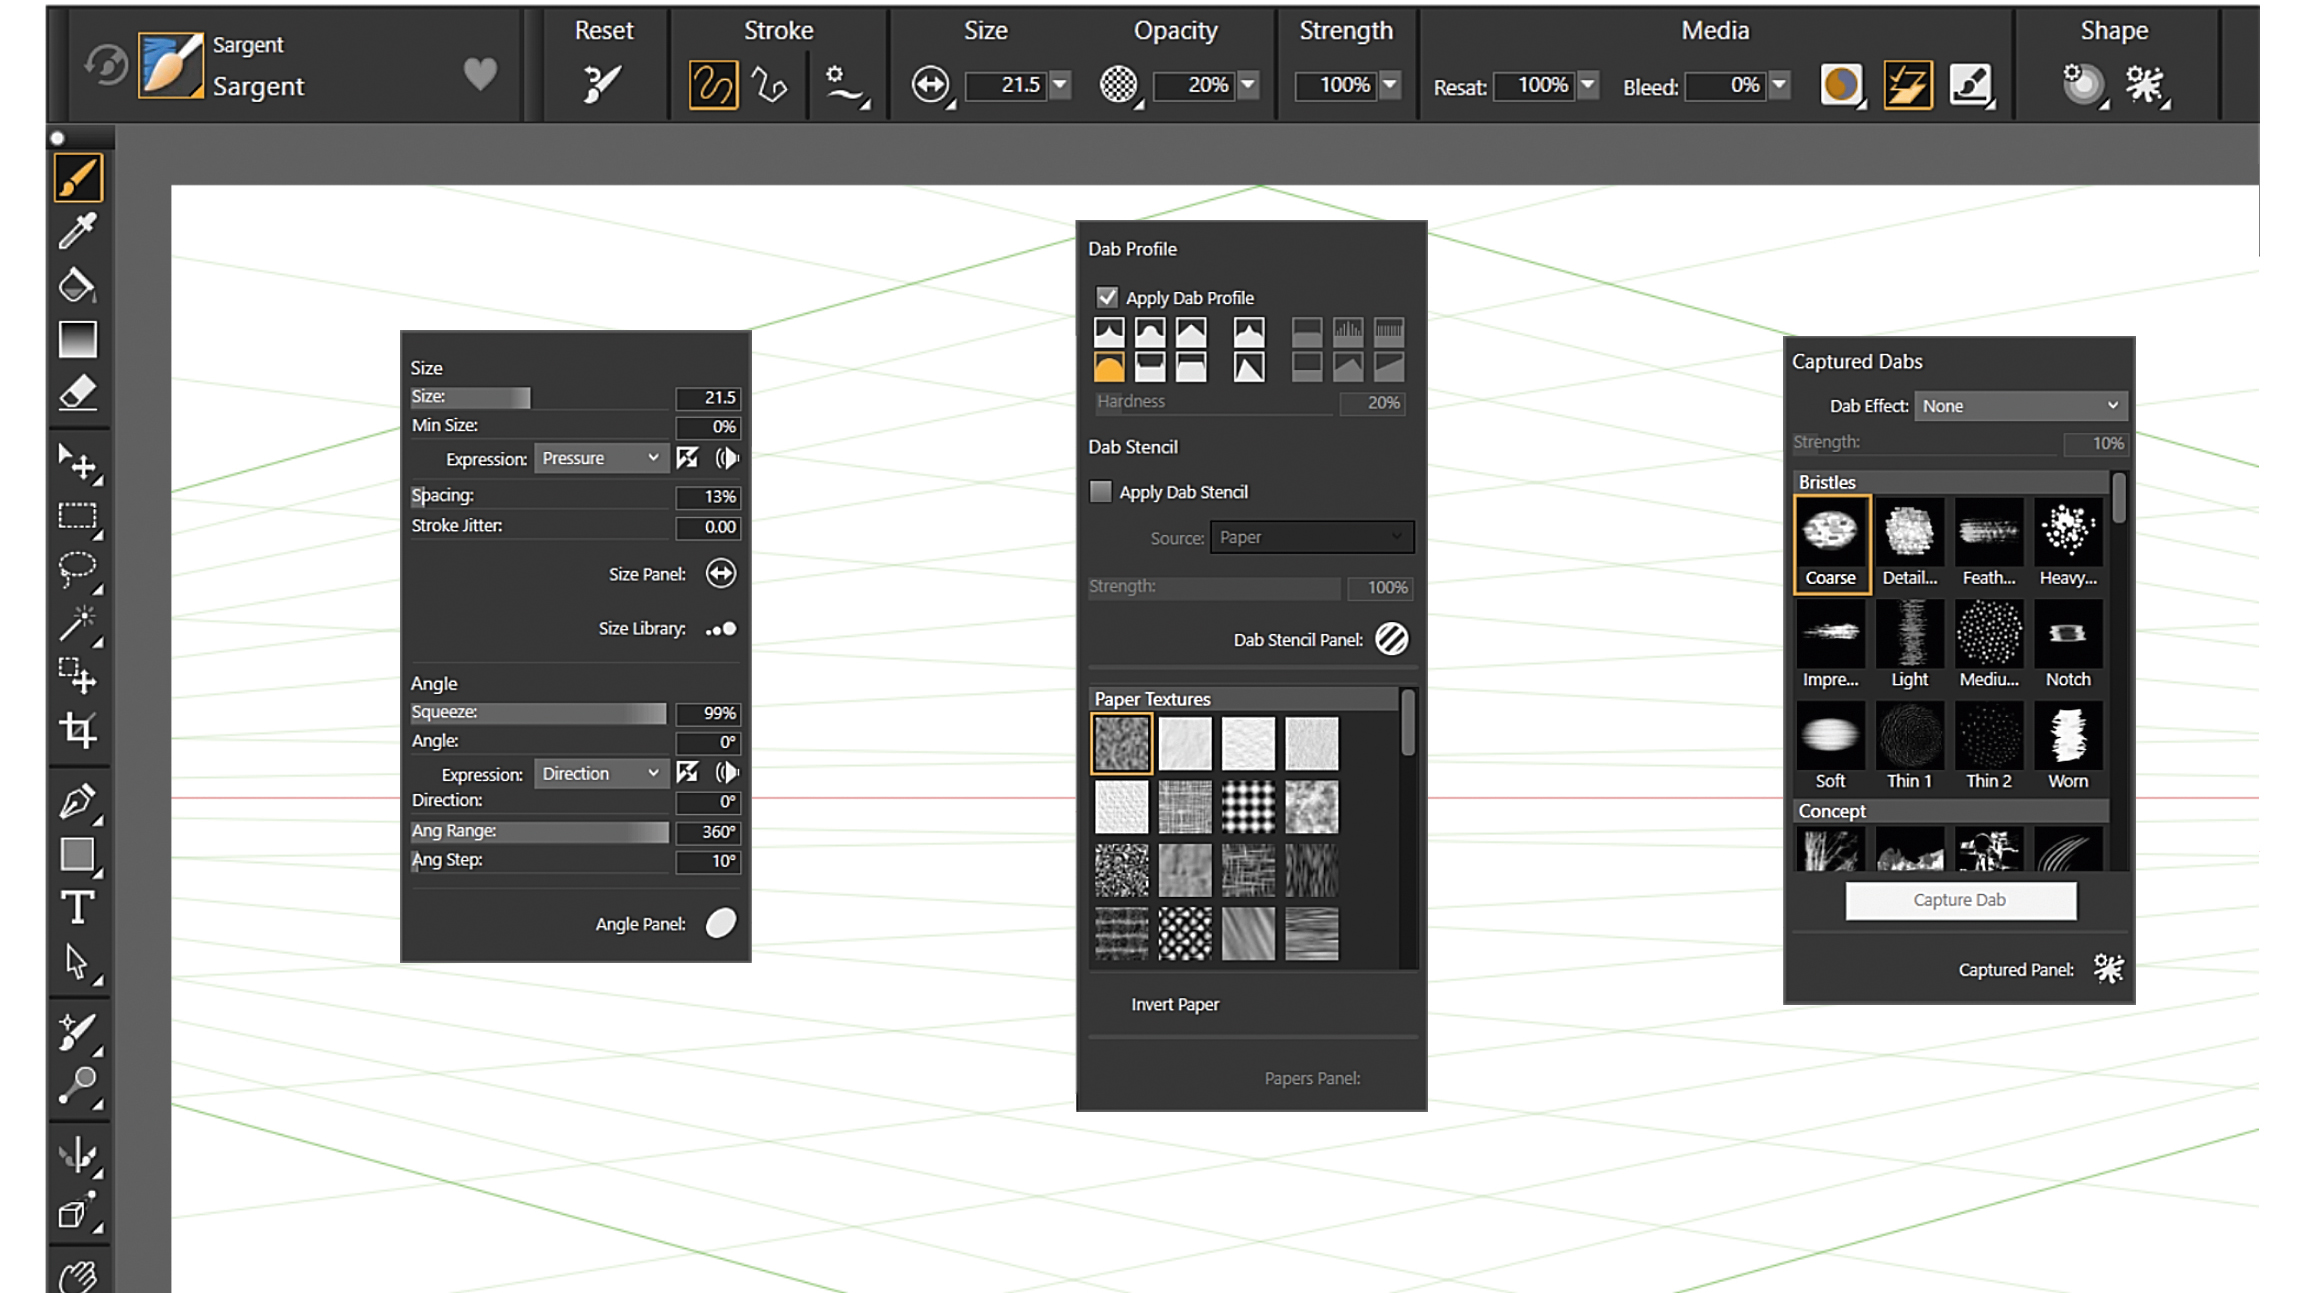
In these panels, the available settings depend on the brush/category. An airbrush may have different settings options than the Sargent Brush, for example. To save any brush or dab you customise from now on, go to Top Menu>Brushes>Save Variant.
Size drop-down panel: Often underestimated and lesser-known set of functions for dab customisation.
Dab Profile and Paper Textures: Here the Paper Textures refer to the textures of your brush stroke, though they won’t show in the dab itself.
Captured Dabs: A set of fun, creative dabs you can use as alternatives on any default stamp-type brush.
02. Use the Size menu
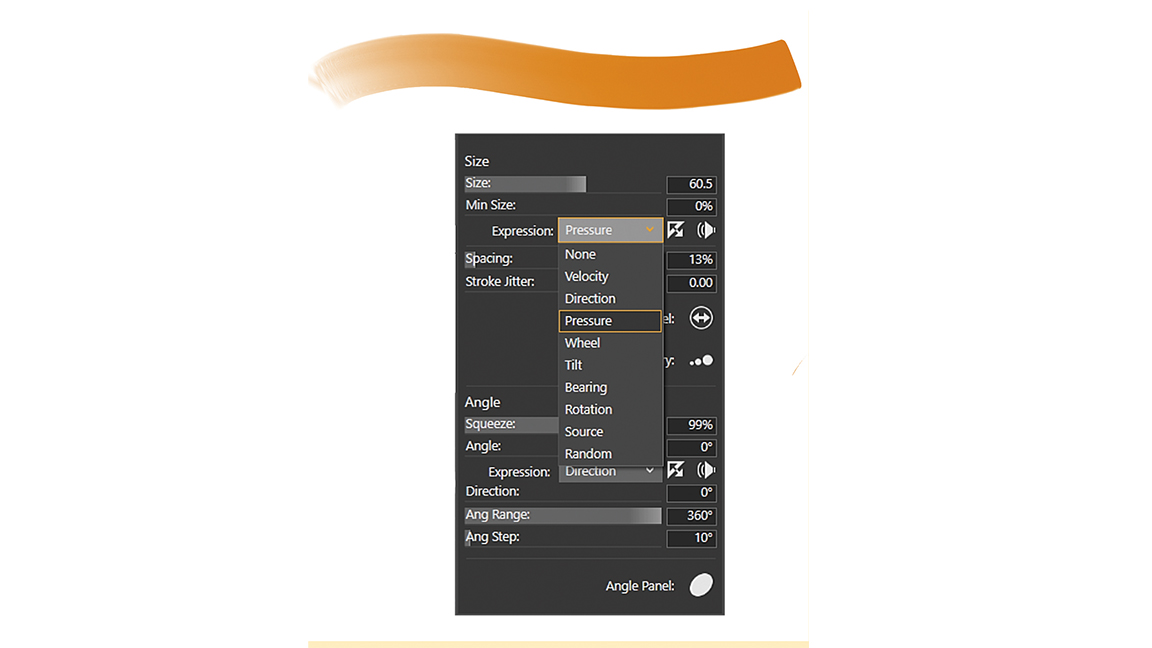
This sub-menu provides several options that can change the appearance of your dab and expression of your brush stroke in surprising ways. They go well beyond the Size label, including Angle and Spacing settings. You can also introduce jitter or vary stroke thickness via the Expression options.
03. Experiment with Expression

When you click Expression, a drop-down menu appears with several options. By default, the brush is set to Pressure. Notice that not all options may give a result depending on the brush. This means that you’ll need to try each one, every time you switch tool, to see what’s possible.
Notice how changing the Expression setting to, for example, Velocity, Direction and Random gave the Sargent brush these interesting, very different dab-stroke characteristics.
Further variants can be created if you take the time to explore the lower half of the panel and adjust the Angle settings by experimenting with the sliding controls.
04. Use the Dab Profile drop-down panel
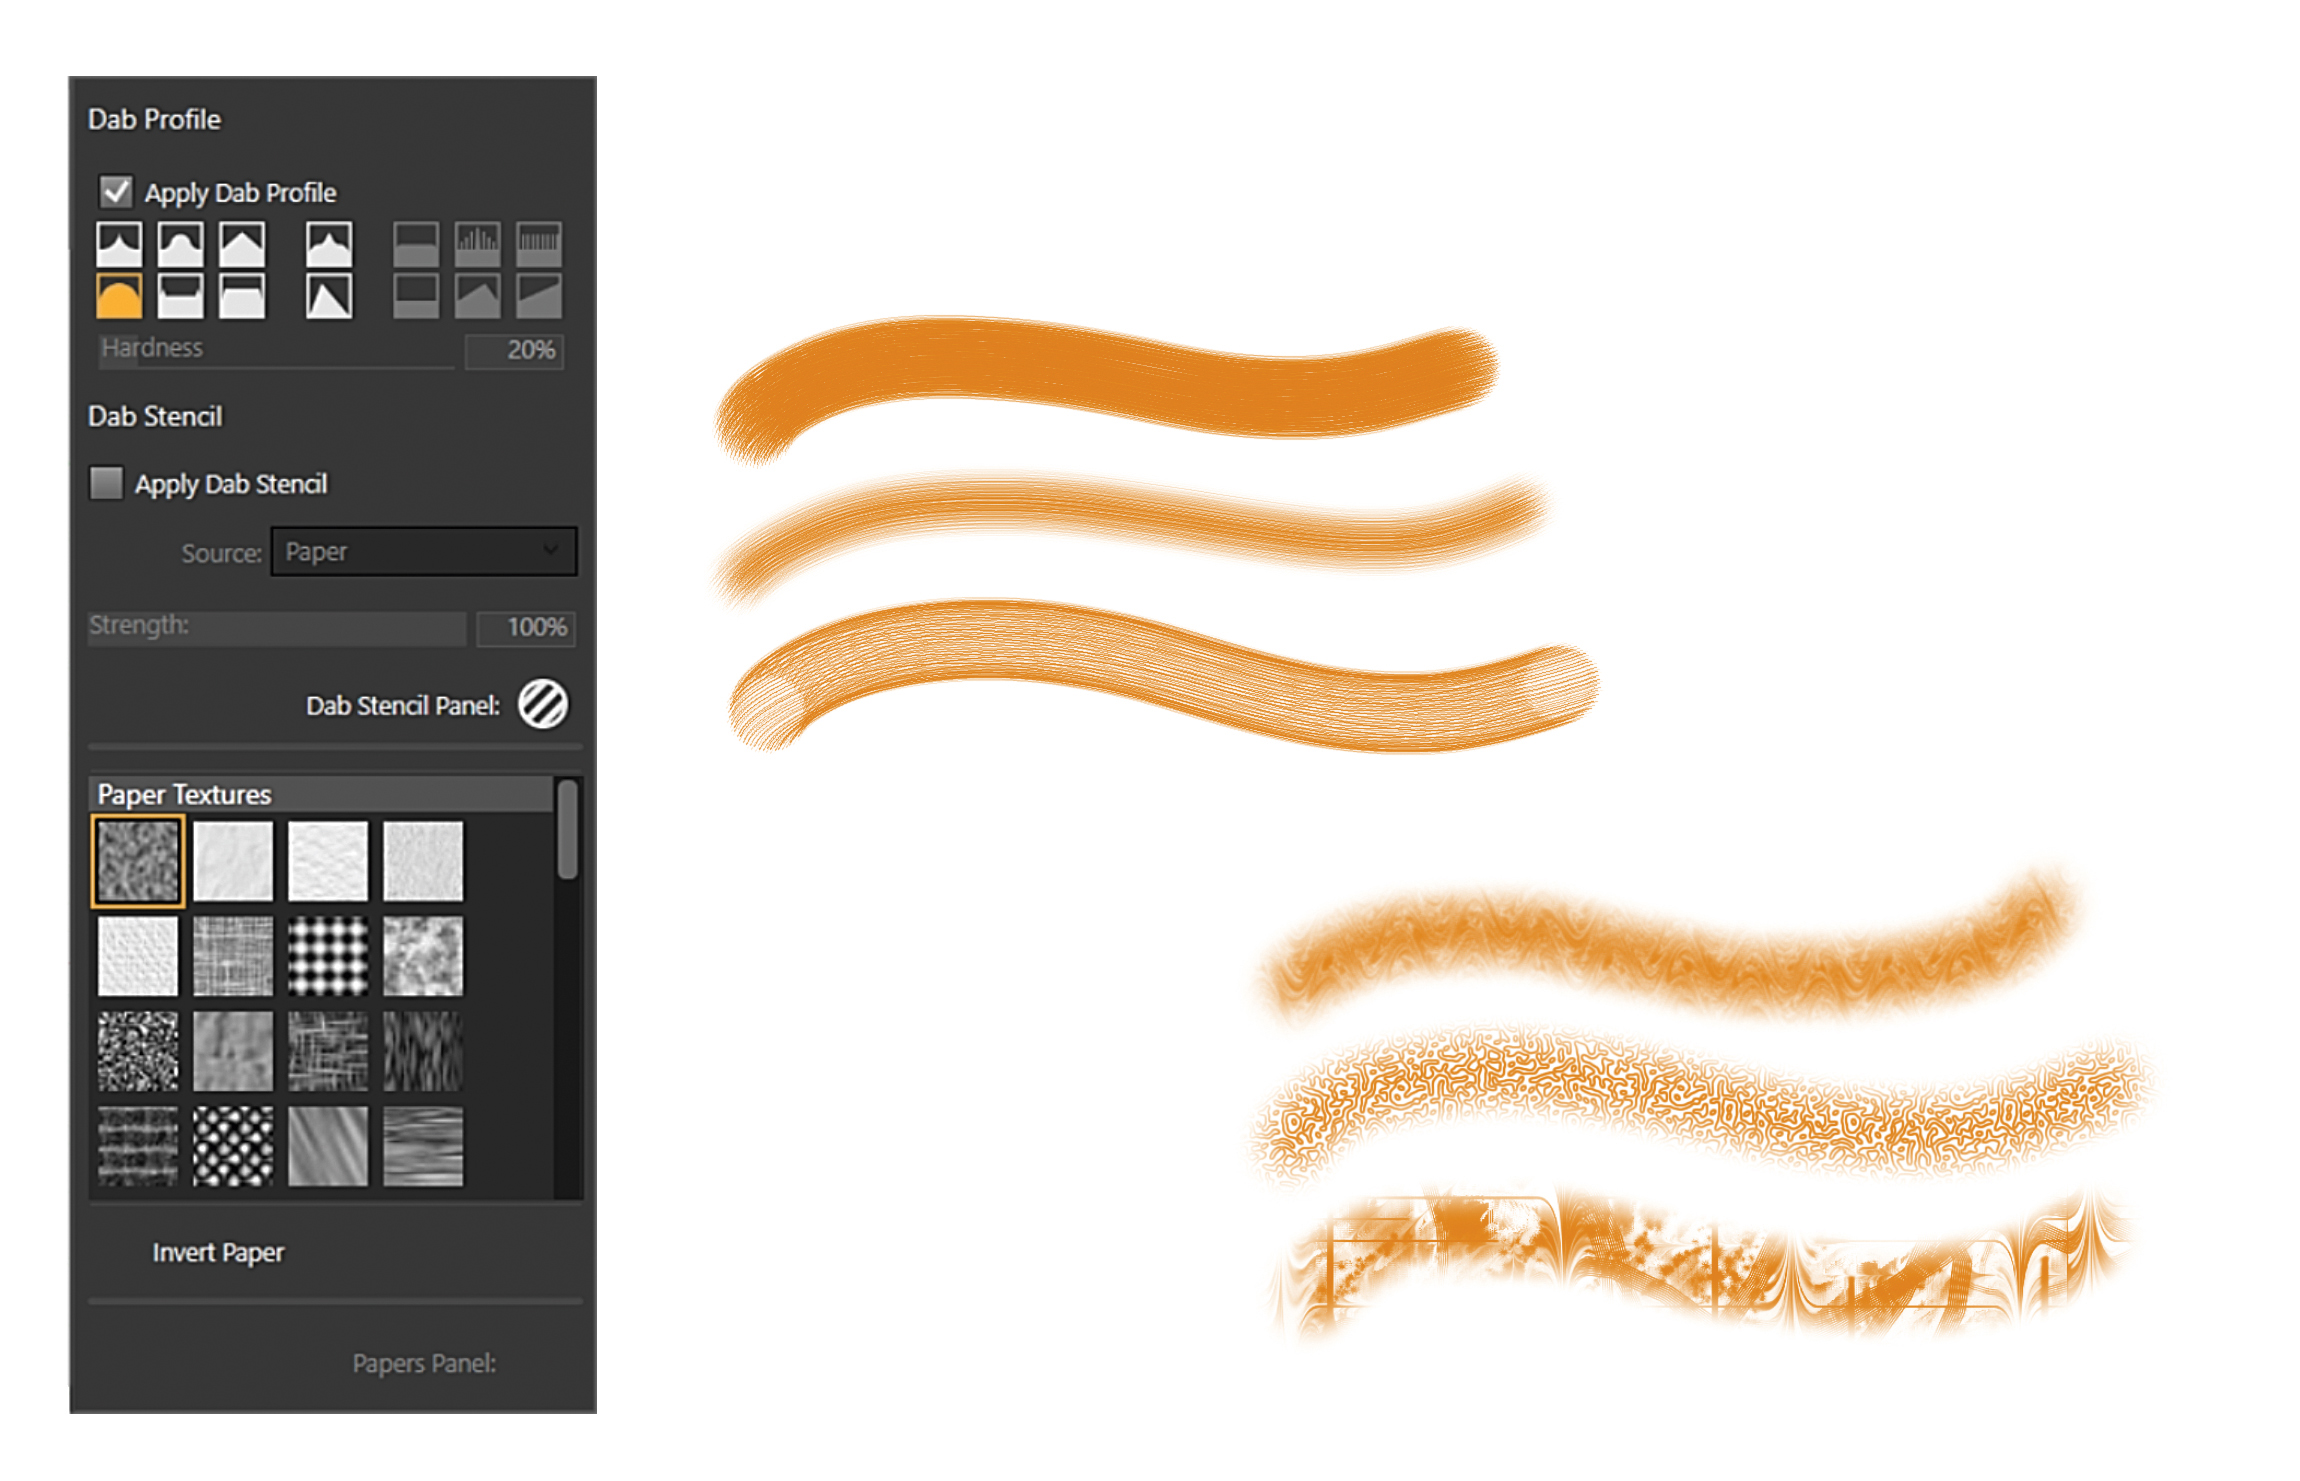
You can change the dab to look more pointy, flat, round and so on, and also adjust the texture for the brush stroke – though the latest doesn’t show on the dab itself. These can be combined with the other settings in the upper bar or other panels. In Painter, menus and options appear depending on the category and specific brush selected. This means that each brush has a set of Dab Profiles available. Some may not have this panel, while others may not have the Paper Textures, for example. The only way of knowing is taking the time to experiment.
05. Use the Captured Dabs Library

This library is organised by categories and can be applied to any stamp-type brush. There are lots of expressive dabs like the Jellyfish, or more common ones such as coarse and clumps. Note that when you use these you can alter other brush settings as normal.
06. Click on Dab Effect
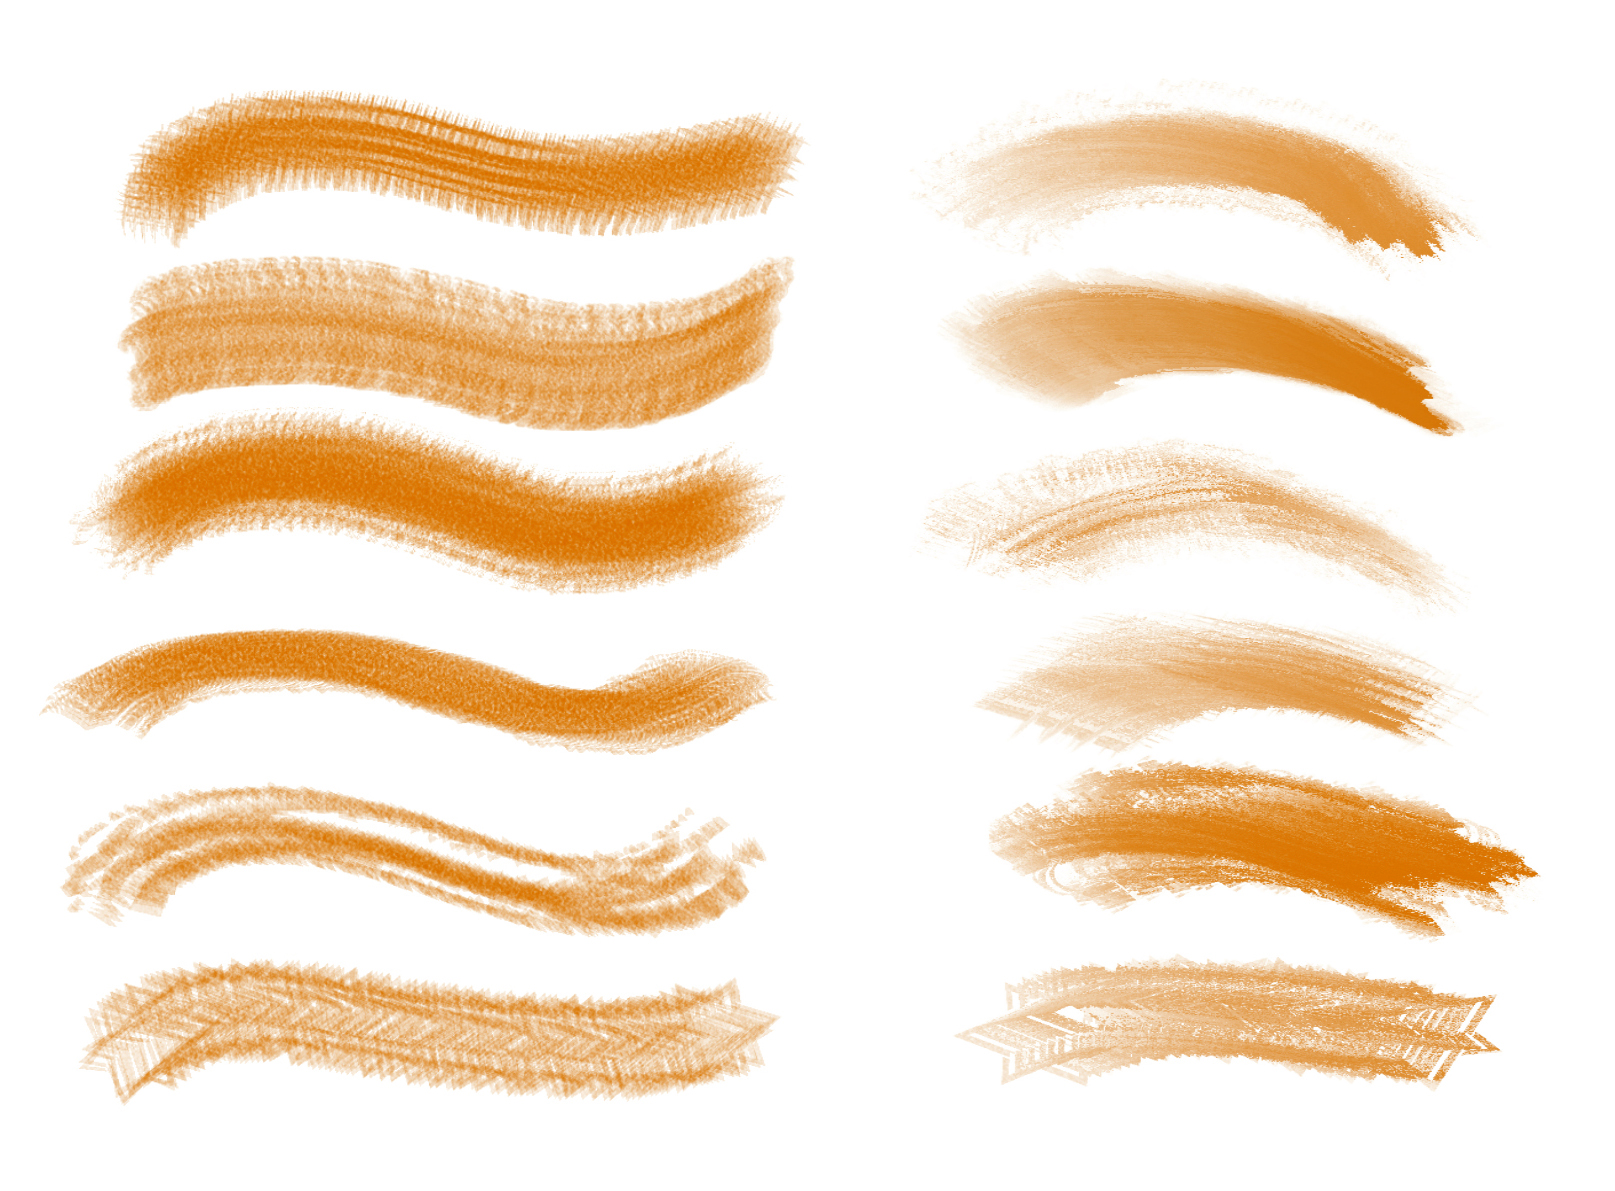
In the Captured Dabs drop-down panel you can fine-tune the chosen stamp with five options, by clicking the Dab Effect drop-down menu. The Library comprises 12 categories or themes. In the example on the left you can see different dabs applied to Charcoal: Loose. The example on the right shows different dabs applied to Oils: General, Impressionist Detail.
07. Create your own custom Dabs
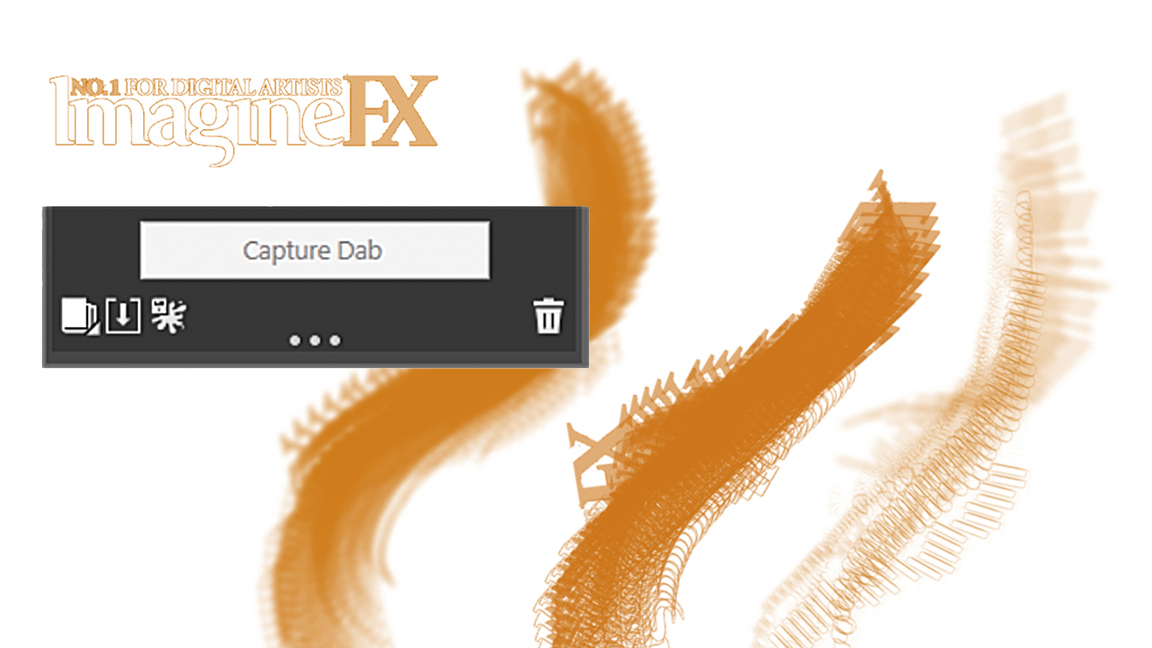
You can transform icons, shapes or even text into brush dabs. You can save them as JPG or PNG and import them into the Library. You can also import Photoshop stamps into Painter, so you don’t need to make a separate set of dabs for these two art programs. We've an ImagineFX logo Dab by exporting a PNG and importing it by clicking the Import Captured Dab icon. JPGs and Photoshop .Abr files are also accepted.
08. Manage your Dabs
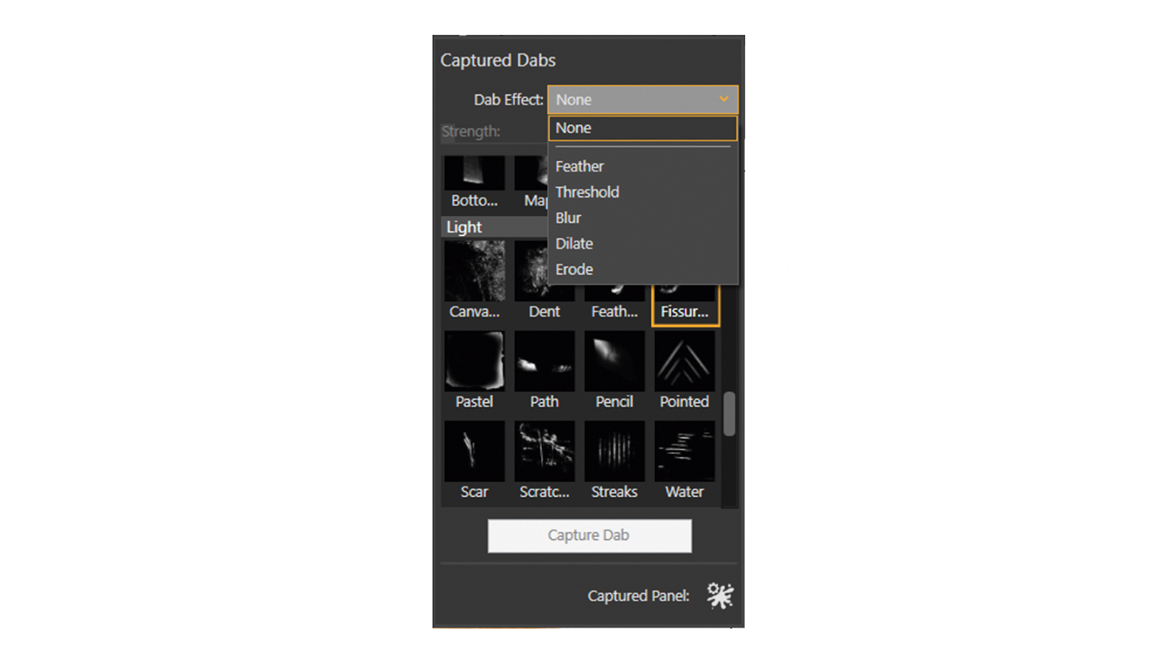
Click the icon (bottom right) to expand the panel. From left to right we have Manage Libraries, Import Captured Dab, and the last icon is a drop-down menu where we can rename a dab, set custom icon, etc.
Never miss an issue of ImagineFX
If you liked this piece, you'll love ImagineFX. The world's favourite digital art magazine is on sale in the UK, Europe, United States, Canada, Australia and more. Limited numbers of ImagineFX print editions are available for delivery to over 120 countries from our online store (the shipping costs are included in all prices).
Get the Creative Bloq Newsletter
Daily design news, reviews, how-tos and more, as picked by the editors.
Read more:
- How to find your art style
- Discover the best iPad stylus
- Which to buy: iPad Pro vs MacBook Air

Thank you for reading 5 articles this month* Join now for unlimited access
Enjoy your first month for just £1 / $1 / €1
*Read 5 free articles per month without a subscription

Join now for unlimited access
Try first month for just £1 / $1 / €1
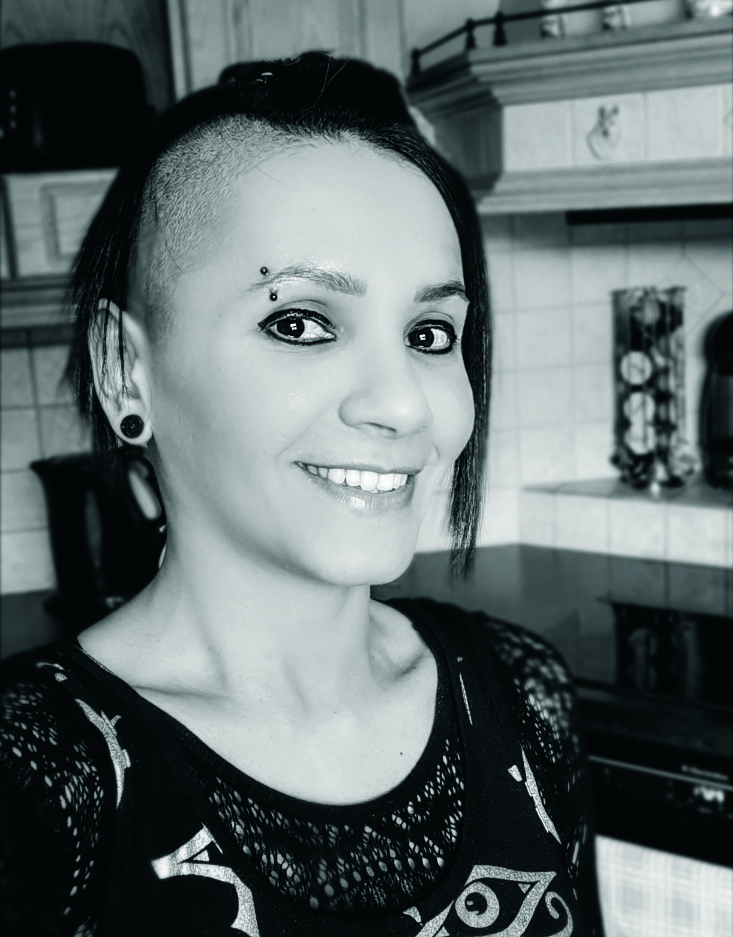
Isis Sousa is an art director at Dog Creative Group, a Corel Painter Master Elite, a Xencelabs Artist and indie filmmaker. She also teaches and speaks at CG events. The past few years she has worked in games and films, as well as the software and technology industries. She has diverse experience, creating art for music and book publishers as well as traditional games and education.
