Convert a photo into a VR set
Follow these simple steps to turn your photos into 3D experiences.
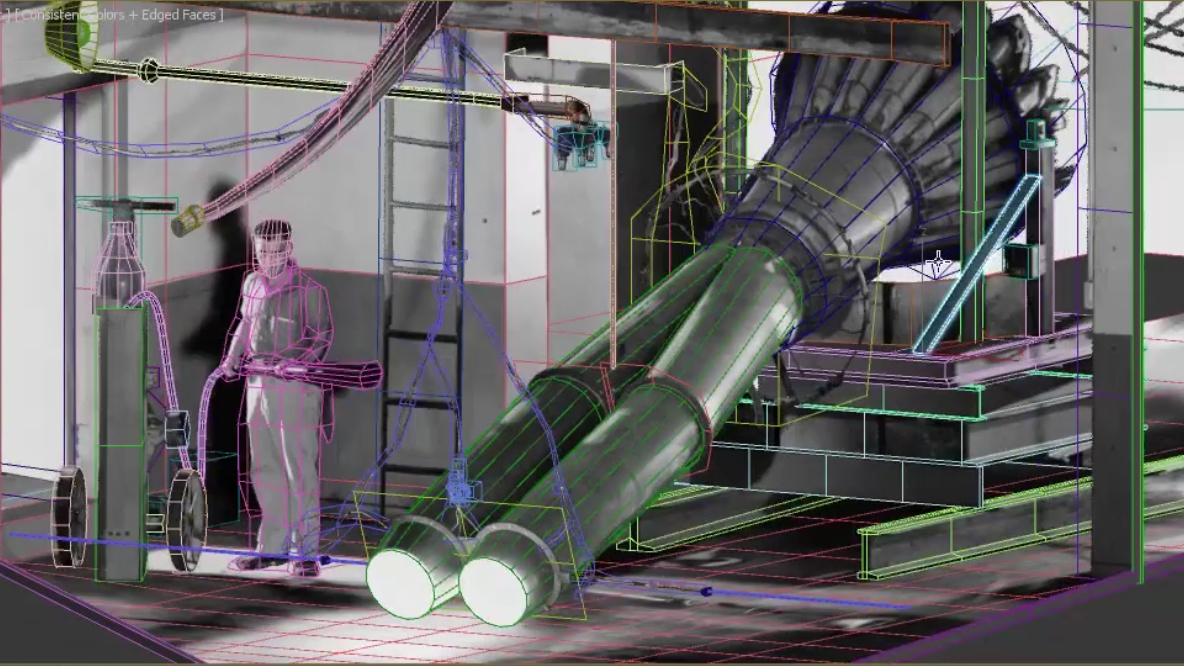
Typically when someone mentions augmented reality or virtual reality, they might be thinking about video games. It’s important to know that there are vast applications for AR and VR other than video games. In this case, we’re going to learn how to bring a photo to life through VR.
For this, we’ll use Photoshop, 3ds Max and Unity. Our final 3D photo will be suitable for something like Google VR, which is very accessible even to non-VR enthusiasts.
01. Choose the right photo
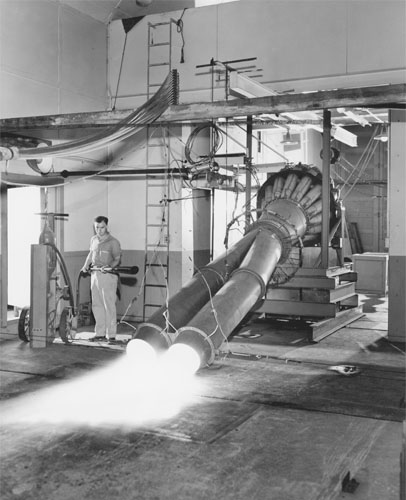
Not every photo is going to work well for a VR set. There are seven key factors that will help you choose the right photo. You want an image that:
- Has been taken from a standing or sitting position. Odd angles will make the viewer uncomfortable – remember, the viewer’s headset is the camera.
- Has flat surfaces. This will make finding vanishing points and the horizon line much easier.
- Doesn’t feature complicated geometry. While it is possible to create, it will quickly multiply the amount of work.
- Isn’t cropped. Notice how, in our image, the jet engine and the man can be seen entirely. A photo that has parts cropped will seem wrong to the viewer.
- Doesn’t feature reflections. This is mostly because phones have a limited amount of processing power and reflections will take up too much.
- Has minimal distortion. Most camera lenses create a small amount of distortion. This is easy to fix, but wide angle lenses create a lot of unnecessary work.
- Is larger than 2048x2048. This will reduce the amount blurriness of the final experience.
02. Find the vanishing points
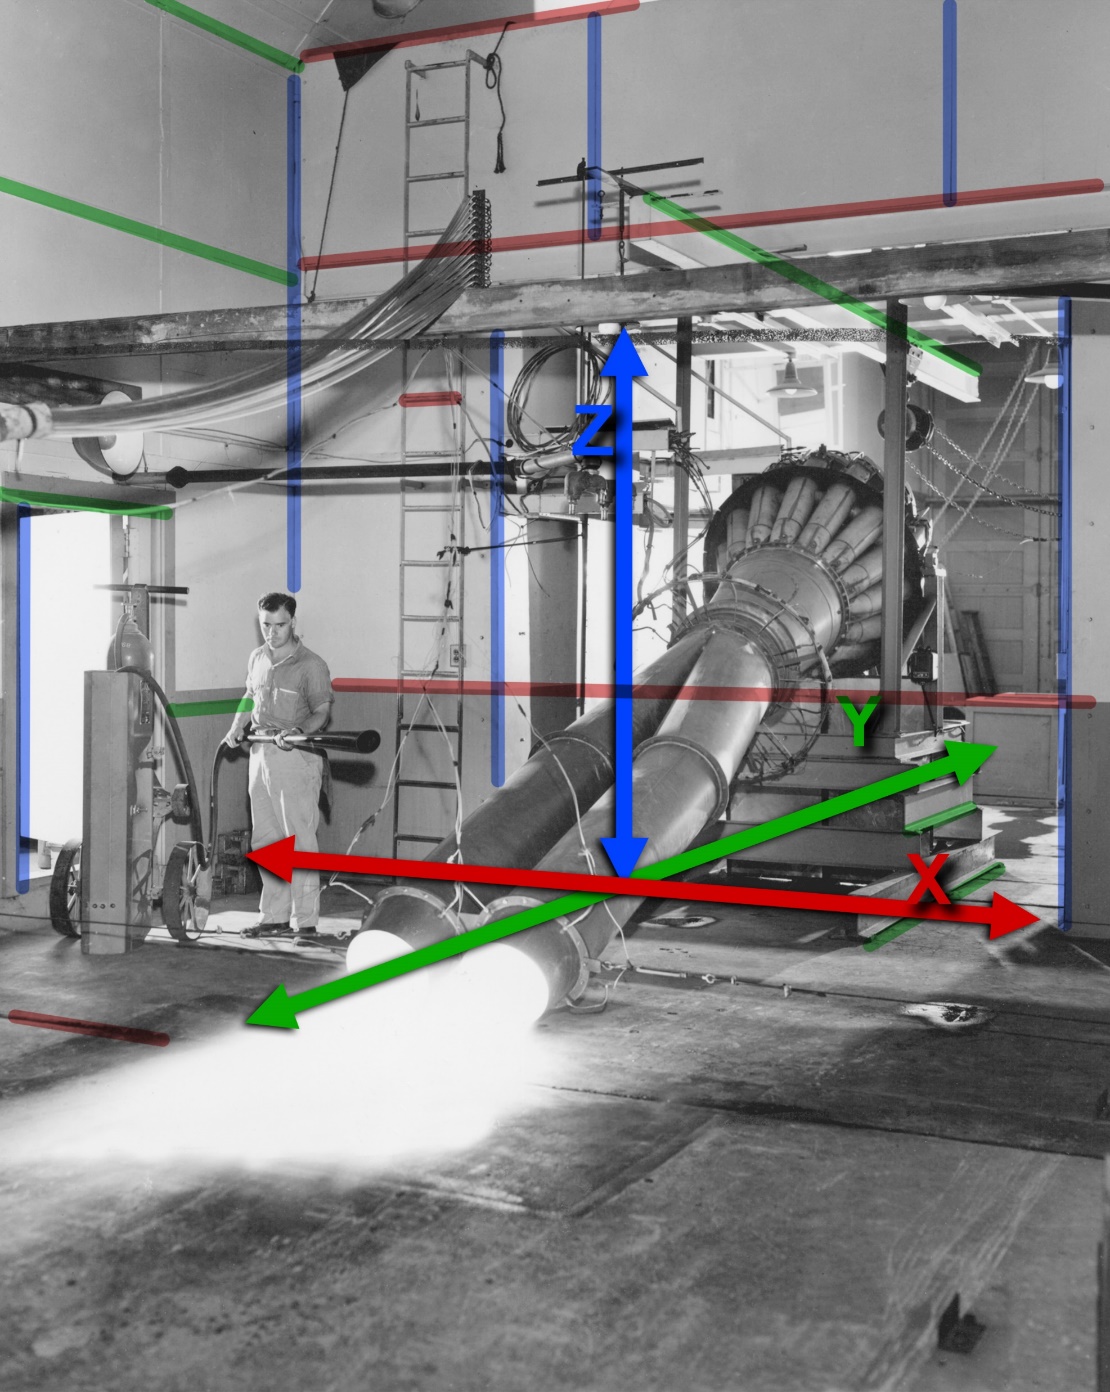
Because we are recreating this photo in 3D space, we need to match the perspective of the original photo. Doing so will make the photo believable in VR and it will also get us on the right path to establishing approximate measurements for our 3d scene.
To begin, we need to remove any lens distortion. To do this, we can simply use the Lens Correction filter in Photoshop and adjust the Remove Distortion slider to make the necessary corrections.
Next, we need to find the vanishing points. Because most buildings are built to be square, we should use the floor and walls to draw out our perspective lines and find the vanishing points in the X and Y directions.
Save a copy of your photo with the vanishing points and perspective lines. We will use this to set up our camera later in 3ds Max using the Perspective Match utility.
Get the Creative Bloq Newsletter
Daily design news, reviews, how-tos and more, as picked by the editors.
03. Break the image into layers
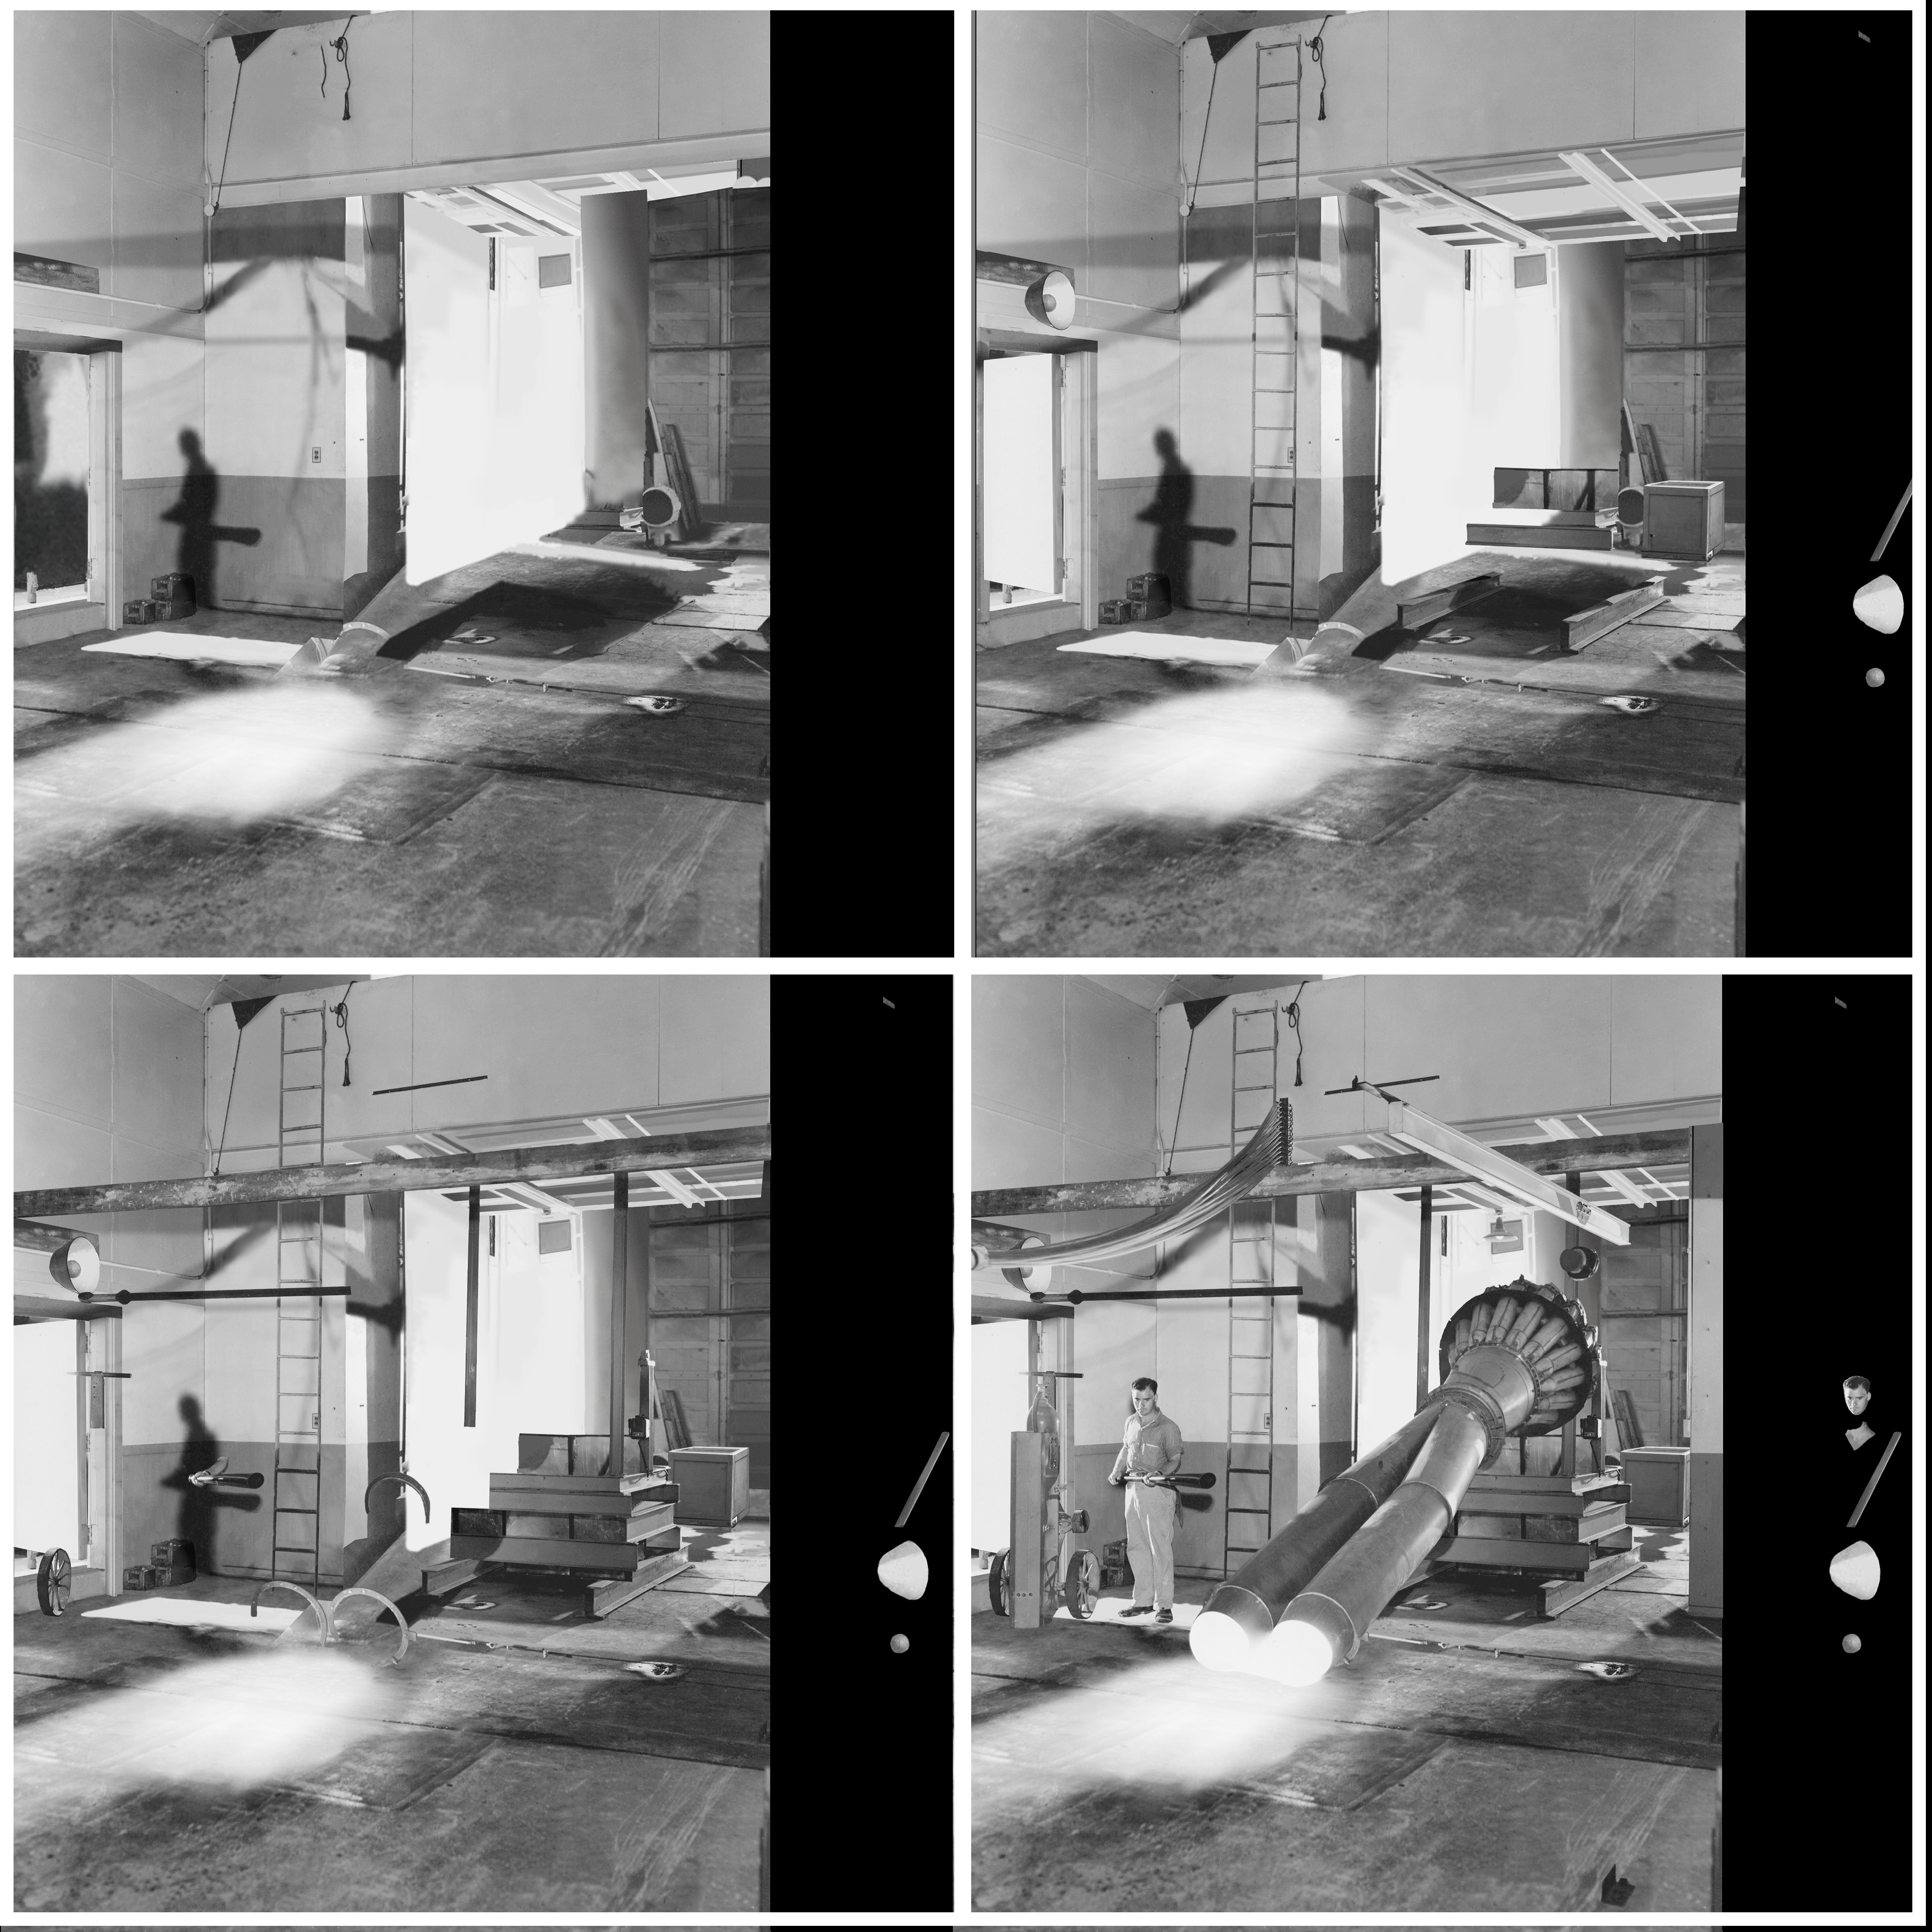
Now it’s time to split the photo into layers. We’ll do that by utilising Layer Masks in Photoshop. This is the most time consuming part of this entire process because we have to separate elements into background, mid-ground, and foreground elements and then repair any image destruction created in the process. When recreating the background elements, be sure to include the shadows of existing the mid-ground and foreground objects.
When splitting these elements, you will have to project yourself into the image from the camera’s point of view. If you were to take a step to the left or to the right, what elements would shift? Objects that are closer to the camera would shift more and the things further to the back would shift less.
This is called the parallax effect. The parallax effect is the key to this experience. If we don’t have enough elements split, then our VR set will still appear flat.
04. Model the layers
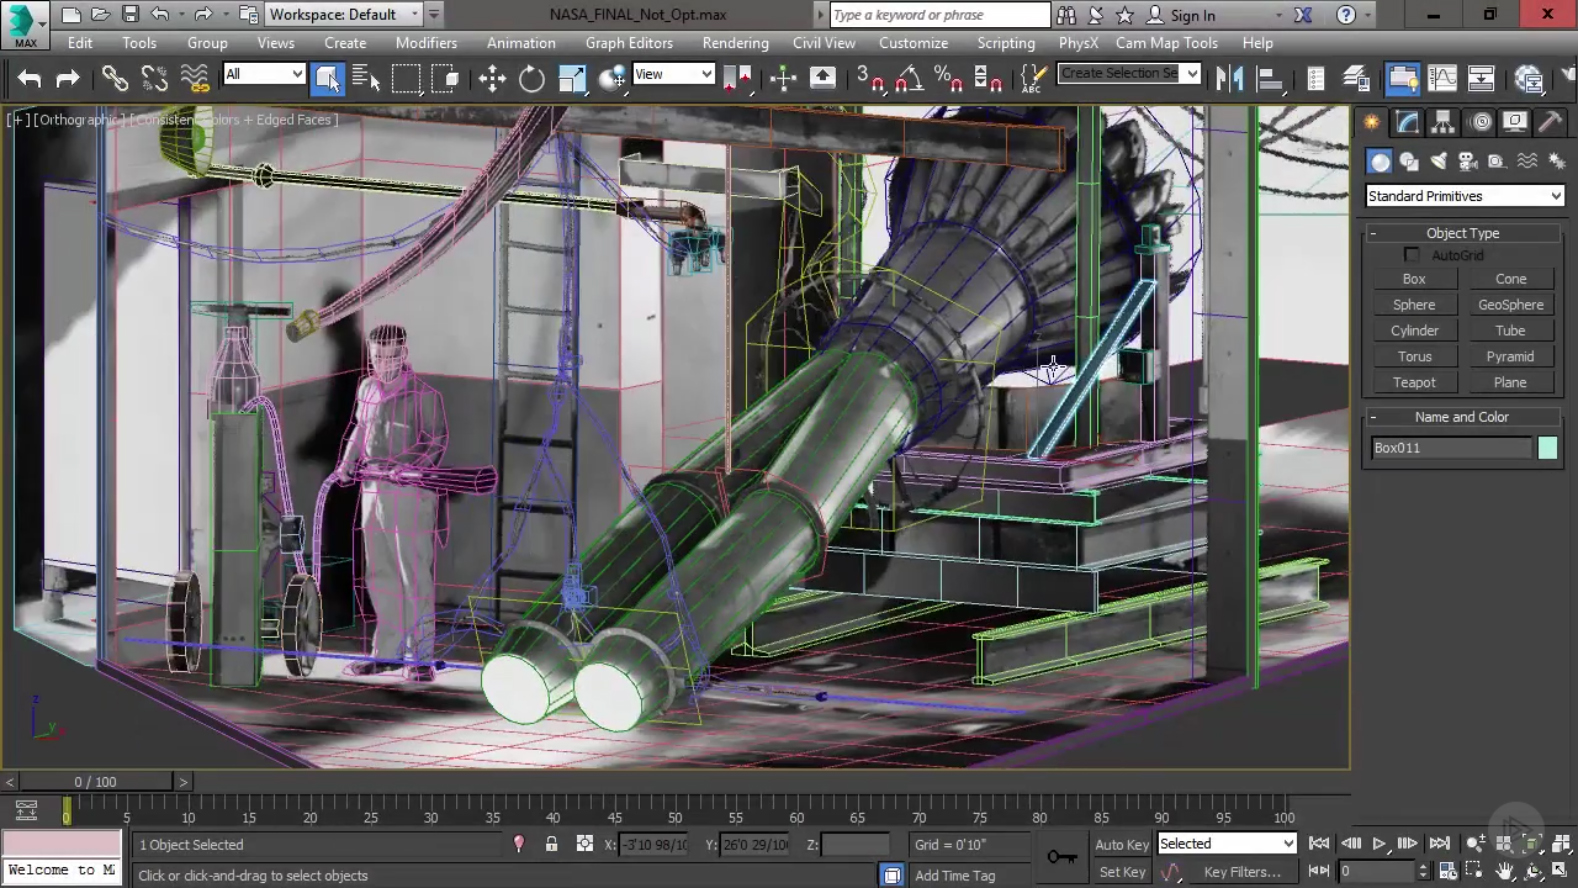
Once we have created our layers, we need to model them out in 3ds Max. When modelling we are only trying to add depth to what can be seen in the photo. For example, we don’t need to model a full human model for the man in the photo; we only need to model enough to give him depth.
Remember to model for the Camera Map modifier. How well this maps depends on the number of vertices in the mesh. The Connect and Swift Loop tool will be invaluable during this process.
05. Export to Unity
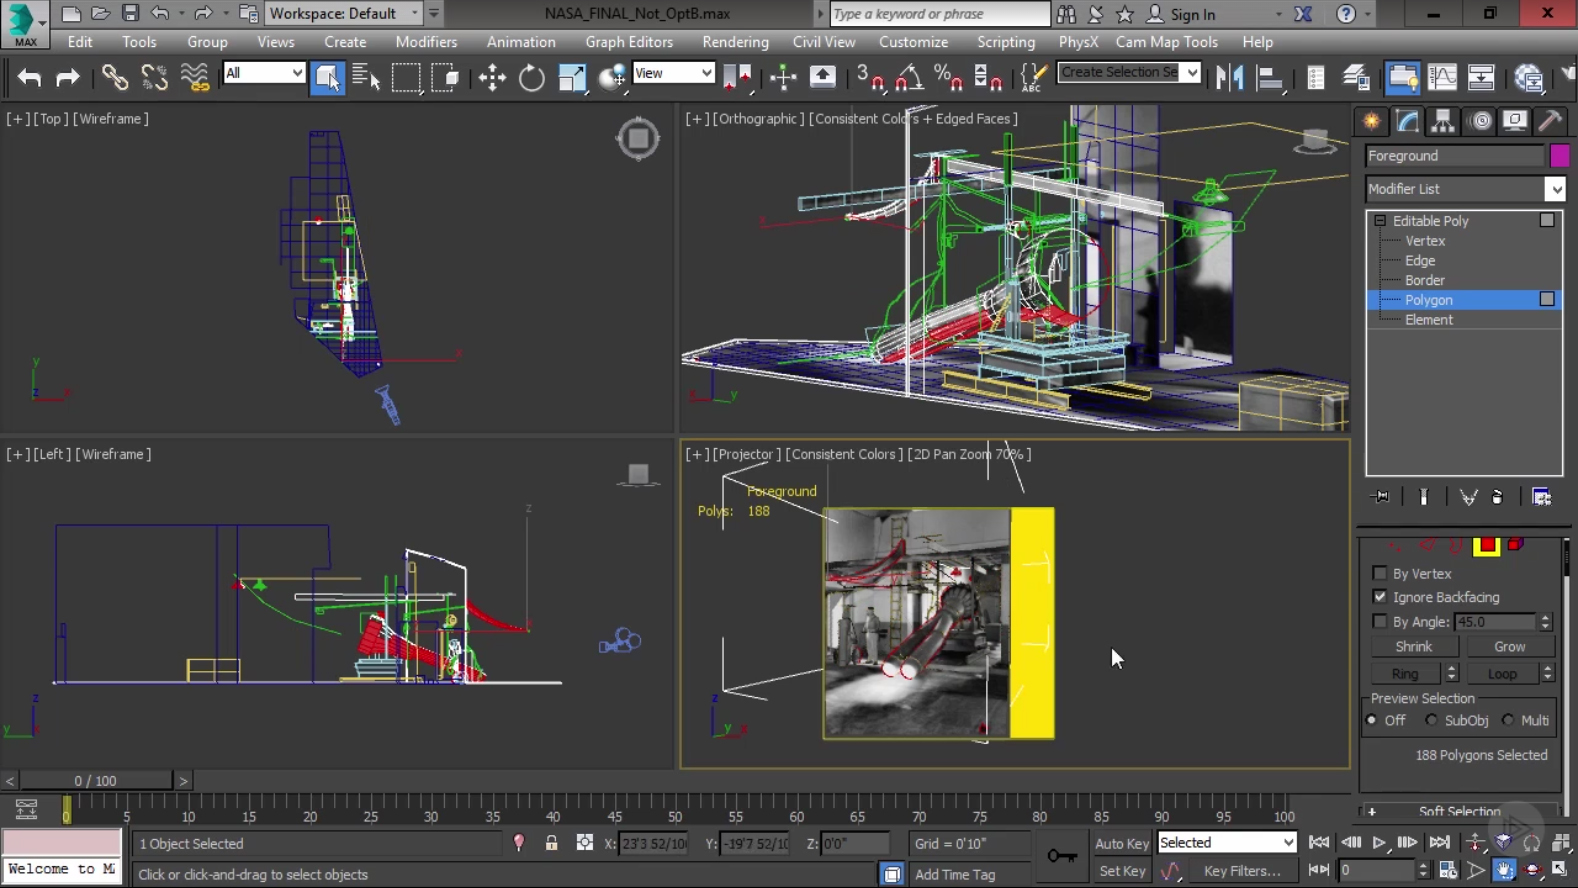
Before we export our 3d scene to Unity, we need to optimise it. Remember, we want to make this VR set viewable using Google VR, so optimising the scene is crucial to ensuring it runs as smoothly as possible.
The first thing we need to do is attach all of our objects into background, mid-ground and foreground objects. Then we need to create a single material for each object. Unity would rather have as few materials as possible, so we will have one material for all of the background objects, one material for mid-ground objects, and one material for the foreground objects.
Finally, we need to optimise the models. Overdraw is what occurs when polygons overlap other polygons, and this wastes a lot of processing power. We will never be able to remove all overdraw but we can certainly remove any unnecessary polygons that will never be seen by the viewer.
Be sure to check for polygons that have been accidentally removed. It’s a good idea to save an un-optimised scene just in case you need to fix any issues.
06. Set up Unity for VR output
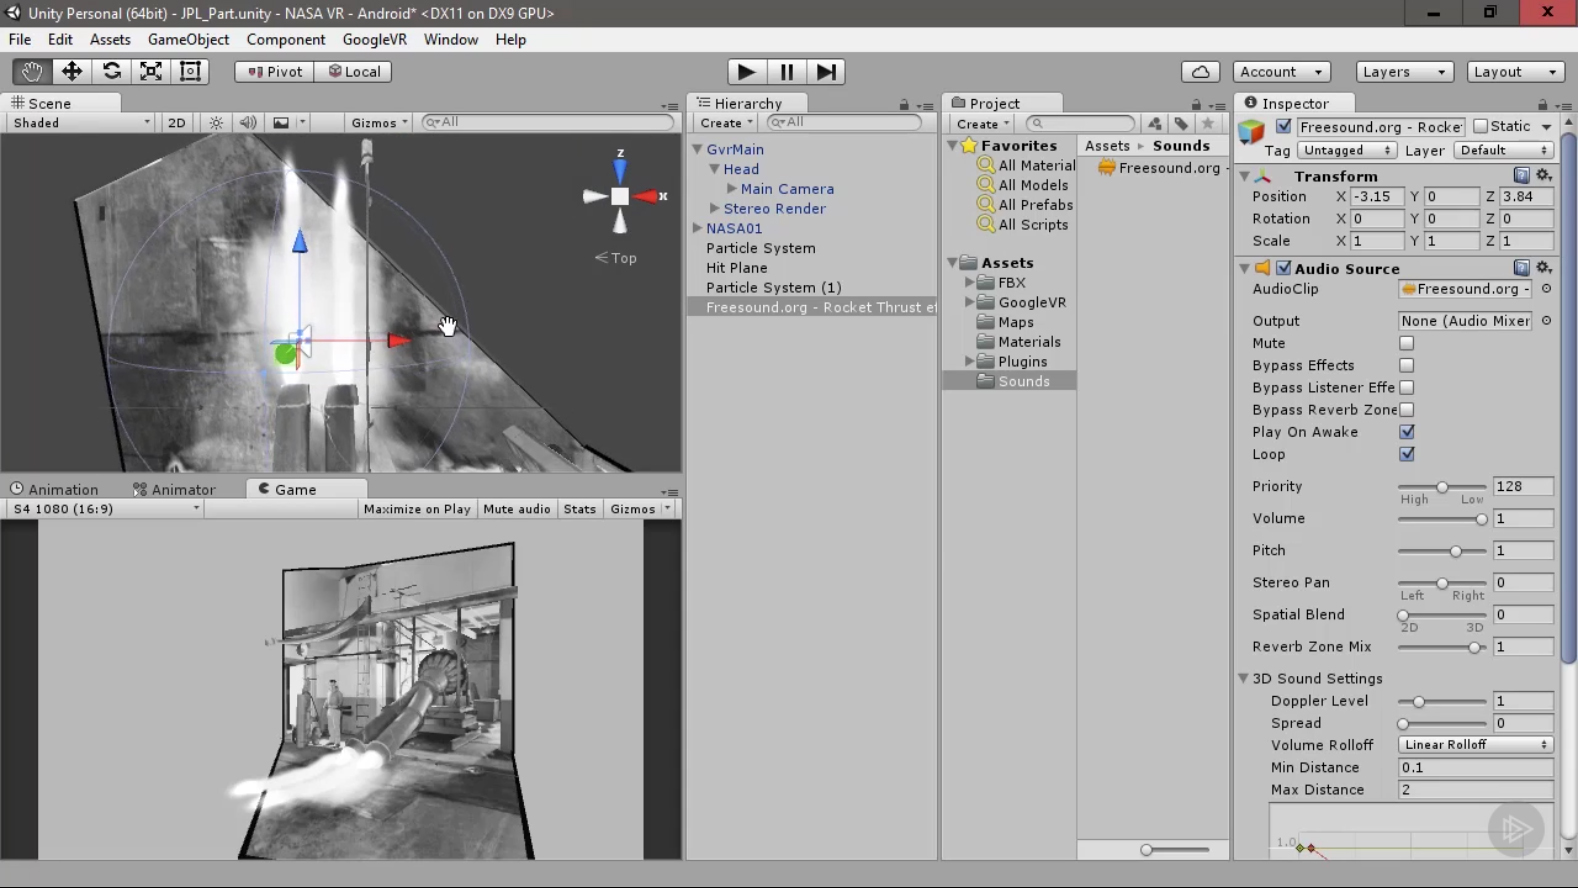
Before we import our VR set, we need to set up Unity for VR output. This requires us to download the Google VR SDK for Unity and add those files to our Unity project. This will give us access to some Unity prefabs like the Google VR camera. We also need to set up our build setting for Android.
Once we’ve set up the project, we can import our scene and then set up the materials. At this point, we could export our project and view it in VR.
07. Go further
Why not take this project even further by adding life to the scene by creating some particles and sound? Doing so will make this a memorable experience.
This process is highly technical and requires some intense planning, but it is well worth it. If you’d like a resource to help bring your old photos to life, check out our course Converting a Photo into a VR Set in 3ds Max.
Free Pluralsight trial
Pluralsight is an enterprise technology learning platform that delivers a unified, end-to-end learning experience for businesses across the globe. Through a subscription service, companies are empowered to move at the speed of technology, increasing proficiency, innovation and efficiency. For a free trial and more information, visit www.pluralsight.com.
Related articles:

Thank you for reading 5 articles this month* Join now for unlimited access
Enjoy your first month for just £1 / $1 / €1
*Read 5 free articles per month without a subscription

Join now for unlimited access
Try first month for just £1 / $1 / €1
