How to use AI prompts in Photoshop and Adobe Firefly for better concept art
Mix the Photoshop Generative Fill tool with Adobe Firefly AI images to create clever concept art experiments.
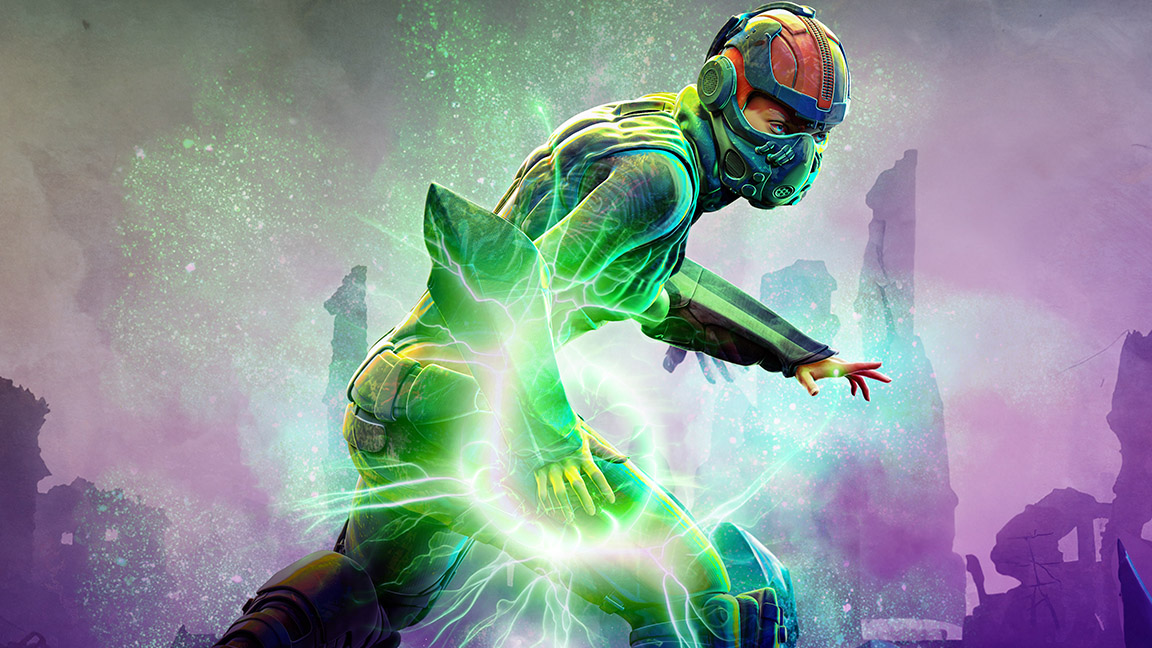
This tutorial focused on how to transform art styles using Photoshop Beta's new generative art tools combined with Adobe's AI, Firefly. As AI becomes ever present it's important to understand how to make it work for you and not become overwhelmed by this new technology.
With the powerful combination of Photoshop Beta's advanced editing tools and Firefly's generative art capabilities, artists can explore new dimensions in transforming their artwork. In this tutorial, I will guide you through the process of leveraging these tools to create captivating art pieces that push the boundaries of style and creativity. (Read my Adobe Firefly explainer for a lowdown on this new AI tool.)
Below I will provide you with comprehensive guidance on transforming art styles using the unique synergy of Photoshop Beta and Generative Art with Adobe Firefly. (You can find more about Photoshop Generative Fill in our recent news story, and read our round up of the best Photoshop tutorials for more advice.)
What will you learn? Well, first I will introduce you to the latest features and functionalities of Photoshop Beta, highlighting its cutting-edge tools for image editing, manipulation, and transformation. Next, I will delve into the world of generative art, exploring how Firefly can generate intricate and visually stunning patterns, textures, and effects that can be seamlessly integrated into your artwork.
Mix Photoshop Generative Art and Adobe Firefly
01. Signing up to Creative Cloud
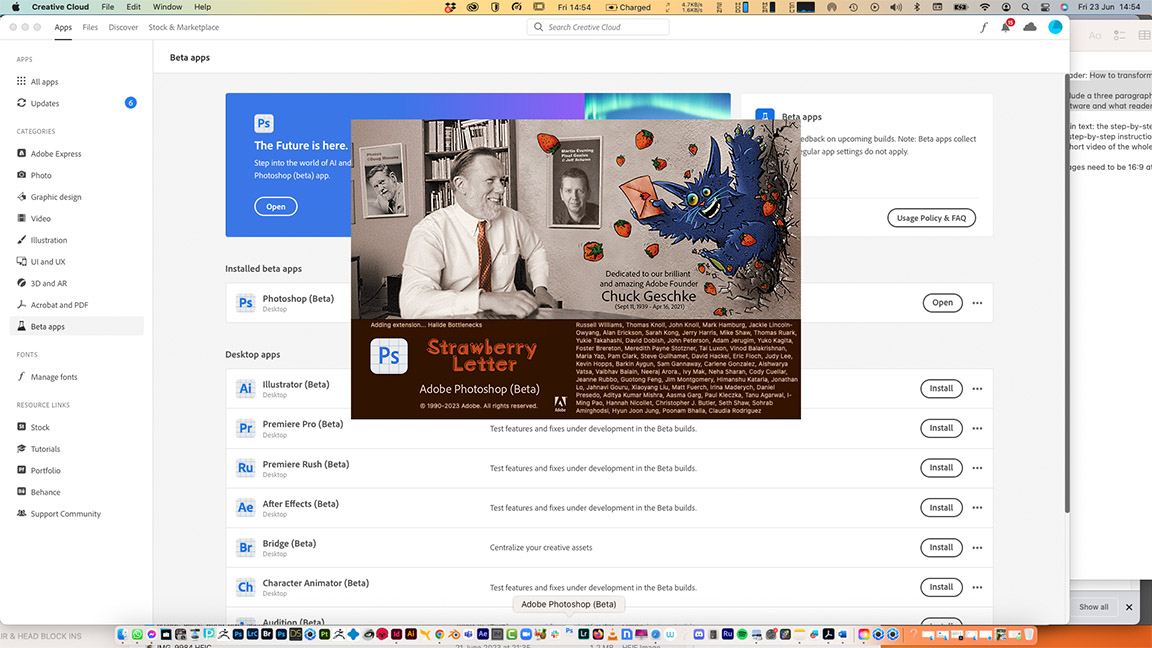
You will need to have and Adobe account access both Firefly and Photoshop Beta in order to follow this tutorial. (We have the latest discounts on Adobe Creative Cloud updated regularly.) Once signed up, log into Creative Cloud and go to the Beta section in the left hand menu to find Photoshop.
02. Creating a Generative Fill background
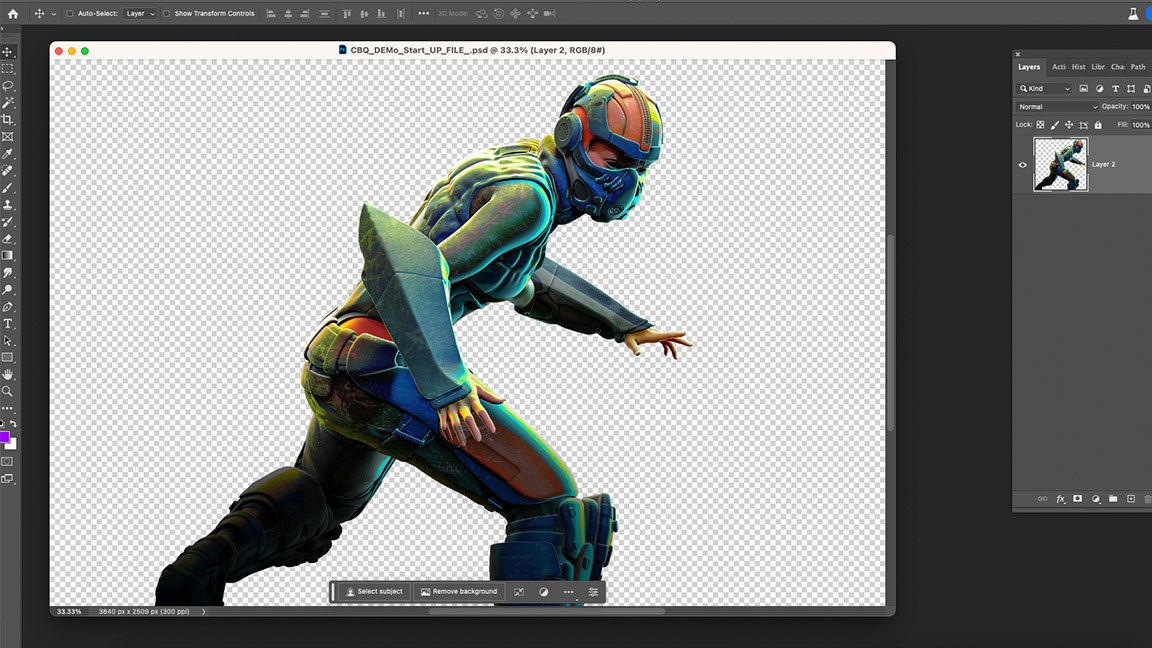
The first thing I do when I open my pre-made figure file is select all the background. This can be found on the top bar between Type and Filter. Once I have selected the whole background (you can create a new blank layer for this) you will see the Generate Fill prompt box appear at the bottom of your image. To begin I use the prompt 'Apocalyptic foggy destroyed city'. The fun thing about the Firefly generative system in Photoshop is the it never creates the same image twice.
03. Using the Lasso tool
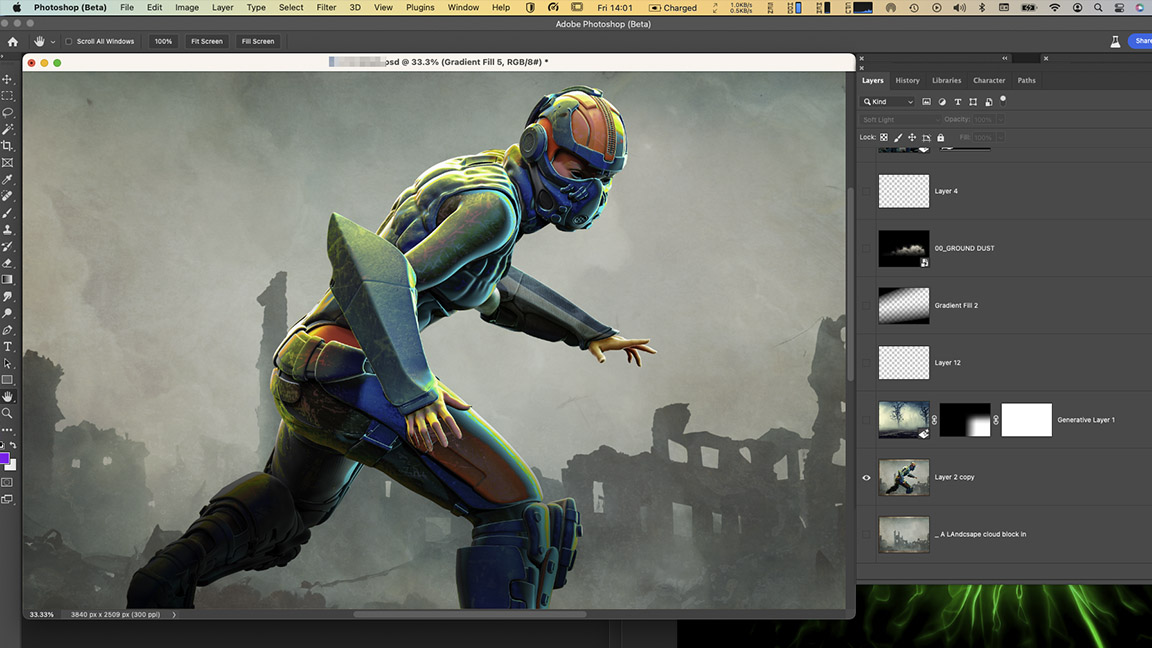
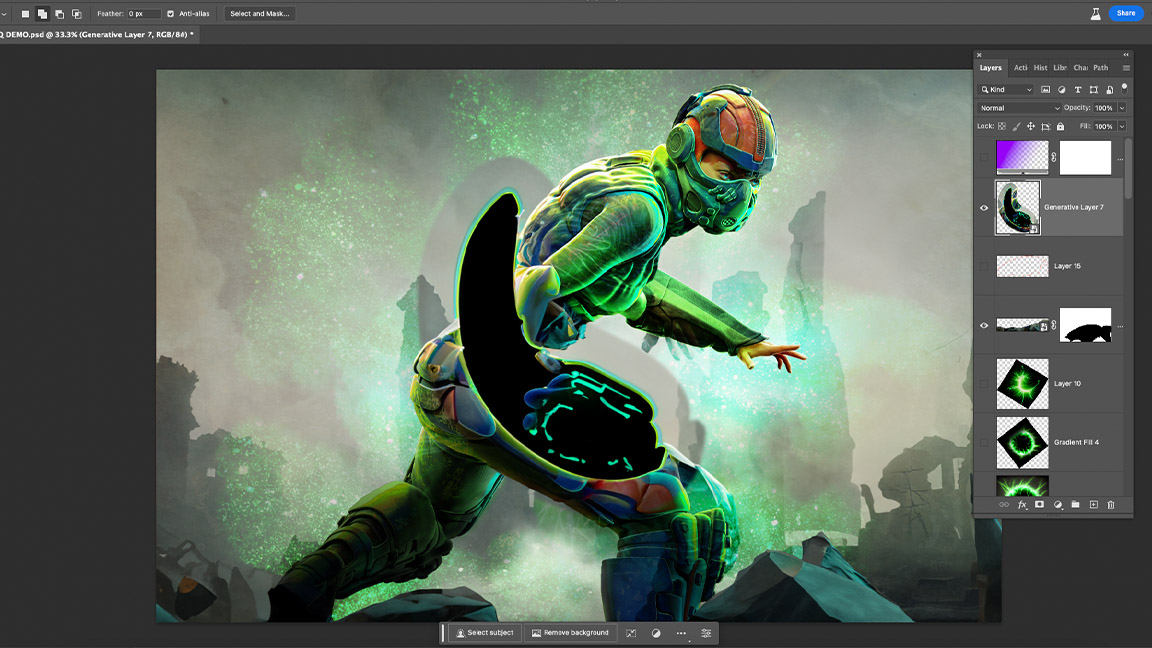
In the early stages of using this type of generative technique to experiment with your concepts the Lasso tool will be your best friend. I make a new layer above my figure. I can now use the Lasso tool to draw, for example the shape of a cape or armour. I experiment with prompts such as 'flowing cape'. The result isn't the best but I trace the forearm armour section with the Lasso tool and prompt 'corroded metal crack green armour' and get some fun and interesting results.
04. Tweaking the Generative Fill results
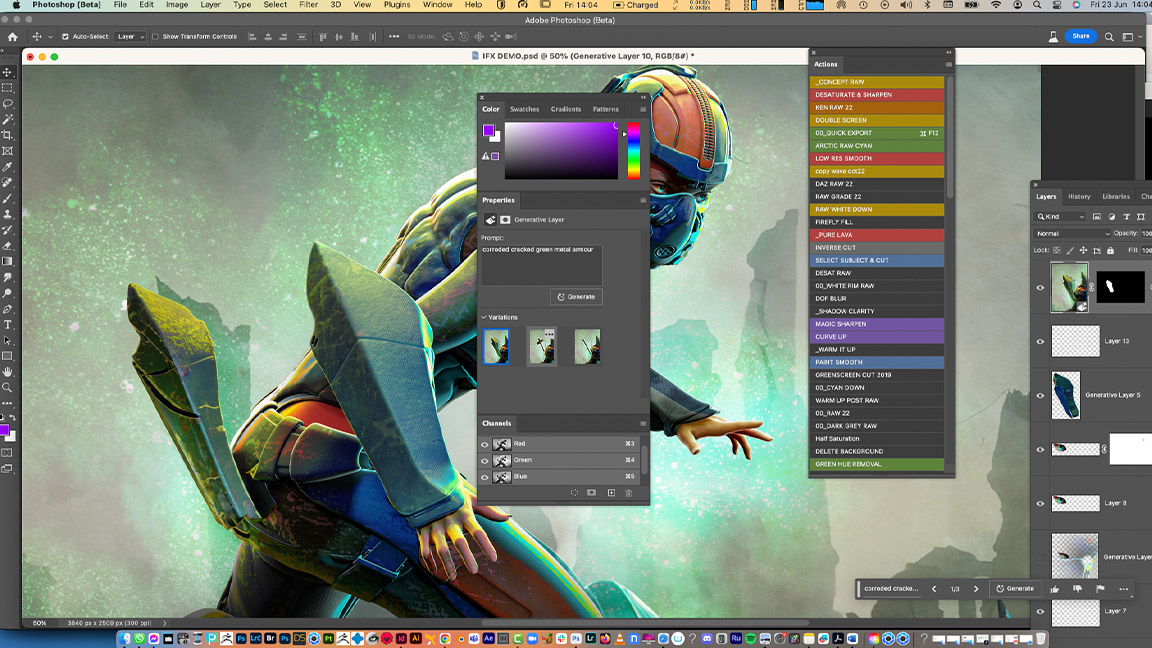
A really neat new trick with Photoshop beta is the updates to the properties window. When you create a generative layer or section to your art you will notice a new 'star' symbol in the corner of the layer. It’s in the same position where the symbol would often be for Smart layer or Vector layer symbol. When a layer is generative you will notice three options in the Properties window. By selecting these you can change the output of the prompt to see if another options suits your goal better.
05. Generating atmospheric effects
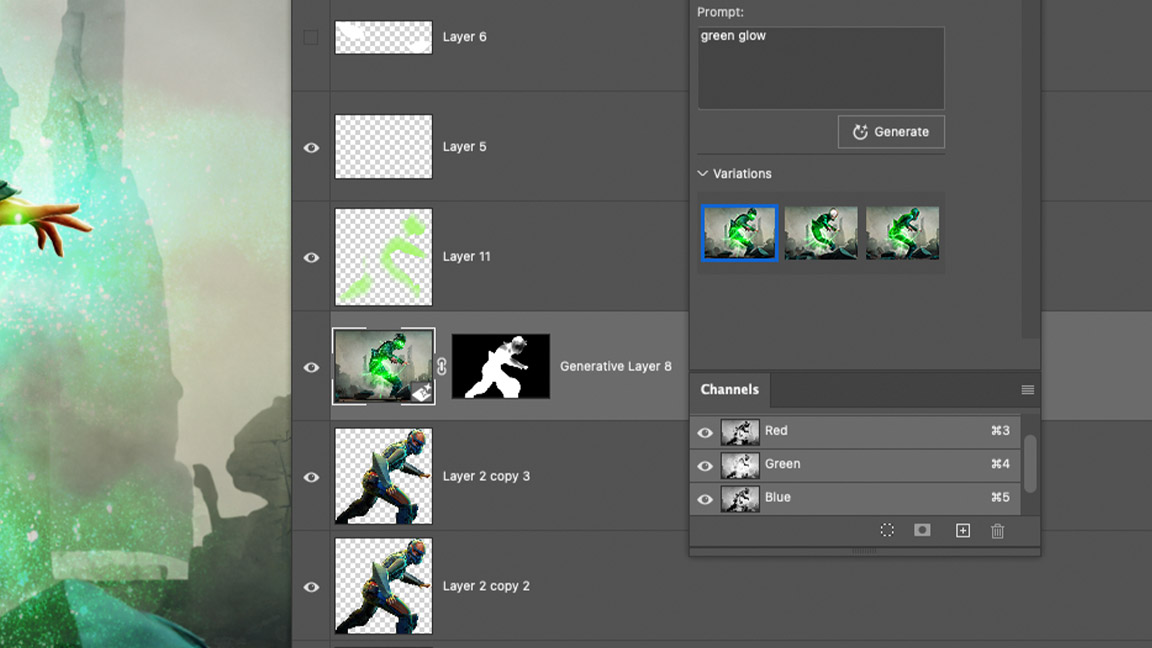
Now that I have covered the basics of using the system it's time for some fun. I use the Lasso tool to generate some textures in my image as well as some atmospheric effects, such as foreground elements. Something to note is that if you create some foreground elements or particles they will include elements of the existing layers so you may have to fine tune the automatically generated mask. I find with this piece I have to use the Brush tools to erase some unnecessary foreground elements that were ruining the composition.
06. Fixing mistakes using Firefly
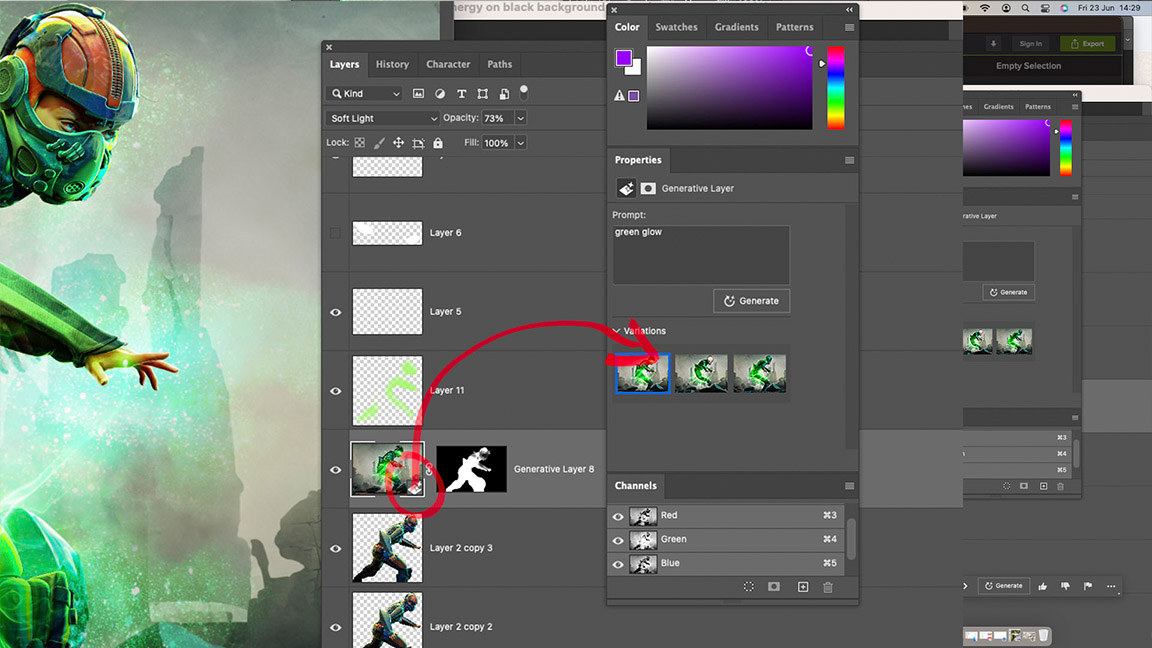
Next I experiment with the Lasso tool around the hand to see of I can create some magical elements using Photoshop's prompt bar. Unfortunately this causes some very strange effects that are not quite what I want to achieve. I find the the best thing to do here is to use Firefly, Adobe's online AI generative engine. You will need an Adobe account in order to access and sign-in to Firefly.
07. Using Adobe Firefly
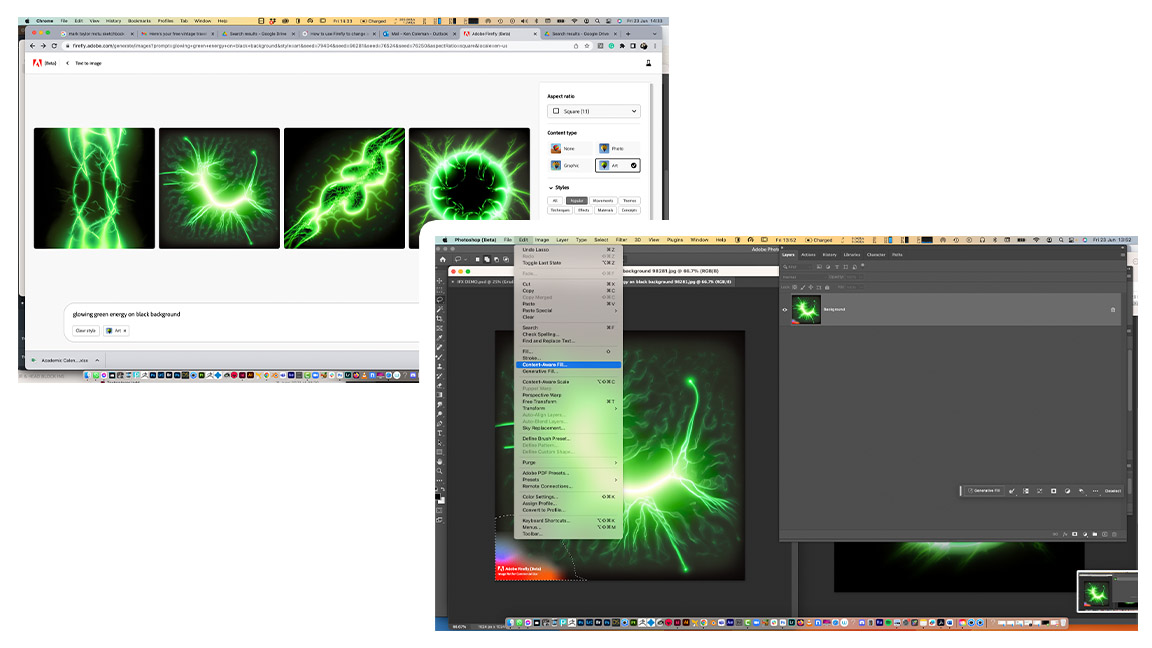
Once I access Firefly I use the text to image option. I use the same prompt from Photoshop to create 'glowing green energy on black background'. I feel two of the images work for this image but they require some editing and clean-up in Photoshop before I can apply them.
When you download images form Firefly, as it is currently in beta, the images will be watermarked in the corner. I bring them into Photoshop where I use the Lasso tool to select the area and then I use Edit > Content Aware Fill to remove the Adobe watermark.
08. Adjusting the Firefly images in Photoshop
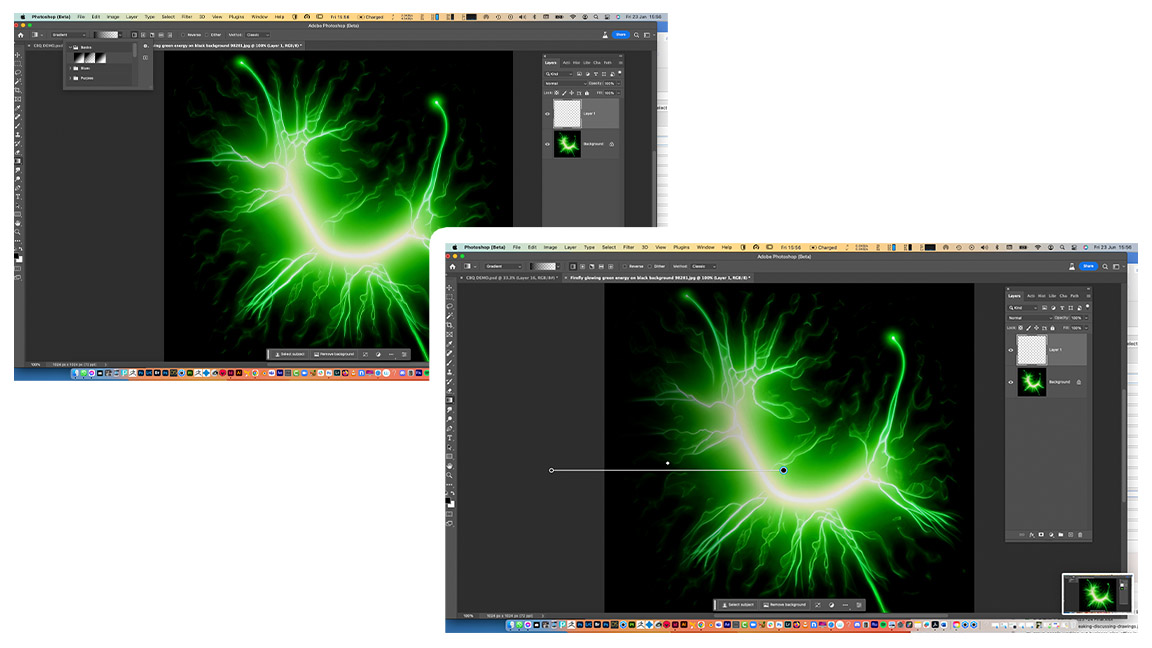
Before I can add these images as particles to my final composition, I often use the Gradient tool to create a faded black on the edges. I go to the Gradient options, set to Basic and choose the second option of Foreground Color Only. This allows me to create a strong black fade to stop the edge lines being visible when I blend the glows over my composition using the Screen Blend mode. The updated Gradient tool takes some getting use to but has more control and sensitivity.
09. Creating a burst effect using AI
Now that I'm happy with how the magic is blending into the artwork around the foreground hand. I decide I want some particles behind my character to create a stronger silhouette. Again, I select the whole canvas after creating a new layer and use the prompt 'magic particle burst'.
It's worth noting that some words, including 'explosive', are prohibited at this time by Adobe. As are words such as 'nude' and 'naked'. So be careful what you type when trying achieve an effect. The result of the burst was quite strong so I use masks to dial it down.
10. Final adjustments in Photoshop
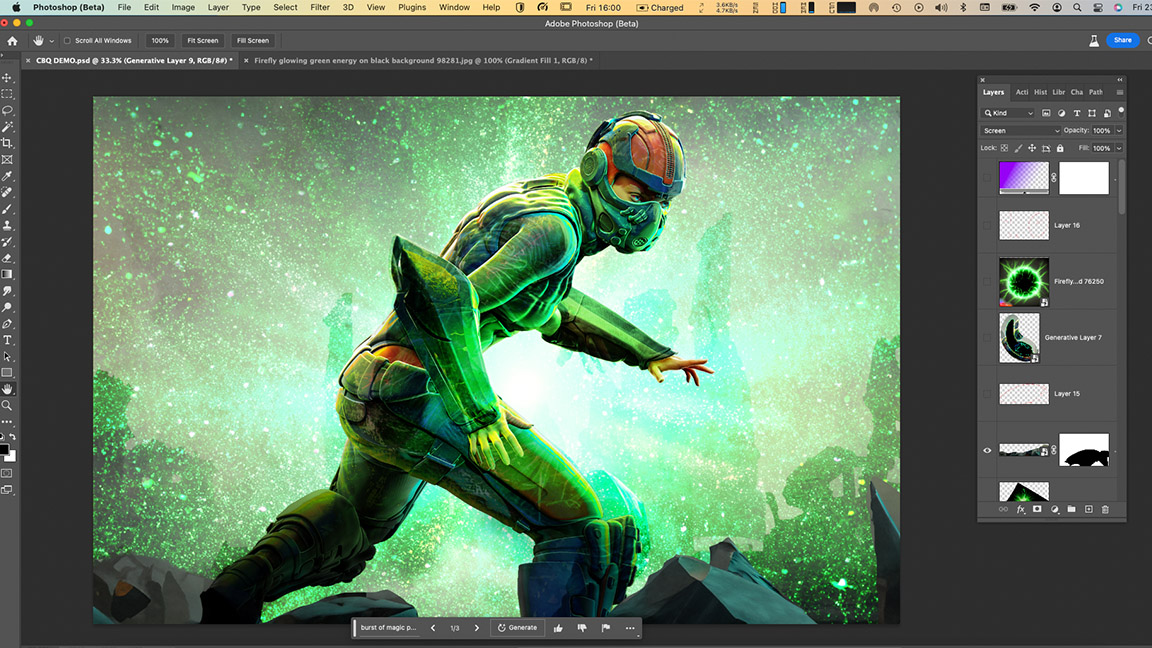
I'm happy now with my overall image. I experiment further with a gradient of purple set to Pin Light blend mode as well as Softlight. I choose this colour as it compliments the bright greens of the image. I also add some layers of my own particles and a layer where I paint some green set to Softlight over my character to accentuate how the magic reflects off the character in order to add some final touches. My next step, once I'm happy, is to bring this artwork to the iPad for a full paint over in Procreate. (Read our tutorial, 'how to do a basic paint over in Procreate' for more advice.)
More Firefly and AI advice
If you're just learning how to make use of Adobe Firefly in your art workflow, then we have some excellent tutorials and advice features that can help. Our feature on how to use Firefly is a good starter, while Ken's guide to using Firefly to create custom brushes in Procreate is a must-read.
Get the Creative Bloq Newsletter
Daily design news, reviews, how-tos and more, as picked by the editors.

Thank you for reading 5 articles this month* Join now for unlimited access
Enjoy your first month for just £1 / $1 / €1
*Read 5 free articles per month without a subscription

Join now for unlimited access
Try first month for just £1 / $1 / €1
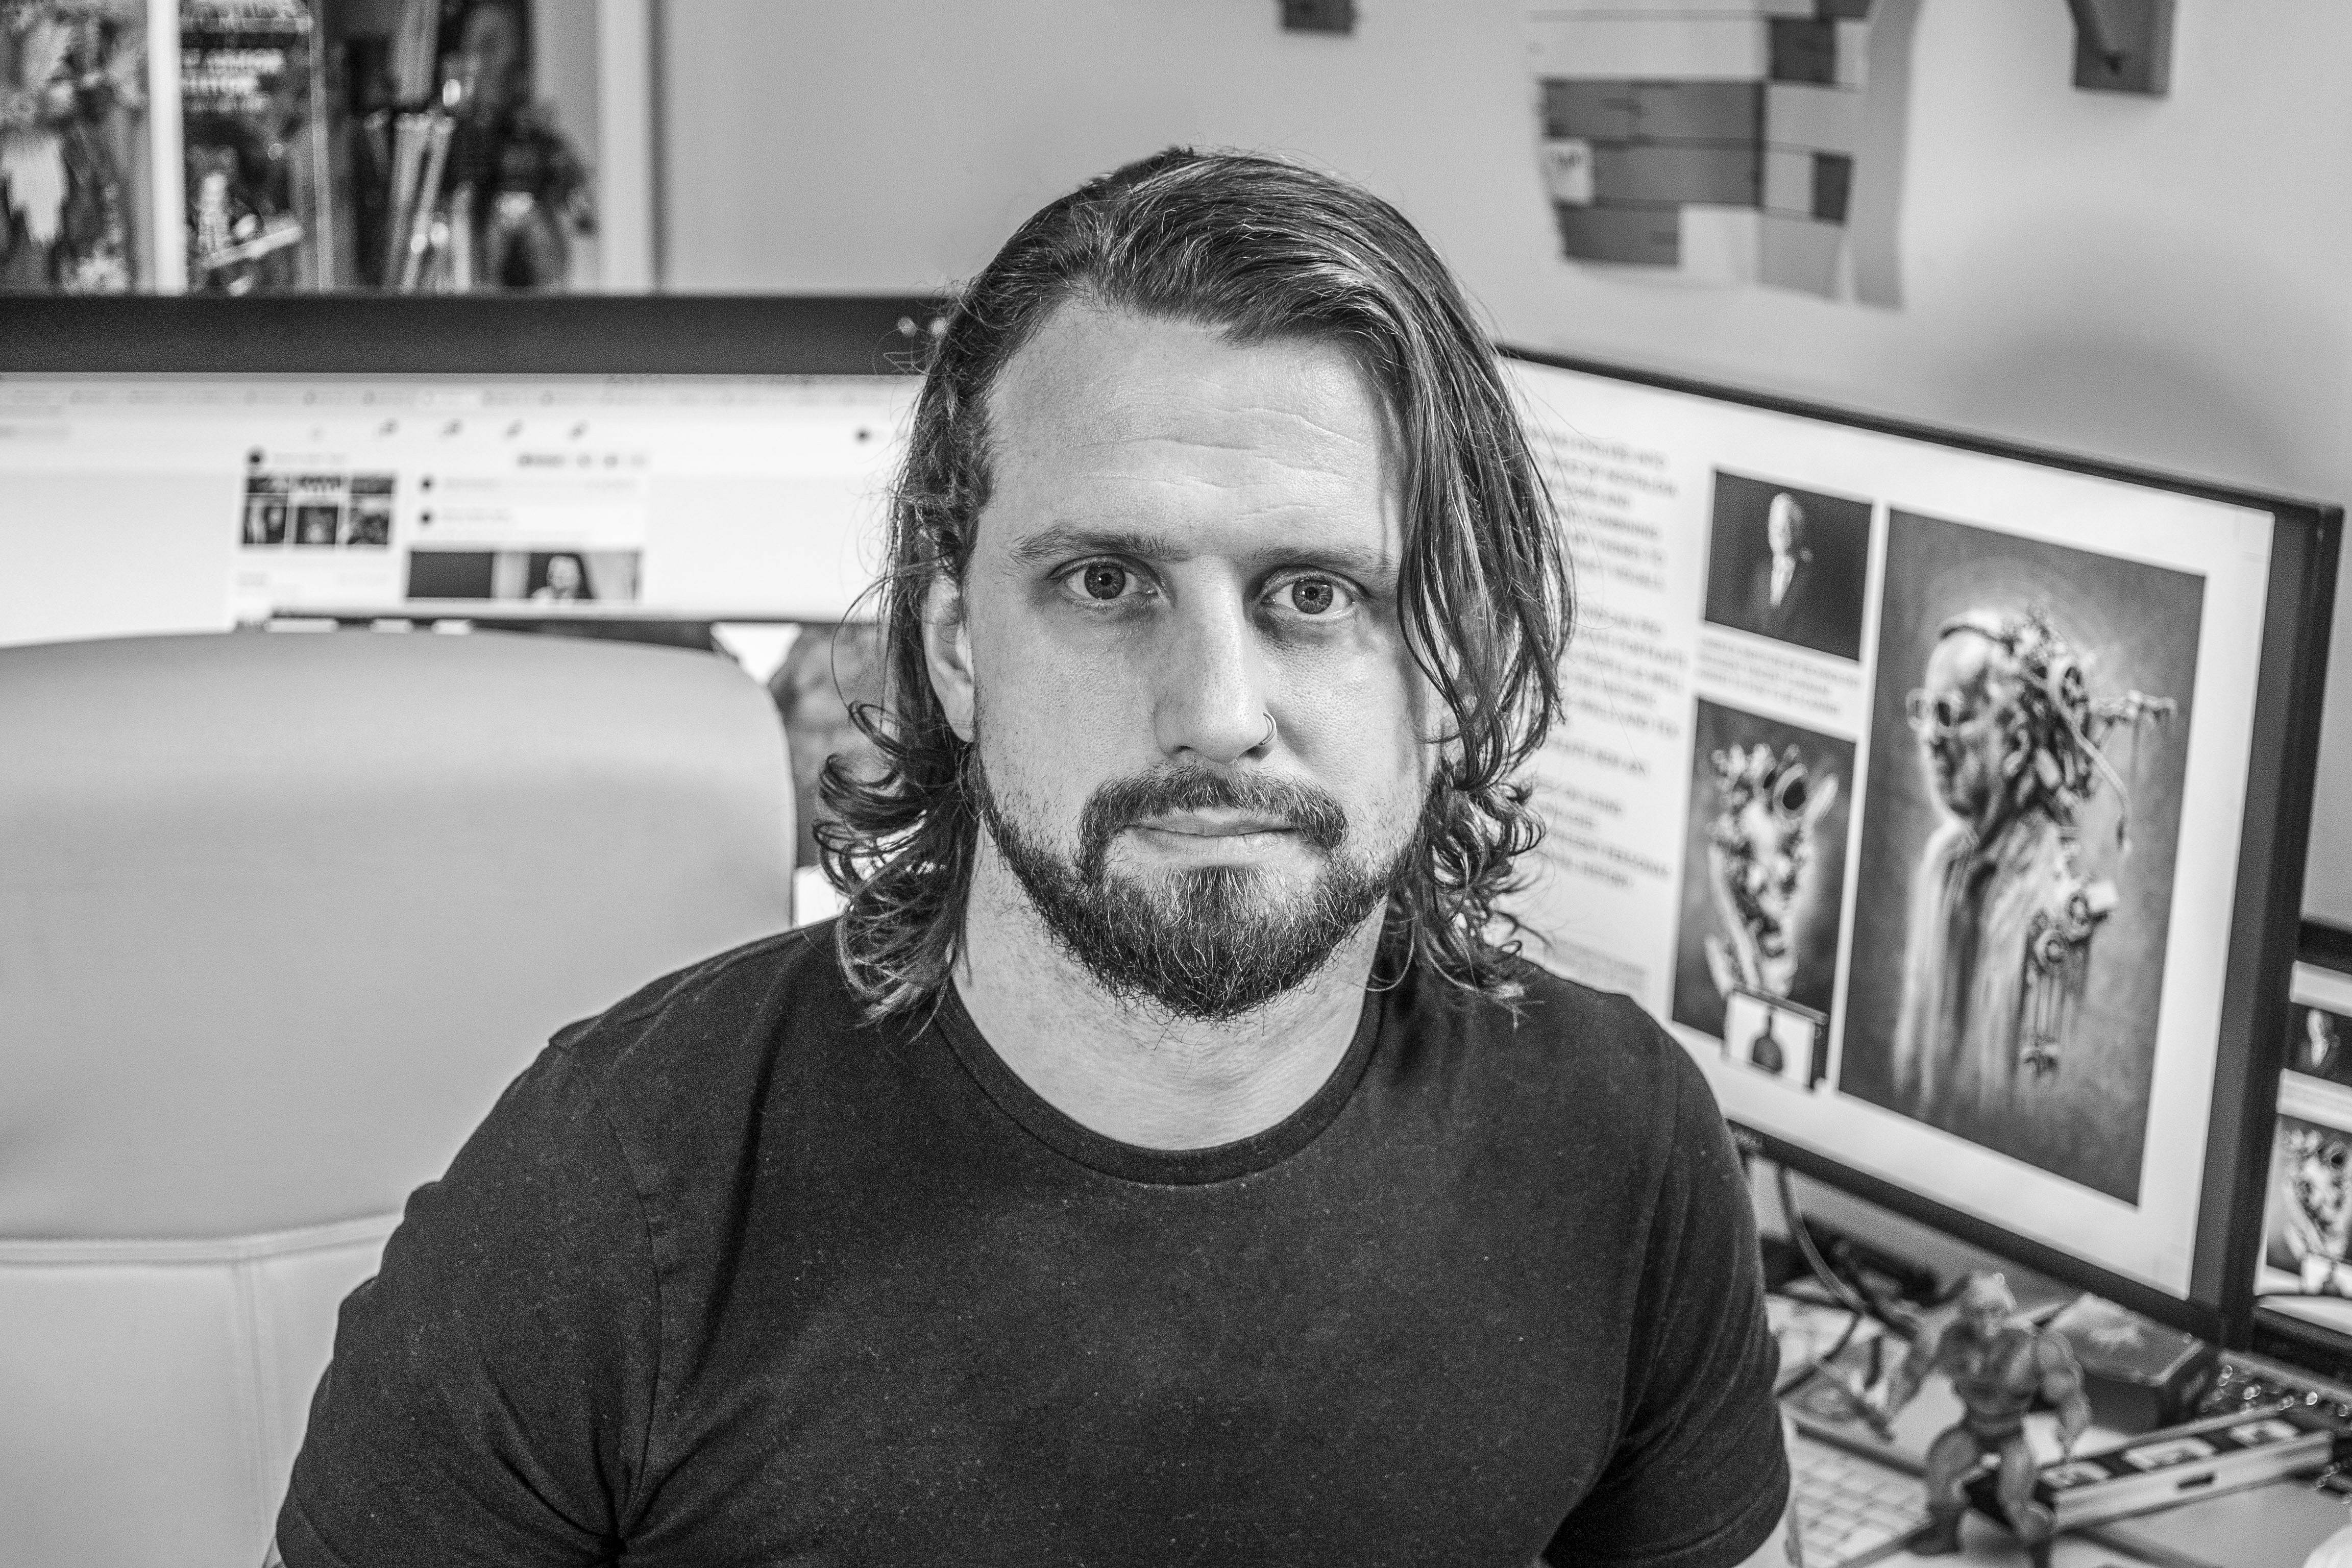
Ken Coleman lectures in game art and design at Clonmel Digital Campus in Ireland. He also designs for clients such as Catalyst Games and Morbid Angel.
