Build terrain in Houdini 17
Learn how to create procedural environments with Houdini 17's new and improved terrain toolset.
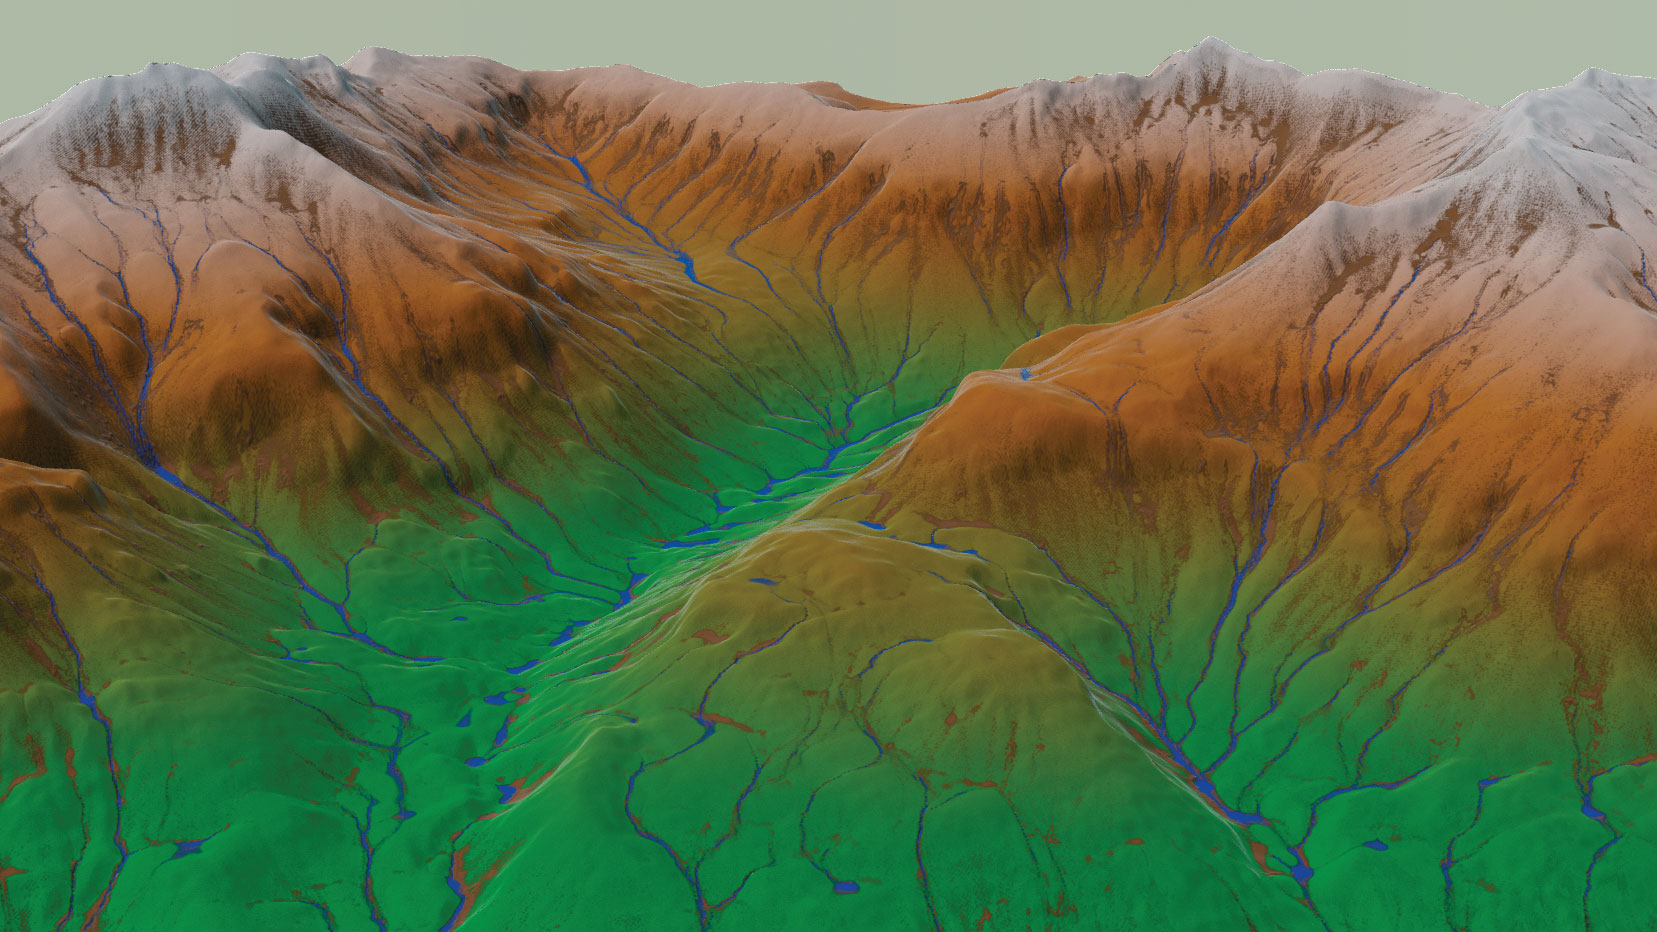
In Houdini 17, SideFX introduced some new tools and enhanced others in order to widen the range of opportunities for artists creating fully procedural terrains or adding details to real-world based models. For example, the enhanced Erode node simulates erosion in a more scientifically plausible way and has many more controls than before. The main parameters of HeightField nodes can now be masked and there is an instant paint button that automatically sets up the appropriate node(s) for painting.
Taking a scientific approach to our CG landscapes will always help us to achieve better results, so that's why we're not simply running through the new terrain features, but also taking a look at some basic scientific aspects and exploring some new methods, such as the Vellum toolset to simulate tectonic compression.
Download the resources for this tutorial.
Also read: Our review of Houdini 17 Banshee.
01. Learn the basics
To effectively use Houdini's heightfield system, we should learn its basic principles first. When SideFX introduced this feature set in version 16, as usual they made a masterclass video (above). I recommend this for those who are not familiar with the basics.
Basically the Terrain module in Houdini consists of a bunch of SOP nodes, every one with HeightField in its name. They create a special kind of geometry: a 2D volume grid, which is more like a 2D image with pixels, but Houdini renders/displays it as a surface.
Similarly to how DEM files store the height data, every pixel stores a height value, and it pushes the particular surface site upwards with this amount, exactly how displacement textures work. These nodes are designed for terrain generation workflows, so even if we use other tools for landscapes, this is the most convenient and most effective way in many cases.
Get the Creative Bloq Newsletter
Daily design news, reviews, how-tos and more, as picked by the editors.
02. Understand geology
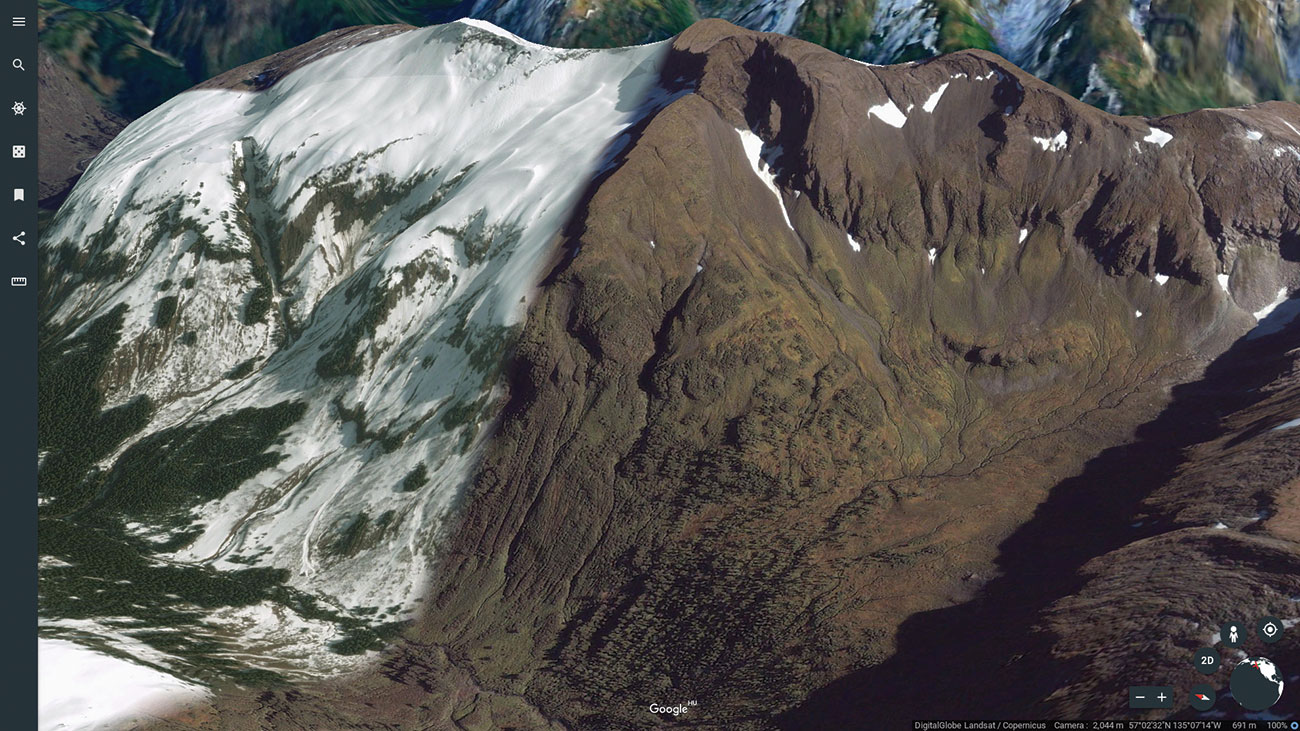
Researching the science behind the Earth's geology is pivotal for accurately simulating real-world processes in a CG environment. At its most simplified, we can think about Earth as a big blob of fluid and relatively soft matter, a mere droplet from the universe's perspective, with solid skin, like a grape. Sometimes the skin of this 12,750 km wide droplet breaks into pieces, similarly to how the skin at the surface of hot milk or pudding tears apart as it gets hotter and starts to boil.
This solidified magma skin, the crust, is thinner below the oceans and forms the base layers of the landscapes and many geologic processes. Some of them are crushed together by forces of tectonic movements. These originally igneous rocks crack, fall apart, decompose and sometimes thousands of miles away settle down and stick together again, forming sedimentary rock. The weathering effects of the atmosphere and water matures the terrain over time, resulting in different shapes and textures.
03. Set up a sandbox scene
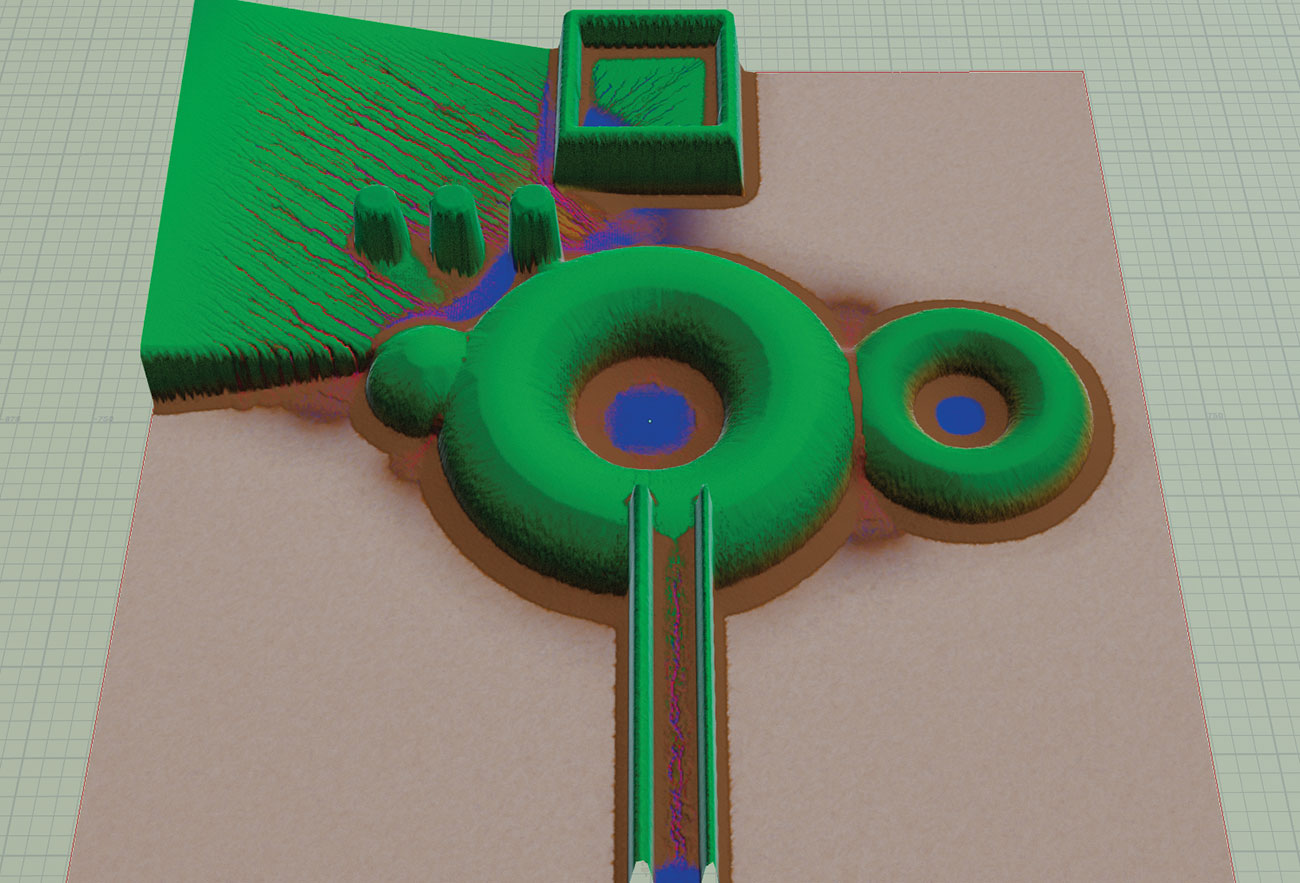
Learning through play is always a good way to get familiar with a CG tool. Even if you have used terrain tools before, it's worth setting up a sandbox scene with simple geometries and trying out the new tools and parameters in H17. Put a few polygon primitives around, like in this image, and incorporate them into a heightfield system by firstly creating a HeightField node then using a HeightField Project node, which stamps the geometries into the heightfield.
Now we can start to go through the different HeightField nodes and apply them to this simple scene. It's much easier and straightforward to understand the effects of these nodes than using arbitrary and complicated shapes. The master node of the erosion effects is the HeightField Erode, which has been updated in version 17 with new features and optimisations.
04. Get to grips with nodes

We can dive into this node to understand how it works. As it automatically dives into a deeper node, we should step up one level after the dive command. As we can see, there are the three basic erosion nodes at the end of the pipeline, the Thermal, Precipitation and Hydro. It's worth creating these outside of this context with the same order to observe their effects.
The Thermal node simulates the mechanical weathering effects of the surfaces at a basic level. In reality there are different causes that lead to the decomposition and disintegration of rocks: thermal expansion and contraction, frost wedging, pressure-release fracturing (sheeting), salt crystal growth, biological activity, abrasion and so on. These break the rock into smaller and smaller pieces and pile up at the bottom of the inclines.
The Precipitation node creates a water layer and spreads drops on it. These are not intended to be related to raindrops – they seed the simulation and add variations which will make the erosion more uneven.
This water layer is necessary for the Hydro node, which contains the Slump node inside, the most complex lower-level node of the erosion simulation.
05. Master cause and effect
The usual first step of terrain generation – if it is intended to be fully procedural – is to add a random-based pattern onto the blank initial surface. In nature there are arguably no random processes at all, as everything depends on previous events. Thus instead of using the HeightField Noise node, we can set up a more physically plausible massing model using the versatile simulation capabilities of Houdini.
However, the main advantage of heightfields is that we can handle larger landscapes with finer details, compared to other types of geometry. Using simulation nodes makes the memory footprint even larger than these geometries themselves, so we should always take care with how much detail we put in this phase. Later we should add the additional details with heightfields, which otherwise would be too heavy.
06. Use Vellum tectonics
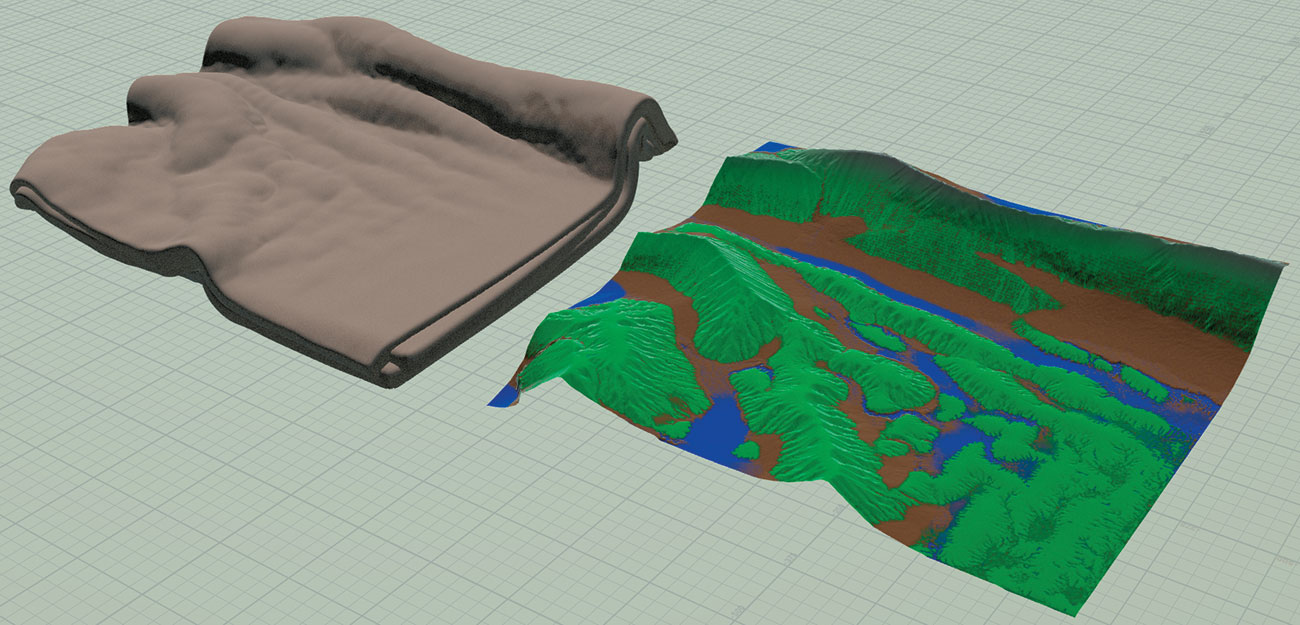
We can actually create this step in the real world using multiple layers of thick cloth. If we put a layer of slightly wet sand or finer grained powder like gypsum on top of it, then start to crush the cloth, we can observe how the top powder layer behaves. I recommend doing practical experiments – even playing with the sand and water on the beach – as it gives us tactile experiences that are unattainable within 3D software.
For similar effects we can use a Vellum cloth simulation in Houdini. In this scene there are three layers of thick cloth geometry on top of each other. Below them there are two polycubes, and each is modulated by a Mountain noise node for uneven surfaces. I animated them with a closing and shearing movement to simulate tectonic plates. They are wired into the static geometry input of the Vellum. I used Vellum Drape instead of the Vellum Solver node for simulation, because it behaves more like the new Erosion node as there is a freeze frame option in it.
In this node the static friction is set to a low value like 0.1; in nature with such scales everything tends to behave fluid and slippery, just very slowly relative to human timescales. However the dynamic friction scales are recommended set to the opposite, well above 1, like 3-4, to get enough friction between the cloth and the tectonic plates, and they can form wrinkles. I used relatively high damping values to overcome exploding behaviours, and the most important thing is to switch on all the plasticity options as they are the 'memory effects' of the cloth simulation: they will keep the wrinkles and prevent them from flattening during the simulation.
I started with one layer of cloth, as it's easier and faster to play with the parameters, but then duplicated them on top of each other with slight rotational differences in order to lessen any grid resolution interferences during the simulation. Using multiple layers makes the simulation more similar to natural processes, as usually there are different rock layers on top of each other. This is also necessary for adding enough thickness to the simulation, as using one cloth with the same thickness can significantly slow down the simulation.
07. Import DEM
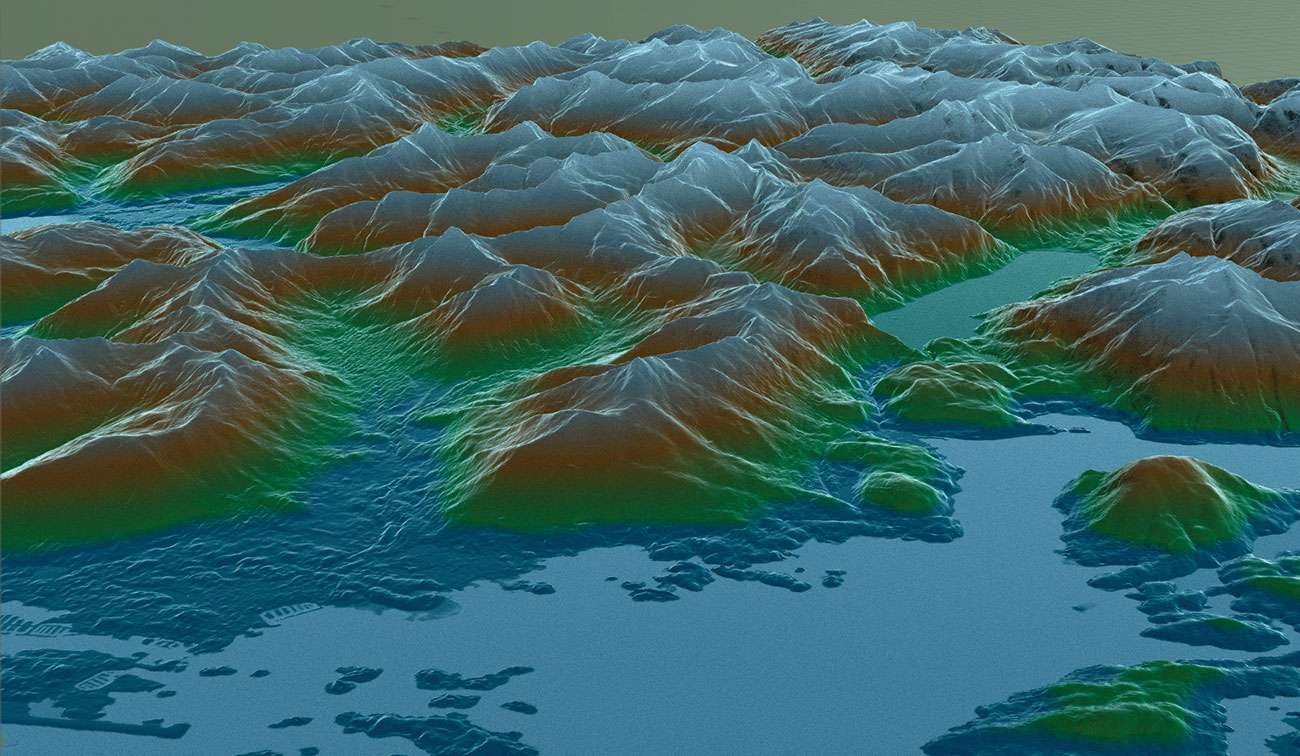
The other way to get a more realistic massing model is to import real-world data. If we have a DEM file, we can directly use the HeightField File for import. With the default settings it will keep the original resolution of the DEM file, which can be huge, so it's recommended to crop an interesting part for experimentation and then use the full area just occasionally. It's a good idea to set real scales here because the simulation nodes will need it.
08. Use the MapBox node
I recommend installing the Game Tools for Houdini, as it has tools that can be useful for terrain work. Maybe the most interesting is the MapBox node which allows us to directly browse the Earth inside Houdini, then we can select a specific area and download the elevation model and the satellite phototexture of it. It has a heightfield output option, so the entire planet is at our hands.
09. Use the erosion node
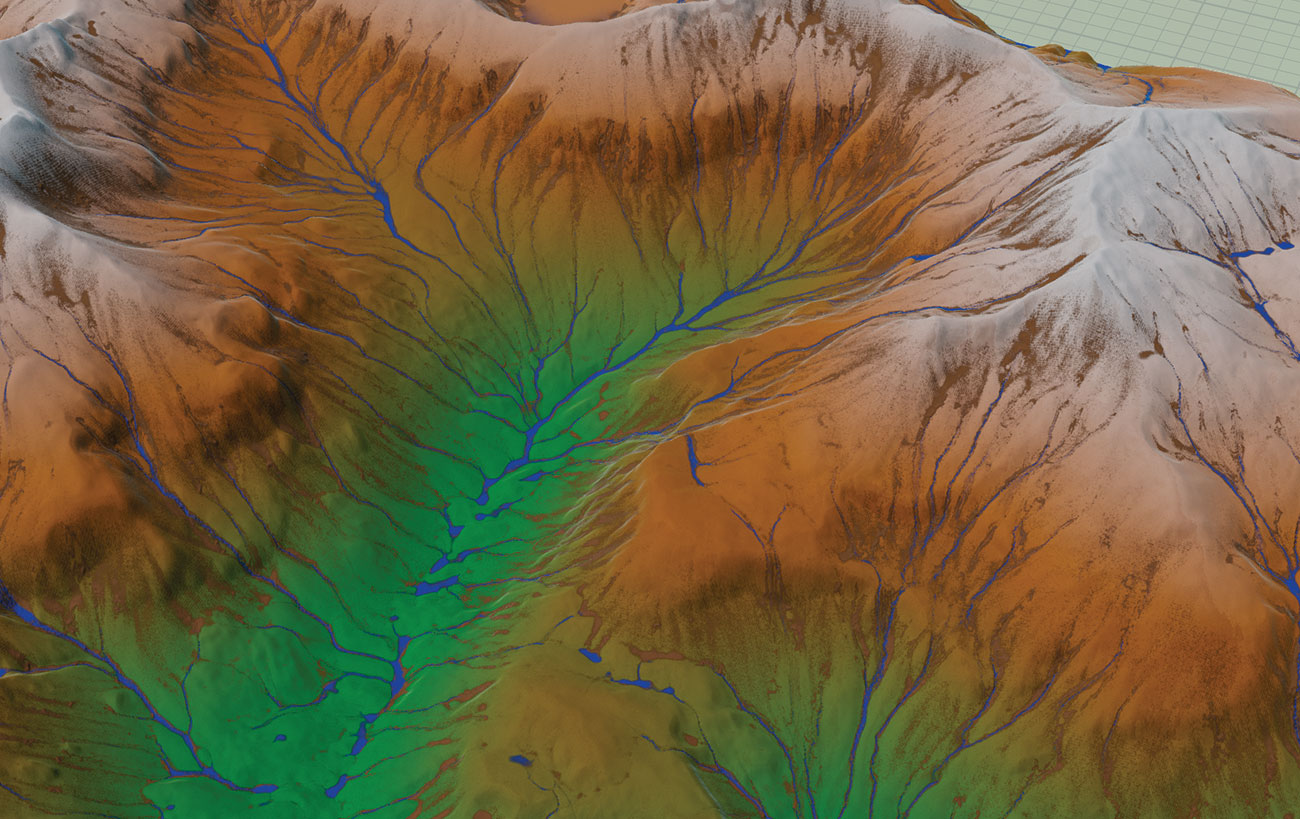
Let's use the Erode node on a real mountain. This elevation data is from Alaska, around the Blue Lake reservoir which has a nice mountainous landscape. As we can see, by just using the default settings we can achieve quite realistic results – they have improved this node in many aspects. There is a new Freeze at Frame switch, so after we are satisfied with the result we can tick this, but it's also good for trying out the effects of the different parameters interactively. Crop a smaller but relevant part of the terrain and tick this, then set it to a low number like 5 and play with the parameters. You can see that it updates more or less interactively, however some simulations inside do not update well, so you should hit the Reset Simulation every time for full feedback.
Describing the new features of this node is far beyond the limits of this tutorial, so I rather recommend the second part of the official H17 Terrain masterclass video (above), which is about the new features of the terrain tools.
10. Explore the Bedrock tab

In the documentation there is still a lack of information about the Bedrock tab, however it's worth using this feature if the goal is to include some kind of 3D rock layer structure in the simulation. We can inject a secondary heightfield in the second input of the Erode node, which defines a 'prehistoric' structure of the landscape in this case. We can achieve strata effects easily by switching on Adjust Erodability by Strata.
The Strata Depth defines the depth range of the ramp editor's horizontal axis, relative to the bedrock layer's height. A negative value inverts the whole thing and puts the strata above this layer. As you can see in this screenshot I used a Distort by Noise node to get the surfaces of the strata uneven, and also rotated the geometry, so it cuts the landscape at a shallow slope angle. In the ramp editor we can add the strata by defining the relative hardness of the bedrock in the function of depth, each with different erodability bands. Switching off Clamp at Strata Bounds loops this pattern, so regardless of the erosion depth we will get repetitive vertical patterns after reaching the end of the ramp.
The only disappointing side of this feature is the limitation of the heightfields, as if we observe these phenomena in reality, especially on bold cliffs, the strata have strong relief patterns that we can't achieve with heightfields. However, converting these parts to polygon or VDB SDF will allow us to add these details.
The 'Adjust Height by Bedrock Change' switch should remain off for this kind of effect, but otherwise it allows us to use an animated bedrock layer which updates the input for this node at every frame.
11. Distort by layer
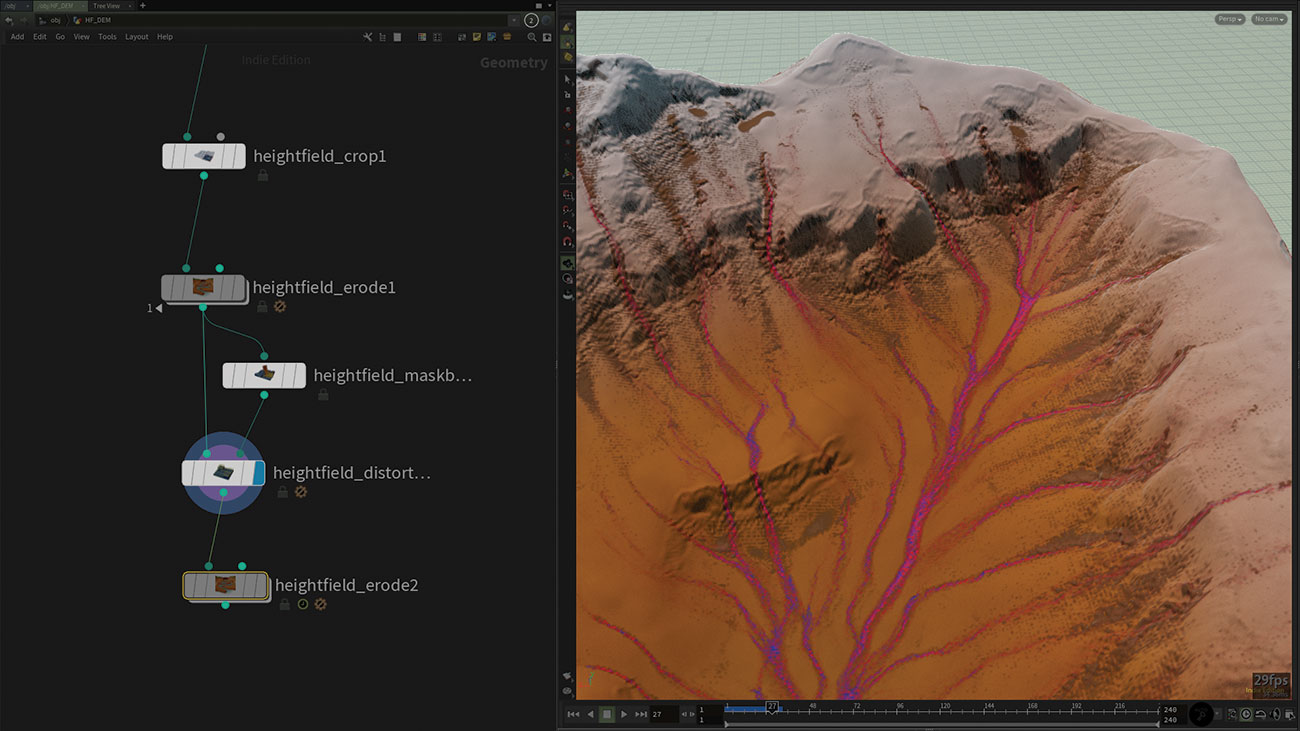
Finally let's talk about this node, as it is completely new in H17. It has two inputs. The first input is usual, for the geometry itself. The second can contain the direction layer for the distortion, similar to how these kinds of nodes work in a node-based comp software.
This article was originally published in issue 243 of 3D World, the world's best-selling magazine for CG artists. Buy issue 243 here or subscribe to 3D World here.
Related articles:

Thank you for reading 5 articles this month* Join now for unlimited access
Enjoy your first month for just £1 / $1 / €1
*Read 5 free articles per month without a subscription

Join now for unlimited access
Try first month for just £1 / $1 / €1
