Build an AI-powered chatbot
Use Google's powerful machine learning to construct a natural language chatbot.

Artificial Intelligence (AI) enables us to create new ways of looking at existing problems, from rethinking environmental strategies to how we learn. Your projects – whether apps, web sites or games – can leverage AI to make them more engaging, easier to use and have more valuable results. One such method involves creating a natural-language chatbot to help users interact with your site.
To create your first chatbot, we’ll use Google’s new Dialogflow toolset. It harnesses powerful machine learning as well as speech-to-text. It can be incorporated right into your website as a widget or customised to your needs.
If you're in the process of planning a new site, you'll need advice on everything from the ideal website builder to which web hosting service to choose, so check out our guides. Creating a new design system? Save it securely in cloud storage so it's accessible to your whole team. Now onto how to create a chatbot...
01. Create an account
Go to dialogflow.com and create your account. Sign in and agree to the permissions to enable Dialogflow to have access to your account.
02. Create an agent
Dialogflow uses the term ‘agent’ to represent instances of your AI. Think of the agent as the virtual intelligence you are creating. You could have many agents working for you, each with its own personality and purpose.
Click on the ‘Create Agent’ button and enter a name for your agent: ‘HAL 9000’.
03. Create an intent
First, you need to create an Intent. We are defining the ‘intention’ of the user’s inputs. Click ‘Create Intent’ and name it ‘open doors’. Press ‘Save’.
Get the Creative Bloq Newsletter
Daily design news, reviews, how-tos and more, as picked by the editors.
04. Train the AI for this intent

Train the AI for this intent by providing phrases that a user might use. The NLP AI will use these and derived variations to train the agent. Add the following training phrases in the ‘Training phrases’ window and add as many of your own as you like:
- ‘Open the Pod bay doors, Hal.’
- ‘Open the doors.’
- ‘Let me in, Hal!’
05. Add responses
Next, you need to add some responses that the agent will respond with. You enter these in the ‘Responses’ window. Try out some like this:
- ‘I’m afraid I can’t do that, Dave.’
- ‘I can’t do that right now.’
Then press ‘Add Responses’ and ‘Save’ up at the top again. You’ll see notifications that the agent is being trained and then it is ready.
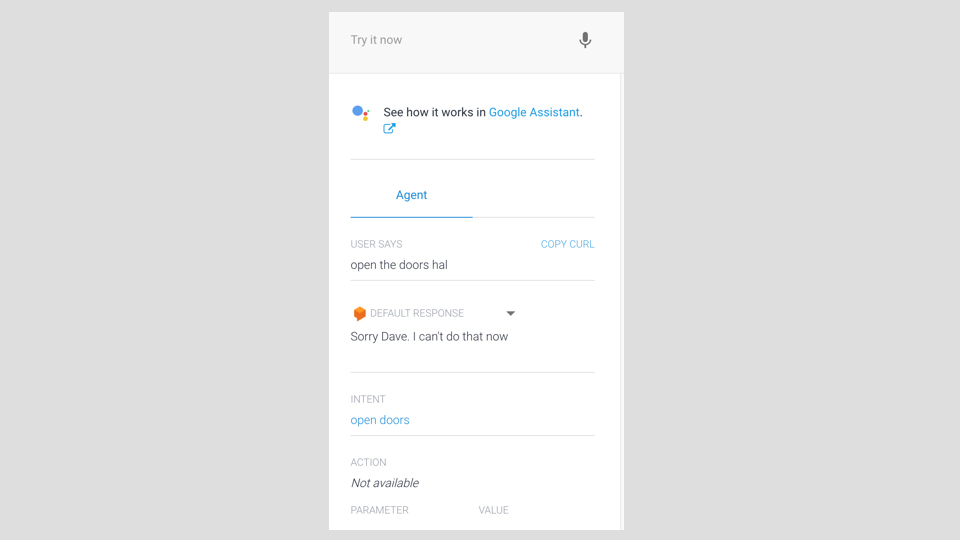
06. Test out the chatbot
On the right-hand side of the screen is a testing tool. The chatbot will use Google’s speech-to-text service to translate your voice into text if you try that out. You should see the results of your request and the response the AI agent selected. Very cool!
07. Create and use an entity
Entities are concepts that can be defined and reused in the agent’s responses as variables. Let’s train the AI to understand when a user is expressing an emotion then use that in its response to the user.
On the left-hand menu, click ‘Entities’. Type ‘emotion’ for the name of your new entity. Keep ‘Define synonyms’ checked. Click in the table below and type ‘angry’ as the first emotion. Then click to the right of that and add synonyms such as ‘mad’, ‘upset’, and so on. Then add another entry for ‘scared’ and use synonyms ‘afraid,’ ‘terrified’, etc., that you like. Press ‘Save’ when done.
This has now trained the Agent to understand that ‘angry’ and ‘scared’ are emotions a user may communicate. All those synonyms are variations that might occur. The AI will generate some as well.
08. Create a new intent
Now we are going to create a new intent to use the ‘emotion’ entity we have created. Call this intent ‘emotions’ and click ‘Save’.
Next add new training phrases such as ‘you’re scaring me’, ‘you’re making me mad’, and ‘I’m very angry,’ using variations of angry and scared keywords. This will train the agent to understand the various ways that a user may phrase this emotional statement.
You’ll notice the system highlights the scared and angry words for you. It’s already flagging these as entities. It has also added an entry into the ‘Actions and parameters’ window. This enables you to use these entities in your responses, too.
09. Add a response using the new ‘emotion’ entity
In the Responses window, add new responses that use this new entity. Note the ‘$’ to denote the ‘$emotion’ Entity. Try adding these responses:
- ‘I am sorry you are feeling $emotion, Dave.’
- ‘Feeling $emotion is a human response, Dave.’
Click ‘Add Responses’ and press the ‘Save’ button at the top of the screen to save the entire Intent.
10. Test your chatbot again
Try saying or typing the following phrases in the testing tool.
- ‘You’re making me very angry Hal.’
- ‘You’re freaking me out.‘
Notice how it responded using ‘scared’ with the second one? It used our synonym, ‘freaked out’ to know that we meant scared. Very cool.
Feel free to play around with this as well as add some more intents and responses that you like and then we’ll add this to a web page.
11. Activate web integration

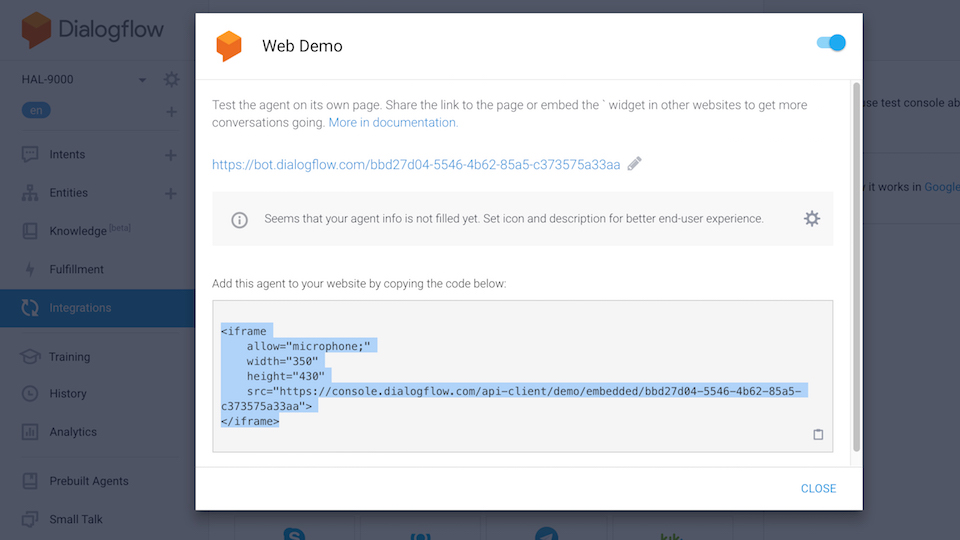
To add it to your web page, click ‘Integrations’ on the left-hand menu. Then click on the ‘Web Demo’ box to turn that option on.
A pop-up will appear that shows you a direct link so you can use to test your integration out right away. It will also display a code snippet that you can use to drop the widget into your own web site. Copy that snippet to the clipboard so you can paste it into your site.
12. Create a basic web page and add the snippet
Create a basic HMTL page and include that code snippet next. Try out the following code and upload it to your server or run it on your local server. Replace the snippet below with the one you copied from your Dialogflow agent:
<!DOCTYPE html>
<html>
<head>
	<title>NET - AI Chatbot</title>
</head>
<body>
	<iframe
    allow=”microphone;” width=”350”height=”430” src=”https://console.dialogflow.com/api-client/demo/embedded/bbd27d04-5546-4b62-85a5-c373575a33aa”>
</iframe>
</body>
</html>
This article was originally published in issue 312 of net, the world's best-selling magazine for web designers and developers. Buy issue 312 or subscribe to net.
Keen to learn more about how you can bring AI to your sites and apps?

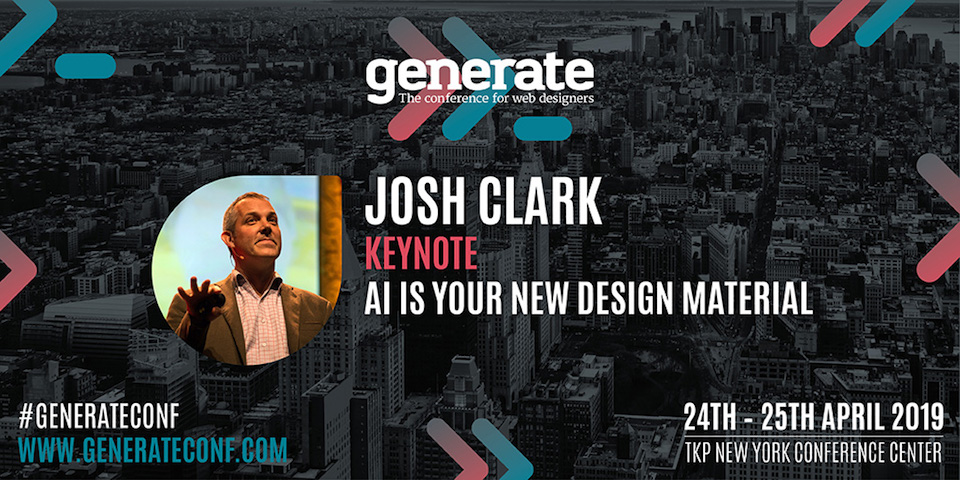
Eager to learn more about how you can bring AI into your designs? Josh Clark, founder of Big Medium, will be giving his keynote 'AI is your New Design Material' at Generate New York on April 25, in which he will teach you to use machine-generated content, insight and interaction as a design material in your everyday work.
Generate New York runs from April 24-25 – get your tickets now!
Related articles:

Thank you for reading 5 articles this month* Join now for unlimited access
Enjoy your first month for just £1 / $1 / €1
*Read 5 free articles per month without a subscription

Join now for unlimited access
Try first month for just £1 / $1 / €1

Richard is an award-winning interactive technologist, designer and developer. He specialises in creating interactive worlds with science-fiction themes, exploring the synergy between human and machine. He has also written regular articles for Net Magazine, and Web Designer Magazine on a range of exciting topics across the world of tech, including artificial intelligence, VFX, 3D and more.
