How to bring a 2D character to life in VR
Use Oculus Medium to create a character in VR.
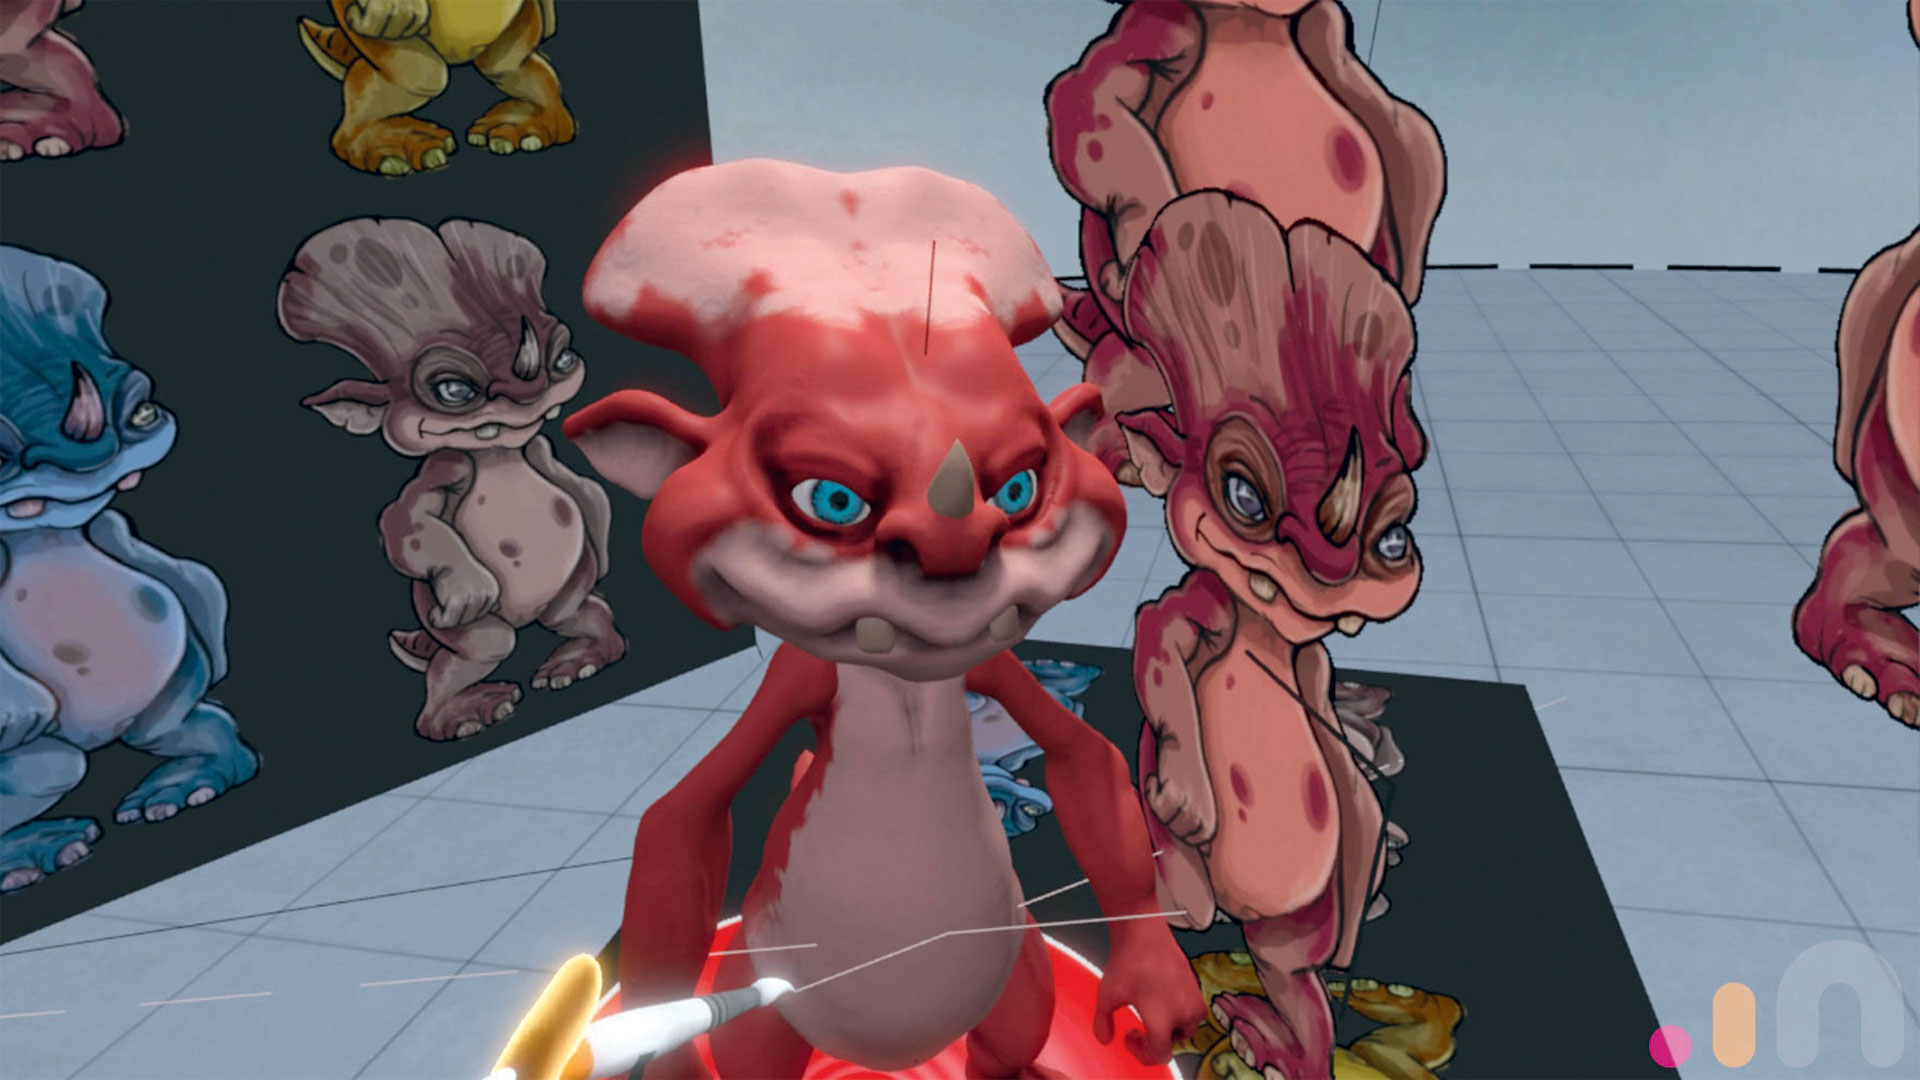
If you follow trends, it's hard to miss that VR is going through another revival. It's happened before, but this time it's slightly different because we have more access to powerful computers and graphics cards at home and in our studios.
Companies like Facebook (Oculus) and HTC (Vive) have made VR hardware such as the Oculus Rift affordable – presuming you already own a high-end gaming PC. It didn't take long for creatives to start asking what's in it for them, and the call was answered with programs like Google Tilt Brush, Oculus Quill, Masterpiece VR, and the one we'll be using today: Oculus Medium.
This article will show how to work up a 3D character design from an existing character sketch. You can, of course, work without the sketches and just free-form sculpt your ideas. Also see the video below to watch the process.
Oculus Medium places you into an environment where you can use the touch controllers to spray clay into the air in front of you and then manipulate it into the shapes you need. There's a layering system so you can break the character down into poseable sections, and you can even take it to a painted, finished concept.
The tool palette has a range of familiar tools like Move, Inflate, Smooth, Paint, Smudge, Cut and the basic Clay Adding tool. You can also make a shape, turn that into a stamp and then use that as your tool.
01. Use reference sketches
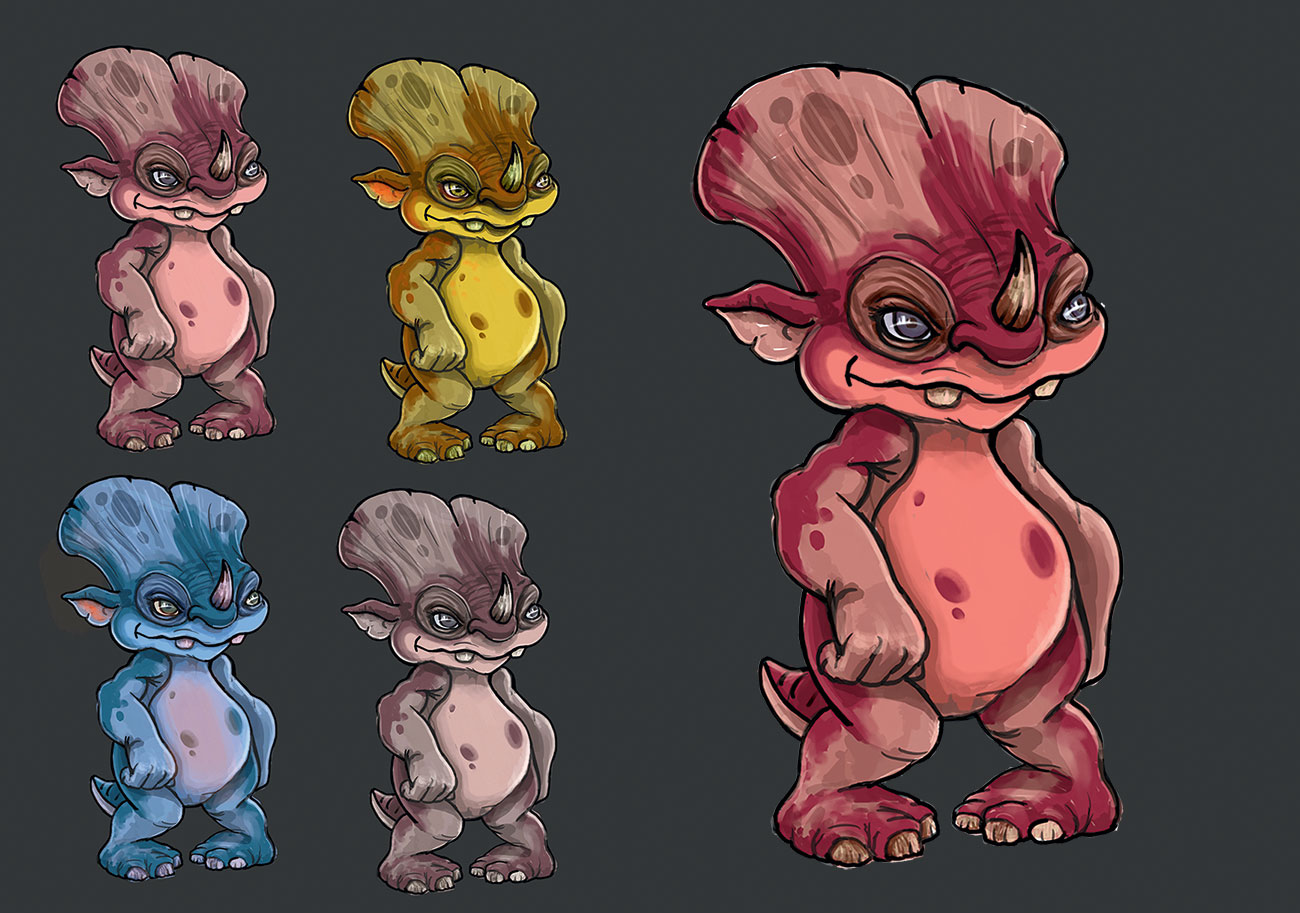
I always try to use good reference in my work. For this workshop I'm using a character sketch of a little creature I've called the Triplop. I sketch the initial design on my iPad, then produce a few different versions to see what works well as a design. I ink it, colour it and then save out a few PNG versions.
02. Bring the references into Medium
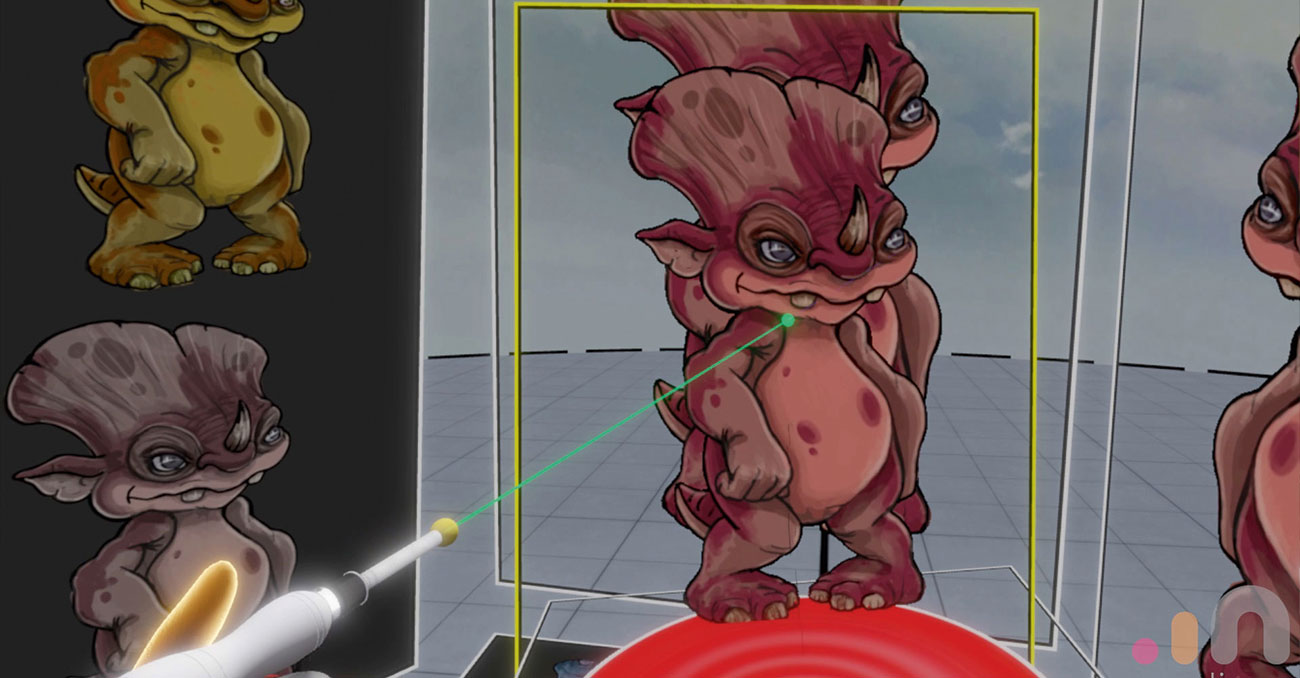
Save the reference images to your Documents Folder (Look for the _import folder). Import the images from the Reference panel to Medium. It's the third button along when you pull down on the thumb stick on the Support Hand. Select the images you need, then in the scene click each one and move it into place. Use the Check button and attach it to your hand.
Get the Creative Bloq Newsletter
Daily design news, reviews, how-tos and more, as picked by the editors.
03. Work with the Mirror feature turned on
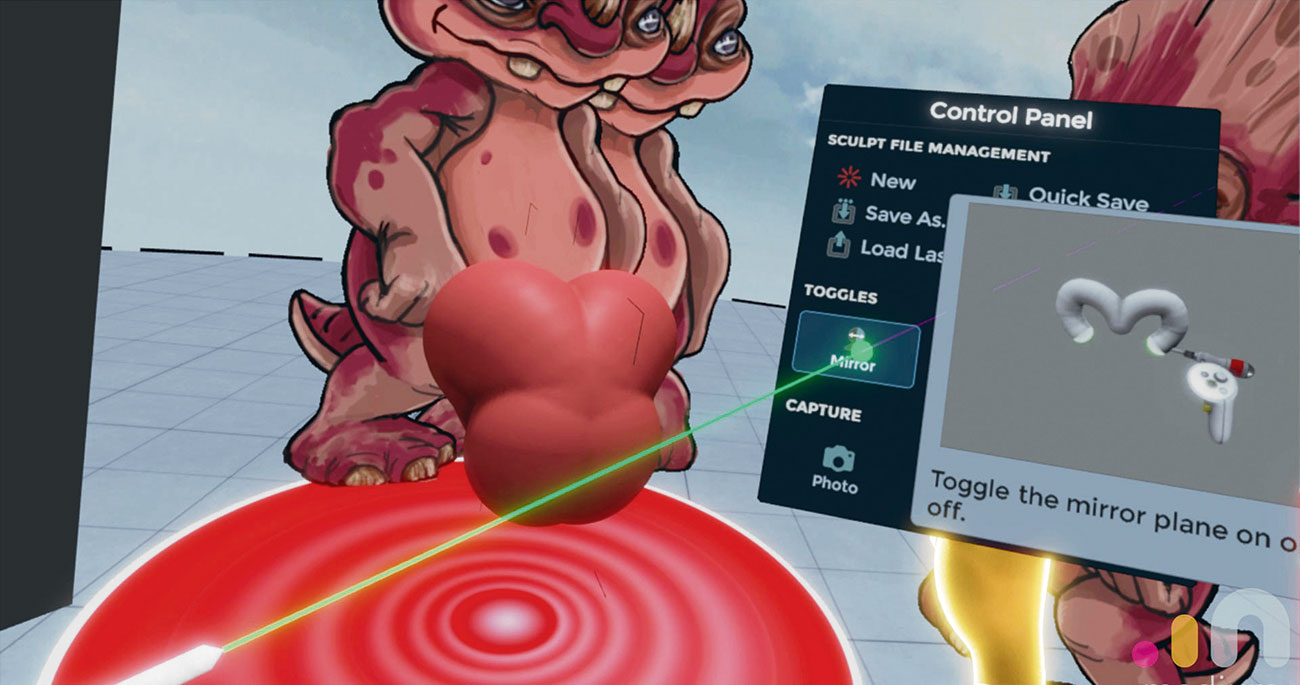
To work symmetrically, go into the Control Panel (Yellow Button, Support hand) and choose Mirror. Every action you perform now will be mirrored across the work centre, including adding clay, painting, moving clay around and any deleting that needs to happen. Later on we'll turn Mirror off and place my Triplop into a range of more dynamic poses using the Move tool.
04. Begin defining the body shape
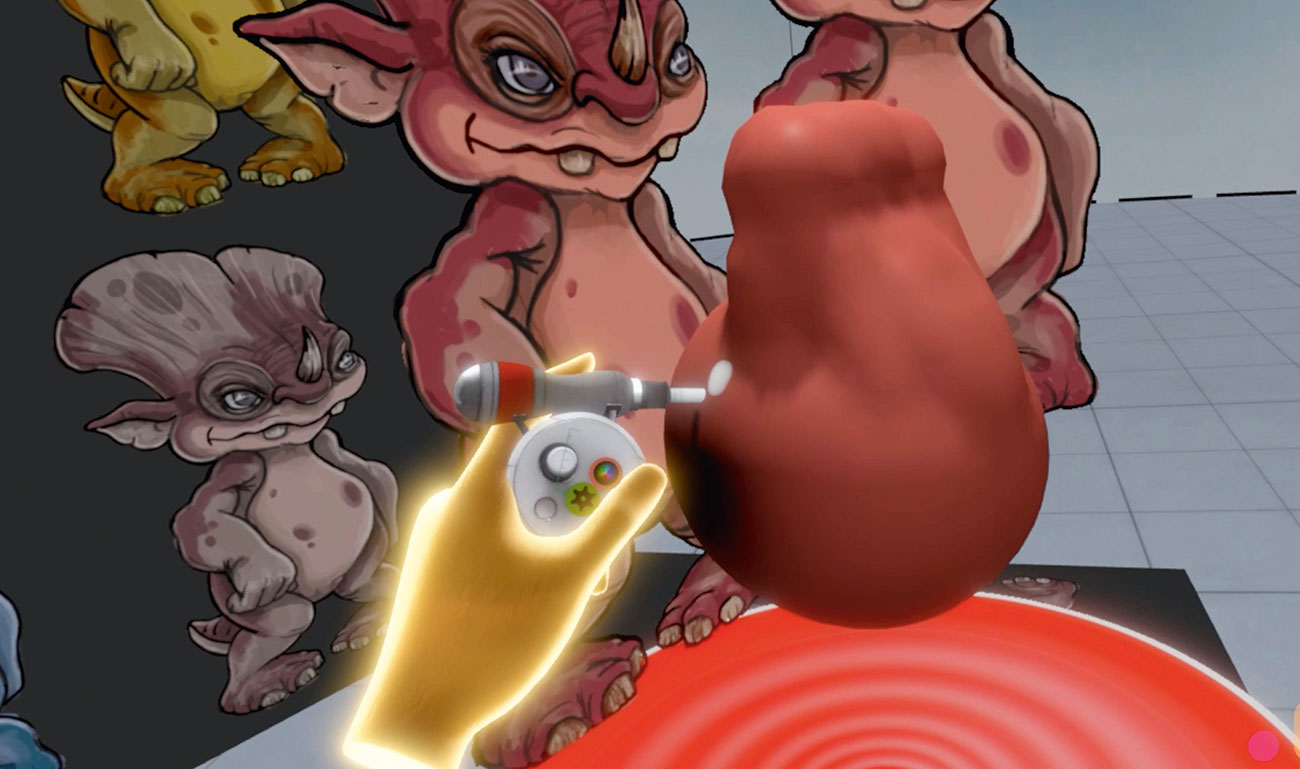
The character will be built on a few different layers, enabling you to pose it later. The default tool in Medium is the Clay tool and you add clay by pressing the trigger on the Tool hand (your dominant hand). Create a belly and chest area going up to the shoulders. Add in a little tail.
05. Introduce legs
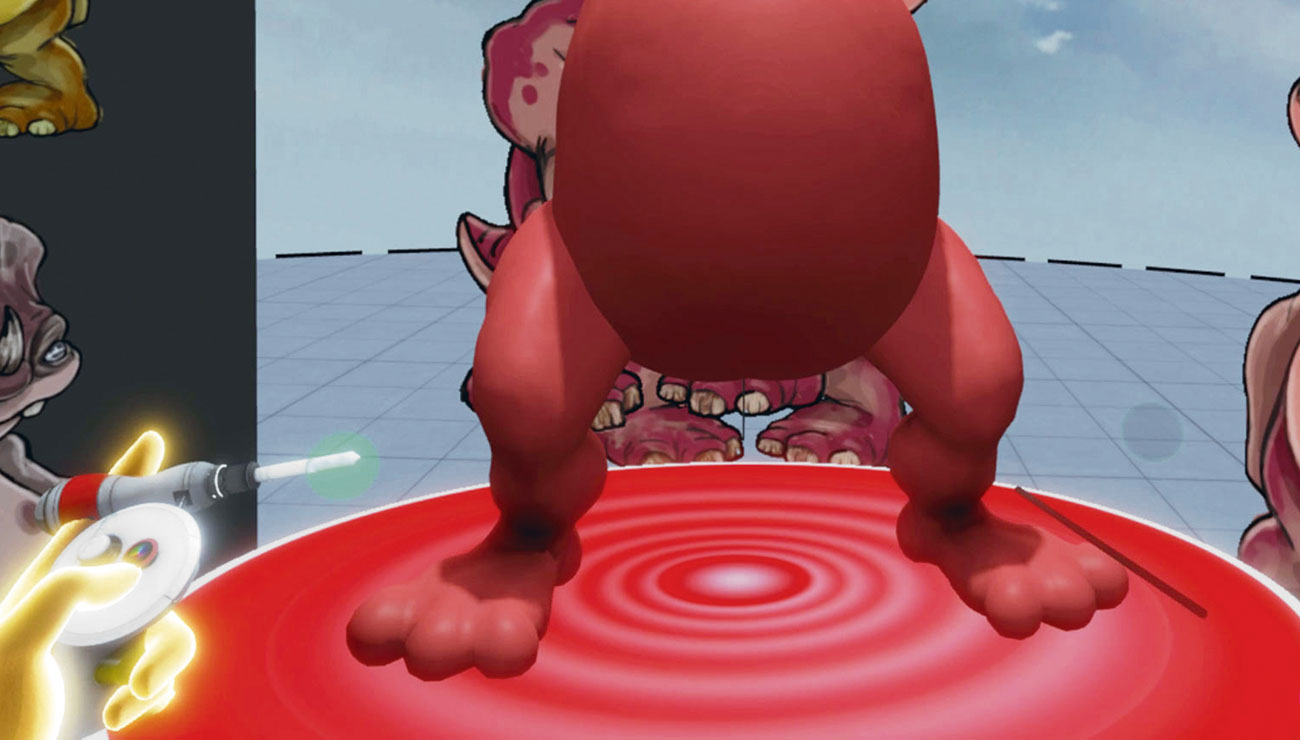
Make a new layer that we can use for the legs. The layer system enables you to adjust parts separately, flip models, and increase and decrease the details level. Using the basic Clay tool, lay down clay for the thigh, calf and a basic foot. Hold the trigger on the support hand to access the Smooth tool and level out the surface as needed.
06. Add arms and hands
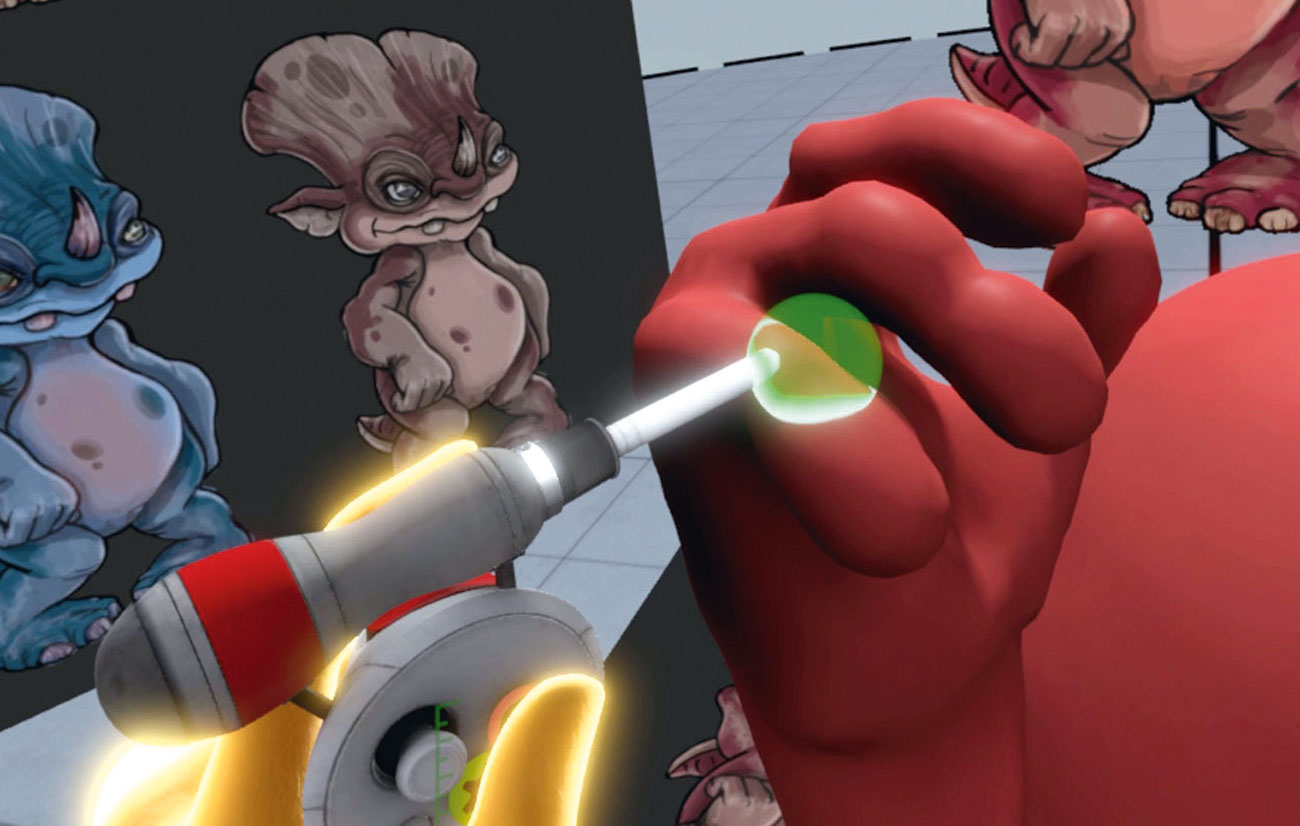
Add a new layer for the arms and add clay down from the shoulder to form the biceps, the elbow and hand. Then create each finger, joint by joint. Using the Smooth tool to get the volumes correct and then switch to the Move tool to tweak the form (push forward on the support hand to access the Tool palette).
07. Lay the foundation of the head component
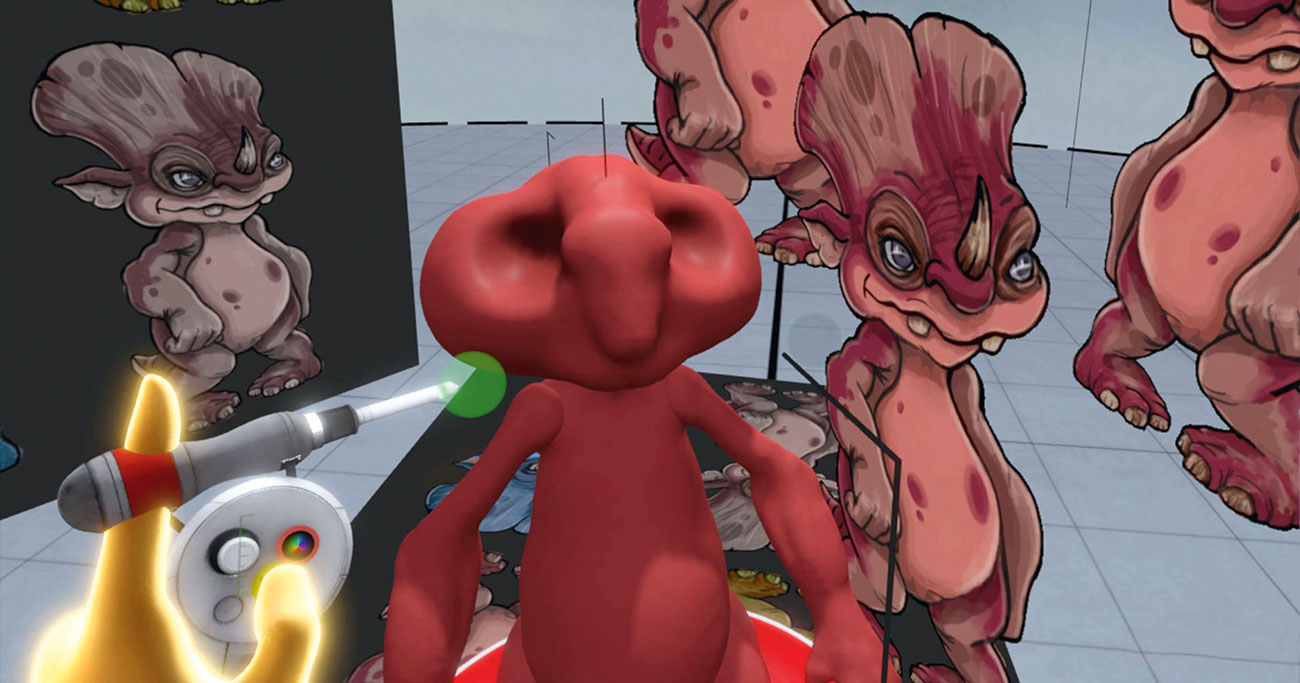
Add a new layer and call it 'Head'. Use the Clay tool to lay down the ball of the head. Add volume for the cheeks, the frill at the back, the beak. Double-tap the gear icon on your Tool Hand and the clay turns red. Make two eye sockets.
08. Refine the shape of the creature's head
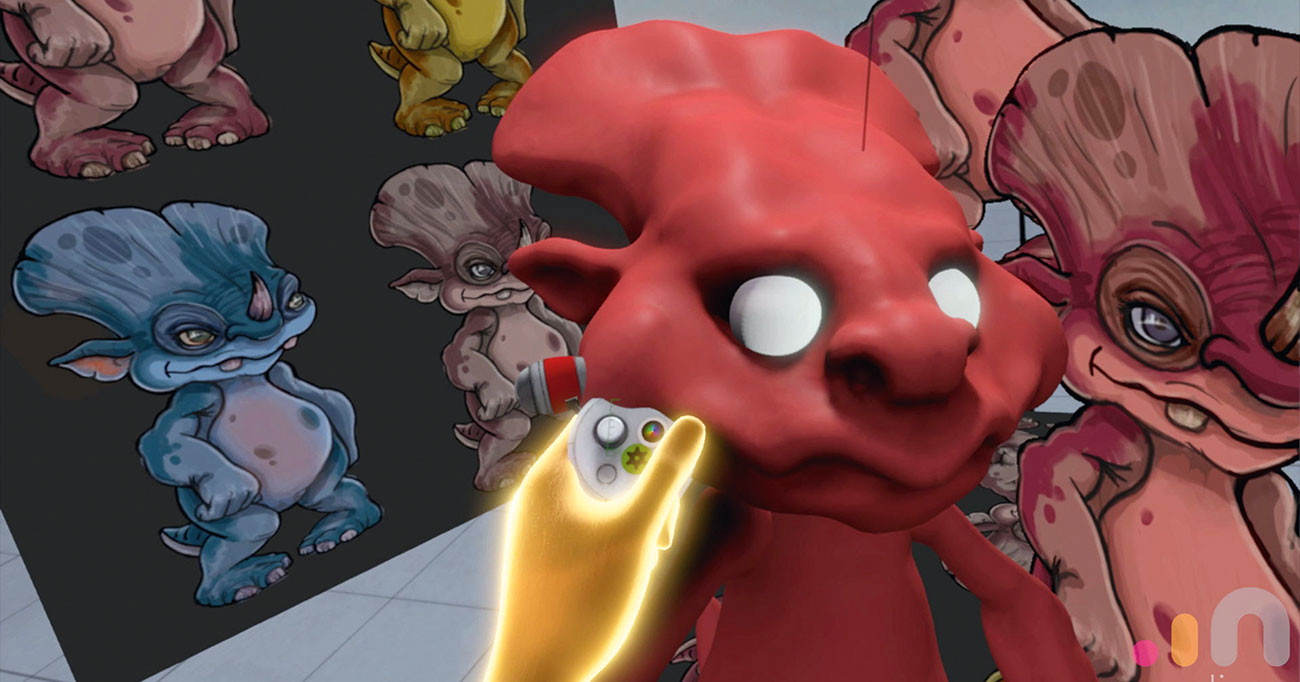
The most important part of the character is the head and facial characteristics, so I spend the most time on this section. Using the Smooth, Clay and Move tools, I make sure that the head reads from all angles and that the mouth and eyes look appealing and friendly. Don't worry about the eye shape until we add the eyes, because it's always easier once a sphere is in the socket.
09. Change the eye material
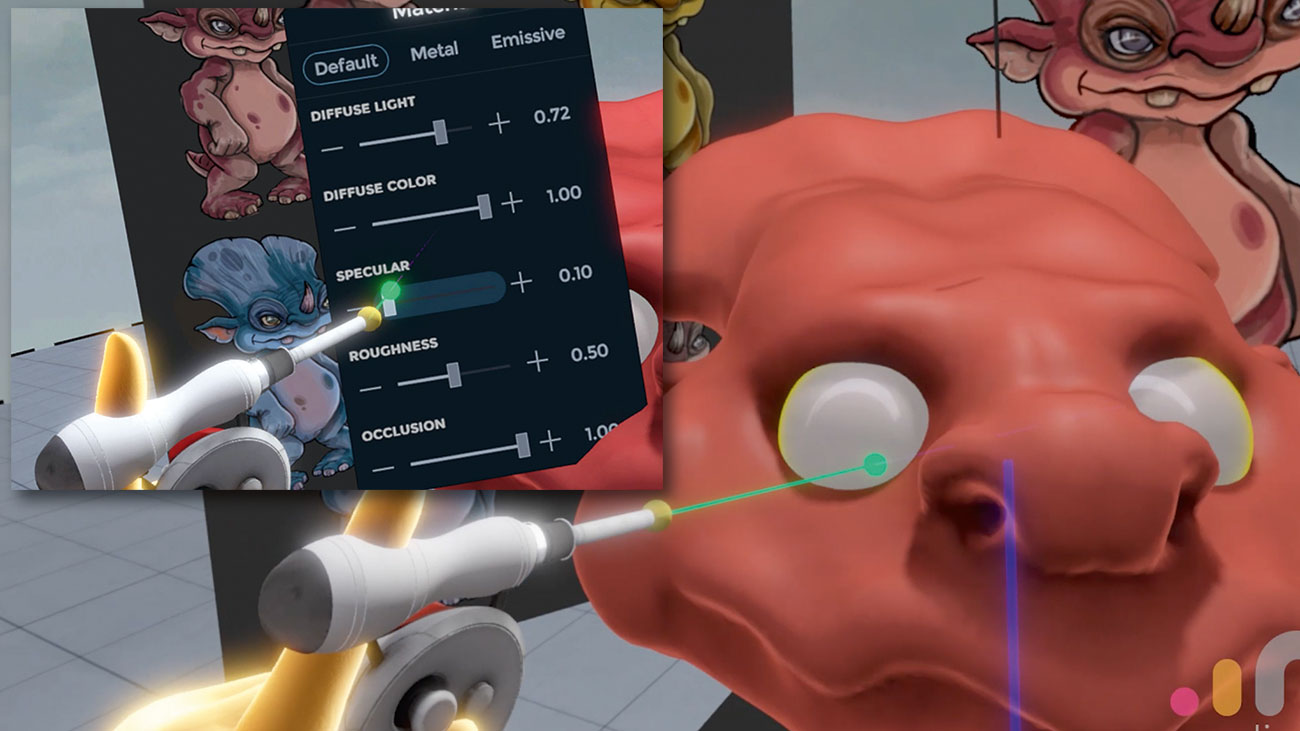
Create a layer for the eyes and use the gear settings icon to change the material. Try metal if that suits you, but the easiest way is to simply increase the specularity of the material to give a glossy effect. Then reduce the occlusion to reduce shadows. Turn on Mirroring and use the Clay tool to add simple spheres for eyes.
10. Give the creature bright blue eyes
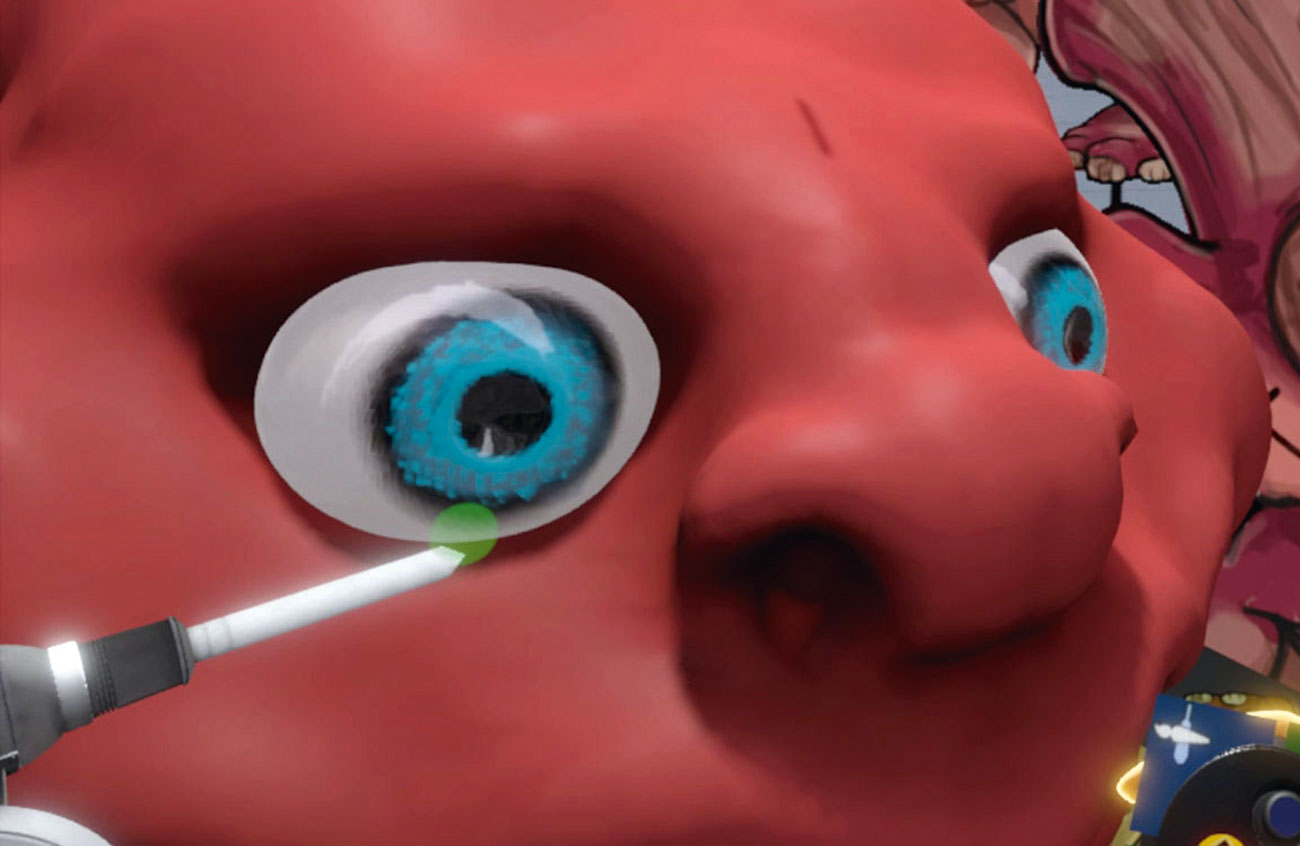
Now change to the Paint tool and paint with blue and black to create the pupil and iris. You can change your Clay settings to 'single' rather than continuous; this enables you to stamp down a single sphere rather than spraying constantly. The size of the sphere depends on the size of the brush that you start with.
11. Create teeth and horns
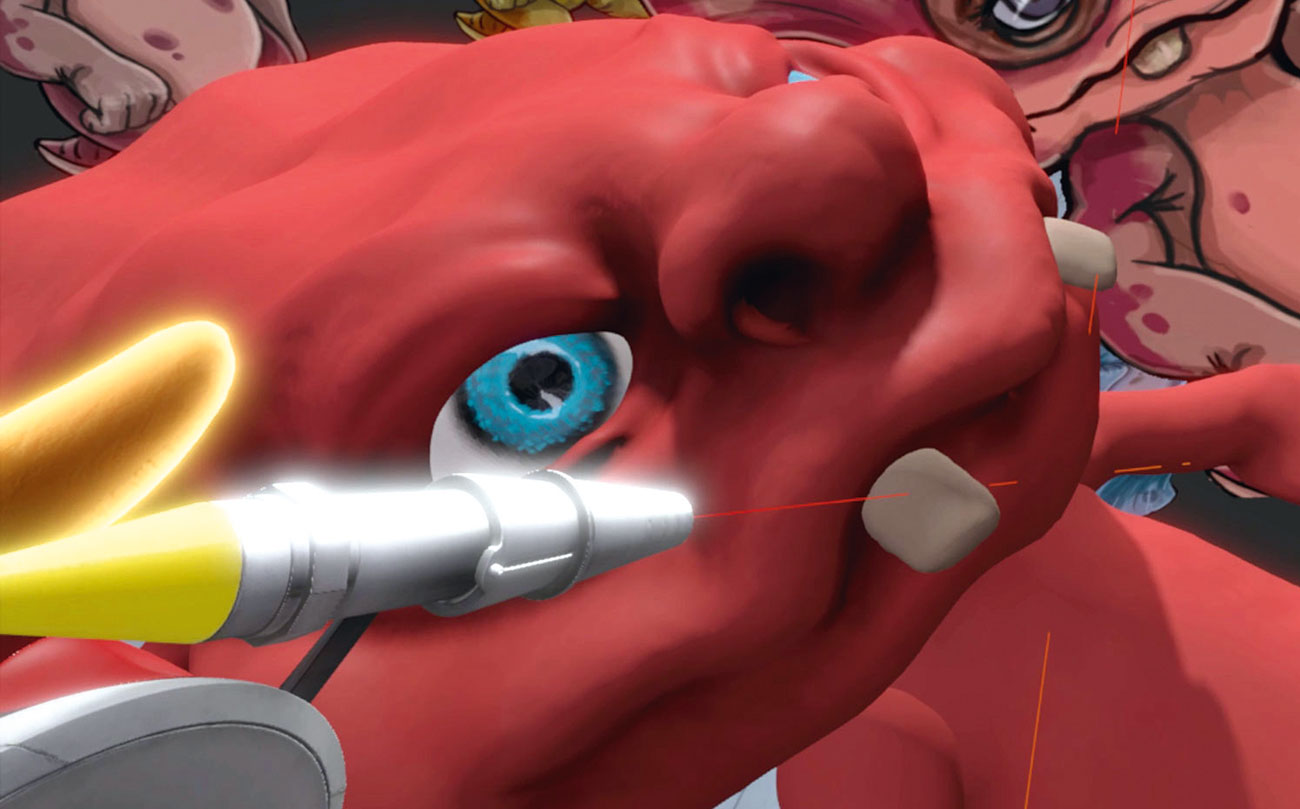
Add a new layer for the teeth and horns. To make the teeth, use a basic Cube tool (click the gear icon on the Tool hand). Draw it onto the character, ensuring it intersects with the upper jaw. Use the Smooth tool to improve the shape and the Move tool if necessary. The horn can be made by spraying the Sphere tool in an arc.
12. Paint the base coat
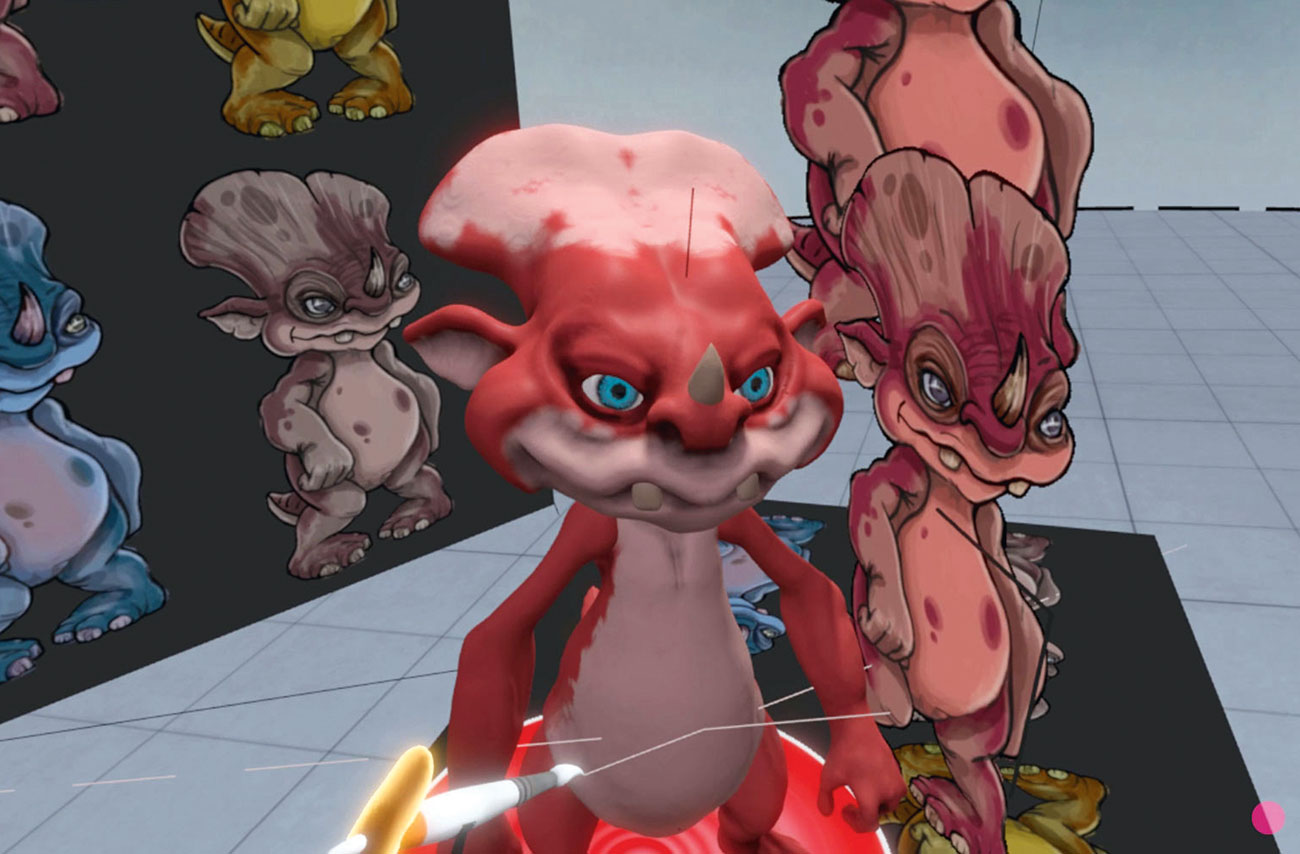
To lay down the base coat, change to the Painting tool and pick a relevant colour. Apply that to all skin areas. Make the colour a little darker and then paint the recessed areas. Choose a few different colours to match your design and gradually build up the overall look that you're after.
13. Detail the surface
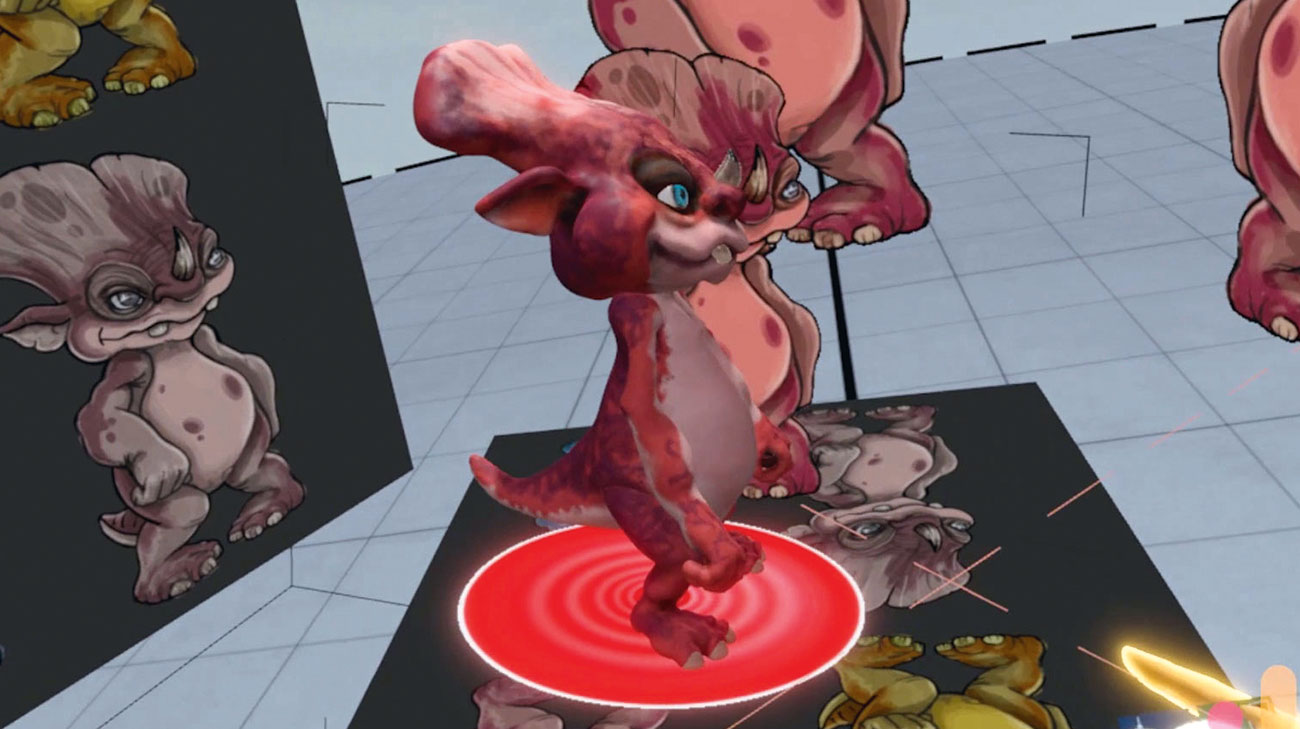
To add smaller details make the brush very small, then hold your hand quite far back and 'pepper' the surface to generate a mottled effect. Add lighter and darker areas to give good contrast to the skin surface. Check there are no flat-looking areas; if you find some, add in some small details like wrinkles or light patches.
14. Final passes and poses
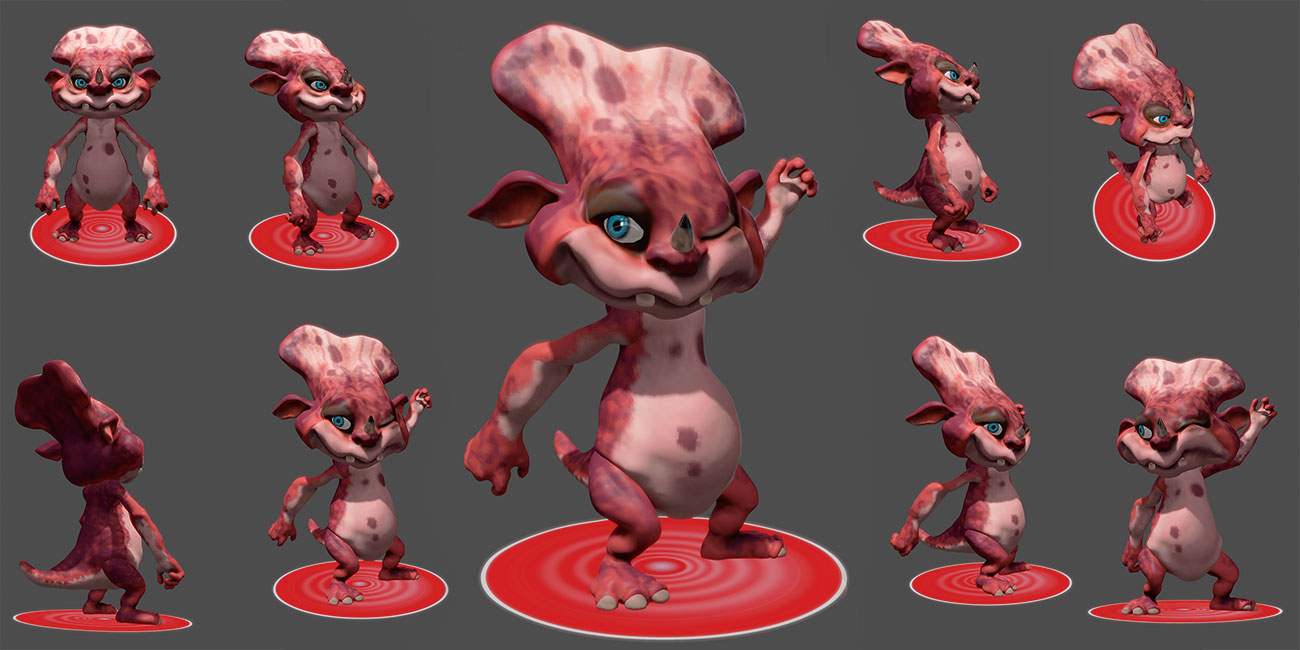
To pose the model, duplicate each layer (not the head) and delete either one side or the other. That way you'll end up with two legs, two arms and so on. Now by selecting each individual part you can move the parts around to achieve dynamic poses. If you need to go more extreme, use the Move tool set to a large brush.
This article was originally published in issue 162 of ImagineFX, the world's best-selling magazine for digital artists. Buy issue 162 here or subscribe to ImagineFX here.
Related articles:

Thank you for reading 5 articles this month* Join now for unlimited access
Enjoy your first month for just £1 / $1 / €1
*Read 5 free articles per month without a subscription

Join now for unlimited access
Try first month for just £1 / $1 / €1
Glen runs SouthernGFX, a small Cheshire-based studio specialising in character and creature design, which creates assets for TV and film. Clients include SKY, Wacom and Oculus Medium and the studio has an impressive project list that features 3D models for Game of Thrones' house sigils. He's been using and training ZBrush for over 15 years and is a Wacom Ambassador for the UK and Ireland.
