Add vibrancy to your oil paintings with these top tips
Use thin layers to get bright colours in your oil paintings.
Kruijt uses linseed oil as a medium, which has the benefit of drying within days. When working in layers, it means you don't have to wait for weeks. She uses synthetic brushes; Round for details, Flat to block areas and a Fan brush to soften edges.
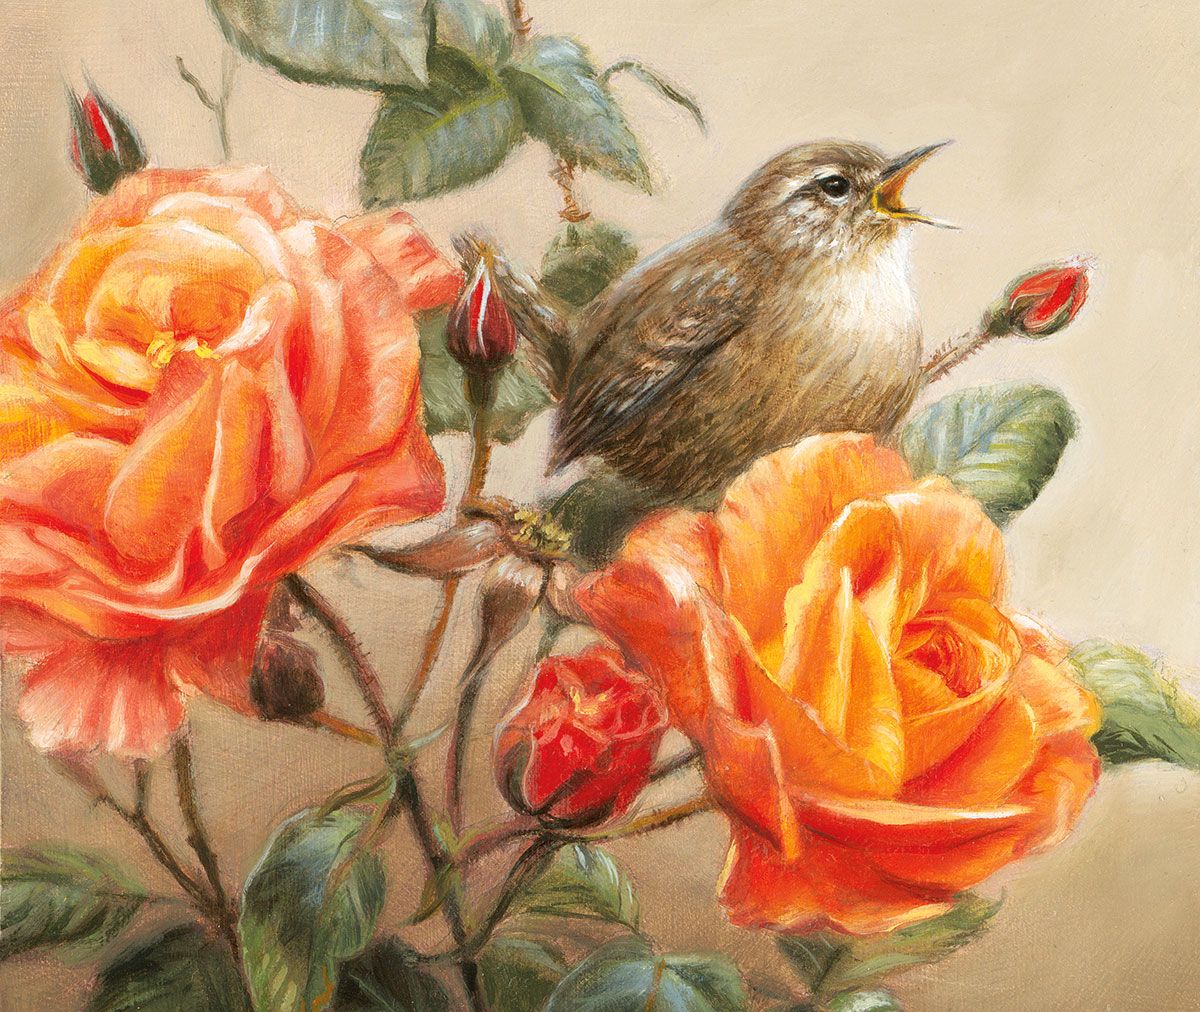
Drawing animals is one thing – but what about birds, or flowers? Painting in oils means you can capture bright colours by gradually building the painting up in multiple layers. This technique is perfect for painting sunny roses. was inspired to create this image after seeing a gorgeous wren sitting in my garden, its song lighting up the early morning. My roses weren't in bloom yet, but this magic moment inspired me to design a painting depicting them.
I always start the painting process by sketching ideas. I place various elements together to create my personal unique designs. I doodle compositions and choice of colour.
When I've found a basic composition that I like, it is only then that I start looking for reference materials. Not the other way around. This way the designs stem from the heart, from a memory or inspired idea.
I chose this wren from my own photo database I've created over the years. I always compare multiple birds, to learn their physical differences. Then I went to buy the perfect roses! Before you start, make sure you've got the best oil paint supplies at the ready. All set? Off we go...
01. Start drawing
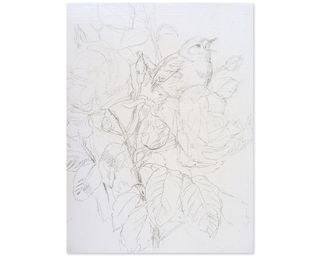
This is when I get excited, because my preliminary sketch is reshaped into a detailed drawing, using an H pencil. I like to keep my pencil drawing visible as long as possible when painting in thin layers. I like the 'feel' of sketchlines, so I don't wipe them away. I fix this underdrawing with pastel spray, then let it dry for a day. Something missing? Try this list of the best art supplies.
02. Apply the midtone
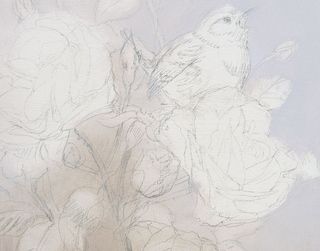
Painting bright colours works best on a white surface (you'll need the best oil paint canvas). Then they become almost iridescent, which can make it difficult to keep the correct values in the whole painting. I always use three values: light, middle and dark. I paint the background first, blocking in with a 'middle' value greyish purple, later adding more subtle values.
03. Start introducing the bright colours
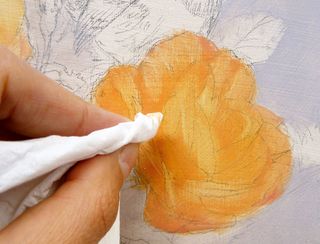
To work more efficiently, it helps me to limit my palette, having the 'right' colours ready to go – choose from the best oil paints around. I mix three values of orange colours, three browns and greens. I paint the first layer of orange, with a mixture of Quinacridone Red and Lemon Yellow. I use a cloth to wipe away the lighter parts. I don't use white – it makes bright colours opaque.
Get the Creative Bloq Newsletter
Daily design news, reviews, how-tos and more, as picked by the editors.
04. Add shadows
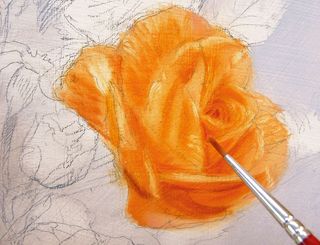
With dark orange, I paint the deepest shadows. To mix a darker orange I use some brown and more Quinacridone Red. With a clean brush I lift out some highlight lines and I blend sharp edges of the shadows with a clean Fan brush. Hard lines or contours make a subject look flat. To prevent that, think in bigger shapes of colour and then soften the outer edges.
05. Basic layer of the wren
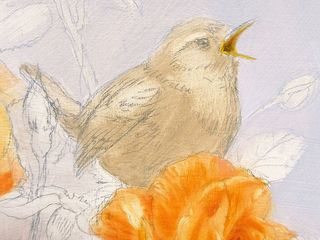
Now using a middle value brown for the wren (a mixture of Burnt Umber and a touch of Ultramarine Blue) I repeat the process used on the rose. A little bit of white makes the colour more opaque. With a cloth, I wipe out the highlights, making sure I follow the round shape.
06. Anatomy and shadows
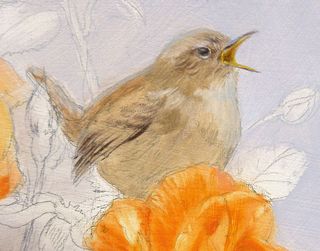
In this stage I start painting the shadows under the wing, (darkest value) and feathers over its body. The plumage has tiny stripes on its wings, tail and belly. The darker lines next to its eyes are shadows between the feathers that are standing out. Always make the effort to consult lots of reference images to confirm that you have the anatomy correct. This has to dry for a few days.
07. Fun with highlights
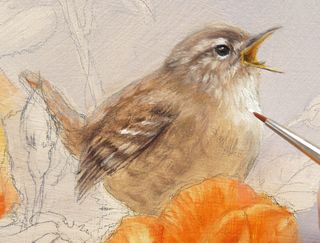
Another great stage is adding the highlights! I apply a layer of medium all over the dry painting, before wiping it off again with a dust free cloth. In the remaining thin medium layer, I paint the light colours, like white, without thinning. My brush slides over the surface, making beautiful gracious lines. The colours that darken during drying get an extra touch up at the end.
08. Juicy greens
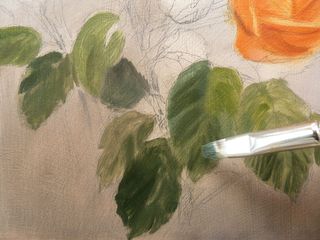
With a Flat brush, I paint the middle value green of the leaves. Paying attention to the more yellow and blue parts, I follow the direction of the veins. The leaf bends here and there, catching more light on the round shapes and looking more blue. I keep thinking forwards, to prevent overworking a specific layer. This way the colours stay bright and not dull because of a wrong mixture.
09. Review your progress
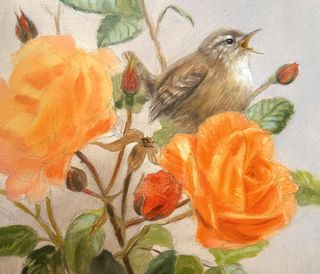
This stage feels halfway. Most values are present, now I will evaluate where to go next. It feels great to paint from a 'small success' to the next. Sometimes I leave out a fun part for the next time, so I know right where to jump in later. I decide to start adding reds, in the rosebuds, shadows and the branches.
10. On to the second rose
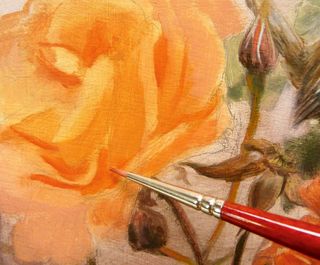
The second rose also started with a middle value orange. I now add the darker tones. I could have done this simultaneously with the other rose, but I decided to let that one dry, to see if the colours would darken. Now I do think my middle orange needs some more yellow to look warmer.
11. Tender petals
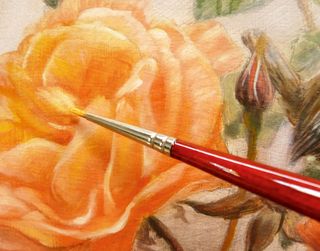
The petals of roses are so delicate, I need to take care that they don't look heavy or massive. With a mixture of almost rose-white, I paint the outer edges. Perfect, now the petals seem to curl! Still I want to get more depth between the petals, so I add more shadows between them in the coming stages. Once more, I need to be patient, because it all needs to dry first.
12. Make some edits
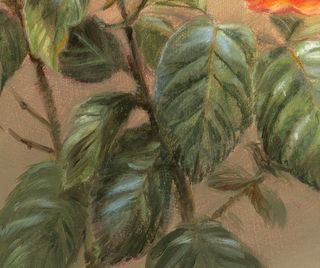
Now my piece is dry again, I start balancing shadows overall to create the depth I am looking for. Using a dark brown, I glaze the complete area below the leaves to make it darker, because that will make the leaves and the roses 'bend out' of the painting. I wipe the glazing medium off the leaves, so I can start adding their dark veins and blue highlights.
13. Time for details!
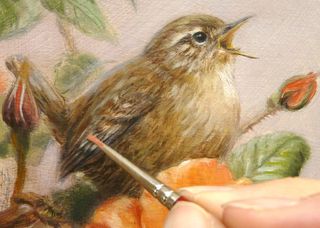
Now, using my finest brush, I add even more feathers, highlights and darker tones to the wren. The shadow below the wing on its belly really makes the wren come to life. Here I also glaze some parts darker, and directly add the details after. The background gets a new thicker layer. By softening the edges between bird and background, it 'clicks'. The light blue line on its back and a dark touch in the eye makes the wren pop out!
14. Define the petal shape with shadows
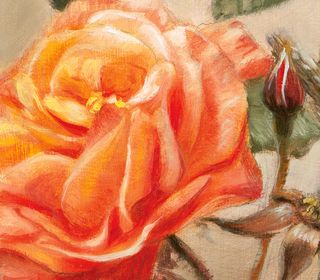
In the next clean medium layer, I add dark red shadows to the roses. The rose petals really are curling open now. I add a glaze of yellow in the middle of the rose and paint the final highlights on the petal edges. I check my overall values again by making a black-and-white photo. I discover that some green leaves need to be a touch lighter, so that they recede in the image.
15. Apply the final tonal touches
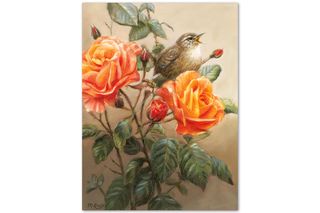
It feels like magic! Now I paint in all areas simultaneously, adding the final highlights and darkening the stems to push them backwards. I constantly step back to assess my progress. Orange and green are almost complementary on the colour wheel, which creates a kind of fight for attention. The balance here is in the size of the roses. They are big enough to stand out and invite you to come over and smell them. The wren finishes everything off with its beautiful song.
This article was originally published in issue 11 of Paint & Draw, the magazine offering tips and inspiration for artists everywhere. Buy issue 11 here.
Related articles:

Thank you for reading 5 articles this month* Join now for unlimited access
Enjoy your first month for just £1 / $1 / €1
*Read 5 free articles per month without a subscription

Join now for unlimited access
Try first month for just £1 / $1 / €1
