13 tips for making a VR gaming world
Find out how Secret Sorcery created the worlds of Tethered using ZBrush and Unreal Engine 4.
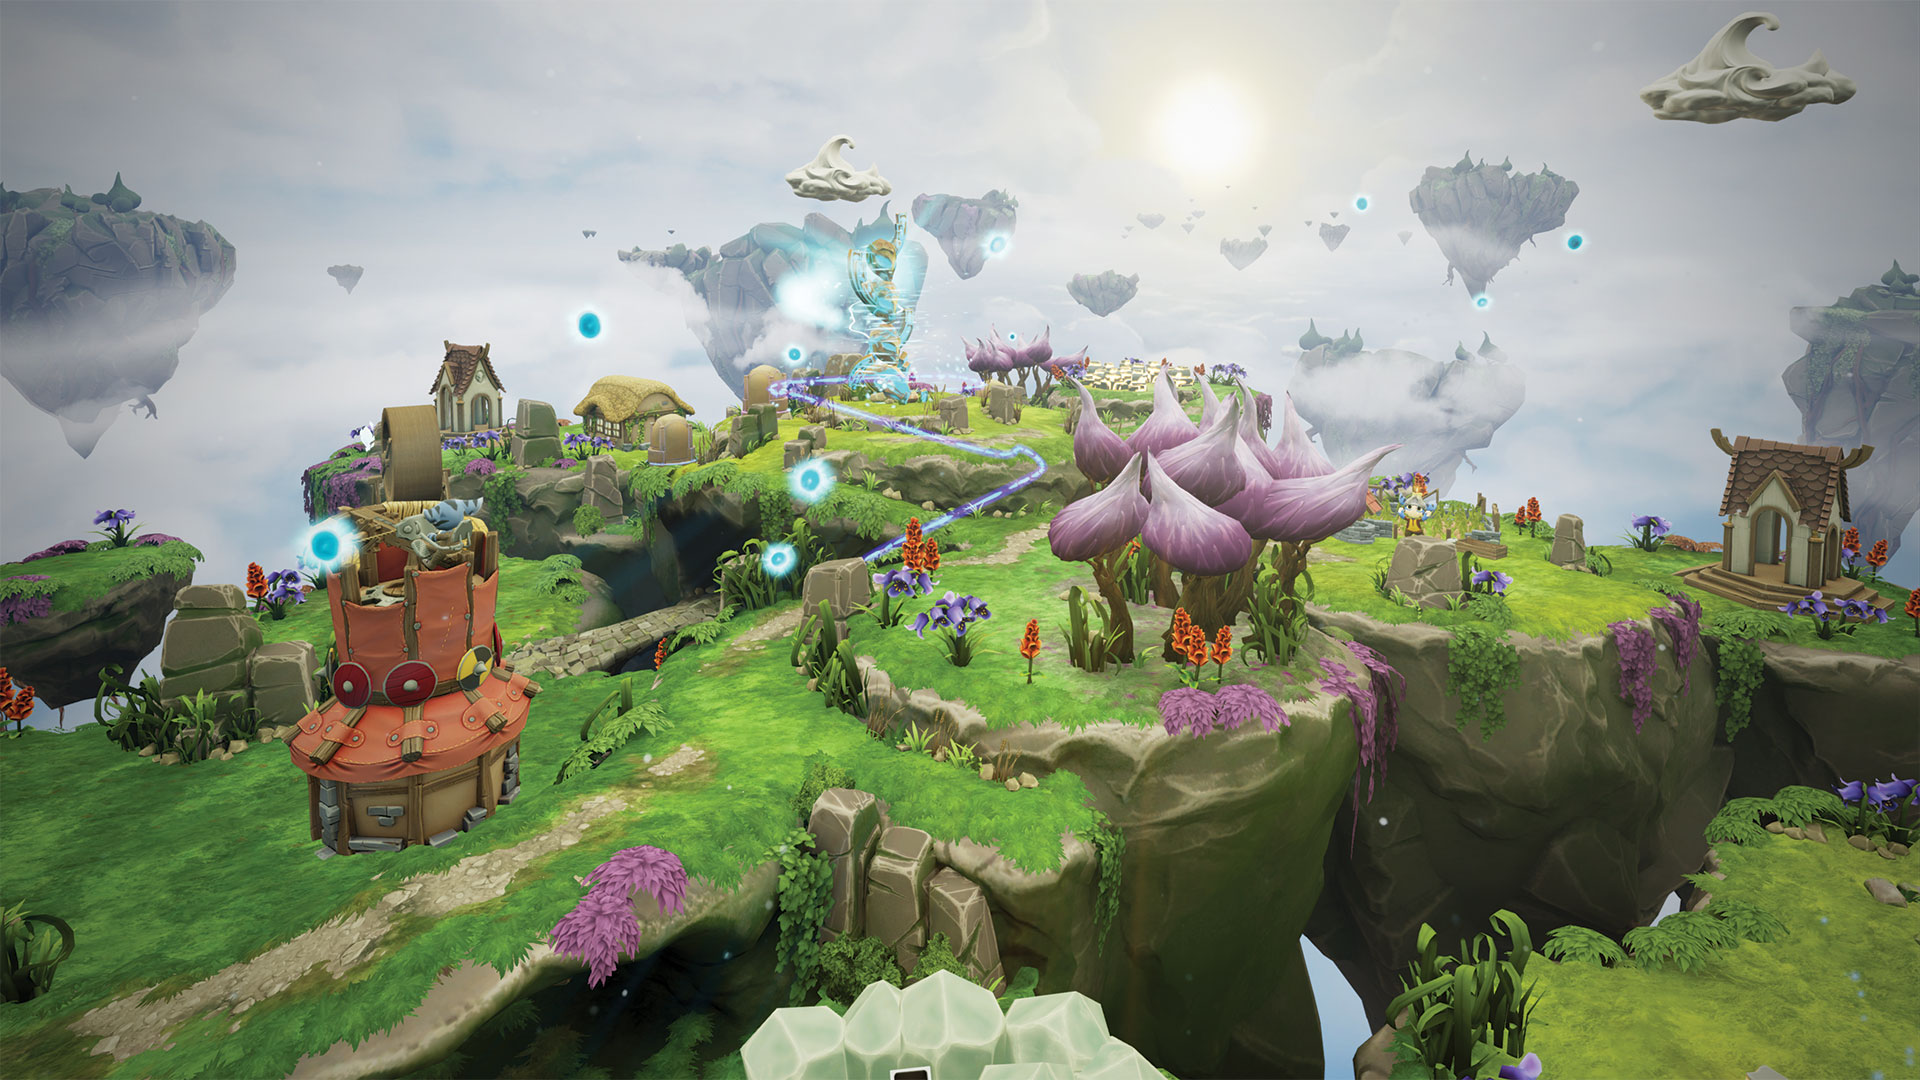
Tethered is a critically acclaimed third-person strategy game, designed for VR. It launched on PlayStation VR in October last year and was later released on PC with support for all major VR platforms.
Most recently, the game has been adapted to support an ultra-glossy non-VR mode boasting a dazzlingly beautiful 4K 60Hz native presentation.
You play the role of a Spirit Guardian, a protector of the world. Your quest is to rid the lands of a nocturnal evil, free the other imprisoned Spirit Guardians and restore balance and nature to your sky-borne world. You do this through your population of industrious and adorable 'Peeps'.
Tethered was developed and published by Secret Sorcery, an indie studio formed in 2015 by a group of senior developers formerly of Sony Evolution Studios (Driveclub, MotorStorm and Wipeout). With an established background in VR prototyping, the team set out to explore new avenues for their creativity.
With rapid prototyping firmly ingrained in the founder's dev ethos, the team chose Unreal Engine as their weapon of choice, which offers an unparalleled toolset out of the box for video game development.
For this project, the world that the colourful little Peeps inhabited, with surrounding vistas, were crafted in a hand-painted style using Unreal Engine 4, ZBrush and Substance Painter.
The following steps outline various techniques we used to create this breathtaking and enchanting world.
Get the Creative Bloq Newsletter
Daily design news, reviews, how-tos and more, as picked by the editors.
01. Research the purpose
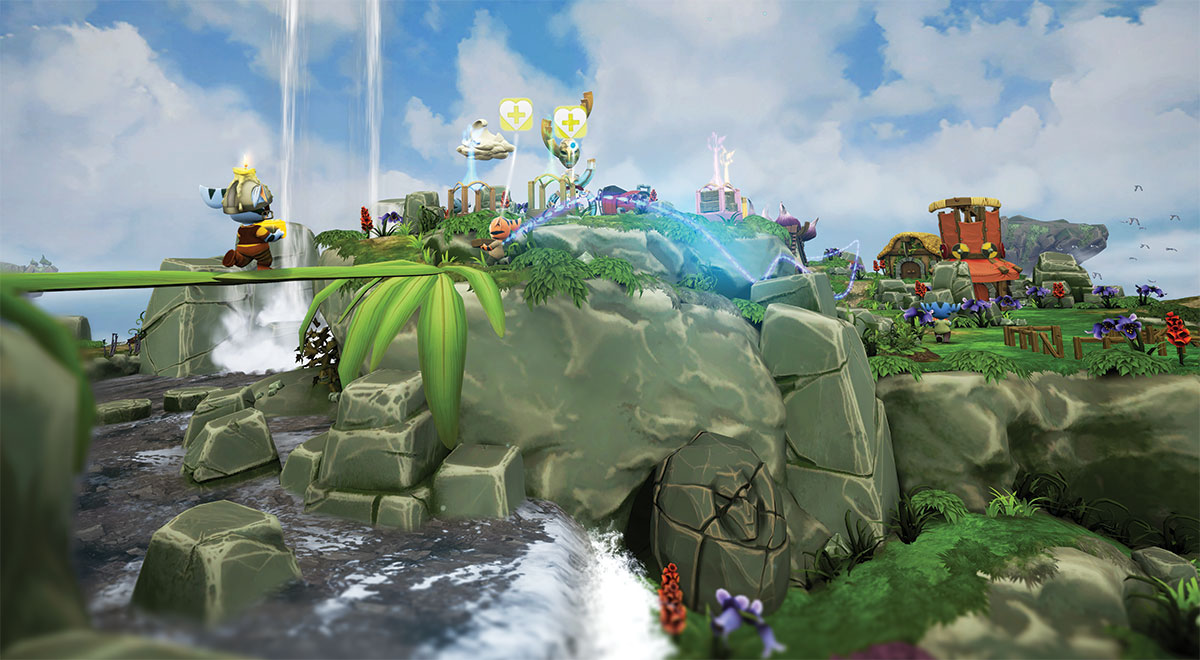
With the initial concept art and style setting the general tone of these idyllic lands, provided by Alan McDermott, creative director of the project, we set out to research the nuts and bolts of this world, from flora to technical necessities.
With the gameplay mechanics of Wild and Tame, the landscape for Tethered had to have multiple states, trying to push the contrast where possible to provide the visual feedback that was necessary for the players' experience, which is of course of utmost importance.
02. Find the design
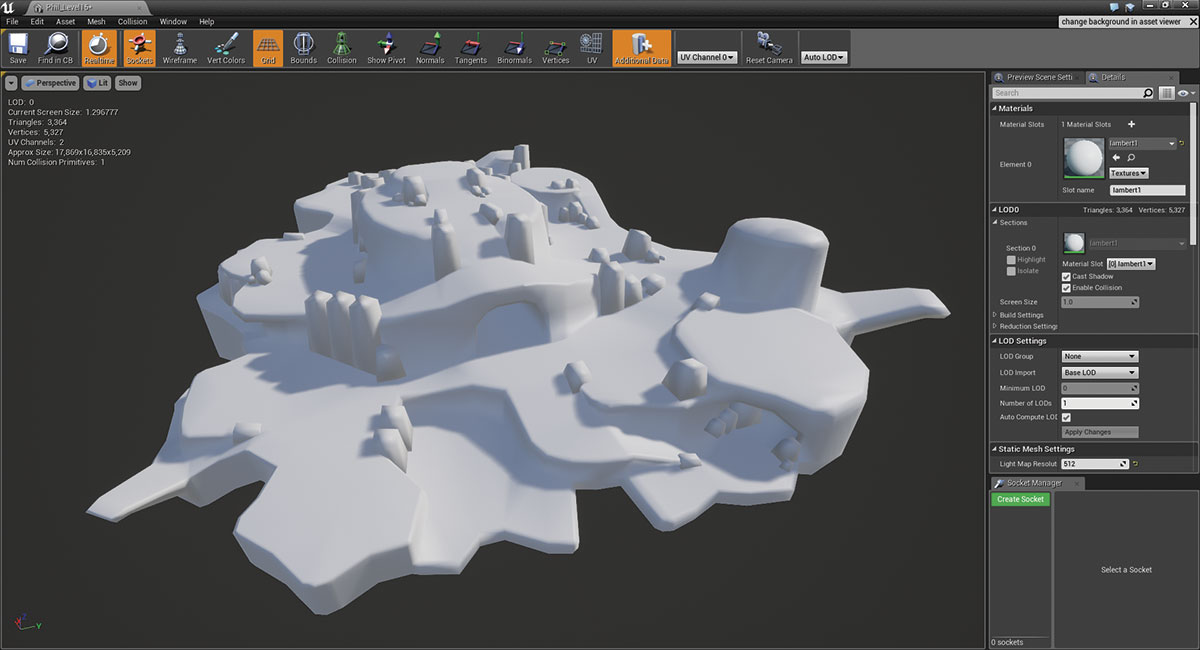
Levels are designed in block-out form by the level designer. The key here is the ability to test and iterate designs effectively. Using Maya, a single polygonal mesh is created and imported into Unreal Engine 4.
The aim was to get into VR quickly to get the godly feel just right. If the scale isn't quite working, the team can quickly iterate, tweak layouts, move cameras and get back in VR fast.
03. Refine the design
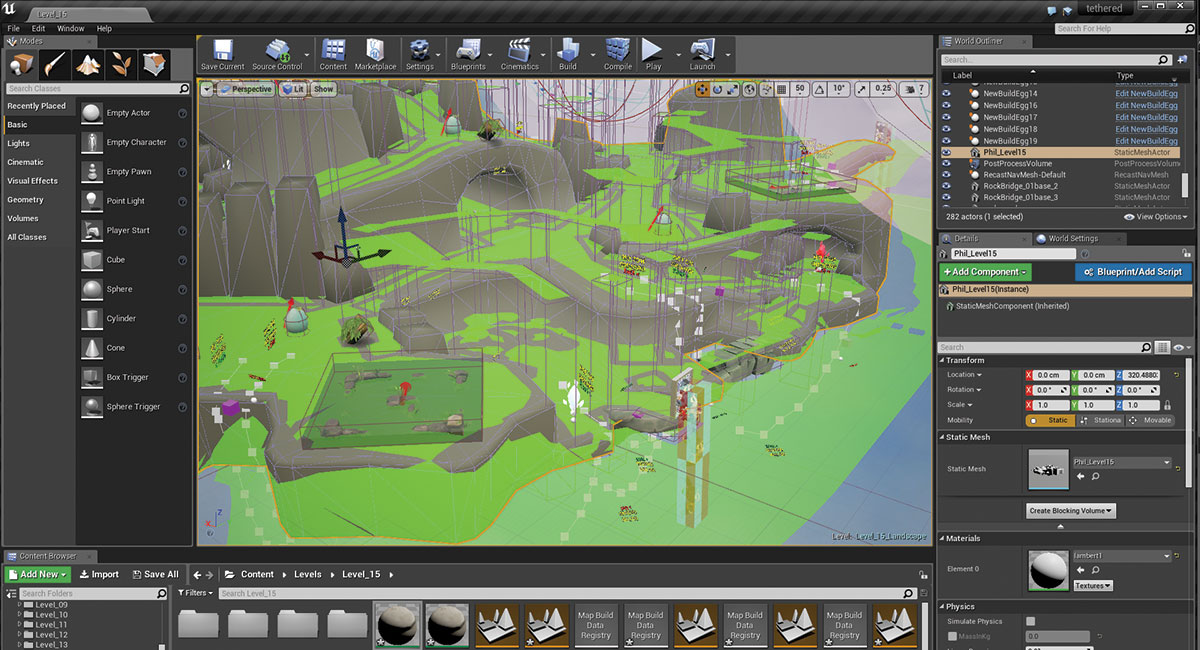
Once the proxy layouts are approved and meet the game level's core-design criteria, it's time for some rigorous play-testing.
All navigation paths are optimised with blocking volumes as much as possible to prevent the characters from wandering aimlessly. The mantra for VR is test, test and test! Working in this manner allows the team to evaluate level designs, the VR experience and quickly make improvements if required.
04. Balance frame rates with visuals

The prototype goes through several stages of iteration before it's finally ready for a detail pass. With a library of pre-made rocks available on an Insert Multi Mesh brush, these could be placed efficiently but also made to blend harmoniously within the landscape – an exercise in efficiency without compromising quality.
With agreed technical budgets for the in-game geometry, rock materials are kept in one draw-call, with just one 4K texture with a simple material to help us to achieve that all important frame rate.
05. Batch texture rocks
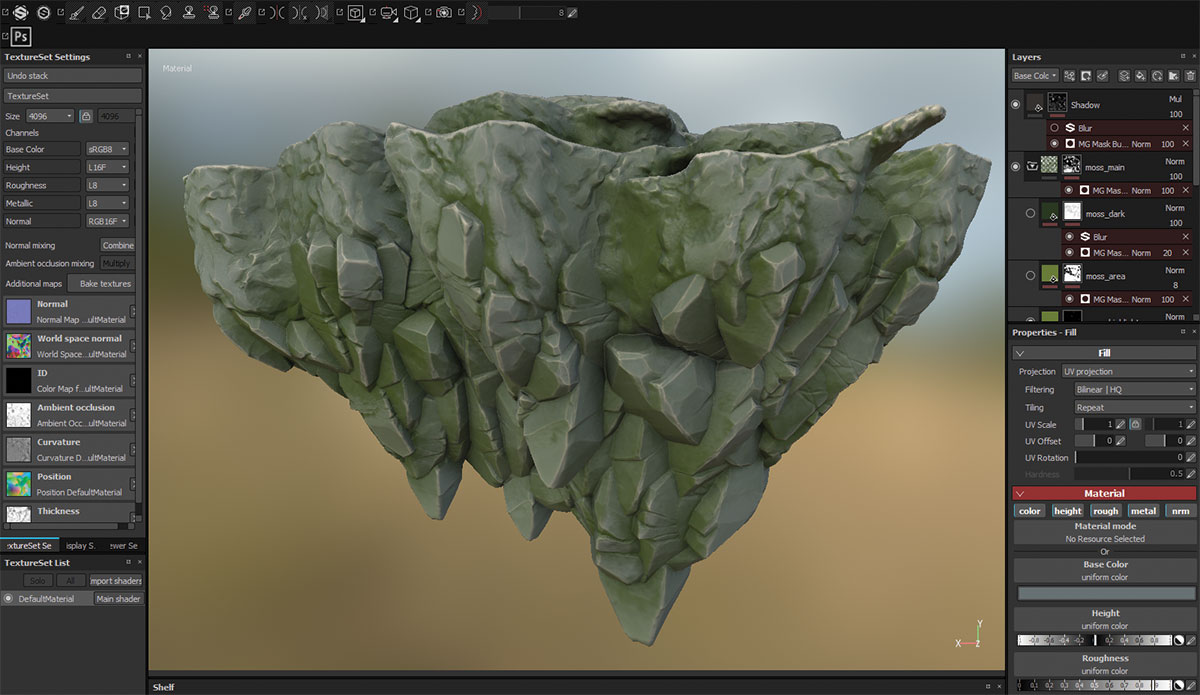
Once sculpted, a template file is created using Substance Painter. By layering up tones using MG mask builders, the goal here was to highlight the rock edges, with tints of green within the occluded areas to help push the forms of the bold rock surfaces.
With this template file setup, all rocks for subsequent levels can then be batch processed for efficiency and continuity by simply changing the project mesh, high mesh and re-baking.
06. Generate the custom landscape
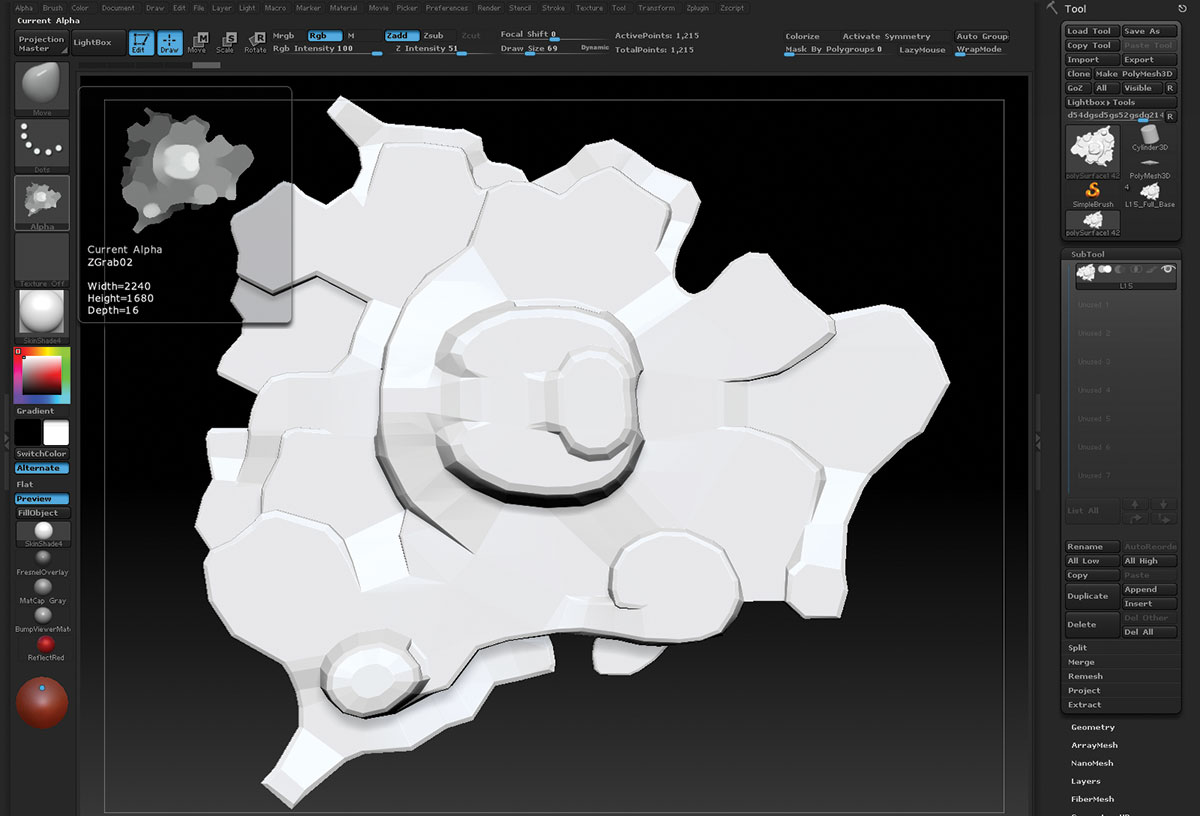
With the landscape layout locked down, we can now use Unreal Engine's landscape system for the raft of navigational benefits that it can offer. The proxy terrain is imported into ZBrush and with the level that's been viewed top-down, the document is ZGrabbed to create a heightmap.
The heightmap is then imported straight into the Unreal Engine 4 landscape system and, with a bit of tweaking, it creates an almost identical layout as the proxy mesh that was provided. From here the sculpting tools within the landscape system can be used to refine any areas that didn't quite transfer correctly.
07. Trim the perimeter
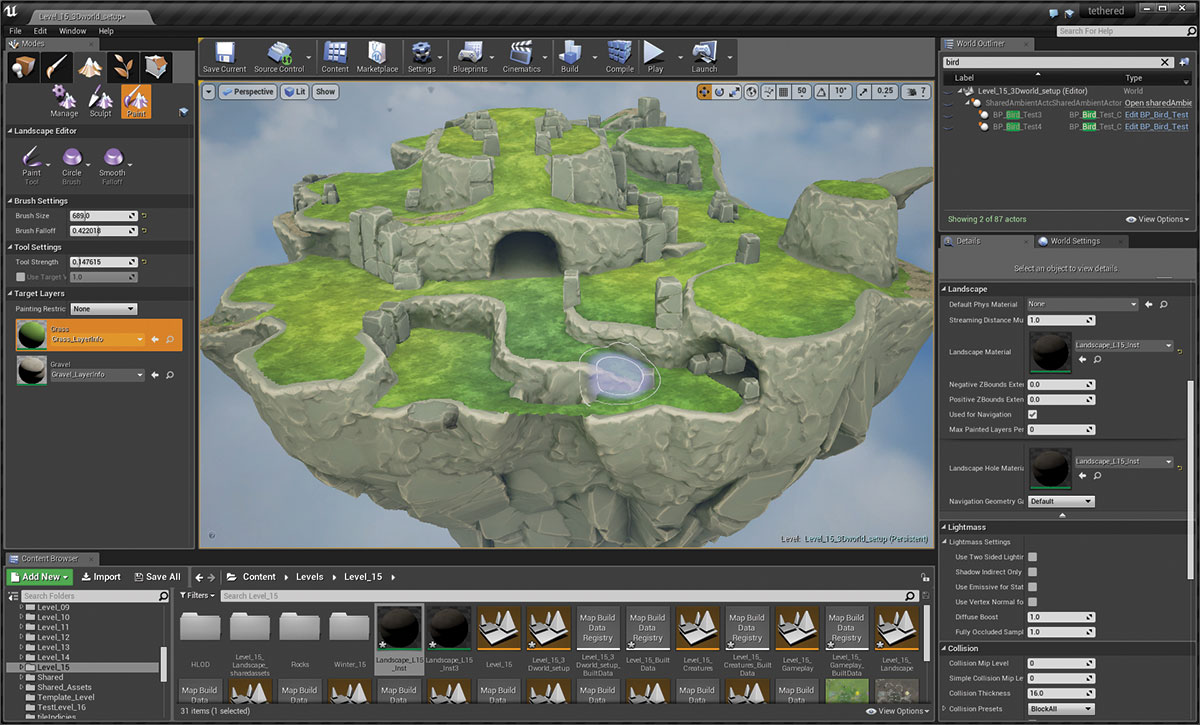
With each of the island's key components ready, it's time to compile them into Unreal Engine 4 to ensure that they all fit well within the geology, and any issues are addressed and any unnecessary landscape patches are deleted. In fact, due to the nature of these islands, the perimeter had to be trimmed.
In order to do this, the landscape shader is placed into the "landscape hole material" slot found within the landscape shader. This also allows any entrances to caves to be opened up.
08. Create a landscape and foliage system
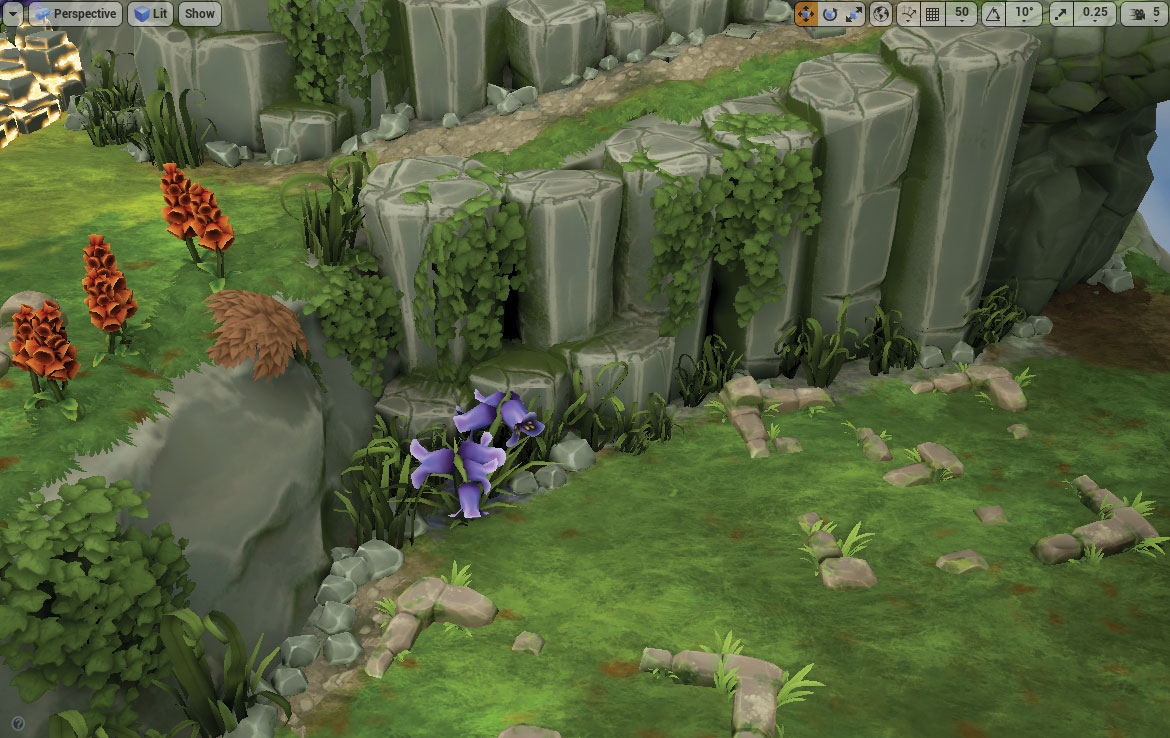
With the rocks and landscape in place, focus is set upon dressing the play area with a catalogue of foliage applied, and we can do this by using the foliage brush system and the new in-VR editor.
First of all a foundation is laid, where small shrubs and pebbles will help bed in the occluded areas and placed in the terrain.
Foliage is then subsequently built up in layers with a rhythmic flow and compositional balance in mind in order to create a simple and bold asset that ready to supplement for a VR scene.
09. Design unique buildings
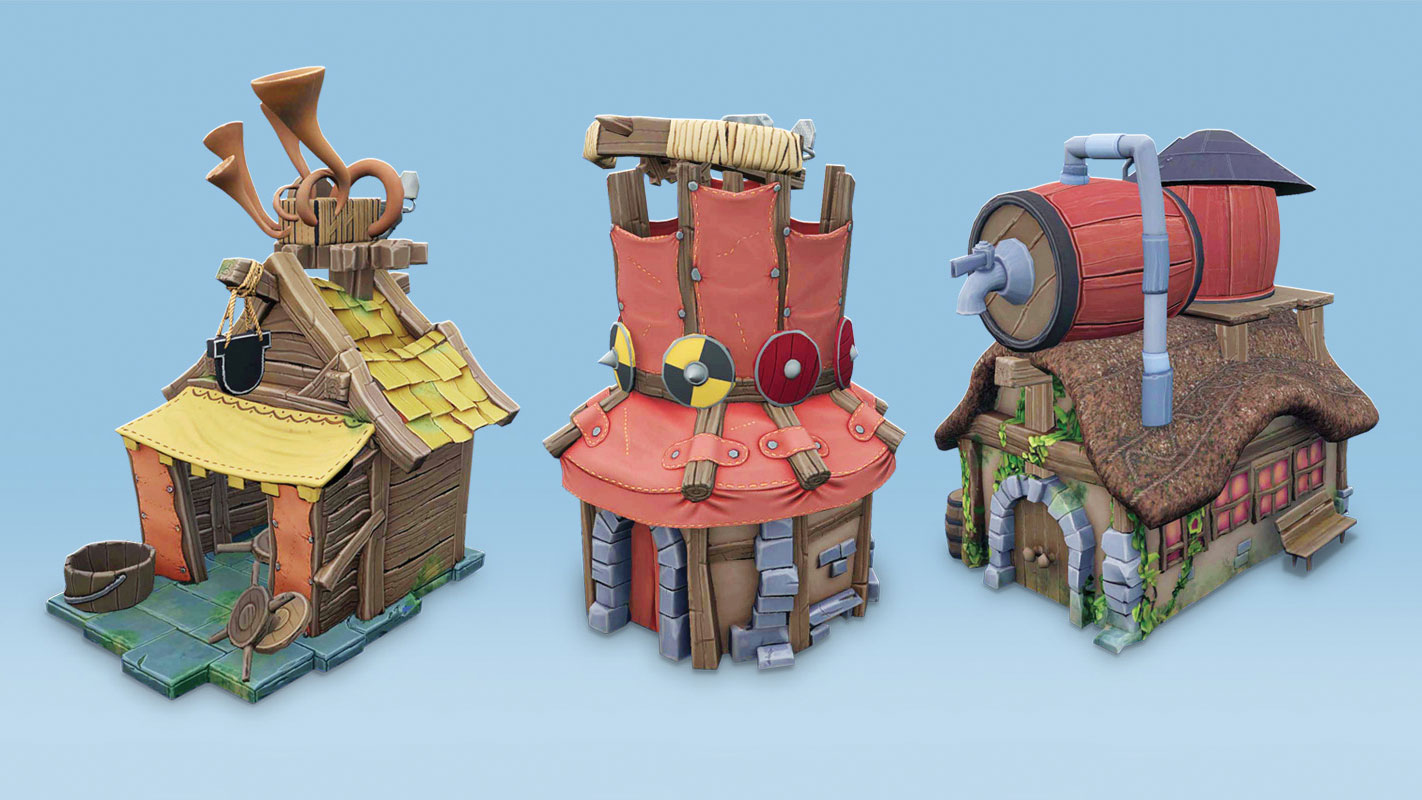
The buildings play a major role in Tethered, each with their own distinguishing features. By tethering your Peeps to the various structures, you can activate that building's unique function.
Initially, buildings could change states to support the Wild/Tame game-play mechanic, but with the benefits of VR it became apparent that the experience could be enhanced by pushing depth in other ways.
10. Design a voxelisation process
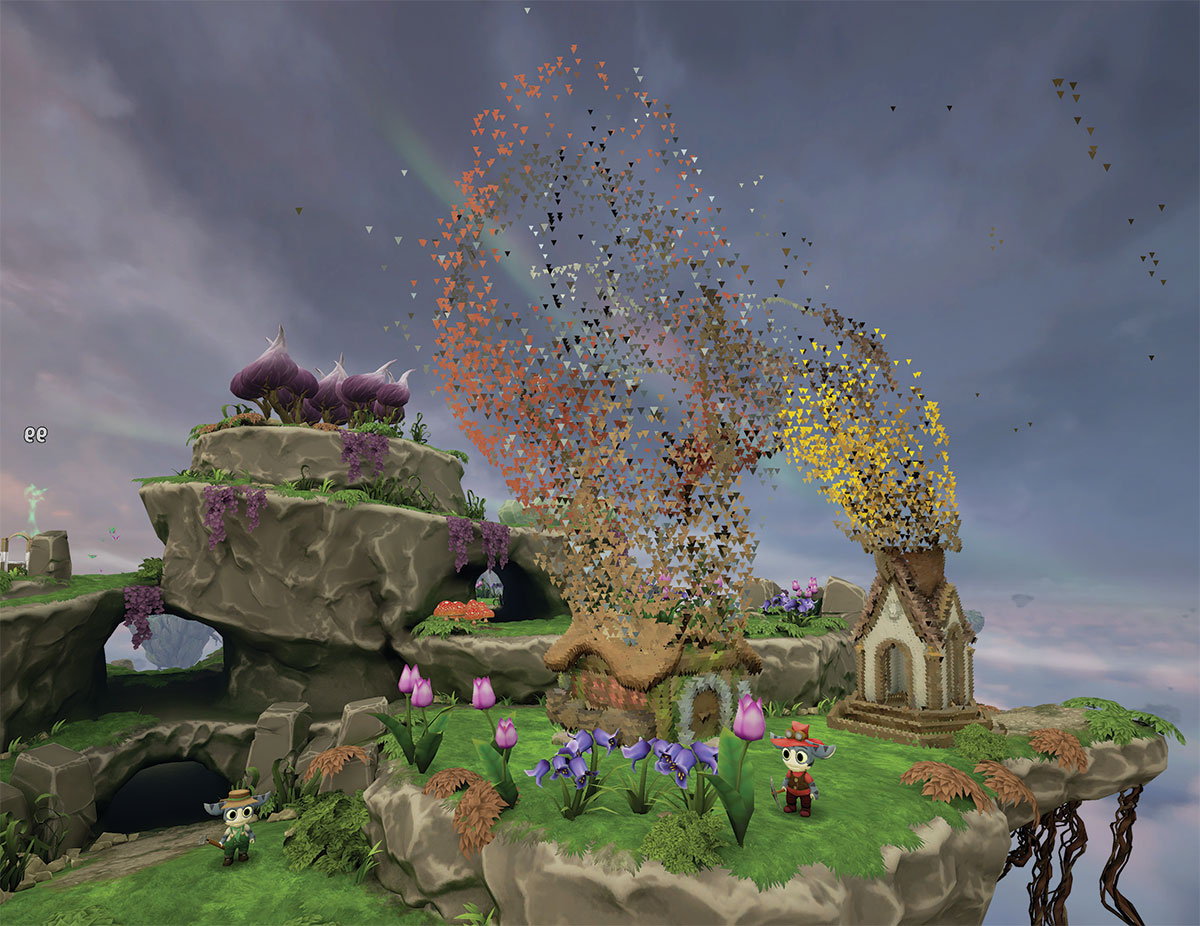
Ian Moran, technical director at Secret Sorcery, explains how he captured scene assets so that they materialised in front of the player.
"We have multiple states for objects and environment, initially we had buildings that morph from one state to another, something that looked great when the player was closely observing the transition, but in VR, large-scale effects are what catch viewers' attention.
"We wanted an effect that was much more spectacular and far less subtle, so we thought 'What if we were able to move objects into the domain of particle systems?' – then we could form objects particle by particle and have objects exploding into dust.
"For this we engineered a process that would capture polygonal and sculpted models into a point cloud in a way that's similar to a 3D laser-scanned real world object. We could even choose the number of particles/voxels, which would allow for levels of detail and performance to be rationalised too.
"Models were 'scanned' from several cameras using the results of a deferred buffer capture. With this we could fuse a positional point cloud with colour and normal data enough to suitably represent an object.
"Point cloud was then rendered using a custom shader that would form at each point along mathematically calculated paths.
"With additional voxels joining with pre-existing buildings as performance allowed, voxels overlay the existing structure for a dramatic result. Buildings could then form from thousands of particles, falling in patterned, mathematically defined paths from the sky."
11. Make sure there's no waste
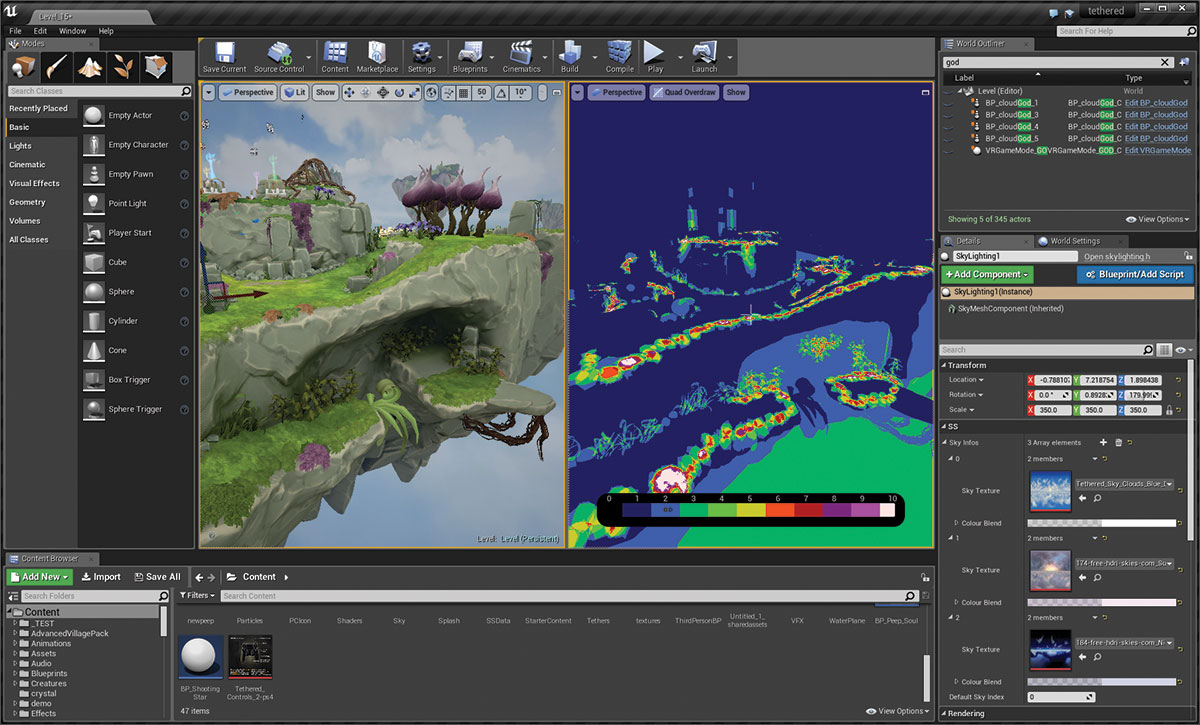
In the land of VR, optimisation is key, and profiling tools are essential to ensure your scene is as efficient as it can be, checking for areas of complex overdraw and so on.
Performance in VR is a requirement rather than a flexible ambition, to hit target frame rates is paramount. The statistical reports make this something that artists can tune their work to directly, rather than leaving content to be culled by programmers.
12. Make VR-friendly water
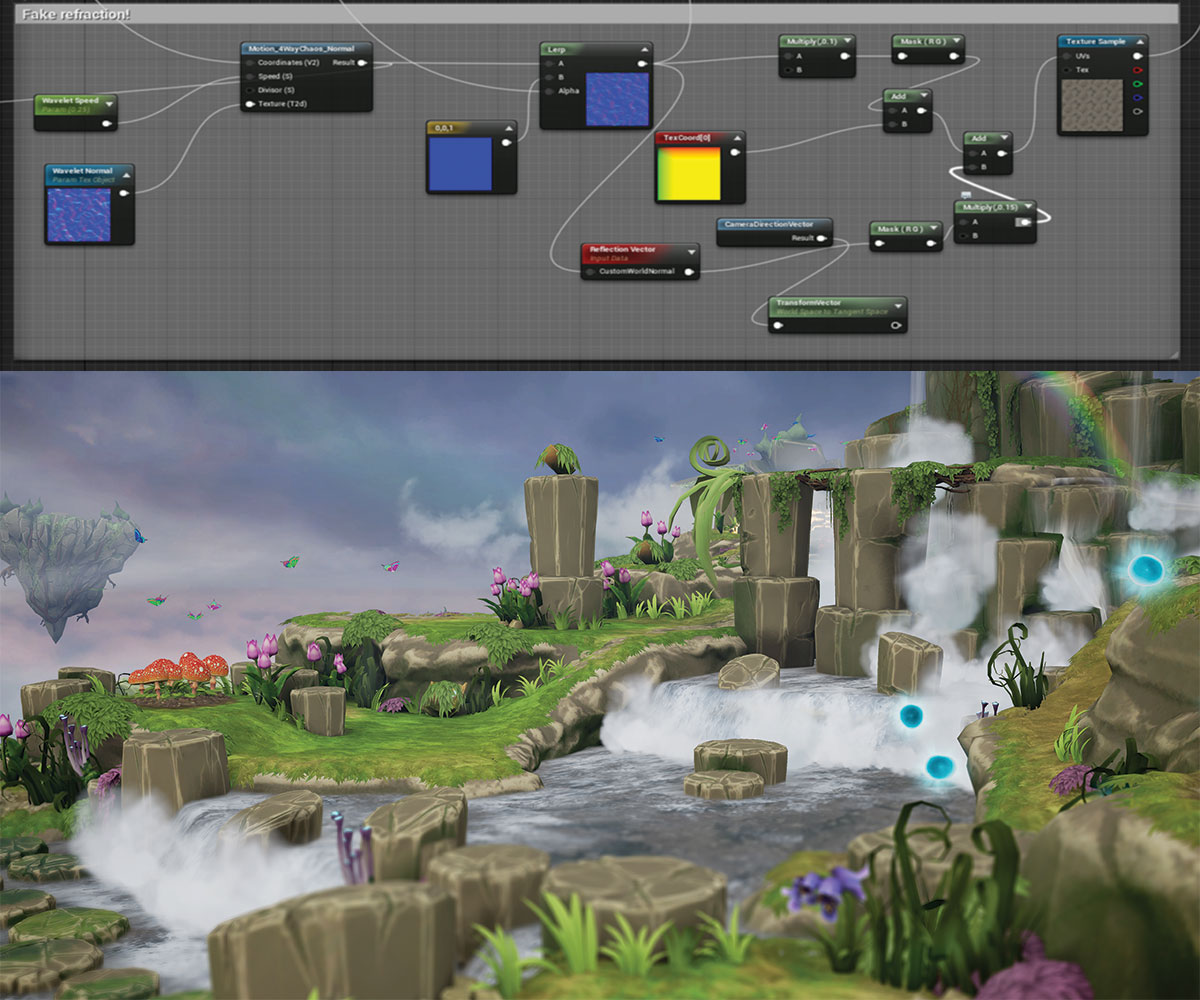
Moran explains how the water was approached for Tethered: "With welcomed additional performance courtesy of PlayStation4 Pro, we could develop refractive and reflective water.
"The refraction of the riverbed through water flowing over it was initially implemented using screen-space techniques. This looked impressive, but it actually suffered from artefacts that broke immersion in VR.
"By using a simple parallax-like shader technique to address the riverbed texture, this didn't require direct sampling of the scene and didn't have the artefacts. This created significantly higher performance, which is always welcome for a VR title."
13. Play with parallax
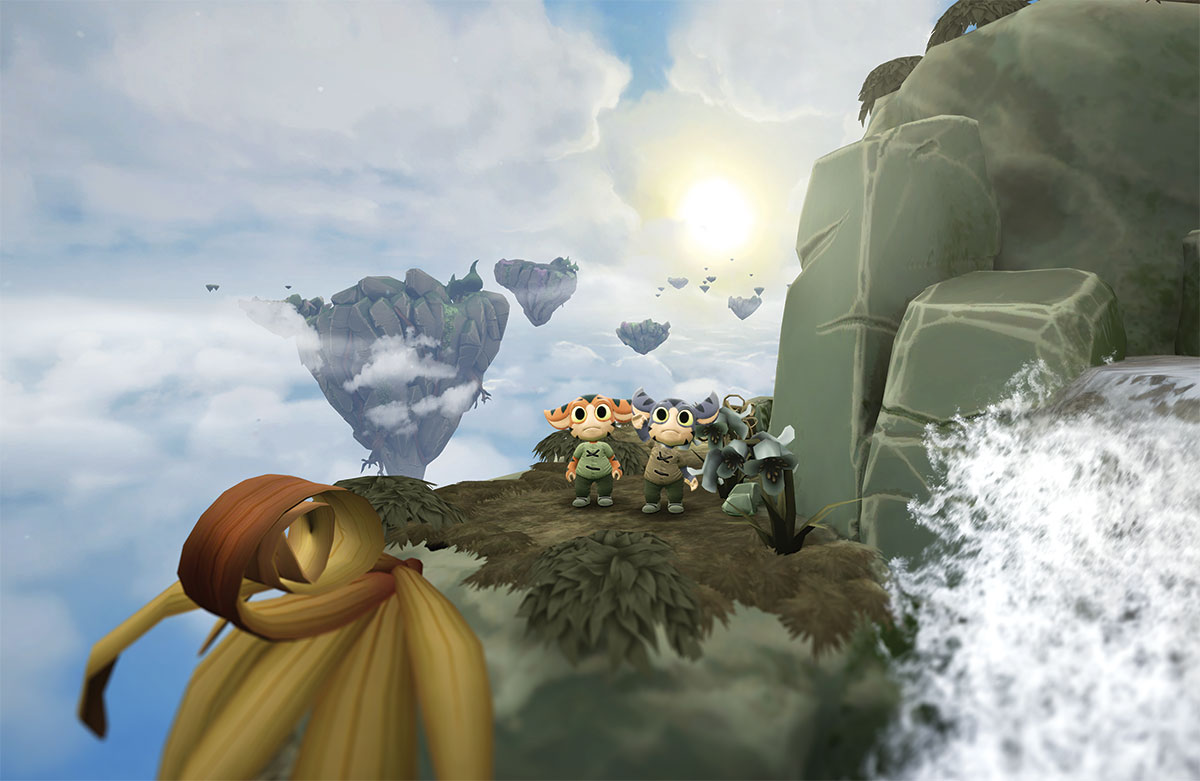
With the archipelago of floating islands surrounding the player, much time was spent structuring their rhythmic formations, with foreground structures purposely overlapping within the planes of depth contained within the vista, using parallax techniques.
VR allows for a visual voyage of discovery and the production of the environments for Tethered were developed to take advantage of this and exploit the medium to its fullest.
This required some old-school ingenuity that may not be all that obvious, but with a significant jump beyond the flat gaming platforms that we have all grown up with, the VR rule book is still very much being written.
This article originally appeared in 3D World issue 225. Buy it here.
Related articles:

Thank you for reading 5 articles this month* Join now for unlimited access
Enjoy your first month for just £1 / $1 / €1
*Read 5 free articles per month without a subscription

Join now for unlimited access
Try first month for just £1 / $1 / €1
