How to simulate fluids in Blender
Add splashing liquids to your scene with Phil Nolan’s in-depth guide to creating realistic fluid simulations.
Download the support files plus 17 minutes of video training.
IMPORTANT: Do not open scene files in LightWave 10.0 or earlier. See step 6
Splashing or flowing liquids can add an extra touch of realism to your 3D scenes – even if it’s something subtle such as a character knocking over a glass of water, or an advert for a new candy bar with melted chocolate pouring over nuts and raisins. Recently, I needed a flowing liquid as the focus for one of my LightWave projects. LightWave has some amazing tools that can handle just about every situation. However, in this case, Blender offered a better option, and I was able to get my fluids flowing and splashing just as I needed, then bring them back into LightWave to finish my project. I’m going to show you how to do the same.
01. Prepare in LightWave Modeler
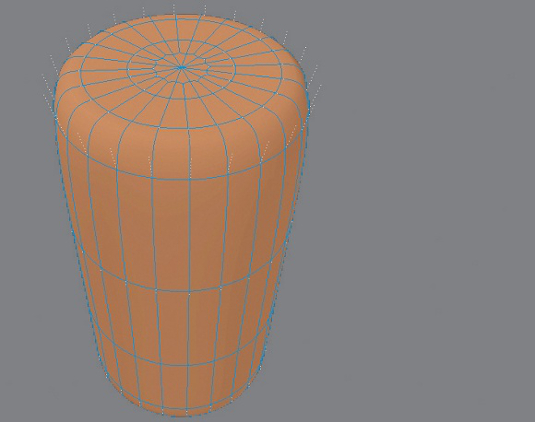
In the files accompanying this tutorial you’ll find some fully textured objects to get you started. There’s a simple tabletop, a glass and an ice cube, as well as the fluid object that will be used as a starting point for your dynamic fluid. The fluid object was made by selecting the polys on the inside of the glass where the fluid will be, and copying them to a new layer, then flipping their normals with the [F] key and closing off the top. If you make your own fluid object like this one, make sure there are no holes anywhere – the object must be watertight, in effect! It may also help to scale the fluid object down a bit so that it’s not quite touching the glass.
02. Set up the scene in Blender
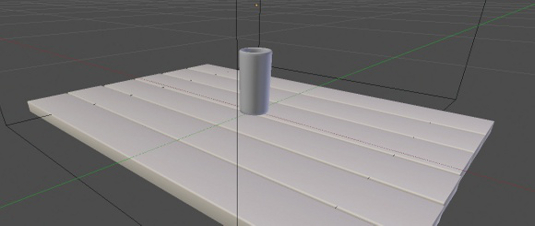
If you don’t know Blender already it can take time to get used to the interface. Luckily, for this project you only need to use a small portion of it. The first thing you’ll need to do is change your view to display the User Preferences with the small icon on the far-left side of the viewport header. This header is along the bottom of the viewport, although I find it makes more sense to right-click it and choose Flip To Top so that the header is along the top of the viewport. On the left-hand side of the AddOns tab in the User Preferences you’ll find the Import-Export category button. Scroll down in the list and you’ll find the option to Import LightWave objects. Check the box and select Save As Default on the lower left-hand side.
Switch back to the 3D view – now that the LightWave object import is enabled, you can load the iced_tea_v002.lwo object from the File menu under Import > LightWave Object. You’ll see each of the objects appear in the 3D view. They are also listed in the Scene Editor. Note that the layer names from Modeler get carried over as object names in Blender. You’ll also find the cube that Blender starts with by default. If you don’t have one you can add one from the menu (Add > Mesh > Cube). This cube can be used as the Domain object for the simulation. So in the Scene Editor panel, double-click the cube’s name and rename it Domain. This is a good time to save your scene in case you need to start again later on.
03. Your first simulation
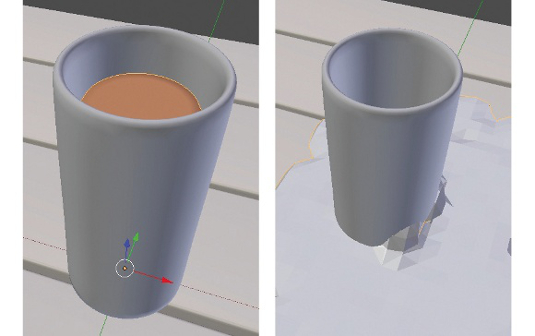
The Domain object is like a room where all of the fluid simulation takes place, so it has to be large enough to contain any splashing of your fluid. If the fluid hits the borders of the room it will look like it’s hitting an invisible wall, so you have to make sure it’s big enough to contain your splash. However, if it’s too big it will take longer to calculate the simulation. Use the objects you just loaded to estimate the size of the Domain and, if you need to, adjust its scale or position with the manipulator widget found on the horizontal viewport toolbar. You can always make the Domain bigger later on if you need to.
Get the Creative Bloq Newsletter
Daily design news, reviews, how-tos and more, as picked by the editors.
With the Domain object selected, go to the Physics tab on the far right of the Properties panel and click the Fluid button. In the drop-down menu that appears pick Domain. Do the same for each of the other objects – except for the table, glass and ice cube (choose the Obstacle option instead) and the Tea object (choose the Fluid option). If your table is flat, use the bottom of the Domain instead.
The Domain object is where most of the action happens. Select it and take a look at the options that appear on the Physics panel. Now do your first test simulation; press the Bake button and it will quickly calculate the simulation. You’ll see the Domain object shrinks to the shape of the Tea object like shrink-wrap. As you scrub the timeline you’ll see a very rough fluid simulation. It can help if you hide the Tea object at this point by clicking the Eye icon next to its name in the Scene Editor.
04. Refine the simulation
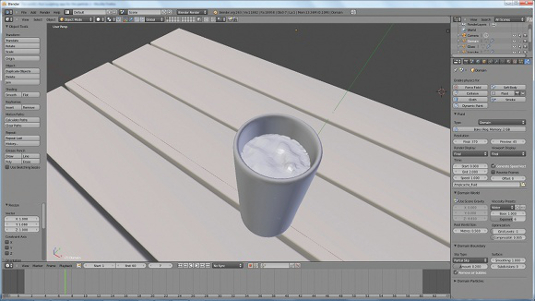
The simulation doesn’t stay in the glass because it doesn’t have enough resolution at this point, so let’s adjust some settings to improve it. First, shorten the timeline to about 60 frames in the End box, because the splash doesn’t take that long to occur – sixty frames is two seconds, so set the end time in the simulation settings to 2.0. Under the Domain World section of the settings you’ll find Viscosity presets. Water is the closest to iced tea, so pick that one. Under Domain Boundary you’ll find a subdivision setting that you might usually increase, but you can leave it at 0 because the subdivision can be added later in LightWave. This saves time during the baking process. Underneath Resolution, set Viewport Display to Final. This will allow you to see how the final fluid will look in the viewport. Try increasing the resolution and doing a test bake. Scrub the timeline to see the result and check the fluid is staying inside the glass. Repeat this until the fluid stays inside without falling through the bottom.
05. Make the splash
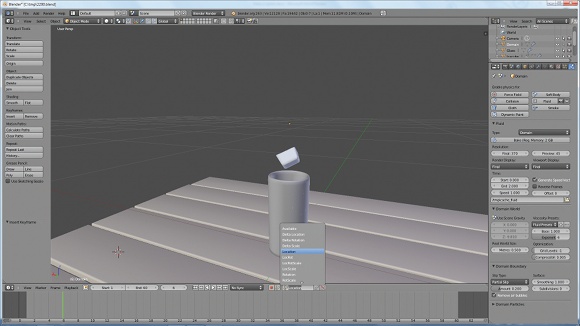
Once you’re satisfied with the fluid, go to a frame where it’s settled inside the glass – around frame five or six. Move the ice cube above the glass and set a keyframe. To do this, pick Location from the drop-down box on the right side of the timeline, and click the Key icon next to it. At around frame 10 or 11, drop the ice cube into the glass and set another keyframe to create a decent splash. You can also rotate the ice cube to an odd angle.
Do another test bake to see the results of your splash. If you’re not happy you can change the speed or direction of the ice cube and rebake. Once satisfied, you can increase the resolution further for an improved result – the more you increase it the longer it will take to bake though, and if you increase it too much it can crash Blender. Before doing a final bake, look at the file selector at the bottom of the Fluid settings. Note the default directory where it stores the simulation files or choose your own destination – you’ll need to know that later.
06. Set up LightWave Layout
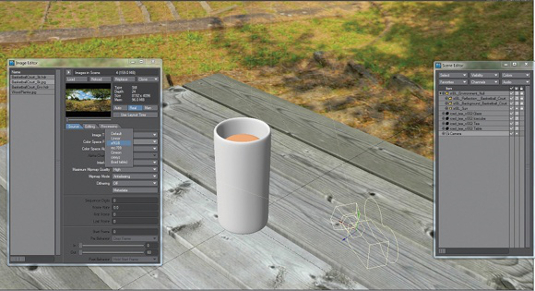
For Layout I’ve included an environment scene to get you started, so load iced_tea_tut_v001.lws from the tutorial files. This scene was set up with SmartIBL from www.hdrlabs.com. The file was saved from LightWave 11.0.3 and it’s important to avoid loading it into LightWave 10.0 or below as it can damage your LightWave installation. If you’re using LightWave 10.0 install the free update to at least version 10.0.1. Next you can load the objects that were used earlier, such as the glass and table. In order for the textures to render correctly, open the Image Editor in the upper left of the screen and make sure Color Space RGB is set as sRGB for the WoodPlanks.jpg and BasketballCourt_8K.jpg images. The Tea object can once again be hidden by clicking its check box in the Scene Editor and setting the box next to that as Hidden, or just clear it from the scene by right-clicking it in the Scene Editor and selecting Clear.
In the tutorial files you’ll find the tibe3_BFMesh plug-in created by Chris Huf at www.splotchdog.com. Load either the 32-bit or 64-bit version, depending on your system, by going to the Utilities tab and clicking Add Plugins. You didn’t create particles in Blender so you won’t need the BlenderParticles plug-in.
07. Import the fluid
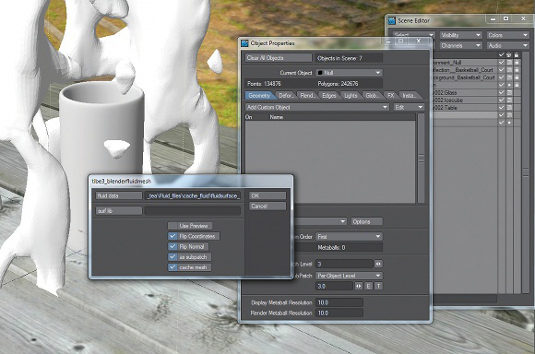
Add a Null object from the Items tab. The plug-in you’ll use replaces this null with a different fluid object for every frame of your animation. With the null object selected hit [P] to open its properties, or right-click it in the Scene Editor and pick Properties. On the Geometry tab look in the Object Replacement drop-down box – pick the tibe3_Blenderfluid item and you’ll see an error saying ‘Object loading failed’. This is fine, it’s only because you haven’t told it what to load yet.
Click OK for the errors and then open the Options with the button next to the drop-down box. Here you can click the Fluid Data button and choose one of the fluidsurface_final_xxxx.bobj.gz object files that were exported from Blender earlier.
Check the boxes below for Flip Coordinates, Flip Normal, As Subpatch and Cache Mesh. Flip Coordinates and Cache Mesh should already be checked. This will correct for some of the problems the fluid files have in LightWave.
08. Surface the fluid
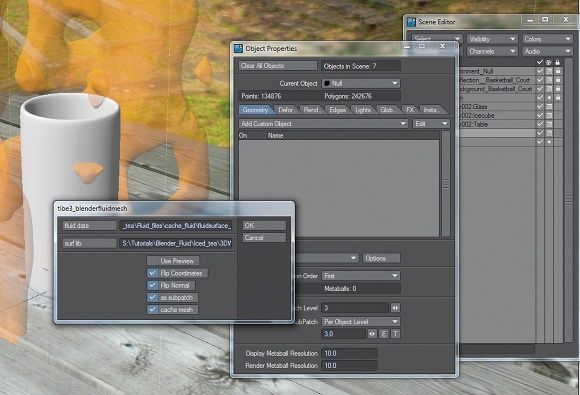
All of the objects included already have surfaces applied but the fluid object is a little different. As the plug-in loads a new fluid object for every frame, you’d have to apply any surface changes to every object. The plug-in can do this automatically if you save your surface changes as a Surface Library file. I’ve included one with an ice tea appearance.
Click the Surf Lib button in the plug-in options, and load the tea_surf. lib file from the tutorial files. When you’re making your own scene, or if you want to make any changes to this surface, you’ll have to create this file yourself. You can do this in the Surface Editor by right-clicking the fluid object name – not the surface name – and choosing Save Library to create the file. You’ll have to save it again every time you make a change to the surface.
09. Fit the tea liquid in the glass
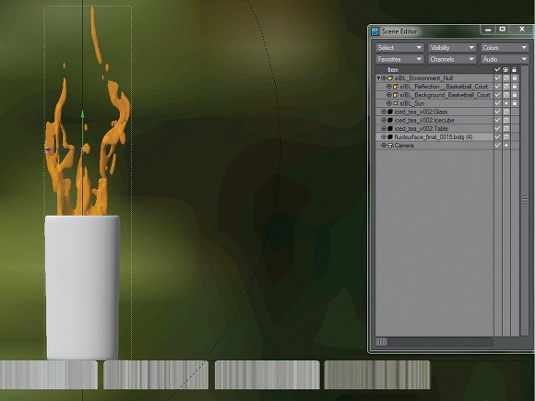
At this point you should be able to see the fluid object in the scene. However, the Blender fluid files don’t store any coordinate information, so your fluid is probably upside down. Change the viewport to look at the glass from the side. With the fluid selected, press [Y] for Rotate and, in the lower left corner, enter 180 for the Pitch and press [Enter] to flip it over. Press [T] for Move and position it into the glass. It might help if you do this at a frame where the fluid has already settled, or even one where some of it has splashed onto the table. If you need to you can also press [Shift]+[H] and drag in the viewport to scale the object.
10 Set up the render

Set your viewport render type to Frontface Wireframe – you can see the empty space in the fluid where the ice cube was. It’s also helpful to set the Display Subpatch Level to 0 on the Geometry tab of the fluid object’s properties, so grab the ice cube object and place it using the Move and Rotate tools. In the Scene Editor, right-click the ice cube and pick Clone to make a copy, which can be positioned in the glass or above as if it’s falling into the drink. Find a frame you like and press [F9] to render. The camera in the included scene is set up to render with anti-aliasing and depth of field to give a nice finished look.
There are a lot of additional tools in Blender to create your fluids, and a lot of settings you can play with to get different results. Try setting objects for inflow and outflow with different obstacles, and experiment.
Phil Nolan is a freelance artist working mostly in television, commercials and corporate videos
Discover the best 3D movies of 2013.

Thank you for reading 5 articles this month* Join now for unlimited access
Enjoy your first month for just £1 / $1 / €1
*Read 5 free articles per month without a subscription

Join now for unlimited access
Try first month for just £1 / $1 / €1

The Creative Bloq team is made up of a group of art and design enthusiasts, and has changed and evolved since Creative Bloq began back in 2012. The current website team consists of eight full-time members of staff: Editor Georgia Coggan, Deputy Editor Rosie Hilder, Ecommerce Editor Beren Neale, Senior News Editor Daniel Piper, Editor, Digital Art and 3D Ian Dean, Tech Reviews Editor Erlingur Einarsson, Ecommerce Writer Beth Nicholls and Staff Writer Natalie Fear, as well as a roster of freelancers from around the world. The ImagineFX magazine team also pitch in, ensuring that content from leading digital art publication ImagineFX is represented on Creative Bloq.
