How to master Cinema 4D's new object tracker
Discover how to use the Object Tracking function to attach 3D geometry to a moving object in live action footage.
The latest version of Cinema 4D R18 included many great new features, but a standout for me was the new Object Tracking function. Unlike Motion Tracking (introduced in Cinema 4D R16), which solves for camera motion, Object Tracking allows you to track moving objects inside live action footage.
Object Tracking allows you to do things like affix 3D models onto objects within a scene. For example, you may wish to add a blaster to the back of a pickup truck as it drives through a rugged terrain, or put a mask on someone’s face as they rotate their head this way and that.
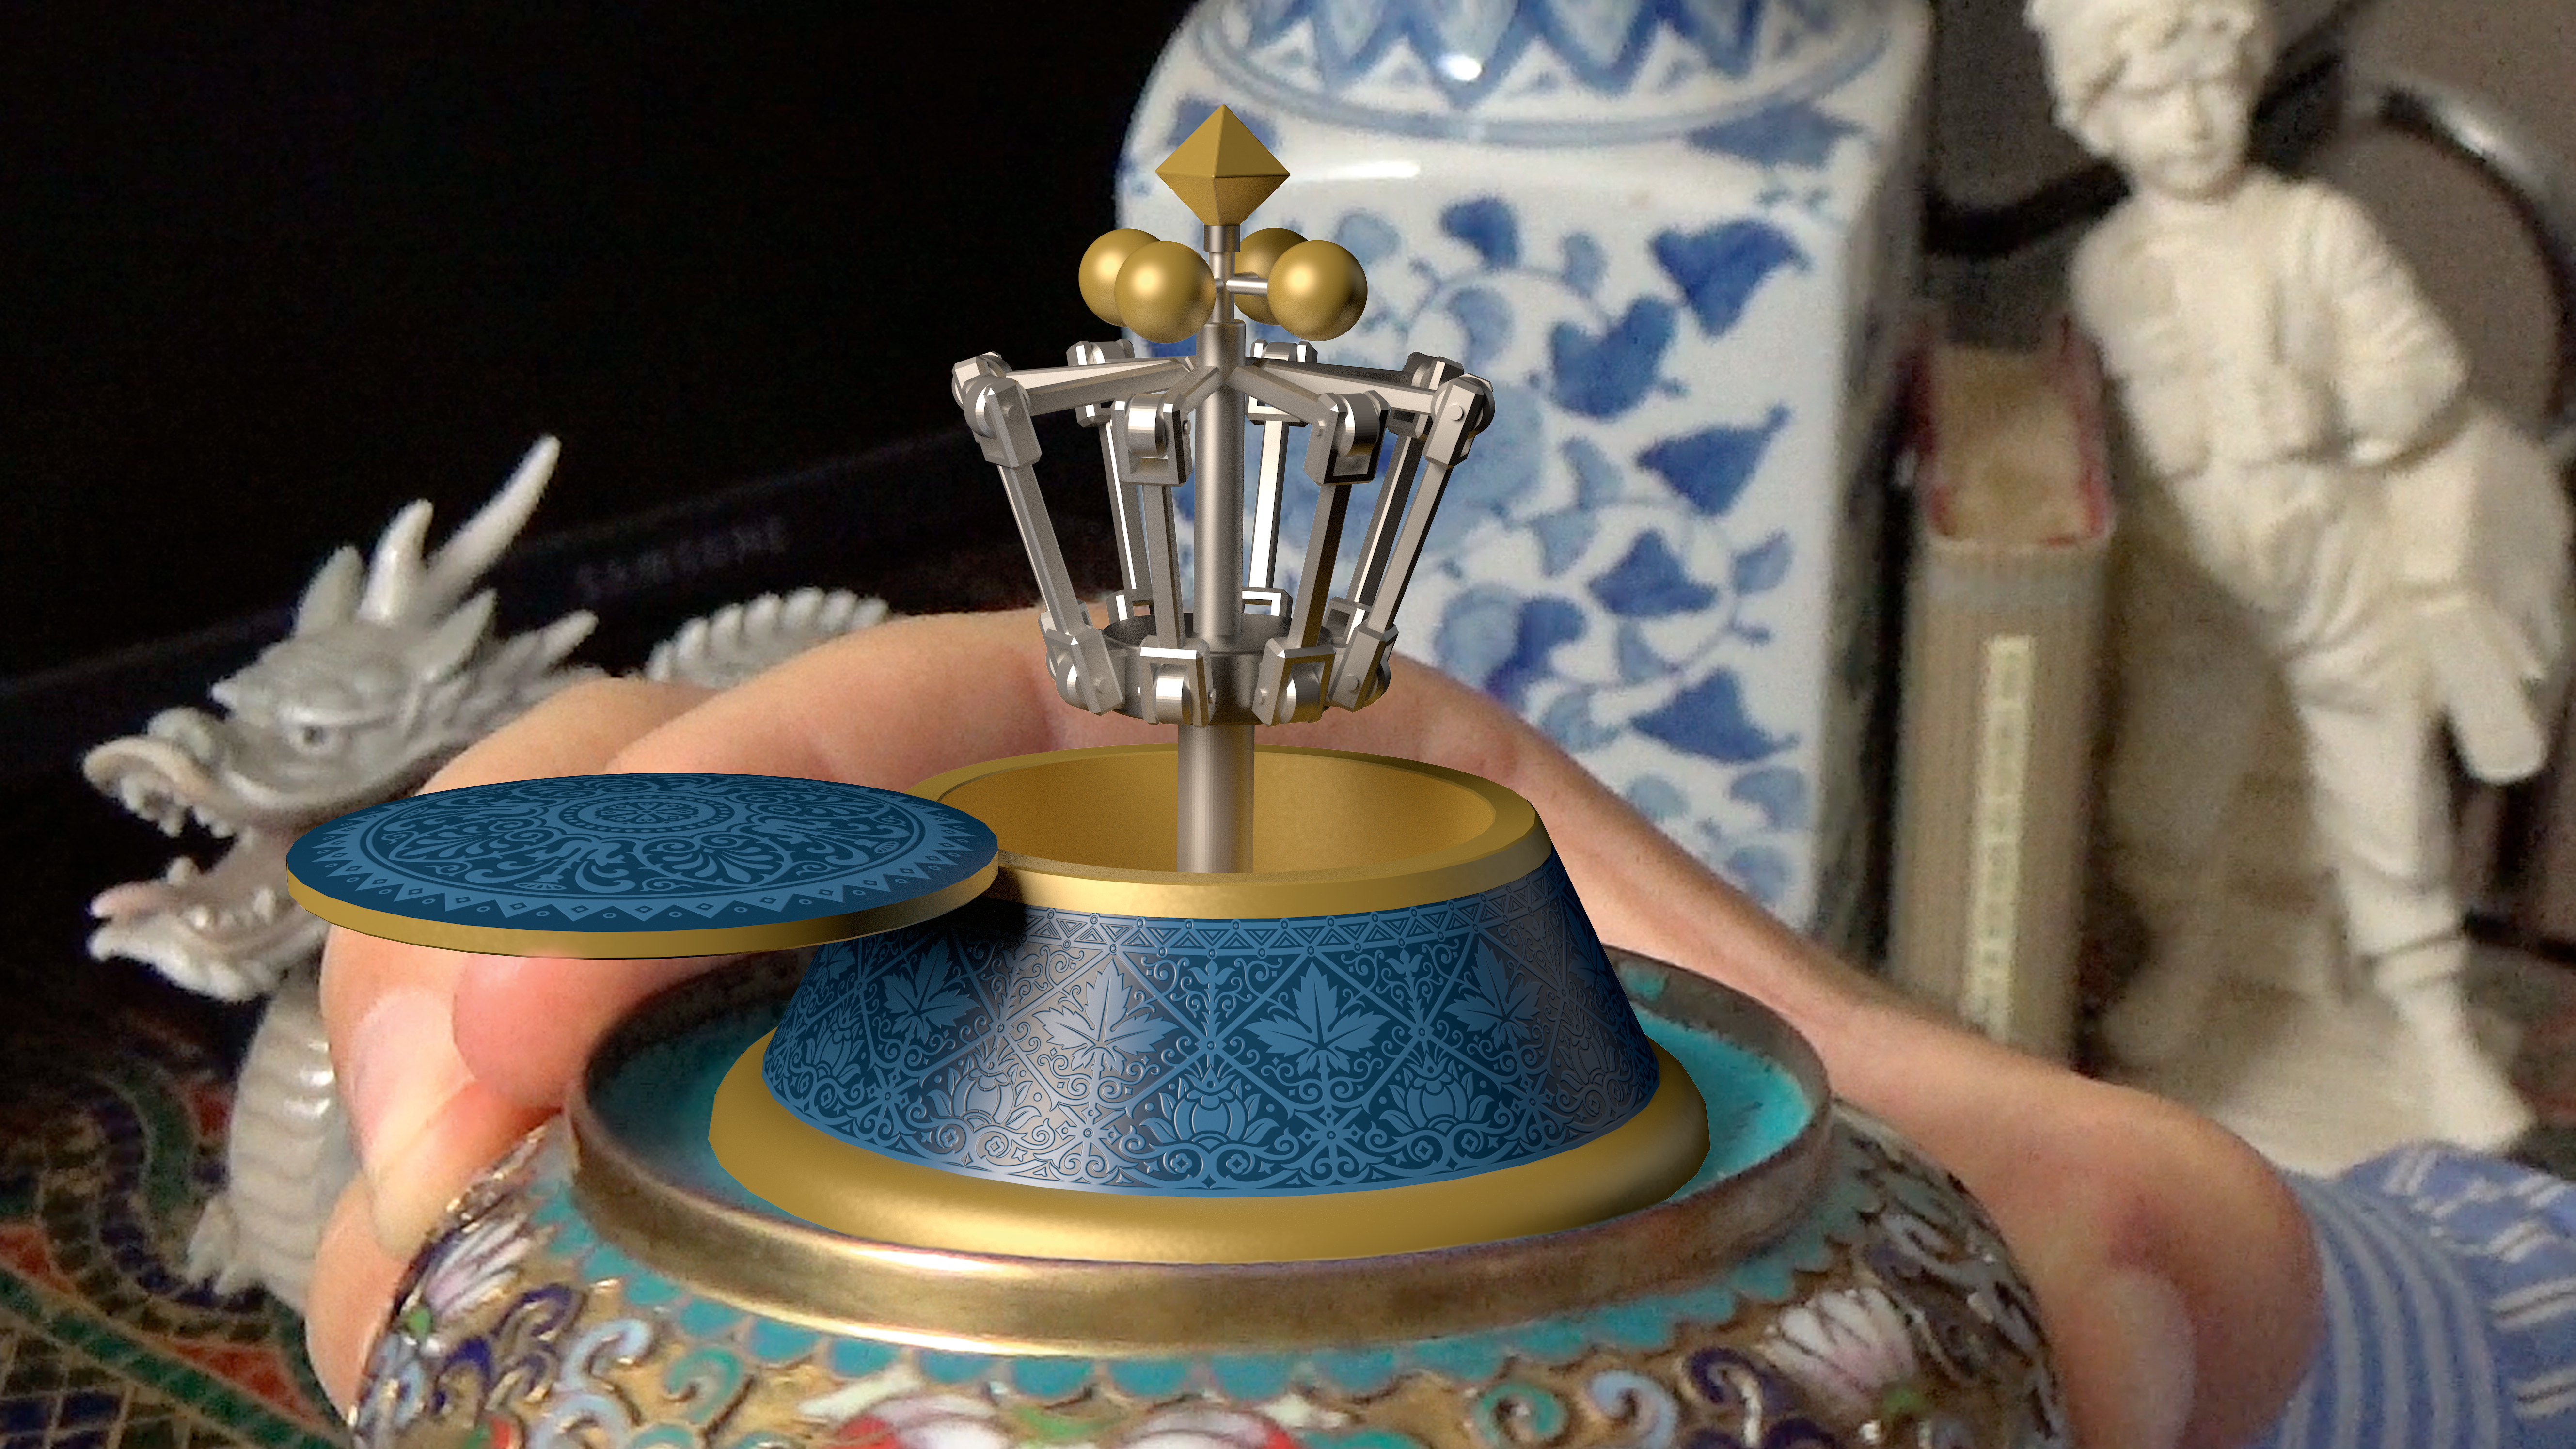
For this Cinema 4D tutorial, I took a small bowl with a few track points drawn onto it and filmed myself moving it around. In this article I’ll show you how to bring that footage inside of Cinema 4D and use the new Object Tracking functionality to track the bowl while using the Motion Tracker Graph View as an aid.
Once it is tracked, we’ll add a previously modelled and animated mechanical contraption to the top of the bowl. Since the contraption exists in another file, we’ll import it as an X-Ref into Cinema 4D.
Object tracking is a very visual process so please be sure to watch the accompanying video tutorial to gain a fuller understanding of the steps involved. You’ll find the video in 3D World's online Vault, along with my texture files and Cinema 4D scene files.
01. Import the footage
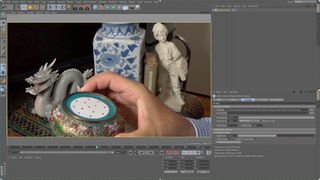
To import a .png sequence, select Motion Tracker in the Motion Tracker menu. (this creates a new Motion Tracker object). In the attributes manager, in the Footage tab, click the button to the right of the Footage field to import all the frames inside the Object-Tracking-Frames folder. Increase Resampling to 100 per cent – this improves the appearance of the footage and increases the tracking accuracy.
02. Sett up the tracks
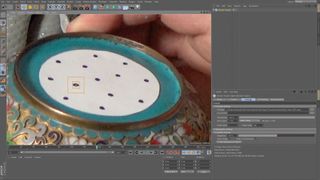
In the Attributes tab of the Motion Tracker, click on the 2D Tracking tab, then click on the Manual Tracking tab. Zoom and pan the footage to a frame where the black markers on top of the bowl are closer to the camera. ctrl+click on one of the dots to create your first track, which appears in the User Tracks list as User 01. Resize the inner box of the track to snugly fit the marker. The default size of the outer search box should be fine.
Get the Creative Bloq Newsletter
Daily design news, reviews, how-tos and more, as picked by the editors.
03. Track the first track
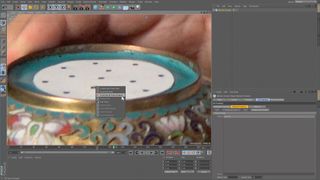
Press on '< Manual Track >' to track User01 in both directions. Scrub the time marker forwards and backwards. Notice that the track stops tracking at some point and turns red. Go to the last good frame and right-click on the tracker and choose Insert Key at Track Position. This creates a new keyframe for the tracker and extends the track further.
04. Examine the Graph View
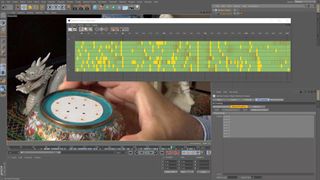
The Motion Tracker Graph View is a useful window that provides valuable insight and information while you track your shot. To view it, choose Motion Tracker Graph View from the Motion Tracker menu. Each tracker will be represented horizontally. Green represents good frames. Yellow represents keyframes. You can also see which part of your tracks are working or not. Watch my video for more details on using this tool.
05. Create the Object Tracker
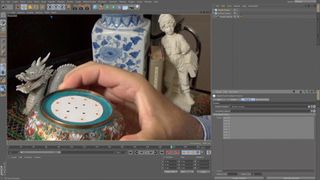
In the Motion Tracker’s attribute manager, under '2D Tracking> Manual Tracking' shift+click to select all the Tracks in the User Track List, then choose Object Tracker from the Motion Tracker menu. A new Object Tracker appears in the Object manager. In the Trackers tab, click Assign Selected to assign the selected tracks to the Object Tracker. Switch to the Reconstruction tab and click Run 3D Solver for Object. It may take a few minutes to complete so be patient.
06. Set the scale
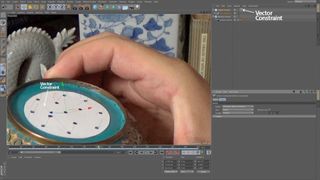
After tracking, expand the Object Tracker to see all of the User Features (nulls) that have been added. Right-click on the Object Tracker and from the pop-up menu choose 'Motion Tracker Tags > Vector Constraint'. A line for the vector constraint appears. Drag each end of the line to the two track points (as shown above), they’ll snap into position. In the attributes manager, change the Length to Known and make the amount 3.81 cm (1.5 inches).
07. Orient the object
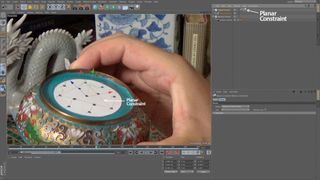
Right-click on the Object Tracker and from the Motion Tracker Tags sub-menu choose Planar Constraint to add its tag to the Object Tracker. Note that a triangular shape appears in the viewport. Drag each vertex of the triangle to a separate marker as shown in the image. This will define the top plane of the bowl. Next, set the Axis of the Vector Constraint to Y. This will orient the object tracker correctly to the top of the bowl.
08. Add the contraption
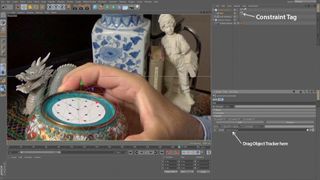
Create a null, name it ObjectNull and make it a child of the Object Tracker, right-click on it and add a Constraint tag to it from the Character Tags sub-menu. Set the type to PSR, and in the PSR tab drag the Object Tracker into the Target field to stick the null to the Object Tracker.
The Contraption exists in a separate file, so we’ll add it as an XRef. From the Create menu under XRef, choose Add XRef and pick 'Contraption.c4d'.
09. Arrange the contraption
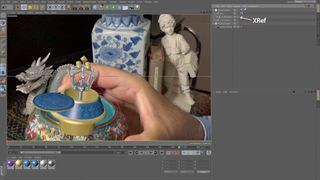
Make the contraption XRef a child of the ObjectNull and in its Coordinates tab, set the X, Y and Z coordinates to zero to centre it on the bowl, and its H, P and B rotations to 0 to correctly align its orientation. The animation of the contraption has been built into the XRef. Scrub through the frames to get a real-time preview of the contraption as the top slides open and the mechanism on the inside is revealed.
10. Hide the bottom
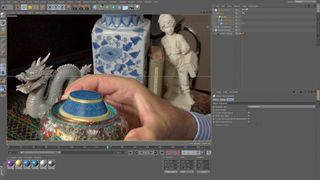
To hide the bottom of the contraption with a Boolean, create a cube, make it a child of the null and make its size 6cm on each dimension. Next set its X and Z coordinates to zero, and its Y coordinate to -3 so it covers the bottom completely and leaves the top in view. In the Create/Modelling submenu, choose Boole and make it a child of the ObjectNull. Make the cube and contraption a child of the boole (the cube should be on the bottom).
11. Wrap up

You’ll want to add a couple of lights (key and fill) to approximate the lighting in the original video. You can also add a shadow catcher on the top of the bowl for enhanced realism. You may also wish to add an object buffer to the contraption to generate a matte for compositing. You can also watch my accompanying video walkthrough where the steps on these pages are demonstrated. Make sure not to miss it. Good luck with your own tracking projects.
This article was originally published in 3D World Magazine issue 216. Buy it here.
Related articles:

Thank you for reading 5 articles this month* Join now for unlimited access
Enjoy your first month for just £1 / $1 / €1
*Read 5 free articles per month without a subscription

Join now for unlimited access
Try first month for just £1 / $1 / €1

