How to make a stencil with Cricut
Learn how to make a stencil with Cricut to achieve professional results.
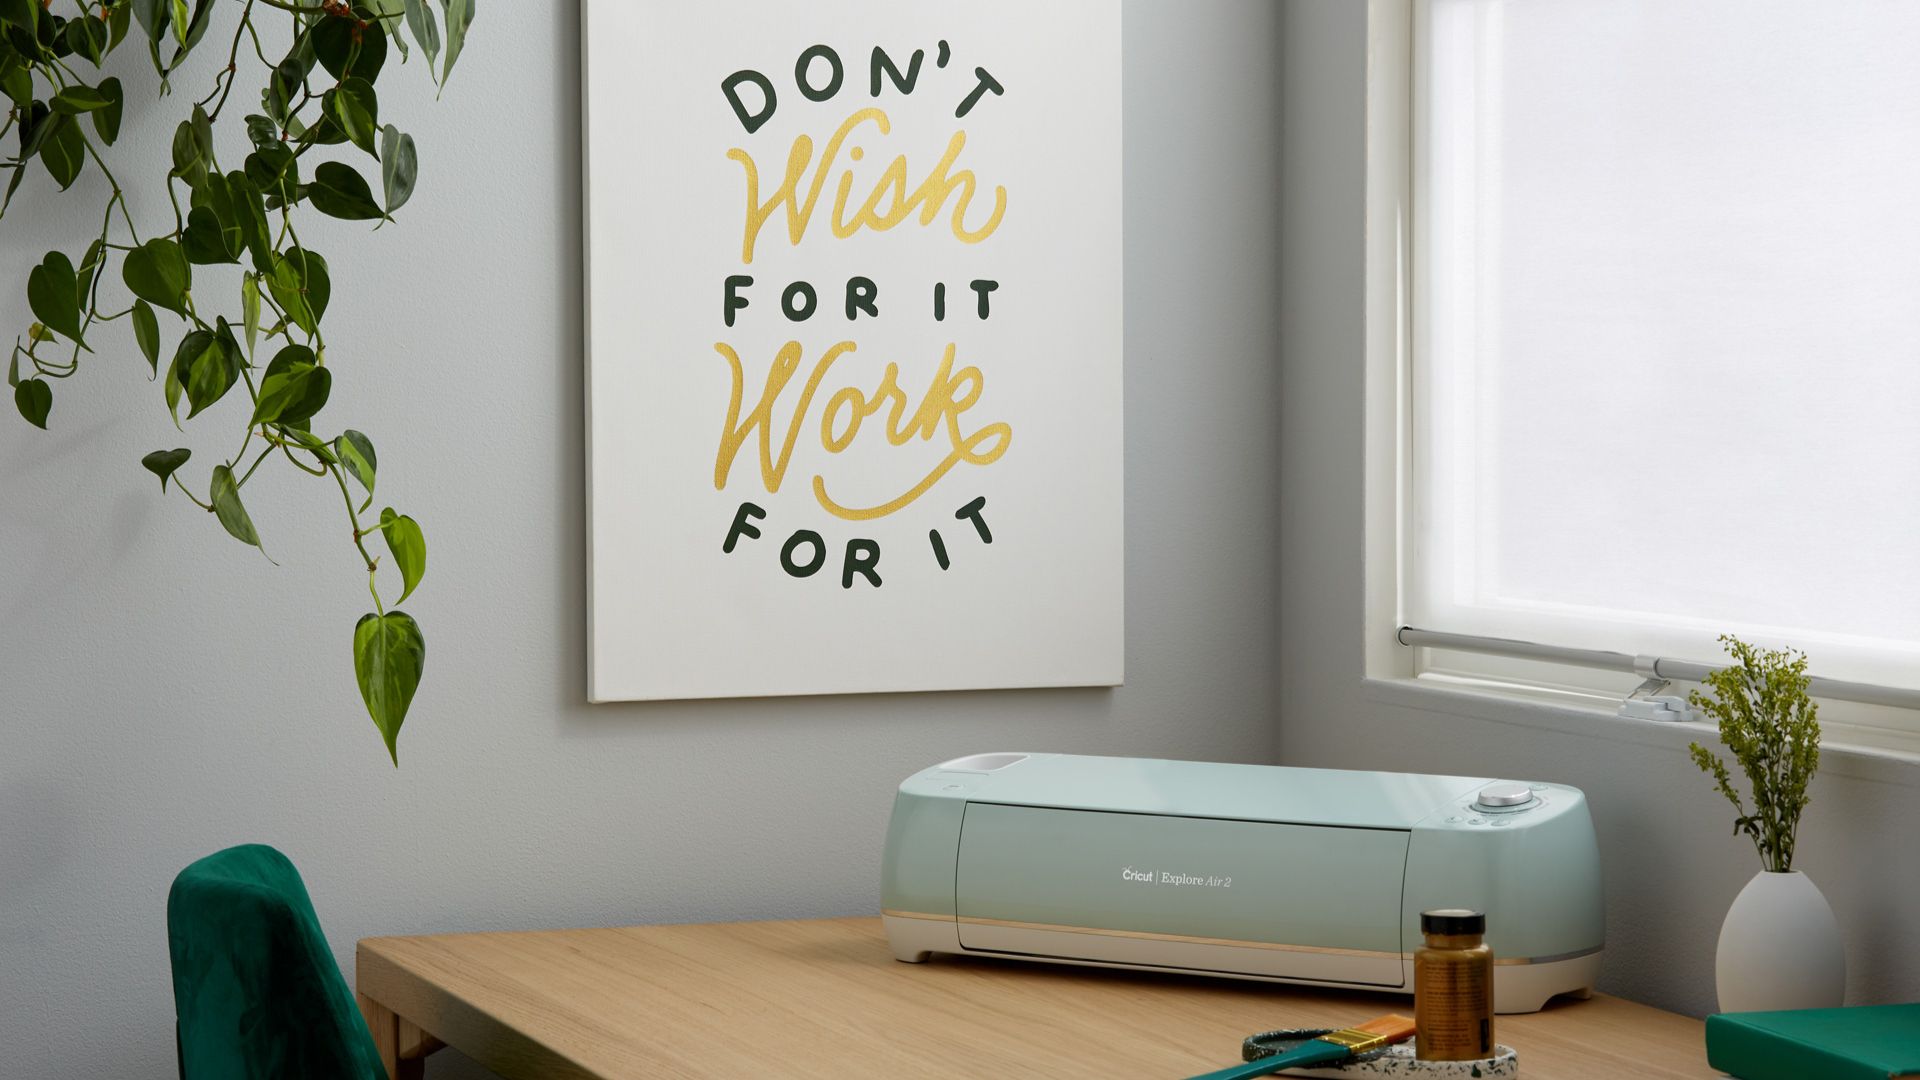
There's no better time to learn How to make a stencil with Cricut, as the trend of up-cycling and personalising items continues to grow during the cost of living crisis. Your Cricut machine is the ideal tool when it comes to making stencils as it can take all the hard work out of the cutting process and ensure you have a perfect, professional-looking stencil each time.
In this tutorial, I’ll walk you through the steps you need to create your own stencil and start turning your project dreams into reality. Stencils are designs cut into material, which is then overlaid onto a surface such as wood, fabric or canvas. Paint or stain is applied over the stencil, and you have your design when the stencil is pulled away.
Stencils are really versatile, and there’s plenty you can make when using them, including home decor items, wood signs and wall art. The best thing is, that your Cricut machine is perfect for making stencils as it’s able to cut intricate designs quickly. If you’re considering buying or upgrading your Cricut, look at our round-up of the best Cricut machines in 2022. The same process can be applied to other craft machines, such as the best Brother ScanNCut machines.
In this tutorial, I am going to show you how to make a basic stencil using just regular self-adhesive vinyl. It may seem like making a stencil is a complicated idea, but in this article, you’ll see just how simple it really is.

Rachael is a regular craft and sewing writer for Creative Bloq, turning in eye-catching and interesting copy whether it's the latest sewing machine review or a guide to how to get more from your Cricut machine. She has also written craft articles for other media outlets, including The Evening Standard, The Independent and TopTenReviews. A passionate crafter and sewist, Rachael has great advice on all things Cricut.
How to make a stencil with Cricut: what you need
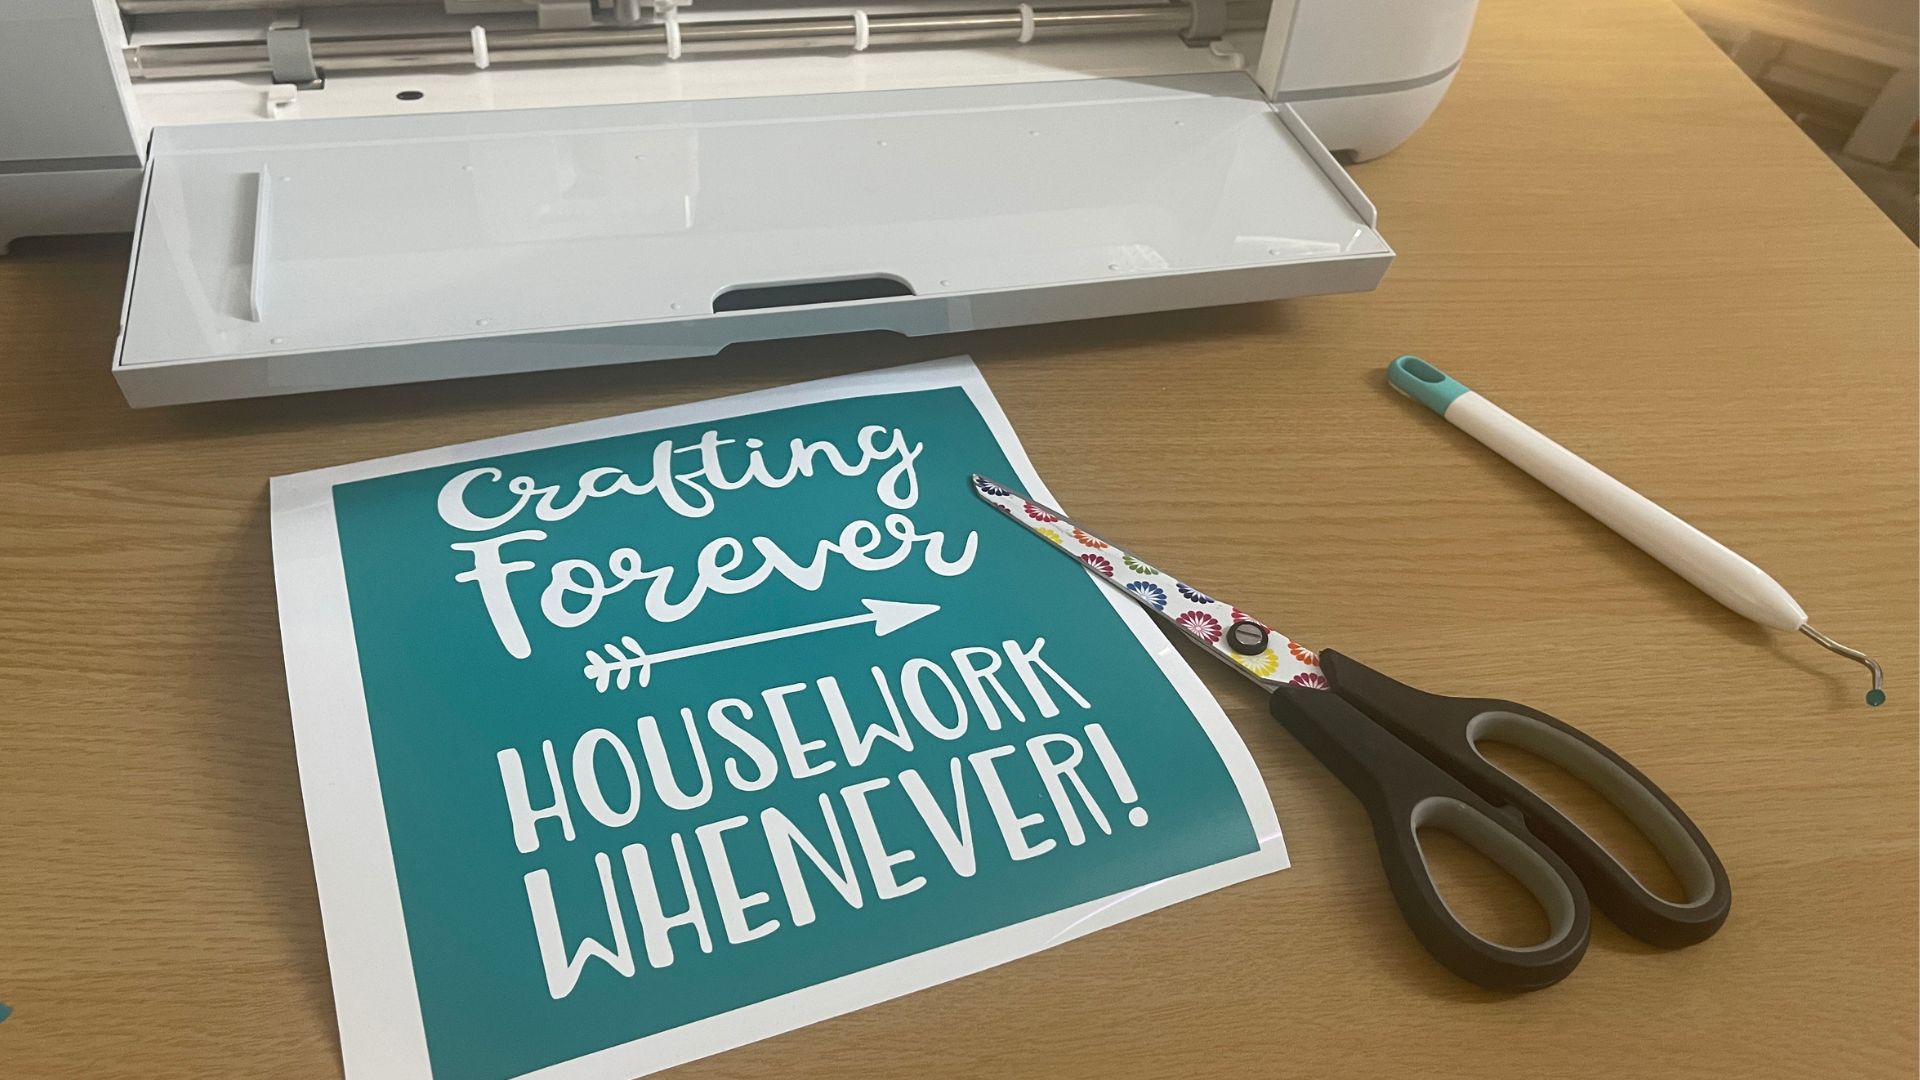
Before you get started and begin making a stencil using Cricut there are some key pieces of kit, tools and materials you'll need. If in doubt, take a look at our guide to the best Cricut materials and the best Cricut accessories. Below is everything I recommend you need to make professional stencils using Cricut.
- A Cricut machine: You can use any Cricut machine to make a stencil. To get the lowdown on the best ones, read our Cricut Maker 3 review, our Cricut Explore 3 review and our Cricut Joy review.
- A surface to stencil: Stencils can be used on almost any surface. For this tutorial, I’m stencilling the lid of an MDF box, but you can also use it on walls, fabric, canvas, wood and much more. Just be mindful of whether the surface you’re stencilling on to will work well with your paint or stain.
- Vinyl: You can use any type of self-adhesive vinyl to make stencils. If you want to make a reusable stencil, you’ll need to purchase some specific stencil vinyl that Cricut sells or craft plastic. But using regular vinyl is a great way of using up scraps or offcuts.
- A cutting mat: Unless you’re using Smart Materials, you will need a mat. I recommend a standard grip as you need it strong enough to grip the vinyl but not too strong that you can’t remove it.
- Weeding and scraper tool: You’ll need a good weeding tool to weed your design. You’ll also need a good scraper as you’ll have to make sure there are no bumps or lumps in the vinyl when you transfer it.
- Paint, stain or pens: This depends on what your material of choice is. If you’re painting wood, acrylic paint works best. For this tutorial, I used acrylic paint markers, which gave a clean, good finish with no bleed and no clean-up. Make sure your paint choice suits your fabric.
- Transfer tape: You will need to transfer your stencil onto your design, which is done using transfer tape. We recommend using the Cricut transfer tape when using Cricut vinyl, as it works much better. If you’re using craft plastic, then you won’t need the transfer tape, but you will need masking tape to hold it in place.
• You can get discounts on all of these craft machines, materials and accessories at the official Cricut store
How to make a stencil with Cricut: tutorial
01. set up your canvas
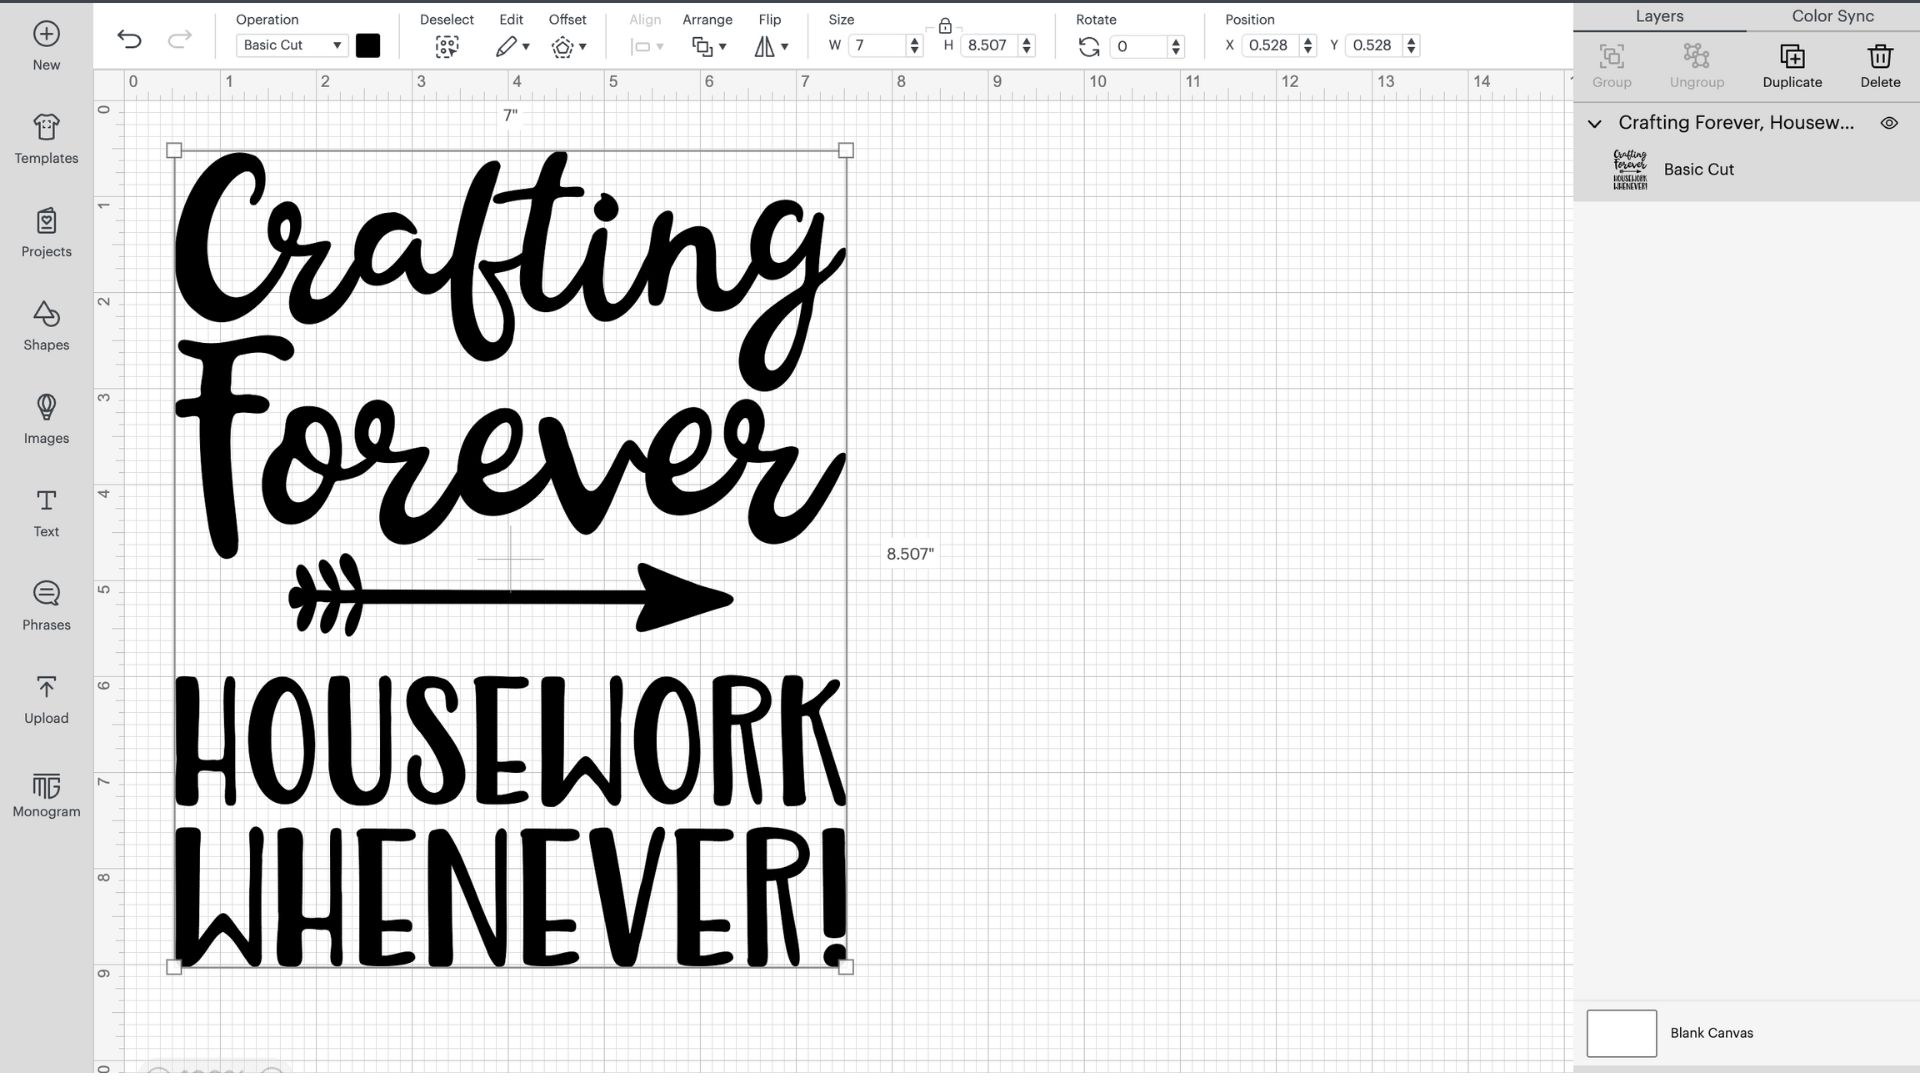
This is going to vary based on what you’re making. Don’t forget that if you’re using Smart Materials, then you’re not confined by the dimensions of the mat, and you can cut up to 12ft in one go, this is really handy if you’re planning on making a banner or sign. If you need to learn more, we have a dedicated guide to how to use Cricut Smart Materials.
Now, Open Design Space and start creating your stencil design. It’s up to you how you choose to design your stencil, you can pick a design from the Cricut Access library, use an SVG file you’ve found online, or even use text to create your own stencil with your favourite font. (Use our guide to the best free SVG files for Cricut for more.)
For this tutorial, I will use a design from Cricut Access. If you want more information on uploading your own images to Design Studio, check out our tutorial on how to print and cut with Cricut where there is a step-by-step guide.
02. Add a box around your design
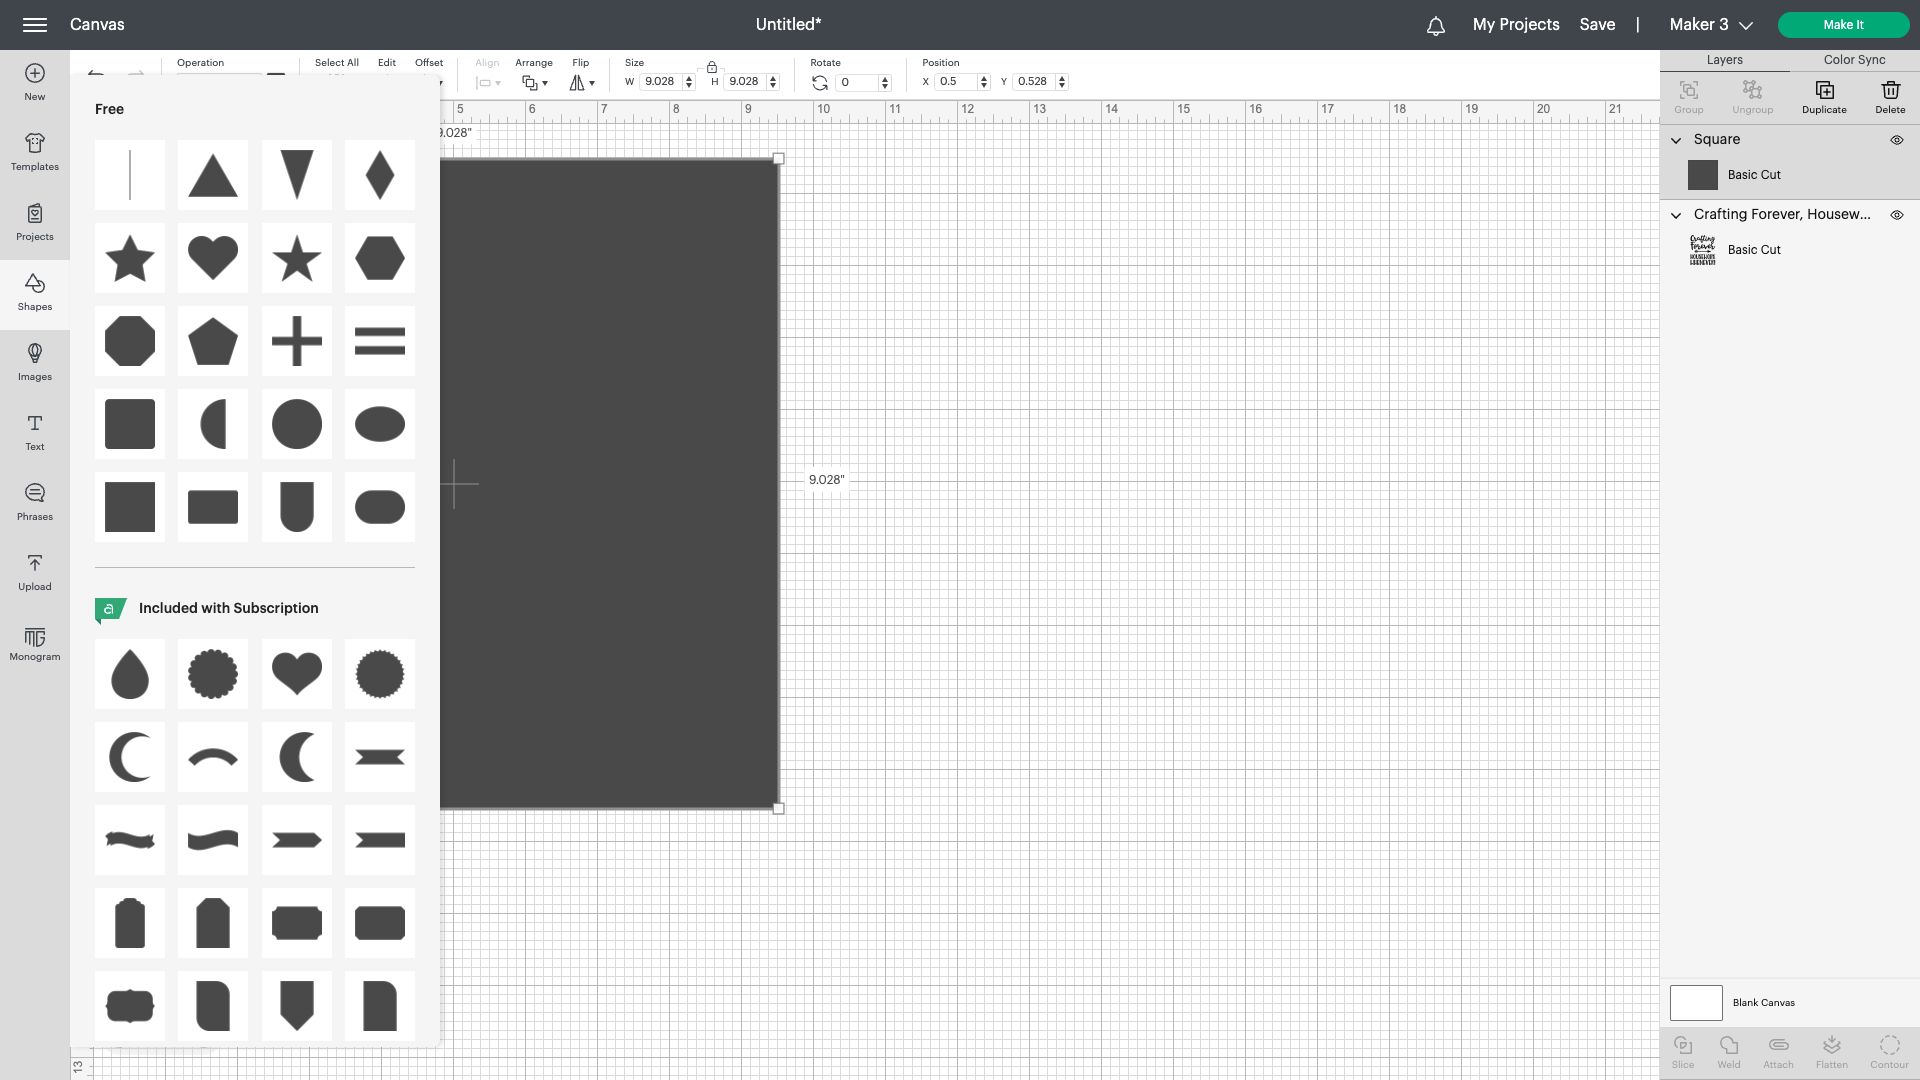
Once you’ve completed your design, click the shapes item and add a box around your design. Because my finished product will be square, I’ve chosen a square box. This is because you will weed within the box as that’ll be the cut-out for your stencil.
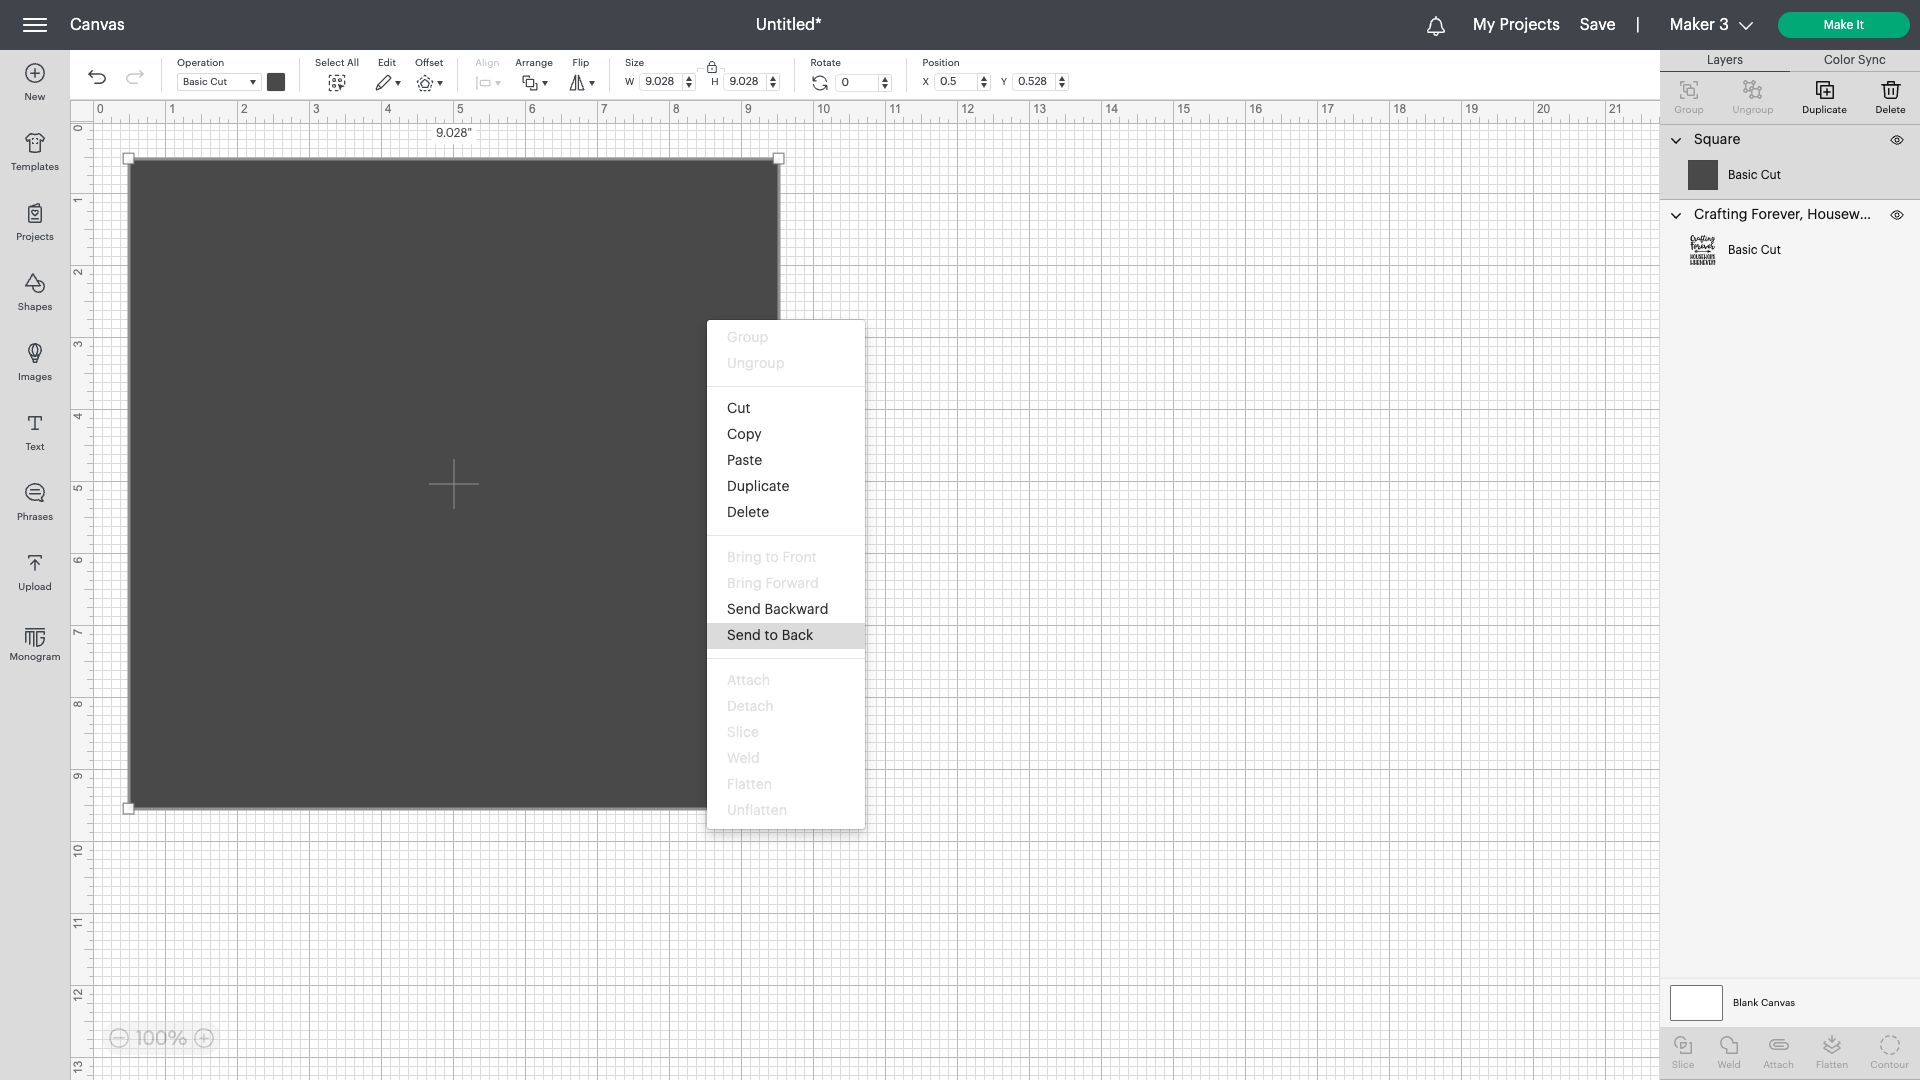
The next thing you’ll need to do is to right-click on your box and select “send to back”. Your main design will come to the forefront so align it in the middle of the box.
Get the Creative Bloq Newsletter
Daily design news, reviews, how-tos and more, as picked by the editors.
My top tip here would be to make the background shape a tad smaller than your workspace, you can then make sure your design fits perfectly. Also, have fun with the shapes. You could even make it a bit of a feature by painting around them so that you have different elements to your finished design.
03. Attach your design
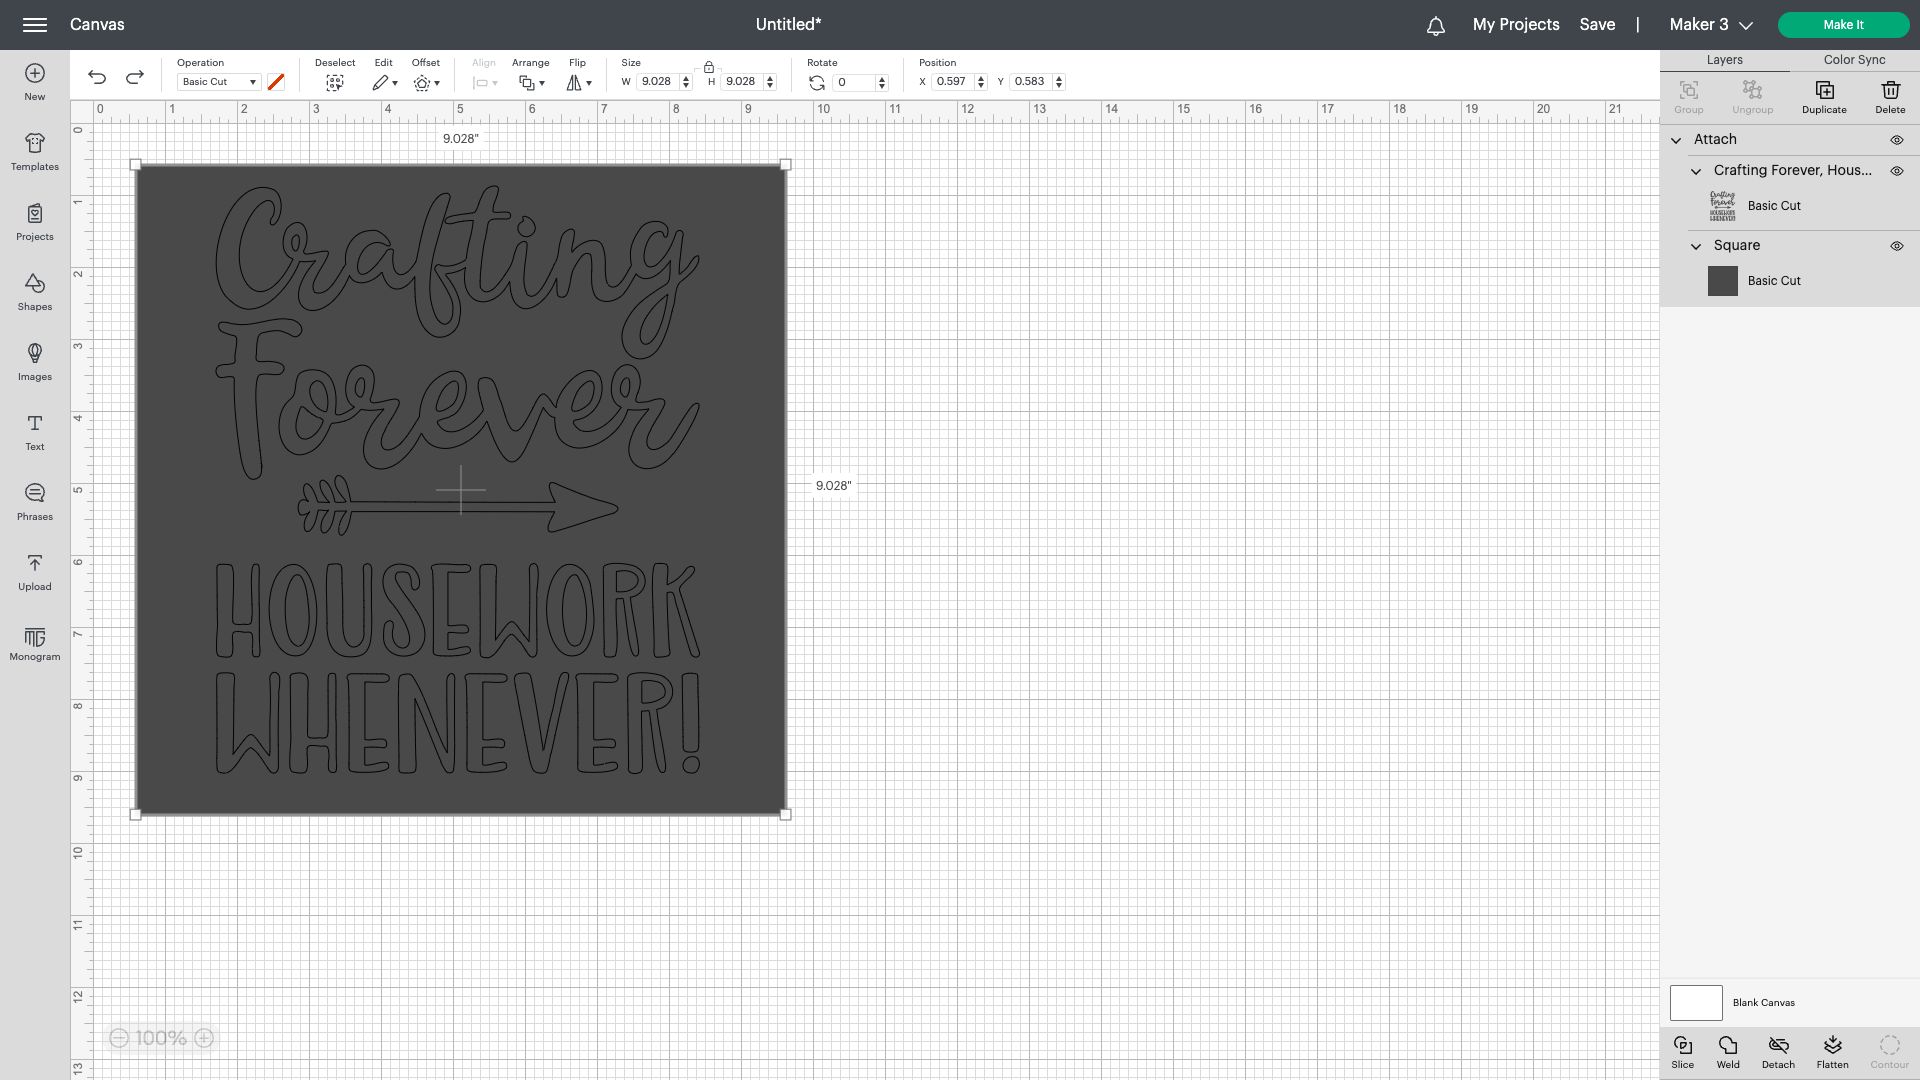
You don’t want your design jumping all over the page on the next step, so highlight the whole of your design and click attach. That will stick the entirety of your design together so you can move it or resize it without having to deal with the individual elements. And that’s it, now on to the cutting part.
04. Start the cutting process
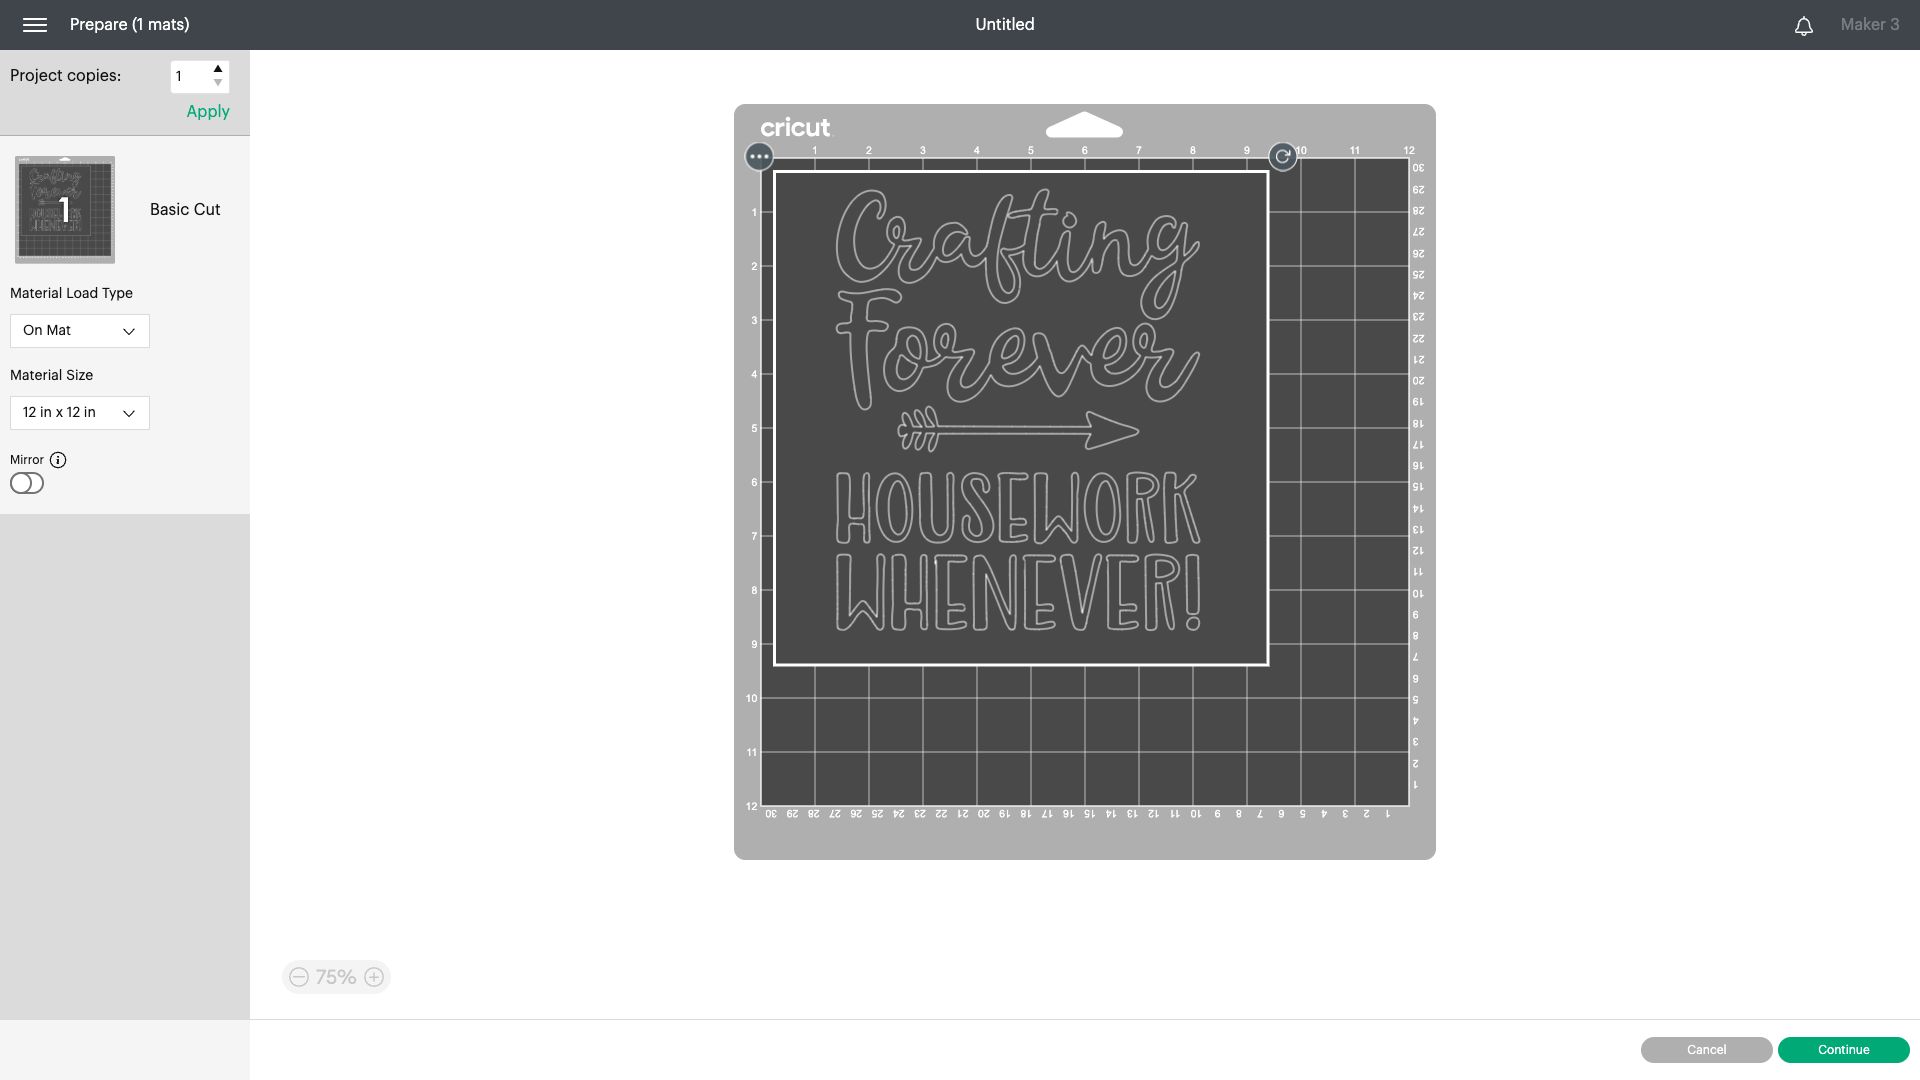
Prepare your mat or insert your smart materials and get ready to start the cutting process. Make sure you choose the right material you’re cutting as this will ensure you get the right cuts. As you’re using self-adhesive vinyl, you won’t need to mirror the image, and the vinyl should be placed colour side up.
05. Weed and apply the transfer tape
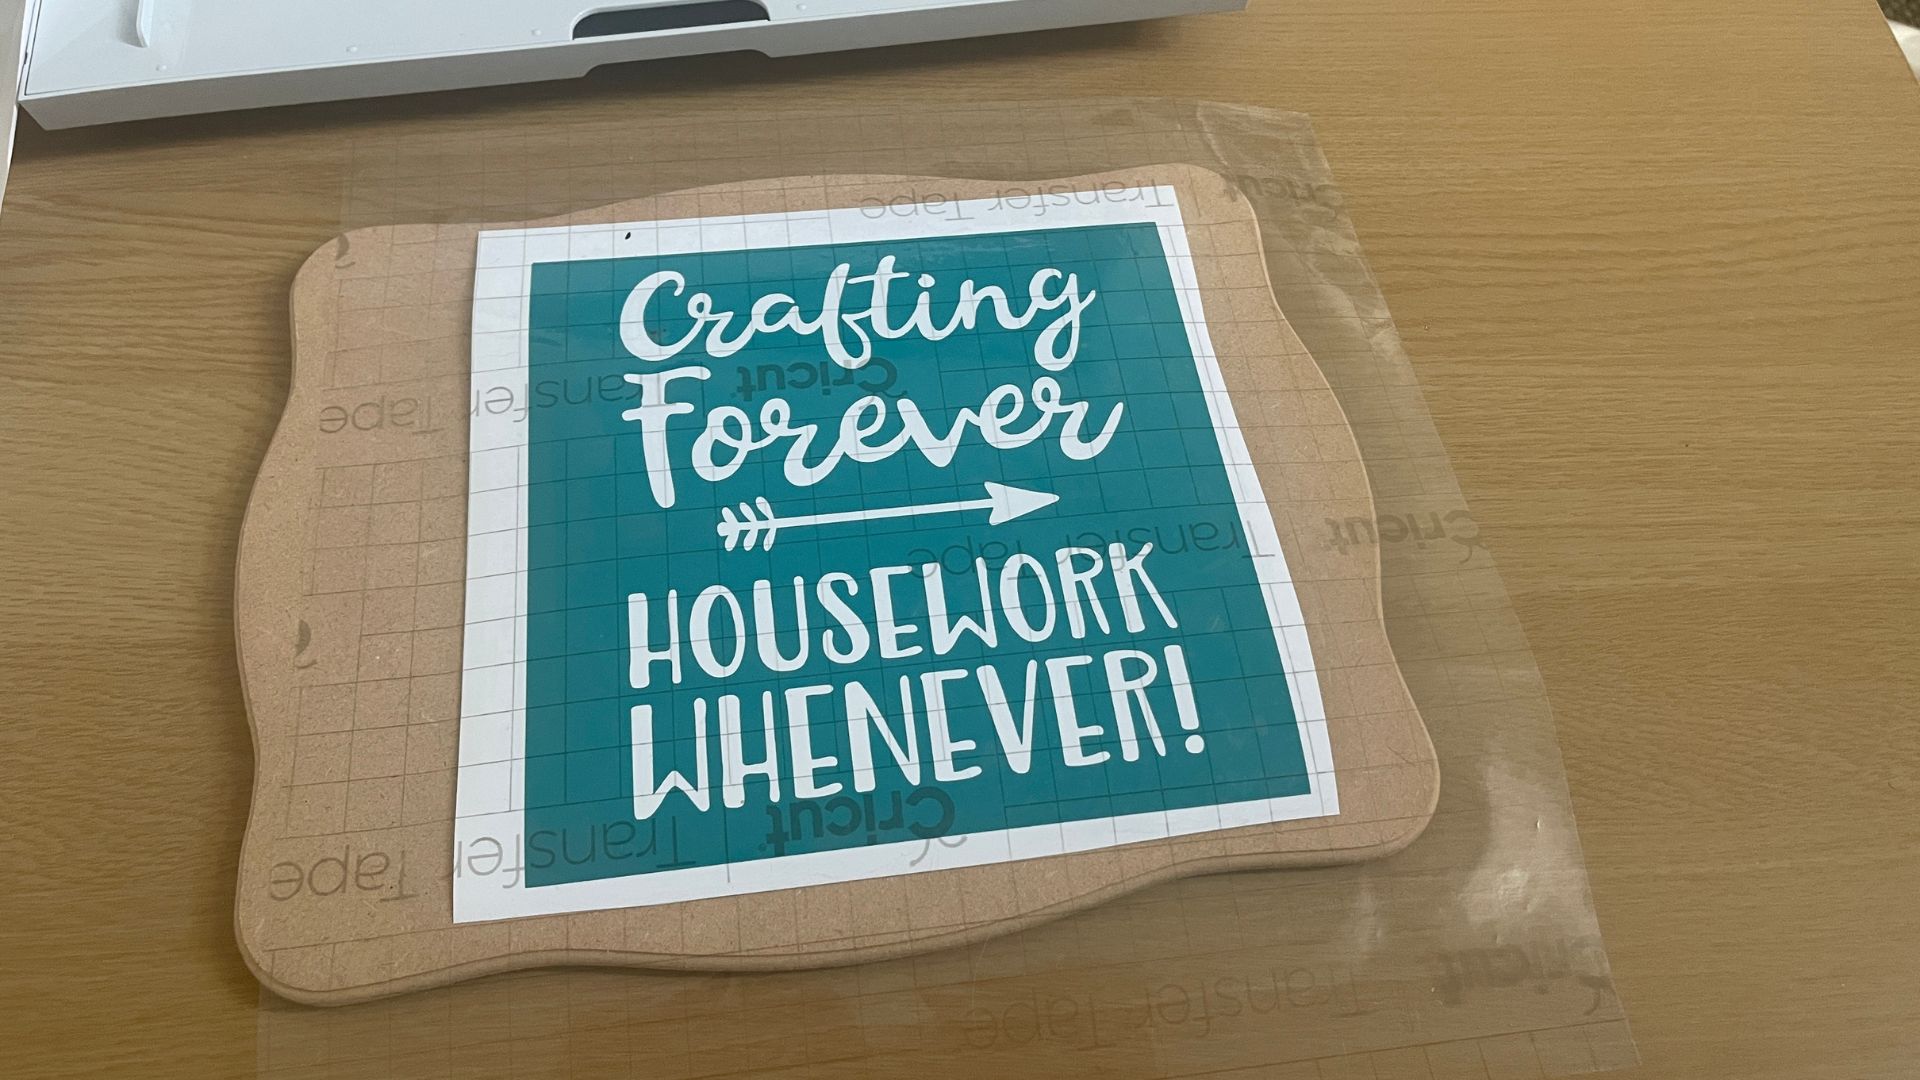
Maybe it's just me but weeding the design is my favourite part. Don’t forget that your wedding is inside the box, so you need to remove the negative pieces from your design. I’d also recommend trimming your design down to size once you’ve weeded so that you have better control over its placement.
You’ll then need to apply the transfer tape.
Place the transfer tape adhesive side down and use the scraper to transfer the stencil vinyl onto the tape. This isn’t a quick process, you need to really make sure that you burnish the transfer tape to make sure you have no bumps or creases. If your design is very intricate or has floating pieces, be sure they’ve also been rubbed properly to ensure they stick to the tape.
06. Place your design on to the surface
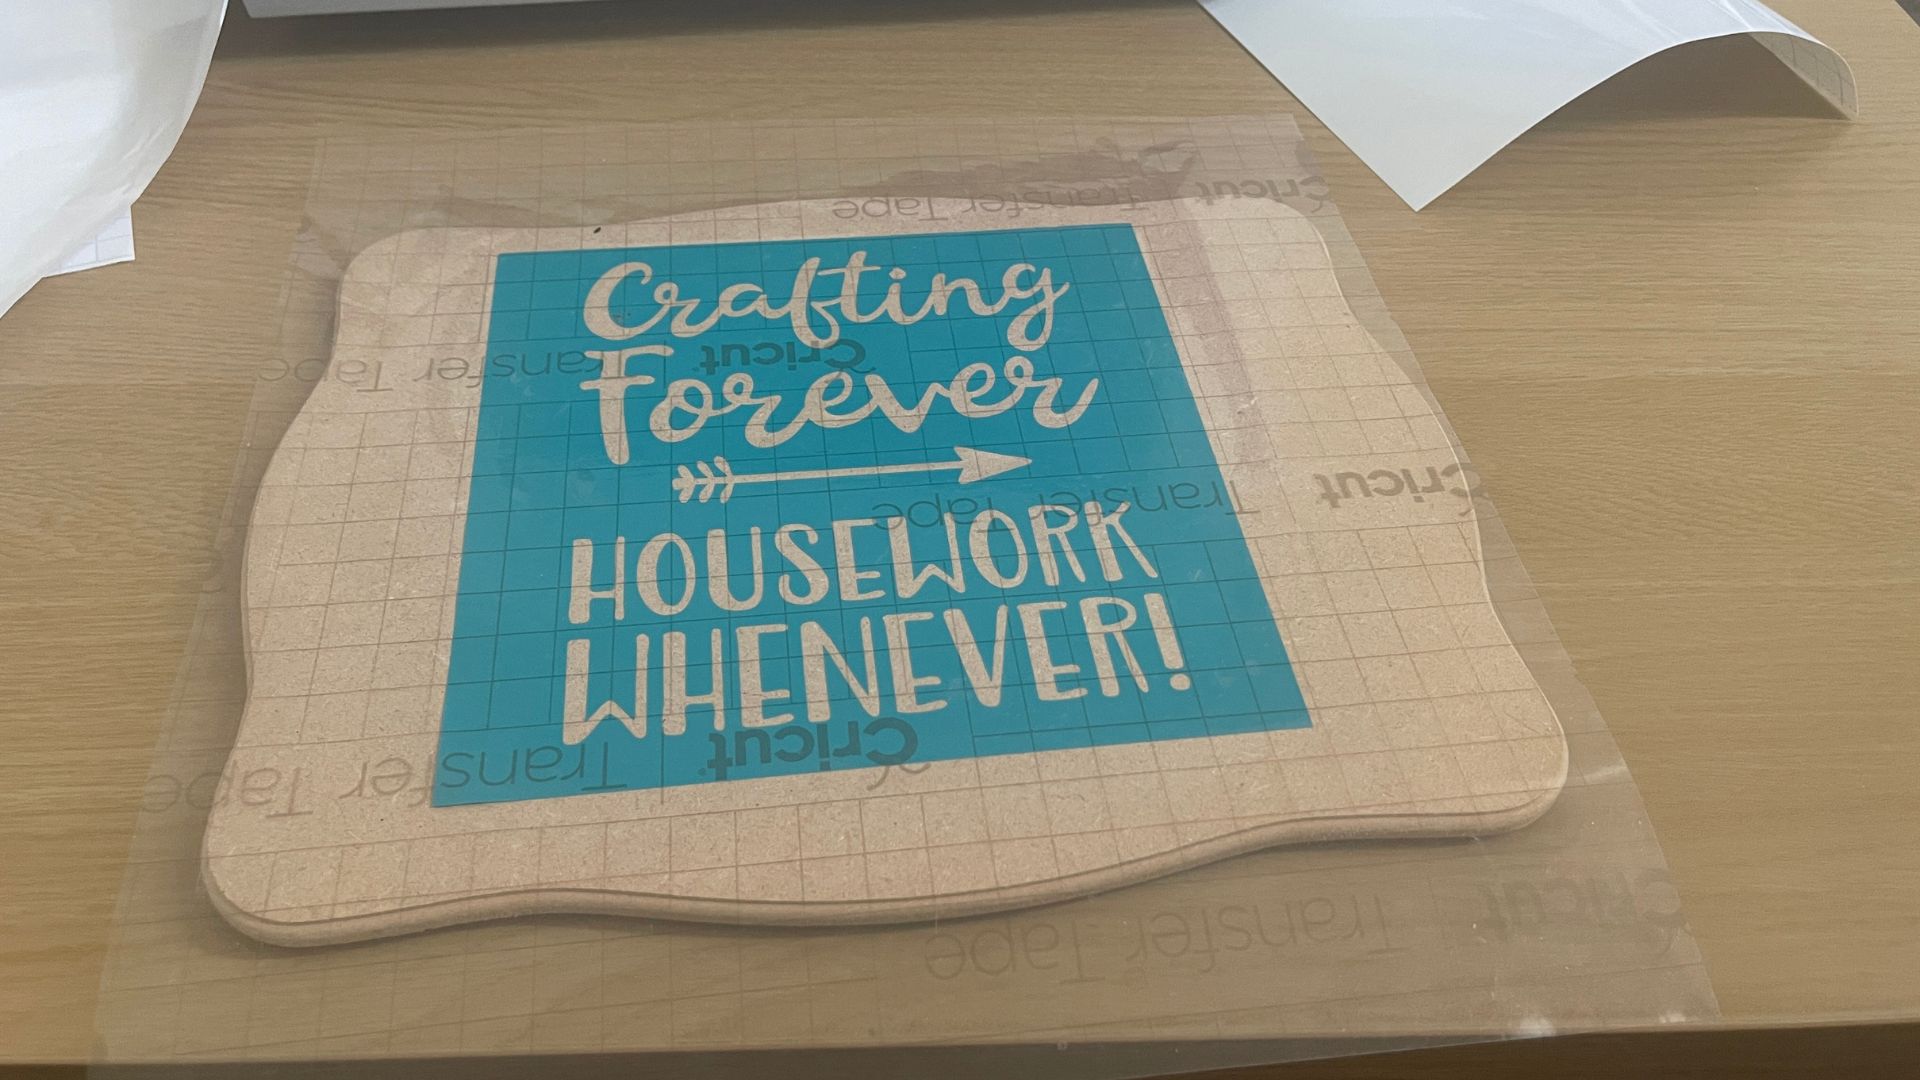
Before you peel the transfer tape, line it up on your project surface, so you know where you want it to sit. You may find it helpful to make a small mark on the surface to get that perfect placement.
Use your Cricut scraper to burnish the stencil vinyl onto your project area. Be sure to make sure that it has stuck down as you don’t want to risk any bleeding under the edges, especially when you’re about to start painting. You should be able to see the areas that aren’t quite stuck down as often there will be creases and bubbles, just keep going over the area until it’s smooth.
When you’re happy that it’s done, peel the transfer tape off at a 45-degree angle, and you’ll see your stencil vinyl is left on the project surface.
07. Get painting
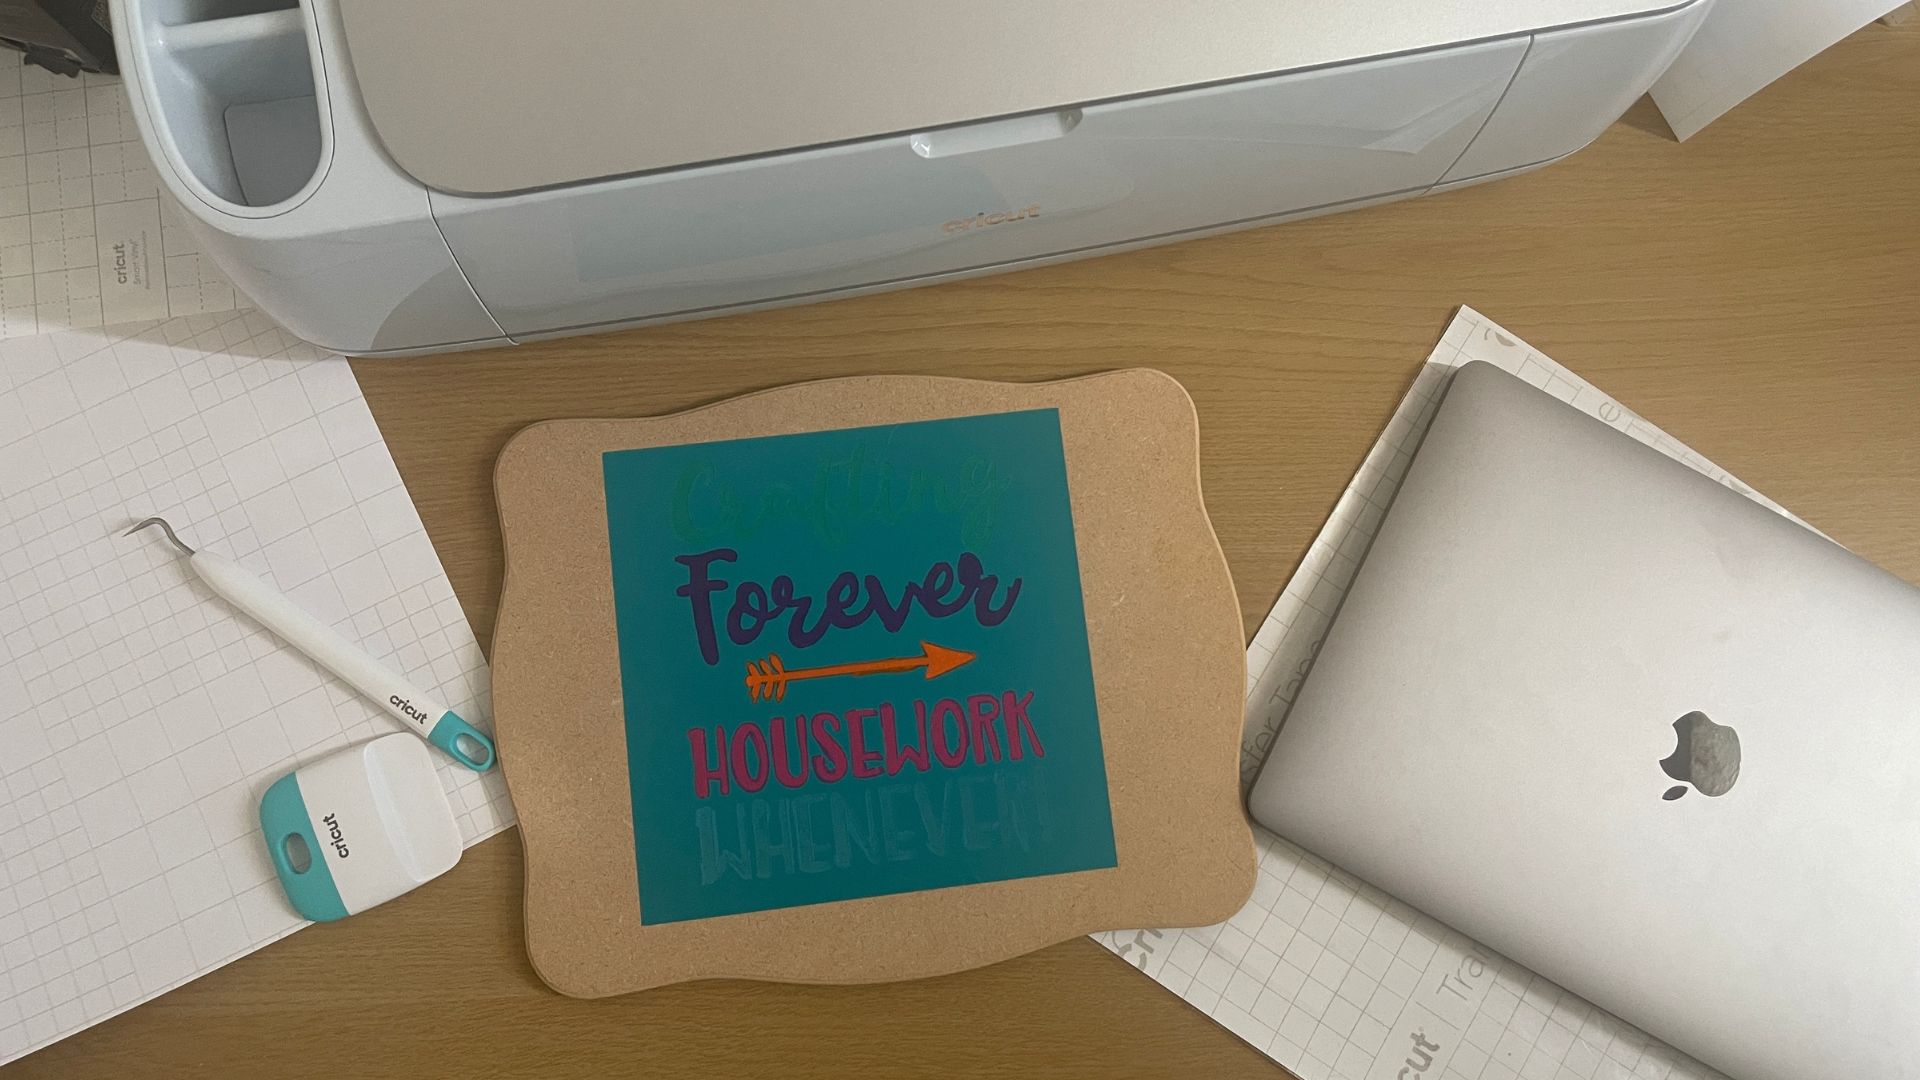
Now it's time to get creative. Use your paint of choice with a stencil brush or sponge brush. Depending on your project surface, you may want to consider layering up your paint. As I mentioned earlier, I used acrylic markers, they give the same result as regular paint, but it’s a much tidier experience.
08. Let the paint dry and remove the stencil
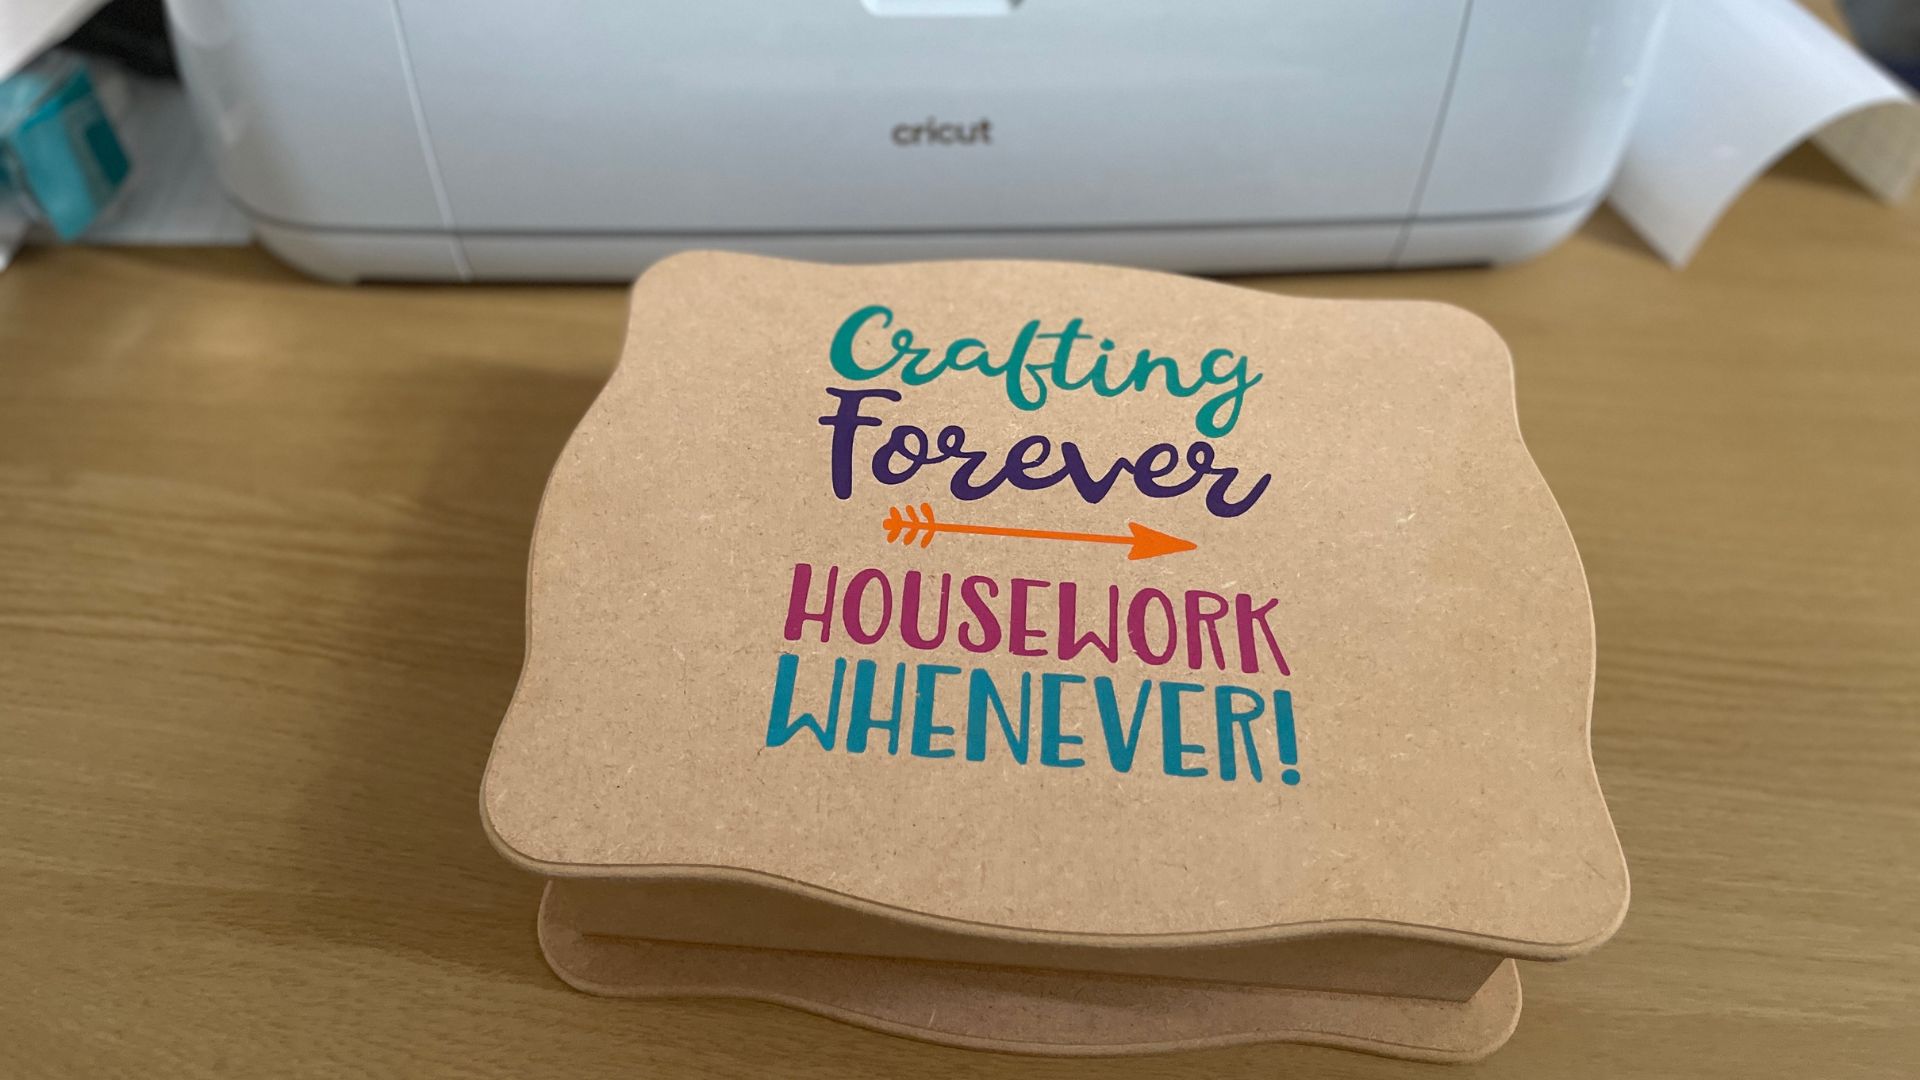
Let your paint dry thoroughly before removing your stencil. I know that it’s tempting to just rip it off, but you don’t want to risk smudging the paint, so walk away, get a drink and let it dry in its own time.
If you’re very careful removing your stencil, you may be able to put it back on the transfer tape and reuse the same stencil. Although using self-adhesive vinyl, it does tend to easily rip when being removed. However, it’s a great way to use up any scraps and off-cuts.
When you’ve removed your stencil, you can seal your project using a clear sealer. I prefer to use a water-based polyurethane as it gives a good, smooth finish.
Read more:
- Cricut shirt design: expert advice to achieve pro results
- These are the best Cricut Brightpad alternatives
- How to print and cut with Cricut

Thank you for reading 5 articles this month* Join now for unlimited access
Enjoy your first month for just £1 / $1 / €1
*Read 5 free articles per month without a subscription

Join now for unlimited access
Try first month for just £1 / $1 / €1

Craft, photography and hardware writer Rachael Penn has written for The Evening Standard, The Independent, Fit&Well, The Radar, T3, and TopTenReviews. She also writes on many other subjects, including lifestyle, travel, food, internet culture and eco-living for online and print publications.
- Ian DeanEditor, Digital Arts & 3D
